在docker中安装nacos,很详细
- 一、安装docker
- 二、拉取nacos镜像
- 三、创建挂载目录
- 四、启动nacos,复制相关文件到挂载目录
- 五、将nacos修改为以mysql存储信息
- 六、启动nacos
- 七、踩坑记录
-
- 1、Tomcat启动失败
- 2、Caused by: java.lang.IllegalArgumentException: the length of secret key must great than or equal 32 bytes; And the secret key must be encoded by base64
- 3、Caused by: org.springframework.beans.factory.BeanCreationException: Error creating bean with name 'authConfigs': Invocation of init method failed; nested exception is ErrCode:50002, ErrMsg:Empty identity, Please set `nacos.core.auth.server.identity.key` and `nacos.core.auth.server.identity.value`
- 4、Caused by: com.alibaba.nacos.api.exception.NacosException: Nacos Server did not start because dumpservice bean construction failure : No DataSource set
原以为在Linux的docker中安装nacos虽会比window中麻烦一点,但不会麻烦太多,事实证明是我想多了,在安装过程还是踩了不少坑,这里做个记录。
一、安装docker
在docker中安装nacos前提必须有docker,如果没有请自行百度。
二、拉取nacos镜像
着急的小伙伴直接看2或者3就好了。
1、查看有那些nacos镜像
查询命令如下:
docker search nacos
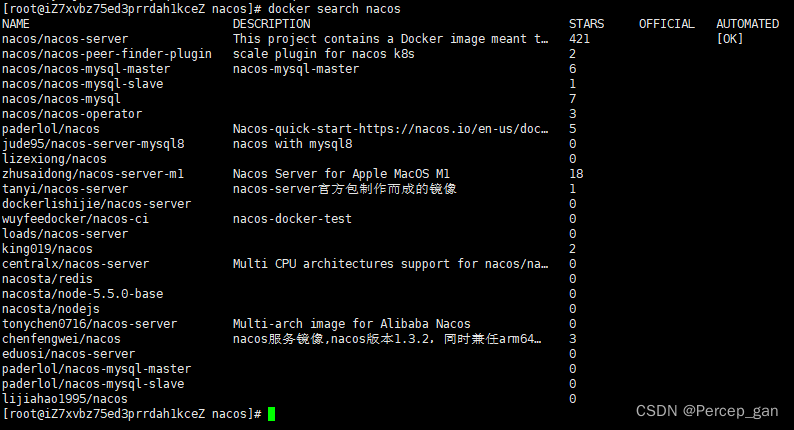
一般没有特殊要求就选择第一个,第一个也就是start最高的。
2、获取最新版本镜像
直接使用 docker pull + “NAME” 就是拉取最新版本的镜像,命令如下:
docker pull nacos/nacos-server
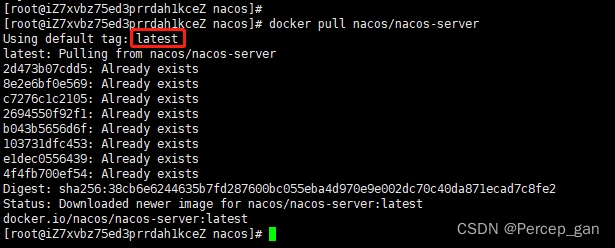
latest就代表最新版本。
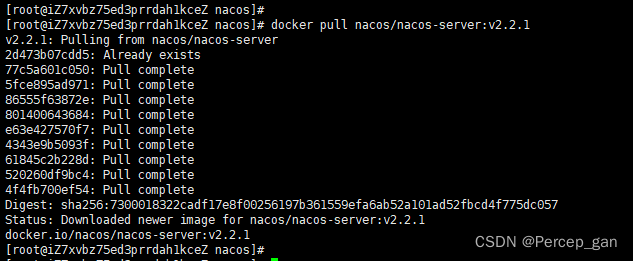
3、获取指定版本的镜像
使用 docker pull + “NAME:版本号” 就是获取指定版本的镜像,我获取的是nacos2.2.1版本的,命令如下:
docker pull nacos/nacos-server:v2.2.1
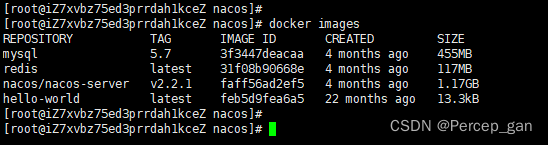
4、查看本地镜像
命令如下:

docker images
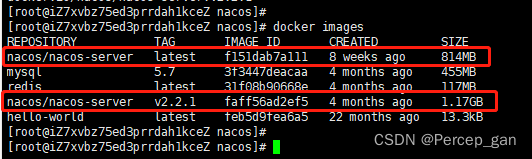
可以看到前面下载的两个镜像。
5、删除镜像
我想用nacos2.2.1版本的镜像,使用 docker rmi -f + “镜像id” 删除最新版本,删除命令如下:
docker rmi -f f151dab7a111

可以看到nacos最新版本的镜像已经删除。
三、创建挂载目录
挂载目录的用于在宿主机中操作nacos镜像中的配置文件,日志,数据文件。也就是创建多级文件的命令。
1、创建nacos配置文件挂载目录
用于后面挂载nacos镜像中的 /home/nacos/conf/ 目录下的文件,这是我的:
mkdir -p /www/wwwroot/changjing/docker/nacos/conf
-p 作用是在创建多级文件时,不存在某一级文件就会创建,存在就使用原文件

2、创建nacos日志文件挂载目录
用于后面挂载nacos镜像中的 /home/nacos/logs/ 目录下的文件,这是我的:
mkdir -p /www/wwwroot/changjing/docker/nacos/logs

3、创建nacos数据文件挂载目录
用于后面挂载nacos镜像中的 /home/nacos/data/ 目录下的文件,这是我的:
mkdir -p /www/wwwroot/changjing/docker/nacos/data

四、启动nacos,复制相关文件到挂载目录
需要先启动nacos镜像创建容器,才能将容器里面的相关文件复制到挂载目录。
1、启动nacos容器
这里只是简单启用,用于将nacos容器的的相关文件复制到挂载目录
docker run --name nacos -d -p 8848:8848 -e MODE=standalone nacos/nacos-server:v2.2.1
解释:
docker run -d :启动容器, -d 表示后台启动并返回容器id
–name nacos :容器名称为nacos
-p 8848:8848 :容器相关端口号,“:”前为宿主机访问启动容器端口号,“:”后为容器端口号
-e MODE=standalone : 以单机版启动
nacos/nacos-server:v2.2.1 :启动容器的nacos镜像

2、复制容器的相关文件到挂载目录
使用 docker cp “容器名”:“容器相关文件目录” “宿主机文件目录” 将容器相关文件复制到宿主机
(1)、复制容器配置文件到宿主机
docker cp nacos:/home/nacos/conf/ /www/wwwroot/changjing/docker/nacos
注意:
我这里的本地文件没有加上conf,如果加上了会在conf下再创建一个conf,后面的同理。
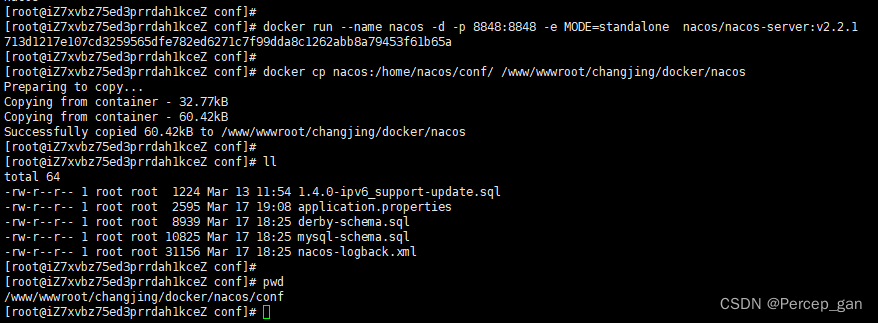
可以看到容器中的配置文件已经复制到宿主机了。
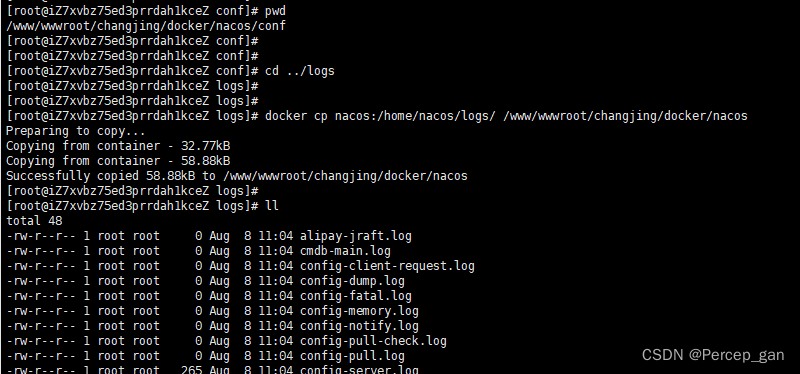
(2)、复制容器日志文件到宿主机
docker cp nacos:/home/nacos/logs/ /www/wwwroot/changjing/docker/nacos
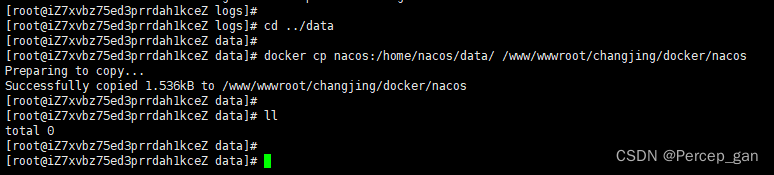
(3)、复制容器数据文件到宿主机
docker cp nacos:/home/nacos/data/ /www/wwwroot/changjing/docker/nacos
五、将nacos修改为以mysql存储信息
这里默认已经有mysql数据库了,没有自行百度安装。
1、将nacos相关数据库导入到宿主机的mysql中
(1)、创建数据库
直接导入没有效果,需要先创建数据库,数据库名称自定义,这是我的创建命令:
CREATE DATABASE `cj-config`
(2)、数据库脚本
数据库脚本在前面复制到宿主机的配置文件中
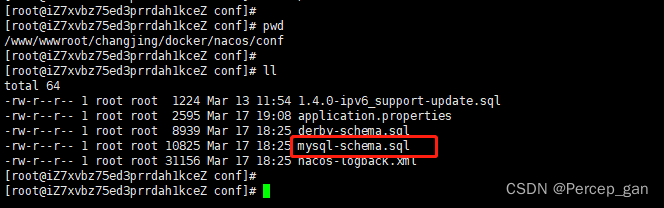
具体如下:
CREATE TABLE `config_info` (
  `id` bigint(20) NOT NULL AUTO_INCREMENT COMMENT 'id',
  `data_id` varchar(255) NOT NULL COMMENT 'data_id',
  `group_id` varchar(128) DEFAULT NULL,
  `content` longtext NOT NULL COMMENT 'content',
  `md5` varchar(32) DEFAULT NULL COMMENT 'md5',
  `gmt_create` datetime NOT NULL DEFAULT CURRENT_TIMESTAMP COMMENT '创建时间',
  `gmt_modified` datetime NOT NULL DEFAULT CURRENT_TIMESTAMP COMMENT '修改时间',
  `src_user` text COMMENT 'source user',
  `src_ip` varchar(50) DEFAULT NULL COMMENT 'source ip',
  `app_name` varchar(128) DEFAULT NULL,
  `tenant_id` varchar(128) DEFAULT '' COMMENT '租户字段',
  `c_desc` varchar(256) DEFAULT NULL,
  `c_use` varchar(64) DEFAULT NULL,
  `effect` varchar(64) DEFAULT NULL,
  `type` varchar(64) DEFAULT NULL,
  `c_schema` text,
  `encrypted_data_key` text NOT NULL COMMENT '秘钥',
  PRIMARY KEY (`id`),
  UNIQUE KEY `uk_configinfo_datagrouptenant` (`data_id`,`group_id`,`tenant_id`)
) ENGINE=InnoDB DEFAULT CHARSET=utf8 COLLATE=utf8_bin COMMENT='config_info';

/******************************************/
/*   数据库全名 = nacos_config   */
/*   表名称 = config_info_aggr   */
/******************************************/
CREATE TABLE `config_info_aggr` (
  `id` bigint(20) NOT NULL AUTO_INCREMENT COMMENT 'id',
  `data_id` varchar(255) NOT NULL COMMENT 'data_id',
  `group_id` varchar(128) NOT NULL COMMENT 'group_id',
  `datum_id` varchar(255) NOT NULL COMMENT 'datum_id',
  `content` longtext NOT NULL COMMENT '内容',
  `gmt_modified` datetime NOT NULL COMMENT '修改时间',
  `app_name` varchar(128) DEFAULT NULL,
  `tenant_id` varchar(128) DEFAULT '' COMMENT '租户字段',
  PRIMARY KEY (`id`),
  UNIQUE KEY `uk_configinfoaggr_datagrouptenantdatum` (`data_id`,`group_id`,`tenant_id`,`datum_id`)
) ENGINE=InnoDB DEFAULT CHARSET=utf8 COLLATE=utf8_bin COMMENT='增加租户字段';


/******************************************/
/*   数据库全名 = nacos_config   */
/*   表名称 = config_info_beta   */
/******************************************/
CREATE TABLE `config_info_beta` (
  `id` bigint(20) NOT NULL AUTO_INCREMENT COMMENT 'id',
  `data_id` varchar(255) NOT NULL COMMENT 'data_id',
  `group_id` varchar(128) NOT NULL COMMENT 'group_id',
  `app_name` varchar(128) DEFAULT NULL COMMENT 'app_name',
  `content` longtext NOT NULL COMMENT 'content',
  `beta_ips` varchar(1024) DEFAULT NULL COMMENT 'betaIps',
  `md5` varchar(32) DEFAULT NULL COMMENT 'md5',
  `gmt_create` datetime NOT NULL DEFAULT CURRENT_TIMESTAMP COMMENT '创建时间',
  `gmt_modified` datetime NOT NULL DEFAULT CURRENT_TIMESTAMP COMMENT '修改时间',
  `src_user` text COMMENT 'source user',
  `src_ip` varchar(50) DEFAULT NULL COMMENT 'source ip',
  `tenant_id` varchar(128) DEFAULT '' COMMENT '租户字段',
  `encrypted_data_key` text NOT NULL COMMENT '秘钥',
  PRIMARY KEY (`id`),
  UNIQUE KEY `uk_configinfobeta_datagrouptenant` (`data_id`,`group_id`,`tenant_id`)
) ENGINE=InnoDB DEFAULT CHARSET=utf8 COLLATE=utf8_bin COMMENT='config_info_beta';

/******************************************/
/*   数据库全名 = nacos_config   */
/*   表名称 = config_info_tag   */
/******************************************/
CREATE TABLE `config_info_tag` (
  `id` bigint(20) NOT NULL AUTO_INCREMENT COMMENT 'id',
  `data_id` varchar(255) NOT NULL COMMENT 'data_id',
  `group_id` varchar(128) NOT NULL COMMENT 'group_id',
  `tenant_id` varchar(128) DEFAULT '' COMMENT 'tenant_id',
  `tag_id` varchar(128) NOT NULL COMMENT 'tag_id',
  `app_name` varchar(128) DEFAULT NULL COMMENT 'app_name',
  `content` longtext NOT NULL COMMENT 'content',
  `md5` varchar(32) DEFAULT NULL COMMENT 'md5',
  `gmt_create` datetime NOT NULL DEFAULT CURRENT_TIMESTAMP COMMENT '创建时间',
  `gmt_modified` datetime NOT NULL DEFAULT CURRENT_TIMESTAMP COMMENT '修改时间',
  `src_user` text COMMENT 'source user',
  `src_ip` varchar(50) DEFAULT NULL COMMENT 'source ip',
  PRIMARY KEY (`id`),
  UNIQUE KEY `uk_configinfotag_datagrouptenanttag` (`data_id`,`group_id`,`tenant_id`,`tag_id`)
) ENGINE=InnoDB DEFAULT CHARSET=utf8 COLLATE=utf8_bin COMMENT='config_info_tag';

/******************************************/
/*   数据库全名 = nacos_config   */
/*   表名称 = config_tags_relation   */
/******************************************/
CREATE TABLE `config_tags_relation` (
  `id` bigint(20) NOT NULL COMMENT 'id',
  `tag_name` varchar(128) NOT NULL COMMENT 'tag_name',
  `tag_type` varchar(64) DEFAULT NULL COMMENT 'tag_type',
  `data_id` varchar(255) NOT NULL COMMENT 'data_id',
  `group_id` varchar(128) NOT NULL COMMENT 'group_id',
  `tenant_id` varchar(128) DEFAULT '' COMMENT 'tenant_id',
  `nid` bigint(20) NOT NULL AUTO_INCREMENT,
  PRIMARY KEY (`nid`),
  UNIQUE KEY `uk_configtagrelation_configidtag` (`id`,`tag_name`,`tag_type`),
  KEY `idx_tenant_id` (`tenant_id`)
) ENGINE=InnoDB DEFAULT CHARSET=utf8 COLLATE=utf8_bin COMMENT='config_tag_relation';

/******************************************/
/*   数据库全名 = nacos_config   */
/*   表名称 = group_capacity   */
/******************************************/
CREATE TABLE `group_capacity` (
  `id` bigint(20) unsigned NOT NULL AUTO_INCREMENT COMMENT '主键ID',
  `group_id` varchar(128) NOT NULL DEFAULT '' COMMENT 'Group ID,空字符表示整个集群',
  `quota` int(10) unsigned NOT NULL DEFAULT '0' COMMENT '配额,0表示使用默认值',
  `usage` int(10) unsigned NOT NULL DEFAULT '0' COMMENT '使用量',
  `max_size` int(10) unsigned NOT NULL DEFAULT '0' COMMENT '单个配置大小上限,单位为字节,0表示使用默认值',
  `max_aggr_count` int(10) unsigned NOT NULL DEFAULT '0' COMMENT '聚合子配置最大个数,,0表示使用默认值',
  `max_aggr_size` int(10) unsigned NOT NULL DEFAULT '0' COMMENT '单个聚合数据的子配置大小上限,单位为字节,0表示使用默认值',
  `max_history_count` int(10) unsigned NOT NULL DEFAULT '0' COMMENT '最大变更历史数量',
  `gmt_create` datetime NOT NULL DEFAULT CURRENT_TIMESTAMP COMMENT '创建时间',
  `gmt_modified` datetime NOT NULL DEFAULT CURRENT_TIMESTAMP COMMENT '修改时间',
  PRIMARY KEY (`id`),
  UNIQUE KEY `uk_group_id` (`group_id`)
) ENGINE=InnoDB DEFAULT CHARSET=utf8 COLLATE=utf8_bin COMMENT='集群、各Group容量信息表';

/******************************************/
/*   数据库全名 = nacos_config   */
/*   表名称 = his_config_info   */
/******************************************/
CREATE TABLE `his_config_info` (
  `id` bigint(20) unsigned NOT NULL,
  `nid` bigint(20) unsigned NOT NULL AUTO_INCREMENT,
  `data_id` varchar(255) NOT NULL,
  `group_id` varchar(128) NOT NULL,
  `app_name` varchar(128) DEFAULT NULL COMMENT 'app_name',
  `content` longtext NOT NULL,
  `md5` varchar(32) DEFAULT NULL,
  `gmt_create` datetime NOT NULL DEFAULT CURRENT_TIMESTAMP,
  `gmt_modified` datetime NOT NULL DEFAULT CURRENT_TIMESTAMP,
  `src_user` text,
  `src_ip` varchar(50) DEFAULT NULL,
  `op_type` char(10) DEFAULT NULL,
  `tenant_id` varchar(128) DEFAULT '' COMMENT '租户字段',
  `encrypted_data_key` text NOT NULL COMMENT '秘钥',
  PRIMARY KEY (`nid`),
  KEY `idx_gmt_create` (`gmt_create`),
  KEY `idx_gmt_modified` (`gmt_modified`),
  KEY `idx_did` (`data_id`)
) ENGINE=InnoDB DEFAULT CHARSET=utf8 COLLATE=utf8_bin COMMENT='多租户改造';


/******************************************/
/*   数据库全名 = nacos_config   */
/*   表名称 = tenant_capacity   */
/******************************************/
CREATE TABLE `tenant_capacity` (
  `id` bigint(20) unsigned NOT NULL AUTO_INCREMENT COMMENT '主键ID',
  `tenant_id` varchar(128) NOT NULL DEFAULT '' COMMENT 'Tenant ID',
  `quota` int(10) unsigned NOT NULL DEFAULT '0' COMMENT '配额,0表示使用默认值',
  `usage` int(10) unsigned NOT NULL DEFAULT '0' COMMENT '使用量',
  `max_size` int(10) unsigned NOT NULL DEFAULT '0' COMMENT '单个配置大小上限,单位为字节,0表示使用默认值',
  `max_aggr_count` int(10) unsigned NOT NULL DEFAULT '0' COMMENT '聚合子配置最大个数',
  `max_aggr_size` int(10) unsigned NOT NULL DEFAULT '0' COMMENT '单个聚合数据的子配置大小上限,单位为字节,0表示使用默认值',
  `max_history_count` int(10) unsigned NOT NULL DEFAULT '0' COMMENT '最大变更历史数量',
  `gmt_create` datetime NOT NULL DEFAULT CURRENT_TIMESTAMP COMMENT '创建时间',
  `gmt_modified` datetime NOT NULL DEFAULT CURRENT_TIMESTAMP COMMENT '修改时间',
  PRIMARY KEY (`id`),
  UNIQUE KEY `uk_tenant_id` (`tenant_id`)
) ENGINE=InnoDB DEFAULT CHARSET=utf8 COLLATE=utf8_bin COMMENT='租户容量信息表';


CREATE TABLE `tenant_info` (
  `id` bigint(20) NOT NULL AUTO_INCREMENT COMMENT 'id',
  `kp` varchar(128) NOT NULL COMMENT 'kp',
  `tenant_id` varchar(128) default '' COMMENT 'tenant_id',
  `tenant_name` varchar(128) default '' COMMENT 'tenant_name',
  `tenant_desc` varchar(256) DEFAULT NULL COMMENT 'tenant_desc',
  `create_source` varchar(32) DEFAULT NULL COMMENT 'create_source',
  `gmt_create` bigint(20) NOT NULL COMMENT '创建时间',
  `gmt_modified` bigint(20) NOT NULL COMMENT '修改时间',
  PRIMARY KEY (`id`),
  UNIQUE KEY `uk_tenant_info_kptenantid` (`kp`,`tenant_id`),
  KEY `idx_tenant_id` (`tenant_id`)
) ENGINE=InnoDB DEFAULT CHARSET=utf8 COLLATE=utf8_bin COMMENT='tenant_info';

CREATE TABLE `users` (
	`username` varchar(50) NOT NULL PRIMARY KEY,
	`password` varchar(500) NOT NULL,
	`enabled` boolean NOT NULL
);

CREATE TABLE `roles` (
	`username` varchar(50) NOT NULL,
	`role` varchar(50) NOT NULL,
	UNIQUE INDEX `idx_user_role` (`username` ASC, `role` ASC) USING BTREE
);

CREATE TABLE `permissions` (
    `role` varchar(50) NOT NULL,
    `resource` varchar(255) NOT NULL,
    `action` varchar(8) NOT NULL,
    UNIQUE INDEX `uk_role_permission` (`role`,`resource`,`action`) USING BTREE
);

INSERT INTO users (username, password, enabled) VALUES ('nacos', '$2a$10$EuWPZHzz32dJN7jexM34MOeYirDdFAZm2kuWj7VEOJhhZkDrxfvUu', TRUE);

INSERT INTO roles (username, role) VALUES ('nacos', 'ROLE_ADMIN');
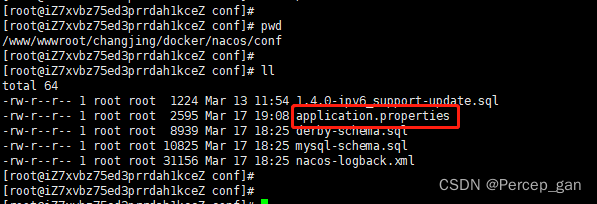
2、修改配置文件
修改这个
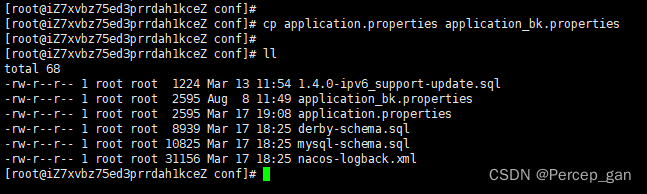
(1)、备份配置文件
在修改之前先备份一份,防止改坏了不知道如何重来,备份命令如下:
cp application.properties application_bk.properties
(2)、修改前
# spring
server.servlet.contextPath=${

    SERVER_SERVLET_CONTEXTPATH:/nacos}
server.contextPath=/nacos
server.port=${

    NACOS_APPLICATION_PORT:8848}
server.tomcat.accesslog.max-days=30
server.tomcat.accesslog.pattern=%h %l %u %t "%r" %s %b %D %{

    User-Agent}i %{

    Request-Source}i
server.tomcat.accesslog.enabled=${

    TOMCAT_ACCESSLOG_ENABLED:false}
# default current work dir
server.tomcat.basedir=file:.
#*************** Config Module Related Configurations ***************#
### Deprecated configuration property, it is recommended to use `spring.sql.init.platform` replaced.
#spring.datasource.platform=${

    SPRING_DATASOURCE_PLATFORM:}
spring.sql.init.platform=${

    SPRING_DATASOURCE_PLATFORM:}
nacos.cmdb.dumpTaskInterval=3600
nacos.cmdb.eventTaskInterval=10
nacos.cmdb.labelTaskInterval=300
nacos.cmdb.loadDataAtStart=false
db.num=${

    MYSQL_DATABASE_NUM:1}
db.url.0=jdbc:mysql://${

    MYSQL_SERVICE_HOST}:${

    MYSQL_SERVICE_PORT:3306}/${

    MYSQL_SERVICE_DB_NAME}?${

    MYSQL_SERVICE_DB_PARAM:characterEncoding=utf8&connectTimeout=1000&socketTimeout=3000&autoReconnect=true&useSSL=false}
db.user.0=${

    MYSQL_SERVICE_USER}
db.password.0=${

    MYSQL_SERVICE_PASSWORD}
### The auth system to use, currently only 'nacos' and 'ldap' is supported:
nacos.core.auth.system.type=${

    NACOS_AUTH_SYSTEM_TYPE:nacos}
### worked when nacos.core.auth.system.type=nacos
### The token expiration in seconds:
nacos.core.auth.plugin.nacos.token.expire.seconds=${

    NACOS_AUTH_TOKEN_EXPIRE_SECONDS:18000}
### The default token:
nacos.core.auth.plugin.nacos.token.secret.key=${

    NACOS_AUTH_TOKEN}
### Turn on/off caching of auth information. By turning on this switch, the update of auth information would have a 15 seconds delay.
nacos.core.auth.caching.enabled=${

    NACOS_AUTH_CACHE_ENABLE:false}
nacos.core.auth.enable.userAgentAuthWhite=${

    NACOS_AUTH_USER_AGENT_AUTH_WHITE_ENABLE:false}
nacos.core.auth.server.identity.key=${

    NACOS_AUTH_IDENTITY_KEY}
nacos.core.auth.server.identity.value=${

    NACOS_AUTH_IDENTITY_VALUE}
## spring security config
### turn off security
nacos.security.ignore.urls=${

    NACOS_SECURITY_IGNORE_URLS:/,/error,/**/*.css,/**/*.js,/**/*.html,/**/*.map,/**/*.svg,/**/*.png,/**/*.ico,/console-fe/public/**,/v1/auth/**,/v1/console/health/**,/actuator/**,/v1/console/server/**}
# metrics for elastic search
management.metrics.export.elastic.enabled=false
management.metrics.export.influx.enabled=false
nacos.naming.distro.taskDispatchThreadCount=10
nacos.naming.distro.taskDispatchPeriod=200
nacos.naming.distro.batchSyncKeyCount=1000
nacos.naming.distro.initDataRatio=0.9
nacos.naming.distro.syncRetryDelay=5000
nacos.naming.data.warmup=true
(3)、修改后(里面有很多踩坑的解决办法,初次安装nacos建议不要跳过)
# spring
server.servlet.contextPath=/nacos
server.contextPath=/nacos
server.port=8848
# server.tomcat.accesslog.max-days=30
# server.tomcat.accesslog.pattern=%h %l %u %t "%r" %s %b %D %{
User-Agent}i %{
Request-Source}i
# server.tomcat.accesslog.enabled=false
# default current work dir
# server.tomcat.basedir=file:.
#*************** Config Module Related Configurations ***************#
### Deprecated configuration property, it is recommended to use `spring.sql.init.platform` replaced.
spring.datasource.platform=mysql
spring.sql.init.platform=mysql
nacos.cmdb.dumpTaskInterval=3600
nacos.cmdb.eventTaskInterval=10
nacos.cmdb.labelTaskInterval=300
nacos.cmdb.loadDataAtStart=false
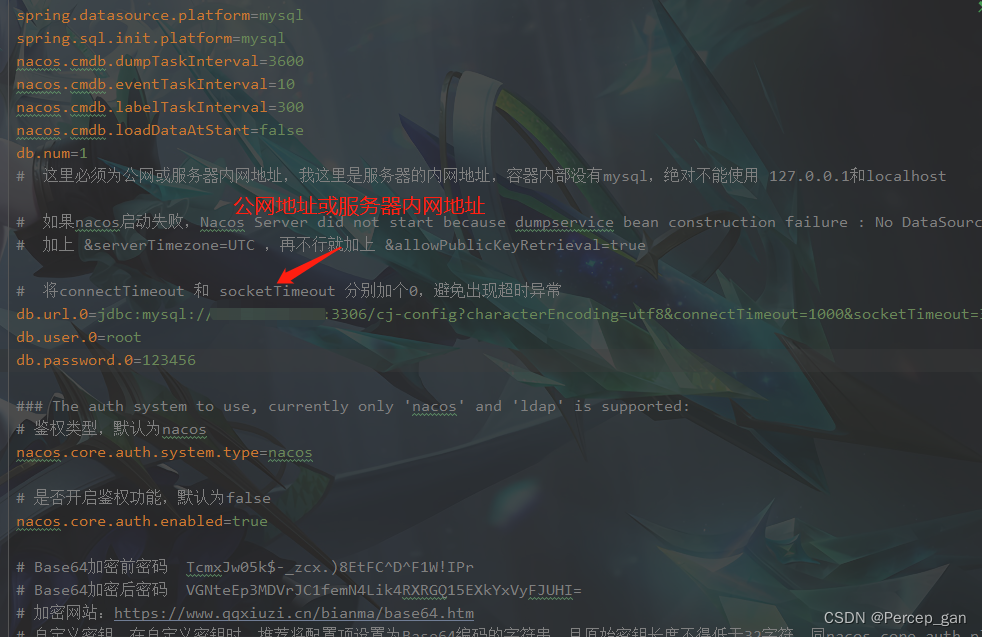
db.num=1
# 这里必须为公网或服务器内网地址,我这里是服务器的内网地址,容器内部没有mysql,绝对不能使用 127.0.0.1和localhost
# 如果nacos启动失败,Nacos Server did not start because dumpservice bean construction failure : No DataSource set
# 加上 &serverTimezone=UTC ,再不行就加上 &allowPublicKeyRetrieval=true
# 将connectTimeout 和 socketTimeout 分别加个0,避免出现超时异常
db.url.0=jdbc:mysql://公网或服务器内网地址:3306/cj-config?characterEncoding=utf8&connectTimeout=10000&socketTimeout=30000&autoReconnect=true&useUnicode=true&useSSL=false
db.user.0=root
db.password.0=123456
### The auth system to use, currently only 'nacos' and 'ldap' is supported:
# 鉴权类型,默认为nacos
nacos.core.auth.system.type=nacos
# 是否开启鉴权功能,默认为false
nacos.core.auth.enabled=true
# Base64加密前密码 TcmxJw05k$-_zcx.)8EtFC^D^F1W!IPr
# Base64加密后密码 VGNteEp3MDVrJC1femN4Lik4RXRGQ15EXkYxVyFJUHI=
# 加密网站:https://www.qqxiuzi.cn/bianma/base64.htm
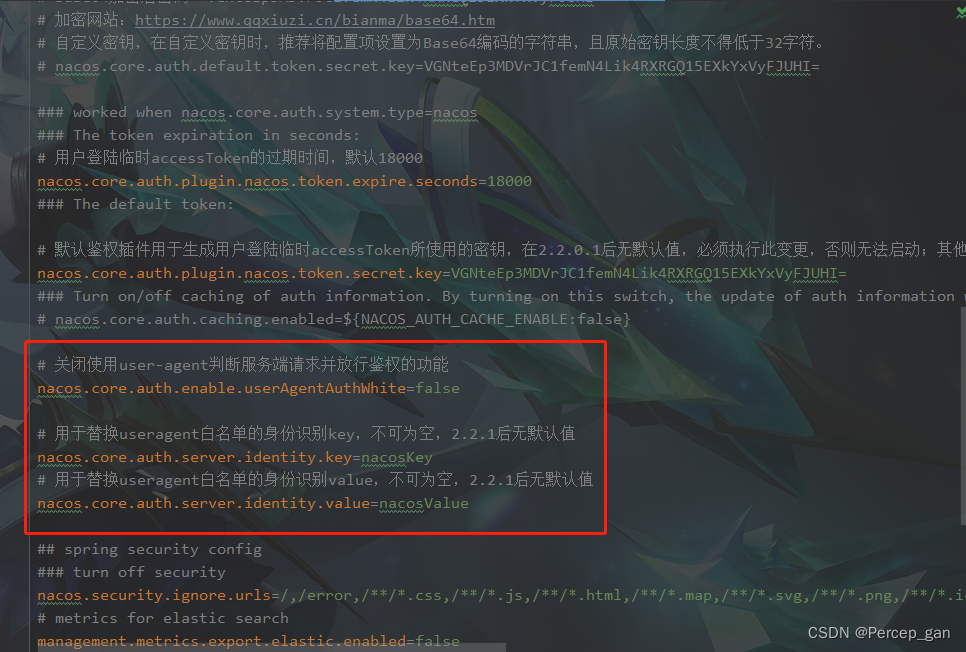
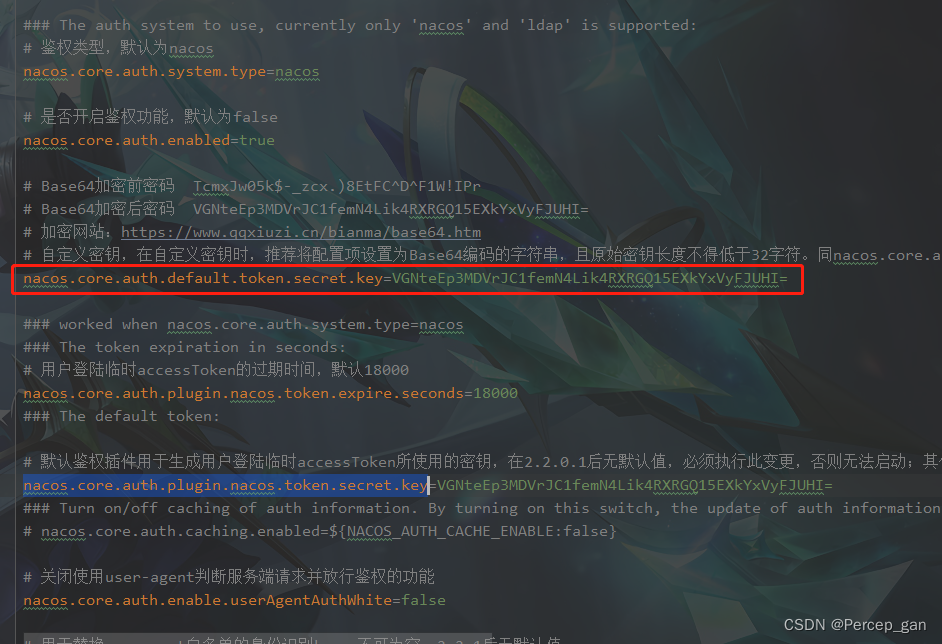
# 自定义密钥,在自定义密钥时,推荐将配置项设置为Base64编码的字符串,且原始密钥长度不得低于32字符。同nacos.core.auth.plugin.nacos.token.secret.key
nacos.core.auth.default.token.secret.key=VGNteEp3MDVrJC1femN4Lik4RXRGQ15EXkYxVyFJUHI=
### worked when nacos.core.auth.system.type=nacos
### The token expiration in seconds:
# 用户登陆临时accessToken的过期时间,默认18000
nacos.core.auth.plugin.nacos.token.expire.seconds=18000
### The default token:
# 默认鉴权插件用于生成用户登陆临时accessToken所使用的密钥,在2.2.0.1后无默认值,必须执行此变更,否则无法启动;其他版本为建议设置。
nacos.core.auth.plugin.nacos.token.secret.key=VGNteEp3MDVrJC1femN4Lik4RXRGQ15EXkYxVyFJUHI=
### Turn on/off caching of auth information. By turning on this switch, the update of auth information would have a 15 seconds delay.
# nacos.core.auth.caching.enabled=${
NACOS_AUTH_CACHE_ENABLE:false}
# 关闭使用user-agent判断服务端请求并放行鉴权的功能
nacos.core.auth.enable.userAgentAuthWhite=false
# 用于替换useragent白名单的身份识别key,不可为空,2.2.1后无默认值
nacos.core.auth.server.identity.key=nacosKey
# 用于替换useragent白名单的身份识别value,不可为空,2.2.1后无默认值
nacos.core.auth.server.identity.value=nacosValue
## spring security config
### turn off security
nacos.security.ignore.urls=/,/error,/**/*.css,/**/*.js,/**/*.html,/**/*.map,/**/*.svg,/**/*.png,/**/*.ico,/console-fe/public/**,/v1/auth/**,/v1/console/health/**,/actuator/**,/v1/console/server/**
# metrics for elastic search
management.metrics.export.elastic.enabled=false
management.metrics.export.influx.enabled=false
nacos.naming.distro.taskDispatchThreadCount=10
nacos.naming.distro.taskDispatchPeriod=200
nacos.naming.distro.batchSyncKeyCount=1000
nacos.naming.distro.initDataRatio=0.9
nacos.naming.distro.syncRetryDelay=5000
nacos.naming.data.warmup=true
六、启动nacos
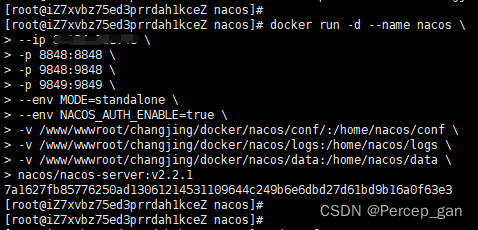
这次启动使用如下命令,注意把IP地址改为自己服务器的公网地址
docker run -d --name nacos \
--ip 0.0.0.0 \
-p 8848:8848 \
-p 9848:9848 \
-p 9849:9849 \
--env MODE=standalone \
--env NACOS_AUTH_ENABLE=true \
-v /www/wwwroot/changjing/docker/nacos/conf/:/home/nacos/conf \
-v /www/wwwroot/changjing/docker/nacos/logs:/home/nacos/logs \
-v /www/wwwroot/changjing/docker/nacos/data:/home/nacos/data \
nacos/nacos-server:v2.2.1
解释:
docker run -d --name nacos \                                            -d 表示运行在后台,--name 指定名称为nacos
--ip 8.134.131.48 \                                                     自定义分配 IP 地址,我写的是服务器的 IP 地址,可忽略
-p 8848:8848 \                                                          前者为暴露给外部访问的端口,后者为nacos容器端口
-p 9848:9848 \                                                          9848是nacos2.0.0版本以上必须要加上端口映射
-p 9849:9849 \                                                          9849是nacos2.0.0版本以上必须要加上端口映射
--env MODE=standalone \                                                 nacos以单机版启动,默认为cluster(集群)
--env NACOS_AUTH_ENABLE=true \                                          如果使用官方镜像,请在启动docker容器时,添加如下环境变量
-v /www/wwwroot/changjing/docker/nacos/conf/:/home/nacos/conf \         nacos 配置文件目录,“:”前为服务器目录,“:”后为nacos容器中的目录
-v /www/wwwroot/changjing/docker/nacos/logs:/home/nacos/logs \          nacos 日志文件目录,“:”前为服务器目录,“:”后为nacos容器中的目录
-v /www/wwwroot/changjing/docker/nacos/data:/home/nacos/data \          nacos 数据文件目录,“:”前为服务器目录,“:”后为nacos容器中的目录
nacos/nacos-server:v2.2.1                                               指定 docker nacos 版本,这里是2.2.1版本
nacos2.0.0以上的版本需要开启鉴权,详情看这里:
https://nacos.io/zh-cn/docs/v2/guide/user/auth.html
这时没有出意外的话,应该要出点意外了,这次启动就报错了。
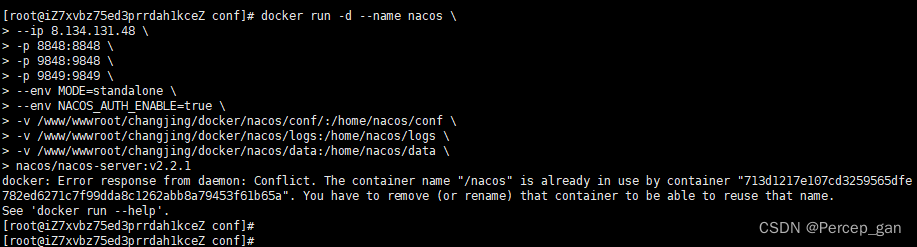
因为前面为了复制容器相关文件,启动过一次,虽然启动失败了,但已经创建过名称为 nacos 的容器了。
先删除它,命令如下:
docker rm -f nacos

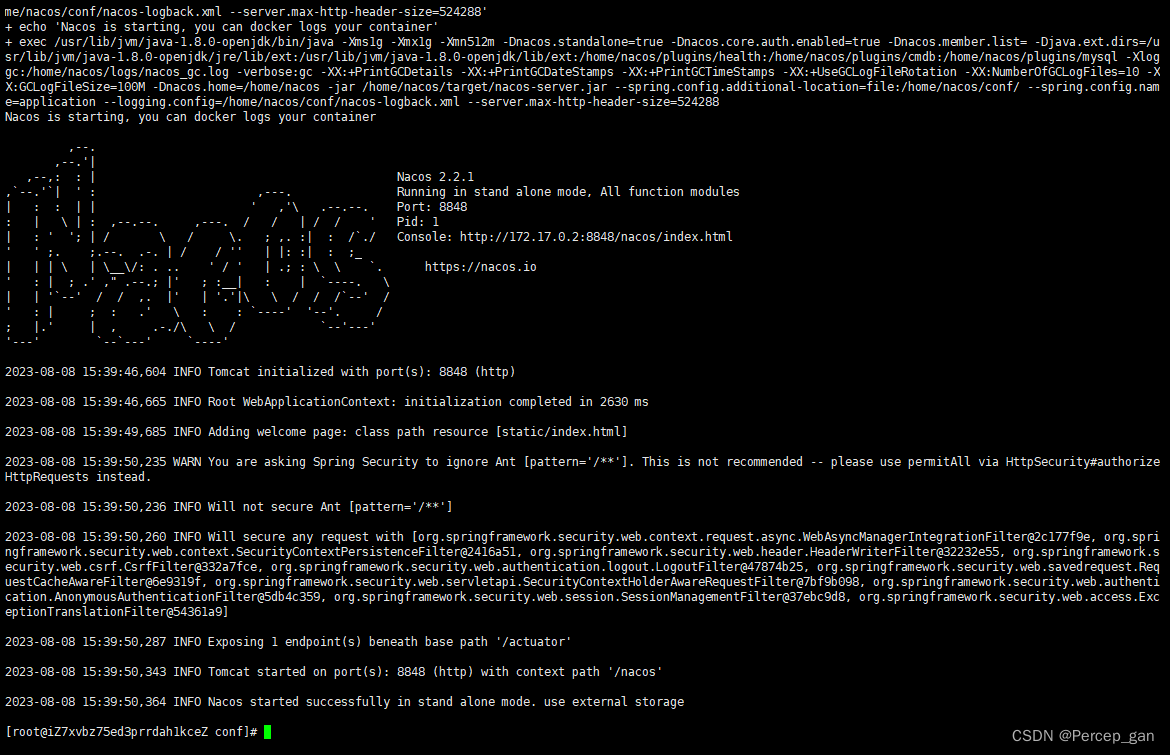
再次启动容器
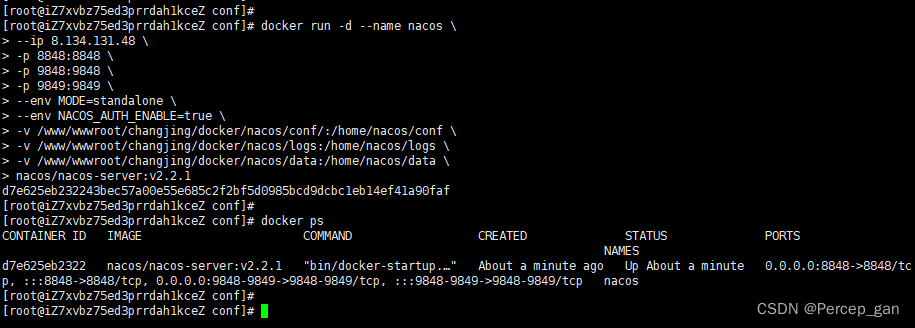
可以看到容器成功了。
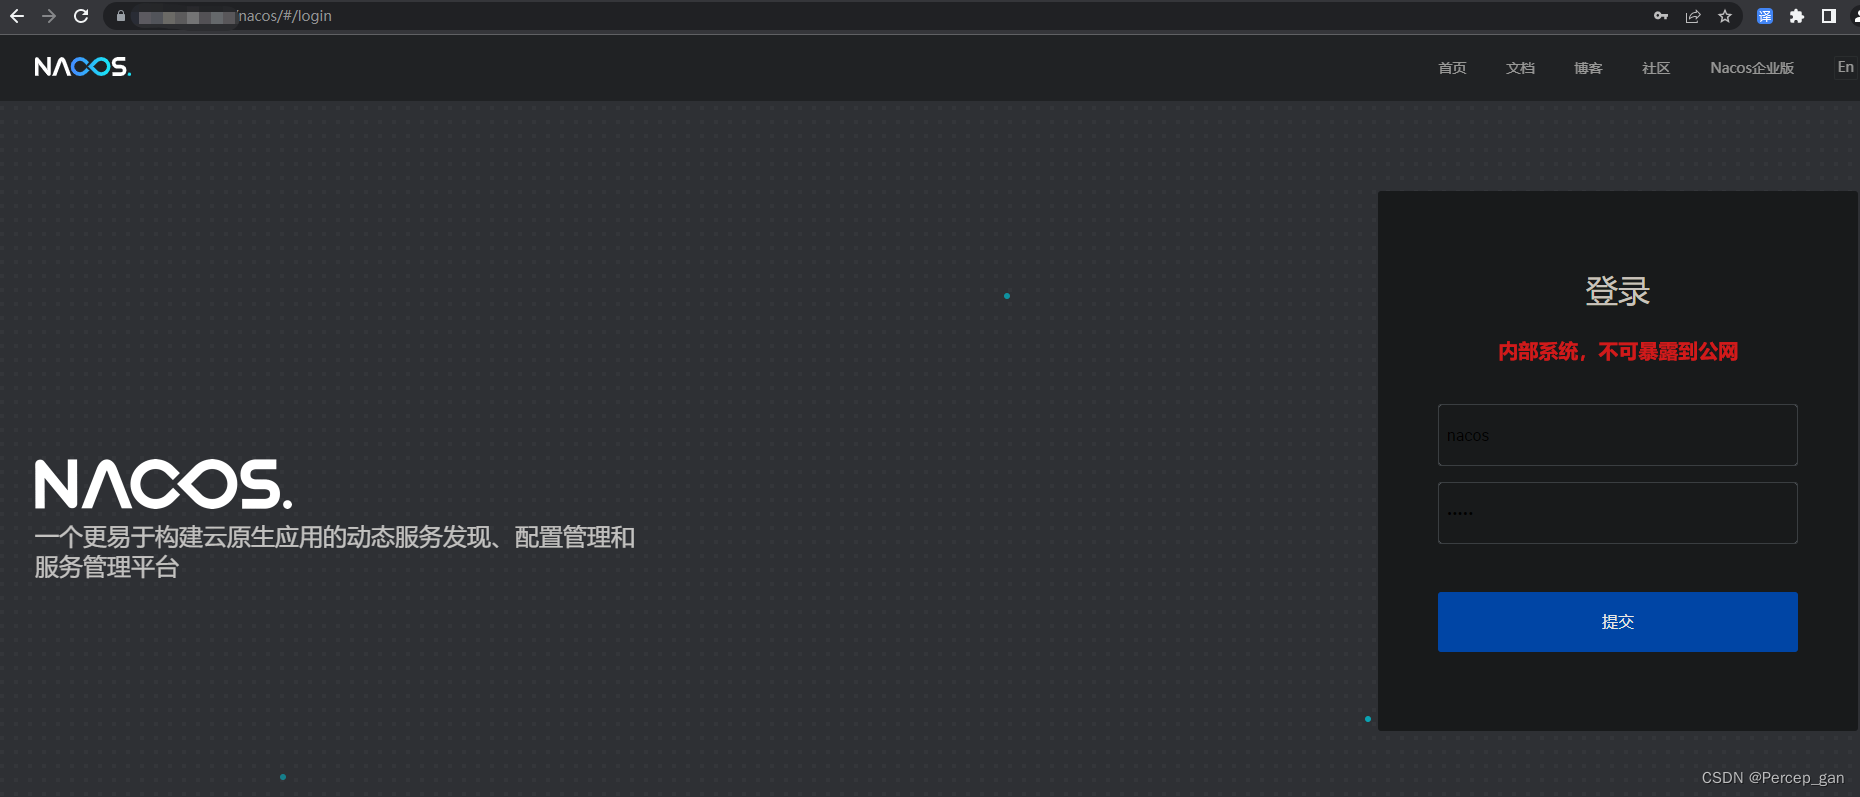
到浏览器使用IP地址或者域名访问:
七、踩坑记录
1、Tomcat启动失败
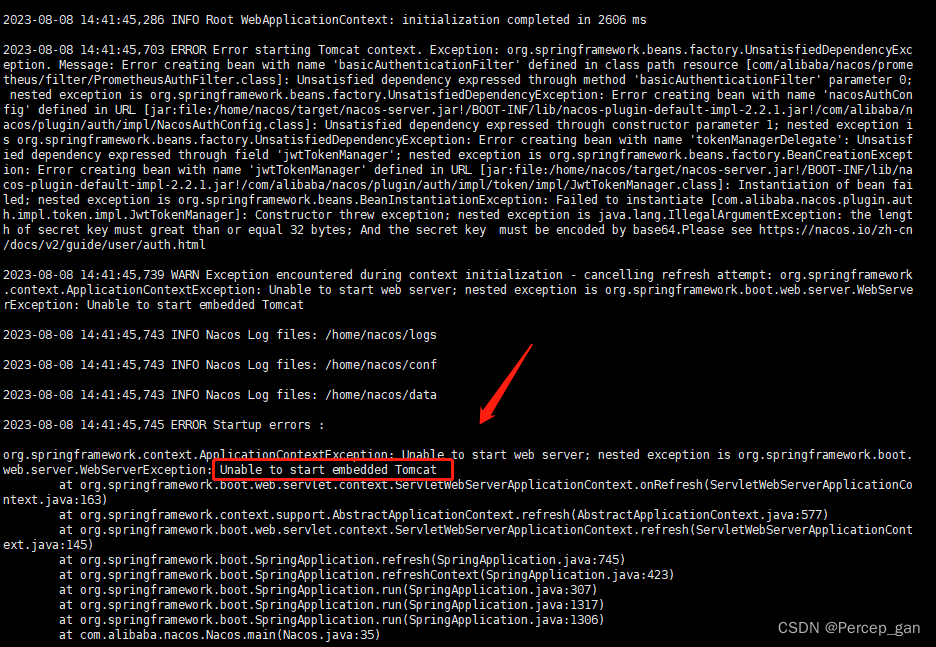
不知道有没有小伙伴像我一样,看到第一个错误,Tomcat启动失败就以为需要安装Tomcat镜像并启动起来,其实并不需要,真正的报错提示在后面
2、Caused by: java.lang.IllegalArgumentException: the length of secret key must great than or equal 32 bytes; And the secret key must be encoded by base64
这个错应该有很多小伙伴遇到
Caused by: java.lang.IllegalArgumentException: the length of secret key must great than or equal 32 bytes; And the secret key  must be encoded by base64.Please see https://nacos.io/zh-cn/docs/v2/guide/user/auth.html
	at com.alibaba.nacos.plugin.auth.impl.token.impl.JwtTokenManager.processProperties(JwtTokenManager.java:73)
	at com.alibaba.nacos.plugin.auth.impl.token.impl.JwtTokenManager.<init>(JwtTokenManager.java:61)
	at sun.reflect.NativeConstructorAccessorImpl.newInstance0(Native Method)
	at sun.reflect.NativeConstructorAccessorImpl.newInstance(NativeConstructorAccessorImpl.java:62)
	at sun.reflect.DelegatingConstructorAccessorImpl.newInstance(DelegatingConstructorAccessorImpl.java:45)
	at java.lang.reflect.Constructor.newInstance(Constructor.java:423)
	at org.springframework.beans.BeanUtils.instantiateClass(BeanUtils.java:211)
	... 112 common frames omitted
Caused by: java.lang.IllegalArgumentException: The specified key byte array is 0 bits which is not secure enough for any JWT HMAC-SHA algorithm.  The JWT JWA Specification (RFC 7518, Section 3.2) states that keys used with HMAC-SHA algorithms MUST have a size >= 256 bits (the key size must be greater than or equal to the hash output size).  See https://tools.ietf.org/html/rfc7518#section-3.2 for more information.
	at com.alibaba.nacos.plugin.auth.impl.jwt.NacosJwtParser.<init>(NacosJwtParser.java:56)
	at com.alibaba.nacos.plugin.auth.impl.token.impl.JwtTokenManager.processProperties(JwtTokenManager.java:71)
	... 118 common frames omitted
2023-08-08 14:41:45,798 WARN [ThreadPoolManager] Start destroying ThreadPool

2023-08-08 14:41:45,798 WARN [ThreadPoolManager] Destruction of the end
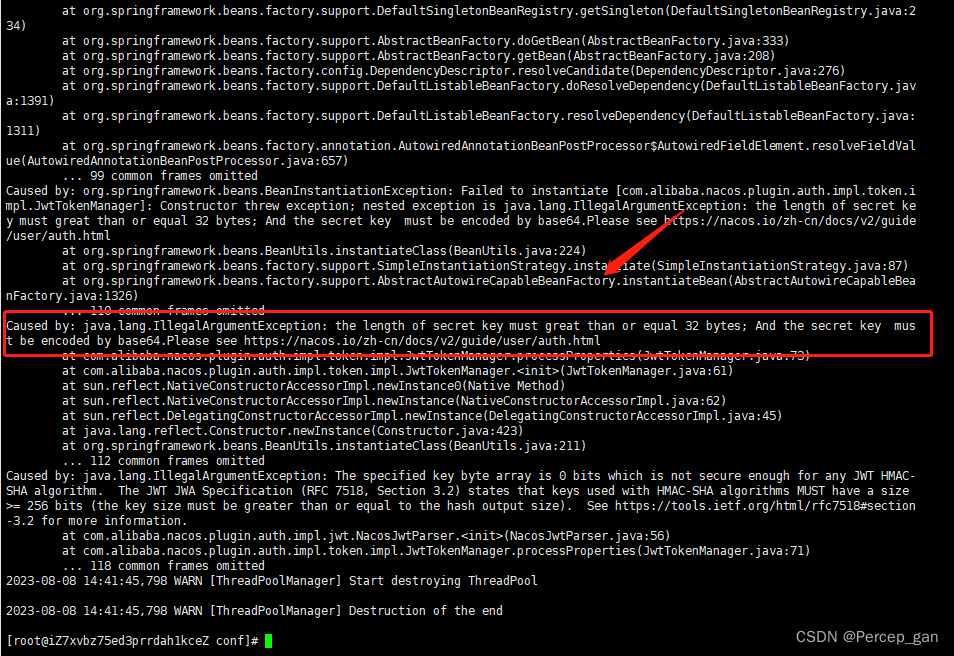
说缺少应该长度不少于32长度的秘钥,还把官方的文档都放出来了
https://nacos.io/zh-cn/docs/v2/guide/user/auth.html
就是这个
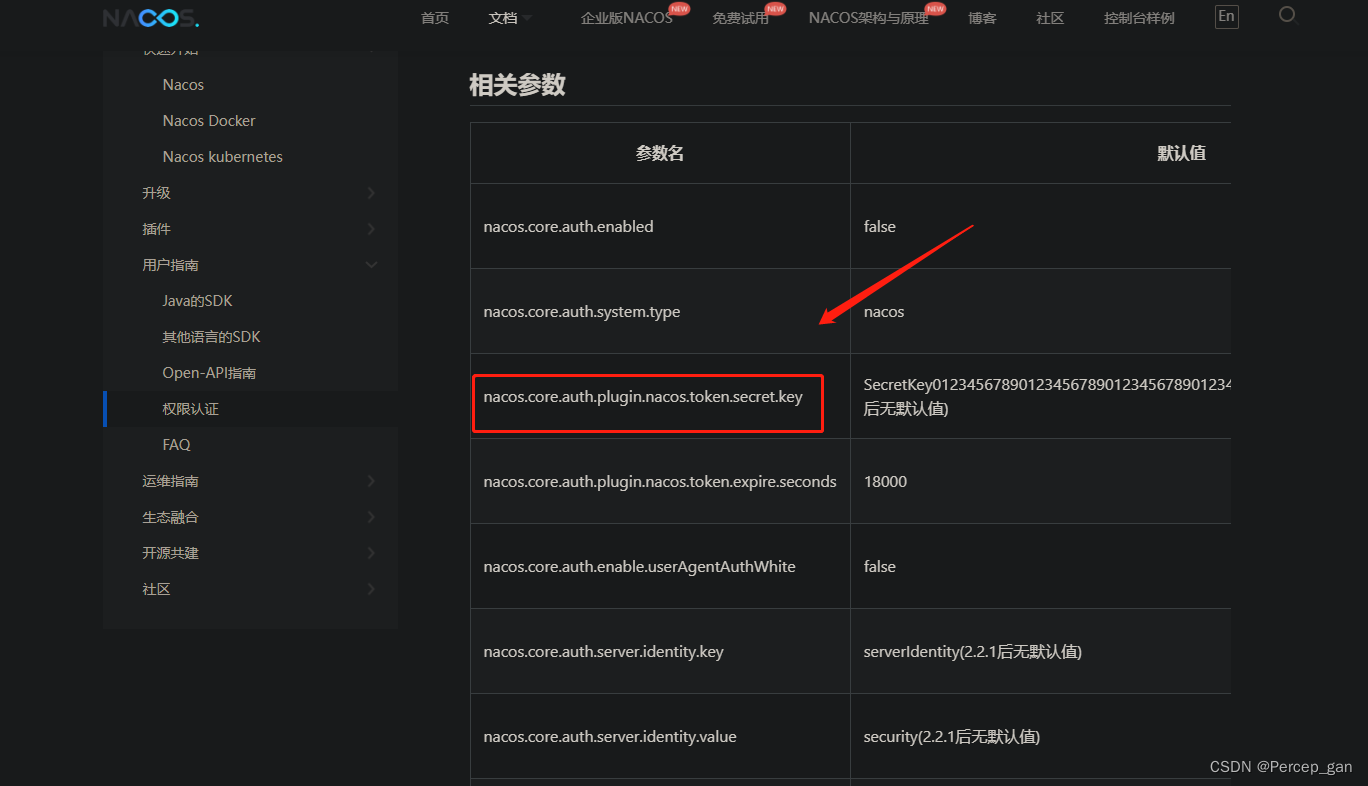
nacos.core.auth.plugin.nacos.token.secret.key 默认鉴权插件用于生成用户登陆临时accessToken所使用的密钥,在2.2.0.1后无默认值,必须执行此变更,否则无法启动;其他版本为建议设置
我的是nacos2.2.1版本的,也就是没有默认值的,当时也没有做修改,启动自然报错。给 nacos.core.auth.plugin.nacos.token.secret.key赋值(32位及以上的Base64编码字符串),再次启动

如果仔细地看完了nacos的文档并做了对应的修改,那应该是启动成功了,如果没有成功就接着往下看。
3、Caused by: org.springframework.beans.factory.BeanCreationException: Error creating bean with name ‘authConfigs’: Invocation of init method failed; nested exception is ErrCode:50002, ErrMsg:Empty identity, Please set nacos.core.auth.server.identity.key and nacos.core.auth.server.identity.value
Caused by: org.springframework.beans.factory.BeanCreationException: Error creating bean with name 'authConfigs': Invocation of init method failed; nested exception is ErrCode:50002, ErrMsg:Empty identity, Please set `nacos.core.auth.server.identity.key` and `nacos.core.auth.server.identity.value`, detail: https://nacos.io/zh-cn/docs/v2/guide/user/auth.html
	at org.springframework.beans.factory.annotation.InitDestroyAnnotationBeanPostProcessor.postProcessBeforeInitialization(InitDestroyAnnotationBeanPostProcessor.java:160)
	at org.springframework.beans.factory.support.AbstractAutowireCapableBeanFactory.applyBeanPostProcessorsBeforeInitialization(AbstractAutowireCapableBeanFactory.java:440)
	at org.springframework.beans.factory.support.AbstractAutowireCapableBeanFactory.initializeBean(AbstractAutowireCapableBeanFactory.java:1796)
	at org.springframework.beans.factory.support.AbstractAutowireCapableBeanFactory.doCreateBean(AbstractAutowireCapableBeanFactory.java:620)
	at org.springframework.beans.factory.support.AbstractAutowireCapableBeanFactory.createBean(AbstractAutowireCapableBeanFactory.java:542)
	at org.springframework.beans.factory.support.AbstractBeanFactory.lambda$doGetBean$0(AbstractBeanFactory.java:335)
	at org.springframework.beans.factory.support.DefaultSingletonBeanRegistry.getSingleton(DefaultSingletonBeanRegistry.java:234)
	at org.springframework.beans.factory.support.AbstractBeanFactory.doGetBean(AbstractBeanFactory.java:333)
	at org.springframework.beans.factory.support.AbstractBeanFactory.getBean(AbstractBeanFactory.java:208)
	at org.springframework.beans.factory.config.DependencyDescriptor.resolveCandidate(DependencyDescriptor.java:276)
	at org.springframework.beans.factory.support.DefaultListableBeanFactory.doResolveDependency(DefaultListableBeanFactory.java:1391)
	at org.springframework.beans.factory.support.DefaultListableBeanFactory.resolveDependency(DefaultListableBeanFactory.java:1311)
	at org.springframework.beans.factory.support.ConstructorResolver.resolveAutowiredArgument(ConstructorResolver.java:887)
	at org.springframework.beans.factory.support.ConstructorResolver.createArgumentArray(ConstructorResolver.java:791)
	... 75 common frames omitted
Caused by: com.alibaba.nacos.api.exception.NacosException: Empty identity, Please set `nacos.core.auth.server.identity.key` and `nacos.core.auth.server.identity.value`, detail: https://nacos.io/zh-cn/docs/v2/guide/user/auth.html
	at com.alibaba.nacos.auth.config.AuthConfigs.validate(AuthConfigs.java:100)
	at sun.reflect.NativeMethodAccessorImpl.invoke0(Native Method)
	at sun.reflect.NativeMethodAccessorImpl.invoke(NativeMethodAccessorImpl.java:62)
	at sun.reflect.DelegatingMethodAccessorImpl.invoke(DelegatingMethodAccessorImpl.java:43)
	at java.lang.reflect.Method.invoke(Method.java:498)
	at org.springframework.beans.factory.annotation.InitDestroyAnnotationBeanPostProcessor$LifecycleElement.invoke(InitDestroyAnnotationBeanPostProcessor.java:389)
	at org.springframework.beans.factory.annotation.InitDestroyAnnotationBeanPostProcessor$LifecycleMetadata.invokeInitMethods(InitDestroyAnnotationBeanPostProcessor.java:333)
	at org.springframework.beans.factory.annotation.InitDestroyAnnotationBeanPostProcessor.postProcessBeforeInitialization(InitDestroyAnnotationBeanPostProcessor.java:157)
	... 88 common frames omitted
2023-08-08 15:03:01,939 WARN [ThreadPoolManager] Start destroying ThreadPool
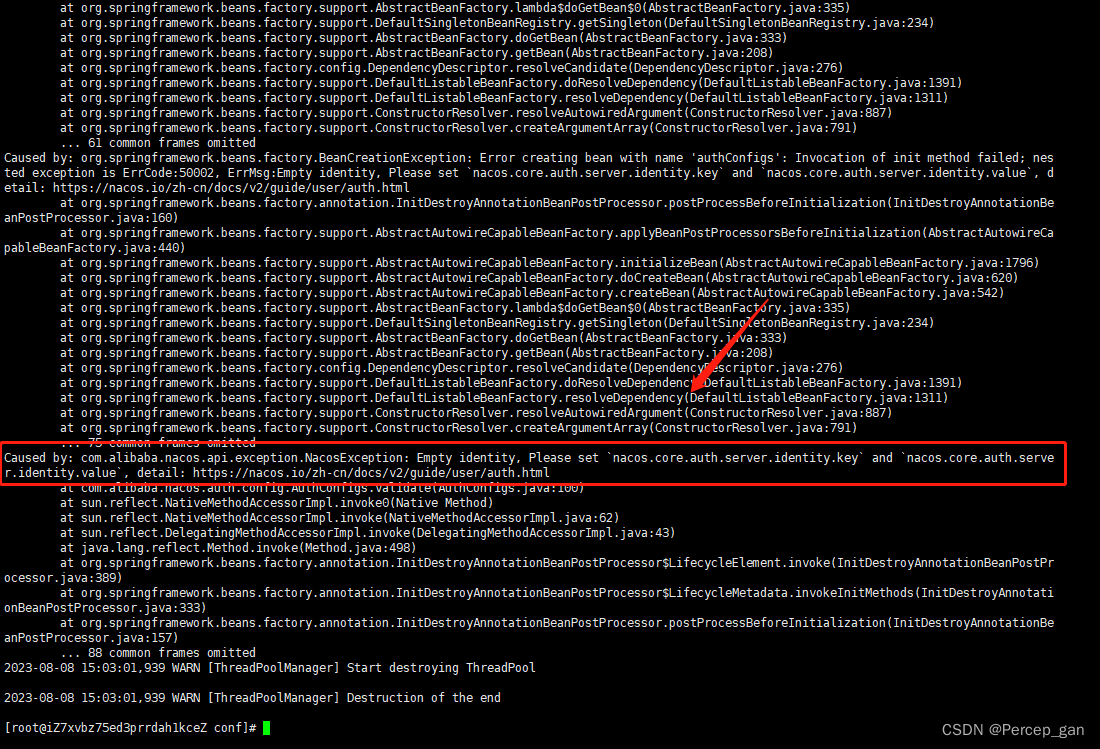
官方文档:
https://nacos.io/zh-cn/docs/v2/guide/user/auth.html
这是没有配置自定义身份识别的key和value

加上对应的配置,再次重启nacos
如果仔细地看完了nacos的文档并做了对应的修改,那鉴权方面应该没有问题了,还有注意的是 nacos.core.auth.default.token.secret.key,文档上说和
同nacos.core.auth.plugin.nacos.token.secret.key
但我试了一下,将 nacos.core.auth.default.token.secret.key 注释掉也能启动成功,但保险起见还是加一下。
到这里,如果没有成功就接着往下看。
4、Caused by: com.alibaba.nacos.api.exception.NacosException: Nacos Server did not start because dumpservice bean construction failure : No DataSource set
Caused by: com.alibaba.nacos.api.exception.NacosException: Nacos Server did not start because dumpservice bean construction failure :
No DataSource set
	at com.alibaba.nacos.config.server.service.dump.DumpService.dumpOperate(DumpService.java:260)
	at com.alibaba.nacos.config.server.service.dump.ExternalDumpService.init(ExternalDumpService.java:61)
	at sun.reflect.NativeMethodAccessorImpl.invoke0(Native Method)
	at sun.reflect.NativeMethodAccessorImpl.invoke(NativeMethodAccessorImpl.java:62)
	at sun.reflect.DelegatingMethodAccessorImpl.invoke(DelegatingMethodAccessorImpl.java:43)
	at java.lang.reflect.Method.invoke(Method.java:498)
	at org.springframework.beans.factory.annotation.InitDestroyAnnotationBeanPostProcessor$LifecycleElement.invoke(InitDestroyAnnotationBeanPostProcessor.java:389)
	at org.springframework.beans.factory.annotation.InitDestroyAnnotationBeanPostProcessor$LifecycleMetadata.invokeInitMethods(InitDestroyAnnotationBeanPostProcessor.java:333)
	at org.springframework.beans.factory.annotation.InitDestroyAnnotationBeanPostProcessor.postProcessBeforeInitialization(InitDestroyAnnotationBeanPostProcessor.java:157)
	... 54 common frames omitted
Caused by: java.lang.IllegalStateException: No DataSource set
	at org.springframework.util.Assert.state(Assert.java:76)
	at org.springframework.jdbc.support.JdbcAccessor.obtainDataSource(JdbcAccessor.java:86)
	at org.springframework.jdbc.core.JdbcTemplate.execute(JdbcTemplate.java:376)
	at org.springframework.jdbc.core.JdbcTemplate.query(JdbcTemplate.java:465)
	at org.springframework.jdbc.core.JdbcTemplate.query(JdbcTemplate.java:475)
	at org.springframework.jdbc.core.JdbcTemplate.queryForObject(JdbcTemplate.java:508)
	at org.springframework.jdbc.core.JdbcTemplate.queryForObject(JdbcTemplate.java:515)
	at com.alibaba.nacos.config.server.service.repository.extrnal.ExternalConfigInfoPersistServiceImpl.findConfigMaxId(ExternalConfigInfoPersistServiceImpl.java:632)
	at com.alibaba.nacos.config.server.service.dump.processor.DumpAllProcessor.process(DumpAllProcessor.java:51)
	at com.alibaba.nacos.config.server.service.dump.DumpService.dumpConfigInfo(DumpService.java:317)
	at com.alibaba.nacos.config.server.service.dump.DumpService.dumpOperate(DumpService.java:230)
	... 62 common frames omitted
2023-08-08 15:32:34,341 WARN [ThreadPoolManager] Start destroying ThreadPool
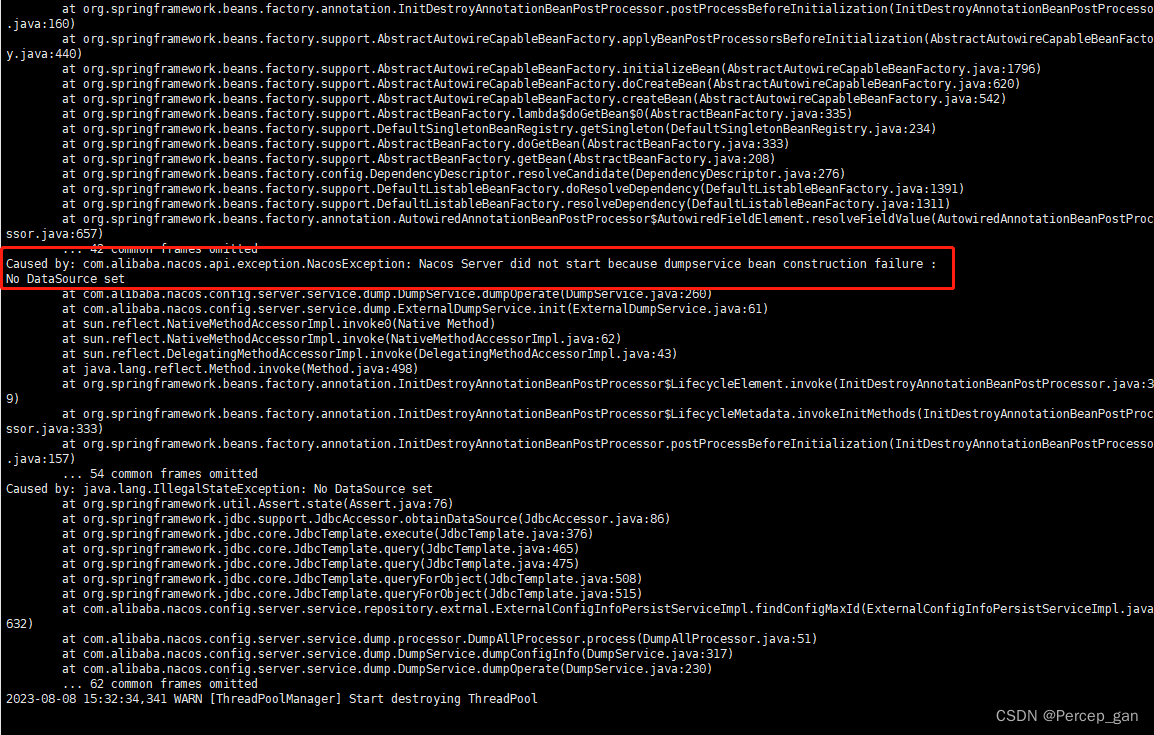
说未设置数据源,仔细检查发现数据库连接中的信息都没有错,但是死活连接不上。
我们得明白,nacos是在docker容器中,并不是宿主机中,将mysql的IP地址改为服务器的IP地址或者内网地址
再次重启
总算成功了!!!
补充:
网上也有帖子说 connectTimeout 和 socketTimeout 这两个值过小,并且当数据库连接耗时比较久时也会报这个错,我并没有遇到,这里还是分别为这两个值加上了个0。