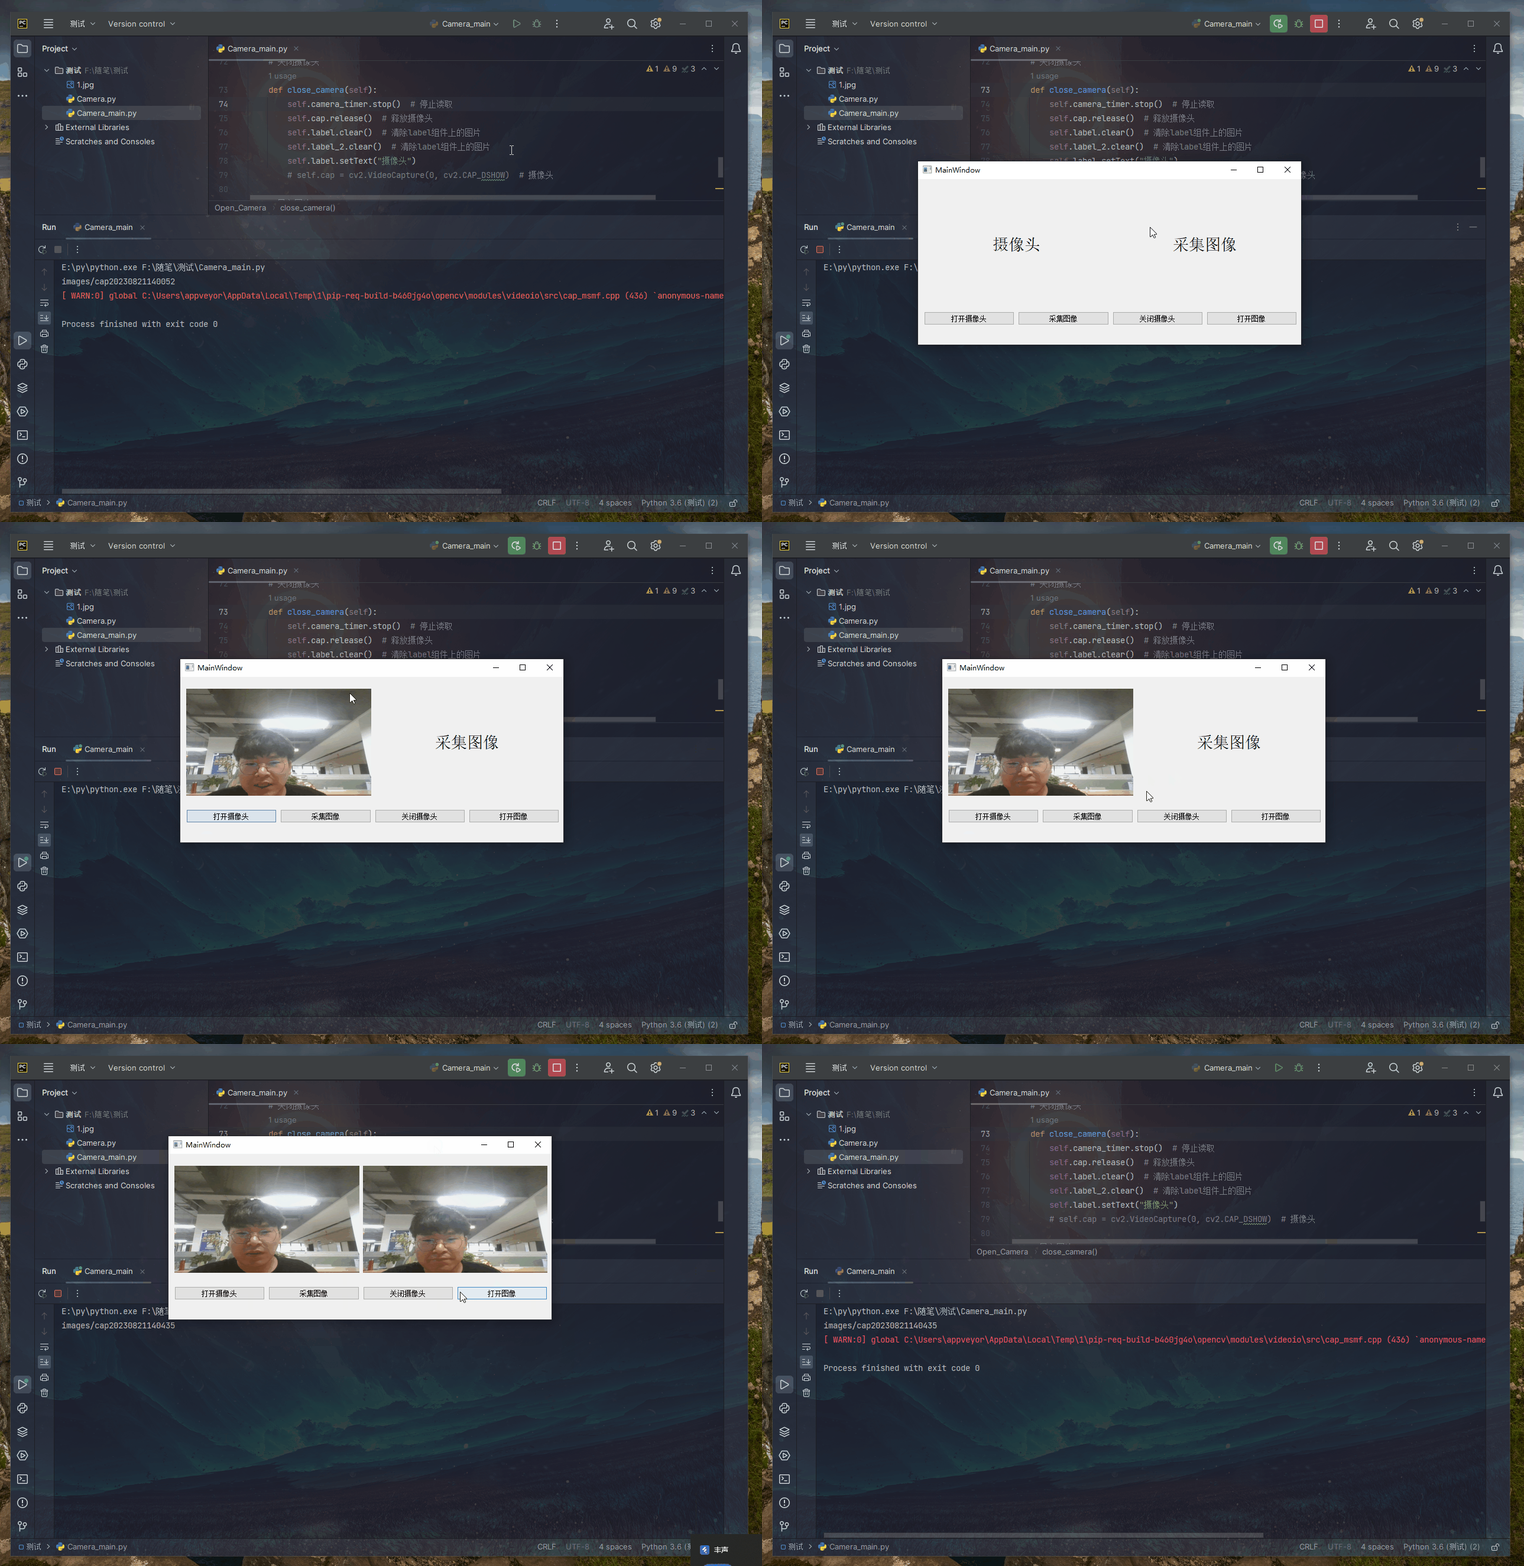
本片为利用Pyqt5设计一个可以打开摄像头进行拍照的Demo,我感觉以后可能会有用,记录一下
Demo运行视频(哈哈感觉很好玩)

用到的模块安装:
| 库 |
安装 |
作用 |
| PyQt5 |
pip install PyQt5 |
界面设计 |
| opencv-python:就是cv2 |
pip install opencv-python==4.3.0.38(这是我之前下载的版本发现ok的) |
操作摄像头 |
1、UI设计部分代码—代码命名:Camera.py
'''
@Time :2023/8/21 13:53
@作者 :
@联系 :
'''
import sys
from PyQt5 import QtGui, QtWidgets
from Camera import Ui_mainWindow
import cv2
import time
from PyQt5.Qt import *
class Open_Camera(QtWidgets.QMainWindow, Ui_mainWindow):
def __init__(self):
super(Open_Camera, self).__init__()
self.setupUi(self)
self.init()
self.cap = cv2.VideoCapture()
self.photo_flag = 0
self.label.setScaledContents(True)
self.label_2.setScaledContents(True)
def init(self):
self.camera_timer = QTimer()
self.camera_timer.timeout.connect(self.show_image)
self.pushButton.clicked.connect(self.open_camera)
self.pushButton_2.clicked.connect(self.taking_pictures)
self.pushButton_3.clicked.connect(self.close_camera)
self.pushButton_4.clicked.connect(self.loadphoto)
def open_camera(self):
self.cap = cv2.VideoCapture(0)
self.camera_timer.start(40)
self.show_image()
def show_image(self):
flag, self.image = self.cap.read()
width, height, _ = self.image.shape
ratio1 = width / self.label.width()
ratio2 = height / self.label.height()
ratio = max(ratio1, ratio2)
image_show = cv2.cvtColor(self.image, cv2.COLOR_BGR2RGB)
image_show = cv2.flip(image_show, 1)
self.showImage = QtGui.QImage(image_show.data, height, width, QImage.Format_RGB888)
self.showImage.setDevicePixelRatio(ratio)
self.label.setPixmap(QPixmap.fromImage(self.showImage))
def taking_pictures(self):
if self.cap.isOpened():
FName = fr"images/cap{
time.strftime('%Y%m%d%H%M%S', time.localtime())}"
print(FName)
self.label_2.setPixmap(QtGui.QPixmap.fromImage(self.showImage))
self.showImage.save('./1.jpg')
else:
QMessageBox.critical(self, '错误', '摄像头未打开!')
return None
def close_camera(self):
self.camera_timer.stop()
self.cap.release()
self.label.clear()
self.label_2.clear()
self.label.setText("摄像头")
def loadphoto(self):
fname, _ = QFileDialog.getOpenFileName(self, '选择图片', '../', 'Image files(*.jpg *.gif *.png*.bmp)')
self.showImage = fname
self.label_2.setPixmap(QPixmap(self.showImage).scaled(self.label_2.width(), self.label_2.height()))
if __name__ == '__main__':
from PyQt5 import QtCore
QtCore.QCoreApplication.setAttribute(QtCore.Qt.AA_EnableHighDpiScaling)
app = QtWidgets.QApplication(sys.argv)
ui = Open_Camera()
ui.show()
sys.exit(app.exec_())
2、打开电脑摄像头的代码:取名—Camera_main.py
import sys
from PyQt5 import QtCore, QtGui, QtWidgets
from PyQt5.QtWidgets import QApplication, QMainWindow
from PyQt5.QtCore import QTimer
from PyQt5.QtGui import QImage, QPixmap
from PyQt5.QtWidgets import QMessageBox
from open_camera import Ui_MainWindow
import numpy as np
import cv2
import time
from random import uniform
from PyQt5.Qt import *
class Open_Camera(QtWidgets.QMainWindow, Ui_MainWindow):
def __init__(self):
super(Open_Camera, self).__init__()
self.setupUi(self)
self.init()
self.cap = cv2.VideoCapture()
self.photo_flag = 0
self.label.setScaledContents(True)
self.label_2.setScaledContents(True)
def init(self):
self.camera_timer = QTimer()
self.camera_timer.timeout.connect(self.show_image)
self.pushButton.clicked.connect(self.open_camera)
self.pushButton_3.clicked.connect(self.taking_pictures)
self.pushButton_2.clicked.connect(self.close_camera)
self.pushButton_5.clicked.connect(self.loadphoto)
'''开启摄像头'''
def open_camera(self):
self.cap = cv2.VideoCapture(0)
self.camera_timer.start(40)
self.show_image()
'''显示图片'''
def show_image(self):
flag, self.image = self.cap.read()
image_show = cv2.resize(self.image, (1280, 720))
width, height = image_show.shape[:2]
image_show = cv2.cvtColor(image_show, cv2.COLOR_BGR2RGB)
image_show = cv2.flip(image_show, 1)
self.showImage = QtGui.QImage(image_show.data, height, width, QImage.Format_RGB888)
self.label.setPixmap(QPixmap.fromImage(self.showImage))
'''拍照'''
def taking_pictures(self):
if self.cap.isOpened():
FName = fr"images/cap{
time.strftime('%Y%m%d%H%M%S', time.localtime())}"
print(FName)
self.label_2.setPixmap(QtGui.QPixmap.fromImage(self.showImage))
self.showImage.save('./1.jpg')
else:
QMessageBox.critical(self, '错误', '摄像头未打开!')
return None
'''关闭摄像头'''
def close_camera(self):
self.camera_timer.stop()
self.cap.release()
self.label.clear()
self.label_2.clear()
self.label.setText("摄像头")
def loadphoto(self):
fname, _ = QFileDialog.getOpenFileName(self, '选择图片', '../', 'Image files(*.jpg *.gif *.png*.bmp)')
self.showImage = fname
self.label_2.setPixmap(QPixmap(self.showImage))
if __name__ == '__main__':
from PyQt5 import QtCore
QtCore.QCoreApplication.setAttribute(QtCore.Qt.AA_EnableHighDpiScaling)
app = QtWidgets.QApplication(sys.argv)
ui = Open_Camera()
ui.show()
sys.exit(app.exec_())
