1.生命周期
Vue3的生命周期中,删除了 create(),取而代之的是其他生命周期加上on,如下图
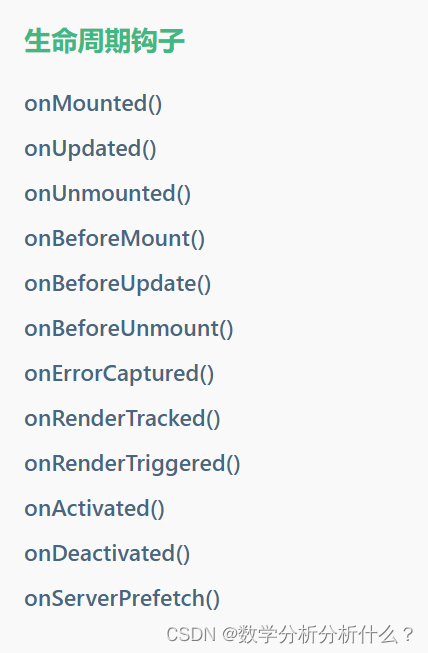
除此之外新增了setup属性,比created更早执行,同时setup中this不会指向实例,这个方法在onBeforeMounted之前被调用,同时vue3在生命周期中也删除了this指向,所有的方法必须自己在vue实例中调用。
语法糖写法,如下:
/**
*作者:星辰38
*链接:https://juejin.cn/post/7044823063027941389
*来源:稀土掘金
**/
<template>
  <div>123</div>
</template>
<script setup>
  //setup写法,自带语法糖(推荐)
  //在setup中没有this,所有的方法必须引入后使用
  import {ref,onMounted,onUnmounted} from 'vue'
  let up =ref(123)
  import {} from 'vue'
    //所有的生命周期用法均为回调函数
   onMounted(()=>{
      console.log('我创建了');
   })
    // 销毁实例变为onUnmounted,与vue2的destroy作用一致
   onUnmounted(()=>{
      console.log('我销毁了');
   })

</script>
原始写法,如下:
<template>
  <div>123</div>
</template>
<script>
import {ref} from 'vue'
export default{
  setup() {
    //定义数据需要在数据前面加ref包裹,后面会具体详解
    let up=ref(123)
    return{
      up
    }
  }
}
</script>
2.数据绑定
ref在vue3中是将数据转换成响应式数据结构的一种,因为vue3中没有了data(){},无法劫持数据做到响应式数据。需注意拿取ref的数据必须加上.value
<template>
  <div>
    <div>{

   { num }}</div>
    <button @click="addNum">num+1</button>
  </div>
</template>
<script setup>
import { ref } from "vue";
let num = ref(1);
let addNum = () => {
  //注意,使用ref变成响应式数据的时候,必须通过.value才可以拿到定义的数据
  num.value = num.value + 1;
  console.log("我执行了,现在的num是" + num.value);
  console.log(num);
};
</script>
3.Dom元素获取
dom渲染完成后才能拿取到,setup时候dom还没渲染,因此需要在onMounted()
周期后获取。
<template>
  <div>
    <!-- 模板中无需使用.value,会被自动编译转换成真实数据 -->
    <div ref="box">{

   { num }}</div>
  </div>
</template>
<script setup>
import { ref,nextTick ,onMounted} from "vue";
let num = ref(1);
// 需要拿取box这个元素,那么只需要定义一个名字为上方ref相同的名字即可
let box =ref();
// 这么拿取的话会是undefined,需要等dom渲染完成后才能拿取到,因为setup时候dom还没渲染
console.log(box.value);//undefined
nextTick(()=>{
  console.log('我是nextTIck执行');
  console.log(box.value);
})
onMounted(()=>{
  console.log('我是mouted执行');
  console.log(box.value);
})
</script>
4.reactive定义数据
reactve可以将整个对象变成响应式数据,免去使用.value取数据的麻烦。
<template>
  <div>
    <div ref="box">{

   { data.name }}</div>
    <button @click="setName">修改名字</button>
  </div>
</template>
<script setup>
import { reactive } from "vue";
let data = reactive({
  name: "张三",
  age: 13,
  sex: "男"
});
function setName() {
  // 调用时更像vue2,不用.value去调用
  data.name = "李四";
  data.age = 35;
  data.sex = "女";
}
</script>
5.方法绑定
使用匿名函数与正常函数均可。
template>
  <div>
    <button @click="setFn"></button>
  </div>
</template>
<script setup>
// 以下方法都可以定义函数,按自己开发习惯定义一种即可
let setFn = ()=>{
  console.log("我是匿名函数");
}
function setFn(){
  console.log('我是普通函数');
}
</script>
6.computed使用
<template>
  <div class="box">
    <!-- 在上方调用即可,结果为169 -->
    {

   {add}}
  </div>
</template>
<script setup>
import { computed, ref } from "vue";
let num1 = ref(13);
let num2 = ref(13);
// 设置个变量接收
let add = computed(() => {
  return num1.value * num2.value;
});
7.单属性监听
<template>
  <div class="box">
    <input type="text" v-model="user" />
  </div>
</template>
<script setup>
import { watch, ref } from "vue";
// 用户名
let user = ref();
// watch监听接收两个或者三个匿名函数,第一个是监听的数值,第二个是处理监听函数,第三个是否开启深监听(可选)
watch(
  () => user.value,
  (newVal, oldVal) => {
    console.log("新值:" + newVal + "旧值:" + oldVal);
  },
  // 可选项,是否开启深监听
  {
    deep: true
  }
);
</script>
8.多属性监听
<template>
  <div class="box">
    <input type="text" v-model="user" />
    <input type="password" v-model="password" />
  </div>
</template>
<script setup>
import { watch, ref } from "vue";
// 用户名
let user = ref();
let password = ref();
// 监听user
watch(
  () => user.value,
  newVal => {
    console.log("用户名:" + newVal);
  },
  // 可选项,是否开启深监听
  {
    deep: true
  }
);
// 监听password
watch(
  () => password.value,
  newVal => {
    console.log("密码:" + newVal);
  }
);
</script>
<template>
<div class="box">
<input type="text" v-model="user" />
<input type="password" v-model="password" />
</div>
</template>
<script setup>
import { watch, ref } from "vue";
// 用户名
let user = ref();
let password = ref();
// 同时监听多个值,只要有一个值变化就会触发方法
// 同时监听user和password,只要user或者password其中一个值变化,就会触发下面的方法
watch(()=>[user.value, password.value],([newUser, newPassword],[oldUser, oldPassword])=>{
console.log('我是新的user值'+newUser);
console.log('我是旧的的user值'+oldUser);
console.log('我是新的pass值'+newPassword);
console.log('我是旧的的pass值'+oldPassword);
})
</script>9.路由跳转
在vue2中使用this.$router.push进行跳转,但在vue3中,需要引入useRouter进行使用。
<template>
  <div>
    <button @click="jumpNewPage">跳转首页</button>
  </div>
</template>
<script setup>
// 切记是在vue-router中引入useRouter
import {useRouter} from 'vue-router'
  const router = useRouter()
let jumpNewPage = ()=>{
  // 切记不可将router定义在方法中,这样他不是响应式数据,会报错
  // const router = useRouter()
  router.push({path: '/'})
}
</script>
10.路由传参
注意:使用query传参时,参数会在路径中体现,如8080/?name=XX,而params不会
<template>
  <div>
    <button @click="jumpNewPage">跳转首页</button>
  </div>
</template>
<script setup>
// 记住是在vue-router中引入useRouter
import {useRouter} from 'vue-router'
  const router = useRouter()
let jumpNewPage = ()=>{
  // 有两种传参方式,query和params,两者写法不一样,请注意
  // query更像get传参,是显性传参,前面跳转加path路径即可,刷新也还在,
  router.push({path: '/',query: {name:'首页'}})
  // params更像post,是隐性传参过去,跳转需注意,不使用path跳转,而是用路由中跳转组件的name进行跳转,否则拿不到params
  router.push({name: 'Home',params: {name:'首页'}})
}
</script>
路由中的home对象为:
const router = [
    {
        path:'/',
        name:'Home',
        component:()=> import('../views/Home.vue')
        meta:{title:'首页'}
    }
]
11.路由接收参数
//#1 params接收
<script setup>
// 引入useRoute,获取是route
import {useRoute} from 'vue-router'
import {onMounted} from 'vue'
  const route = useRoute()
  onMounted(()=>{
    console.log(route.params);//结果为{name:'首页'}
  })
</script>


//#2 query接收
<script setup>
// 引入useRoute,获取是route
import {useRoute} from 'vue-router'
import {onMounted} from 'vue'
  const route = useRoute()
  onMounted(()=>{
    console.log(route.query);//结果为{name:'首页'}
  })
</script>
12.组件
组件在props里直接引入就可在template里直接使用,无需再进行注册。
<template>
  <div class="box">
    <!-- 子组件引用 -->
   <v-child></v-child>
  </div>
</template>
<script setup>
// 引入后无需注册
import vChild from '../components/child.vue'
</script>
13.父传子defineProps传参
父元素传递给子元素的数据,子元素使用defineProps进行接收。
//父元素
<template>
  <div class="box">
    <!-- 子组件引用 -->
   <v-child msg='我给子元素带的一段话'></v-child>
  </div>
</template>
//子元素
<template>
<div class="child">
我是子组件
</div>
</template>
<script setup>
import {defineProps} from 'vue'
// 在接收时候也得注意,vue3 props接收必须规定数据类型,如果父元素数据类型出错,那么会报错
const props = defineProps({msg:String})
console.log(props); // Proxy {msg: '我给子元素带的一段话'}
</script>14.子传父defineEmits传值
//子组件
<template>
    <div class="child">
        我是子组件
    </div>
</template>
<script setup>
import {defineEmits,onMounted} from 'vue'
const emit = defineEmits()
onMounted(()=>{
    emit('getChildMsg','我是子元素,给父元素传的话')
})
</script>
//父组件
<template>
<div class="box">
<!-- 接收子组件的方法 -->
<v-child @getChildMsg="getMsg"></v-child>
</div>
</template>
<script setup>
// 引入后无需注册
import vChild from "../components/child.vue";
let getMsg = e => {
console.log(e); //我是子元素,给父元素传的话
};
</script>15.父拿子方法defineExpose
//子组件
<template>
    <div class="child">
        {

   {val}}
    </div>
</template>
<script setup>
import {ref,defineExpose} from 'vue'
let val = ref('我是子组件')
let fn = ()=>{
    val.value='我改变了子组件'
}
// 暴露val和fn
defineExpose({
    val,fn
})
</script>
//父组件
<template>
<div class="box">
<!-- 接收子组件的方法 -->
<v-child ref ='child'></v-child>
</div>
</template>
<script setup>
// 引入后无需注册
import vChild from "../components/child.vue";
import {ref,onMounted} from 'vue';
// 获取child实例
let child = ref()
onMounted(()=>{
console.log(child.value.val);//直接打印:我是子组件,并不需要加.value
// 执行子组件的fn函数
child.value.fn()
})
</script>