一、动态组件
1、介绍
动态组件指的是动态切换组件的显示与隐藏。
2、实现动态组件的渲染
Vue提供了一个内置的组件,专门用来实现动态组件的渲染。
3、动态渲染相关代码
3.1 APP.vue
<template>
  <div id="app">
    <h1>App组件</h1>
    <hr />

    <button @click="comName = 'Left'">展示Left</button>
    <button @click="comName = 'Right'">展示Right</button>
    <div class="box">
      <!--渲染Left组件和Right组件-->
      <!--1. component 标签是vue内置的,作用:组件的占位符-->
      <!--2. is属性的值,表示要渲染的组件的名字-->
      <component :is="comName"></component>
    </div>
  </div>
</template>

<script>
import Left from "@/components/Left.vue";
import Right from "@/components/Right.vue";

export default {
  data() {
    return {
      // comName表示要展示的组件的名字
      comName: "Left",
    };
  },
  components: {
    Left,
    Right,
  },
};
</script>

<style lang="less">
</style>
3.2 Left.vue
<template>
  <div class="left-container">
    <h1>Left组件---{

   { count }}</h1>
  </div>
</template>

<script>
export default {
  data() {
    return {
      count: 0,
    };
  },
  created() {
    console.log("Left组件被创建了!");
  },
  destroyed() {
    console.log("Left组件被销毁了");
  },

  // 当组件第一次被创建的时候,既会执行created生命周期,也会执行activated生命周期
  // 但是当组件被激活的时候,只会触发activated生命周期,不再触发created。因为组件没有被重新创建。
  activated() {
    console.log("组件被激活了,activated");
  },
  deactivated() {
    console.log("组件被缓存了,deactivated");
  },
};
</script>

<style lang="less" scoped>
.left-container {
  width: 100%;
  min-height: 250px;
  background-color: orange;
  text-align: center;
}
</style>
3.3 Right.vue
<template>
    <div class="right-container">
        <h1>Right组件---{

   {  }}</h1>
    </div>
</template>

<script>
export default {

}
</script>

<style lang="less" scoped>
.right-container{
    width: 100%;
    min-height: 250px;
    background-color: rgb(0, 162, 255);
    text-align: center;
}
</style>
4、keep-alive保持状态
4.1 介绍
vue可以使用keep-alive来保持组件切换时的状态,也就是在切换的时候,该组件不会被销毁,而是处于未激活状态,保持原本状态,直到重新激活。
4.2 生命周期函数
当组件被缓存时,会自动触发组件的deactivated生命周期函数。
当组件被激活时,会自动触发组件的activated生命周期函数
4.3 相关代码
4.3.1 模板
<!-- keep-alive可以把内部的组件进行缓存,而不是销毁组件-->
<keep-alive>
   <component :is="comName"></component>
</keep-alive>
4.3.2 APP.vue
<template>
  <div id="app">
    <h1>App组件</h1>
    <hr />

    <button @click="comName = 'Left'">展示Left</button>
    <button @click="comName = 'Right'">展示Right</button>
    <div class="box">
      <!--渲染Left组件和Right组件-->
      <!--1. component 标签是vue内置的,作用:组件的占位符-->
      <!--2. is属性的值,表示要渲染的组件的名字-->
      <!--3. is属性的值,应该是组件在components节点下的注册名称-->

      <!-- keep-alive可以把内部的组件进行缓存,而不是销毁组件-->
      <keep-alive>
        <component :is="comName"></component>
      </keep-alive>
    </div>
  </div>
</template>

<script>
import Left from "@/components/Left.vue";
import Right from "@/components/Right.vue";

export default {
  data() {
    return {
      // comName表示要展示的组件的名字
      comName: "Left",
    };
  },
  components: {
    Left,
    Right,
  },
};
</script>

<style lang="less">
</style>
4.4 include属性和exclude属性
(1)include属性用来指定:只有名称匹配的组件会被缓存。多个组件名之间使用英文的逗号分隔。
(2)exclude属性用来排除:通过exclude属性指定哪些组件不需要被缓存。
注意:不需要同时使用include和exclude这两个属性
<keep-alive include="Left,Right">
    <component :is="comName"></component>
</keep-alive>
5、注册名称和组件声明时,name的用法
5.1 介绍
当提供了name属性之后,组件的名称,就是name属性的值。
(1)组件的“注册名称”的主要应用场景是:以标签的形式,把注册好的组件,渲染和使用到页面结构中。
(2)组件声明时候的“name”名称的主要应用场景:结合标签实现组件的缓存功能;以及在调试工具中看到组件的name名称。
5.2 相关代码
5.2.1 Right.vue
<template>
  <div class="right-container">
    <h1>Right组件---{

   {}}</h1>
  </div>
</template>

<script>
export default {
  // 当提供了name属性之后,组件的名称,就是name属性的值
  // 对比:
  // 1.组件的“注册1名称”的主要应用场景是:以标签的形式,把注册好的组件,渲染和使用到页面结构中。
  // 2.组件声明时候的“name”名称的主要应用场景:结合<keep-alive>标签实现组件的缓存功能;以及在调试工具中看到组件的name名称。
  name: "MyRight",
};
</script>

<style lang="less" scoped>
.right-container {
  width: 100%;
  min-height: 250px;
  background-color: rgb(0, 162, 255);
  text-align: center;
}
</style>
二、插槽
1、介绍
插槽(Slot)是vue为组件的封装者提供的能力。允许开发者在封装组件时,把不确定的,希望由用户指定的部分定义为插槽。
2、v-slot(简写为:#)
默认情况下,在使用组件的时候,提供的内容都会被填充到名字为default的插槽之中。
如果要把内容填充到指定名称的插槽中,需要使用v-slot:这个指令。
v-slot后面要跟上插槽的名字。同时v-slot指令不能直接用在元素身上,必须用在template标签上。template这个标签,它是一个虚拟的标签,只起到包裹性质的作用,但是不会渲染为任何实质性的html元素。
v-slot指令的简写形式是 #
3、相关基础代码
3.1 App.vue
<template>
  <div id="app">
    <h1>App组件</h1>
    <hr />

    <div class="box">
      <Left>
        <!--默认情况下,在使用组件的时候,提供的内容都会被填充到名字为default的插槽之中-->
        <!--1.如果要把内容填充到指定名称的插槽中,需要使用v-slot:这个指令-->
        <!--2.v-slot:后面要跟上插槽的名字-->
        <!--3.v-slot:指令不能直接用在元素身上,必须用在template标签上-->
        <!--4.template这个标签,它是一个虚拟的标签,只起到包裹性质的作用,但是不会渲染为任何实质性的html元素-->
        <!--5.v-slot指令的简写形式是 #-->
        <template v-slot:default>
          <p>这是在Left组件的内容区域,声明的p标签</p>
        </template>
      </Left>
    </div>
  </div>
</template>

<script>
import Left from "@/components/Left.vue";
import Right from "@/components/Right.vue";

export default {
  components: {
    // 如果在"声明组件"的时候,没有为组件指定name名称,则组件的名称默认就是“注册时候的名称”
    Left,
    Right,
  },
};
</script>

<style lang="less">
</style>
3.2 Left.vue
<template>
  <div class="left-container">
    <h1>Left组件</h1>
    <hr/>
    <!--声明一个插槽区域-->
    <!--vue官方规定:每一个slot插槽,都要有一个name名称-->
    <!--如果省略了slot的name属性。则有一个默认名称叫做default-->
    <slot name="default"></slot>
  </div>
</template>

<script>
export default {}
</script>

<style lang="less" scoped>
.left-container {
  width: 100%;
  min-height: 250px;
  background-color: orange;
  text-align: center;
}
</style>
4、具名插槽
4.1 介绍
插槽有具体的名字,如果有多个插槽,则要为每个插槽取具体的名字。
4.2 相关代码
4.2.1 APP.vue
<template>
  <div id="app">
    <h1>App组件</h1>
    <hr />

    <Article>
      <template v-slot:title>
        <h3>一首诗</h3>
      </template>

      <template #content>
        <div>
          <p>内容区域</p>
        </div>
      </template>

      <template #author>
        <div>
          <p>作者</p>
        </div>
      </template>
    </Article>
    <hr/>
  </div>
</template>

<script>
import Article from "@/components/Article.vue";

export default {
  components: {
    // 如果在"声明组件"的时候,没有为组件指定name名称,则组件的名称默认就是“注册时候的名称
    Article
  },
};
</script>

<style lang="less">
</style>
4.2.2 Article.vue
<template>
  <div class="article-container">
    <!--文章的标题-->
    <div class="header-box">
        <slot name="title"></slot>
    </div>

    <!--文章的内容-->
    <div class="content-box">
        <slot name="content"></slot>
    </div>

    <!--文章的作者-->
    <div class="footer-box">
        <slot name="author"></slot>
    </div>

  </div>
</template>

<script>
export default {
  // 首字母大写
  name: 'Article'
}
</script>

<style lang="less" scoped>
.article-container{
    > div{
        min-height: 150px;
    }
    .header-box{
        background-color:pink;
    }
    .content-box{
        background-color:lightblue;
    }
    .footer-box{
        background-color:lightsalmon;
    }
}
</style>
5、作用域插槽
5.1 介绍
在封装组件时,为预留的提供属性对应的值,这种用法,叫做“作用域插槽”。(scope)
<template #content="scope">
        <div>
          <p>内容区域</p>
          <p>{

   { scope.msg }}</p>
        </div>
</template>
5.2 相关代码
5.2.1 APP.vue
<template>
  <div id="app">
    <h1>App组件</h1>
    <hr />

    <Article>
      <template #content="scope">
        <div>
          <p>内容区域</p>
          <p>{

   { scope.msg }}</p>
        </div>
      </template>
    </Article>
    <hr/>
  </div>
</template>

<script>
import Article from "@/components/Article.vue";

export default {
  components: {
    Article
  },
};
</script>

<style lang="less">
</style>
5.2.2 Article.vue
<template>
  <div class="article-container">
    <div class="content-box">
        <!--在封装组件时,为预留的<slot>提供属性对应的值,这种用法,叫做“作用域插槽”-->
        <slot name="content" msg="hello world"></slot>
    </div>
  </div>
</template>

<script>
export default {
  // 首字母大写
  name: 'Article'
}
</script>

<style lang="less" scoped>
.article-container{
    > div{
        min-height: 150px;
    }
    .content-box{
        background-color:lightblue;
    }
}
</style>
5.3 作用域插槽的解构赋值
5.3.1 介绍
可以将属性值动态绑定
5.3.2 相关代码(APP.vue)
<template>
  <div id="app">
    <h1>App组件</h1>
    <hr />

    <Article>
      <template #content="scope">
        <div>
          <p>内容区域</p>
          <p>{

   { scope.msg }}</p>
          <p>{

   { scope.user.name }}</p>
          <p>{

   { scope.user.age }}</p>
        </div>
      </template>
    </Article>
    <hr/>
  </div>
</template>

<script>
import Article from "@/components/Article.vue";

export default {
  components: {
    Article
  },
};
</script>

<style lang="less">
</style>
5.3.3 Article.vue
<template>
  <div class="article-container">
    <div class="content-box">
        <!--在封装组件时,为预留的<slot>提供属性对应的值,这种用法,叫做“作用域插槽”-->
        <slot name="content" msg="hello world" :user="userinfo"></slot>
    </div>
  </div>
</template>

<script>
export default {
  // 首字母大写
  name: 'Article',
  data(){
    return {
        // 用户信息对象
        userinfo:{
            name:'zs',
            age:18
        }
    }
  }
}
</script>

<style lang="less" scoped>
.article-container{
    > div{
        min-height: 150px;
    }
    .content-box{
        background-color:lightblue;
    }
}
</style>
三、自定义指令
1、介绍
vue官方提供了v-text、v-for、v-model、v-if等常用指令。除此之外vue还允许开发者自定义指令。
2、自定义指令
2.1 私有自定义指令
在每个vue组件中,可以在directives节点下声明私有自定义指令。
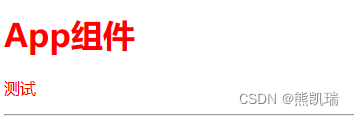
2.1.1 私有自定义指令的基础用法
<template>
  <div id="app">
    <h1 v-color>App组件</h1>
    <p v-color>测试</p>
    <hr />
  </div>
</template>

<script>
export default {
  components: {
  },
  directives: {
    // 定义名为color的指令,指向一个配置对象
    color: {
      // 当指令第一次被绑定到元素上的时候,会立即触发bind函数
      // 形参中的el表示当前指令所绑定到的那个DOM对象
      bind(el) {
        console.log("触发了v-color的bind函数")
        el.style.color = 'red'
      },
    },
  },
};
</script>

<style lang="less">
</style>
结果
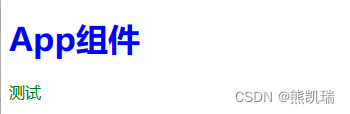
2.1.2 使用binding.value获取指令绑定的值
当指令第一次被绑定到元素上的时候,会立即触发bind函数
<template>
  <div id="app">
    <h1 v-color = "color">App组件</h1>
    <p v-color = "'green'">测试</p>
    <hr />
  </div>
</template>

<script>

export default {
  data(){
    return {
      color:'blue'
    }
  },
  components: {
  },
  directives: {
    // 定义名为color的指令,指向一个配置对象
    color: {
      // 当指令第一次被绑定到元素上的时候,会立即触发bind函数
      // 形参中的el表示当前指令所绑定到的那个DOM对象
      bind(el,binding) {
        console.log("触发了v-color的bind函数")
        el.style.color = binding.value
      },
    },
  },
};
</script>

<style lang="less">
</style>
结果
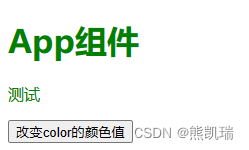
2.1.3 使用update函数调用元素
update函数会在每次DOM更新时被调用
<template>
  <div id="app">
    <h1 v-color = "color">App组件</h1>
    <p v-color = "'green'">测试</p>
    <button @click="color='green'">改变color的颜色值</button>
    <hr />
  </div>
</template>

<script>
export default {
  data(){
    return {
      color:'blue'
    }
  },
  components: {
  },
  directives: {
    // 定义名为color的指令,指向一个配置对象
    color: {
      // 在DOM更新的时候,会触发update函数
      update(el, binding){
        console.log("触发了v-color的update函数")
        el.style.color = binding.value
      }
    },
  },
};
</script>

<style lang="less">
</style>
结果
2.1.4 函数简写
<template>
  <div id="app">
    <h1 v-color = "color">App组件</h1>
    <p v-color = "'green'">测试</p>
    <button @click="color='green'">改变color的颜色值</button>
    <hr/>
  </div>
</template>

<script>
export default {
  data(){
    return {
      color:'blue'
    }
  },
  components: {
  },
  directives: {
    // 定义名为color的指令,指向一个配置对象
    color(el, binding){
      el.style.color = binding.value
    }
  },
};
</script>

<style lang="less">
</style>
2.2 全局自定义指令
全局共享的自定义指令需要通过“Vue.directive()”进行声明
import Vue from 'vue'
import App from './App.vue'

Vue.config.productionTip = false

Vue.directive('color',function(el, binding){


  el.style.color = binding.value
})

new Vue({


  render: h => h(App),
}).$mount('#app')