目的:Android 无障碍服务实现单击界面上的按钮
先看效果图:
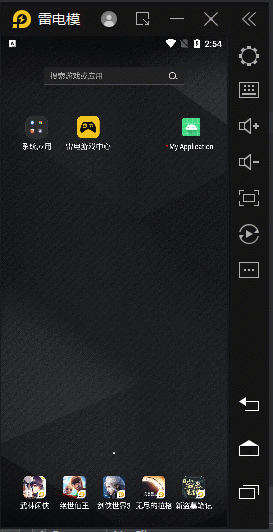
图1-效果

图2-日志
在使用GT库里封装的架构当然需要先依赖好GT库:
详细依赖教程请参看
 https://github.com/1079374315/GT
第一步:先来写 无障碍服务实现类 DemoServer,并在 AndroidManifest.xml注册
/**
 * 无障碍服务 业务逻辑类
 */
public class DemoServer extends GT.DarknessMagic.AccessibilityServiceBase {

    @Override
    protected void initView(int action, String packageName, AccessibilityNodeInfo rootInfo, AccessibilityEvent event) {
        GT.err("packageName:" + packageName);//打印当前屏幕操作的app包名
        showAll(rootInfo);//一个用于递归查看所有组件信息的方法
    }

    private void showAll(AccessibilityNodeInfo accessibilityNodeInfo) {
        for (int i = 0; i < accessibilityNodeInfo.getChildCount(); i++) {
            AccessibilityNodeInfo child = accessibilityNodeInfo.getChild(i);
            GT.log("所有组件信息:" + child);
            //如果找到是我需要的信息,那就使用GT库自带的封装工具包单击它
            if (child.toString().contains("单击测试")) {
                GT.log("我需要的组件信息", child);
                //GT库提供的单击方法,里面还有其他提供的方法
                GT.DarknessMagic.AccessibilityServiceUtils.clickView(child);
            }
            if (child.getChildCount() > 1) {//如果有子组件那就继续找
                showAll(child);
            } else {//没有子组件直接释放资源
                child.recycle();
            }
        }
    }
}
<application>
..
<!-- 无障碍服务 -->
<service
android:name=".DemoServer"
android:enabled="true"
android:exported="true"
android:permission="android.permission.BIND_ACCESSIBILITY_SERVICE">
<intent-filter>
<action android:name="android.accessibilityservice.AccessibilityService" />
</intent-filter>
<meta-data
android:name="android.accessibilityservice"
android:resource="@xml/accessible_service_describe" />
</service>
..
</<application>第二步:来看布局文件,布局很简单(按钮+文本)

参考代码:
<?xml version="1.0" encoding="utf-8"?>
<androidx.constraintlayout.widget.ConstraintLayout xmlns:android="http://schemas.android.com/apk/res/android"
    xmlns:app="http://schemas.android.com/apk/res-auto"
    xmlns:tools="http://schemas.android.com/tools"
    android:layout_width="match_parent"
    android:layout_height="match_parent"
    tools:context=".MainActivity">

    <TextView
        android:id="@+id/tv"
        android:layout_width="300dp"
        android:layout_height="40dp"
        android:gravity="center"
        android:hint="暂无数据"
        android:textSize="28sp"
        android:textStyle="bold"
        app:layout_constraintBottom_toTopOf="@+id/btn"
        app:layout_constraintEnd_toEndOf="parent"
        app:layout_constraintStart_toStartOf="parent"
        app:layout_constraintTop_toTopOf="parent" />

    <Button
        android:id="@+id/btn"
        android:layout_width="wrap_content"
        android:layout_height="wrap_content"
        android:onClick="onClick"
        android:text="单击测试"
        app:layout_constraintBottom_toBottomOf="parent"
        app:layout_constraintEnd_toEndOf="parent"
        app:layout_constraintStart_toStartOf="parent"
        app:layout_constraintTop_toTopOf="parent" />

</androidx.constraintlayout.widget.ConstraintLayout>
第三步:MainActivity 的业务逻辑处理
public class MainActivity extends AppCompatActivity {

    private TextView tv;
    private int count = 0;//单击次数

    protected void onCreate(Bundle savedInstanceState) {
        super.onCreate(savedInstanceState);
        setContentView(R.layout.activity_main);
        tv = findViewById(R.id.tv);

        //申请使用无障碍服务
        if (!DemoServer.isStart()) {//当前无障碍服务是否开启
            try {
                startActivity(new Intent(Settings.ACTION_ACCESSIBILITY_SETTINGS));
            } catch (Exception e) {
                startActivity(new Intent(Settings.ACTION_SETTINGS));
                e.printStackTrace();
            }
        }
    }

    //按钮在xml中注册的单击事件
    public void onClick(View view) {
        GT.logs("触发了单击");
        tv.setText("当前单击的次数为:" + ++count + " 次");
        if (count == 1) {
            GT.toast(this, "开始测试");
        } else if (count >= 400) {//单击了400次就关闭
            DemoServer.finish();//关闭无障碍服务
            GT.toast(this, "关闭测试");
        }
    }

    @Override
    protected void onStart() {
        super.onStart();
        DemoServer.start();//开启无障碍服务
    }

    @Override
    protected void onStop() {
        super.onStop();
        DemoServer.finish();//关闭无障碍服务,注意:如果不关闭无障碍,你APP切换后台后还会进行无障碍服务的监听
    }
}
总结:然后就可以直接运行使用了,是不是感觉特别简单,在 GT.DarknessMagic.AccessibilityServiceUtils 这个类中还提供了较多的无障碍操作方法,可以进行使用哦。
点个关注点个赞呗(〃'▽'〃),关注博主最新发布库:GitHub - 1079374315/GT