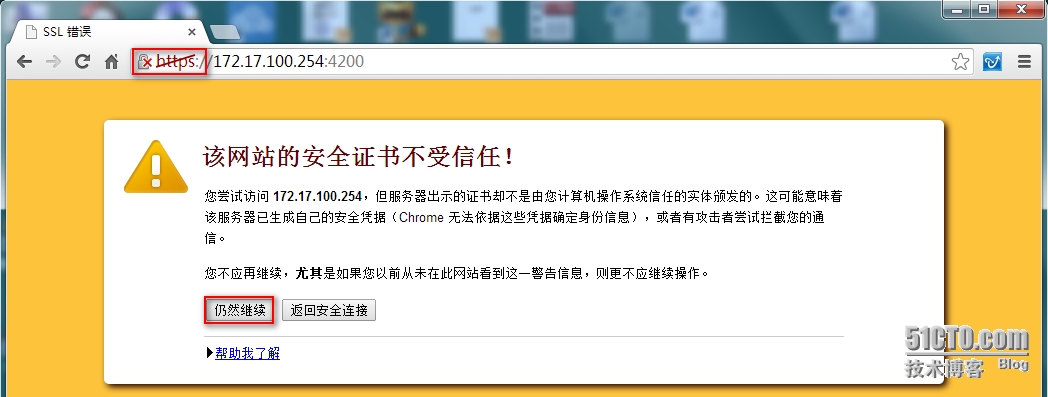
Shellinabox 是一个利用 Ajax 技术构建的基于 Web 浏览器的远程终端模拟器,也就是说安装了该软件之后,服务器端不需要开启 ssh服务,通过 Web 浏览器就可以对远程主机进行操作,但是你的web浏览器需要支持AJAX/Javascript和CSS,因此可以用http://localhost:4200来登录到你的系统,并且默认情况下启用了SSL/TLS证书,需要用https://localhost:4200来登录。
默认情况下shellinabox使用的是TCP协议的4200端口,因此如果你的系统启用了防火墙的话,请放行4200端口。
2. Shellinabox安装和配置
2.1 shellinabox的安装
shellinabox软件包有源码包和rpm包,最简单的方式就是通过rpm包进行安装。
源码包:http://shellinabox.googlecode.com/files/shellinabox-2.10.tar.gz
rpm包:
http://pkgs.org/centos-6/epel-x86_64/shellinabox-2.14-24.git88822c1.el6.x86_64.rpm.html
2.1.1 rpm包的安装
将下载后的rpm包上传到系统后,直接使用yum install -y shellinabox-*或者是rpm -ivh shellinabox进行安装即可。
[root@server1software]# yum install -y shellinabox-2.14-24.git88822c1.el6.x86_64.rpm
2.1.2 源码包安装
解压:
[root@server2 software]#tar -zxvf shellinabox-2.10.tar.gz
进入到解压目录,编译和安装:
[root@server2software]# cd shellinabox-2.10
[[email protected]]# ./configure && make && make install
在编译的时候还可以使用--prefix指定安装路径。
如:
./configure --prefix=/usr/local/shellinabox
则安装时将会安装在/usr/local/shellinabox目录下,如果不指定的话,则默认会安装到/usr/local/bin目录下。
2.2 shellinabox的配置
采用不同的方式安装shellinabox时,其配置文件也在不同的位置。
2.2.1 采用rpm方式安装时配置文件
如果安装的是rpm包的话,则可以用rpm -ql shellinabox查看该软件安装了哪些文件,并显示这些文件所在的位置。
[root@server1 ~]#rpm -ql shellinabox
/etc/rc.d/init.d/shellinaboxd
/etc/sysconfig/shellinaboxd
/usr/sbin/shellinaboxd
/usr/share/doc/shellinabox-2.14
/usr/share/doc/shellinabox-2.14/AUTHORS
/usr/share/doc/shellinabox-2.14/COPYING
/usr/share/doc/shellinabox-2.14/GPL-2
/usr/share/doc/shellinabox-2.14/NEWS
/usr/share/doc/shellinabox-2.14/README
/usr/share/doc/shellinabox-2.14/README.Fedora
/usr/share/doc/shellinabox-2.14/print-styles.css
/usr/share/doc/shellinabox-2.14/shell_in_a_box.js
/usr/share/doc/shellinabox-2.14/styles.css
/usr/share/man/man1/shellinaboxd.1.gz
/usr/share/shellinabox
/usr/share/shellinabox/color.css
/usr/share/shellinabox/monochrome.css
/usr/share/shellinabox/white-on-black.css
/var/lib/shellinabox
[root@server1 ~]#
其中/etc/sysconfig/shellinaboxd是其配置文件。并且还会创建一个shellinabox的用户作为启动该服务的用户。
[root@server1 ~]#grep shellinabox /etc/passwd
shellinabox:x:495:492:Shellinabox:/var/lib/shellinabox:/sbin/nologin
[root@server1 ~]#
默认情况下/etc/sysconfig/shellinaboxd的内容如下:
[root@server1 ~]#more /etc/sysconfig/shellinaboxd
# Shell in a boxdaemon configuration
# For details seeshellinaboxd man page
# Basic options
USER=shellinabox
GROUP=shellinabox
CERTDIR=/var/lib/shellinabox
PORT=4200
OPTS="--disable-ssl-menu-s /:LOGIN"
# Additionalexamples with custom options:
# Fancyconfiguration with right-click menu choice for black-on-white:
#OPTS="--user-css Normal:+black-on-white.css,Reverse:-white-on-black.css--disable-ssl-menu -s /:LOGIN"
# Simpleconfiguration for running it as an SSH console with SSL disabled:
# OPTS="-t -s/:SSH:host.example.com"
[root@server1 ~]#
注释:
USER和GROUP:指定以哪个用户和组启动该服务。
CERTDIR:指定存放SSL证书的目录。
PORT:指定shellinaboxd服务的监听端口。默认为4200.
OPTS:设置一些其他的参数。
常用的opts如下:
-t:关闭SSL/TLS的支持。也就是不需要使用HTTPS连接,可以直接用http连接。
服务的启动与停止:
/etc/init.d/shellinaboxd start
/etc/init.d/shellinaboxd restart
/etc/init.d/shellinaboxd stop
观察服务监听的端口:
[root@server1 ~]#netstat -tnlp | grep shellinabox
tcp 0 0 0.0.0.0:4200 0.0.0.0:* LISTEN 22455/shellinaboxd
[root@server1 ~]#
设置服务的开机自动启动:
[root@server1 ~]#chkconfig shellinaboxd --level 35 on
[root@server1 ~]#chkconfig --list | grep shellinaboxd
shellinaboxd 0:off 1:off 2:off 3:on 4:on 5:on 6:off
[root@server1 ~]#
2.2.2 采用源码包安装时启动服务的指令
当采用源码包安装shellinabox时,启动服务的方式如下:
<安装路径>/bin/shellinaboxd 选项
常用的选项如下:
-b:在后台运行该服务
-u:指定运行该服务的用户,默认为nobody
-g:指定运行该服务的组,默认为nobody
-p:指定shellinaboxd的监听端口
-t:表示关闭SSL/TLS的支持。
-c:指定存放SSL证书的目录。
启动服务:
/usr/local/bin/shellinaboxd-b -t -u root
观察服务监听的端口:
[root@server2 bin]#netstat -tunlp | grep shellinabox
tcp 0 0 0.0.0.0:4200 0.0.0.0:* LISTEN 6765/shellinaboxd
[root@server2 bin]#
停止服务:
killall -9 shellinaboxd
设置服务的开机自动启动:
编辑/etc/rc.d/rc.local,增加如下内容:
/usr/local/bin/shellinaboxd-b -t -u root -g root
3. 客户端测试
这里采用的是HTTPS的方式登录的,点击”仍然继续”
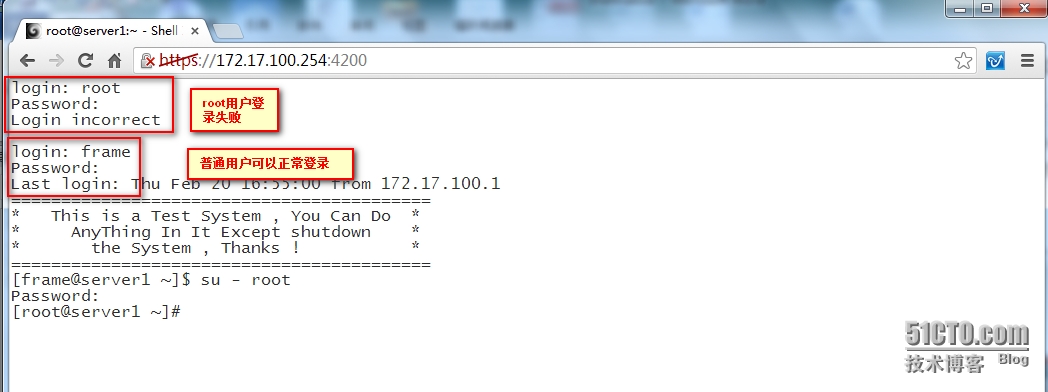
当我们采用root用户登录时,登录失败,普通用户登录是没有问题的。
先以普通用户登录,然后su到root用户。其他的工作就和SSH登录是一样的了。

