目录

1.概念(指导思想)
1)IOC(Inversion of Control):
控制反转,是一个理论,一个指导思想,指导开发人员如何使用对象,管理对象的,把对象的创建,属性赋值,对象的生命周期都交给代码之外的容器管理。
IoC分为控制和反转:
控制:对象的创建,属性赋值,生命周期管理
说反转前先说下正转,
正转:开发人员在代码中,使用new 等方式创建对象,开发人员掌握了都对象的创建,属性赋值,对象从开始到销毁的全部过程,开发人员有对对象全部控制。
反转:开发人员把对对象的管理权限交给了代码之外的容器实现。由容器完成对象的管理。
通过容器,可以使用容器中的对象(容器已经创建了对象,对象属性赋值了,对象也组装好了)
2)IoC的技术实现
DI(依赖注入):Dependency Injection,缩写就是DI,是IoC的一种技术实现,程序只需要提供对象名称就可以了,对象如何创建,如何从容器中查找,获取都由容器内部自己实现。
3)Spring框架使用DI实现IoC
通过spring框架,只需要提供所要使用的对象的名称就可以了,从容器中获取名称对应的对象。
spring底层通过反射创建对象,赋值等等。
2.Spring的第一个程序
第一个例子实现步骤:
1)新建maven项目
2)加入依赖,修改pom.xml文件
spring-context:spring依赖
junit:单元测试
3)开发人员定义类:接口和实现
类也可以没有接口
接口和实现类的定义:和没有spring一样,该怎么定义就怎么定义
4)创建spring的配置文件,作用:生命对象
把对象交给spring创建和管理
使用<bean>表示对象声明,一个bean表示一个java对象
5)使用容器中的对象:
创建一个表示spring容器的对象,ApplicationContext
从容器中根据名称获取对象,使用getBean("对象名称")
目录结构:

pom.xml
<?xml version="1.0" encoding="UTF-8"?>
<project xmlns="http://maven.apache.org/POM/4.0.0" xmlns:xsi="http://www.w3.org/2001/XMLSchema-instance"
         xsi:schemaLocation="http://maven.apache.org/POM/4.0.0 https://maven.apache.org/xsd/maven-4.0.0.xsd">
    <modelVersion>4.0.0</modelVersion>

    <groupId>com.kuang</groupId>
    <artifactId>Spring-01</artifactId>
    <version>1.0.0</version>

    <name>Spring-01</name>
    <description>Demo project</description>
    <properties>
        <java.version>1.8</java.version>
    </properties>
    <dependencies>
        <dependency>
            <groupId>org.springframework</groupId>
            <artifactId>spring-context</artifactId>
            <version>5.2.5.RELEASE</version>
        </dependency>

        <dependency>
            <groupId>junit</groupId>
            <artifactId>junit</artifactId>
            <version>4.11</version>
            <scope>test</scope>
        </dependency>

    </dependencies>

</project>
配置文件beans.xml
<?xml version="1.0" encoding="UTF-8"?>
<beans xmlns="http://www.springframework.org/schema/beans"
       xmlns:xsi="http://www.w3.org/2001/XMLSchema-instance"
       xsi:schemaLocation="http://www.springframework.org/schema/beans http://www.springframework.org/schema/beans/spring-beans.xsd">

    <bean id="someService" class="com.feiyang.service.impl.SomeServiceImpl">
    </bean>

</beans>
接口和实现类:
package com.feiyang.service;

public interface SomeService {
    void doSome();
}
package com.feiyang.service.impl;
import com.feiyang.service.SomeService;
/**
* @author:飞扬
* @公众hao:程序员飞扬
* @description:
*/
public class SomeServiceImpl implements SomeService {
public void doSome() {
System.out.println("doSome()方法执行了");
}
}main方法:
package com.feiyang;

import com.feiyang.service.SomeService;
import org.springframework.context.support.ClassPathXmlApplicationContext;

public class Spring01Application {
    public static void main(String[] args) {
        //传统方法
        /*SomeService someService = new SomeServiceImpl();
        someService.doSome();*/

        //使用spring框架
        String config = "beans.xml";
        ClassPathXmlApplicationContext ctx = new ClassPathXmlApplicationContext(config);
        SomeService someService1 = (SomeService) ctx.getBean("someService");
        someService1.doSome();
    }
}
执行结果:
doSome()方法执行了
spring的配置文件:
<?xml version="1.0" encoding="UTF-8"?>
<beans xmlns="http://www.springframework.org/schema/beans"
       xmlns:xsi="http://www.w3.org/2001/XMLSchema-instance"
       xsi:schemaLocation="http://www.springframework.org/schema/beans http://www.springframework.org/schema/beans/spring-beans.xsd">

</beans>
spring标准的配置文件:
1)根标签是beans
2)beans后面是约束文件说明
3)beans里面是bean声明
4)什么是bean:bean就是java对象,spring 容器管理的java对象,叫做bean
3.spring容器创建对象的特点
1.容器对象ApplicationContext:接口
通过ApplicationContext对象,获取要使用的其他java对象,执行getBean("id")
2.spring默认是调用类的无参构造方法创建对象
3.spring读取配置文件,一次创建好所有的java对象,都放到map中
package com.feiyang;

import com.feiyang.service.SomeService;
import org.junit.Test;
import org.springframework.context.support.ClassPathXmlApplicationContext;

import java.util.Date;

/**
 * @author:飞扬
 * @公众hao:程序员飞扬
 * @description:
 */
public class MyTest {

    //spring创建对象,调用的是类的哪个方法?
    //默认调用类的无参构造方法
    @Test
    public void test01(){
        String config = "beans.xml";
        ClassPathXmlApplicationContext ctx = new ClassPathXmlApplicationContext(config);
        SomeService bean = ctx.getBean(SomeService.class);
        bean.doSome();

        //打印:
        //SomeServiceImpl的无参构造方法执行了
        //doSome()方法执行了
    }


    /**
     * spring什么时候创建对象?
     *
     * spring创建容器对象的时候,会读取配置文件,创建文件中的所有声明的java对象
     */
    @Test
    public void test02(){
        String config = "beans.xml";
        ClassPathXmlApplicationContext ctx = new ClassPathXmlApplicationContext(config);
//        SomeService bean = ctx.getBean(SomeService.class);
//        bean.doSome();

        //打印:
        //SomeServiceImpl的无参构造方法执行了
    }

    /**
     * 获取容器中的对象信息
     */
    @Test
    public void test03(){
        String config = "beans.xml";
        ClassPathXmlApplicationContext ctx = new ClassPathXmlApplicationContext(config);

        //获取容器中有多少个对象
        int beanDefinitionCount = ctx.getBeanDefinitionCount();
        System.out.println("容器中定义的对象数量=" + beanDefinitionCount);

        //获取容器中对象的名称
        String[] beanDefinitionNames = ctx.getBeanDefinitionNames();
        for (String beanDefinitionName : beanDefinitionNames) {
            System.out.println("容器中对象名称=" + beanDefinitionName);
        }
    }
    //打印:
    /**
     * SomeServiceImpl的无参构造方法执行了
     * SomeServiceImpl的无参构造方法执行了
     * 容器中定义的对象数量=3
     * 容器中对象名称=someService
     * 容器中对象名称=someService1
     * 容器中对象名称=myDate
     */

    /**
     * 创建非自定义对象
     */
    @Test
    public void test04() {
        String config = "beans.xml";
        ClassPathXmlApplicationContext ctx = new ClassPathXmlApplicationContext(config);
        Date myDate = (Date) ctx.getBean("myDate");
        System.out.println(myDate);
    }
//打印:
/**
* SomeServiceImpl的无参构造方法执行了
* SomeServiceImpl的无参构造方法执行了
* Sun Oct 02 15:08:52 GMT+08:00 2022
*/
}
4.基于xml的DI
4.1 注入分类
1)set注入
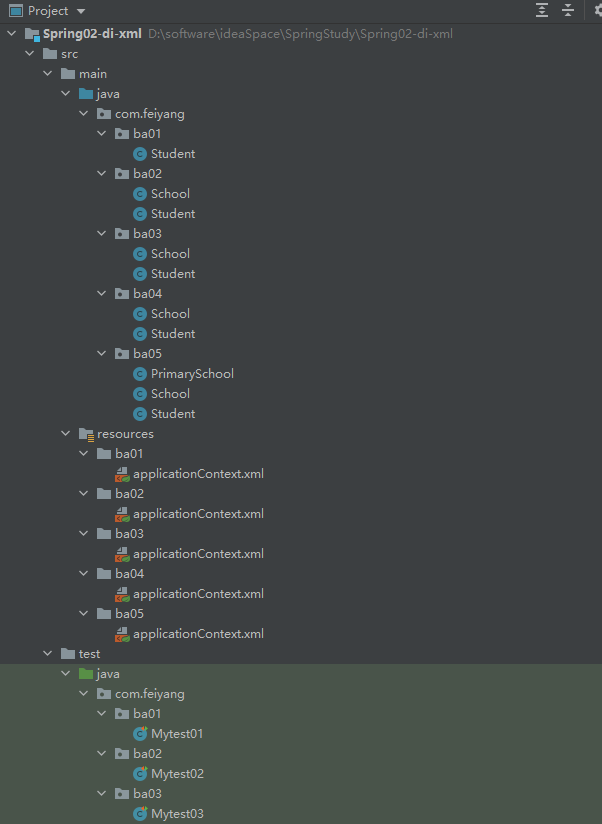
目录:

①基本类型赋值
pom.xml
<?xml version="1.0" encoding="UTF-8"?>
<project xmlns="http://maven.apache.org/POM/4.0.0"
         xmlns:xsi="http://www.w3.org/2001/XMLSchema-instance"
         xsi:schemaLocation="http://maven.apache.org/POM/4.0.0 http://maven.apache.org/xsd/maven-4.0.0.xsd">
    <modelVersion>4.0.0</modelVersion>

    <groupId>org.example</groupId>
    <artifactId>Spring02-di-xml</artifactId>
    <version>1.0-SNAPSHOT</version>

    <properties>
        <maven.compiler.source>8</maven.compiler.source>
        <maven.compiler.target>8</maven.compiler.target>
    </properties>

    <dependencies>
        <dependency>
            <groupId>org.springframework</groupId>
            <artifactId>spring-context</artifactId>
            <version>5.2.5.RELEASE</version>
        </dependency>

        <dependency>
            <groupId>junit</groupId>
            <artifactId>junit</artifactId>
            <version>4.11</version>
            <scope>test</scope>
        </dependency>
        <dependency>
            <groupId>junit</groupId>
            <artifactId>junit</artifactId>
            <version>4.11</version>
            <scope>test</scope>
        </dependency>

    </dependencies>

</project>
applicationContext.xml
<?xml version="1.0" encoding="UTF-8"?>
<beans xmlns="http://www.springframework.org/schema/beans"
       xmlns:xsi="http://www.w3.org/2001/XMLSchema-instance"
       xsi:schemaLocation="http://www.springframework.org/schema/beans http://www.springframework.org/schema/beans/spring-beans.xsd">

    <!-- 简单类型set注入 -->
    <bean id="myStudent" class="com.feiyang.ba01.Student">
        <property name="name" value="张三"></property>
        <property name="age" value="28"></property>
        <property name="email" value="[email protected]"></property>
    </bean>

    <!-- 给非自定义类属性赋值-->
    <bean id="myDate" class="java.util.Date">
        <property name="time" value="956955551315"></property>
    </bean>
</beans>
Student.java
package com.feiyang.ba01;

/**
 * @author:飞扬
 * @公众hao:程序员飞扬
 * @description:
 */
public class Student {
    private String name;
    private int age;

    public Student() {
        System.out.println("无参构造方法执行了");
    }

    public Student(String name, int age) {
        System.out.println("有参构造执行了");
        this.name = name;
        this.age = age;
    }

    public String getName() {
        return name;
    }

    public void setName(String name) {
        System.out.println("setName方法执行了");
        this.name = name;
    }

    public int getAge() {
        return age;
    }

    public void setAge(int age) {
        System.out.println("setAge方法执行了");
        this.age = age;
    }

    //set注入,和属性名无关,有set方法就执行
    public void setEmail(String email){
        System.out.println("setEmail方法执行了");
    }

    @Override
    public String toString() {
        return "Student{" +
                "name='" + name + '\'' +
                ", age=" + age +
                '}';
    }
}
Mytest01:
package com.feiyang.ba01;

import org.junit.Test;
import org.springframework.context.support.ClassPathXmlApplicationContext;

import java.util.Date;

/**
 * @author:飞扬
 * @公众hao:程序员飞扬
 * @description:
 */
public class Mytest01 {

    @Test
    public void test01(){
        String config = "ba01/applicationContext.xml";
        ClassPathXmlApplicationContext ctx = new ClassPathXmlApplicationContext(config);

        //简单类型set注入
        Object student = ctx.getBean("myStudent");
        System.out.println(student);

        //给非自定义对象属性赋值
        Date date = (Date)ctx.getBean("myDate");
        System.out.println("date===" + date);

    }
}
执行结果:
无参构造方法执行了
setName方法执行了
setAge方法执行了
setEmail方法执行了
Student{name='张三', age=28}
date===Sat Apr 29 04:59:11 GMT+08:00 2000
②引用类型赋值
School.java
package com.feiyang.ba02;

/**
 * @author:飞扬
 * @公众hao:程序员飞扬
 * @description:
 */
public class School {
    private String name;
    private String address;

    public School() {
    }

    public School(String name, String address) {
        this.name = name;
        this.address = address;
    }

    public void setName(String name) {
        this.name = name;
    }

    public void setAddress(String address) {
        this.address = address;
    }

    @Override
    public String toString() {
        return "School{" +
                "name='" + name + '\'' +
                ", address='" + address + '\'' +
                '}';
    }
}
Student.java
package com.feiyang.ba02;

/**
 * @author:飞扬
 * @公众hao:程序员飞扬
 * @description:
 */
public class Student {
    private String name;
    private int age;
    private School school;

    public Student() {
        System.out.println("无参构造方法执行了");
    }

    public Student(String name, int age) {
        System.out.println("有参构造执行了");
        this.name = name;
        this.age = age;
    }

    public void setName(String name) {
        System.out.println("setName方法执行了");
        this.name = name;
    }

    public void setAge(int age) {
        System.out.println("setAge方法执行了");
        this.age = age;
    }

    public void setSchool(School school) {
        this.school = school;
    }

    @Override
    public String toString() {
        return "Student{" +
                "name='" + name + '\'' +
                ", age=" + age +
                ", school=" + school +
                '}';
    }
}
applicationContext.xml
<?xml version="1.0" encoding="UTF-8"?>
<beans xmlns="http://www.springframework.org/schema/beans"
       xmlns:xsi="http://www.w3.org/2001/XMLSchema-instance"
       xsi:schemaLocation="http://www.springframework.org/schema/beans http://www.springframework.org/schema/beans/spring-beans.xsd">

    <!-- 引用类型注入 -->
    <bean id="myStudent" class="com.feiyang.ba02.Student">
        <property name="name" value="张三"></property>
        <property name="age" value="28"></property>
        <property name="school" ref="mySchool"></property>
    </bean>

    <bean id="mySchool" class="com.feiyang.ba02.School">
        <property name="name" value="同济大学"></property>
        <property name="address" value="四平路"></property>
    </bean>
</beans>
Mytest02:
package com.feiyang.ba02;

import org.junit.Test;
import org.springframework.context.support.ClassPathXmlApplicationContext;

import java.util.Date;

/**
 * @author:飞扬
 * @公众hao:程序员飞扬
 * @description:
 */
public class Mytest02 {

    @Test
    public void test02(){
        String config = "ba02/applicationContext.xml";
        ClassPathXmlApplicationContext ctx = new ClassPathXmlApplicationContext(config);

        Object student = ctx.getBean("myStudent");
        System.out.println(student);
    }
}
执行结果:
无参构造方法执行了
setName方法执行了
setAge方法执行了
Student{name='张三', age=28, school=School{name='同济大学', address='四平路'}}
2)构造注入
applicationContext.xml
<?xml version="1.0" encoding="UTF-8"?>
<beans xmlns="http://www.springframework.org/schema/beans"
       xmlns:xsi="http://www.w3.org/2001/XMLSchema-instance"
       xsi:schemaLocation="http://www.springframework.org/schema/beans http://www.springframework.org/schema/beans/spring-beans.xsd">

    <!-- 构造注入-使用name属性 -->
    <bean id="myStudent" class="com.feiyang.ba03.Student">
        <constructor-arg name="name" value="lisi"></constructor-arg>
        <constructor-arg name="age" value="25"></constructor-arg>
        <constructor-arg name="school" ref="mySchool"></constructor-arg>
    </bean>

    <!-- 构造注入-使用index属性,index属性表示参数的索引,0,1,2... -->
    <bean id="myStudent2" class="com.feiyang.ba03.Student">
        <constructor-arg index="0" value="王五"></constructor-arg>
        <constructor-arg index="1" value="28"></constructor-arg>
        <constructor-arg index="2" ref="mySchool"></constructor-arg>
    </bean>

    <!-- 构造注入-省略index属性 -->
    <bean id="myStudent3" class="com.feiyang.ba03.Student">
        <constructor-arg value="赵六"></constructor-arg>
        <constructor-arg value="22"></constructor-arg>
        <constructor-arg ref="mySchool"></constructor-arg>
    </bean>

    <bean id="myFile" class="java.io.File">
        <constructor-arg name="pathname" value="d:\\myFile.txt"></constructor-arg>
    </bean>

    <bean id="mySchool" class="com.feiyang.ba03.School">
        <property name="name" value="同济大学"></property>
        <property name="address" value="四平路"></property>
    </bean>
</beans>
package com.feiyang.ba03;
/**
* @author:飞扬
* @公众hao:程序员飞扬
* @description:
*/
public class Student {
private String name;
private int age;
private School school;
public Student() {
}
public Student(String name, int age, School school) {
this.name = name;
this.age = age;
this.school = school;
}
@Override
public String toString() {
return "Student{" +
"name='" + name + '\'' +
", age=" + age +
", school=" + school +
'}';
}
}package com.feiyang.ba03;
/**
* @author:飞扬
* @公众hao:程序员飞扬
* @description:
*/
public class School {
private String name;
private String address;
public School() {
}
public School(String name, String address) {
this.name = name;
this.address = address;
}
public void setName(String name) {
this.name = name;
}
public void setAddress(String address) {
this.address = address;
}
@Override
public String toString() {
return "School{" +
"name='" + name + '\'' +
", address='" + address + '\'' +
'}';
}
}package com.feiyang.ba03;
import org.junit.Test;
import org.springframework.context.support.ClassPathXmlApplicationContext;
import java.io.File;
import java.io.IOException;
/**
* @author:飞扬
* @公众hao:程序员飞扬
* @description:
*/
public class Mytest03 {
@Test
public void test03() throws IOException {
String config = "ba03/applicationContext.xml";
ClassPathXmlApplicationContext ctx = new ClassPathXmlApplicationContext(config);
Object student = ctx.getBean("myStudent");
System.out.println(student);
Object student2 = ctx.getBean("myStudent2");
System.out.println(student2);
Object student3 = ctx.getBean("myStudent3");
System.out.println(student3);
File myFile = (File)ctx.getBean("myFile");
myFile.createNewFile();
System.out.println(myFile + ",创建成功");
}
}执行结果:
Student{name='lisi', age=25, school=School{name='同济大学', address='四平路'}}
Student{name='王五', age=28, school=School{name='同济大学', address='四平路'}}
Student{name='赵六', age=22, school=School{name='同济大学', address='四平路'}}
d:\myFile.txt,创建成功
4.2 引用类型的自动注入
1)byName(按名称注入)
:java类中属性的名称和spring容器中bean的id名称一致,且数据类型一样的,这样的bean能够自动赋值给引用类型。
语法:<bean id="xxx" class="yyy" autowire="byName"> </bean>
<?xml version="1.0" encoding="UTF-8"?>
<beans xmlns="http://www.springframework.org/schema/beans"
       xmlns:xsi="http://www.w3.org/2001/XMLSchema-instance"
       xsi:schemaLocation="http://www.springframework.org/schema/beans http://www.springframework.org/schema/beans/spring-beans.xsd">

    <!-- byName方式,自动注入 -->
    <bean id="myStudent" class="com.feiyang.ba04.Student" autowire="byName">
        <property name="name" value="张三"></property>
        <property name="age" value="28"></property>
        <!--<property name="school" ref="mySchool"></property>-->
    </bean>

    <bean id="school" class="com.feiyang.ba04.School">
        <property name="name" value="同济大学"></property>
        <property name="address" value="四平路"></property>
    </bean>

</beans>
package com.feiyang.ba04;
import org.junit.Test;
import org.springframework.context.support.ClassPathXmlApplicationContext;
/**
* @author:飞扬
* @公众hao:程序员飞扬
* @description:自动注入byName
*/
public class Mytest04 {
@Test
public void test04(){
String config = "ba04/applicationContext.xml";
ClassPathXmlApplicationContext ctx = new ClassPathXmlApplicationContext(config);
Object student = ctx.getBean("myStudent");
System.out.println(student);
}
}执行结果:
无参构造方法执行了
setName方法执行了
setAge方法执行了
Student{name='张三', age=28, school=School{name='同济大学', address='四平路'}}
2)byType(按类型注入)
:java对象中引种类型的数据类型和bean的class的值一样;或是父子关系;或是接口和实现关系
<?xml version="1.0" encoding="UTF-8"?>
<beans xmlns="http://www.springframework.org/schema/beans"
       xmlns:xsi="http://www.w3.org/2001/XMLSchema-instance"
       xsi:schemaLocation="http://www.springframework.org/schema/beans http://www.springframework.org/schema/beans/spring-beans.xsd">

    <!-- byType方式,自动注入 -->
    <bean id="myStudent2" class="com.feiyang.ba05.Student" autowire="byType">
        <property name="name" value="韩梅梅"></property>
        <property name="age" value="16"></property>
        <!--<property name="school" ref="mySchool"></property>-->
    </bean>

    <!-- byType自动注入条件①:java对象中的引用类型属性的数据类型和bean的class对象相同 -->
    <!--<bean id="school2" class="com.feiyang.ba05.School">
        <property name="name" value="同济大学"></property>
        <property name="address" value="上海四平路"></property>
    </bean>-->

    <!-- byType自动注入条件②:或者java对象中的引用类型属性的数据类型和bean的class是继承关系 -->
    <bean id="primarySchool" class="com.feiyang.ba05.PrimarySchool">
        <property name="name" value="实验小学"></property>
        <property name="address" value="上海淮海路"></property>
    </bean>
</beans>
package com.feiyang.ba05;
/**
* @author:飞扬
* @公众hao:程序员飞扬
* @description:
*/
public class PrimarySchool extends School{
private String name;
private String address;
public PrimarySchool() {
}
public PrimarySchool(String name, String address) {
this.name = name;
this.address = address;
}
public void setName(String name) {
this.name = name;
}
public void setAddress(String address) {
this.address = address;
}
@Override
public String toString() {
return "School{" +
"name='" + name + '\'' +
", address='" + address + '\'' +
'}';
}
}package com.feiyang.ba05;
import org.junit.Test;
import org.springframework.context.support.ClassPathXmlApplicationContext;
/**
* @author:飞扬
* @公众hao:程序员飞扬
* @description:自动注入byType
*/
public class Mytest05 {
@Test
public void test05(){
String config = "ba05/applicationContext.xml";
ClassPathXmlApplicationContext ctx = new ClassPathXmlApplicationContext(config);
Object student2 = ctx.getBean("myStudent2");
System.out.println(student2);
}
}执行结果:
无参构造方法执行了
setName方法执行了
setAge方法执行了
Student{name='韩梅梅', age=16, school=School{name='实验小学', address='上海淮海路'}}
spring的工作方式:

4.3 Ioc案例练习
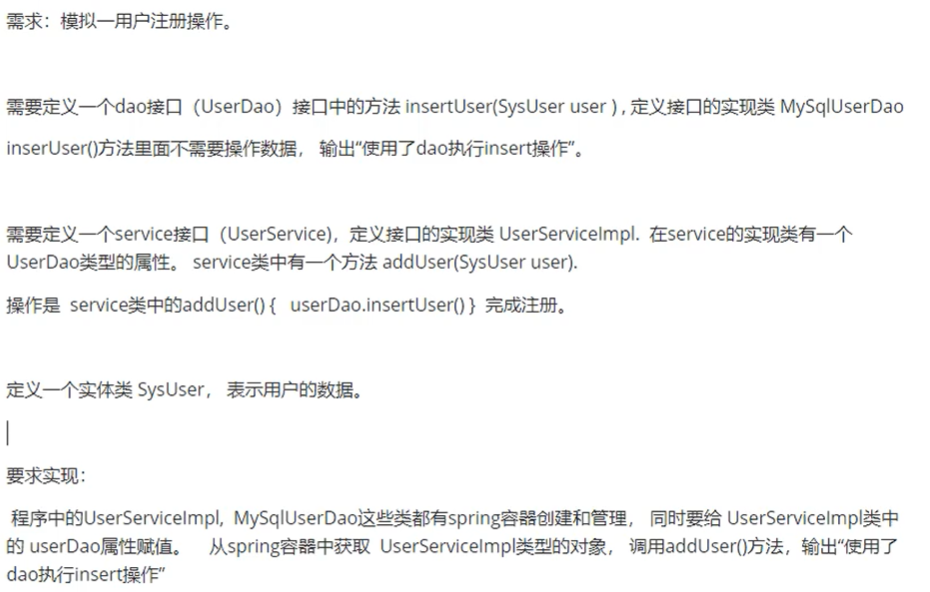
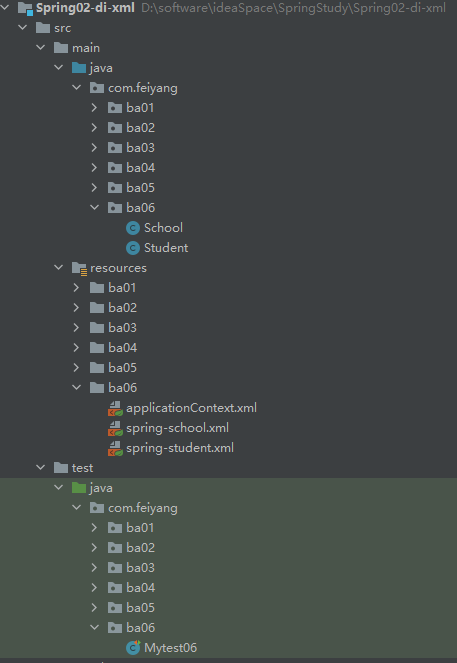
目录结构:

applicationContext.xml
<?xml version="1.0" encoding="UTF-8"?>
<beans xmlns="http://www.springframework.org/schema/beans"
       xmlns:xsi="http://www.w3.org/2001/XMLSchema-instance"
       xsi:schemaLocation="http://www.springframework.org/schema/beans http://www.springframework.org/schema/beans/spring-beans.xsd">


    <bean id="mysqlUserDao" class="com.feiyang.dao.impl.MysqlUserDao"></bean>

    <bean id="userService" class="com.feiyang.service.impl.UserServiceImpl">
        <property name="userDao" ref="mysqlUserDao"></property>
    </bean>
</beans>
package com.feiyang.domain;
/**
* @author:飞扬
* @公众hao:程序员飞扬
* @description:
*/
public class SysUser {
private String name;
private Integer age;
public String getName() {
return name;
}
public void setName(String name) {
this.name = name;
}
public Integer getAge() {
return age;
}
public void setAge(Integer age) {
this.age = age;
}
}package com.feiyang.dao;
import com.feiyang.domain.SysUser;
public interface UserDao {
void addUser(SysUser user);
}package com.feiyang.dao.impl;
import com.feiyang.dao.UserDao;
import com.feiyang.domain.SysUser;
/**
* @author:飞扬
* @公众hao:程序员飞扬
* @description:
*/
public class MysqlUserDao implements UserDao {
@Override
public void addUser(SysUser user) {
System.out.println("使用了dao执行了user的添加");
}
}package com.feiyang.service;
import com.feiyang.domain.SysUser;
public interface UserService {
void addUser(SysUser user);
}package com.feiyang.service.impl;
import com.feiyang.dao.UserDao;
import com.feiyang.domain.SysUser;
import com.feiyang.service.UserService;
/**
* @author:飞扬
* @公众hao:程序员飞扬
* @description:
*/
public class UserServiceImpl implements UserService {
private UserDao userDao;
public void setUserDao(UserDao userDao) {
this.userDao = userDao;
}
@Override
public void addUser(SysUser user) {
userDao.addUser(user);
}
}测试类Mytest01:
package com.feiyang;

import com.feiyang.domain.SysUser;
import com.feiyang.service.UserService;
import org.junit.Test;
import org.springframework.context.support.ClassPathXmlApplicationContext;

/**
 * @author:飞扬
 * @公众hao:程序员飞扬
 * @description:
 */
public class Mytest01 {

    @Test
    public void test01(){
        String config = "applicationContext.xml";
        ClassPathXmlApplicationContext ctx = new ClassPathXmlApplicationContext(config);
        UserService userService = (UserService) ctx.getBean("userService");

        SysUser sysUser = new SysUser();
        sysUser.setName("胖虎");
        sysUser.setAge(8);
        userService.addUser(sysUser);
    }
}
执行结果:
使用了dao执行了user的添加
IoC可以实现解耦合:

新增dao实现:
package com.feiyang.dao.impl;

import com.feiyang.dao.UserDao;
import com.feiyang.domain.SysUser;

/**
 * @author:飞扬
 * @公众hao:程序员飞扬
 * @description:
 */
public class OracleUserDao implements UserDao {

    @Override
    public void addUser(SysUser user) {
        System.out.println("oracle使用了dao执行了user的添加");
    }
}
修改配置文件:
<?xml version="1.0" encoding="UTF-8"?>
<beans xmlns="http://www.springframework.org/schema/beans"
       xmlns:xsi="http://www.w3.org/2001/XMLSchema-instance"
       xsi:schemaLocation="http://www.springframework.org/schema/beans http://www.springframework.org/schema/beans/spring-beans.xsd">


    <bean id="mysqlUserDao" class="com.feiyang.dao.impl.MysqlUserDao"></bean>

    <bean id="oracleUserDao" class="com.feiyang.dao.impl.OracleUserDao"></bean>

    <!--<bean id="userService" class="com.feiyang.service.impl.UserServiceImpl">
        <property name="userDao" ref="mysqlUserDao"></property>
    </bean>-->

    <bean id="userService" class="com.feiyang.service.impl.UserServiceImpl">
        <property name="userDao" ref="oracleUserDao"></property>
    </bean>
</beans>
其他代码都不需要动,执行结果:
oracle使用了dao执行了user的添加
4.4 为应用指定多个配置文件
加载多个配置文件有多个方式:
①使用import加载多个配置文件
②使用通配符加载多个配置文件
package com.feiyang.ba06;

/**
 * @author:飞扬
 * @公众hao:程序员飞扬
 * @description:
 */
public class School {
    private String name;
    private String address;

    public School() {
    }

    public School(String name, String address) {
        this.name = name;
        this.address = address;
    }

    public void setName(String name) {
        this.name = name;
    }

    public void setAddress(String address) {
        this.address = address;
    }

    @Override
    public String toString() {
        return "School{" +
                "name='" + name + '\'' +
                ", address='" + address + '\'' +
                '}';
    }
}
package com.feiyang.ba06;
/**
* @author:飞扬
* @公众hao:程序员飞扬
* @description:
*/
public class Student {
private String name;
private int age;
private School school;
public Student() {
//System.out.println("无参构造方法执行了");
}
public Student(String name, int age) {
//System.out.println("有参构造执行了");
this.name = name;
this.age = age;
}
public void setName(String name) {
//System.out.println("setName方法执行了");
this.name = name;
}
public void setAge(int age) {
//System.out.println("setAge方法执行了");
this.age = age;
}
public void setSchool(School school) {
this.school = school;
}
@Override
public String toString() {
return "Student{" +
"name='" + name + '\'' +
", age=" + age +
", school=" + school +
'}';
}
}spring-school.xml
<?xml version="1.0" encoding="UTF-8"?>
<beans xmlns="http://www.springframework.org/schema/beans"
       xmlns:xsi="http://www.w3.org/2001/XMLSchema-instance"
       xsi:schemaLocation="http://www.springframework.org/schema/beans http://www.springframework.org/schema/beans/spring-beans.xsd">

    <!-- byType自动注入条件①:java对象中的引用类型属性的数据类型和bean的class对象相同 -->
    <bean id="school" class="com.feiyang.ba06.School">
        <property name="name" value="同济大学"></property>
        <property name="address" value="上海四平路"></property>
    </bean>

</beans>
spring-student.xml
<?xml version="1.0" encoding="UTF-8"?>
<beans xmlns="http://www.springframework.org/schema/beans"
       xmlns:xsi="http://www.w3.org/2001/XMLSchema-instance"
       xsi:schemaLocation="http://www.springframework.org/schema/beans http://www.springframework.org/schema/beans/spring-beans.xsd">

    <!-- byType方式,自动注入 -->
    <bean id="myStudent2" class="com.feiyang.ba06.Student" autowire="byType">
        <property name="name" value="韩梅梅"></property>
        <property name="age" value="16"></property>
        <!--<property name="school" ref="school2"></property>-->
    </bean>

</beans>
applicationContext.xml
<?xml version="1.0" encoding="UTF-8"?>
<beans xmlns="http://www.springframework.org/schema/beans"
       xmlns:xsi="http://www.w3.org/2001/XMLSchema-instance"
       xsi:schemaLocation="http://www.springframework.org/schema/beans http://www.springframework.org/schema/beans/spring-beans.xsd">

    <!-- import方式加载多个配置文件 -->
    <!--<import resource="classpath:/ba06/spring-school.xml"></import>
    <import resource="classpath:/ba06/spring-student.xml"></import>-->

    <!-- 通配符方式加载多个配置文件-->
    <import resource="classpath:/ba06/spring-*"></import>

</beans>
测试类:
package com.feiyang.ba06;

import org.junit.Test;
import org.springframework.context.support.ClassPathXmlApplicationContext;

/**
 * @author:飞扬
 * @公众hao:程序员飞扬
 * @description:自动注入byType
 */
public class Mytest06 {

    @Test
    public void test06(){
        String config = "ba06/applicationContext.xml";
        ClassPathXmlApplicationContext ctx = new ClassPathXmlApplicationContext(config);

        Object student2 = ctx.getBean("myStudent2");
        System.out.println(student2);
    }
}
执行结果:
Student{name='韩梅梅', age=16, school=School{name='同济大学', address='上海四平路'}}
5.基于注解的DI(重点掌握)
5.1 定义bean的注解@Component
基于注解的DI:使用spring提供的注解,完成java对象创建,属性赋值
注解使用的核心步骤:
1.在源代码中加入注解,例如:@Component
2.在spring的配置文件中,加入组件扫描器的标签
<context:component-scan base-package="com.feiyang.ba01"></context:component-scan>
1)demo工程

applicationContext.xml
<?xml version="1.0" encoding="UTF-8"?>
<beans xmlns="http://www.springframework.org/schema/beans"
       xmlns:xsi="http://www.w3.org/2001/XMLSchema-instance"
       xmlns:context="http://www.springframework.org/schema/context"
       xsi:schemaLocation="http://www.springframework.org/schema/beans http://www.springframework.org/schema/beans/spring-beans.xsd http://www.springframework.org/schema/context https://www.springframework.org/schema/context/spring-context.xsd">

    <context:component-scan base-package="com.feiyang.ba01"></context:component-scan>
</beans>
package com.feiyang.ba01;
import org.springframework.stereotype.Component;
/**
* @author:飞扬
* @公众hao:程序员飞扬
* @description:
*/
//使用value指定对象的名称
//@Component(value = "myStudent")
//value可以省略
//@Component("myStudent")
//没有指定名称,则框架默认的名称是,类名首字母小写,例如:student
@Component()
public class Student {
private String name;
private int age;
@Override
public String toString() {
return "Student{" +
"name='" + name + '\'' +
", age=" + age +
'}';
}
}package com.feiyang.ba01;
import org.junit.Test;
import org.springframework.context.support.ClassPathXmlApplicationContext;
/**
* @author:飞扬
* @公众hao:程序员飞扬
* @description:
*/
public class Mytest01 {
@Test
public void test01(){
String config = "/ba01/applicationContext.xml";
ClassPathXmlApplicationContext ctx = new ClassPathXmlApplicationContext(config);
//Student student = (Student) ctx.getBean("myStudent");
Student student = (Student) ctx.getBean("student");//没有指定名称,则为默认名称
System.out.println(student);
}
}执行结果:
Student{name='null', age=0}
2)创建对象的四个注解
① @Component
和@Component功能相同的创建对象的注解
② @Repository 放在dao接口的实现类上面,表示创建dao对象,持久层对象,能访问数据库。
③ @Service 放在业务层接口的实现类上面,表示创建业务层对象,业务层对象有事务的功能。
④ @Controller 放在控制器类上面,表示创建控制器对象,属于表示层对象,控制器对象能接收请求,把请求的处理结果显示给客户。
以上四个注解都能创建对象,但后三个有角色说明,表示对象是分层的。且后三个注解都是在第一个注解的基础上扩展的。
3)扫描多个包的三种方式
<?xml version="1.0" encoding="UTF-8"?>
<beans xmlns="http://www.springframework.org/schema/beans"
       xmlns:xsi="http://www.w3.org/2001/XMLSchema-instance"
       xmlns:context="http://www.springframework.org/schema/context"
       xsi:schemaLocation="http://www.springframework.org/schema/beans http://www.springframework.org/schema/beans/spring-beans.xsd http://www.springframework.org/schema/context https://www.springframework.org/schema/context/spring-context.xsd">

    <context:component-scan base-package="com.feiyang.ba01"></context:component-scan>

    <!-- 扫描多个包的三种方式 -->
    <!-- 第一种:使用多次组件扫描 -->
    <context:component-scan base-package="com.feiyang.ba01"></context:component-scan>
    <context:component-scan base-package="com.feiyang.ba02"></context:component-scan>

    <!-- 第二种:使用分隔符(;或,),指定多个包 -->
    <context:component-scan base-package="com.feiyang.ba01;com.feiyang.ba01"></context:component-scan>

    <!-- 第三种:指定父包 -->
    <context:component-scan base-package="com.feiyang"></context:component-scan>
</beans>
5.2简单类型属性注入@Value
两种方式:①直接在属性上加注解,并指定值
@Value("张三")
private String name;
②引用外部配置文件
@Value("${myname}")
private String name;
applicationContext.xml
<?xml version="1.0" encoding="UTF-8"?>
<beans xmlns="http://www.springframework.org/schema/beans"
       xmlns:xsi="http://www.w3.org/2001/XMLSchema-instance"
       xmlns:context="http://www.springframework.org/schema/context"
       xsi:schemaLocation="http://www.springframework.org/schema/beans http://www.springframework.org/schema/beans/spring-beans.xsd http://www.springframework.org/schema/context https://www.springframework.org/schema/context/spring-context.xsd">

    <context:component-scan base-package="com.feiyang.ba02"></context:component-scan>

    <!-- 读取外部配置文件 -->
    <context:property-placeholder location="classpath:/myconf.properties"></context:property-placeholder>

</beans>
package com.feiyang.ba02;
import org.springframework.beans.factory.annotation.Value;
import org.springframework.stereotype.Component;
import org.springframework.stereotype.Controller;
import org.springframework.stereotype.Repository;
import org.springframework.stereotype.Service;
/**
* @author:飞扬
* @公众hao:程序员飞扬
* @description:
*/
//使用value指定对象的名称
@Component(value = "myStudent")
//value可以省略
//@Component("myStudent")
//没有指定名称,则框架默认的名称是,类名首字母小写,例如:student
//@Component()
public class Student {
//@Value("张三")
//读取外部配置文件
@Value("${myname}")
private String name;
@Value("${myage}")
private int age;
@Override
public String toString() {
return "Student{" +
"name='" + name + '\'' +
", age=" + age +
'}';
}
}package com.feiyang.ba02;
import com.feiyang.ba02.Student;
import org.junit.Test;
import org.springframework.context.support.ClassPathXmlApplicationContext;
/**
* @author:飞扬
* @公众hao:程序员飞扬
* @description:
*/
public class Mytest02 {
@Test
public void test01(){
String config = "/ba01/applicationContext.xml";
ClassPathXmlApplicationContext ctx = new ClassPathXmlApplicationContext(config);
Student student = (Student) ctx.getBean("myStudent");
System.out.println(student);
}
}执行结果:
Student{name='李雷', age=16}
5.3 @Autowired自动注入
有两种方式:①byType自动注入@Autowired
②byName自动注入@Autowired与@Qualifier
@Autowired属性,require:布尔类型的属性
true:spring启动,创建容器对象时,会检查引用类型是否赋值成功,如果赋值失败,终止程序并报错
false:应用类型若赋值失败,程序正常执行不报错,引用类型的值是null.
package com.feiyang.ba03;

import org.springframework.beans.factory.annotation.Value;
import org.springframework.stereotype.Component;

/**
 * @author:飞扬
 * @公众hao:程序员飞扬
 * @description:
 */

@Component(value = "mySchool")
public class School {

    @Value("复旦大学")
    private String name;

    @Value("上海市四平路校区")
    private String address;

    @Override
    public String toString() {
        return "School{" +
                "name='" + name + '\'' +
                ", address=" + address +
                '}';
    }
}
package com.feiyang.ba03;
import org.springframework.beans.factory.annotation.Autowired;
import org.springframework.beans.factory.annotation.Qualifier;
import org.springframework.beans.factory.annotation.Required;
import org.springframework.beans.factory.annotation.Value;
import org.springframework.stereotype.Component;
import javax.xml.ws.RequestWrapper;
/**
* @author:飞扬
* @公众hao:程序员飞扬
* @description:
*/
//使用value指定对象的名称
@Component(value = "myStudent")
//value可以省略
//@Component("myStudent")
//没有指定名称,则框架默认的名称是,类名首字母小写,例如:student
//@Component()
public class Student {
//@Value("张三")
//读取外部配置文件
@Value("${myname}")
private String name;
@Value("${myage}")
private int age;
/**
* 引用类型
* @Autowired spring提供的注解,给引用类型赋值,使用自动注入原理,支持byName,byType。默认是byType
* 位置:1)在属性上面,无set方法(推荐使用)
* 2)在set方法上面
*
*/
//第一种方式:byType
// @Autowired
// private School school;
//第二中方式:byName
//@Qualifier:指定对象
/**
* 属性,require:布尔类型的属性
* true:spring启动,创建容器对象时,会检查引用类型是否赋值成功,如果赋值失败,终止程序并报错
* false:应用类型若赋值失败,程序正常执行不报错,引用类型的值是null.
*/
@Autowired(required = true)
@Qualifier("mySchool")
private School school;
@Override
public String toString() {
return "Student{" +
"name='" + name + '\'' +
", age=" + age +
", school=" + school +
'}';
}
}package com.feiyang;
import com.feiyang.ba03.Student;
import org.junit.Test;
import org.springframework.context.support.ClassPathXmlApplicationContext;
/**
* @author:飞扬
* @公众hao:程序员飞扬
* @description:
*/
public class Mytest03 {
@Test
public void test03(){
String config = "/ba01/applicationContext.xml";
ClassPathXmlApplicationContext ctx = new ClassPathXmlApplicationContext(config);
Student student = (Student) ctx.getBean("myStudent");
System.out.println(student);
}
}执行结果:
Student{name='李雷', age=16, school=School{name='复旦大学', address=上海市四平路校区}}
5.4JDK注解@Resource自动注入
Spring提供了对jdk@Resource注解的支持。@Resource注解既可以按名称匹配Bean,也可以按类型匹配Bean。默认是按名称注入。使用该注解要求JDK版本必须是6及以上版本。@Resource可以在属性上,也可以在set方法上。
//默认使用byName方式赋值,如果赋值失败再使用byType赋值
    @Resource
    private School school;

//只使用byName方式赋值
    @Resource(name="mySchool")
    private School school;
6.IoC总结
1.创建对象的注解
@Component
@Repository
@Service
@Controller
2.简单类型属性赋值
@Value
3.引用类型赋值
@Autowired : spring提供的注解,支持byName,byType
@Autowired : 默认就是byType
@Autowired @Qualifier : 使用byName
@Resource : 来自jdk的注解,给引用类型赋值的,默认是byName
@Resource : 先使用byName,再byType
@Resource(name="bean的名称") : 只使用byName注入
IoC : 管理对象的,把对象放到容器中,创建,赋值,管理依赖关系。
IoC : 通过管理对象实现解耦合,IoC解决处理业务逻辑对象之间的耦合关系,也就是service和dao之间的解耦合。