目录
1. 源码安装nginx,并提供服务脚本
1.下载源码包
[root@slave2 ~]# wget -c https://nginx.org/download/nginx-1.20.1.tar.gz
2.解压源码到/usr/local/src
[root@slave2 ~]# tar xf nginx-1.20.1.tar.gz -C /usr/local/src/
3.编译
(1)根据rpm安装的nginx查看编译选项
1.安装需要的库文件
yum install -y pcre-devel
yum install -y openssl-devel
2.编译
./configure --prefix=/usr/local/nginx --with-http_stub_status_module --with-http_ssl_module
make
make install
3.创建用户
nginx:x:304:305:Nginx web server:/var/lib/nginx:/sbin/nologin
4.关闭防火墙
systemctl status firewalld.service
getenforce
编写nginx服务脚本
编写nginx脚本
vim /usr/lib/systemd/system/nginx.service
[root@slave2 sbin]# cat /usr/lib/systemd/system/nginx.service
[Unit]
Description=nginx
After=network.target

[Service]
Type=forking
ExecStart=/usr/local/nginx/sbin/nginx -c /usr/local/nginx/conf/nginx.conf
ExecReload=/usr/local/nginx/sbin/nginx -s reload
ExecStop=/usr/local/nginx/sbin/nginx -s quit
PrivateTmp=true

[Install]
WantedBy=multi-user.target
启动脚本
systemctl daemon-reload
systemctl start nginx.service
问题:如果启动不起来需要解决
1:查看是否存在nginx进程,存在杀死
不存在,执行默认的关闭nginx的命令 :./nginx -s stop
指定所在安装nginx所在配置文件的位置
/usr/local/nginx/sbin/nginx -c /usr/local/nginx/conf/nginx.conf
测试:192.168.27.122:80
2.基于域名虚拟主机配置
1.在主配置文件中添
[root@slave2 conf]# vim /usr/local/nginx/conf/nginx.conf
include /etc/nginx/conf.d/*.conf;
    server {
        listen       80;
        server_name  localhost;

        #charset koi8-r;

        #access_log  logs/host.access.log  main;

        location / {
            root   html;
            index  index.html index.htm;
        }
2.编写虚拟主机配置文件
虚拟主机的配置必须是server{}包含location{}
server中有 监听端口以及server_name
location 中有 访问目录 文件
1.vim /etc/nginx/conf.d/vhosts.conf
[root@slave2 conf.d]# cat vhosts.conf
server {
        listen 192.168.27.122:80;
        server_name bbs.test.com;
        location / {
                root   html/bbs;
                index  index.html index.htm;
	}
}

server {
        listen 192.168.27.126:80;
        server_name blog.test.com;
        location / {
                root   html/blog;
                index  index.html index.htm;
	}
}
2.[root@slave2 conf.d]# systemctl restart nginx.service
3.编写两个页面
1.创建目录
mkdir /usr/local/nginx/html/bbs
mkdir /usr/local/nginx/html/blog
2.切到bbs目录下创建index.html
[root@slave2 html]# cd bbs/
[root@slave2 bbs]# ll
total 4
-rw-r--r--. 1 root root 14 Mar 30 10:02 index.html
[root@slave2 html]# cd blog/
[root@slave2 blog]# ll
total 4
-rw-r--r--. 1 root root 15 Mar 30 09:53 index.html
3.重启
[root@slave2 blog]# systemctl restart nginx.service
4.windos底下的配置hosts文件
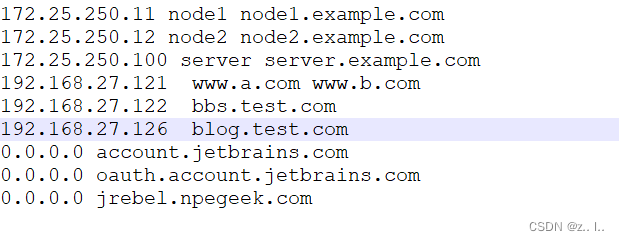
5.测试
浏览器:bbs.test.com blog.test.com
3.配置nginx基于用户和地址的访问控制。
配置nginx基于用户
不允许某个主机访问,不允许192.168.27.126:80端口访问某个页面
1.修改虚拟主机
[root@slave2 conf.d]# vim vhosts.conf
server {
        listen 192.168.27.122:80;
        server_name bbs.test.com;
        location / {
                root   html/bbs;
                index  index.html index.htm;
                deny 192.168.27.121;
                allow 192.168.27.0/24;
        }
}

server {
        listen 192.168.27.126:80;
        server_name blog.test.com;
        location / {
                root   html/blog;
                index  index.html index.htm;
        }
}
2.重启
[root@slave2 conf.d]# systemctl restart nginx.service
测试
在192.168.27.121主机上去测试:curl 192.168.27.122:80
在再192.168.27.0/24的其他网段
基于用户访问控制
1.下载httpd-tools工具
yum install httpd-tools
2.创建加密用户文件
[root@slave2 ~]# htpasswd -c /usr/local/nginx/html/.file tom
New password:
Re-type new password:
Adding password for user tom
3.修改虚拟文件
[root@slave2 conf.d]# cat vhosts.conf
server {
        listen 192.168.27.126:80;
        server_name blog.test.com;
        location / {
                root   html/blog;
                index  index.html index.htm;
		auth_basic "Restricted";
		auth_basic_user_file /usr/local/nginx/html/.file;
	}
}
测试:
在浏览器输入blog.test.com,然后会出来用户提示,实现访问网站或密码登录
4. 配置LNMP,并部署php应用
1.部署lnmp环境
1.安装扩展源
wget -O /etc/yum.repos.d/epel.repo http://mirrors.aliyun.com/repo/epel-7.repo
2.部署lnmp环境
[root@slave2 ~]# yum install mariadb-server php php-mysql php-gd php-fpm -y nginx
3.配置额外配置文件
[root@slave2 conf.d]# cat test.conf   /etc/nginx/conf.d/test.conf
server {
   location / {
	root html;
	index index.html index.htm;
	auth_basic "Restricted";
	auth_basic_user_file  /usr/local/nginx/html/.file;


}

location ~ \.php$ {
	root /usr/local/nginx/html;
	fastcgi_pass 127.0.0.1:9000;
	fastcgi_index index.php;
	#fastcgi_param SCRIPT_FILENAME /scripts$fastcgi_script_name;
	fastcgi_param SCRIPT_FILENAME $document_root$fastcgi_script_name;
	include fastcgi_params;
}
}
4.启动服务
systemctl restart nginx mariadb php-fpm
5.测试nginx和php
[root@node1 conf.d]# echo "<?php phpinfo(); ?>" >/usr/local/nginx/html/phpinfo.php
[root@node1 conf.d]# systemctl restart nginx
6.配置数据库密码
mysqladmin -uroot password '123456'
7.写入mysql.php
[root@node2 conf.d]# cat /usr/slocal/nginx/html/nysql.php
<?php
$con = mysql_connect("localhost","root","12345");
if (!$con) {
die("could not connect to the db:\n" . mysql_error());
}
else { echo "success"; }
mysql_close($con);
?>
测试:
192.168.27.122/mysql.php
192.168.27.122/phpinfo.php
测试完毕,删除测试的php文件!!!
部署应用 部署discuz论坛
1.安装Discuz压缩包
2.解压
unzip Discuz_X3.2_SC_UTF8.zip
3.切到upload目录下
[root@slave2 upload]# ls
admin.php  archiver     cp.php           favicon.ico  home.php   member.php  portal.php  source    uc_client
api        config       crossdomain.xml  forum.php    index.php  misc.php    robots.txt  static    uc_server
api.php    connect.php  data             group.php    install    plugin.php  search.php  template  userapp.php
4.将upload移动到/usr/local/nginx/html/adc
[root@slave2 conf.d]# mv upload/ /usr/local/nginx/html/abc
5.在浏览器页面访问
http://192.168.27.122/abc/install/index.php
6.加执行权限
[root@slave2 abc]# chmod -R  a+w data/ uc_client/ config/ uc_server/
[root@slave2 abc]# systemctl restart nginx.service php-fpm.service
进一步安装操作
http://192.168.27.122/abc/forum.php
在页面访问时输入192.168.27.122访问需要在配置文件以及子配置文件,将index.php放在index之后
http://192.168.27.122/abc