参考
【教程】Fiddler真机模拟器抓包+frida突破ssl pinning_痞老板2的博客-CSDN博客_frida 抓包
安装 python

安装Frida
frida框架分为两部分:
- 一部分是运行在系统上的交互工具frida CLI。
- 另一部分是运行在目标机器上的代码注入工具 frida-serve。
frida-server 是一个守护进程,通过TCP和Frida核心引擎通信,默认的监听端口是27042
一、Window 安装
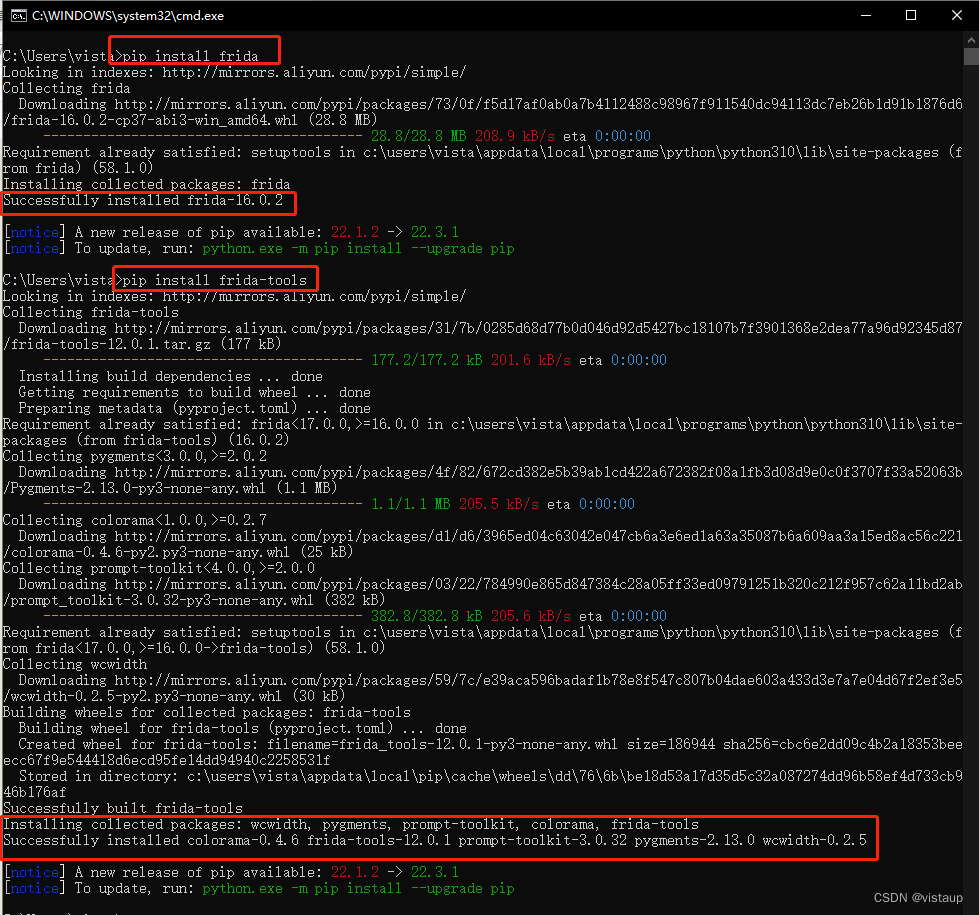
pip install frida
pip install frida-tools
可以使用 frida --version 查看版本信息
如果需要指定版本:
pip install frida==12.8.0
pip install frida-tools==5.3.0
二、手机安装
确定我们手机的架构,输入以下命令:
adb shell getprop ro.product.cpu.abi
我的是 arm64-v8a ,去 https://github.com/frida/frida/releases 下载 frida-server 的 Android 版本
frida-server-16.0.2-android-arm64.xz
注意:需要和 windows 上的版本对应,我的是 16.0.2
下载得到文件 frida-server-16.0.2-android-arm64
然后通过adb将其上传到手机
adb push .\frida-server-16.0.2-android-arm64 /data/local/tmp
然后再给其授予777权限(需要使用 su )。然后在
chmod 777 frida-server-16.0.2-android-arm64
Frida 15.XX不再支持Android 5及更低版本
实测我的Android 5.1 设备使用 64位会重启,降级版本
https://github.com/frida/frida/issues/871
貌似找到了问题所在,我目前手上的几部root的手机都是联发科64位的cpu,以及华为海思麒麟的cpu,所以12.5.0以上的frida-server会导致手机重启,然后找了一个高通64位cpu的手机发现没问题了,可能是作者没有适配好联发科的cpu,如果是联发科的cpu就用12.4.0的版本吧,亲测可用
卸载命令
pip uninstall frida
pip uninstall frida-tools
使用 12.4.0 (需要回退 python 到 3.7 ,推荐使用 pyenv-win 进行管理)
关于 pyenv-win
Python的pyenv-win工具[包]安装与使用_软件开发技术爱好者的博客-CSDN博客_pyenv 查看安装的包
https://www.jianshu.com/p/fe8991a7e14d
pip install frida==12.4.0
pip install frida-tools==1.3.1
启动手机端的 frida server
cd /data/local/tmp/
./frida-server-12.4.0-android-arm64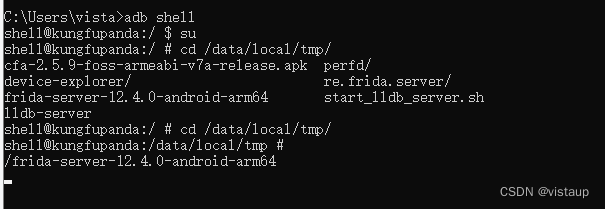
卡住就是正常运行。
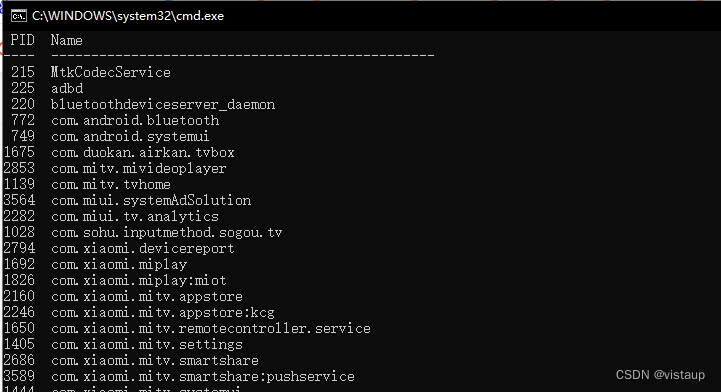
然后我们在window上执行
Frida-ps -U
如下图所示,则表示安装成功
① 如果执行“frida -U -f 包名”出现:
Failed to spawn: unable to handle 64-bit processes due to build configuration
则需要回到第三步,选择对应 64位版本的frida-server。
② 如果 rida安装完成后,运行frida-ps会报错提示找不到对应模块
Failed to load the Frida native extension: DLL load failed: 找不到指定的模块。
Please ensure that the extension was compiled for Python 3.x.
***
Traceback (most recent call last):
File "D:\Python37\Scripts\frida-ps-script.py", line 11, in <module>
load_entry_point('frida-tools==1.1.0', 'console_scripts', 'frida-ps')()
File "d:\python37\lib\site-packages\frida_tools\ps.py", line 6, in main
from frida_tools.application import ConsoleApplication
File "d:\python37\lib\site-packages\frida_tools\application.py", line 19, in <
module>
import frida
File "d:\python37\lib\site-packages\frida\__init__.py", line 24, in <module>
raise ex
File "d:\python37\lib\site-packages\frida\__init__.py", line 7, in <module>
import _frida
ImportError: DLL load failed: 找不到指定的模块。
这个问题是因为python版本过高 或 低 ,pip frdia 并没有对应版本兼容。更换低版本 如python 3.8 ,再安装 pip install frida 和 pip install frida-tools即可解决。 参见:frida · PyPI 查看python版本支持
注入脚本
GitHub - BigFaceCat2017/frida_ssl_logger: ssl_logger based on frida
GitHub - google/ssl_logger: Decrypts and logs a process's SSL traffic.
这里的抓取基于 BigFaceCat2017 的抓取工具
记得先安装 hexdump
pip install hexdump启动抓包,并保存文件到 test.pcap
python3 ssl_logger.py -U -f -p test.pcap com.yiban.app 关闭SELinux,在adb shell中执行:
echo 0 > /sys/fs/selinux/enforce
或者
setenforce 0
如果出现“frida.ServerNotRunningError: unable to connect to remote frida-server”的错误,试试端口转发:
adb forward tcp:27042 tcp:27042Frida 中文乱码解决
进入到frida的安装包中找到application.py文件(图为低版本frida目录结构图,高版本frida在frida-tools文件夹中)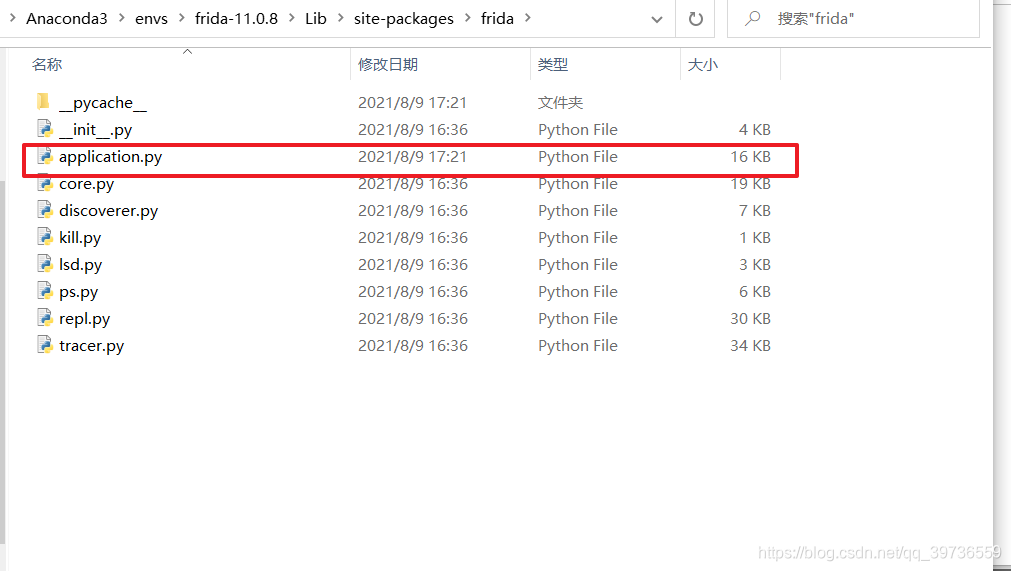
找到ConsoleApplication类下的_print函数(低版本大概在333行左右)
# 原始的
# def _print(self, *args, **kwargs):
#     encoded_args = []
#     if sys.version_info[0] >= 3:
#         string_type = str
#         decoder = "unicode-escape"
#     else:
#         string_type = unicode
#         decoder = "string-escape"
#     encoding = sys.stdout.encoding or 'UTF-8'
#     for arg in args:
#         if isinstance(arg, string_type):
#             encoded_args.append(arg.encode(encoding, errors='replace').decode(decoder, errors='replace'))
#         else:
#             encoded_args.append(arg)
#     print(*encoded_args, **kwargs)
#     self._console_state = ConsoleState.TEXT


# frida-tools抄的(修改成以下代码)
def _print(self, *args, **kwargs):
    encoded_args = []
    encoding = sys.stdout.encoding or 'UTF-8'
        if encoding == 'UTF-8':
		encoded_args = args
    else:
        if sys.version_info[0] >= 3:
            string_type = str
        else:
            string_type = unicode
        for arg in args:
            if isinstance(arg, string_type):
                encoded_args.append(arg.encode(encoding, errors='backslashreplace').decode(encoding))
            else:
                encoded_args.append(arg)
    print(*encoded_args, **kwargs)
    self._console_state = ConsoleState.TEXT
保存后重新运行即可