目录
6、将由容器生成的镜像push到镜像仓库docker hub
基本思路:先下载Nginx镜像,然后运行一个Nginx容器,在容器中配置相关参数,最后把配置好的容器制作成一个镜像,后期发布到服务器上可以省去重复配置。
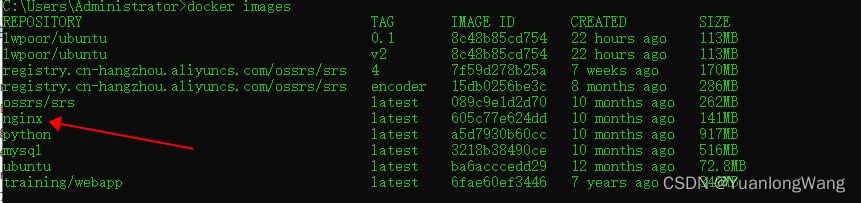
1、查看是否存在nginx镜像
docker images

发现还没有下载过nginx镜像
2、搜索可用的nginx镜像,下载nginx镜像
首先查询可用的nginx镜像:
docker search nginx

就下载第一个nginx:
docker pull nginx
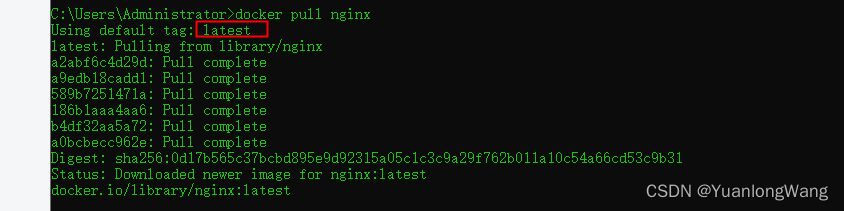
不指定版本号,默认就是最新版本
3、创建并启动nginx容器
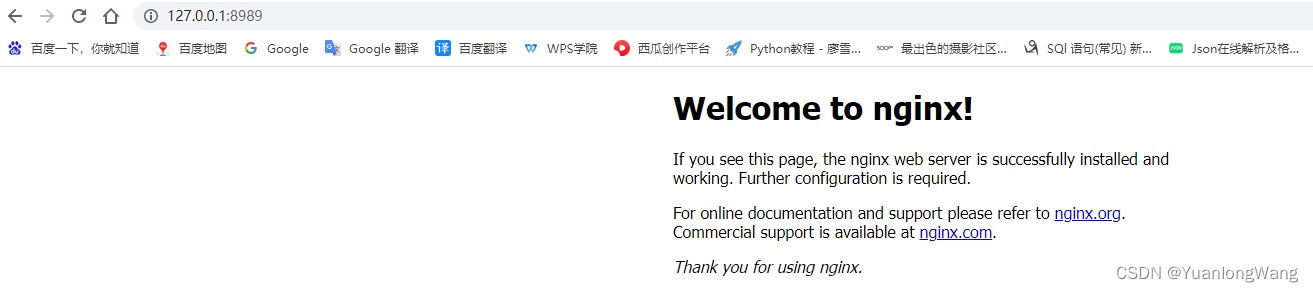
docker run --name mynginx -d -p 8989:80 nginx
# --name 给容器起一个名字
# -d 在后台运行
# -p 8989:80 把容器内的80端口映射到宿主机的8989端口

查看容器运行状态:
docker ps

访问验证:使用外部端口8989可以访问该容器nginx
4、进入容器,对相关文件进行配置
进入容器:
docker exec -it mynginx /bin/bash
# -i: 交互式操作。
# -t: 终端。
# mynginx : nginx镜像。
# /bin/bash:放在镜像名后的是命令,这里我们希望有个交互式 Shell,因此用的是 /bin/bash。
C:\Users\Administrator>docker exec -it mynginx /bin/bash
root@1eb487ead85e:/# ls
bin   dev                  docker-entrypoint.sh  home  lib64  mnt  proc  run   srv  tmp  var
boot  docker-entrypoint.d  etc                   lib   media  opt  root  sbin  sys  usr
root@1eb487ead85e:/# whereis nginx
nginx: /usr/sbin/nginx /usr/lib/nginx /etc/nginx /usr/share/nginx
root@1eb487ead85e:/# cd /etc/nginx
root@1eb487ead85e:/etc/nginx# ls
conf.d  fastcgi_params  mime.types  modules  nginx.conf  scgi_params  uwsgi_params
root@1eb487ead85e:/etc/nginx# cd conf.d
root@1eb487ead85e:/etc/nginx/conf.d# ls
default.conf
root@1eb487ead85e:/etc/nginx/conf.d# cat default.conf
server {
    listen       80;
    listen  [::]:80;
    server_name  localhost;

    #access_log  /var/log/nginx/host.access.log  main;

    location / {
        root   /usr/share/nginx/html;
        index  index.html index.htm;
    }

    #error_page  404              /404.html;

    # redirect server error pages to the static page /50x.html
    #
    error_page   500 502 503 504  /50x.html;
    location = /50x.html {
        root   /usr/share/nginx/html;
    }

    # proxy the PHP scripts to Apache listening on 127.0.0.1:80
    #
    #location ~ \.php$ {
    #    proxy_pass   http://127.0.0.1;
    #}

    # pass the PHP scripts to FastCGI server listening on 127.0.0.1:9000
    #
    #location ~ \.php$ {
    #    root           html;
    #    fastcgi_pass   127.0.0.1:9000;
    #    fastcgi_index  index.php;
    #    fastcgi_param  SCRIPT_FILENAME  /scripts$fastcgi_script_name;
    #    include        fastcgi_params;
    #}

    # deny access to .htaccess files, if Apache's document root
    # concurs with nginx's one
    #
    #location ~ /\.ht {
    #    deny  all;
    #}
}

root@1eb487ead85e:/etc/nginx/conf.d# cd /usr/share/nginx/html
root@1eb487ead85e:/usr/share/nginx/html# ls
50x.html  index.html
可以看到nginx的默认配置是在/etc/nginx/conf.d/default.conf配置文件里,通过配置文件里
location / {
root /usr/share/nginx/html;
index index.html index.htm;
}
可以知道nginx的html文件目录,这样就可以把我们自己的代码拷贝到html文件夹下:
docker cp d:/html 1eb487ead85e:/usr/share/nginx
# docker cp 本机文件路径 容器id:容器内的路径
5、更新镜像
我们对nginx进行配置后,需要使用当前容器生成一个新的镜像,
我们可以通过命令 docker commit 来提交容器副本。
docker commit -m="更新配置" -a=lwpoor 1eb487ead85e lwpoor/nginx:1.0
# -m: 提交的描述信息
# -a: 指定镜像作者
# 1eb487ead85e :容器 ID
# lwpoor/nginx:1.0: 指定要创建的目标镜像名
C:\Users\Administrator>docker commit -m="更新配置" -a=lwpoor 1eb487ead85e lwpoor/nginx:1.0
sha256:110f8f64ca1ea47ba61b3c773b3fe5a07c13492a17e6378455dc6d254f17177e

C:\Users\Administrator>docker images
REPOSITORY                                    TAG       IMAGE ID       CREATED         SIZE
lwpoor/nginx                                  1.0       110f8f64ca1e   9 seconds ago   224MB
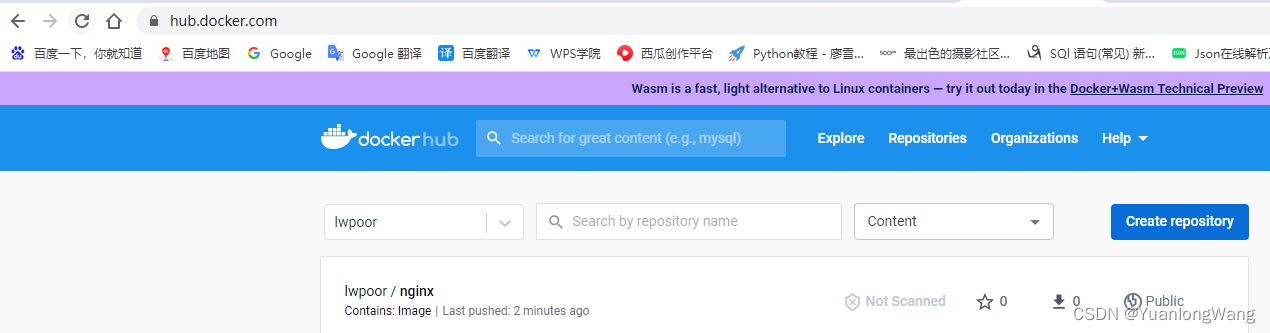
6、将由容器生成的镜像push到镜像仓库docker hub
首先需要登录 docker hub:
docker login
推送到镜像仓库:
docker push lwpoor/nginx:1.0
C:\Users\Administrator>docker login
Authenticating with existing credentials...
Login Succeeded

Logging in with your password grants your terminal complete access to your account.
For better security, log in with a limited-privilege personal access token. Learn more at https://docs.docker.com/go/access-tokens/

C:\Users\Administrator>docker push lwpoor/nginx:1.0
The push refers to repository [docker.io/lwpoor/nginx]
c269977a08d5: Pushed
d874fd2bc83b: Mounted from library/nginx
32ce5f6a5106: Mounted from library/nginx
f1db227348d0: Mounted from library/nginx
b8d6e692a25e: Mounted from library/nginx
e379e8aedd4d: Mounted from library/nginx
2edcec3590a4: Mounted from library/nginx
1.0: digest: sha256:fe4d4e8f68cace0f19cc7d070c84030487b31a585cdcd5969afe6f8848f80aca size: 1782
可以看到已经推送到镜像仓库了: