Ble蓝牙App(一)扫描
前言
关于低功耗的蓝牙介绍我已经做过很多了,只不过很多人不是奔着学习的目的去的,拿着源码就去运行,后面又发现连接设备后马上断开,然后不会自己看问题,这个现象就是快餐式的,你不了解里面的知识内容,自然就不知道是怎么回事,重复的问题我回答了好多次了。而我也是觉得写的有问题,本意上来说我是希望读者可以参考来写,能看一看文章内容,而结果绝大多数,看个标题看个运行效果,下载源码就运行,运行有问题就问你,没有什么思考。
针对这个情况,我决定做了系列性的Ble蓝牙App,尽可能的避免在你运行的时候出现bug,所以这是一个低功耗蓝牙工具App,可以让你了解到一些东西。注意是低功耗,不是经典蓝牙,如果你不知道两者之间的区别,建议你先了解一下。本文的效果:
正文
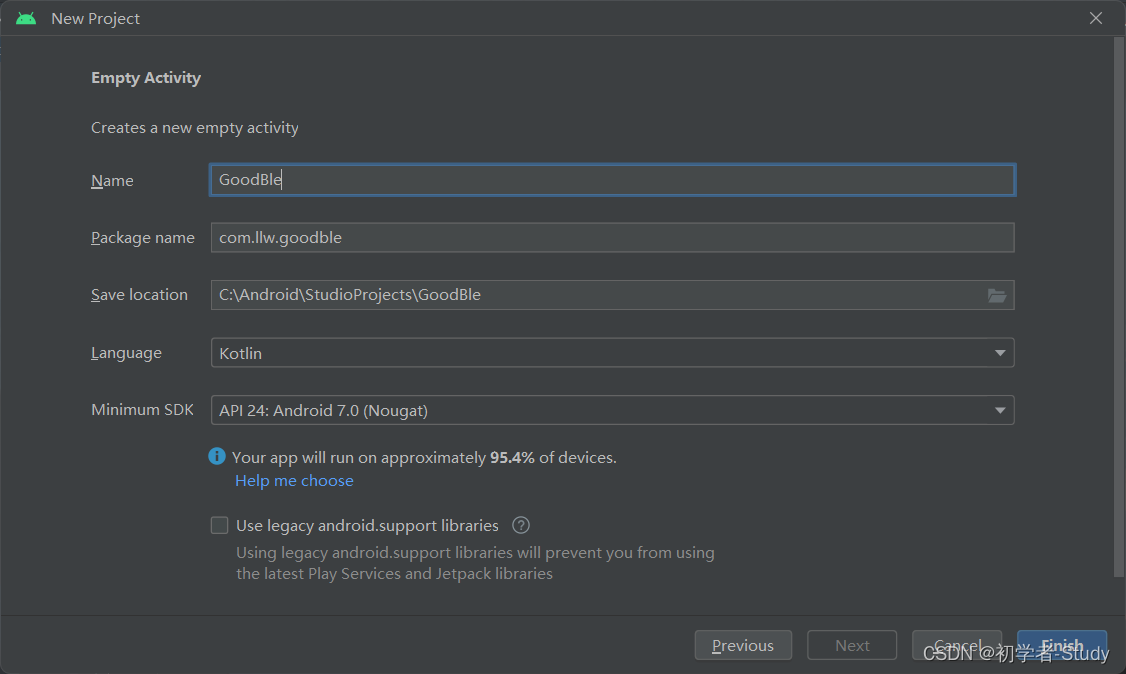
本文将会重新创建一个项目,功能一个一个的做,尽量的做好每一个功能的优化,下面我们创建一个名为GoodBle的项目,语言为Kotlin。
至于为什么使用Kotlin,稳固一下,不然太久不用就会生疏,文本我们讲述的是扫描,你可能回想,一个扫描有什么好写,不就是开始、结束、显示设备嘛?至于单独作为一个功能来写一篇文章嘛?那么我们带着问题来看这篇文章,看看扫描到底有没有必要这样来做。
一、基本配置
当前我们创建项目有一个MainActivity,然后我们需要打开viewBinding的开关,在app的build.gradle中的android{}闭包中添加如下代码:
	buildFeatures {


        viewBinding true
    }
然后Sync Now,同步一下,开启成功。随后我们就可以在Activity中使用ViewBinding了,常规的使用方式是这样的:
class MainActivity : AppCompatActivity() {


    private lateinit var binding: ActivityMainBinding;

    override fun onCreate(savedInstanceState: Bundle?) {


        super.onCreate(savedInstanceState)
        binding = ActivityMainBinding.inflate(layoutInflater);
        setContentView(binding.root)
    }
}
在Java中封装通常采用反射的方式,在Kotlin中如果要对ViewBinding进行封装的话同时利用上Kotlin的一些特性的话,可以这样做,原文地址如下:Viewbinding使用和委托封装,感觉写得蛮好的,太久没用Kotlin了,还是看了一会才看懂,感兴趣的可以看看。
那么我们在com.llw.goodble下面创建一个base包,base包下创建BaseViewBinding.kt文件,里面的代码如下所示:

package com.llw.goodble.base

import android.app.Activity
import android.view.LayoutInflater
import androidx.viewbinding.ViewBinding
import kotlin.properties.ReadOnlyProperty
import kotlin.reflect.KProperty

fun <VB : ViewBinding> viewBinding(viewInflater: (LayoutInflater) -> VB):
        ReadOnlyProperty<Activity, VB> = ActivityViewBindingProperty(viewInflater)

class ActivityViewBindingProperty<VB : ViewBinding>(
    private val viewInflater: (LayoutInflater) -> VB
) : ReadOnlyProperty<Activity, VB> {


    private var binding: VB? = null

    override fun getValue(thisRef: Activity, property: KProperty<*>): VB {


        return binding ?: viewInflater(thisRef.layoutInflater).also {


            thisRef.setContentView(it.root)
            binding = it
        }
    }
}
通过委托的方式进行封装,下面来看在MainActivity中怎么使用它,
class MainActivity : AppCompatActivity() {


    private val binding by viewBinding(ActivityMainBinding::inflate)

    override fun onCreate(savedInstanceState: Bundle?) {


        super.onCreate(savedInstanceState)
        setContentView(R.layout.activity_main)
    }
}
使用起来很简单,后面就采用这种方式,你可以运行一下,看看有没有问题,然后我们可以再创建一个ScanActivity类,用于扫描页面,修改一下activity_main.xml中的代码,如下所示:
<?xml version="1.0" encoding="utf-8"?>
<androidx.constraintlayout.widget.ConstraintLayout xmlns:android="http://schemas.android.com/apk/res/android"
    xmlns:app="http://schemas.android.com/apk/res-auto"
    xmlns:tools="http://schemas.android.com/tools"
    android:layout_width="match_parent"
    android:layout_height="match_parent"
    tools:context=".MainActivity">

    <com.google.android.material.appbar.MaterialToolbar
        android:id="@+id/toolbar"
        android:layout_width="match_parent"
        android:layout_height="?attr/actionBarSize"
        android:background="@color/orange"
        app:layout_constraintEnd_toEndOf="parent"
        app:layout_constraintStart_toStartOf="parent"
        app:layout_constraintTop_toTopOf="parent"
        app:navigationIcon="@drawable/ic_scan_ble"
        app:title="GoodBle"
        app:titleCentered="true"
        app:titleTextColor="@color/white" />

</androidx.constraintlayout.widget.ConstraintLayout>
这里用到了图标,代码如下所示:
<vector xmlns:android="http://schemas.android.com/apk/res/android"
    android:width="32dp"
    android:height="32dp"
    android:viewportWidth="1024"
    android:viewportHeight="1024">
    <path
        android:fillColor="#ffffff"
        android:pathData="M761.5,141.1c-14.3,-9.6 -33.6,-5.9 -43.2,8.4 -9.6,14.2 -5.9,33.6 8.4,43.2 106,71.6 169.3,190.7 169.3,318.4 0,211.7 -172.2,384 -384,384S128,722.9 128,511.1c0,-127.8 63.3,-246.8 169.3,-318.4 14.2,-9.6 18,-29 8.4,-43.2s-29,-18 -43.2,-8.4C139.3,224.4 65.7,362.7 65.7,511.1c0,246.1 200.2,446.2 446.2,446.2S958.2,757.2 958.2,511.1C958.2,362.7 884.6,224.4 761.5,141.1z" />
    <path
        android:fillColor="#ffffff"
        android:pathData="M402.1,157.6c17.2,0 31.1,-13.9 31.1,-31.1L433.2,96c0,-17.2 -13.9,-31.1 -31.1,-31.1s-31.1,13.9 -31.1,31.1l0,30.4C371,143.6 384.9,157.6 402.1,157.6z" />
    <path
        android:fillColor="#ffffff"
        android:pathData="M624.3,157.6c17.2,0 31.1,-13.9 31.1,-31.1L655.5,96c0,-17.2 -13.9,-31.1 -31.1,-31.1s-31.1,13.9 -31.1,31.1l0,30.4C593.2,143.6 607.1,157.6 624.3,157.6z" />
    <path
        android:fillColor="#ffffff"
        android:pathData="M428.3,227.4c11.2,18 41.8,48.4 85.9,48.4 43.8,0 74.9,-30.2 86.3,-48.1 9.3,-14.5 5.1,-33.7 -9.4,-43 -14.5,-9.3 -33.7,-5 -43,9.4 -0.1,0.2 -13.3,19.4 -33.9,19.4 -19.9,0 -32.3,-18 -33.2,-19.3 -9.1,-14.4 -28.2,-18.7 -42.7,-9.7C423.7,193.6 419.2,212.8 428.3,227.4z" />
    <path
        android:fillColor="#ffffff"
        android:pathData="M306,440.9c-9.2,14.5 -4.8,33.8 9.7,42.9l142.7,90.1L314.1,665.1c-14.5,9.2 -18.9,28.4 -9.7,42.9 5.9,9.4 16,14.5 26.3,14.5 5.7,0 11.4,-1.6 16.6,-4.8l135.7,-85.7 0,148c0,10.6 4,20.2 10.3,27.8 0.4,0.5 0.8,1 1.2,1.4 8.4,9.3 20.5,15.3 34.1,15.3 2.4,0 4.8,-0.3 7,-0.9 5.8,-0.9 11.4,-2.8 16.5,-5.8 0.8,-0.5 1.6,-1 2.3,-1.5l134,-96.2c12.7,-8.2 20.5,-22.2 20.6,-37.2 0,-15.5 -8.4,-30.1 -21.2,-37.7l-113,-71.4 110.6,-69.9c13.6,-8.1 22,-22.8 21.9,-38.3 -0.1,-15 -8,-29 -20.7,-37.1l-132.4,-94.4c-0.8,-0.6 -1.6,-1.1 -2.5,-1.6 -21,-12.1 -47.9,-6.1 -61.4,13.7 -2.5,3.7 -4.1,7.8 -4.8,11.9 -1.7,3.9 -2.7,8.1 -2.7,12.7l0,144.9 -134.1,-84.7C334.4,422 315.2,426.4 306,440.9zM545.3,746.4 L545.3,628.9l87.1,55L545.3,746.4zM630.7,465.1l-85.4,53.9L545.3,404.3 630.7,465.1z" />
</vector>
颜色值,在colors.xml中增加:
	<color name="orange">#FF5722</color>
    <color name="warm_yellow">#FFC107</color>
    <color name="dark_orange">#FF9800</color>
    <color name="light_orange">#FFF3E0</color>
    <color name="gray_white">#F8F8F8</color>
    <color name="gray">#989898</color>
这里给toolbar设置导航图标,点击这个导航到扫描页面,不过再次之前我们可以在base包下再创建一个BaseActivity,这里面可以写一些常用的函数,代码如下所示:
open class BaseActivity : AppCompatActivity() {


    private var context: Context? = null

    override fun onCreate(savedInstanceState: Bundle?) {


        super.onCreate(savedInstanceState)
        context = this
    }

    protected fun jumpActivity(clazz: Class<*>?, finish: Boolean = false) {


        startActivity(Intent(context, clazz))
        if (finish) finish()
    }

    protected fun back(toolbar: Toolbar, finish: Boolean = false) =
        toolbar.setNavigationOnClickListener {

     if (finish) finish() else onBackPressed() }

    protected fun showMsg(msg: CharSequence) =
        Toast.makeText(context, msg, Toast.LENGTH_SHORT).show()

	protected open fun isAndroid12() = Build.VERSION.SDK_INT >= Build.VERSION_CODES.S

    protected open fun hasAccessFineLocation() =
        hasPermission(Manifest.permission.ACCESS_FINE_LOCATION)

    protected open fun hasCoarseLocation() =
        hasPermission(Manifest.permission.ACCESS_COARSE_LOCATION)

    @RequiresApi(Build.VERSION_CODES.S)
    protected open fun hasBluetoothConnect() = hasPermission(Manifest.permission.BLUETOOTH_CONNECT)

    @RequiresApi(Build.VERSION_CODES.S)
    protected open fun hasBluetoothScan() = hasPermission(Manifest.permission.BLUETOOTH_SCAN)

    /**
     * 检查是有拥有某权限
     *
     * @param permission 权限名称
     * @return true 有  false 没有
     */
    protected open fun hasPermission(permission: String) = checkSelfPermission(permission) == PackageManager.PERMISSION_GRANTED

    /**
     * 蓝牙是否打开
     *
     * @return true or false
     */
    protected open fun isOpenBluetooth(): Boolean {


        (getSystemService(BLUETOOTH_SERVICE) as BluetoothManager).also {


            it.adapter ?: return false
            return it.adapter.isEnabled
        }
    }

    /**
     * 位置是否打开
     */
    protected open fun isOpenLocation(): Boolean {


        val locationManager = getSystemService(LOCATION_SERVICE) as LocationManager
        val gps = locationManager.isProviderEnabled(LocationManager.GPS_PROVIDER)
        val network = locationManager.isProviderEnabled(LocationManager.NETWORK_PROVIDER)
        val locationEnabled = isLocationEnabled()
        Log.d("TAG", "gps: $gps,network:$network,locationEnabled:$locationEnabled")
        return gps || network || locationEnabled
    }

    open fun isLocationEnabled(): Boolean {


        val locationMode = try {


            Settings.Secure.getInt(contentResolver, Settings.Secure.LOCATION_MODE)
        } catch (e: SettingNotFoundException) {


            e.printStackTrace()
            return false
        }
        return locationMode != Settings.Secure.LOCATION_MODE_OFF
    }
}
这里面就是一些比较基础的方法,在后面扫描页面会用到的,然后再修改一下MainActivity中的代码,继承BaseActivity,点击中跳转扫描页面:
class MainActivity : BaseActivity() {


    private val binding by viewBinding(ActivityMainBinding::inflate)

    override fun onCreate(savedInstanceState: Bundle?) {


        super.onCreate(savedInstanceState)
        setContentView(R.layout.activity_main)

        binding.toolbar.setNavigationOnClickListener {

     jumpActivity(ScanActivity::class.java) }
    }
}
为了保持一样的UI效果,下面更改一下themes.xml中的代码,如下所示:
<resources xmlns:tools="http://schemas.android.com/tools">
    <!-- Base application theme. -->
    <style name="Theme.GoodBle" parent="Theme.MaterialComponents.DayNight.NoActionBar">
        <!-- Primary brand color. -->
        <item name="colorPrimary">@color/orange</item>
        <item name="colorPrimaryVariant">@color/orange</item>
        <item name="colorOnPrimary">@color/white</item>
        <!-- Secondary brand color. -->
        <item name="colorSecondary">@color/light_orange</item>
        <item name="colorSecondaryVariant">@color/dark_orange</item>
        <item name="colorOnSecondary">@color/white</item>
        <!-- Status bar color. -->
        <item name="android:statusBarColor">?attr/colorPrimaryVariant</item>
        <!-- Customize your theme here. -->
        <item name="android:windowBackground">@color/gray_white</item>
    </style>

    <style name="BottomSheetDialogStyle" parent="Theme.Design.BottomSheetDialog">
        <item name="android:windowFrame">@null</item>
        <item name="android:windowIsFloating">true</item>
        <item name="android:windowIsTranslucent">true</item>
        <item name="android:background">@android:color/transparent</item>
        <item name="android:backgroundDimEnabled">true</item>
        <item name="android:colorBackground">@android:color/transparent</item>
    </style>
</resources>
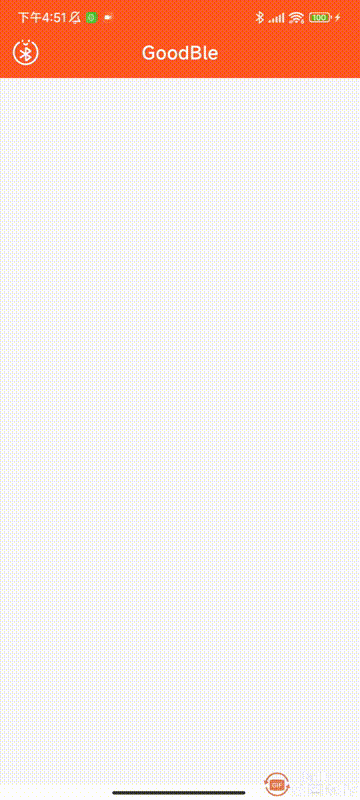
主要就是修改状态栏颜色,窗口默认背景颜色,现在前置的条件都准备的差不多了,运行一下看看MainActivity的页面效果。

二、扫描准备
下面在com.llw.goodble包下新建一个ble包,里面我们需要创建一些类来处理扫描的相关事务,首先在ble包下创建一个BleCore类,里面先不写内容,然后我们在ble包下新建一个scan包。在scan包下新建一个BleScanCallback接口,这是一个扫描回调接口,代码如下所示:
interface BleScanCallback {


    /**
     * 扫描结果
     */
    fun onScanResult(result: ScanResult)

    /**
     * 批量扫描结果
     */
    fun onBatchScanResults(results: List<ScanResult>) {

    }

    /**
     * 扫描错误
     */
    fun onScanFailed(failed: String) {

    }
}
同时在扫描页面需要监听一下蓝牙和定位是否打开,在scan包下添加一个广播接收器的ReceiverCallback 接口,代码如下所示:
interface ReceiverCallback {


    /**
     * 蓝牙关闭
     */
    fun bluetoothClose()

    /**
     * 位置关闭
     */
    fun locationClose()
}
下面在scan创建广播接收器ScanReceiver,代码如下所示:
class ScanReceiver : BroadcastReceiver() {


    private var callback: ReceiverCallback? = null

    fun setCallback(callback: ReceiverCallback?) {


        this.callback = callback
    }

    private var isSend = 0
    override fun onReceive(context: Context, intent: Intent) {


        val action = intent.action
        if (action == BluetoothAdapter.ACTION_STATE_CHANGED) {


            when (intent.getIntExtra(BluetoothAdapter.EXTRA_STATE, BluetoothAdapter.ERROR)) {


                BluetoothAdapter.STATE_OFF -> Log.d(TAG, "STATE_OFF Phone bluetooth off")
                BluetoothAdapter.STATE_TURNING_OFF -> {


                    callback!!.bluetoothClose()
                    Log.d(TAG, "STATE_TURNING_OFF Phone bluetooth is turning off")
                }
                BluetoothAdapter.STATE_ON -> Log.d(TAG, "STATE_ON Phone bluetooth turned on")
                BluetoothAdapter.STATE_TURNING_ON -> Log.d(TAG, "STATE_TURNING_ON Phone bluetooth is on")
            }
        } else if (action == LocationManager.PROVIDERS_CHANGED_ACTION) {


            if (!isGPSOpen(context)) {


                isSend++
                if (isSend == 1) {


                    Log.d(TAG, "Positioning off")
                    callback!!.locationClose()
                } else if (isSend == 4) {


                    isSend = 0
                }
            }
        }
    }

    companion object {


        val TAG: String = ScanReceiver::class.java.simpleName
        fun isGPSOpen(context: Context): Boolean {


            val locationMode = try {


                Settings.Secure.getInt(context.contentResolver, Settings.Secure.LOCATION_MODE)
            } catch (e: SettingNotFoundException) {


                e.printStackTrace()
                return false
            }
            return locationMode != Settings.Secure.LOCATION_MODE_OFF
        }
    }
}
这里的代码相对简单就是广播接收器接收相关的动作信息,再进行回调,然后我们写一个用于扫描类,在scan包下新建一个BleScan类,代码如下所示:
/**
 * 低功耗扫描类
 */
@SuppressLint("MissingPermission", "InlinedApi")
class BleScan private constructor(private val context: Context) {


    private var mScanFilters: List<ScanFilter>
    private var mScanSettings: ScanSettings
    private var bleScanCallback: BleScanCallback? = null
    var mIsScanning = false

    init {


        mScanFilters = ArrayList()
        mScanSettings = ScanSettings.Builder().build()
    }

    companion object {


        @SuppressLint("StaticFieldLeak")
        @Volatile
        private var instance: BleScan? = null

        private var mBluetoothAdapter: BluetoothAdapter? = null

        private var mScanner: BluetoothLeScanner? = null

        fun getInstance(context: Context) = instance ?: synchronized(this) {


            instance ?: BleScan(context).also {


                instance = it
                val manager = context.getSystemService(Context.BLUETOOTH_SERVICE) as BluetoothManager
                mBluetoothAdapter = manager.adapter
                if (mBluetoothAdapter != null) {


                    mScanner = mBluetoothAdapter?.bluetoothLeScanner
                }
            }
        }
    }

    /**
     * 设置扫描过滤
     */
    fun setScanFilters(scanFilters: List<ScanFilter>) {


        mScanFilters = scanFilters
    }

    /**
     * 设置扫描设置选项
     */
    fun setScanSettings(scanSettings: ScanSettings) {


        mScanSettings = scanSettings
    }

    /**
     * 设置扫描回调
     */
    fun setPhyScanCallback(bleScanCallback: BleScanCallback?) {


        this.bleScanCallback = bleScanCallback
    }

    fun isScanning() = mIsScanning

    /**
     * 扫描回调
     */
    private val scanCallback: ScanCallback = object : ScanCallback() {


        override fun onScanResult(callbackType: Int, result: ScanResult) {


            bleScanCallback?.onScanResult(result)
        }

        override fun onBatchScanResults(results: List<ScanResult>) {


            bleScanCallback?.onBatchScanResults(results)
        }

        override fun onScanFailed(errorCode: Int) {


            localScanFailed(
                when (errorCode) {


                    SCAN_FAILED_ALREADY_STARTED -> "Fails to start scan as BLE scan with the same settings is already started by the app."
                    SCAN_FAILED_APPLICATION_REGISTRATION_FAILED -> "Fails to start scan as app cannot be registered."
                    SCAN_FAILED_INTERNAL_ERROR -> "Fails to start scan due an internal error"
                    SCAN_FAILED_FEATURE_UNSUPPORTED -> "Fails to start power optimized scan as this feature is not supported."
                    else -> "UNKNOWN_ERROR"
                }
            )
        }
    }

    /**
     * 显示本地扫描错误
     */
    private fun localScanFailed(failed: String) = bleScanCallback?.onScanFailed(failed)

    /**
     * 开始扫描
     */
    @SuppressLint("MissingPermission")
    fun startScan() {


        if (!isOpenBluetooth()) {


            localScanFailed("Bluetooth is not turned on.")
            return
        }
        if (isAndroid12()) {


            if (!hasBluetoothScan()) {


                localScanFailed("Android 12 needs to dynamically request bluetooth scan permission.")
                return
            }
        } else {


            if (!hasAccessFineLocation()) {


                localScanFailed("Android 6 to 12 requires dynamic request location permission.")
                return
            }
        }
        if (mIsScanning) {


            localScanFailed("Currently scanning, please close the current scan and scan again.")
            return
        }
        if (mScanner == null) mScanner = mBluetoothAdapter?.bluetoothLeScanner
        if (!mBluetoothAdapter!!.isEnabled) {


            localScanFailed("Bluetooth not turned on.")
            return
        }
        mScanner?.startScan(mScanFilters, mScanSettings, scanCallback)
        mIsScanning = true
    }

    /**
     * 停止扫描
     */
    fun stopScan() {


        if (!mIsScanning) {


            localScanFailed("Not currently scanning, your stop has no effect.")
            return
        }
        if (mScanner == null) {


            localScanFailed("BluetoothLeScanner is Null.")
            return
        }
        if (!mBluetoothAdapter!!.isEnabled) {


            localScanFailed("Bluetooth not turned on.")
            return
        }
        mIsScanning = false
        mScanner?.stopScan(scanCallback)
    }

    /**
     * 是否打开蓝牙
     */
    private fun isOpenBluetooth() = if (mBluetoothAdapter == null) {


        localScanFailed("BluetoothAdapter is Null."); false
    } else mBluetoothAdapter!!.isEnabled

    private fun isAndroid12() = Build.VERSION.SDK_INT >= Build.VERSION_CODES.S

    private fun hasAccessFineLocation() = hasPermission(Manifest.permission.ACCESS_FINE_LOCATION)

    private fun hasBluetoothConnect() = hasPermission(Manifest.permission.BLUETOOTH_CONNECT)

    private fun hasBluetoothScan() = hasPermission(Manifest.permission.BLUETOOTH_SCAN)

    private fun hasPermission(permission: String) = context.checkSelfPermission(permission) == PackageManager.PERMISSION_GRANTED
}
这里首先是创建一个单例,在里面对当前类和一些变量进行初始化,核心就是一个扫描回调,开始和停止扫描的方法处理。因为后面还需要写Ble相关的数据处理,因此在ble包下创建一个BleCore类,代码如下所示:
class BleCore private constructor(private val context: Context) {


    @SuppressLint("StaticFieldLeak")
    companion object {


        @SuppressLint("StaticFieldLeak")
        @Volatile
        private var instance: BleCore? = null

        @SuppressLint("StaticFieldLeak")
        private lateinit var bleScan: BleScan

        fun getInstance(context: Context) = instance ?: synchronized(this) {


            instance ?: BleCore(context).also {


                instance = it
                //蓝牙扫描
                bleScan = BleScan.getInstance(context)
            }
        }
    }

    fun setPhyScanCallback(bleScanCallback: BleScanCallback) {


        bleScan.setPhyScanCallback(bleScanCallback)
    }

    fun isScanning() = bleScan.isScanning()

    fun startScan() = bleScan.startScan()

    fun stopScan() = bleScan.stopScan()
}
同样是一个单例,在里面初始化BleScan,然后增加几个函数去调用BleScan中的函数,最后我们在com.llw.goodble包下创建一个BleApp类,代码如下所示:
class BleApp : Application() {


    @SuppressLint("StaticFieldLeak")
    private lateinit var context: Context

    @SuppressLint("StaticFieldLeak")
    private lateinit var bleCore: BleCore

    override fun onCreate() {


        super.onCreate()
        context = applicationContext
        //初始化Ble核心库
        bleCore = BleCore.getInstance(this)
    }

    fun getBleCore() = bleCore
}
这里继承Application,通过自定义的方式在App启动的时候加载这个类,然后在onCreate()函数中,完成对于Ble核心类的初始化,顺便完成对于Ble扫描类的初始化。最后在AndroidManifest.xml中的application标签中配置这个BleApp,如下所示:
    <application
        android:name=".BleApp"
        ...>
三、扫描页面
在Android12及以上版本,使用蓝牙时需要请求扫描、连接权限、如果还需要使用手机作为从机的话,就请求广播权限,后面会提到的,同时在低版本Android中我们扫描蓝牙请求定位权限,那么首先我们就把权限的部分先做了。
首先声明静态权限,在AndroidManifest.xml中增加如下代码:
    <uses-permission android:name="android.permission.ACCESS_FINE_LOCATION" />
    <uses-permission android:name="android.permission.ACCESS_COARSE_LOCATION" />
    <uses-permission android:name="android.permission.BLUETOOTH" />
    <uses-permission android:name="android.permission.BLUETOOTH_ADMIN" />
    <uses-permission android:name="android.permission.BLUETOOTH_CONNECT" />
    <uses-permission android:name="android.permission.BLUETOOTH_SCAN" />

    <uses-feature android:name="android.hardware.bluetooth_le"/>
① 增加UI布局
动态权限请求有两种方式,一种是进入这个页面一下子请求多个权限,另一种是一个一个来请求,让你知道为什么会请求这个权限,这里我们选择第二种,因此需要增加一些布局xml,如下图所示的布局XML。

下面我们依次创建,lay_android12_should_connect.xml
<?xml version="1.0" encoding="utf-8"?>
<LinearLayout xmlns:android="http://schemas.android.com/apk/res/android"
    xmlns:app="http://schemas.android.com/apk/res-auto"
    android:id="@+id/request_location_lay"
    android:layout_width="match_parent"
    android:layout_height="match_parent"
    android:background="@color/gray_white"
    android:gravity="center"
    android:orientation="vertical"
    android:paddingStart="16dp"
    android:paddingEnd="16dp">

    <ImageView
        android:layout_width="wrap_content"
        android:layout_height="wrap_content"
        android:layout_gravity="center_horizontal"
        android:padding="16dp"
        android:src="@drawable/ic_bluetooth_connected" />

    <TextView
        android:layout_width="wrap_content"
        android:layout_height="wrap_content"
        android:text="需要蓝牙连接权限"
        android:textColor="@color/dark_orange"
        android:textSize="16sp" />

    <TextView
        android:layout_width="match_parent"
        android:layout_height="wrap_content"
        android:layout_marginTop="16dp"
        android:layout_marginBottom="16dp"
        android:text="从Android12.0开始,打开蓝牙之前需要请求此权限,使用蓝牙连接权限"
        app:titleTextColor="@color/black" />

    <com.google.android.material.button.MaterialButton
        android:id="@+id/btn_request_connect_permission"
        android:layout_width="wrap_content"
        android:layout_height="wrap_content"
        android:layout_gravity="center_horizontal"
        android:text="授予权限"
        android:textColor="@color/white" />
</LinearLayout>
用到一个图标ic_bluetooth_connected.xml
<?xml version="1.0" encoding="UTF-8" standalone="no"?>
<vector xmlns:android="http://schemas.android.com/apk/res/android"
    android:width="48dp"
    android:height="48dp"
    android:tint="@color/orange"
    android:viewportWidth="24.0"
    android:viewportHeight="24.0">

    <path
        android:fillColor="@android:color/white"
        android:pathData="M7,12l-2,-2 -2,2 2,2 2,-2zM17.71,7.71L12,2h-1v7.59L6.41,5 5,6.41 10.59,12 5,17.59 6.41,19 11,14.41L11,22h1l5.71,-5.71 -4.3,-4.29 4.3,-4.29zM13,5.83l1.88,1.88L13,9.59L13,5.83zM14.88,16.29L13,18.17v-3.76l1.88,1.88zM19,10l-2,2 2,2 2,-2 -2,-2z" />
</vector>
布局lay_android12_should_scan.xml
<?xml version="1.0" encoding="utf-8"?>
<LinearLayout xmlns:android="http://schemas.android.com/apk/res/android"
    xmlns:app="http://schemas.android.com/apk/res-auto"
    android:id="@+id/request_location_lay"
    android:layout_width="match_parent"
    android:layout_height="match_parent"
    android:background="@color/gray_white"
    android:gravity="center"
    android:orientation="vertical"
    android:paddingStart="16dp"
    android:paddingEnd="16dp">

    <ImageView
        android:layout_width="wrap_content"
        android:layout_height="wrap_content"
        android:layout_gravity="center_horizontal"
        android:padding="16dp"
        android:src="@drawable/ic_bluetooth_scan" />

    <TextView
        android:layout_width="wrap_content"
        android:layout_height="wrap_content"
        android:text="需要扫描权限"
        android:textColor="@color/dark_orange"
        android:textSize="16sp" />

    <TextView
        android:layout_width="match_parent"
        android:layout_height="wrap_content"
        android:layout_marginTop="16dp"
        android:layout_marginBottom="16dp"
        android:text="从Android12.0开始,扫描设备不再需要请求定位权限,使用此权限"
        app:titleTextColor="@color/black" />

    <com.google.android.material.button.MaterialButton
        android:id="@+id/btn_request_scan_permission"
        android:layout_width="wrap_content"
        android:layout_height="wrap_content"
        android:layout_gravity="center_horizontal"
        android:text="授予权限"
        android:textColor="@color/white" />
</LinearLayout>
图标ic_bluetooth_scan.xml
<?xml version="1.0" encoding="UTF-8" standalone="no"?>
<vector xmlns:android="http://schemas.android.com/apk/res/android"
    android:width="48dp"
    android:height="48dp"
    android:autoMirrored="true"
    android:tint="@color/orange"
    android:viewportWidth="24.0"
    android:viewportHeight="24.0">

    <path
        android:fillColor="@android:color/white"
        android:pathData="M14.24,12.01l2.32,2.32c0.28,-0.72 0.44,-1.51 0.44,-2.33 0,-0.82 -0.16,-1.59 -0.43,-2.31l-2.33,2.32zM19.53,6.71l-1.26,1.26c0.63,1.21 0.98,2.57 0.98,4.02s-0.36,2.82 -0.98,4.02l1.2,1.2c0.97,-1.54 1.54,-3.36 1.54,-5.31 -0.01,-1.89 -0.55,-3.67 -1.48,-5.19zM15.71,7.71L10,2L9,2v7.59L4.41,5 3,6.41 8.59,12 3,17.59 4.41,19 9,14.41L9,22h1l5.71,-5.71 -4.3,-4.29 4.3,-4.29zM11,5.83l1.88,1.88L11,9.59L11,5.83zM12.88,16.29L11,18.17v-3.76l1.88,1.88z" />
</vector>
布局lay_empty.xml:
<?xml version="1.0" encoding="utf-8"?>
<LinearLayout xmlns:android="http://schemas.android.com/apk/res/android"
    xmlns:app="http://schemas.android.com/apk/res-auto"
    android:layout_width="match_parent"
    android:layout_height="match_parent"
    android:gravity="center"
    android:orientation="vertical">

    <ImageView
        android:id="@+id/imageView"
        android:layout_width="100dp"
        android:layout_height="100dp"
        app:srcCompat="@mipmap/ic_scanning" />

    <TextView
        android:id="@+id/textView2"
        android:layout_width="wrap_content"
        android:layout_height="wrap_content"
        android:layout_marginTop="24dp"
        android:text="努力扫描中"
        android:textColor="@color/gray"
        android:textSize="18sp"
        android:textStyle="bold" />
</LinearLayout>
图标不是XML图片,去源码中获取,这是在扫描不到设备的时候显示的布局,布局lay_should_enable_bluetooth.xml。
<?xml version="1.0" encoding="utf-8"?>
<LinearLayout xmlns:android="http://schemas.android.com/apk/res/android"
    xmlns:app="http://schemas.android.com/apk/res-auto"
    android:layout_width="match_parent"
    android:layout_height="match_parent"
    android:background="@color/gray_white"
    android:gravity="center"
    android:orientation="vertical">

    <ImageView
        android:layout_width="wrap_content"
        android:layout_height="wrap_content"
        android:padding="16dp"
        app:srcCompat="@drawable/ic_bluetooth_disabled" />

    <TextView
        android:layout_width="wrap_content"
        android:layout_height="wrap_content"
        android:gravity="center_horizontal"
        android:text="蓝牙已禁用"
        android:textColor="@color/dark_orange"
        android:textSize="16sp" />

    <TextView
        android:layout_width="match_parent"
        android:layout_height="wrap_content"
        android:layout_marginTop="16dp"
        android:gravity="center_horizontal"
        android:text="蓝牙适配器已关闭,单击下面的按钮以启用它。"
        android:textColor="@color/black" />

    <com.google.android.material.button.MaterialButton
        android:id="@+id/btn_enable_bluetooth"
        android:layout_width="wrap_content"
        android:layout_height="wrap_content"
        android:layout_gravity="center_horizontal"
        android:layout_marginTop="16dp"
        android:text="启用"
        android:textColor="@color/white" />
</LinearLayout>
图标ic_bluetooth_disabled.xml
<vector xmlns:android="http://schemas.android.com/apk/res/android"
    android:width="48dp"
    android:height="48dp"
    android:viewportWidth="24.0"
    android:viewportHeight="24.0">
    <path
        android:fillColor="@color/orange"
        android:pathData="M13,5.83l1.88,1.88 -1.6,1.6 1.41,1.41 3.02,-3.02L12,2h-1v5.03l2,2v-3.2zM5.41,4L4,5.41 10.59,12 5,17.59 6.41,19 11,14.41V22h1l4.29,-4.29 2.3,2.29L20,18.59 5.41,4zM13,18.17v-3.76l1.88,1.88L13,18.17z" />
</vector>
布局lay_should_enable_location.xml
<?xml version="1.0" encoding="utf-8"?>
<LinearLayout xmlns:android="http://schemas.android.com/apk/res/android"
    xmlns:app="http://schemas.android.com/apk/res-auto"
    android:layout_width="match_parent"
    android:layout_height="match_parent"
    android:background="@color/gray_white"
    android:gravity="center"
    android:orientation="vertical">

    <ImageView
        android:layout_width="wrap_content"
        android:layout_height="wrap_content"
        android:layout_gravity="center_horizontal"
        android:padding="16dp"
        app:srcCompat="@drawable/ic_location_disabled" />

    <TextView
        android:layout_width="wrap_content"
        android:layout_height="wrap_content"
        android:text="位置已禁用"
        android:textColor="@color/dark_orange"
        android:textSize="16sp" />

    <TextView
        android:layout_width="match_parent"
        android:layout_height="wrap_content"
        android:layout_marginTop="16dp"
        android:gravity="center_horizontal"
        android:text="位置已关闭,单击下面的按钮以启用它。"
        android:textColor="@color/black" />

    <com.google.android.material.button.MaterialButton
        android:id="@+id/btn_enable_location"
        android:layout_width="wrap_content"
        android:layout_height="wrap_content"
        android:layout_gravity="center_horizontal"
        android:layout_marginTop="16dp"
        android:text="启用"
        android:textColor="@color/white" />
</LinearLayout>
图标ic_location_disabled.xml
<?xml version="1.0" encoding="UTF-8" standalone="no"?>
<vector xmlns:android="http://schemas.android.com/apk/res/android"
    android:width="48dp"
    android:height="48dp"
    android:tint="@color/orange"
    android:viewportWidth="24.0"
    android:viewportHeight="24.0">

    <path
        android:fillColor="@android:color/white"
        android:pathData="M20.94,11c-0.46,-4.17 -3.77,-7.48 -7.94,-7.94L13,1h-2v2.06c-1.13,0.12 -2.19,0.46 -3.16,0.97l1.5,1.5C10.16,5.19 11.06,5 12,5c3.87,0 7,3.13 7,7 0,0.94 -0.19,1.84 -0.52,2.65l1.5,1.5c0.5,-0.96 0.84,-2.02 0.97,-3.15L23,13v-2h-2.06zM3,4.27l2.04,2.04C3.97,7.62 3.25,9.23 3.06,11L1,11v2h2.06c0.46,4.17 3.77,7.48 7.94,7.94L11,23h2v-2.06c1.77,-0.2 3.38,-0.91 4.69,-1.98L19.73,21 21,19.73 4.27,3 3,4.27zM16.27,17.54C15.09,18.45 13.61,19 12,19c-3.87,0 -7,-3.13 -7,-7 0,-1.61 0.55,-3.09 1.46,-4.27l9.81,9.81z" />
</vector>
布局lay_should_location_lay.xml
<?xml version="1.0" encoding="utf-8"?>
<LinearLayout xmlns:android="http://schemas.android.com/apk/res/android"
    xmlns:app="http://schemas.android.com/apk/res-auto"
    android:id="@+id/request_location_lay"
    android:layout_width="match_parent"
    android:layout_height="match_parent"
    android:background="@color/gray_white"
    android:gravity="center"
    android:orientation="vertical"
    android:paddingStart="16dp"
    android:paddingEnd="16dp">

    <ImageView
        android:layout_width="wrap_content"
        android:layout_height="wrap_content"
        android:layout_gravity="center_horizontal"
        android:padding="16dp"
        android:src="@drawable/ic_location_off" />

    <TextView
        android:layout_width="wrap_content"
        android:layout_height="wrap_content"
        android:text="需要位置许可"
        android:textColor="@color/dark_orange"
        android:textSize="16sp" />

    <TextView
        android:layout_width="match_parent"
        android:layout_height="wrap_content"
        android:layout_marginTop="16dp"
        android:layout_marginBottom="16dp"
        android:text="从 Android 6.0 Marshmallow 开始,应用程序需要位置权限才能扫描低功耗蓝牙设备。" />

    <com.google.android.material.button.MaterialButton
        android:id="@+id/btn_request_location_permission"
        android:layout_width="wrap_content"
        android:layout_height="wrap_content"
        android:layout_gravity="center_horizontal"
        android:text="授予权限"
        android:textColor="@color/white" />
</LinearLayout>
图标ic_location_off.xml
<vector xmlns:android="http://schemas.android.com/apk/res/android"
    android:width="48dp"
    android:height="48dp"
    android:viewportWidth="24.0"
    android:viewportHeight="24.0">
    <path
        android:fillColor="@color/orange"
        android:pathData="M12,6.5c1.38,0 2.5,1.12 2.5,2.5 0,0.74 -0.33,1.39 -0.83,1.85l3.63,3.63c0.98,-1.86 1.7,-3.8 1.7,-5.48 0,-3.87 -3.13,-7 -7,-7 -1.98,0 -3.76,0.83 -5.04,2.15l3.19,3.19c0.46,-0.52 1.11,-0.84 1.85,-0.84zM16.37,16.1l-4.63,-4.63 -0.11,-0.11L3.27,3 2,4.27l3.18,3.18C5.07,7.95 5,8.47 5,9c0,5.25 7,13 7,13s1.67,-1.85 3.38,-4.35L18.73,21 20,19.73l-3.63,-3.63z" />
</vector>
好了,在我们的努力下这些布局总算是创建完成了,下面我们将它们放置到activity_scan.xml中,代码如下所示:
<?xml version="1.0" encoding="utf-8"?>
<RelativeLayout xmlns:android="http://schemas.android.com/apk/res/android"
    xmlns:app="http://schemas.android.com/apk/res-auto"
    xmlns:tools="http://schemas.android.com/tools"
    android:layout_width="match_parent"
    android:layout_height="match_parent"
    tools:context=".ScanActivity">

    <com.google.android.material.appbar.MaterialToolbar
        android:id="@+id/toolbar"
        android:layout_width="match_parent"
        android:layout_height="?attr/actionBarSize"
        android:background="@color/orange"
        app:title="选择蓝牙设备"
        app:titleTextColor="@color/white">

        <TextView
            android:id="@+id/tv_scan_status"
            android:layout_width="wrap_content"
            android:layout_height="wrap_content"
            android:layout_gravity="end"
            android:layout_marginEnd="6dp"
            android:padding="10dp"
            android:text="搜索"
            android:textColor="@color/white"
            android:textSize="14sp"
            android:visibility="gone" />

    </com.google.android.material.appbar.MaterialToolbar>

    <ProgressBar
        android:id="@+id/pb_scan_loading"
        style="?android:attr/progressBarStyleHorizontal"
        android:layout_width="match_parent"
        android:layout_height="wrap_content"
        android:layout_alignBottom="@+id/toolbar"
        android:layout_marginBottom="-10dp"
        android:indeterminate="true"
        android:indeterminateTint="@color/orange"
        android:visibility="invisible" />

    <!--设备列表-->
    <androidx.recyclerview.widget.RecyclerView
        android:id="@+id/rv_device"
        android:layout_width="match_parent"
        android:layout_height="match_parent"
        android:layout_below="@+id/toolbar"
        android:layout_marginTop="4dp"
        android:overScrollMode="never" />

    <!--未扫描到设备时显示-->
    <include
        android:id="@+id/empty_lay"
        layout="@layout/lay_empty"
        android:layout_width="match_parent"
        android:layout_height="match_parent"
        android:layout_below="@id/toolbar" />

    <!-- Android 12蓝牙扫描权限为许可时显示 Shell_Unresponsive-->
    <include
        android:id="@+id/request_bluetooth_scan_lay"
        layout="@layout/lay_android12_should_scan"
        android:layout_width="match_parent"
        android:layout_height="match_parent"
        android:layout_below="@id/toolbar"
        android:visibility="gone" />

    <!--Android 6 至 11 没有打开位置开关 无法扫描蓝牙-->
    <include
        android:id="@+id/enable_location_lay"
        layout="@layout/lay_should_enable_location"
        android:layout_width="match_parent"
        android:layout_height="match_parent"
        android:layout_below="@id/toolbar"
        android:visibility="gone" />

    <!-- 位置权限未许可时显示 -->
    <include
        android:id="@+id/request_location_lay"
        layout="@layout/lay_should_location_lay"
        android:layout_width="match_parent"
        android:layout_height="match_parent"
        android:layout_below="@id/toolbar"
        android:visibility="gone" />

    <!-- 手机蓝牙未开启时显示 -->
    <include
        android:id="@+id/enable_bluetooth_lay"
        layout="@layout/lay_should_enable_bluetooth"
        android:layout_width="match_parent"
        android:layout_height="match_parent"
        android:layout_below="@id/toolbar"
        android:visibility="gone" />

    <!-- Android12 开启蓝牙需要先请求蓝牙连接权限 -->
    <include
        android:id="@+id/request_bluetooth_connect_lay"
        layout="@layout/lay_android12_should_connect"
        android:layout_width="match_parent"
        android:layout_height="match_parent"
        android:layout_below="@id/toolbar"
        android:visibility="gone" />

</RelativeLayout>
下面我们可以写代码了,在ScanActivity中,
② 点击监听
首先是ScanActivity的一些基本配置,如下所示:
class ScanActivity : BaseActivity() {


    private val TAG = ScanActivity::class.java.simpleName

    private val binding by viewBinding(ActivityScanBinding::inflate)

    override fun onCreate(savedInstanceState: Bundle?) {


        super.onCreate(savedInstanceState)
        setContentView(R.layout.activity_scan)
    }
}
然后增加布局中按钮的点击监听,创建一个initView()函数,在onCreate()中调用它,代码如下所示:
    override fun onCreate(savedInstanceState: Bundle?) {


        super.onCreate(savedInstanceState)
        setContentView(R.layout.activity_scan)

        initView()
    }

    private fun initView() {


        binding.requestBluetoothConnectLay.btnRequestConnectPermission.setOnClickListener(this)
        binding.enableBluetoothLay.btnEnableBluetooth.setOnClickListener(this)
        binding.requestLocationLay.btnRequestLocationPermission.setOnClickListener(this)
        binding.enableLocationLay.btnEnableLocation.setOnClickListener(this)
        binding.requestBluetoothScanLay.btnRequestScanPermission.setOnClickListener(this)
        binding.toolbar.setOnClickListener(this)
        binding.tvScanStatus.setOnClickListener(this)
    }
然后实现点击监听
class ScanActivity : BaseActivity(), View.OnClickListener
重写onClick()函数,代码如下所示:
    override fun onClick(v: View) {


        when (v.id) {


            //请求蓝牙连接权限
            R.id.btn_request_connect_permission -> {

    }
            //打开蓝牙开关
            R.id.btn_enable_bluetooth -> {

    }
            //请求定位权限
            R.id.btn_request_location_permission -> {

    }
            //打开位置开关
            R.id.btn_enable_location -> {

    }
            //请求蓝牙扫描权限
            R.id.btn_request_scan_permission -> {

    }
            //扫描或停止扫描
            R.id.tv_scan_status -> {

    }
            else -> {

    }
        }
    }
在这里我们先不写内容,后面再完善,然后我们可以先处理权限,再重写Activity的onResume()函数,代码如下所示:
    override fun onResume() {


        super.onResume()
        if (isAndroid12()) {


            //蓝牙连接
            binding.requestBluetoothConnectLay.root.visibility = if (hasBluetoothConnect()) View.GONE else View.VISIBLE
            if (!hasBluetoothConnect()) {


                Log.d(TAG, "onResume: 未获取蓝牙连接权限")
                return
            }
            //打开蓝牙开关
            binding.enableBluetoothLay.root.visibility = if (isOpenBluetooth()) View.GONE else View.VISIBLE
            if (!isOpenBluetooth()) {


                Log.d(TAG, "onResume: 未打开蓝牙")
                return
            }
            //蓝牙扫描
            binding.requestBluetoothScanLay.root.visibility = if (hasBluetoothScan()) View.GONE else View.VISIBLE
            if (!hasBluetoothScan()) {


                Log.d(TAG, "onResume: 未获取蓝牙扫描权限")
                return
            }
        }
        //打开蓝牙
        binding.enableBluetoothLay.root.visibility = if (isOpenBluetooth()) View.GONE else View.VISIBLE
        if (!isOpenBluetooth()) {


            Log.d(TAG, "onResume: 未打开蓝牙")
            return
        }
        //打开定位
        binding.enableLocationLay.root.visibility = if (isOpenLocation()) View.GONE else View.VISIBLE
        if (!isOpenLocation()) {


            Log.d(TAG, "onResume: 未打开位置")
            return
        }
        //请求定位
        binding.requestLocationLay.root.visibility = if (hasCoarseLocation() && hasAccessFineLocation()) View.GONE else View.VISIBLE
        if (!hasAccessFineLocation()) {


            Log.d(TAG, "onResume: 未获取定位权限")
            return
        }
        binding.tvScanStatus.visibility = View.VISIBLE
        //开始扫描

    }
③ 扫描处理
在这个函数中对activity_scan.xml中引入的布局判断是否显示,在请求权限或者是打开开关之后都会触发这个函数,然后进行检查,当所有检查都通过之后说明你可以开始扫描了。那么如果要扫描,我们需要得到BleCore的对象,先声明,然后在onCreate中进行实例化。
    private lateinit var bleCore: BleCore

    override fun onCreate(savedInstanceState: Bundle?) {


        ...

        bleCore = (application as BleApp).getBleCore()
    }
下面我们可以写扫描相关的方法,代码如下所示:
    private fun startScan() {


        bleCore?.startScan()
        binding.tvScanStatus.text = "停止"
        binding.pbScanLoading.visibility = View.VISIBLE
    }

    private fun stopScan() {


        bleCore?.stopScan()
        binding.tvScanStatus.text = "搜索"
        binding.pbScanLoading.visibility = View.INVISIBLE
    }
这里就是开始和停止扫描,别忘了还有扫描回调,这个回调应该写在哪里,首先是在onCreate()函数中,代码如下:
    override fun onCreate(savedInstanceState: Bundle?) {


        ...
        //设置扫描回调
        if (isOpenBluetooth()) bleCore!!.setPhyScanCallback(this@ScanActivity)
    }
这里还判断了一下是否开启蓝牙,扫描的结果需要实现BleScanCallback接口,如下所示:
class ScanActivity : BaseActivity(), View.OnClickListener, BleScanCallback
重写onScanResult()函数,如下所示:
    /**
     * 扫描回调
     */
    override fun onScanResult(result: ScanResult) {


    }
④ 广播处理
然后别忘记了我们还有一个广播处理,在onCreate()函数中进行广播注册,代码如下所示:
    override fun onCreate(savedInstanceState: Bundle?) {


		...
        //注册广播
        registerReceiver(
            ScanReceiver().apply {

     setCallback(this@ScanActivity) },
            IntentFilter().apply {


                addAction(BluetoothAdapter.ACTION_STATE_CHANGED)
                addAction(LocationManager.PROVIDERS_CHANGED_ACTION)
            })
    }
实现接口ReceiverCallback,代码如下所示:
class ScanActivity : BaseActivity(), View.OnClickListener, BleScanCallback, ReceiverCallback
重写里面的函数,代码如下所示:
    /**
     * 蓝牙关闭
     */
    override fun bluetoothClose() {


    }

    /**
     * 位置关闭
     */
    override fun locationClose() {


    }
四、权限处理
下面我们进行权限和开关的请求处理,在ScanActivity中新增如下代码:
    //蓝牙连接权限
    private val requestConnect =
        registerForActivityResult(ActivityResultContracts.RequestPermission()) {


            showMsg(if (it) "可以打开蓝牙" else "Android12 中不授予此权限无法打开蓝牙")
        }

    //启用蓝牙
    private val enableBluetooth =
        registerForActivityResult(ActivityResultContracts.StartActivityForResult()) {

     result ->
            if (result.resultCode == Activity.RESULT_OK) {


                showMsg("蓝牙已打开")
                Log.d(TAG, ": 蓝牙已打开")
                bleCore.setPhyScanCallback(this@ScanActivity)
            }
        }

    //请求定位
    private val requestLocation =
        registerForActivityResult(ActivityResultContracts.RequestMultiplePermissions()) {

     result ->
            val coarseLocation = result[Manifest.permission.ACCESS_COARSE_LOCATION]
            val fineLocation = result[Manifest.permission.ACCESS_FINE_LOCATION]
            if (coarseLocation == true && fineLocation == true) {


                //开始扫描设备
                showMsg("定位权限已获取")
                if (isOpenBluetooth()) bleCore.setPhyScanCallback(this@ScanActivity)
            }
        }

    //启用定位
    private val enableLocation =
        registerForActivityResult(ActivityResultContracts.StartActivityForResult()) {

     result ->
            if (result.resultCode == Activity.RESULT_OK) {


                showMsg("位置已打开")
                Log.d(TAG, ": 位置已打开")
                if (isOpenBluetooth()) bleCore.setPhyScanCallback(this@ScanActivity)
            }
        }

    //蓝牙连接权限
    private val requestScan =
        registerForActivityResult(ActivityResultContracts.RequestPermission()) {


            showMsg(if (it) "可以开始扫描设备了" else "Android12 Android12 中不授予此权限无法扫描蓝牙")
        }
这里使用了Activity Result API,需要注意的是它们是与onCreate()函数平级的,下面修改onClick()函数中的代码:
    override fun onClick(v: View) {


        when (v.id) {


            //请求蓝牙连接权限
            R.id.btn_request_connect_permission -> if (isAndroid12()) requestConnect.launch(Manifest.permission.BLUETOOTH_CONNECT)
            //打开蓝牙开关
            R.id.btn_enable_bluetooth -> enableBluetooth.launch(Intent(BluetoothAdapter.ACTION_REQUEST_ENABLE))
            //请求定位权限
            R.id.btn_request_location_permission -> requestLocation.launch(
                arrayOf(
                    Manifest.permission.ACCESS_COARSE_LOCATION,
                    Manifest.permission.ACCESS_FINE_LOCATION
                )
            )
            //打开位置开关
            R.id.btn_enable_location -> enableLocation.launch(Intent(Settings.ACTION_LOCATION_SOURCE_SETTINGS))
            //请求蓝牙扫描权限
            R.id.btn_request_scan_permission -> if (isAndroid12()) requestScan.launch(Manifest.permission.BLUETOOTH_SCAN)
            //扫描或停止扫描
            R.id.tv_scan_status -> if (bleCore.isScanning()) stopScan() else startScan()
            else -> {

    }
        }
    }
这里就比较的简单了,下面再修改bluetoothClose()和locationClose()函数,在回调时都判断当前是否正在扫描,在扫描则停止,同时显示对应的布局。
    override fun bluetoothClose() {


        //蓝牙关闭时停止扫描
        if (bleCore.isScanning()) {


            stopScan()
            binding.enableBluetoothLay.root.visibility = View.VISIBLE
        }
    }

    override fun locationClose() {


        //位置关闭时停止扫描
        if (bleCore.isScanning()) {


            stopScan()
            binding.enableLocationLay.root.visibility = View.VISIBLE
        }
    }
最后再增加一个onStop()函数,代码如下:
    override fun onStop() {


        super.onStop()
        //页面停止时停止扫描
        if (bleCore.isScanning()) stopScan()
    }
当页面销毁了或者是进入后台了,那么触发回调,停止扫描。
五、扫描结果
要显示扫描结果,首先要做的是定义一个类去装载扫描结果,在ble包下新建一个BleDevice数据类,代码如下所示:
data class BleDevice(
    var realName: String? = "Unknown device", //蓝牙设备真实名称
    var macAddress: String, //蓝牙设备Mac地址
    var rssi: Int, //信号强度
    var device: BluetoothDevice,//蓝牙设备
    var gatt: BluetoothGatt? = null//gatt
)
扫描的结果我们可以用列表来展示,选择使用RecyclerView,那么相应的会使用到适配器。
① 列表适配器
首先创建适配器的布局,在layout下新建一个item_device_rv.xml,代码如下所示:
<?xml version="1.0" encoding="utf-8"?>
<androidx.constraintlayout.widget.ConstraintLayout xmlns:android="http://schemas.android.com/apk/res/android"
    xmlns:app="http://schemas.android.com/apk/res-auto"
    xmlns:tools="http://schemas.android.com/tools"
    android:id="@+id/item_device"
    android:layout_width="match_parent"
    android:layout_height="wrap_content"
    android:layout_marginBottom="1dp"
    android:background="@color/white"
    android:foreground="?attr/selectableItemBackground"
    android:orientation="vertical">

    <ImageView
        android:id="@+id/imageView2"
        android:layout_width="wrap_content"
        android:layout_height="wrap_content"
        android:layout_marginStart="16dp"
        android:src="@drawable/ic_bluetooth_blue"
        app:layout_constraintBottom_toBottomOf="parent"
        app:layout_constraintStart_toStartOf="parent"
        app:layout_constraintTop_toTopOf="parent" />

    <TextView
        android:id="@+id/tv_device_name"
        android:layout_width="wrap_content"
        android:layout_height="wrap_content"
        android:layout_marginStart="16dp"
        android:layout_marginTop="8dp"
        android:ellipsize="end"
        android:singleLine="true"
        android:text="设备名称"
        android:textColor="@color/black"
        android:textSize="16sp"
        app:layout_constraintStart_toEndOf="@+id/imageView2"
        app:layout_constraintTop_toTopOf="parent" />

    <TextView
        android:id="@+id/tv_mac_address"
        android:layout_width="wrap_content"
        android:layout_height="wrap_content"
        android:layout_marginBottom="8dp"
        android:ellipsize="end"
        android:singleLine="true"
        android:text="Mac地址"
        android:textSize="12sp"
        app:layout_constraintBottom_toBottomOf="parent"
        app:layout_constraintStart_toStartOf="@+id/tv_device_name"
        app:layout_constraintTop_toBottomOf="@+id/tv_device_name" />

    <TextView
        android:id="@+id/tv_rssi"
        android:layout_width="wrap_content"
        android:layout_height="wrap_content"
        android:layout_marginEnd="16dp"
        android:text="信号强度"
        android:textSize="12sp"
        app:layout_constraintBottom_toBottomOf="parent"
        app:layout_constraintEnd_toEndOf="parent"
        app:layout_constraintTop_toTopOf="parent" />

</androidx.constraintlayout.widget.ConstraintLayout>
这里的内容不多,主要内容就是设备名称、地址、信号强度,下面我们创建适配器,在com.llw.goodble包下新建一个adapter包,该包下新建一个OnItemClickListener接口,用于实现Item的点击监听,代码如下所示:
interface OnItemClickListener {


    fun onItemClick(view: View?, position: Int)
}
下面我们写适配器,在adapter包下新建一个BleDeviceAdapter类,代码如下所示:
class BleDeviceAdapter(
    private val mDevices: List<BleDevice>
) : RecyclerView.Adapter<BleDeviceAdapter.ViewHolder>() {


    private var mOnItemClickListener: OnItemClickListener? = null

    fun setOnItemClickListener(mOnItemClickListener: OnItemClickListener?) {


        this.mOnItemClickListener = mOnItemClickListener
    }

    override fun onCreateViewHolder(parent: ViewGroup, viewType: Int): ViewHolder {


        val viewHolder = ViewHolder(ItemDeviceRvBinding.inflate(LayoutInflater.from(parent.context), parent, false))
        viewHolder.binding.itemDevice.setOnClickListener {

     v ->
            if (mOnItemClickListener != null) mOnItemClickListener!!.onItemClick(v, viewHolder.adapterPosition)
        }
        return viewHolder
    }

    override fun onBindViewHolder(holder: ViewHolder, position: Int) {


        val bleDevice: BleDevice = mDevices[position]
        val rssi: Int = bleDevice.rssi
        holder.binding.tvRssi.text = String.format(Locale.getDefault(), "%d dBm", rssi)
        //设备名称
        holder.binding.tvDeviceName.text = bleDevice.realName
        //Mac地址
        holder.binding.tvMacAddress.text = bleDevice.macAddress
    }

    override fun getItemCount() = mDevices.size

    class ViewHolder(itemView: ItemDeviceRvBinding) : RecyclerView.ViewHolder(itemView.root) {


        var binding: ItemDeviceRvBinding

        init {


            binding = itemView
        }
    }
}
这里就是基本的写法,结合了ViewBinding,在onBindViewHolder()中进行数据渲染,那么适配器就写好了,下面我们回到ScanActivity中,去完成后的扫描结果显示。
② 扫描结果处理
首先我们声明变量,在ScanActivity中增加如下代码:
    private var mAdapter: BleDeviceAdapter? = null

    //设备列表
    private val mList: MutableList<BleDevice> = mutableListOf()

    private fun findIndex(bleDevice: BleDevice, mList: MutableList<BleDevice>): Int {


        var index = 0
        for (devi in mList) {


            if (bleDevice.macAddress.contentEquals(devi.macAddress)) return index
            index += 1
        }
        return -1
    }
这个findIndex()函数用于在列表中找是否有添加过设备,下面修改扫描的回调函数onScanResult(),代码如下所示:
    override fun onScanResult(result: ScanResult) {


        if (result.scanRecord!!.deviceName == null) return
        if (result.scanRecord!!.deviceName!!.isEmpty()) return
        val bleDevice = BleDevice(
            result.scanRecord!!.deviceName,
            result.device.address,
            result.rssi,
            result.device
        )
        Log.d(TAG, "onScanResult: ${

      bleDevice.macAddress}")
        if (mList.size == 0) {


            mList.add(bleDevice)
        } else {


            val index = findIndex(bleDevice, mList)
            if (index == -1) {


                //添加新设备
                mList.add(bleDevice)
            } else {


                //更新已有设备的rssi
                mList[index].rssi = bleDevice.rssi
            }
        }
        //如果未扫描到设备,则显示空内容布局
        binding.emptyLay.root.visibility = if (mList.size == 0) View.VISIBLE else View.GONE
        //如果mAdapter为空则会执行run{}中的代码,进行相关配置,最终返回配置的结果mAdapter
        mAdapter ?: run {


            mAdapter = BleDeviceAdapter(mList)
            binding.rvDevice.apply {


                (itemAnimator as SimpleItemAnimator).supportsChangeAnimations = false
                layoutManager = LinearLayoutManager(this@ScanActivity)
                adapter = mAdapter
            }
            mAdapter!!.setOnItemClickListener(this@ScanActivity)
            mAdapter
        }
        mAdapter!!.notifyDataSetChanged()
    }
那么在开始扫描的时候我们最好清理一下列表,修改一下startScan()函数,代码如下所示:
    private fun startScan() {


        mList.clear()
        mAdapter?.notifyDataSetChanged()
        bleCore.startScan()
        binding.tvScanStatus.text = "停止"
        binding.pbScanLoading.visibility = View.VISIBLE
    }
同时在扫描回调中还有一个适配器的Item点击监听,先实现它,修改代码:
class ScanActivity : BaseActivity(), View.OnClickListener, BleScanCallback, ReceiverCallback,
    OnItemClickListener {
重写onItemClick()函数,代码如下:
    override fun onItemClick(view: View?, position: Int) {


        if (bleCore.isScanning()) stopScan()
        //选中设备处理
        val intent = Intent()
        intent.putExtra("device", mList[position].device)
        setResult(RESULT_OK, intent)
        finish()
    }
我们是通过MainActivity进入到ScanActivity的,那么在选中设备之后将设备对象返回并销毁当前页面。ScanActivity中还有最后一个修改的地方,那就是在onResume()函数中增加开始扫描的代码,代码如下所示:
    override fun onResume() {


       	...
       	//开始扫描
        if (!bleCore.isScanning()) startScan()
    }
这里的意思就是当进入页面检查到条件都满足时就开始扫描。
③ 接收结果
最后我们在MainActivity中接收结果,修改代码如下所示:
class MainActivity : BaseActivity() {


    private val binding by viewBinding(ActivityMainBinding::inflate)

    @SuppressLint("MissingPermission")
    private val scanIntent =
        registerForActivityResult(ActivityResultContracts.StartActivityForResult()) {

     result ->
            if (result.resultCode == Activity.RESULT_OK) {


                if (result.data == null) return@registerForActivityResult
                //获取选中的设备
                val device = if (Build.VERSION.SDK_INT >= Build.VERSION_CODES.TIRAMISU) {


                    result.data!!.getParcelableExtra("device", BluetoothDevice::class.java)
                } else {


                    result.data!!.getParcelableExtra("device") as BluetoothDevice?
                }
                showMsg("${

      device?.name} , ${

      device?.address}")
            }
        }

    override fun onCreate(savedInstanceState: Bundle?) {


        super.onCreate(savedInstanceState)
        setContentView(R.layout.activity_main)

        binding.toolbar.setNavigationOnClickListener {

     scanIntent.launch(Intent(this,ScanActivity::class.java)) }
    }
}
下面我们运行一下:
六、源码
如果对你有所帮助的话,不妨 Star 或 Fork,山高水长,后会有期~
源码地址:GoodBle