ubuntu18 pwn环境基本配置
第一步 更换镜像源
由于ubuntu自身的镜像源比较慢,所以我们应该优先更改镜像源。但是ubuntu自身并不带文本编辑工具vim,所以我们优先下载vim
sudo apt install vim
然后我们编辑 /etc/apt/sources.list,输入命令
sudo vim /etc/apt/sources.list
阿里云部分相关镜像源如下:
deb http://mirrors.aliyun.com/ubuntu/ bionic main restricted universe multiverse
deb-src http://mirrors.aliyun.com/ubuntu/ bionic main restricted universe multiverse

deb http://mirrors.aliyun.com/ubuntu/ bionic-security main restricted universe multiverse
deb-src http://mirrors.aliyun.com/ubuntu/ bionic-security main restricted universe multiverse

deb http://mirrors.aliyun.com/ubuntu/ bionic-updates main restricted universe multiverse
deb-src http://mirrors.aliyun.com/ubuntu/ bionic-updates main restricted universe multiverse

deb http://mirrors.aliyun.com/ubuntu/ bionic-proposed main restricted universe multiverse
deb-src http://mirrors.aliyun.com/ubuntu/ bionic-proposed main restricted universe multiverse

deb http://mirrors.aliyun.com/ubuntu/ bionic-backports main restricted universe multiverse
deb-src http://mirrors.aliyun.com/ubuntu/ bionic-backports main restricted universe multiverse
阿里云网址如下:阿里云镜像源
第二步 安装pwntools
官方文档 pwntools
Python3
$ apt-get update
$ apt-get install python3 python3-pip python3-dev git libssl-dev libffi-dev build-essential
$ python3 -m pip install --upgrade pip
$ python3 -m pip install --upgrade pwntools
python2
$ apt-get update
$ apt-get install python python-pip python-dev git libssl-dev libffi-dev build-essential
$ python2 -m pip install --upgrade pip==20.3.4
$ python2 -m pip install --upgrade pwntools
第三步 安装gdb插件pwndbg
“工欲善其事,必先利其器。”安装合适的插件,可以让我们的调试更加方便。
安装pwndbg
git clone https:github.com/pwndbg/pwndbg.git
cd pwndbg	# 进入文件夹
sudo ./setup.sh		# 运行配置文件进行配置
如果是第一次安装插件,会自动配置该插件。如果不是第一次或是其他情况,我们需要手动切换对应插件位pwndbg:
vim ~/.gdbinit
source /pwndbg安装路径/pwndbg/gdbinit.py
下面给出大佬的pwndbg基本使用教程:pwndbg大佬详细教程
第四步 安装LibcSearcher
我们在做栈溢出相关习题时,经常会遇到构造ROP链的情况。若我们在IDA反编译之后没有看到system函数,栈题大概率需要泄漏libc库中的函数,此时,LibcSearcher就是最好的选择,可以用它找到偏移地址
安装LibcSearcher
git clone https://github.com/lieanu/LibcSearcher.git
cd LibcSearcher
python setup.py develop
第五步 安装one_gadget
one_gadget可以用来动态查找执行libc动态库中的system执行函数,可以一步到位。在做相关堆题时尤为有效。不过,需要注意one_gadget相关限制条件。
sudo apt install ruby
sudo gem install one_gadget
第六步 安装glibc-all-in-one
在做堆题时,经常遇到不同版本的libc,这时glibc-all-in-one可以很好的派上用场,动态更改elf文件libc版本
git clone https://github.com/matrix1001/glibc-all-in-one.git
下载完成后,可以进行如下操作
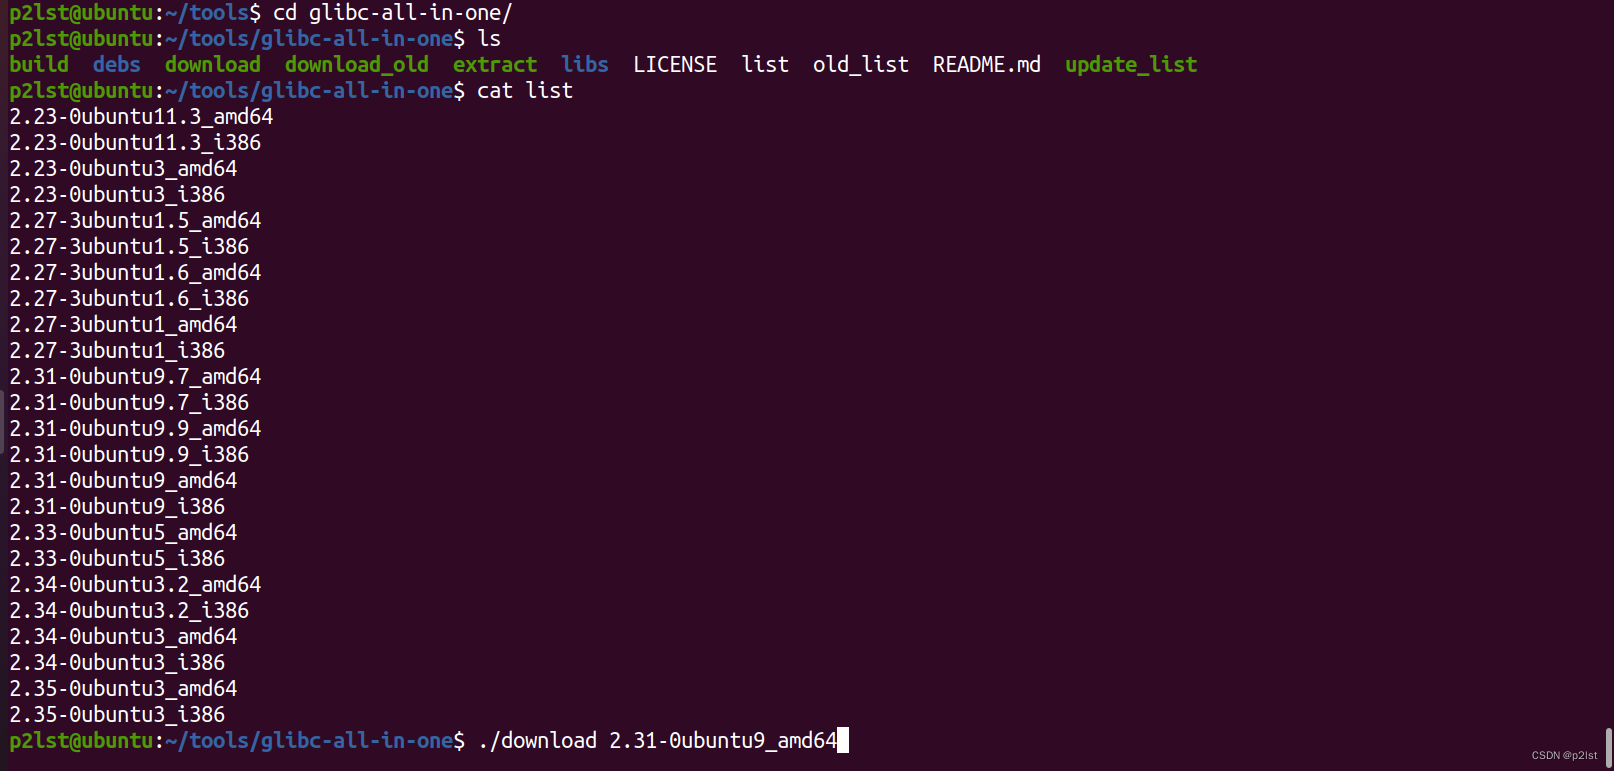
cd glibc-all-in-one
./update_list
cat list
./download 需要的libc版本
详细过程如下图所示
第七步 安装patchelf
上述glibc-all-in-one提供了不同glibc版本的libc.so以及ld-libc.so,具体我们需要使用patchelf更换elf文件的libc。
话不多说,直接安装patchelf
sudo apt install patchelf
更换libc版本
patchelf --set-interpreter  /lib64/ld-2.27.so.2 ./pwn
patchelf --set-rpath ./libc-2.27.so ./pwn
总结
我们在做pwn相关习题时,一定要掌握以上工具的用法。只有在掌握了相关工具的使用技巧,我们才能将注意力放在题解上。最后,希望大家能够成为一个合格的pwn选手。
参考文章:
https://blog.csdn.net/qq_44108455/article/details/105458234
https://blog.csdn.net/yongbaoii/article/details/109101822
https://bbs.pediy.com/thread-257558.htm