设想-巴发云
我想做一个人体红外传感器发现人体报警,同时给我手机发报警提醒,同时发送图片的设计,找了一些资料,发现巴发云正好可以满足我的要求,结合esp32-cam和人体红外传感器,很好的实现了。代码如下:
/*
 * 2020-07-07
 * QQ交流群:824273231
 * 微信:19092550573
 * 官网https://bemfa.com
 *
 *此版本需要json库,再arduino IDE 选项栏,点击“工具”-->"管理库"-->搜索arduinojson 第一个库就是,点击安装即可
 *
分辨率默认配置:config.frame_size = FRAMESIZE_UXGA;
其他配置:
FRAMESIZE_UXGA (1600 x 1200)
FRAMESIZE_QVGA (320 x 240)
FRAMESIZE_CIF (352 x 288)
FRAMESIZE_VGA (640 x 480)
FRAMESIZE_SVGA (800 x 600)
FRAMESIZE_XGA (1024 x 768)
FRAMESIZE_SXGA (1280 x 1024)

config.jpeg_quality = 10;(10-63)越小照片质量最好
数字越小表示质量越高,但是,如果图像质量的数字过低,尤其是在高分辨率时,可能会导致ESP32-CAM崩溃

*支持发布订阅模式,当图片上传时,订阅端会自动获取图片url地址,可做图片识别,人脸识别,图像分析
*/

#include <HTTPClient.h>
#include "esp_camera.h"
#include <WiFi.h>
#include <ArduinoJson.h>

/*********************需要修改的地方**********************/
const char* ssid = "l";           //WIFI名称
const char* password = "5";     //WIFI密码
int capture_interval = 20*1000;        // 默认20秒上传一次,可更改(本项目是自动上传,如需条件触发上传,在需要上传的时候,调用take_send_photo()即可)
const char*  post_url = "http://images.bemfa.com/upload/v1/upimages.php"; // 默认上传地址
const char*  uid = "";    //用户私钥,巴法云控制台获取
const char*  topic = "yi";     //图云主题名字,可在控制台新建
bool sentWechat = true;               //是否推送到微信,默认不推送,true 为推送。需要在控制台先绑定微信,不然推送不到
const char*  wechatMsg = "有人进入.";     //推送到微信的消息,可随意修改,修改为自己需要发送的消息
/********************************************************/


bool internet_connected = false;
long current_millis;
long last_capture_millis = 0;

// CAMERA_MODEL_AI_THINKER
#define PWDN_GPIO_NUM     32
#define RESET_GPIO_NUM    -1
#define XCLK_GPIO_NUM      0
#define SIOD_GPIO_NUM     26
#define SIOC_GPIO_NUM     27
#define Y9_GPIO_NUM       35
#define Y8_GPIO_NUM       34
#define Y7_GPIO_NUM       39
#define Y6_GPIO_NUM       36
#define Y5_GPIO_NUM       21
#define Y4_GPIO_NUM       19
#define Y3_GPIO_NUM       18
#define Y2_GPIO_NUM        5
#define VSYNC_GPIO_NUM    25
#define HREF_GPIO_NUM     23
#define PCLK_GPIO_NUM     22

void setup()
{


  Serial.begin(115200);
  //PIR初始状态
  pinMode(12,INPUT);
  digitalWrite(12,LOW);

  if (init_wifi()) {

     // Connected to WiFi
    internet_connected = true;
    Serial.println("Internet connected");
  }

  camera_config_t config;
  config.ledc_channel = LEDC_CHANNEL_0;
  config.ledc_timer = LEDC_TIMER_0;
  config.pin_d0 = Y2_GPIO_NUM;
  config.pin_d1 = Y3_GPIO_NUM;
  config.pin_d2 = Y4_GPIO_NUM;
  config.pin_d3 = Y5_GPIO_NUM;
  config.pin_d4 = Y6_GPIO_NUM;
  config.pin_d5 = Y7_GPIO_NUM;
  config.pin_d6 = Y8_GPIO_NUM;
  config.pin_d7 = Y9_GPIO_NUM;
  config.pin_xclk = XCLK_GPIO_NUM;
  config.pin_pclk = PCLK_GPIO_NUM;
  config.pin_vsync = VSYNC_GPIO_NUM;
  config.pin_href = HREF_GPIO_NUM;
  config.pin_sscb_sda = SIOD_GPIO_NUM;
  config.pin_sscb_scl = SIOC_GPIO_NUM;
  config.pin_pwdn = PWDN_GPIO_NUM;
  config.pin_reset = RESET_GPIO_NUM;
  config.xclk_freq_hz = 20000000;
  config.pixel_format = PIXFORMAT_JPEG;
  //init with high specs to pre-allocate larger buffers
  if (psramFound()) {


    config.frame_size = FRAMESIZE_UXGA;
    config.jpeg_quality = 10;
    config.fb_count = 2;
  } else {


    config.frame_size = FRAMESIZE_SVGA;
    config.jpeg_quality = 12;
    config.fb_count = 1;
  }

  // camera init
  esp_err_t err = esp_camera_init(&config);
  if (err != ESP_OK) {


    Serial.printf("Camera init failed with error 0x%x", err);
    return;
  }
}


/********初始化WIFI*********/
bool init_wifi()
{


  int connAttempts = 0;
  Serial.println("\r\nConnecting to: " + String(ssid));
  WiFi.begin(ssid, password);
  while (WiFi.status() != WL_CONNECTED ) {


    delay(500);
    Serial.print(".");
    if (connAttempts > 10) return false;
    connAttempts++;
  }
  return true;
}


/********推送图片*********/
static esp_err_t take_send_photo()
{


    //初始化相机并拍照
    Serial.println("Taking picture...");
    camera_fb_t * fb = NULL;
    fb = esp_camera_fb_get();
    if (!fb) {


      Serial.println("Camera capture failed");
      return ESP_FAIL;
    }

    HTTPClient http;
    //设置请求url
    http.begin(post_url);

    //设置请求头部信息
    http.addHeader("Content-Type", "image/jpg");
    http.addHeader("Authorization", uid);
    http.addHeader("Authtopic", topic);
    if(sentWechat){

     //判断是否需要推送到微信
      http.addHeader("Wechatmsg", wechatMsg);  //设置 http 请求头部信息
    }
    //发起请求,并获取状态码
    int httpResponseCode = http.POST((uint8_t *)fb->buf, fb->len);

    if(httpResponseCode==200){


        //获取post请求后的服务器响应信息,json格式
        String response = http.getString();  //Get the response to the request
        Serial.print("Response Msg:");
        Serial.println(response);           // 打印服务器返回的信息


        //json数据解析
        StaticJsonDocument<200> doc;
        DeserializationError error = deserializeJson(doc, response);
        if (error) {


          Serial.print(F("deserializeJson() failed: "));
          Serial.println(error.c_str());
        }
        const char* url = doc["url"];
        Serial.print("Get URL:");
        Serial.println(url);//打印获取的URL


    }else{


        //错误请求
        Serial.print("Error on sending POST: ");
        Serial.println(httpResponseCode);
    }

    Serial.print("HTTP Response code: ");
    Serial.println(httpResponseCode);

    //清空数据
    esp_camera_fb_return(fb);
    //回收下次再用
    http.end();

}


void loop()
{


    //PIR检测电平变化
    if(digitalRead(12)==HIGH)||(digitalRead(13)==HIGH) {


      Serial.println("Somebody is here.");
      take_send_photo();
    }
    else  {


      Serial.println("Nobody.");
    }
    delay(1000);
}
转折-照片数量限制
但是问题也来了,可能是图库成本太高的原因,巴发云之能免费存储100张图片,超过了就要开会员,而且,这100张是永久的一次性的,无法删除,本人最近经济太拮据了,已经坐吃山空,也想支持以下这么好的云平台,但无奈那个中羞涩。找了很多地方也没有解决方法,于是我把图片的转发希望转到了其他的方法,直到我看到有文章说可以通过邮件的附件的方式传给我自己的邮箱,于是开始搞起。这是巴发云上使用esp8266上传人体红外传感器到微信发送报警的代码,这个报警的次数是没有限制的,但是只能文字提醒。没有图片。
代码
/*
 * 微信通知提醒
 * 2021-3-26
 * QQ 1217882800
 * https://bemfa.com
 *
 * 注意:由于微信更新的原因,此版本可能失效,可在 https://cloud.bemfa.com/tcp/wechat.html 页面查看新接口教程
 */

//esp8266头文件,需要先安装esp8266开发环境
#include <ESP8266WiFi.h>
#include <ESP8266HTTPClient.h>


/******************************************************************************/
#define DEFAULT_STASSID  "newhtc"                              //WIFI名称
#define DEFAULT_STAPSW   "qq123456"                        //WIFI密码

String uid = "4d9ec352e0376f2110a0c601a2857225";             // 用户私钥,巴法云控制台获取
String type = "2";                                           // 1表示是预警消息,2表示设备提醒消息
String device = "人体红外传感器设备";                           // 设备名称
String msg = "检测到";       //发送的消息
int delaytime = 0;                                          //为了防止被设备“骚扰”,可设置贤者时间,单位是秒,如果设置了该值,在该时间内不会发消息到微信,设置为0立即推送。
String ApiUrl = "http://api.bemfa.com/api/wechat/v1/";        //默认 api 网址

/******************************************************************************/
static uint32_t lastWiFiCheckTick = 0;//wifi 重连计时
WiFiClient client;  //初始化wifi客户端
HTTPClient http;  //初始化http

//=======================================================================
//              WIFI重新连接函数
//=======================================================================
void startSTA(){


  WiFi.disconnect();//断开连接
  WiFi.mode(WIFI_STA);//设置wifi模式
  WiFi.begin(DEFAULT_STASSID, DEFAULT_STAPSW);// 开始连接
}


//=======================================================================
//              WIFI状态检测函数,如果WIFI断开自动重连
//=======================================================================
void doWiFiTick(){


    if ( WiFi.status() != WL_CONNECTED ) {

    //如果没连接
        if (millis() - lastWiFiCheckTick > 1000) {

     //未连接1s重连,检查是否大于1秒
          lastWiFiCheckTick = millis();
          startSTA();//重新连接
        }
      }
 }

//=======================================================================
//                    初始化
//=======================================================================

void setup() {


  delay(1000);
  Serial.begin(115200);     //设置串口波特率
  WiFi.mode(WIFI_OFF);        //设置wifi模式
  delay(1000);
  WiFi.mode(WIFI_STA);         //设置wifi模式

  WiFi.begin(DEFAULT_STASSID, DEFAULT_STAPSW);     //开始连接wifi
  Serial.println("");

  Serial.print("Connecting");
  // Wait for connection
  while (WiFi.status() != WL_CONNECTED) {

    //检查是否连接成功
    delay(500);
    Serial.print(".");
  }

  //如果连接成功,打印ip等信息
  Serial.println("");
  Serial.print("Connected to ");
  Serial.println(DEFAULT_STASSID);
  Serial.print("IP address: ");
  Serial.println(WiFi.localIP());  //IP 地址
}

//=======================================================================
//                    主循环
//=======================================================================
void loop() {


      doHttpStick();//在想推送消息的地方执行推送函数即可
      delay(20000);//20s推送一次,可删除delay,在想推送消息的地方执行推送函数即可
}


//******微信消息推送函数********//
void doHttpStick(){

      //微信消息推送函数
  String postData;
  //Post Data
  postData = "uid="+uid+"&type=" + type +"&time="+delaytime+"&device="+device+"&msg="+msg;
  http.begin(client,ApiUrl);              //Specify request destination
  http.addHeader("Content-Type", "application/x-www-form-urlencoded");    //Specify content-type header
  int httpCode = http.POST(postData);   //Send the request
  String payload = http.getString();    //Get the response payload
  Serial.println(httpCode);   //Print HTTP return code
  Serial.println(payload);    //Print request response payload
  http.end();  //Close connection
  Serial.println("send success");
  }
//=======================================================================
避开巴发云照片限制
我的想法是移植到的esp32-cam板子上,这个 <ESP8266WiFi.h>头文件要改成<6WiFi.h>,但是我把doHttpStick()微信消息推送函数一直到esp32-cam板子上的时候,发现并不能运行,<ESP8266HTTPClient.h>头文件已经改成<HTTPClient.h>,提示http未定义错误,我才发现, http.begin(client,ApiUrl); 之前没有对http进行定义,所以我加了一句句代码, HTTPClient http;终于可以了,哇咔咔。以下代码顺利编译通过了,
#include <HTTPClient.h>
#include "esp_camera.h"
#include <Arduino.h>
#include <WiFi.h>
#include <ArduinoJson.h>
#include "ESP32_MailClient.h"
/*********************需要修改的地方**********************/
const char* ssid = "l"; //WIFI名称
const char* password = ""; //WIFI密码
/********************************************************/
/******************************************************************************/
String uid = "e5f"; // 用户私钥,巴法云控制台获取
String type = "1"; // 1表示是预警消息,2表示设备提醒消息
String device = "传感器设备"; // 设备名称
String msg = "有人进入"; //发送的消息
int delaytime = 0; //为了防止被设备“骚扰”,可设置贤者时间,单位是秒,如果设置了该值,在该时间内不会发消息到微信,设置为0立即推送。
String ApiUrl = "http://api.bemfa.com/api/wechat/v1/"; //默认 api 网址
/******************************************************************************/
bool internet_connected = false;
long current_millis;
long last_capture_millis = 0;
// CAMERA_MODEL_AI_THINKER
#define PWDN_GPIO_NUM 32
#define RESET_GPIO_NUM -1
#define XCLK_GPIO_NUM 0
#define SIOD_GPIO_NUM 26
#define SIOC_GPIO_NUM 27
#define Y9_GPIO_NUM 35
#define Y8_GPIO_NUM 34
#define Y7_GPIO_NUM 39
#define Y6_GPIO_NUM 36
#define Y5_GPIO_NUM 21
#define Y4_GPIO_NUM 19
#define Y3_GPIO_NUM 18
#define Y2_GPIO_NUM 5
#define VSYNC_GPIO_NUM 25
#define HREF_GPIO_NUM 23
#define PCLK_GPIO_NUM 22
SMTPData smtpData;
//void sendCallback(SendStatus info);
void setup()
{
Serial.begin(115200);
if (init_wifi()) {
// Connected to WiFi
internet_connected = true;
Serial.println("Internet connected");
}
camera_config_t config;
config.ledc_channel = LEDC_CHANNEL_0;
config.ledc_timer = LEDC_TIMER_0;
config.pin_d0 = Y2_GPIO_NUM;
config.pin_d1 = Y3_GPIO_NUM;
config.pin_d2 = Y4_GPIO_NUM;
config.pin_d3 = Y5_GPIO_NUM;
config.pin_d4 = Y6_GPIO_NUM;
config.pin_d5 = Y7_GPIO_NUM;
config.pin_d6 = Y8_GPIO_NUM;
config.pin_d7 = Y9_GPIO_NUM;
config.pin_xclk = XCLK_GPIO_NUM;
config.pin_pclk = PCLK_GPIO_NUM;
config.pin_vsync = VSYNC_GPIO_NUM;
config.pin_href = HREF_GPIO_NUM;
config.pin_sscb_sda = SIOD_GPIO_NUM;
config.pin_sscb_scl = SIOC_GPIO_NUM;
config.pin_pwdn = PWDN_GPIO_NUM;
config.pin_reset = RESET_GPIO_NUM;
config.xclk_freq_hz = 20000000;
config.pixel_format = PIXFORMAT_JPEG;
//init with high specs to pre-allocate larger buffers
if (psramFound()) {
config.frame_size = FRAMESIZE_UXGA;
config.jpeg_quality = 10;
config.fb_count = 2;
} else {
config.frame_size = FRAMESIZE_SVGA;
config.jpeg_quality = 12;
config.fb_count = 1;
}
// camera init
esp_err_t err = esp_camera_init(&config);
if (err != ESP_OK) {
Serial.printf("Camera init failed with error 0x%x", err);
return;
}
}
/********初始化WIFI*********/
bool init_wifi()
{
int connAttempts = 0;
Serial.println("\r\nConnecting to: " + String(ssid));
WiFi.begin(ssid, password);
WiFi.setAutoReconnect(true);
while (WiFi.status() != WL_CONNECTED ) {
delay(500);
Serial.print(".");
if (connAttempts > 10) return false;
connAttempts++;
}
return true;
}
static esp_err_t sendMail2m() {
//初始化相机并拍照
Serial.println("Taking picture...");
camera_fb_t * fb = NULL;
fb = esp_camera_fb_get();
if (!fb) {
Serial.println("Camera capture failed");
return ESP_FAIL;
}
Serial.println("Sending email...");
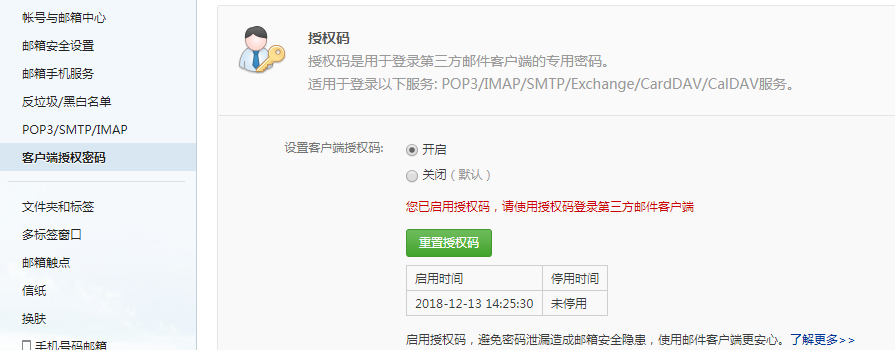
smtpData.setLogin("smtp.qq.com", 465, "@qq.com", "授权码");
smtpData.setSender("ESP32", "");
smtpData.setPriority("High");
smtpData.setSubject("有人!!");
smtpData.setMessage("有人闯入!", true);
smtpData.addRecipient(".com");
smtpData.addAttachData("firebase_logo.jpg", "image/jpg", (uint8_t *)fb->buf, fb->len);
//从内存中
smtpData.setSendCallback(sendCallback);
if (!MailClient.sendMail(smtpData)){
Serial.println("Error sending Email, " + MailClient.smtpErrorReason());
esp_restart() ;
}
smtpData.empty();
//清空数据
esp_camera_fb_return(fb);
}
void loop()
{
//定时发送
//当前时间减去上次时间大于20S就执行拍照上传函数
//PIR检测电平变化
if((digitalRead(12)==HIGH)||(digitalRead(13)==HIGH)) {
Serial.println("有人进入.");
sendMail2m(); //拍照上传函数,在需要的地方调用即可,这里是定时拍照
doHttpStick();//在想推送消息的地方执行推送函数即可
}
else {
Serial.println("Nobody.");
}
delay(1000);
}
void sendCallback(SendStatus msg)
{
Serial.println(msg.info());
if (msg.success())
{
Serial.println("----------------");
}
}
//******微信消息推送函数********//
void doHttpStick(){
//微信消息推送函数
HTTPClient http;
String postData;
//Post Data
postData = "uid="+uid+"&type=" + type +"&time="+delaytime+"&device="+device+"&msg="+msg;
http.begin(ApiUrl); //Specify request destination
http.addHeader("Content-Type", "application/x-www-form-urlencoded"); //Specify content-type header
int httpCode = http.POST(postData); //Send the request
String payload = http.getString(); //Get the response payload
Serial.println(httpCode); //Print HTTP return code
Serial.println(payload); //Print request response payload
http.end(); //Close connection
Serial.println("send success");
}
邮箱的坑
但是一开始我使用的是qq邮箱,找了一大顿方法和qq邮箱的设置,获取到了授权码,但是通过串口工具,一直提示鉴权被拒,于是转变思路,换成163邮箱,终于实现了。
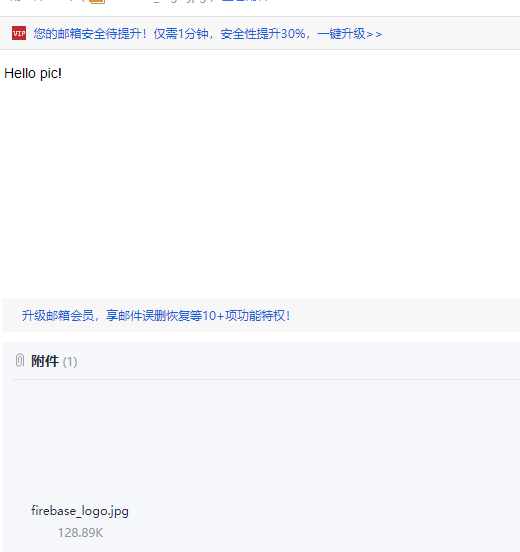
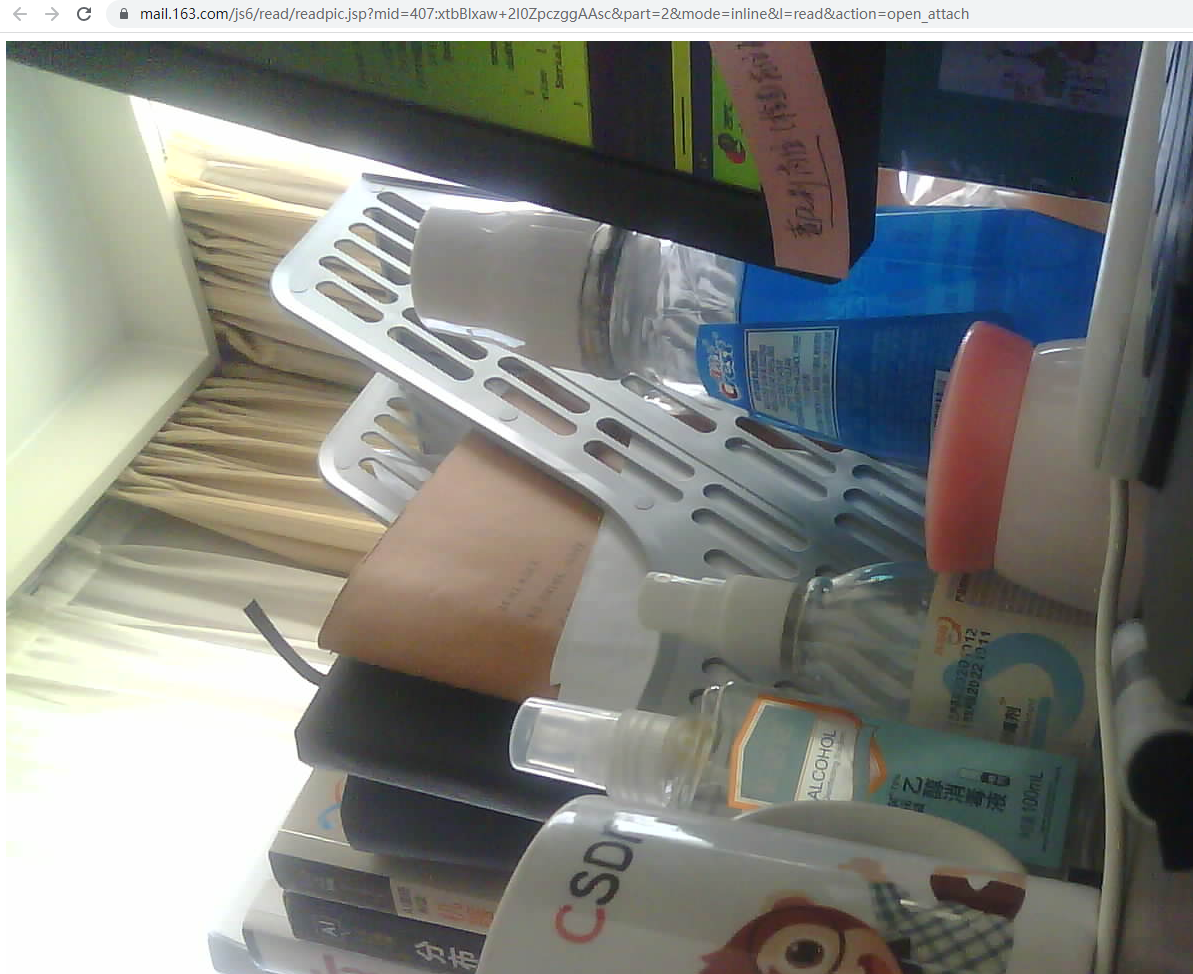
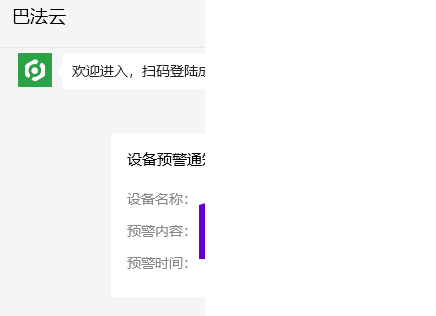
同时我的巴发云微信也受到了提醒报警,虽然没有图片显示。