一、简介
在使用编译构造子系统前,应了解如下基本概念:
子系统
子系统是一个逻辑概念,它由一个或多个具体的组件构成、OpenHarmony整体遵从分层设计,从下向上依次为:内核层、系统服务层、架构层和应用层。系统功能按照“系统 > 子系统 > 组件”逐级展开,在多设备部署场景下,支持根据实际需求裁剪某些非必要的子系统或组件。
组件
系统最小的可复用、可配置、可剪裁的功能单元。组件具备目录独立可并行开发、可独立编译、可独立测试的特征。
gn
Generate ninja的缩写,用于产生ninja文件。
ninja
ninja是一个专注于速度的小型构建系统
hb
OpenHarmony的命令行工具,用来执行编译命令。
编译目录结构
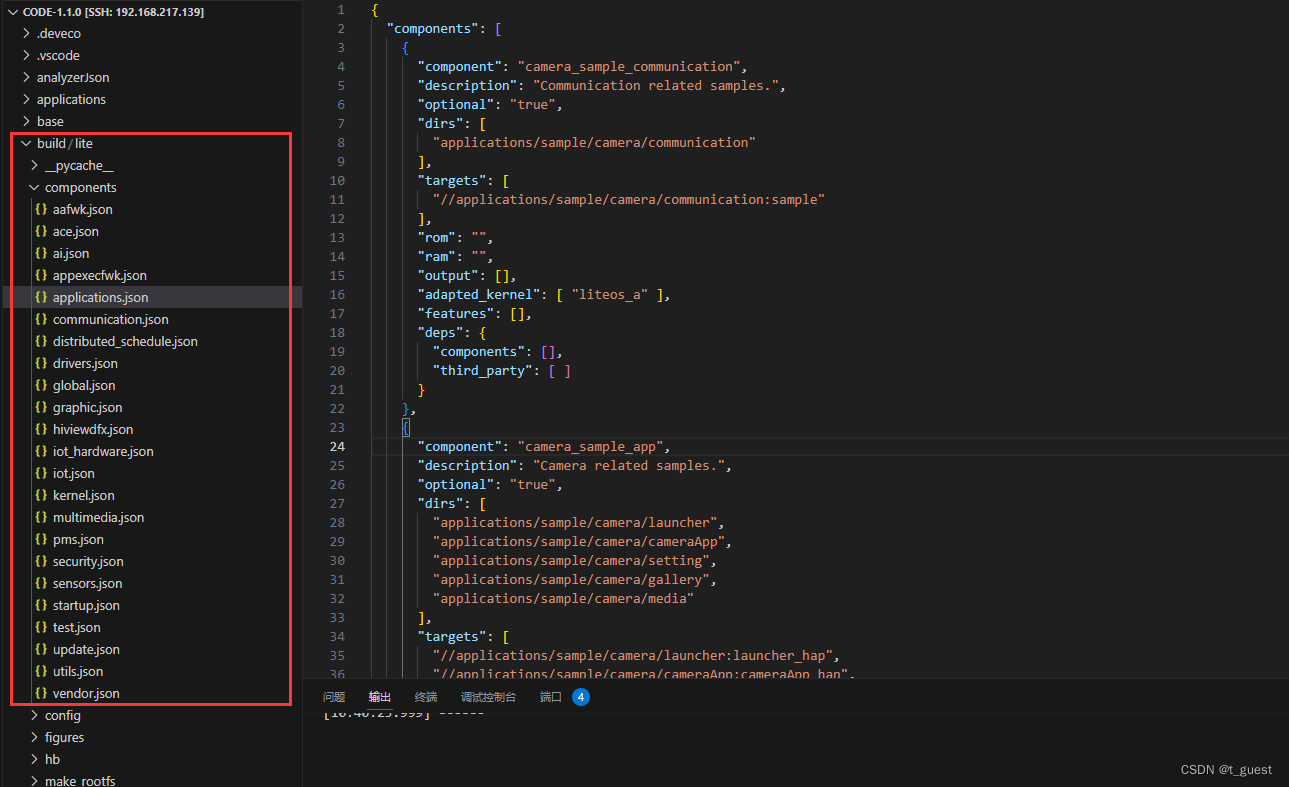
build/lite
├── components                  # 组件描述文件
├── figure                     # readme中的图片
├── hb                          # hb pip安装包源码
├── make_rootfs                 # 文件系统镜像制作脚本
├── config                      # 编译配置项
│   ├── component               # 组件相关的模板定义
│   ├── kernel                  # 内核相关的编译配置
│   └── subsystem               # 子系统编译配置
├── platform                    # ld脚本
├── testfwk                     # 测试编译框架
└── toolchain                   # 编译工具链配置,包括:编译器路径、编译选项、链接选项等
二、构建规则
为了实现芯片解决方案、产品解决方案与OpenHarmony是解耦的、可插拔的,组件、芯片解决方案和产品解决方案的路径、目录树和配置需遵循一定的规则,具体如下:
组件
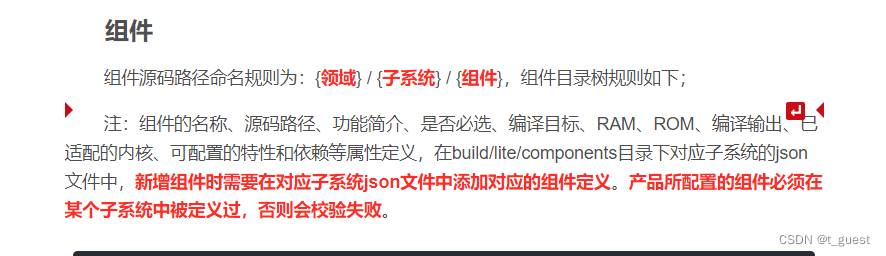
组件源码路径命名规则为:{ 领域} / { 子系统} / { 组件},组件目录树规则如下;
注:组件的名称、源码路径、功能简介、是否必选、编译目标、RAM、ROM、编译输出、已适配的内核、可配置的特性和依赖等属性定义,在build/lite/components目录下对应子系统的json文件中,新增组件时需要在对应子系统json文件中添加对应的组件定义。产品所配置的组件必须在某个子系统中被定义过,否则会校验失败。
component
├── interfaces
│   ├── innerkits  # 系统内接口,组件间使用
│   └── kits       # 应用接口,应用开发者使用
├── frameworks     # framework实现
├── services       # service实现
└── BUILD.gn       # 组件编译脚本

以applications.json中的wifi_iot_sample_app为例:
    {
      "component": "wifi_iot_sample_app",  #组件名称
      "description": "Wifi iot samples.",    #组件功能描述
      "optional": "true",    #组件是否为最小系统必选
      "dirs": [    #组件源码路径
        "applications/sample/wifi-iot/app"
      ],
      "targets": [    #组件编译入口
        "//applications/sample/wifi-iot/app"
      ],
      "rom": "",    #组件ROM值
      "ram": "",    #组件RAM估值
      "output": [],    #组件编译输出
      "adapted_board": [ "hi3861v100" ],    #组件已适配的芯片
      "adapted_kernel": [ "liteos_m" ],    #组件已适配的内核
      "features": [],    #组件可适配的特性
      "deps": {
          "components": [    #组件依赖的其他组件
            "utils_base"
        ]
      }
    },
组件BUILD.gn的编译建议如下:
- 编译目标名称与组件一致
- 组件对外可配置的特性变量需声明在该组件BUILD.gn中,特性变量命名规则:ohos_{subsystem}_{component}_{feature}。特性在组件描述中也需要同步定义,在产品配置文件config.json中按需配置。
- 宏定义规则:OHOS_{SUBSYSTEM}_{COMPONENT}_{FEATURE}
芯片解决方案
芯片解决方案是指基于某款开发板的完整解决方案,包含驱动、设备侧接口适配、开发板SDK等。
芯片解决方案是一个特殊的组件,源码路径规则为:device / { 芯片解决方案厂商} / { 开发板}
芯片解决方案组件会随产品选择的开发板默认编译
芯片解决方案目录树规则如下:
device
└── hisilicon                       # 芯片解决方案厂商(海思)
    ├── BUILD.gn                # 编译脚本
    ├── hals                    # OS南向接口适配
    ├── hispark_aries           # Hi3518
    ├── hispark_pegasus         # Hi3861
    ├── hispark_taurus          # Hi3516
产品解决方案
产品解决方案为基于开发板的完整产品,主要包含产品对OS的适配、组件拼装配置、启动配置和文件系统配置等。产品解决方案的源码路劲规则为:vendor / { 产品方案解决厂商} / { 产品名称}。产品解决方案也是一个特殊的组件。
产品解决方案的目录树规则如下:
vendor
└── hisilicon                       # 产品解决方案厂商(海思)
    ├── hispark_aries               # 产品名称 Hi3518
    ├── hispark_pegasus             # 产品名称 Hi3861
    ├── hispark_taurus              # 产品名称 Hi3516
    │   ├── init_configs
    │   │     ├── etc               # init进程启动配置(可选,仅linux内核需要)
    │   │     └── init.cfg          # 系统服务启动配置
    │   ├── hals                    # 产品解决方案OS适配
    │   ├── BUILD.gn                # 产品编译脚本
    │   └── config.json             # 产品配置文件
    │   └── fs.yml                  # 文件系统打包配置
    └── ......
注:新增产品需按如上的规则创建目录和文件,编译构建系统将按该规则扫描已配置的产品。
关键目录和文件详细介绍如下:
1.vendor / company / product / init_configs / etc
该文件夹中包含rcs脚本,Sxxx脚本和fstab脚本。init进程在启动系统服务之前执行这些脚本。执行流程为“rcs -> fstab -> S00-xxx”。Sxxx脚本中的内容与开发板和产品需求有关,主要包括设备节点的创建、创建目录、扫描设备节点、修改文件权限等等。这些文件在产品编译的BUILD.gn中按需拷贝到产品out目录中,最终打包到rootfs镜像中。
2.vendor / company / product / init_configs / init.cfg
init 进程启动服务的配置文件,当前支持解析的命令有:
start:启动某个服务
mkdir:创建文件夹
chmod:修改指定路径/文件的权限
chown:修改指定路径/文件的属性
mount:挂在命令
3.vendor / company / product / hals
解决方案厂商对OS的适配,需要实现的接口请见各个组件的readme说明文档。
4.vendor / company / product / config.json
config.json 为编译构造的主入口,包含了开发板、OS组件和内核等配置信息。
以hispark_pegasus为例
    "product_name": "wifiiot_hispark_pegasus",    #产品名称
    "ohos_version": "OpenHarmony 1.0",    #选择的OS版本
    "device_company": "hisilicon",    #芯片厂商
    "board": "hispark_pegasus",    #开发板名称
    "kernel_type": "liteos_m",    #内核类型
    "kernel_version": "",    #内核版本
    "subsystems": [    #子系统
      {
        "subsystem": "applications",    #子系统名称
        "components": [
          { "component": "wifi_iot_sample_app", "features":[] }    #选择的组件和组件的特性配置
        ]
      },
5.vendor / company / product / BUILD.gn
产品编译的入口,主要用于编译解决方案厂商源码和拷贝启动配置文件。如果某个产品被选择为要编译的产品,那么对应产品目录下的BUILD.gn会默认编译。一个典型的产品编译BUILD.gn应该如下:
group("product") { # target名称需与product名称即三级目录名称一致
  deps = []
  # 拷贝init配置
  deps += [ "init_configs" ]
  # 其他
  ......
}
三、新增组件
在上一章中,添加了hello_world工程。这里回顾一下。目录结构如下:
applications/sample
└── wifi-iot
    └── app
        ├── hello_world
            ├── hello_world.c
            ├── BUILD.gn
        └──BUILD.gn
hello_world下的BUILD.gn内容如下:
static_library("hello_world") {
    sources = [
        "hello_world.c"
    ]
    include_dirs = [
        "//utils/native/lite/include",
        "//kernel/liteos_m/kal/cmsis",
    ]
}
hello_world.c内容如下:
int cnt = 0;

void HelloWorld(void)
{
    printf("[DEMO] Hello world.\n");
    while(1)
    {
        cnt++;
        osDelay(100);
        printf("[DEMO] Hello world.[%d]\n",cnt);
    }
}

APP_FEATURE_INIT(HelloWorld);
在原有组件中添加hello world
修改app目录下的BUILD.gn文件如下:
import("//build/lite/config/component/lite_component.gni")

lite_component("app") {
    features = [
        "hello_world:hello_world",
    ]
}
此时编译,下载。
看结果:
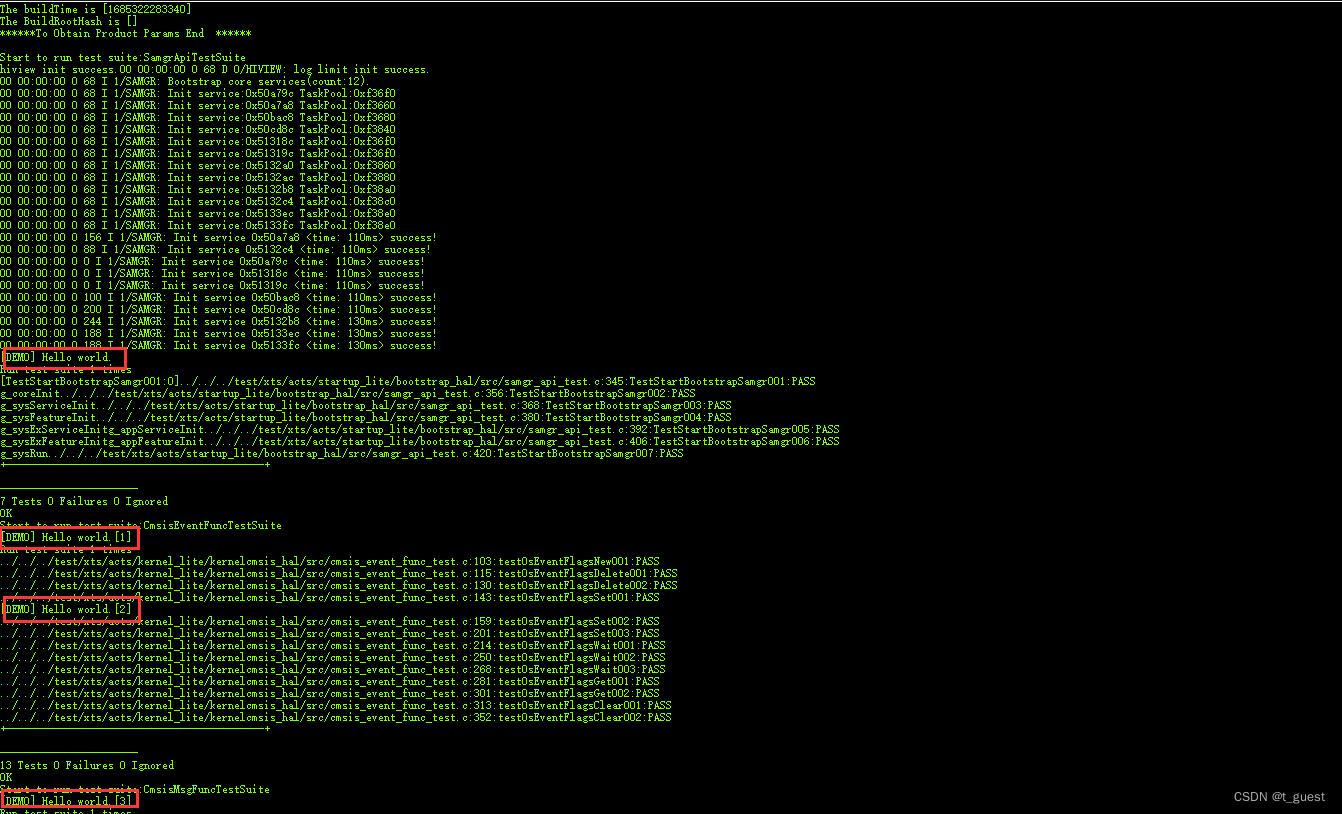
可以看到,这里不单单是打印出hello world,还打印了很多test的代码。这是因为SDK默认是运行xts_test,需要关闭xts_test。
在vendor / hisilicon / hispark_pegasus / config.json中,将子系统“test”删除。注:这里不能注释掉,只能删除。
      {
       "subsystem": "test",
       "components": [
         { "component": "xts_acts", "features":[] },
         { "component": "xts_tools", "features":[] }
        ]
      }
重新编译,需要注意的是,这里只有clean后,重新build,设置才会生效。
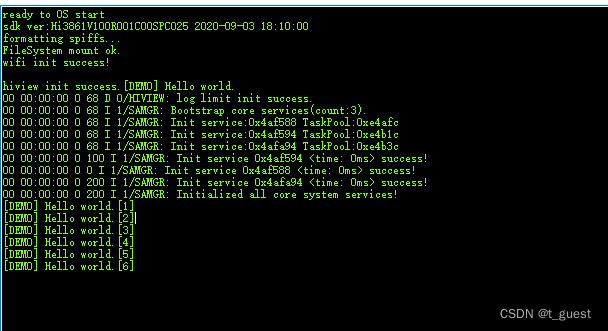
重新clean,build,Upload后,运行正常。
新建hello world组件
不使用app目录下的BUILD.gn,内容如下:
import("//build/lite/config/component/lite_component.gni")

lite_component("app") {
    features = [

    ]
}
在上边的文章中介绍过,系统是通过 领域 -> 子系统 -> 组件来的。新增加的组件需要在build/lite/components目录下对应子系统的json文件中声明。
那么就在buld/lite/components/applications.json文件中增加如下代码:
    {
      "component": "hello_world",
      "description": "hello world.",
      "optional": "true",
      "dirs": [
        "applications/sample/wifi-iot/app/hello_world"
      ],
      "targets": [
        "//applications/sample/wifi-iot/app/hello_world"
      ],
      "rom": "",
      "ram": "",
      "output": [],
      "adapted_board": [ "hi3861v100" ],
      "adapted_kernel": [ "liteos_m" ],
      "features": [],
      "deps": {
          "components": [
            "utils_base"
        ]
      }
    },
声明后,还需要让编译系统知道要把该组件编译进去,所以需要在编译构造的主入口文件中添加要编译进去的子系统。

在vendor/hisilicon/hispark_tegasus/config.json中添加如下代码:
{ "component": "hello_world", "features":[] }
添加完成后,重新编译,下载。

可以看到,自己添加的Hello world组件,已经正常运行了。
四、新增产品
直接修改vendor/hisilicon/hispark_pegasus/config.json文件。修改“product_name”为“hello_world_test”。完整代码如下:
  {
    "product_name": "hello_world_test",
    "ohos_version": "OpenHarmony 1.0",
    "device_company": "hisilicon",
    "board": "hispark_pegasus",
    "kernel_type": "liteos_m",
    "kernel_version": "",
    "subsystems": [
      {
        "subsystem": "applications",
        "components": [
          { "component": "hello_world", "features":[] }
        ]
      },
      {
        "subsystem": "iot_hardware",
        "components": [
          { "component": "iot_controller", "features":[] }
        ]
      },
      {
        "subsystem": "hiviewdfx",
        "components": [
          { "component": "hilog_lite", "features":[] },
          { "component": "hievent_lite", "features":[] }
        ]
      },
      {
        "subsystem": "distributed_schedule",
        "components": [
          { "component": "system_ability_manager", "features":[] }
        ]
      },
      {
        "subsystem": "security",
        "components": [
          { "component": "hichainsdk", "features":[] }
        ]
      },
      {
        "subsystem": "startup",
        "components": [
          { "component": "bootstrap", "features":[] },
          { "component": "syspara", "features":[] }
        ]
      },
      {
        "subsystem": "communication",
        "components": [
          { "component": "wlan", "features":[] },
          { "component": "soft_bus", "features":[] },
          { "component": "wifi_aware", "features":[]}
        ]
      },
      {
        "subsystem": "update",
        "components": [
          { "component": "hota", "features":[] }
        ]
      },
      {
        "subsystem": "iot",
        "components": [
          { "component": "iot_link", "features":[] }
        ]
      },
      {
        "subsystem": "utils",
        "components": [
          { "component": "file", "features":[] },
          { "component": "kv_store", "features":[] },
          { "component": "os_dump", "features":[] }
        ]
      },
      {
        "subsystem": "vendor",
        "components": [
          { "component": "hi3861_sdk", "target": "//device/hisilicon/hispark_pegasus/sdk_liteos:wifiiot_sdk", "features":[] }
        ]
      }
    ],
    "vendor_adapter_dir": "//device/hisilicon/hispark_pegasus/hi3861_adapter",
    "third_party_dir": "//device/hisilicon/hispark_pegasus/sdk_liteos/third_party",
    "product_adapter_dir": "//vendor/hisilicon/hispark_pegasus/hals",
    "ohos_product_type":"",
    "ohos_manufacture":"",
    "ohos_brand":"",
    "ohos_market_name":"",
    "ohos_product_series":"",
    "ohos_product_model":"",
    "ohos_software_model":"",
    "ohos_hardware_model":"",
    "ohos_hardware_profile":"",
    "ohos_serial":"",
    "ohos_bootloader_version":"",
    "ohos_secure_patch_level":"",
    "ohos_abi_list":""
  }
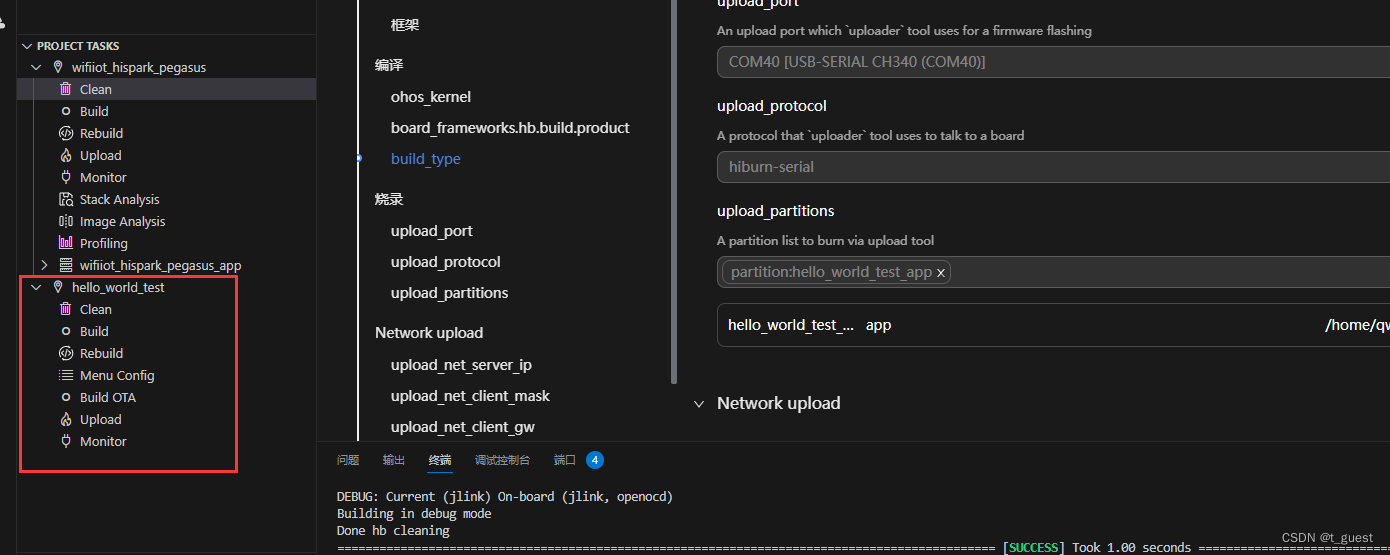
此时,在DevEco中,即可查看到该产品。

创建好之后,配置产品的相关配置,包括upload_port和upload_partitions等。完成后,在左侧的PROJECT TASKS中也会出现“hello_world_test”的工具栏,即可进行编译和下载。
编译下载过程这里就不再介绍。