文章目录
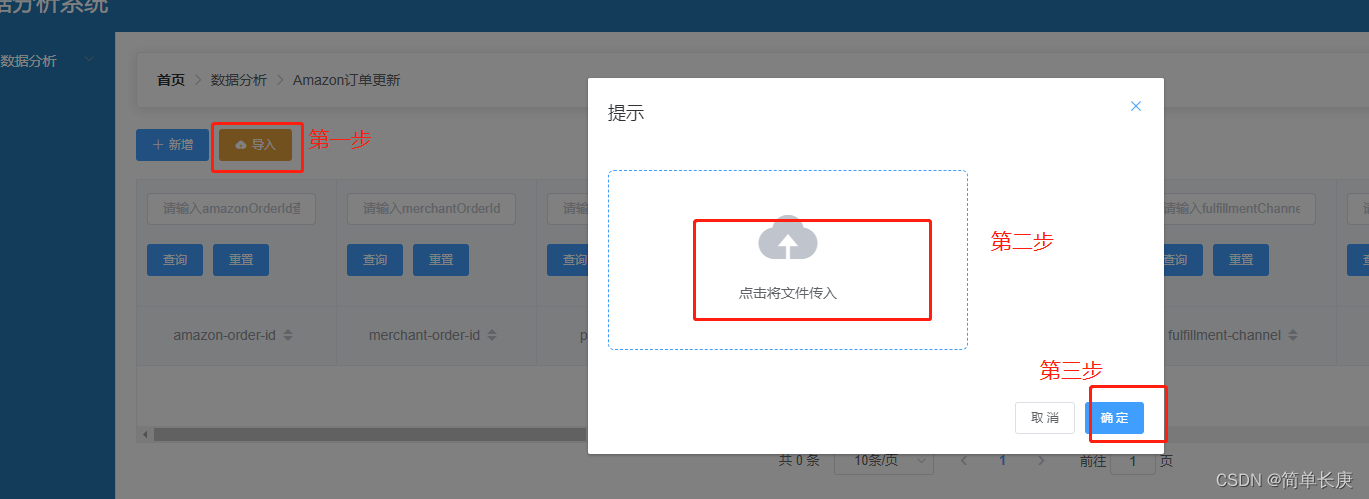
为实现如图所示功能,点击第一步弹出模态框,第二部将所有文件导入,第三步点击确定的时候上传到后台接口,封装一个组件
1.搭建template
 <div style="display: inline-block; margin-left: 10px;">
    <el-button type="warning"
               class="filter-item"
               icon="el-icon-upload"
               @click="uploadDialog">导入</el-button>
    <el-dialog title="提示"
               :visible.sync="uploadBox"
               width="30%">
      <el-upload class="upload-demo"
                 ref="uploadForm"
                 :http-request="upLoad"
                 action
                 multiple
                 drag
                 :before-remove="beforeRemove"
                 :file-list="fileList"
                 :auto-upload="false"
                 :limit="1">
        <i class="el-icon-upload"></i>
        <div class="el-upload__text">点击将文件传入</div>
      </el-upload>
      <span slot="footer"
            class="dialog-footer">
        <el-button @click="uploadBox = false">取 消</el-button>
        <el-button type="primary"
                   @click="submitUpload">确 定</el-button>
      </span>
    </el-dialog>
  </div>
阅读官方文档可知,主要的参数属性为:
action:必选参数,上传的地址,string类型
为实现自定义上传的内容,即上传的网址为后端提供的接口,需要修改如下属性:
http-request:覆盖默认的上传行为,可以自定义上传的实现
为实现第三步,点击确定之后再上传,需要修改的属性为:
auto-upload:是否在选取文件后立即进行上传,改为false
其他限制属性(以本文为例):
multiple 是否支持多选文件 boolean
drag 是否启用拖拽上传 boolean
before-remove 删除文件之前的钩子,参数为上传的文件和文件列表,若返回 false 或者返回 Promise 且被 reject,则停止删除。 function(file, fileList)
limit 最大允许上传个数 number
file-list 上传的文件列表, 例如: [{name: ‘food.jpg’, url: ‘https://xxx.cdn.com/xxx.jpg’}] array
其他属性可见elementUI官方网站
2.需要从父级接收到需要上传的网址,本文还封装了一下axios
api/api.js文件
export function getUpload (url, data) {


  return request({


    method: 'post',
    url,
    data
  })
}
getOrderList:为列表渲染的方法
完整代码
<template>
  <div style="display: inline-block; margin-left: 10px;">
    <el-button type="warning"
               class="filter-item"
               icon="el-icon-upload"
               @click="uploadDialog">导入</el-button>
    <el-dialog title="提示"
               :visible.sync="uploadBox"
               width="30%">
      <el-upload class="upload-demo"
                 ref="uploadForm"
                 :http-request="upLoad"
                 action
                 multiple
                 drag
                 :before-remove="beforeRemove"
                 :file-list="fileList"
                 :auto-upload="false"
                 :limit="1">
        <i class="el-icon-upload"></i>
        <div class="el-upload__text">点击将文件传入</div>
      </el-upload>
      <span slot="footer"
            class="dialog-footer">
        <el-button @click="uploadBox = false">取 消</el-button>
        <el-button type="primary"
                   @click="submitUpload">确 定</el-button>
      </span>
    </el-dialog>
  </div>
</template>

<script>
import {

       getUpload } from '@/api/api';
export default {


  props: ['url', 'getOrderList'],
  data () {


    return {


      //点击导入的内容
      fileList: [],
      //弹出传入文件的框
      uploadBox: false
    }
  },

  methods: {


    beforeRemove (file, fileList) {


      // 文件列表移出之前的钩子
      return this.$confirm(`确定移除 ${
        file.name}?`);

    },

    upLoad (item) {


      const loading = this.$loading({


        lock: true,
        text: 'Loading',
        spinner: 'el-icon-loading',
        background: 'rgba(0, 0, 0, 0.7)'
      });
      let formDatas = new FormData();
      formDatas.append('file', item.file)


      getUpload(this.url, formDatas).then(res => {


        loading.close();
        if (res.data.code == 0) {


          this.$message({


            message: '上传成功',
            type: 'success'
          });
          this.fileList = []
          this.getOrderList()
        } else {


          loading.close();
          this.$message({


            message: "上传失败",
            type: 'error'
          });
          this.fileList = []
        }
      })
    },
    //弹出要传入的模态框
    uploadDialog () {


      this.uploadBox = true
    },
    submitUpload () {


      this.$refs.uploadForm.submit();
      this.uploadBox = false;


    }
  }

}
</script>

<style>
</style>
如果没有对axios进行二次封装,upLoad中的方法可以写为:
  upLoad (item) {


      const loading = this.$loading({


        lock: true,
        text: 'Loading',
        spinner: 'el-icon-loading',
        background: 'rgba(0, 0, 0, 0.7)'
      });
      let formDatas = new FormData();
      formDatas.append('file', item.file)


      axios.post(this.url, formDatas).then(res => {


        loading.close();
        if (res.data.code == 0) {


          this.$message({


            message: '上传成功',
            type: 'success'
          });
          this.fileList = []
          this.getOrderList()
        } else {


          loading.close();
          this.$message({


            message: "上传失败",
            type: 'error'
          });
          this.fileList = []
        }
      })
    },