1.下载easyUI的开发包
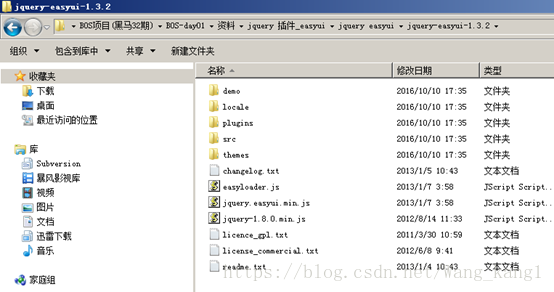
该包的结构是
2.将easyUI的资源文件引入的页面中:
<link rel="stylesheet" type="text/css" href="${pageContext.request.contextPath }/js/easyui/themes/default/easyui.css">
<link rel="stylesheet" type="text/css" href="${pageContext.request.contextPath }/js/easyui/themes/icon.css">
<script type="text/javascript" src="${pageContext.request.contextPath }/js/jquery-1.8.3.js"></script>
<script type="text/javascript" src="${pageContext.request.contextPath }/js/easyui/jquery.easyui.min.js"></script>
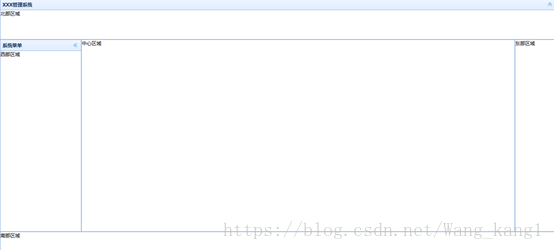
1.1 layout页面布局
<body class="easyui-layout">
	<!-- 使用div元素描述每个区域 -->
	<div style="height: 100px" data-options="region:'north'">北部区域</div>
	<div style="width: 200px" data-options="region:'west'">西部区域</div>
	<div data-options="region:'center'">中心区域</div>
	<div style="width: 100px" data-options="region:'east'">东部区域</div>
	<div style="height: 50px" data-options="region:'south'">南部区域</div>
</body>| region | string | 定义的布局面板位置,这个值是一个如下: north, south, east, west, center |
显示界面
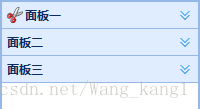
1.2 accordion折叠面板
<!-- 制作accordion折叠面板
			fit:true----自适应(填充父容器)
		-->
		<div class="easyui-accordion" data-options="fit:true">
			<!-- 使用子div表示每个面板 -->
			<div data-options="iconCls:'icon-cut'" title="面板一">1111</div>
			<div title="面板二">2222</div>
			<div title="面板三">3333</div>
		</div>
效果:
| selected | boolean | 设置为true来展开面板。 | false |
| title | String | 设置面板的标题 | |
| iconCls | String | 一个图标的CSS类显示在选项卡面板标题 | icon-search(查询) icon-add(增加) icon-cancel(删除) icon-save(保存) |
1.3 tabs选项卡面板
<!-- 制作一个tabs选项卡面板 -->
		<div class="easyui-tabs" data-options="fit:true">
			<!-- 使用子div表示每个面板 -->
			<div data-options="iconCls:'icon-cut'" title="面板一">1111</div>
			<div data-options="closable:true" title="面板二">2222</div>
			<div title="面板三">3333</div>
		</div>
显示页面
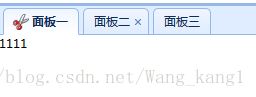
| closable | boolean | 当设置为true,该选项卡面板将显示一个按钮就可闭点击关闭选项卡面板。 | false |
1.4在页面中引入ztree相关的文件:
<link rel="stylesheet" href="../../../css/zTreeStyle/zTreeStyle.css" type="text/css">
<script type="text/javascript" src="../../../js/jquery-1.4.4.min.js"></script>
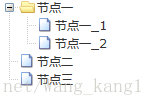
<script type="text/javascript" src="../../../js/jquery.ztree.core-3.5.js"></script> <!-- 展示ztree效果 :使用标准json数据构造ztree-->
<ul id="ztree1" class="ztree"></ul>
<script type="text/javascript">
$(function(){
//页面加载完成后,执行这段代码----动态创建ztree
var setting = {};
//构造节点数据
var zNodes = [
{"name":"节点一","children":[
{"name":"节点一_1"},
{"name":"节点一_2"}
]},//每个json对象表示一个节点数据
{"name":"节点二"},
{"name":"节点三"}
];
//调用API初始化ztree
$.fn.zTree.init($("#ztree1"), setting, zNodes);
});
</script>效果如图
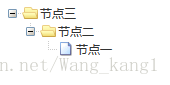
1.5 使用简单json数据构造ztree(重点)
<!-- 展示ztree效果 :使用简单json数据构造ztree-->
	<ul id="ztree2" class="ztree"></ul>
		<script type="text/javascript">
			$(function(){
				//页面加载完成后,执行这段代码----动态创建ztree
			           var setting2 = {
					data: {
					simpleData: {
						enable: true//使用简单json数据构造ztree节点
						}
					}
				};
			//构造节点数据
		     var zNodes2 = [
		    {"id":"1","pId":"2","name":"节点一"},//每个json对象表示一个节点数据
	            {"id":"2","pId":"3","name":"节点二"},
		     {"id":"3","pId":"0","name":"节点三"}
						              ];
		   //调用API初始化ztree
		   $.fn.zTree.init($("#ztree2"), setting2, zNodes2);
					});
				</script>
其中pId表示父节点 例如 {"id":"1","pId":"2","name":"节点一"} {"id":"2","pId":"3","name":"节点二"} 表示节点一是节点二的子节点显示效果
1.6 发送ajax请求获取json数据构造ztree
<!-- 展示ztree效果 :发送ajax请求获取简单json数据构造ztree-->
				<ul id="ztree3" class="ztree"></ul>
				<script type="text/javascript">
					$(function(){
						//页面加载完成后,执行这段代码----动态创建ztree
						var setting3 = {
								data: {
									simpleData: {
										enable: true//使用简单json数据构造ztree节点
									}
								}
						};

						//发送ajax请求,获取json数据
						//jQuery提供 的ajax方法:ajax、post、get、load、getJSON、getScript
						var url = "${pageContext.request.contextPath}/json/menu.json";
						$.post(url,{},function(data){
							//调用API初始化ztree
							$.fn.zTree.init($("#ztree3"), setting3, data);
						},'json');
					});
</script>$.post(url,data,success(data, textStatus, jqXHR),dataType)
| url | 必需。规定把请求发送到哪个 URL。 |
| data | 可选。映射或字符串值。规定连同请求发送到服务器的数据。 |
| success(data, textStatus, jqXHR) | 可选。请求成功时执行的回调函数。 |
| dataType | 可选。规定预期的服务器响应的数据类型。 默认执行智能判断(xml、json、script 或 html)。 |
1.7 使用ztree提供的API为节点绑定事件
<!-- 展示ztree效果 :发送ajax请求获取简单json数据构造ztree-->
<ul id="ztree3" class="ztree"></ul>
	<script type="text/javascript">
		$(function(){
			//页面加载完成后,执行这段代码----动态创建ztree
			var setting3 = {
				data: {
				    simpleData: {
					enable: true//使用简单json数据构造ztree节点
						}
					},
				callback: {
					//为ztree节点绑定单击事件
					onClick: function(event, treeId, treeNode){
						if(treeNode.page != undefined){
							//判断选项卡是否已经存在
							var e = $("#mytabs").tabs("exists",treeNode.name);
							if(e){
							//已经存在,选中
							$("#mytabs").tabs("select",treeNode.name);
								}else{
								//动态添加一个选项卡
							$("#mytabs").tabs("add",{
									title:treeNode.name,
									closable:true,
									content:'<iframe frameborder="0" height="100%" width="100%" src="'+treeNode.page+'"></iframe>'
									});
									}
								}
							}
					}
			};

				//发送ajax请求,获取json数据
				//jQuery提供 的ajax方法:ajax、post、get、load、getJSON、getScript
				var url = "${pageContext.request.contextPath}/json/menu.json";
				$.post(url,{},function(data){
					//调用API初始化ztree
					$.fn.zTree.init($("#ztree3"), setting3, data);
					},'json');
					});
				</script>
| select | which | 选择一个选项卡面板,‘which’参数可以是标题或索引的选项卡面板。 |
| exists | which | 表明如果特别面板是存在,‘which’参数可以是标题或索引的选项卡面板。 |
| add | options | 添加一个新的选项卡面板,选择参数是一个配置对象,看到选项卡面板属性为更多的细节。 当添加一个新的选项卡面板,它将成为选择。 添加一个未经选择的选项卡面板,记得设置”selected“属性为false。 // add a unselected tab panel
$('#tt').tabs('add',
{
title: 'new tab',
selected: false
//...
}); |
1.7 jQuery easyUI messager使用方式
alert
| .messager.alert | title, msg, icon, fn | 显示一个警告窗口。参数: title: 标题文本显示在标题面板。 msg: 消息文本显示。 icon: 形象的图标将显示。可用值是:error,question,info,warning. fn: 这个回调函数窗口关闭时触发。 代码示例: $.messager.alert('My Title','Here is a info message!','info'); |
  //alert方法 消息提示框
    $(function(){
    	$.messager.alert("标题","内容","info");
    });
效果如下
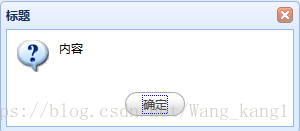
confirm
| .messager.confirm | title, msg, fn | 显示一个确认消息窗口,可以取消按钮。参数: title: 标题文本显示在标题面板。 msg: 消息文本显示。 fn(b): 回调函数,当用户单击Ok按钮,通过true函数,否则通过false来它。 代码示例: $.messager.confirm('Confirm', 'Are you sure to exit this system?', function(r){if (r){ // exit action; } }); |
//confirm方法  确认框    其中function中的参数可以任意字母,返回值有true false
     $(function(){
    	$.messager.confirm("提示信息","你确定要删除这条信息吗?",function(t){
    		alert(t);
    	});
    });
效果如下

show
| messager.show | options | 显示一个消息窗口在屏幕底部。选项参数是一个配置对象: showType: 定义了如何将显示消息窗口。可用值: null,slide,fade,show. 默认为slide。 showSpeed: 定义了时间在毫秒完成显示消息窗口。默认值为600。 width: 定义消息窗口的宽度。默认值为250。 height: 定义消息窗口的高度。默认值为100。 title: 标题文本显示在标题面板。 msg: 消息文本显示。 style: 定义了自定义dpecification风格为消息窗口。 timeout: 如果定义为0,消息窗口不会关闭,除非用户关闭它。对unzero定义,消息窗口将自动关闭当超时。默认为4秒。 代码示例: $.messager.show({
title:'My Title',
msg:'Message will be closed after 5 seconds.',
timeout:5000,
showType:'slide'
});
// 显示消息窗口顶部中心
$.messager.show({
title:'My Title',
msg:'Message will be closed after 4 seconds.',
showType:'show',
style:{
right:'',
top:document.body.scrollTop+document.documentElement.scrollTop,
bottom:''
}
}); |
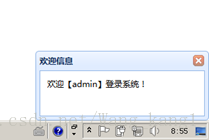
 //show方法   欢迎框
    $(function(){
    	$.messager.show({
    		title:'欢迎信息',
    		msg:'欢迎admin登录',
    		timeout:5000,
    		showType:'show'
    	});
    });
效果如图
1.8 jQuery easyUI menubutton菜单使用
<!-- 制作菜单 -->
	<a data-options="iconCls:'icon-help',menu:'#mm'" class="easyui-menubutton">控制面板</a>

	<!-- 使用div元素制作下拉菜单 -->
	<div id="mm">
		<div οnclick="alert(1111)" data-options="iconCls:'icon-edit'">修改密码</div>
		<div>联系管理员</div>
		<div class="menu-sep"></div>
		<div>退出系统</div>
	</div>
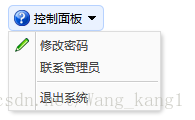
其中上面的iconCls的值也是这四种 icon-search(查询) icon-add(增加) icon-cancel(删除) icon-save(保存)
1.9validatebox使用
提供的校验规则:
1、非空校验required="required"
2、使用validType指定
email:正则表达式匹配电子邮件规则。
url:正则表达式匹配的URL规则。
length[0,100]:在x和x字符允许。
remote['http://.../action.do','paramName']:发送ajax请求做验证值,返回“true”当成功<tr>
<td>确认密码:</td>
<td><input required="true" data-options="validType:'length[4,6]'" id="txtRePass" type="Password" class="txt01 easyui-validatebox" /></td>
</tr>
1.92 combotree(组合树)
<!-- 组合树 -->
  <input name="parentFunction.id"
	  class="easyui-combotree" style="width:170px;"
	  data-options="url:'functionAction_listajax.action'"/>
注 其中url返回的数据是json数据如 其中text文本是展现到界面看的 children是管理系统的子节点的内容
{
"id" : 1,
"text" : "系统管理",
"iconCls" : "icon-save",
"children" : [
{
"text" : "主机信息",
"state" : "closed",
"children" : [
{
"text" : "版本信息"
}
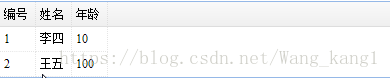
2. datagrid使用方法(重要)
<!-- 方式一:将静态HTML渲染为datagrid样式 -->
    <table class="easyui-datagrid">
       <thead>
           <tr>
              <th data-options="field:'id'" >编号</th>
              <th data-options="field:'name'" >姓名</th>
              <th data-options="field:'age'" >年龄</th>
           </tr>
       </thead>
       <tbody>
            <tr>
              <td>1</td>
              <td>李四</td>
              <td>10</td>
            </tr>
             <tr>
              <td>2</td>
              <td>王五</td>
              <td>100</td>
            </tr>

       </tbody>
    </table>
| field | string | 列字段名。相当于<input>里面的name的值 |
显示效果
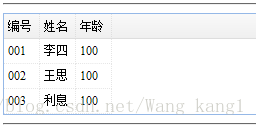
 <!-- 方式二:发送ajax请求获取json数据创建datagrid -->
    <table   data-options="url:'${pageContext.request.contextPath }/json/datagrid.json'"
        class="easyui-datagrid">
       <thead>
           <tr>
              <th data-options="field:'id'">编号</th>
              <th data-options="field:'name'">姓名</th>
              <th data-options="field:'age'" >年龄</th>
           </tr>
       </thead>
    </table>
提供json文件:
                   {"id":"001","name":"李四","age":100},
		   {"id":"002","name":"王思","age":100},
		   {"id":"003","name":"利息","age":100}
效果如图
<!-- 方式三:使用easyUI提供的API创建datagrid -->
    <table id="mytables">
    </table>
    <script type="text/javascript">
       $(function(){
    	 //页面加载完成后,创建数据表格datagrid
    	   $("#mytables").datagrid({
    		 //定义标题行所有的列
    		   columns:[[
    			     {title:'编号',field:'id'},
    			     {title:'姓名',field:'name'},
    			     {title:'年龄',field:'age'}
    		       ]],
    		   url:'${pageContext.request.contextPath }/json/datagrid_data.json',
    			 //定义工具栏
    			 toolbar:[
    				 {text:'添加',iconCls:'icon-add',
    					 //为按钮绑定单击事件
    					 handler:function(){
    						 alert("sadas");
    					 }},
    				 {text:'删除',iconCls:'icon-remove'},
    				 {text:'更新',iconCls:'icon-edit'},
    				 {text:'查询',iconCls:'icon-search'}
    			 ],
    			 //分页
    			 pagination:true
    	   });
       });
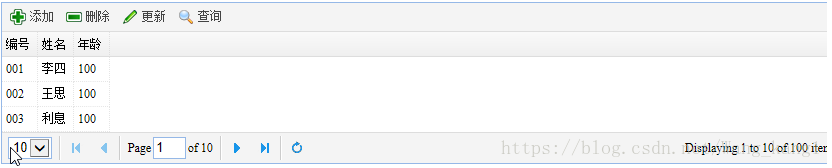
</script>| columns |
array |
定义标题行所有的列 | |
| url | string | 一个URL请求数据从远程站点 它返回的是json数据 |
|
| toolbar |
array,selector |
顶部工具栏的数据网格面板 text为工具的名称 iconCls为工具的图标 |
如果数据表格中使用了分页条,要求服务端响应的json变为:

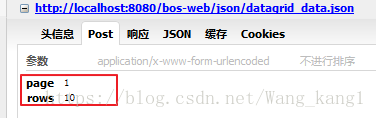
响应
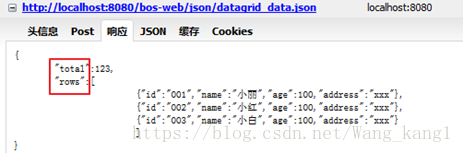
效果如图
2.1 jquery OCUpload一键上传插件使用
第一步:将js文件引入页面
<script type="text/javascript" src="${pageContext.request.contextPath }/js/jquery-1.8.3.js"></script>
<script type="text/javascript" src="${pageContext.request.contextPath }/js/jquery.ocupload-1.1.2.js"></script>
第二步:在页面中提供任意一个元素
<input id="myButton" type="button" value="上传">第三步:调用插件提供的upload方法,动态修改HTML页面元素
<script type="text/javascript">
	$(function(){
		//页面加载完成后,调用插件的upload方法,动态修改了HTML页面元素
		$("#myButton").upload({
			action:'xxx.action',
			name:'myFile'
		});
	});</scripe>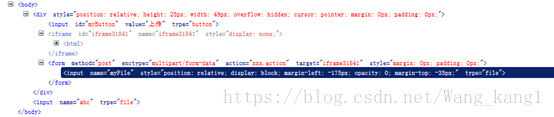
2.2 easyUI combobox下拉框使用
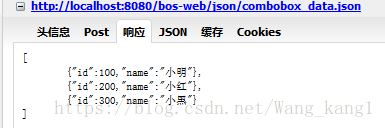
制作一个json文件:
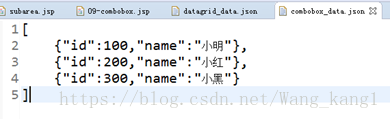
<input data-options="url:'${pageContext.request.contextPath }/json/combobox_data.json',
			valueField:'id',
			textField:'name'"
class="easyui-combobox">| mode | string | 定义了如何加载列表数据当文本改变。设置为“remote“如果下拉列表框从服务器加载。当设置为“remot“模式下,用户类型将被发送的 http请求参数命名为“q”服务器来检索新数据。 |
效果如图
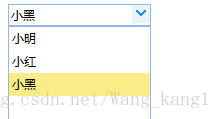
其中 valueField的值因与json数据的存在key相对应 同理textFiled也是
总之 valueField和textFiled的值是json数据的key值 class=“easyui-combobox”表示已下拉框样式使用
2.3 datagrid编辑功能使用方式
| editor | string,object | 显示编辑类型。当字符串显示编辑类型,当对象包含两个属性: type: 字符串,编辑类型、可能的类型是:文本,文本区,复选框,numberbox,validatebox,datebox combotree、组合框。 options: 对象,编辑选项对应的编辑类型。 |
||
| insertRow | param |
|
||
| deleteRow | index | 删除一行。 | ||
| onAfterEdit | rowIndex, rowData, changes | 当用户完成编辑,参数包含: rowIndex: 编辑行索引,从0 rowData: 对应的记录编辑行 changes: 更改的字段/值对 |
||
| getRowIndex | row | 返回指定的行索引,行参数可以一行记录或id字段值。 | ||
| beginEdit | index | 编辑一行结束。 | ||
| endEdit | index | 编辑一行结束。 |
<table id="mytable"></table>
	<!-- 方式三:使用easyUI提供的API创建datagrid -->
	<script type="text/javascript">
		$(function(){
			var myIndex = -1;//全局变量,值为正在编辑行的索引
			//页面加载完成后,创建数据表格datagrid
			$("#mytable").datagrid({
				//定义标题行所有的列
				columns:[[
				          {title:'编号',field:'id',checkbox:true},
				          {width:150,title:'姓名',field:'name',editor:{
				        	  								type:'validatebox',
				        	  								options:{}
				          								   }},
				          {width:150,title:'年龄',field:'age',editor:{
								type:'numberbox',
  								options:{}
								   }},
				          {width:150,title:'日期',field:'address',editor:{
								type:'datebox',
  								options:{}
								   }}
				          ]],
				//指定数据表格发送ajax请求的地址
				url:'${pageContext.request.contextPath }/json/datagrid_data.json',
				rownumbers:true,
				singleSelect:true,
				//定义工具栏
				toolbar:[
				         {text:'添加',iconCls:'icon-add',
				        	 //为按钮绑定单击事件
				        	 handler:function(){
				        		 $("#mytable").datagrid("insertRow",{
				        			 index:0,//在第一行插入数据
				        			 row:{}//空行
				        		 });
				        		 $("#mytable").datagrid("beginEdit",0);
				        		 myIndex = 0;
				         	 }
				         },
				         {text:'删除',iconCls:'icon-remove',handler:function(){
				        	//获得选中的行对象
				        	 var rows = $("#mytable").datagrid("getSelections");
				        	 if(rows.length == 1){
				        		 var row = rows[0];
				        		 //获得指定行对象的索引
				        		 myIndex = $("#mytable").datagrid("getRowIndex",row);
				        	 }
				        	 $("#mytable").datagrid("deleteRow",myIndex);
				        	 //$.post();
				         }},
				         {text:'修改',iconCls:'icon-edit',handler:function(){
				        	 //获得选中的行对象
				        	 var rows = $("#mytable").datagrid("getSelections");
				        	 if(rows.length == 1){
				        		 var row = rows[0];
				        		 //获得指定行对象的索引
				        		 myIndex = $("#mytable").datagrid("getRowIndex",row);
				        	 }
				        	 $("#mytable").datagrid("beginEdit",myIndex);
				         }},
				         {text:'保存',iconCls:'icon-save',handler:function(){
				        	 $("#mytable").datagrid("endEdit",myIndex);
				         }}
				         ],
				//显示分页条
				pagination:true,
				pageList:[3,5,7,10],
				//数据表格提供的用于监听结束编辑事件
				onAfterEdit:function(index,data,changes){
					console.info(data);
					$.post();
				}
			});
		});
	</script>
总结
一般 $("{1}").datagrid(param,value);
{1}表示那个标签执行的id值 param 表示 操作datagrid(数据表格)的属性 value表示param 的值