SpringData
一:背景介绍
本篇为SpringData系列文章的第二篇文章,我们在第一篇文章里,讲述了什么是Jpa,Jpa与hibernate、MyBatis的关系,并且给出了相应的示例,让读者们宏观的了解到SpringData,与之前知识进行关联。
本文将会从配置开始,介绍如何在我们的项目中使用SpringData,并且会给出其提供的Repositories的使用方法,编写一些简单的CRUD代码。
希望通过本文,读者可以学会SpringData的基础使用~
二:XML配置 与JavaConfig配置
想要使用SpringData,就必须要对齐进行一系列的配置,其配置与我们上一篇文章使用Hibernate时,配置相差不大,只不过是Spring的配置方式,配置主要有以下几个方面:
- 数据库连接池
- 配置entityManagerFactory
- 事务管理器
通过对这三部分的配置即可使用SpringData
2.1 XML配置
2.1.1 配置文件
此配置为XML方式进行的配置,比较复杂,现在主流使用的是JavaConfig的配置方式。
<?xml version="1.0" encoding="UTF-8"?>
<beans xmlns="http://www.springframework.org/schema/beans"
       xmlns:xsi="http://www.w3.org/2001/XMLSchema-instance"
       xmlns:aop="http://www.springframework.org/schema/aop"
       xmlns:context="http://www.springframework.org/schema/context"
       xmlns:jdbc="http://www.springframework.org/schema/jdbc"
       xmlns:tx="http://www.springframework.org/schema/tx"
       xmlns:jpa="http://www.springframework.org/schema/data/jpa"
       xmlns:task="http://www.springframework.org/schema/task"
       xsi:schemaLocation="http://www.springframework.org/schema/beans http://www.springframework.org/schema/beans/spring-beans.xsd
           http://www.springframework.org/schema/aop http://www.springframework.org/schema/aop/spring-aop.xsd
           http://www.springframework.org/schema/context http://www.springframework.org/schema/context/spring-context.xsd
           http://www.springframework.org/schema/jdbc http://www.springframework.org/schema/jdbc/spring-jdbc.xsd
           http://www.springframework.org/schema/tx http://www.springframework.org/schema/tx/spring-tx.xsd
           http://www.springframework.org/schema/data/jpa http://www.springframework.org/schema/data/jpa/spring-jpa.xsd">

    <!-- 1. dataSource 配置数据库连接池 -->
    <bean id="dataSource" class="com.alibaba.druid.pool.DruidDataSource" name="dataSource">
        <property name="driverClassName" value="com.mysql.jdbc.Driver" />
        <property name="url" value="jdbc:mysql://82.157.199.3:3306/jpa?characterEncoding=UTF-8" />
        <property name="username" value="root" />
        <property name="password" value="root666" />
    </bean>

    <!-- 2. 配置entityManagerFactory -->
    <bean id="entityManagerFactory" class="org.springframework.orm.jpa.LocalContainerEntityManagerFactoryBean">
        <property name="dataSource" ref="dataSource" />
        <property name="packagesToScan" value="org.example.entity" />
        <property name="persistenceProvider">
            <bean class="org.hibernate.jpa.HibernatePersistenceProvider" />
        </property>
        <!-- JPA的供应商适配器 -->
        <property name="jpaVendorAdapter">
            <bean class="org.springframework.orm.jpa.vendor.HibernateJpaVendorAdapter">
                <!--                自动生成表-->
                <property name="generateDdl" value="true" />
                <property name="database" value="MYSQL" />
                <property name="databasePlatform" value="org.hibernate.dialect.MySQLDialect" />
                <property name="showSql" value="true" />
            </bean>
        </property>
    </bean>

    <!-- 整合spring data jpa -->
    <jpa:repositories base-package="org.example.repositories"
                      transaction-manager-ref="transactionManager"
                      entity-manager-factory-ref="entityManagerFactory" />

    <!-- 3. 事务管理器 -->
    <!-- JPA事务管理器 -->
    <bean id="transactionManager" class="org.springframework.orm.jpa.JpaTransactionManager">
        <property name="entityManagerFactory" ref="entityManagerFactory" />
    </bean>

    <!-- 基于注解方式的事务,开启事务的注解驱动
    如果基于注解的和xml的事务都配置了会以注解的优先 -->
    <tx:annotation-driven transaction-manager="transactionManager" />

    <!-- 组装其他配置文件 -->

</beans>
2.1.2 具体使用
在需要使用的类上,添加注解,引入此配置文件:
@ContextConfiguration("/spring.xml")
@RunWith(SpringJUnit4ClassRunner.class)
2.2 JavaConfig配置
2.2.1 配置类
JavaConfig 的配置方式是由XML配置方式演化而来,与xml方式相比,JavaConfig方式更加的清晰易读
package org.example.config;

import com.alibaba.druid.pool.DruidDataSource;
import org.springframework.context.annotation.Bean;
import org.springframework.context.annotation.Configuration;
import org.springframework.data.jpa.repository.config.EnableJpaRepositories;
import org.springframework.orm.jpa.JpaTransactionManager;
import org.springframework.orm.jpa.LocalContainerEntityManagerFactoryBean;
import org.springframework.orm.jpa.vendor.HibernateJpaVendorAdapter;
import org.springframework.transaction.PlatformTransactionManager;
import org.springframework.transaction.annotation.EnableTransactionManagement;

import javax.persistence.EntityManagerFactory;

/**
 * JavaConfig配置方式
 *
 * 数据源配置
 *
 * 实体管理器工厂配置
 *
 * 事务管理器配置
 */
@Configuration
@EnableJpaRepositories(basePackages = "org.example.repositories")
@EnableTransactionManagement
public class SpringDataJpaConfig {


    /**
     * 数据源配置
     */
    @Bean
    public DruidDataSource dataSource() {


        // 创建Druid数据源对象
        DruidDataSource dataSource = new DruidDataSource();
        // 设置数据库用户名
        dataSource.setUsername("root");
        // 设置数据库密码
        dataSource.setPassword("123456");
        // 设置数据库驱动类名
        dataSource.setDriverClassName("com.mysql.jdbc.Driver");
        // 设置数据库连接URL
        dataSource.setUrl("jdbc:mysql://localhost:3306/springdata_jpa");
        return dataSource;
    }

    /**
     * 实体管理器工厂配置
     */
    @Bean
    public LocalContainerEntityManagerFactoryBean entityManagerFactory() {


        // 创建Hibernate JPA供应商适配器
        HibernateJpaVendorAdapter vendorAdapter = new HibernateJpaVendorAdapter();
        // 设置是否自动生成DDL语句
        vendorAdapter.setGenerateDdl(true);
        // 设置是否在控制台打印SQL语句
        vendorAdapter.setShowSql(true);

        // 创建本地容器实体管理器工厂Bean
        LocalContainerEntityManagerFactoryBean factory = new LocalContainerEntityManagerFactoryBean();
        factory.setJpaVendorAdapter(vendorAdapter);
        // 设置实体类所在的包路径
        factory.setPackagesToScan("com.tuling.pojo");
        // 设置数据源
        factory.setDataSource(dataSource());
        return factory;
    }

    /**
     * 事务管理器配置
     */
    @Bean
    public PlatformTransactionManager transactionManager(EntityManagerFactory entityManagerFactory) {


        // 创建JPA事务管理器
        JpaTransactionManager txManager = new JpaTransactionManager();
        // 设置实体管理器工厂
        txManager.setEntityManagerFactory(entityManagerFactory);
        return txManager;
    }

}
2.2.2 具体使用:
在启动类上,添加如下注解
@ContextConfiguration(classes = SpringDataJpaConfig.class)
@RunWith(SpringJUnit4ClassRunner.class)
三:SpringDataJpa的CRUD
无论是使用XML方式还是使用JavaConfig方式,配置完成后我们就可以使用SpringData的方式来进行代码开发了,我们可以在我们指定的repositories包内,建立一个接口,使用其继承CrudRepository类,进行一些CRUD的基础操作。
3.1 接口代码
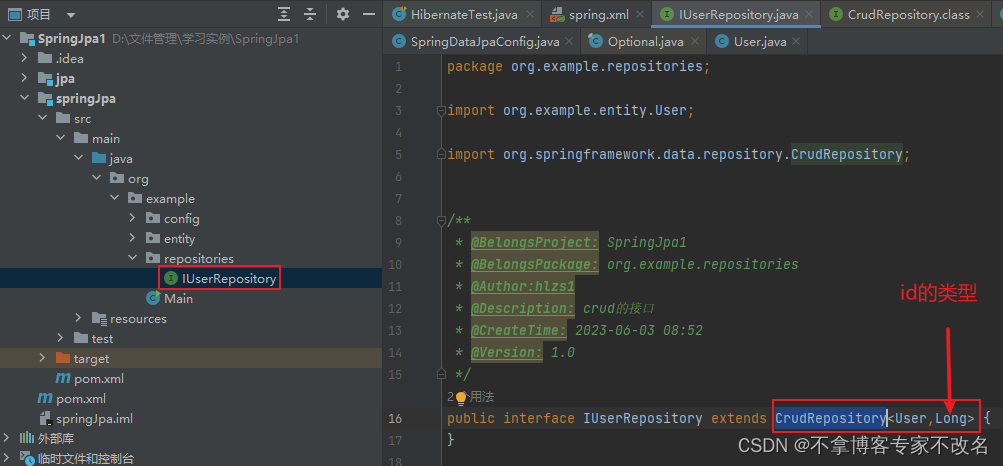
package org.example.repositories;
import org.example.entity.User;
import org.springframework.data.repository.CrudRepository;
/**
 * @BelongsProject: SpringJpa1
 * @BelongsPackage: org.example.repositories
 * @Author:hlzs1
 * @Description: crud的接口
 * @CreateTime: 2023-06-03 08:52
 * @Version: 1.0
 */
public interface IUserRepository extends CrudRepository<User,Long> {


}
3.2 具体使用
import org.example.entity.User;
import org.example.repositories.IUserRepository;
import org.junit.Test;
import org.junit.runner.RunWith;
import org.springframework.beans.factory.annotation.Autowired;
import org.springframework.test.context.ContextConfiguration;
import org.springframework.test.context.junit4.SpringJUnit4ClassRunner;
import java.util.Optional;

/**
 * @BelongsProject: SpringJpa1
 * @BelongsPackage: PACKAGE_NAME
 * @Author:hlzs1
 * @Description: 测试类
 * @CreateTime: 2023-06-03 08:56
 * @Version: 1.0
 */
@ContextConfiguration("/spring.xml")
@RunWith(SpringJUnit4ClassRunner.class)
public class SpringDataTest {


    @Autowired
    private IUserRepository iUserRepository;

    //增加
    @Test
    public void testC(){


        User user = new User();
        user.setUserName("郝xml");

        iUserRepository.save(user);
    }

    //读取
    @Test
    public void testR(){


        Optional<User> byId = iUserRepository.findById(1l);

        System.out.println(byId.get().getUserName());

    }

    //Update
    @Test
    public void testU(){


        User user = new User();
        user.setId(3L);
        user.setUserName("郝xml666");
        iUserRepository.save(user);

    }

    //Delete
    @Test
    public void testD(){


        User user = new User();
        user.setId(3L);
        user.setUserName("郝xml666");
        iUserRepository.delete(user);

    }
}
通过这种方式,我们无需编写sql即可实现见得的CRUD,将会很大程度上解放我们的生产力。
3.3 其它方法
CrudRepository还有很多方法,这里就不进行解释了,将其中方法列在下方:

// 用来插入和修改 有主键就是修改 没有就是新增
// 获得插入后自增id, 获得返回值
<S extends T> S save(S entity);

// 通过集合保存多个实体
<S extends T> Iterable<S> saveAll(Iterable<S> entities);

// 通过主键查询实体
Optional<T> findById(ID id);

// 通过主键查询是否存在 返回boolean
boolean existsById(ID id);

// 查询所有
Iterable<T> findAll();

// 通过集合的主键 查询多个实体,返回集合
Iterable<T> findAllById(Iterable<ID> ids);

// 查询总数量
long count();

// 根据id进行删除
void deleteById(ID id);

// 根据实体进行删除
void delete(T entity);

// 删除多个
void deleteAllById(Iterable<? extends ID> ids);

// 删除多个传入集合实体
void deleteAll(Iterable<? extends T> entities);

// 删除所有
void deleteAll();
3.4 分页方法
其中有一个分页方法,比较特殊,其使用的是CrudRepository上的PagingAndSortingRepository的抽象,其添加了额外的方法简化对实体的分页访问。
@ContextConfiguration(classes = SpringDataJpaConfig.class)
@RunWith(SpringJUnit4ClassRunner.class)
public class SpringDataTest2 {


    @Autowired
    private IUserRepository2 iUserRepository2;


    @Test
    public void testPaging() {


        Page<User> all = iUserRepository2.findAll(PageRequest.of(0, 2));
        System.out.println(all.getTotalPages());  // 打印总页数
        System.out.println(all.getTotalElements());  // 打印总元素数
        System.out.println(all.getContent());  // 打印内容
    }

    @Test
    public void testSort() {


        Sort sort = Sort.by("custId").descending();

        Iterable<User> all = iUserRepository2.findAll(sort);

        System.out.println(all);
    }

    @Test
    public void testSortTypeSafe() {


        Sort.TypedSort<User> sortType = Sort.sort(User.class);

        Sort sort = sortType.by(User::getId).descending();

        Iterable<User> all = iUserRepository2.findAll(sort);

        System.out.println(all);
    }

}
四:总结&提升
本文给出了如何通过XML和Javaconfig两种方式进行SpringData的配置,并且给出了使用CrudRepository进行代码的CRUD的方法,并且罗列出了CrudRepository内的主要方法,通过此篇文章,相信你已经学会了如何使用SpringData。
接下来我们还会讲述CRUD的自定义操作、多表关联等知识,如果感兴趣,可以持续关注~~