提到extends继承,最先想到的可能是ES6中的class、TS中的interface、面向对象编程语言中中的类和接口概念等等,但是我们今天的关注点在于:如何在Vue中使用extends继承特性。
目录
Vue:创建Vue实例的方式
再开始探讨Vue继承相关的内容之前,有必要回顾一下创建Vue组件实例的几种方式,个人总结如下,
构造函数方式:new Vue
这种方式是较为常见的,在Vue-cli脚手架构建的前端项目中,经常看到如下所示的代码段,
new Vue({
  router,
  store,
  render: h => h(App)
}).$mount('#app')
这就是在以Vue构造函数的方式创建实例,然后将其挂载到id选择器为app的DOM元素上。
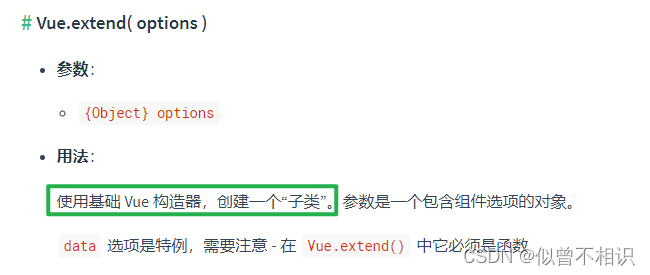
Vue.extend方式
Vue.js开发库提供了Vue.extend()API,用于创建一个组件。
Vue.extend()方法的源码如下,内部主要是创建了一个Vue组件对象,并通过外部配置项,将其props、computed、mixin等选项设置为可用,最终将对象返回,
/**
       * Class inheritance
       */
      Vue.extend = function (extendOptions) {
          extendOptions = extendOptions || {};//外部配置项-即:Vue组件的选项配置
          console.log(extendOptions)
          var Super = this;//指向Vue自身实例的引用
          var SuperId = Super.cid;
          var cachedCtors = extendOptions._Ctor || (extendOptions._Ctor = {});
          if (cachedCtors[SuperId]) {
              return cachedCtors[SuperId];
          }
          var name = getComponentName(extendOptions) || getComponentName(Super.options);
          if (name) {
              validateComponentName(name);
          }
          var Sub = function VueComponent(options) {
              this._init(options);
          };
          Sub.prototype = Object.create(Super.prototype);
          Sub.prototype.constructor = Sub;
          Sub.cid = cid++;
          Sub.options = mergeOptions(Super.options, extendOptions);
          Sub['super'] = Super;
          // For props and computed properties, we define the proxy getters on
          // the Vue instances at extension time, on the extended prototype. This
          // avoids Object.defineProperty calls for each instance created.
          if (Sub.options.props) {
              initProps(Sub);
          }
          if (Sub.options.computed) {
              initComputed(Sub);
          }
          // allow further extension/mixin/plugin usage
          Sub.extend = Super.extend;
          Sub.mixin = Super.mixin;
          Sub.use = Super.use;
          // create asset registers, so extended classes
          // can have their private assets too.
          ASSET_TYPES.forEach(function (type) {
              Sub[type] = Super[type];
          });
          // enable recursive self-lookup
          if (name) {
              Sub.options.components[name] = Sub;
          }
          // keep a reference to the super options at extension time.
          // later at instantiation we can check if Super's options have
          // been updated.
          Sub.superOptions = Super.options;
          Sub.extendOptions = extendOptions;
          Sub.sealedOptions = extend({}, Sub.options);
          // cache constructor
          cachedCtors[SuperId] = Sub;
          return Sub;
}通过查看Vue.extend()方法的源码,我们会发现,它内部是在调用Vue原型对象上面的_init()方法来完成组件初始化,通过如下图所示的一些核心配置,使其成为一个名副其实的Vue组件实例,

那么我们自己如何调用Vue.extend()方法创建组件呢?示例代码如下,
    /**
     * 方式1-Vue.extend-使用基础 Vue 构造器,创建一个组件
     * PS:此种方式中,data必须为函数
     * */
    const IButton = Vue.extend({
      name: "IButton",
      template: `<button class="btn" @click="clickBtnHandler($event)">Click</button>`,
      methods: {
        clickBtnHandler(e) {
          console.log(e.target.dataset)
        }
      },
    })
    Vue.component('i-button', IButton);//Vue.component用途之一:将组件注册到全局环境
Vue.component方式

Vue.component()方法有两个作用,其①:将组件注册全局可用的组件;其②:以给定的id,创建一个全局范围内可用的组件。使用此接口创建一个Vue组件的示例代码如下,
    /**
     * 方式2-Vue.component-间接调用Vue.extend,创建一个组件
     * PS:此种方式中,data必须为函数
     * */
    const IList = Vue.component('i-list', {
      template: `<div>
        <p>列表</p>
        <ul>
          <li v-for="n in number">{

   {n}}</li>
        </ul></div>`,
      data: function () {
        return {
          number: 5
        }
      }
    })
    // Vue.component('i-list', IList);//Vue.component创建的组件无需再注册
render渲染函数方式

也可以通过Vue.js提供的render()渲染函数创建一个Vue组件,如下示例代码,通过render函数的函数,根据props参数level来创建了一个级别为level的h标签,并提供插槽供开发者对其进行拓展。
 //方式3:基于渲染函数构造函数式组件-[基于slot插槽方式提供组件内容1]
    const ITitle = Vue.component(
      "i-title",
      {
      render: function (createElement) {
        return createElement(
          'h' + this.level,   // 标签名称
          this.$slots.default // 子节点数组
        )
      },
      props: {
        level: {
          type: Number,
          required: true
        }
      }
    });
对象方式

通过对象的形式定义组件-这也是我们在Vue前端应用开发中最常使用的方式,然后通过export default导出。示例代码如下,
    //方式4-通过对象的形式定义组件-这也是我们在Vue前端应用开发中最常使用的方式,然后通过export default导出
    const InfoBox = {
      name: "InfoBox",
      template: `<div class="box" :style="styleObject">{

   {content}}</div>`,
      data() {
        return {
          content: '消息内容',
          styleObject: {
            boxSizing: "border-box",
            padding: "25px",
            width: '300px',
            height: '200px',
            backgroundColor: 'rgba(0,0,0,0.3)'
          }
        }
      }
    }
    Vue.component('info-box', InfoBox);//Vue.component用途之一:将组件注册到全局环境
Vue:extends继承特性
第一部分只介绍了如何创建一个组件,并没有介绍如何去提高一个组件的复用性。既然谈到复用性,可行的方法有很多,例如:slot插槽、mixix混入、Vue.directive自定义一个可复用的指令、通过Install方法开发一个可复用的插件、通过Vue.filter定义一个可复用的过滤器等。关于如上内容,Vue官网都有详细的介绍。
而接下来要讨论的就是Vue官网里面介绍比较含蓄的一种方法:借助extends实现组件的继承。

那么具体如何操作呢?我们先来定义一个基础列表组件IList,并以事件委托的方式为每一个列表元素注册点击事件,示例代码如下,
<!--
* @Description: IList列表组件,基于事件委托机制对列表事件回调做了优化处理
* @Author: Xwd
* @Date: 2023-02-16 00:21:49
* @LastEditors: Xwd
* @LastEditTime: 2023-02-19 17:03:25
* @Attention: 此列表组件的clickHandler()点击事件默认基于index下标来选择性的返回item的值,在一些场景下存在风险-->
<template>
<div class="i-list">
<p v-if="!!title" class="i-title">{
{ title }}</p>
<!-- <div class="split-horizon"></div> -->
<div v-if="(list || []).length > 0" class="i-content" @click="clickHandler($event)">
<div class="i-item" v-for="(item, index) in list" :key="index">
<img class="i-item-icon" :src="item.image || noImage" />
<div class="i-item-body">
<div class="i-item-title">{
{ item.title }}<span class="iconfont" title="地图定位" :data-id="item.id"
:data-index="index"></span></div>
<div class="i-item-desc" :title="item.desc">{
{ item.desc }}</div>
</div>
</div>
</div>
</div>
</template>
<script>
import noImage from '@/assets/images/no.png';
export default {
name: "IList",
props: {
title: {
type: String,
required: false,
default: "",
},
list: {
type: Array,
required: false,
default: () => [],
}
},
mounted() { },
methods: {
/**
* 列表元素点击事件-回调函数
* @param {*} event
*/
clickHandler(event) {
const index = event.target.dataset.index;
if (typeof index !== "undefined" && index !== null) {
this.$emit("click", this.list[Number(index)], Number(index));
}
}
}
}
</script>
<style lang="less" scoped>
</style>而由于我们存在一些不确定因素,例如:props中的list是否具有唯一id、点击回调函数中的具体逻辑是什么?所以我们可以将次组件作为一个基组件,在后续使用过程中,在子组件TownList.vue中通过extends的选项,来继承IList组件,实现复用。示例代码如下,
<!--
 * @Description:
 * @Author: Xwd
 * @Date: 2023-02-19 16:50:16
 * @LastEditors: Xwd
 * @LastEditTime: 2023-02-19 16:56:57
-->
<script>
import IList from '@/components/layout/IList.vue';
export default {
  name:"TownList",
  extends:IList,
  methods:{
     /**
     * 列表元素点击事件-回调函数,覆写父组件方法,基于元素id值重定义处理逻辑
     * @param {*} event 事件对象
     */
     clickHandler(event) {
      const id = event.target.dataset.id;
      console.log(`id=${id}`)
      if (typeof id !== "undefined" && id !== null) {
        const dataIndex = this.list.findIndex(item => item.id == id);
        dataIndex !== -1 & this.$emit("click", this.list[dataIndex], dataIndex)
      }
    }
  }
}
</script>此处我们通过id来区分每一个元素,并覆写了父组件中的clickHandler——点击事件回调方法。最终效果如下,

此种方式的不足之处在于:无法在子组件中添加template节点,否则会直接覆盖掉原有的template模板。