最近工作中有个需求,就是根据json文件里的参数,在figma中做出色标图例。
由于要素很多,不同的要素的色标配置文件都不同,如果手动一个颜色一个颜色去复制粘贴很费时间,所以我让chatGPT去帮我实现。但是我用的是GPT-3,生成的总是会有各种问题,而且只支持颜色用字符串的形式,如果颜色换成十六进制或者RGB格式,它就不认识了。
于是小老虎帮我写了一个可以识别RGB格式的脚本,可以在figma的Scripter插件中使用,使用时替换colorStops中的json文件内容即可。
终于可以解放双手了,不然像以前那样图例里的每个色块都要手输3个值,手指都要废了。
const colorStops = {


  "stops": [
    {


      "stop": "rgb(90, 70, 115)",
      "value": -60
    },
    {


      "stop": "rgb(127, 59, 183)",
      "value": -24
    },
    {


      "stop": "rgb(22, 101, 172)",
      "value": -15
    },
    {


      "stop": "rgb(70, 151, 223)",
      "value": -8
    },
    {


      "stop": "rgb(98, 168, 232)",
      "value": -4
    },
    {


      "stop": "rgb(140, 212, 210)",
      "value": 0
    },
    {


      "stop": "rgb(60, 153, 90)",
      "value": 4
    },
    {


      "stop": "rgb(234, 228, 124)",
      "value": 8
    },
    {


      "stop": "rgb(234, 192, 73)",
      "value": 16
    },
    {


      "stop": "rgb(217, 137, 81)",
      "value": 26
    },
    {


      "stop": "rgb(204, 88, 48)",
      "value": 32
    },
    {


      "stop": "rgb(140, 44, 11)",
      "value": 40
    },
    {


      "stop": "rgb(51, 0, 0)",
      "value": 60
    }
  ],
  "fieldName": "O"
}

// Create a frame for each color stop
colorStops.stops.forEach((stop, index) => {


  const frame = createFrame();

  // Set the frame size
  frame.resize(80, 16);

  // Set the frame background color
  const [r, g, b] = stop.stop.match(/\d+/g).map(Number);
  const color = {

     r: r / 255, g: g / 255, b: b / 255 };
  frame.fills = [{

     type: 'SOLID', color: color }];

  // Position the frame
  frame.x = 0;
  frame.y = index * 16;

  // Add a text node with the color value
  const textNode = createText();
  textNode.characters = `${

      stop.value}`;
  textNode.x = 8;
  textNode.y = 0;

  // Add the text node to the frame
  frame.appendChild(textNode);

  // Add the frame to the Figma page
  figma.currentPage.appendChild(frame);
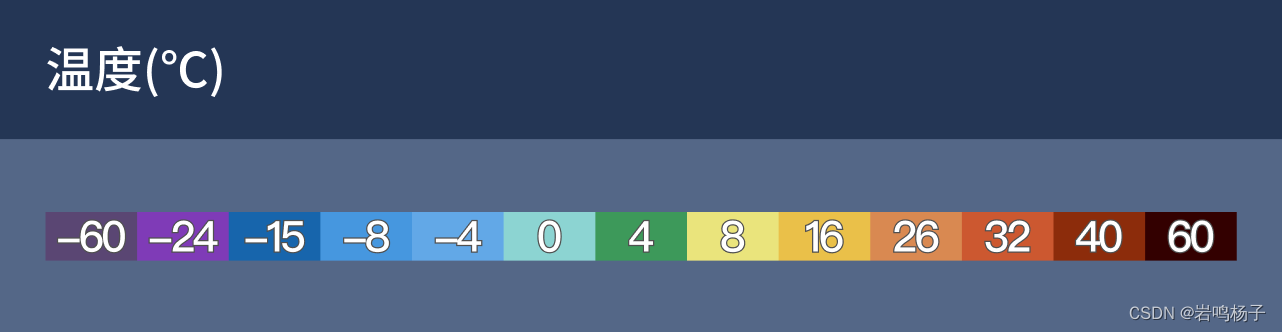
生成的效果如下:

手动调整一下样式,再加上autolayout,就能作为一个可复用的色标组件了。