背景
在深度学习炼丹过程中,总会遇到各种奇怪问题,这个时候总会在csdn和知乎平台找到答案,那每次遇到的问题是解决了,但没有记录起来,确实太可惜,因为未来某个时间或者某个人会遇到类似问题,所以在这片文章专项整理,pytorch、python、conda、pip等问题,希望能给大家更多帮助
pytorch
问题1:cuda error:device-side assert triggered
如果报错在你自己的代码中,这一般和自己的代码逻辑错误有关了:
1.检查代码,看是否是训练时loss成为nan,可以更换词向量的拼接方式等。
2.如果是分类任务,可能是标签个数不对应。
参考一篇文章,可以尝试在代码中加入:torch.backends.cudnn.enable =True, torch.backends.cudnn.benchmark = True。(对于我的问题没有用)
这种问题操作tensor异常,如数组越界、精度不匹配等
问题2:cuda out of memory
- 改小batch_size
- 在报错的地方加上这一句torch.cuda.empty_cache()
- 加上这一条语句with torch.no_grad():
- 加上这么一句model.eval()
- loss和评价指标强制转换为float()类型的,或者在每个epoch的最后,都将loss删掉。
- 将"pin_memory": True改为False,具体原因原博:
pin_memory就是锁页内存,创建DataLoader时,设置pin_memory=True,则意味着生成的Tensor数据最开始是属于内存中的锁页内存,这样将内存的Tensor转义到GPU的显存就会更快一些。
主机中的内存,有两种存在方式,一是锁页,二是不锁页,锁页内存存放的内容在任何情况下都不会与主机的虚拟内存进行交换(注:虚拟内存就是硬盘),而不锁页内存在主机内存不足时,数据会存放在虚拟内存中。显卡中的显存全部是锁页内存,当计算机的内存充足的时候,可以设置pin_memory=True。当系统卡住,或者交换内存使用过多的时候,设置pin_memory=False。因为pin_memory与电脑硬件性能有关,pytorch开发者不能确保每一个炼丹玩家都有高端设备,因此pin_memory默认为False。
参考资料:https://blog.csdn.net/xiyou__/article/details/118529350
问题3:nn.TransformerEncoder 使用 src_key_padding_mask 时出现nan
出现nan的原因来自于src_key_padding_mask,src_key_padding_mask 是一个二值化的tensor,在需要被忽略地方应该是True,在需要保留原值的情况下,是False。检查发现src_key_padding_mask全为True,此时会导致编码后结果全为nan。
解决方法是更新mask或不使用mask。
问题4:Tensor must be contiguous
解决方法
batch_data[1].permute([1,0,2]).contiguous()
参考资料:
https://www.jianshu.com/p/51678ea7a959
问题5:加载模型后optimizer.step()处报错:RuntimeError: expected device cpu but got device cuda:0
原因:optimizer加载参数时,tensor默认在CPU上,故需将所有的tensor都放到GPU上,否则:在optimizer.step()处报错:RuntimeError: expected
device cpu but got device cuda:0。
optimizer = model.configure_optimizers(weight_decay, learning_rate, (beta1, beta2), device_type=cfg.device)
        optimizer.load_state_dict(checkpoint['optimizer'])
        for state in optimizer.state.values():
            for k, v in state.items():
                if torch.is_tensor(v):
                    state[k] = v.to(cfg.device)
问题6:进程在运行时卡住,显存分配了却不开始训练(卡在Using /home/faith/.cache/torch_extensions as PyTorch extensions root…)
解决方案:
一般会在用户主目录下会有一个自动生成的 .cache文件夹(有可能是隐藏状态,需要你打开显示隐藏文件选项),将这个文件夹删除即可,可以重新生成.cache文件夹,然后就不会有冲突啦

问题7:导入apex出现ImportError: cannot import name ‘UnencryptedCookieSessionFactoryConfig’
解决方法:
下载apex安装文件,手动安装!不再使用pypi管理的apex!
1、git clone git://github.com/NVIDIA/apex
2、cd apex
3、pip install -v --no-cache-dir ./
注:通过pip install apex 是不是nvidia官方文件
问题8:accelerate库 RuntimeError: Expected all tensors to be on the same device, but found at least two devices, cuda:1 and cuda:0! (when checking argument for argument index in method wrapper_CUDA__index_select)
注:问题还在定位分析中
问题9:RuntimeError: Library cudart is not initialized
问题原因:
缺少cudatoolkit
解决方法:
conda install cudatoolkit=11.7 -c nvidia
python
1)sqlalchemy
问题1:sqlalchemy+pandas.read_sql)AttributeError: ‘Engine‘ object has no attribute ‘execution_options‘
场景:通过数据库sql ,使用pandas.read_sql读取数据,
分析:SQLAlchemy v2.0.0版本和V1.X.X版本差别较大,同样代码,2.0.0版本以上无法运行
解决方案:
添加文本导入 ,将执行sql传到text方法
from sqlalchemy import create_engine, text
s_settings_df = pd.DataFrame(engine_cloud.connect().execute(text(query)))
conda
问题1:An unexpected error has occurred. Conda has prepared the above report. If submitted, this report will be used by core maintainers to improve future releases of conda.
场景:
在主机上的服务器里用miniconda安装新环境时,输入
conda create -n chatgpt python==3.8.0时安装失败,遇到了An unexpected error has occurred. Conda has prepared the above report.问题。.
分析:我遇到这个问题是因为我改动了miniconda 安装类库路径了,因为我有台服务器根目录空间不够
解决方案:在网上查阅好多资料,都试过了,最终没解决问题,最后采用卸载minicoda后,重新安装,指定下新目录
参考资料:
- [conda报错 已解决]An unexpected error has occurred. Conda has prepared the above report.
- conda报错-Collecting package metadata (current_repodata.json): failed
pip
问题1:[ERROR: Could not install packages due to an OSError: [Errno 28] No space left on
背景:pip 安装torch库,代码如下
pip install -I https://download.pytorch.org/whl/cu118/torch-2.0.1%2Bcu118-cp38-cp38-linux_x86_64.whl
原因:pip install的过程中使用/tmp目录临时存放build需要的文件,而/tmp目录空间不足,从而导致无法安装
解决方案:
将/tmp目录大文件删除,
执行命令,可以帮我们找到/tmp目录大文件
du -h --max-depth=1 | sort -hr
问题2:pip install 报错 FileNotFoundError: [Errno 2] No usable temporary directory found in [‘/tmp‘, ‘/var/tmp‘, ‘/usr/tmp’]
场景:pip 安装torch库,代码如下
pip install -I https://download.pytorch.org/whl/cu118/torch-2.0.1%2Bcu118-cp38-cp38-linux_x86_64.whl
原因:因问题1 删除了pip相关临时文件导致
解决方案:
将~/.cache/pip/ 所有文件删除
下面给出几种**.cache文件清理方法**以供参考:
- 找到日期大于365天的文件,直接删除之,命令:find ~/.cache/ -type f -atime +365 -delete
- 找到大于10M的文件,命令:find ~/.cache/ -size +10M,然后酌情清理之。
- 列出体积大于100M的目录,命令:du ~/.cache -t 100M,然后酌情清理之。
参考资料:https://blog.csdn.net/qq_36332660/article/details/129241167
图像库
clip
问题1:module ‘clip‘ has no attribute ‘load‘
直接用pip install clip,但此clip非彼clip,建议直接安装官网git代码仓库
网速快方式: pip install git+https://github.com/openai/CLIP.git
网上慢方式:
- 先clone 官方代码到某个目录,git clone https://github.com/openai/CLIP.git /tmp//CLIP
- 然后执行pip install ./ 或者python -m setup.py
问题2:model, preprocess = clip.load(‘ViT-L/14’) certificate verify failed: self signed certificate in certificate chain
场景:精简下核心代码,如下:
import torch
import clip
from PIL import Image

device = "cuda" if torch.cuda.is_available() else "cpu"
model, preprocess = clip.load("ViT-B/32", device=device)
原因:网络不行呗,没梯子,但有懒着弄
解决方案:
手动下载吧,分析下clip源码,涉及下载操作有1个核心文件
clip.py
内容如下:
_MODELS = {
    "RN50": "https://openaipublic.azureedge.net/clip/models/afeb0e10f9e5a86da6080e35cf09123aca3b358a0c3e3b6c78a7b63bc04b6762/RN50.pt",
    "RN101": "https://openaipublic.azureedge.net/clip/models/8fa8567bab74a42d41c5915025a8e4538c3bdbe8804a470a72f30b0d94fab599/RN101.pt",
    "RN50x4": "https://openaipublic.azureedge.net/clip/models/7e526bd135e493cef0776de27d5f42653e6b4c8bf9e0f653bb11773263205fdd/RN50x4.pt",
    "RN50x16": "https://openaipublic.azureedge.net/clip/models/52378b407f34354e150460fe41077663dd5b39c54cd0bfd2b27167a4a06ec9aa/RN50x16.pt",
    "RN50x64": "https://openaipublic.azureedge.net/clip/models/be1cfb55d75a9666199fb2206c106743da0f6468c9d327f3e0d0a543a9919d9c/RN50x64.pt",
    "ViT-B/32": "https://openaipublic.azureedge.net/clip/models/40d365715913c9da98579312b702a82c18be219cc2a73407c4526f58eba950af/ViT-B-32.pt",
    "ViT-B/16": "https://openaipublic.azureedge.net/clip/models/5806e77cd80f8b59890b7e101eabd078d9fb84e6937f9e85e4ecb61988df416f/ViT-B-16.pt",
    "ViT-L/14": "https://openaipublic.azureedge.net/clip/models/b8cca3fd41ae0c99ba7e8951adf17d267cdb84cd88be6f7c2e0eca1737a03836/ViT-L-14.pt",
    "ViT-L/14@336px": "https://openaipublic.azureedge.net/clip/models/3035c92b350959924f9f00213499208652fc7ea050643e8b385c2dac08641f02/ViT-L-14-336px.pt",
}
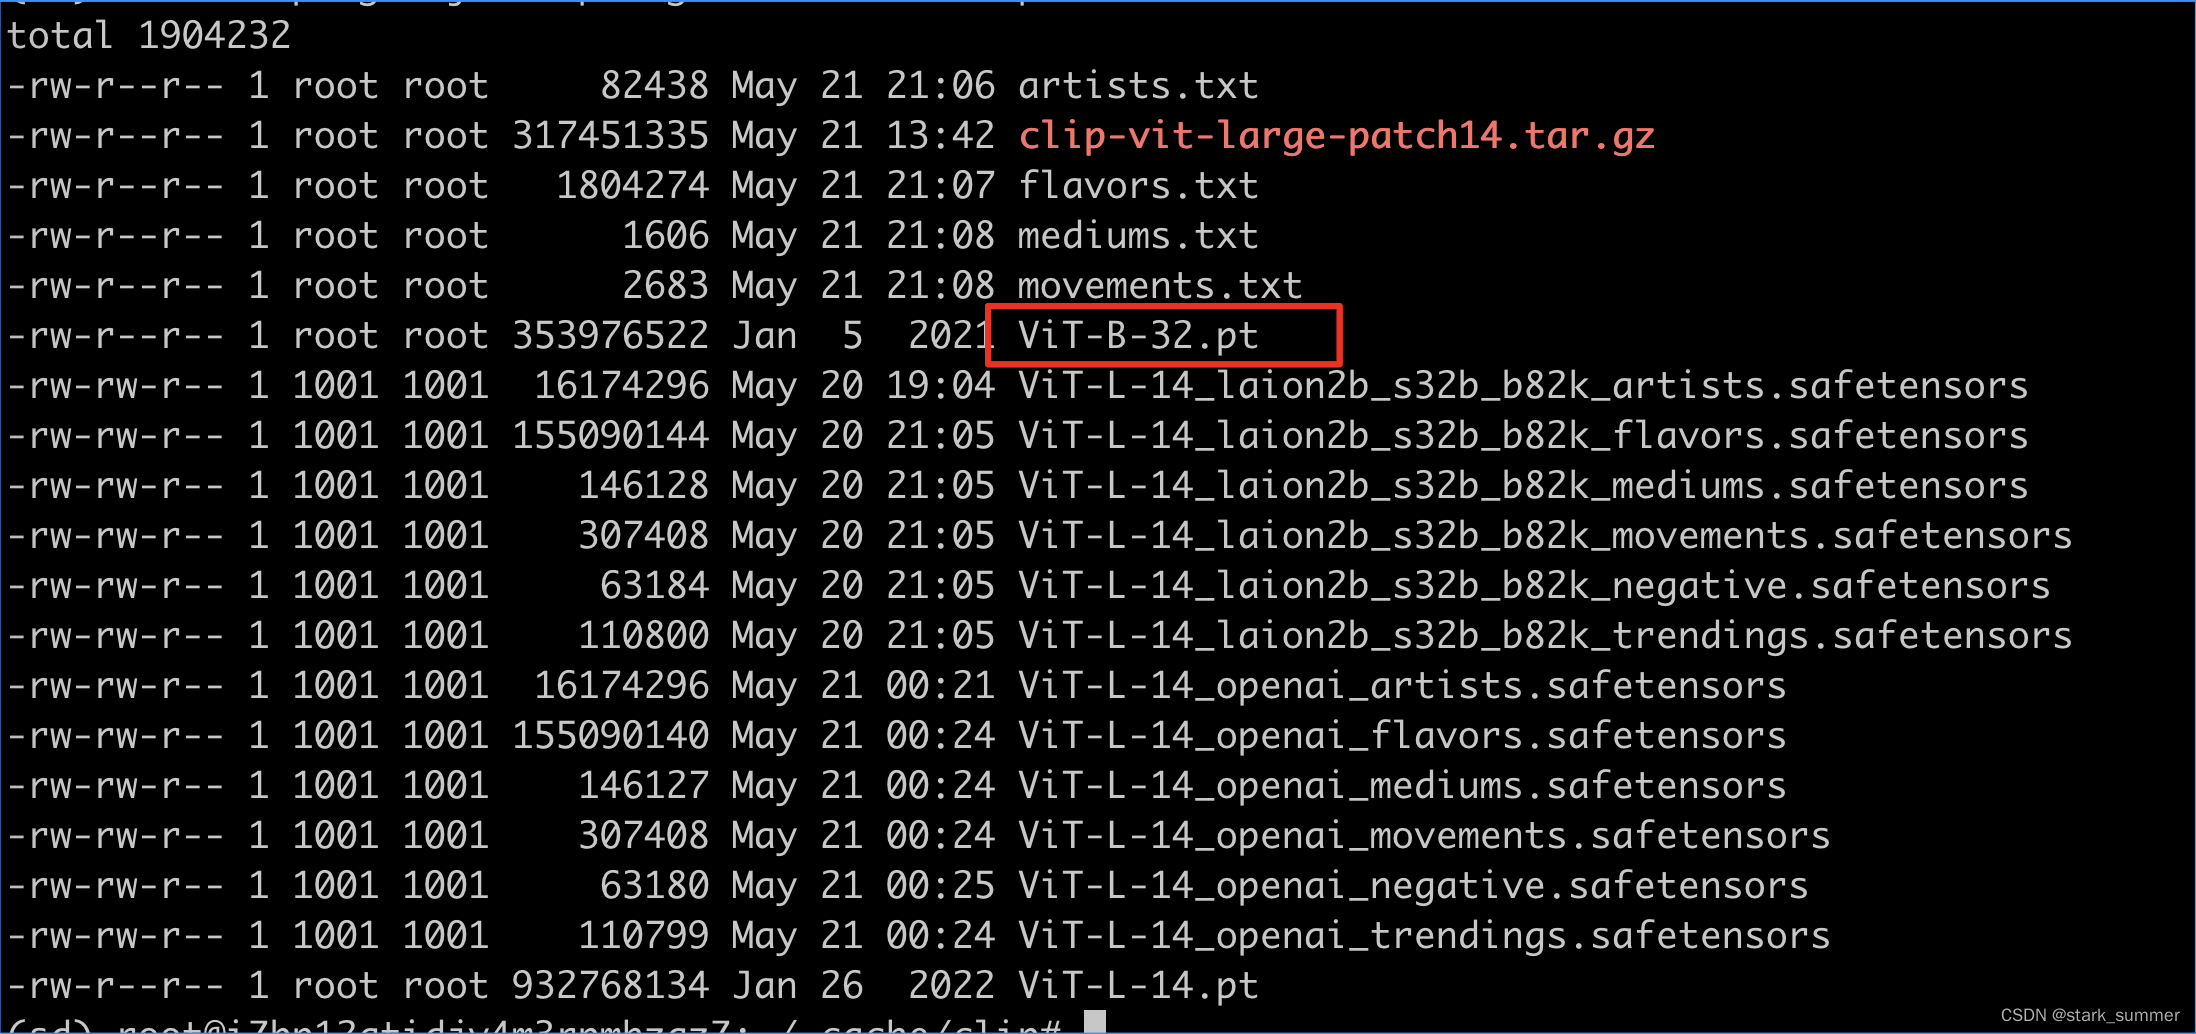
根据使用需求,将对应模型版本文件下载到~/.cache/clip/,如ViT-B-32.pt模型,然后再执行上述代码就正常了

参考资料:https://zhuanlan.zhihu.com/p/613923088