1、设置软件源
http://blog.csdn.net/ezreal_king/article/details/72790291
2、安装mysql
3、mysql授权
(1)授权
mysql> GRANT ALL PRIVILEGES ON *.* TO 'root'@'%' IDENTIFIED BY '123456' WITH GRANT OPTION;
Query OK, 0 rows affected, 1 warning (0.00 sec)

mysql> FLUSH PRIVILEGES;
Query OK, 0 rows affected (0.00 sec)

说明:【想要root用户使用密码123456从任何主机连接到mysql服务器】
(2)查看授权结果
mysql> use mysql
Reading table information for completion of table and column names
You can turn off this feature to get a quicker startup with -A
Database changed
mysql> select host,user from user;
+———–+——————+
| host | user |
+———–+——————+
| % | root |
| localhost | debian-sys-maint |
| localhost | mysql.session |
| localhost | mysql.sys |
| localhost | root |
+———–+——————+
5 rows in set (0.00 sec)
mysql> exit
4、修改配置文件
vim /etc/mysql/mysql.conf.d/mysqld.cnf修改如下
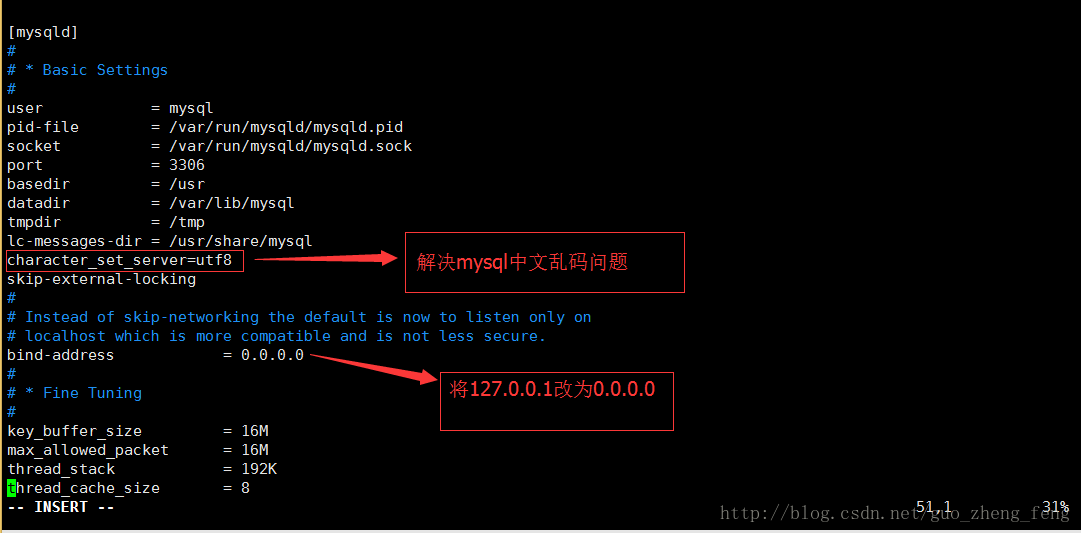
然后重启mysql
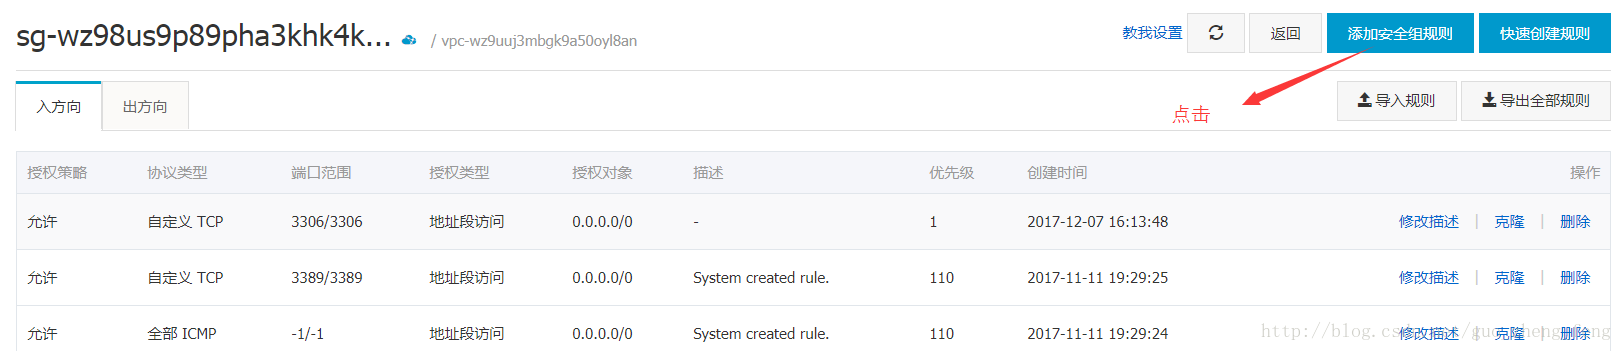
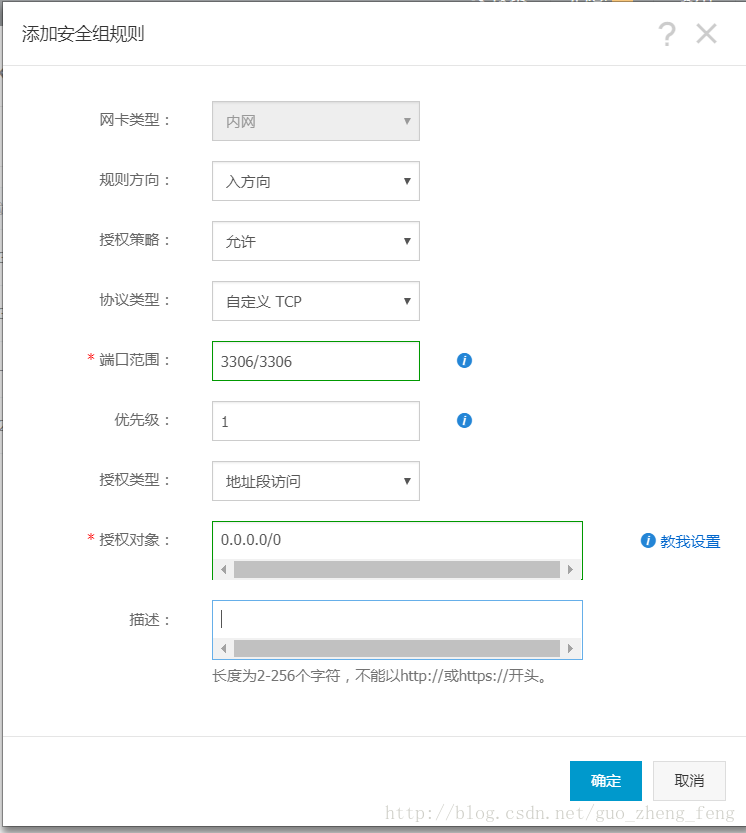
service mysql restart5、阿里云服务器控制台开放Ubuntu防火墙3306端口


这样就可以通过Navicat连接到阿里云服务器里的mysql了