Nacos
Nacos(官方网站:Nacos.io)是一个易于使用的平台,用于动态服务发现、配置和服务管理。它帮助您轻松构建云原生应用程序和微服务平台。
Nacos支持几乎所有类型的服务。例如,Dubbo/gRPC service, Spring Cloud RESTFul service or Kubernetes service.
Nacos 的关键特性包括:
- 服务发现和服务健康监测
- 动态配置服务
- 动态 DNS 服务
- 服务及其元数据管理
相关网址:
https://github.com/alibaba/spring-cloud-alibaba/wiki
Nacos安装(win环境下)
下载地址:https://github.com/alibaba/nacos/releases
根据自己的spring cloud alibaba版本选择合适的nacos版本下载,我这里云服务是个轻量级的,下载的是zip的,准备安装在win上使用。下载完成解压即用。
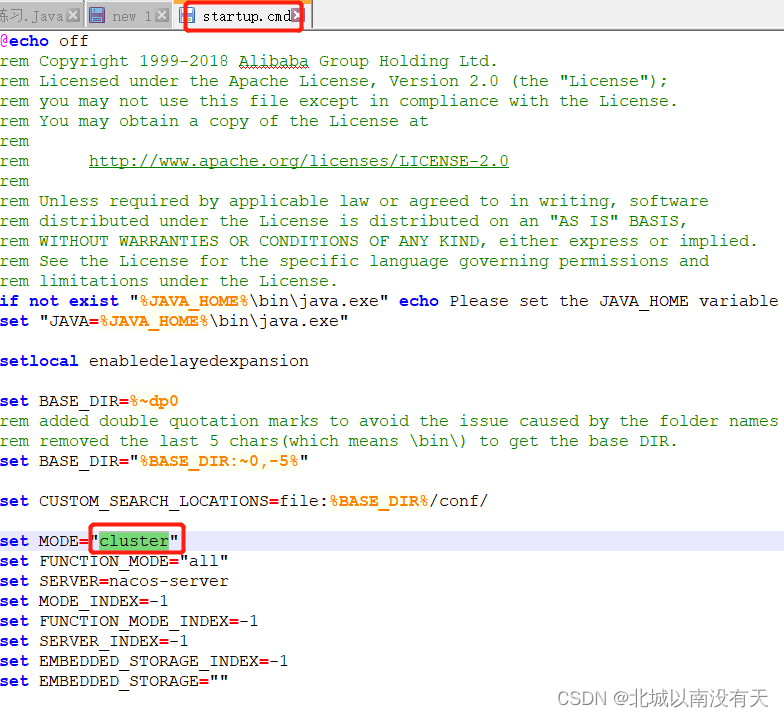
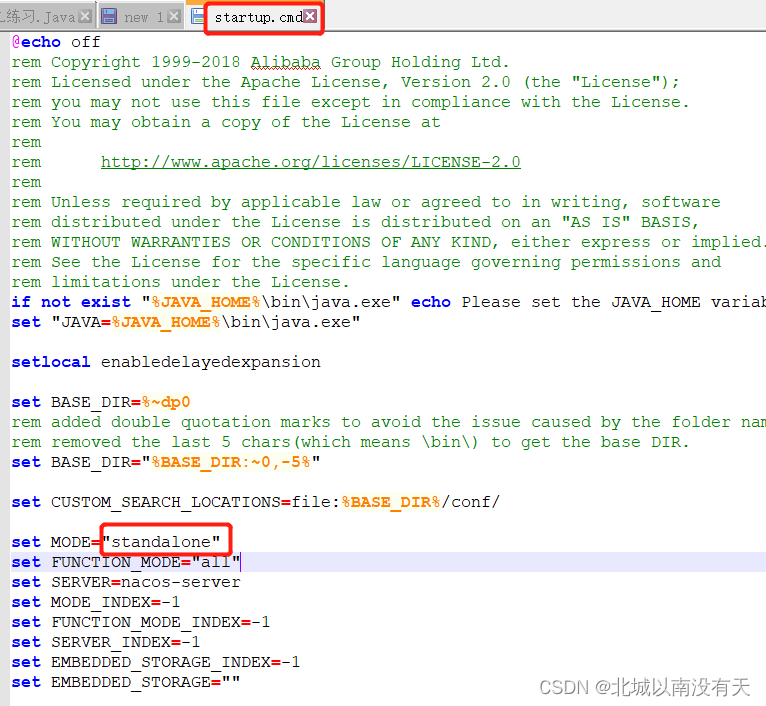
不过在使用之前是需要修改一些配置的。Nacos默认是集群安装,我这边自己本地电脑自己使用,就使用的是单机安装。
修改前:
修改后:
启动Nacos服务
双击修改过的startup.cmd文件即可。

启动完成后效果

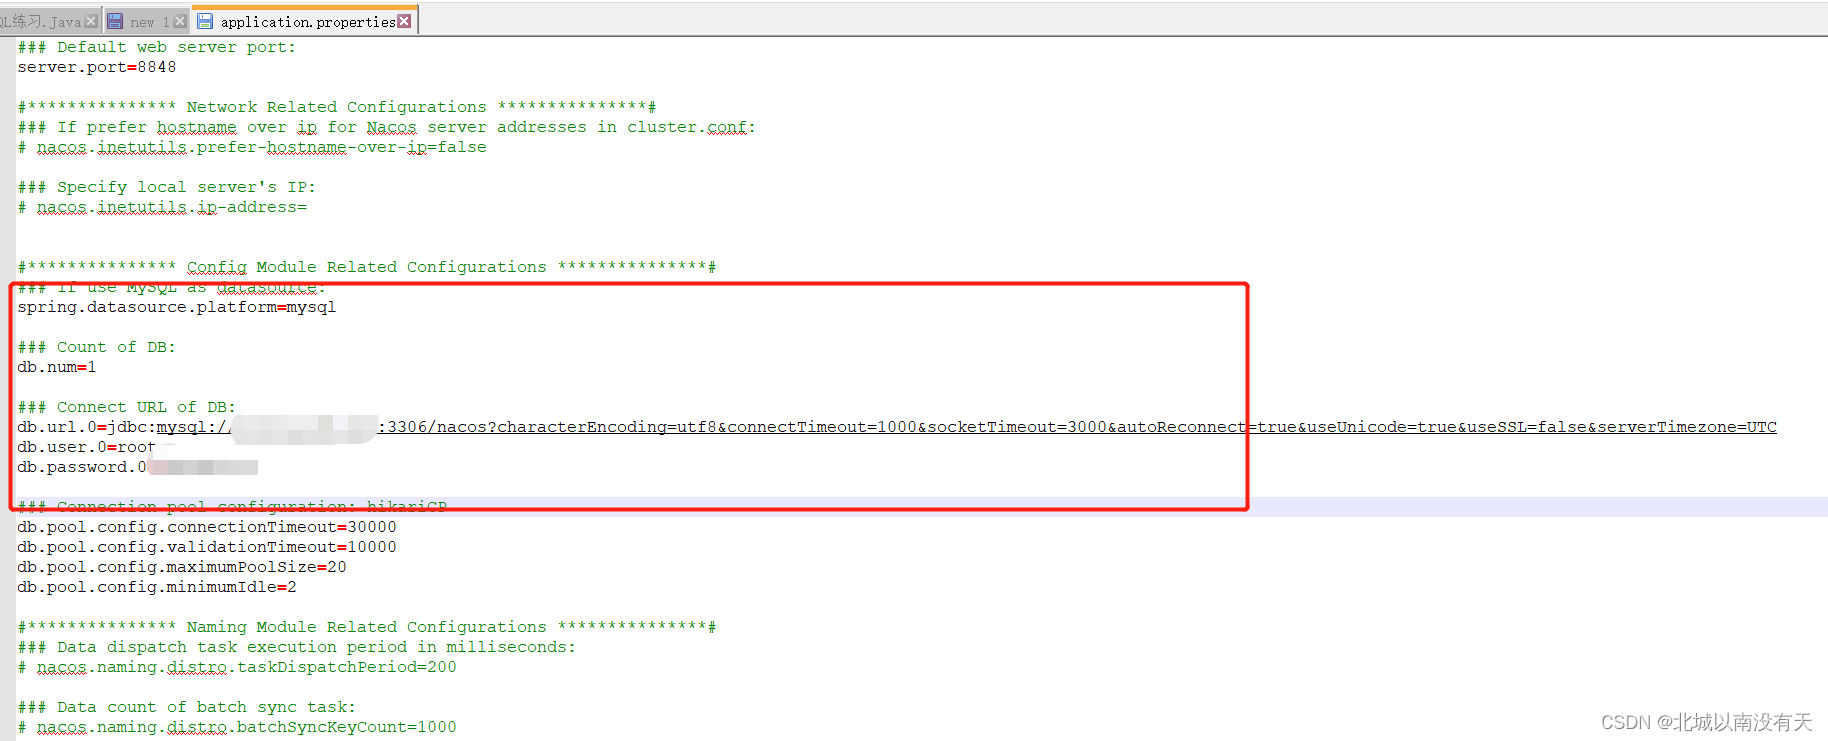
这种模式是属于将数据放在内存中,没有放在数据库中。如果是放在数据库中则需要修改conf/application.properties配置文件,将数据库注释打开。并写入数据库IP和端口
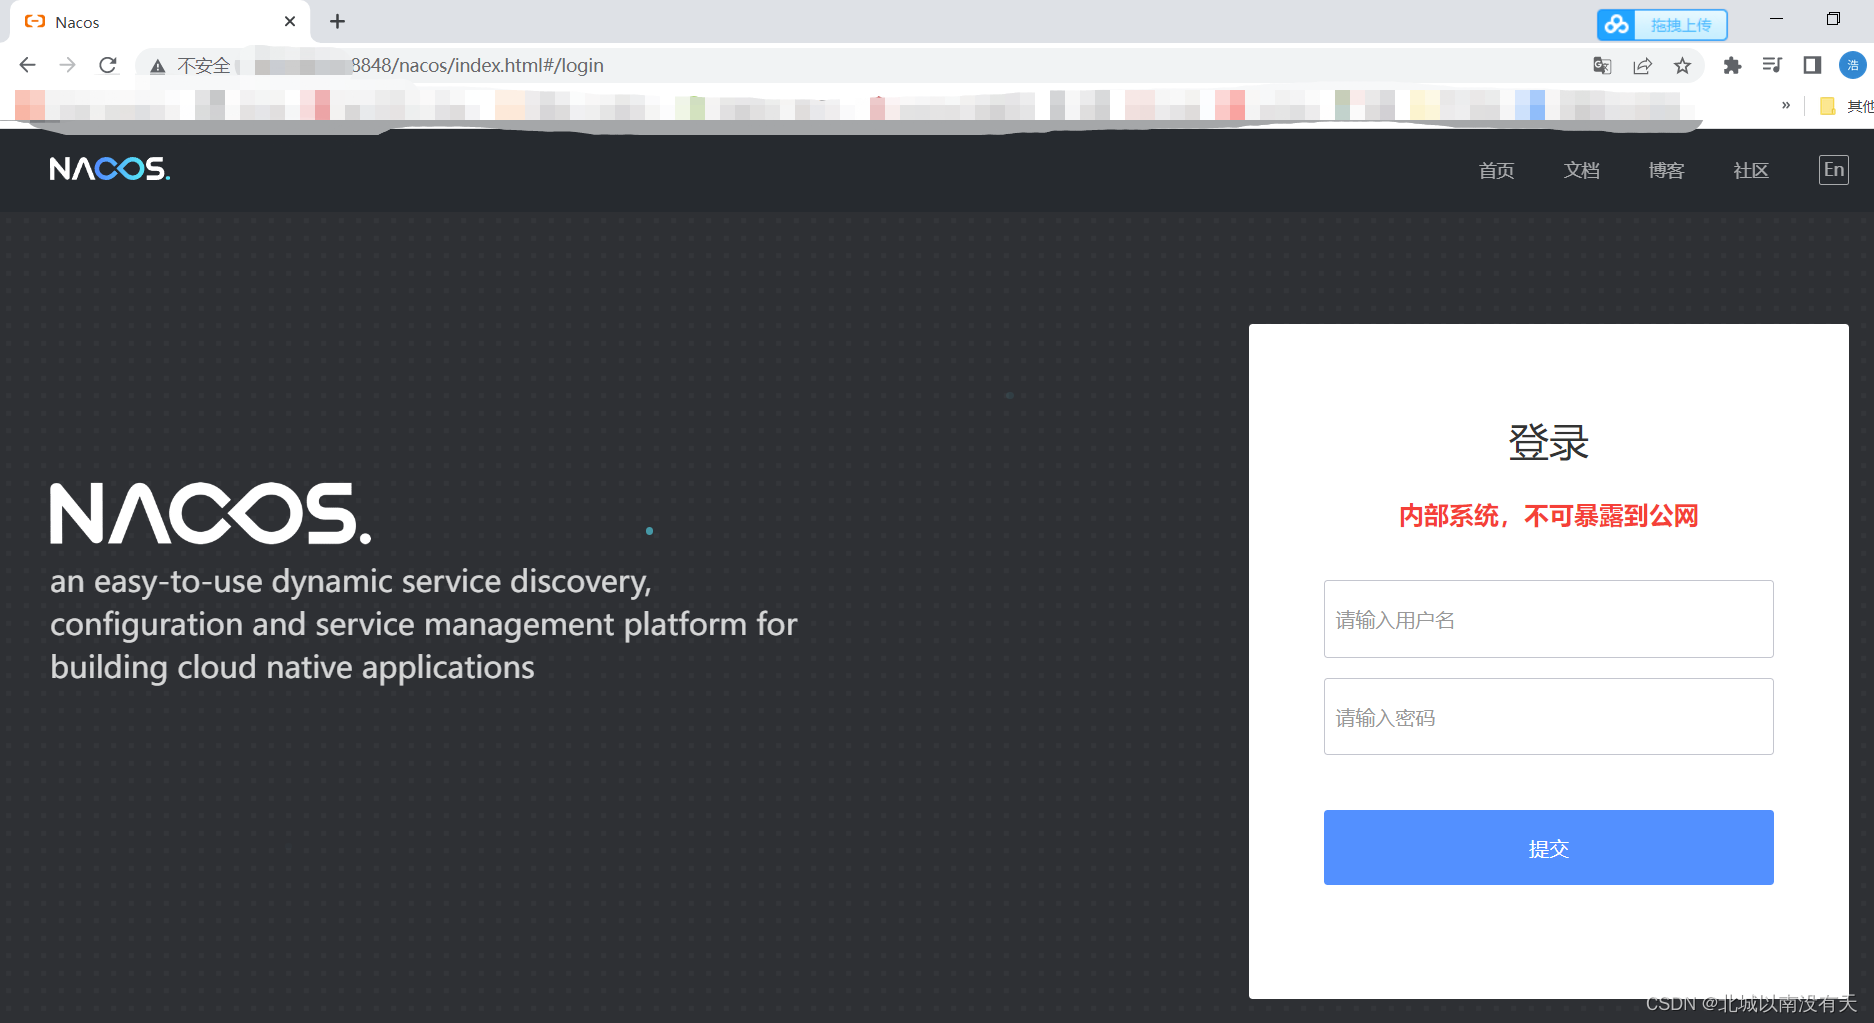
登录Nacos
http://IP:8848/nacos/index.html
访问启动后的控制台地址登录Nacos
默认登录名密码:nacos/nacos
Nacos 注册中心
-
添加依赖
<dependency> <groupId>com.alibaba.cloud</groupId> <artifactId>spring-cloud-starter-alibaba-nacos-discovery</artifactId> </dependency> -
添加配置文件
server: port: 8033 # 应用名称 (nacos会将该名称当做服务名称) spring: application: name: product-service cloud: nacos: server-addr: 192.168.2.6:8848 # nacos地址 discovery: username: nacos password: nacos namespace: public -
添加注解
@SpringBootApplication
@EnableDiscoveryClient
@EnableFeignClients
public class productApplication {


    public static void main(String[] args) {


        SpringApplication.run(productApplication.class,args);
    }
}
Nacos config 配置中心
开启nacos权限需配置
conf/application.properties配置文件,将nacos.core.auth.caching.enabled变更为true

-
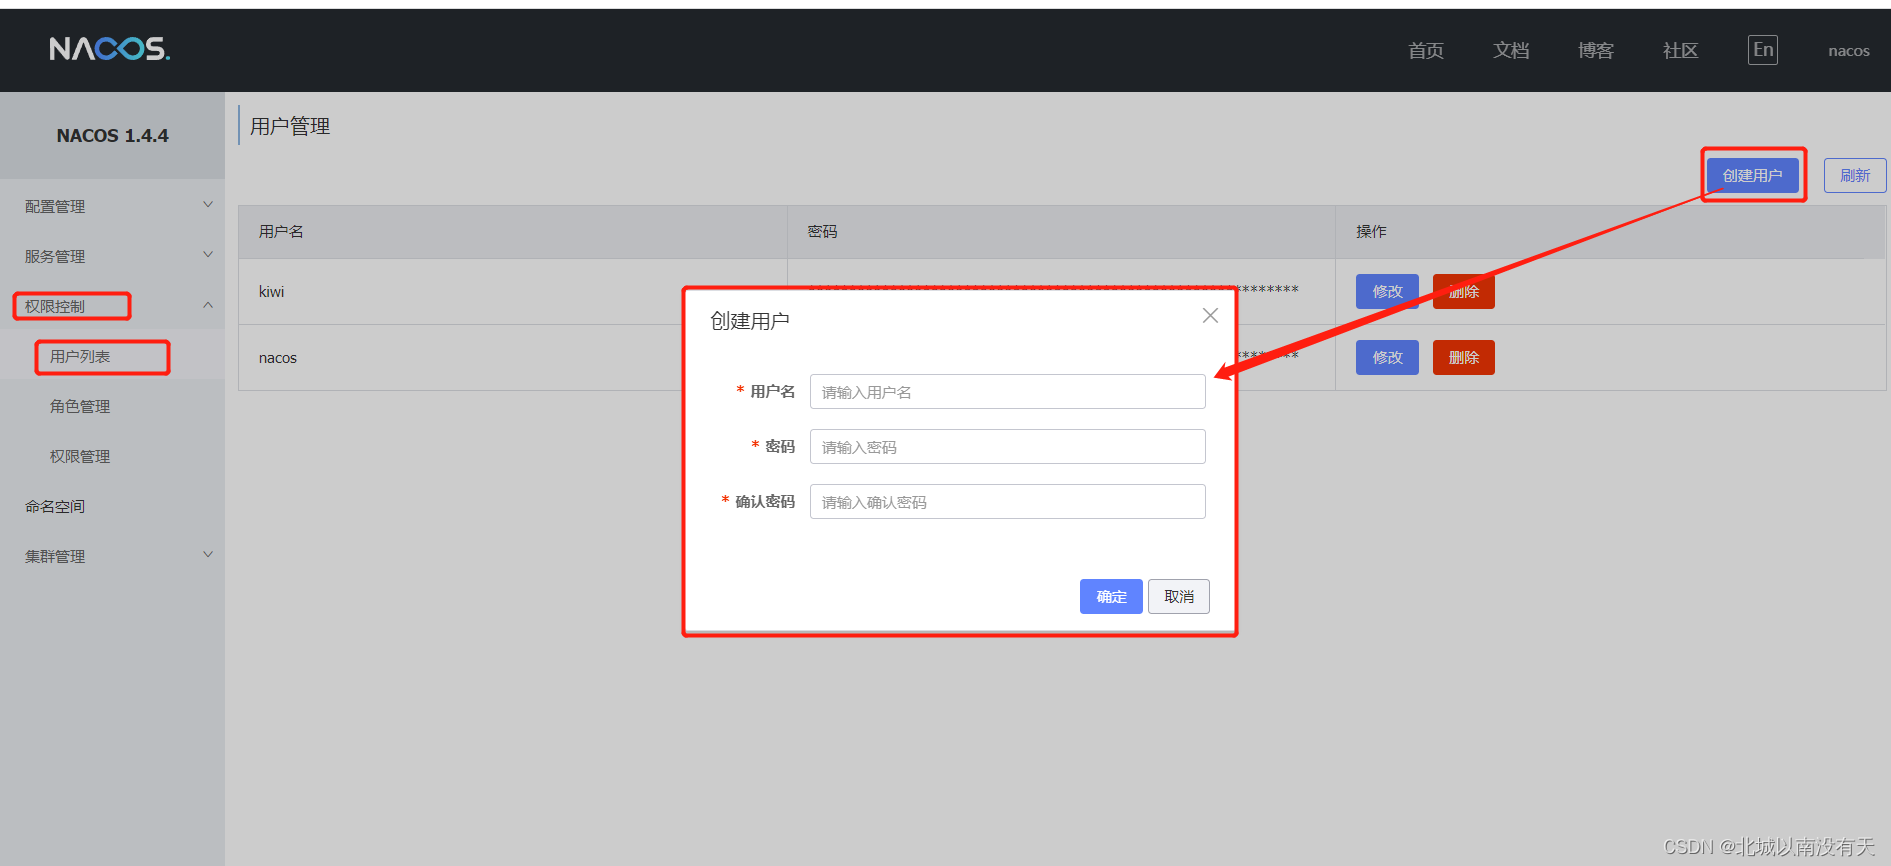
创建用户
-
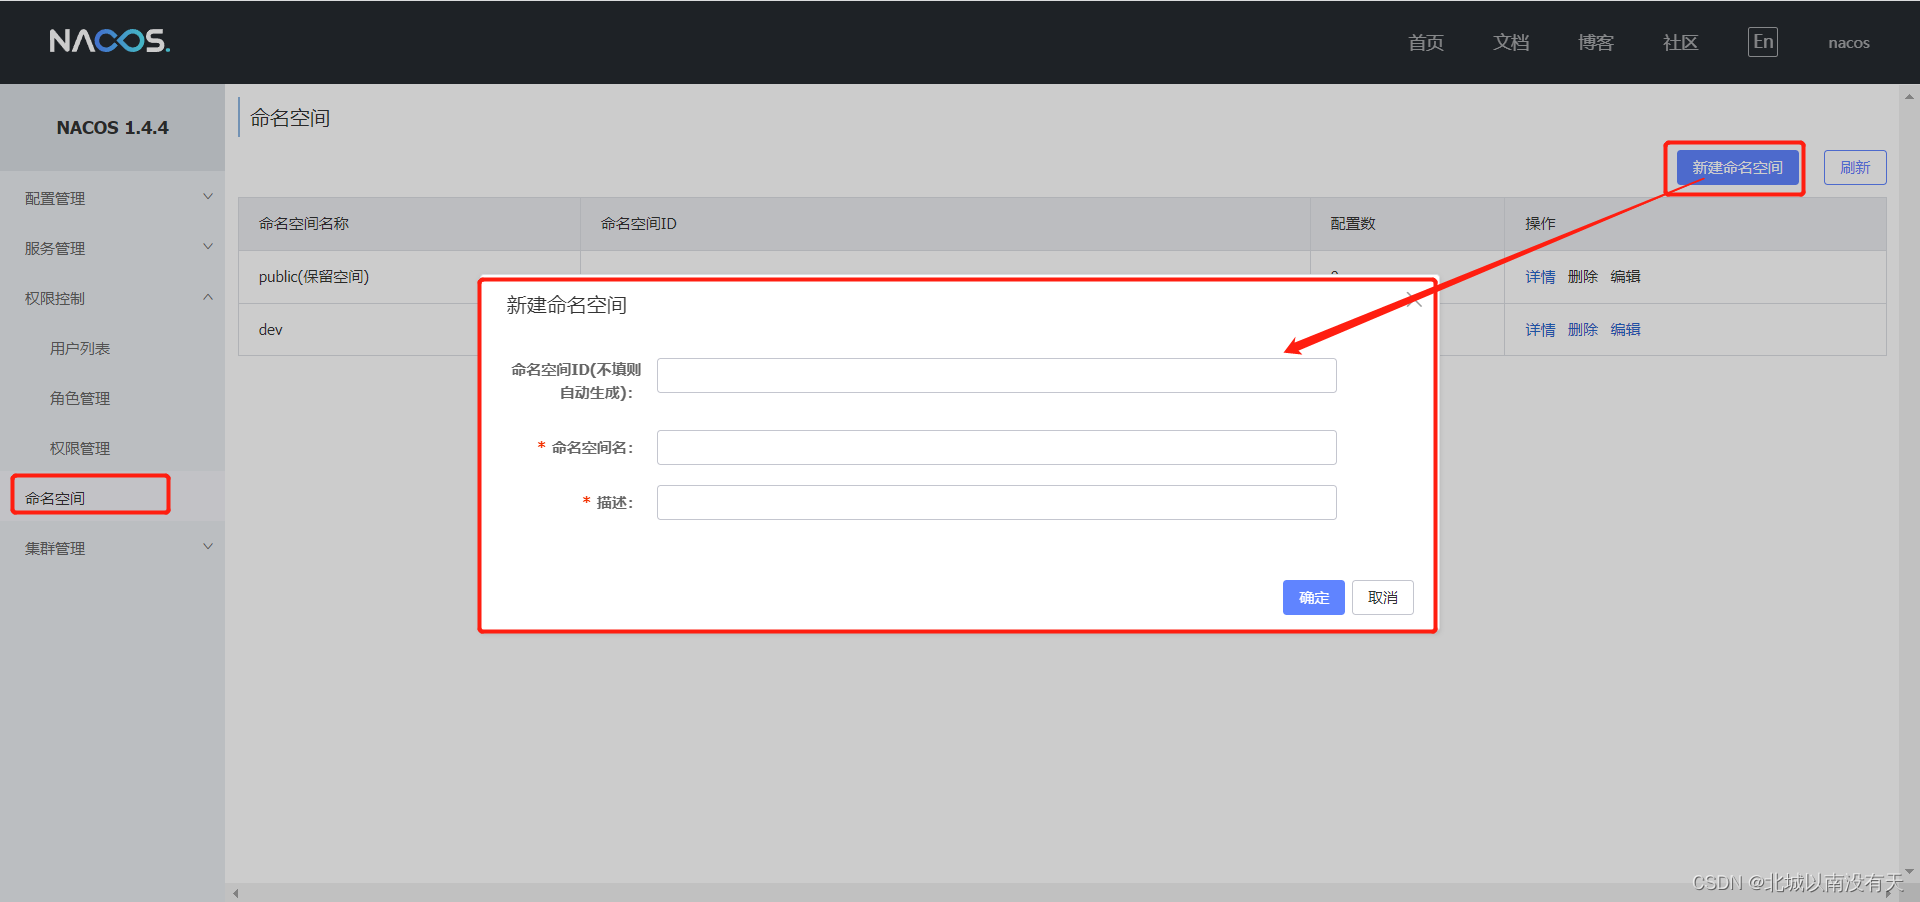
创建名称空间
-
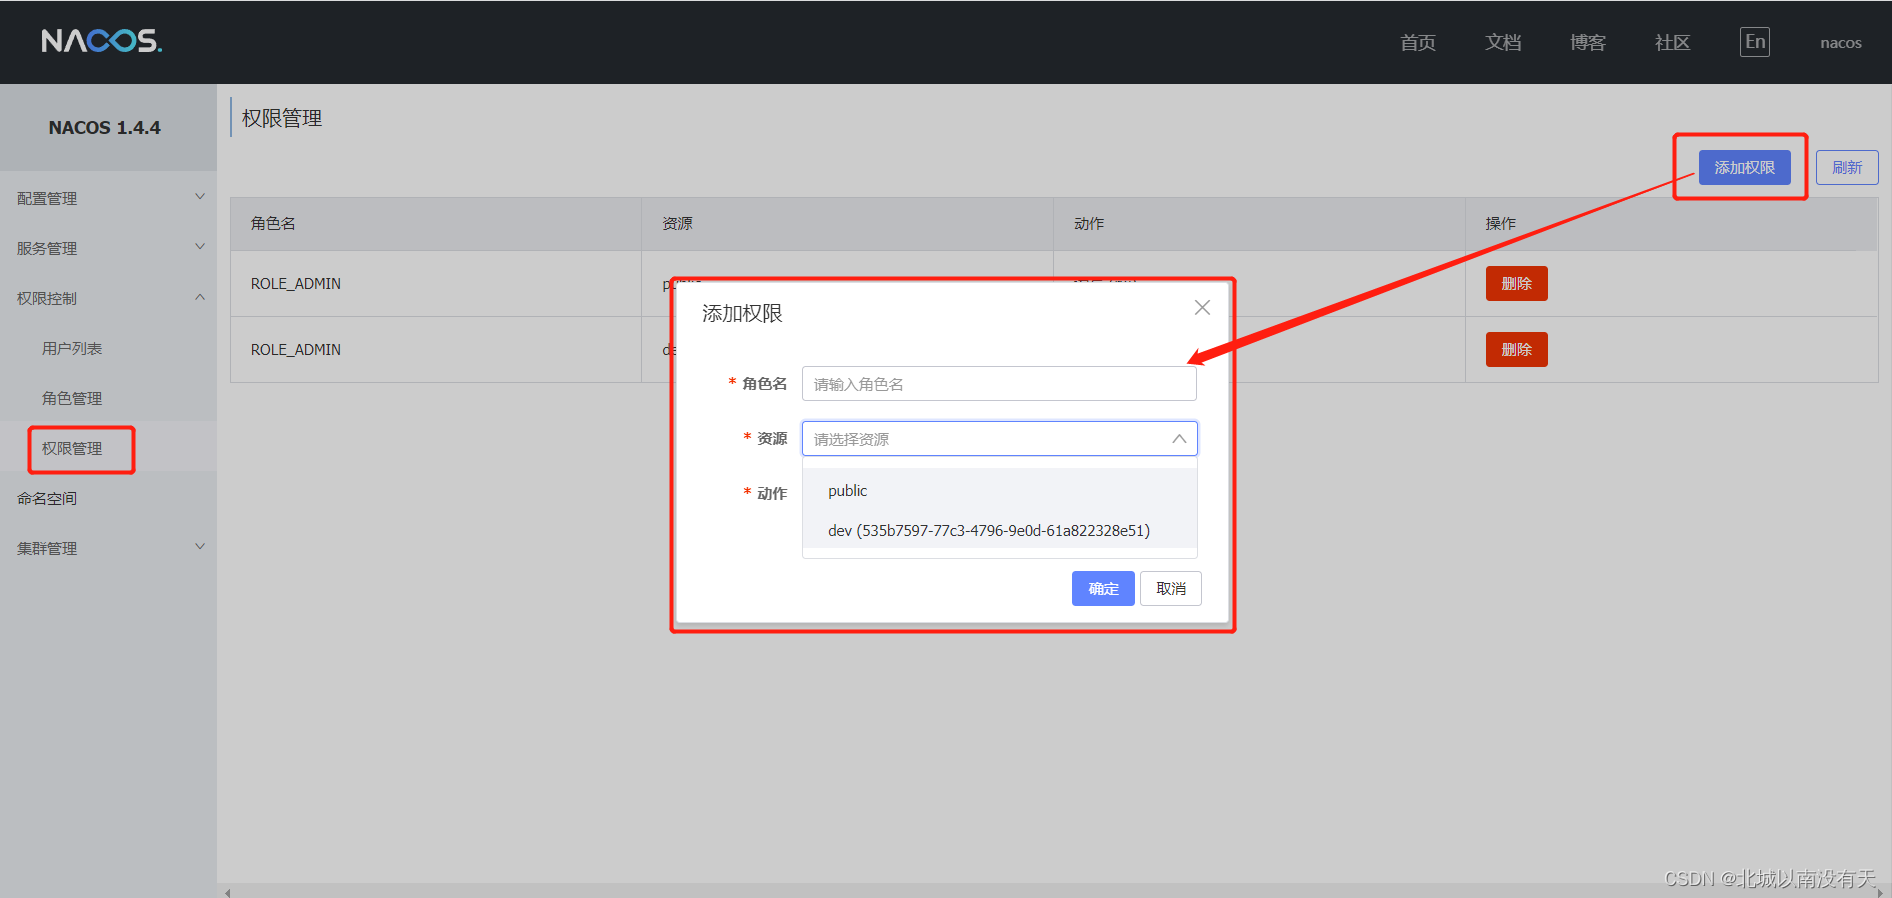
绑定权限
-
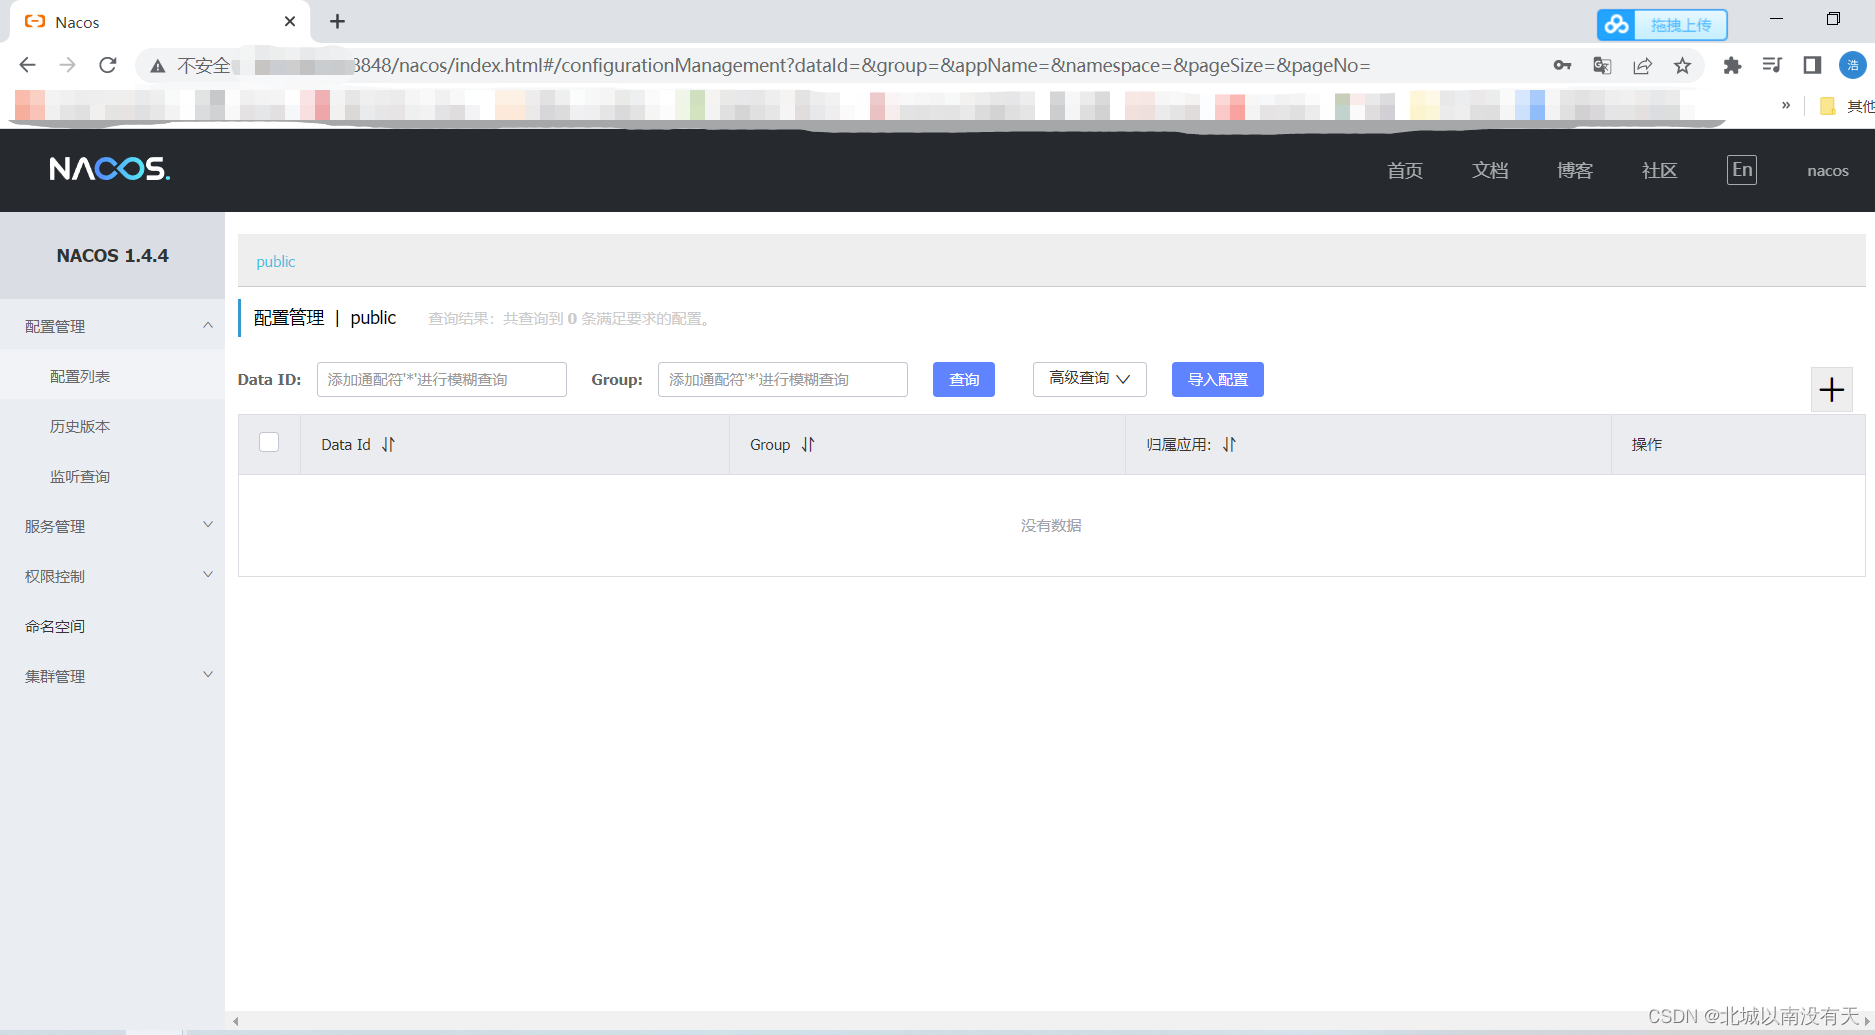
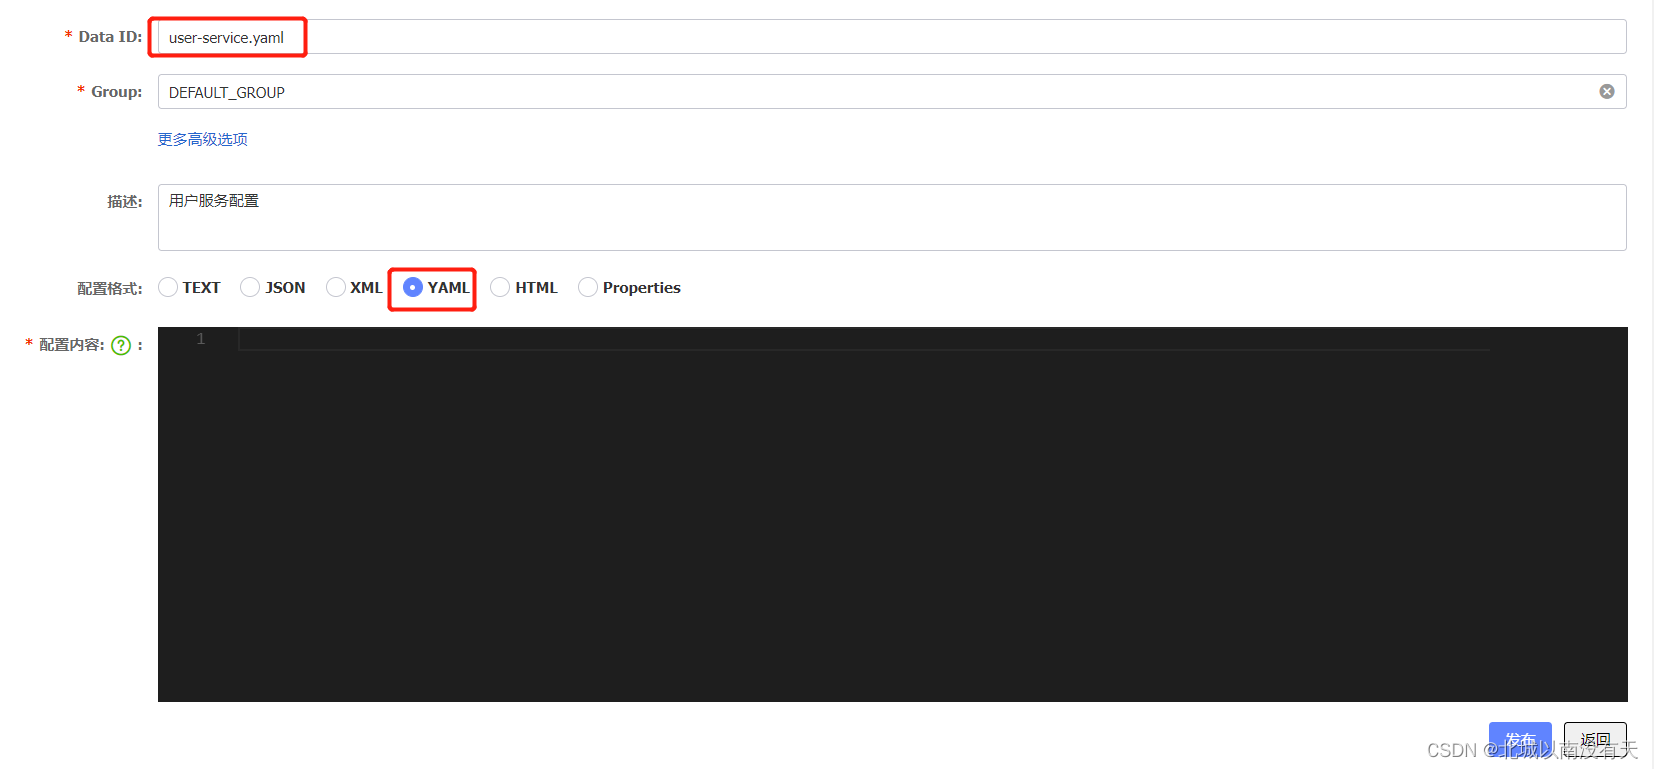
创建配置(Data ID命名时带上后缀)
-
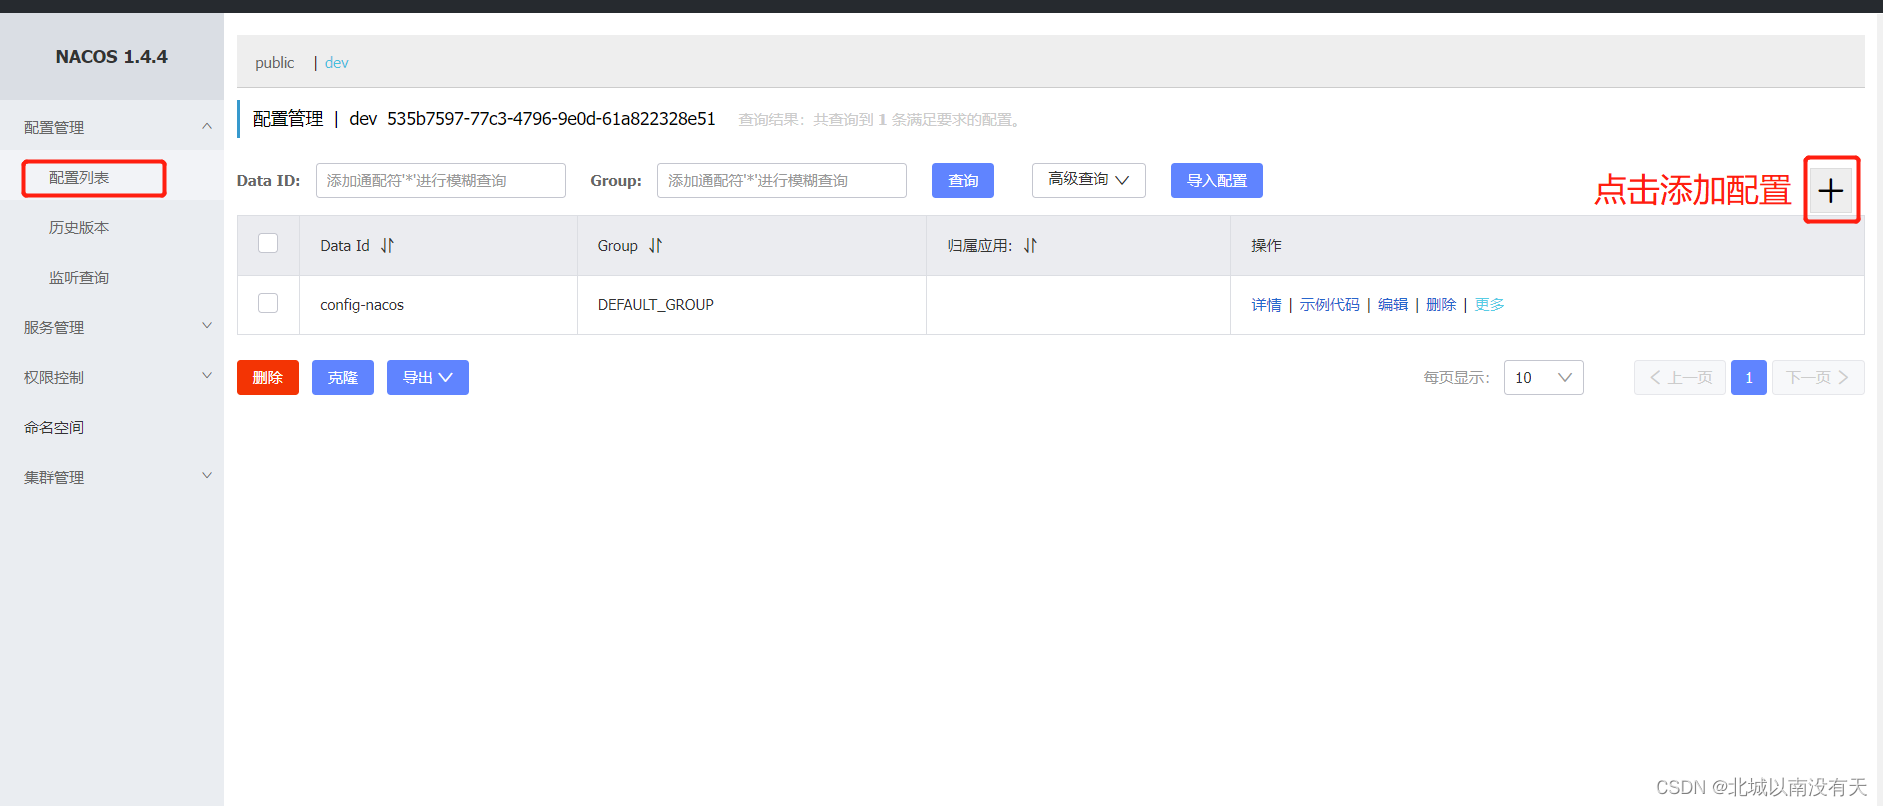
添加配置
-
导入依赖
<dependency> <groupId>com.alibaba.cloud</groupId> <artifactId>spring-cloud-starter-alibaba-nacos-config</artifactId> </dependency> -
编写bootstrap.yml配置文件(nacos配置中心的配置信息要写在bootstrap.yml中)
server: port: 8044 spring: application: # 服务名 # 会根据服务名拉取对应的Data ID。如果Data ID和服务名不一致可以手动来指定Data ID name: config-nacos cloud: nacos: #nacos地址,用户名密码 server-addr: 192.168.2.6:8848 username: nacos password: nacos config: # 名称空间 namespace: 535b7597-77c3-4796-9e0d-61a822328e51 # 指定配置中心的文件类型,默认是properties类型 file-extension: yaml -
读取nacos中的配置
@SpringBootApplication
public class ConfigApplication {


    public static void main(String[] args) throws InterruptedException {


        ConfigurableApplicationContext applicationContext = SpringApplication.run(ConfigApplication.class, args);
        while (true){


            //读取配置中心配置
            String name = applicationContext.getEnvironment().getProperty("user.username");
            String age = applicationContext.getEnvironment().getProperty("user.age");
            System.out.println("name:" + name + ",age:" + age);
            TimeUnit.SECONDS.sleep(1);
        }

    }

}
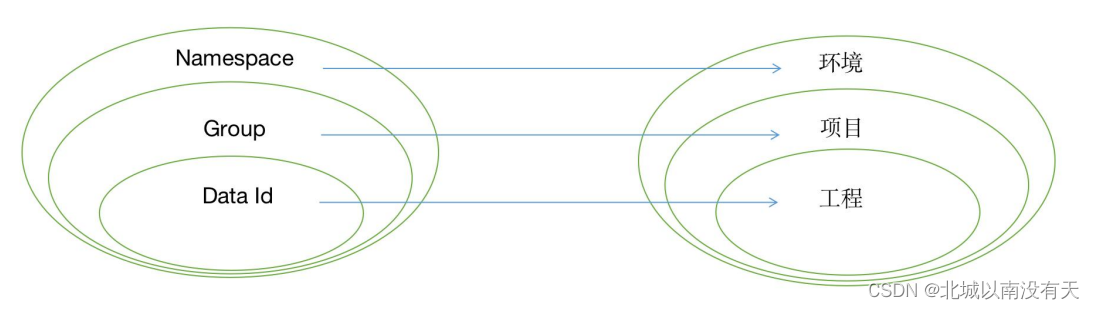
Namespace,Group,Data ID最佳实践
- namespace:区分不同的环境,如开发环境,测试环境,预发环境,生产环境
- Group:区分不同的项目,如某某医疗项目,某某电商项目
- Data Id:区分项目下不同的工程(微服务),每个Data ID是一个工程的主配置文件
自定义扩展的Data ID
配置文件的优先级(优先级大的会覆盖优先级小的,并且会形成互补)
profile>默认配置文件(和服务名相同的配置文件)>extension-configs(下标越大优先级越高)>shared-configs(下标越大优先级越高)
server:
  port: 8044

spring:
  application:
    name: config-nacos
  cloud:
    nacos:
      server-addr: 192.168.2.6:8848
      username: nacos
      password: nacos
      config:
        namespace: 535b7597-77c3-4796-9e0d-61a822328e51
        file-extension: yaml
        shared-configs: # 用- 表示数组的第一个,也可以使用[0]表示。 同一个shared下,下标越大优先级越大
          - data-id: common.yaml
            refresh: true
        extension-configs[0]:
         data-id: common-ex.yaml
         refresh: true
@RefreshScope
@Value注解可以获取到配置中心的值,但是无法动态感知修改后的值,需要利用@RefreshScope注解。
@Setter
@Getter
@ConfigurationProperties(prefix = "kiwi.security")
@RefreshScope
public class SecurityProperties {


    private AuthProperties auth = new AuthProperties();
    private PermitProperties ignore = new PermitProperties();
    private ValidateCodeProperties code = new ValidateCodeProperties();
}
kiwi:
  security:
    ignore:
      # 忽略认证的地址
      httpUrls: >
        /api-uaa/oauth/**,
        /api-uaa/validata/**,
        /api-uaa/css/**,
        /api-uaa/images/**,
        /api-uaa/js/**,
        /login.html,
        /user/login,
        /api-uaa/tokens/key
    auth:
      urlPermission:
        #是否开启url级别权限
        enable: false
        #配置只进行登录认证,不进行url权限认证的api
        ignoreUrls: >
          /api-user/menus/current,
          /api-user/users/current,
          /api-log/requestStat
        #白名单
        includeClientIds:
          - webApp
      renew:
        #是否开启token自动续签(目前只有redis实现)
        enable: true
        #白名单
        includeClientIds:
          - webApp
SecurityProperties里面的属性是可以有多个,嵌套多层或者使用List,数组来接收的。以Auth配置为例,配置文件中的配置和配置类中的属性是能对上的。
@Setter
@Getter
public class AuthProperties {


    /**
     * 配置要认证的url(默认不需要配置)
     *
     * 优先级大于忽略认证配置`kiwi.security.ignore.httpUrls`
     * 意思是如果同一个url同时配置了`忽略认证`和`需要认证`,则该url还是会被认证
     */
    private String[] httpUrls = {

    };

    /**
     * token自动续签配置(目前只有redis实现)
     */
    private RenewProperties renew = new RenewProperties();

    /**
     * url权限配置
     */
    private UrlPermissionProperties urlPermission = new UrlPermissionProperties();

    /**
     * 是否开启统一登出
     * 1. 登出时把同一个用户名下的所有token都注销
     * 2. 登出信息通知所有单点登录系统
     */
    private Boolean unifiedLogout = false;

    /**
     * 是否同应用同账号登录互踢
     */
    private Boolean isSingleLogin = false;

    /**
     * 是否同应用同账号登录时共用token
     * true: 多个用户使用同一账号登录时共用一个token
     * false: 就算使用同一账号登录时都会新建一个token
     */
    private Boolean isShareToken = true;
}
@Setter
@Getter
public class UrlPermissionProperties {


    /**
     * 是否开启url级别权限
     */
    private Boolean enable = false;

    /**
     * 白名单,配置需要url权限认证的应用id(与黑名单互斥,只能配置其中一个),不配置默认所有应用都生效
     * 配置enable为true时才生效
     */
    private List<String> includeClientIds = new ArrayList<>();

    /**
     * 黑名单,配置不需要url权限认证的应用id(与白名单互斥,只能配置其中一个)
     * 配置enable为true时才生效
     */
    private List<String> exclusiveClientIds = new ArrayList<>();

    /**
     * 配置只进行登录认证,不进行url权限认证的api
     * 所有已登录的人都能访问的api
     */
    private String[] ignoreUrls = {

    };
}

 List<String> includeClientIds = new ArrayList<>();

    /**
     * 黑名单,配置不需要url权限认证的应用id(与白名单互斥,只能配置其中一个)
     * 配置enable为true时才生效
     */
    private List<String> exclusiveClientIds = new ArrayList<>();

    /**
     * 配置只进行登录认证,不进行url权限认证的api
     * 所有已登录的人都能访问的api
     */
    private String[] ignoreUrls = {

    };
}