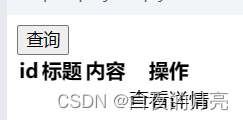
(1)articleList.html 效果如下:
<!DOCTYPE html>
<html lang="en" xmlns:th="http://www.thymeleaf.org/">
<head>
<meta charset="UTF-8">
<title>article 列表</title>
</head>
<body>
<form method="get" th:action="@{

     '/articles/list'}">
<!--th:action 相当于 action-->
<input type="submit" value="查询">
</form>
<table cellspacing="1">
<thead>
<tr>
<th>id</th>
<th>标题</th>
<th>内容</th>
<th>操作</th>
</tr>
</thead>
<!--
Thymeleaf 遍历格式如下:
<tr th:each="user : ${userList}">
<td th:text="${user.name}">xxx</td>
</tr>
-->
<tbody th:each="article:${articleList}">
<tr>
<td th:text="${article.id}"></td>
<td th:text="${article.title}"></td>
<td th:text="${article.content}"></td>
<td>
<a th:href="@{/article/findById(id=${article.id})}">查看详情</a>
</td>
</tr>
</tbody>
</table>
</body>
</html>
th:action属性: 用于设置查询表单的URL地址;
th:each属性: 指定了循环渲染的数据源和迭代变量;
th:text属性: 用于将变量的值渲染到HTML标签内部;
th:href属性: 指定了链接的URL地址,并使用${}语法将变量的值传递给后端接口。
(2**)articleDetail.html** 效果如下:
评论列表:
- 说:
<!DOCTYPE html>
<html lang="en" xmlns:th="http://www.thymeleaf.org/">
<head>
    <meta charset="UTF-8">
    <title>文章详情</title>
</head>
<body>
    <h2 th:text="${article.title}"></h2>
    <p th:text="${article.content}"></p>
    <hr>
    <h3>评论列表:</h3>
    <ul th:each="comment:${article.commentList}">
        <li>
            <span th:text="${comment.username}"></span> 说:
            <span th:text="${comment.content}"></span>
        </li>
    </ul>
</body>
</html>
(3)在 application.properties 配置 thymeleaf 页面信息:
spring.thymeleaf.cache=false
spring.thymeleaf.encoding=UTF-8
spring.thymeleaf.mode=HTML5
spring.thymeleaf.prefix=classpath:/templates/
spring.thymeleaf.suffix=.html
(4)pom.xml 中添加数据源依赖 —>druid-spring-boot-starter
<dependency>
<groupId>com.alibaba</groupId>
<artifactId>druid-spring-boot-starter</artifactId>
<version>1.1.10</version>
</dependency>
(5)创建实体类 Article 和 Comment,注意:此时实体类所在包为 domain。
public class Article {


    private int id;
    private String title;
    private String content;

    // getter and setter methods
    public int getId() {


        return id;
    }
    public void setId(int id) {


        this.id = id;
    }
    public String getTitle() {


        return title;
    }
    public void setTitle(String title) {


        this.title = title;
    }
    public String getContent() {


        return content;
    }
    public void setContent(String content) {


        this.content = content;
    }

    @Override
    public String toString() {


        return "Article{" +
                "id=" + id +
                ", title='" + title + '\'' +
                ", content='" + content + '\'' +
                '}';
    }
}
public class Comment {


    private int id;
    private String content;
    private String author;
    private int a_id;

    // getter and setter methods
    public int getId() {


        return id;
    }
    public void setId(int id) {


        this.id = id;
    }
    public String getContent() {


        return content;
    }
    public void setContent(String content) {


        this.content = content;
    }
    public String getAuthor() {


        return author;
    }
    public void setAuthor(String author) {


        this.author = author;
    }
    public int getA_id() {


        return a_id;
    }
    public void setA_id(int a_id) {


        this.a_id = a_id;
    }

    @Override
    public String toString() {


        return "Comment{" +
                "id=" + id +
                ", content='" + content + '\'' +
                ", author='" + author + '\'' +
                ", a_id=" + a_id +
                '}';
    }
}
(6)创建 Article 对应的 Mapper 接口 ArticleMapper,注意:此时接口类所在包为 mapper。
@Repository
@Mapper
public interface ArticleMapper {


public Article findById(int id);
public List<Article> findAll();
}
(7)在 resources 路径下,创建 mapper 目录,并在其中创建 ArticleMapper.xml文件,实现 ArticleMapper 接口中对应的方法。
<!DOCTYPE mapper PUBLIC "-//mybatis.org//DTD Mapper 3.0//EN"
        "http://mybatis.org/dtd/mybatis-3-mapper.dtd">
<mapper namespace="com.tyut.mapper.ArticleMapper">

    <!-- 根据 id 查询一篇文章 -->
    <select id="findById" resultType="com.tyut.domain.Article" parameterType="int">
        SELECT id, title, content FROM t_article WHERE id = #{

    id}
    </select>

    <!-- 查询所有文章 -->
    <select id="findAll" resultMap="articleResultMap">
        SELECT id, title, content FROM t_article
    </select>

    <!-- 定义 Article 对象的 ResultMap -->
    <resultMap id="articleResultMap" type="com.tyut.domain.Article">
        <id column="id" property="id"/>
        <result column="title" property="title"/>
        <result column="content" property="content"/>
    </resultMap>

</mapper>
下面是对该 XML 文件中各个标签及其属性的解释:
<mapper>标签:定义 Mapper 文件,必须包含命名空间属性,指定该 Mapper 对应的 Java 包路径,如namespace="com.tyut.mapper.ArticleMapper"。
<select>标签:定义查询语句,可用于查询单个对象或多个对象,该标签必须指定 id 属性,指定该 SQL 语句的唯一标识符。
resultType属性:指定该 SQL 语句的结果类型,如resultType="com.tyut.domain.Article"。
parameterType属性:指定该 SQL 语句的参数类型,如parameterType="int"。SQL 语句:SELECT 语句,用于查询数据表中的数据。
<id>标签:定义主键字段映射,用于表示该属性为数据库表的主键。
column属性:指定该属性映射的数据库字段名称。
property属性:指定该属性的 Java 对象属性名称。
<result>标签:定义普通字段映射,用于表示该属性为数据库表的普通列字段。
column属性:指定该属性映射的数据库列名称。
property属性:指定该属性的 Java 对象属性名称。
<resultMap>标签:定义映射关系,可用于定义复杂的字段映射,包括主键字段映射和普通字段映射。
id属性:指定该 resultMap 的唯一标识符。
type属性:指定该 resultMap 对应的 Java 类型。
<id>子标签和<result>子标签:用于定义主键字段映射和普通字段映射,其中子标签属性同上述解释。
(8)在 application.properties 中配置数据库、数据源、mapper 映射等相关配置:(结合自身电脑情况修改)
spring.datasource.url=jdbc:mysql://localhost:3306/springboottest
spring.datasource.username=root
spring.datasource.password=123456
spring.datasource.druid.db-type=com.alibaba.druid.pool.DruidDataSource
spring.datasource.druid.initial-size=20
spring.datasource.druid.min-idle=10
spring.datasource.druid.max-active=100
mybatis.configuration.map-underscore-to-camel-case=true
mybatis.mapper-locations=classpath:mapper/*.xml
mybatis.type-aliases-package=com.tyut.domain
(9)创建 ArticleController,用于进行请求接受和转发,注意:此时控制类所在包为 controller。
@Controller
@RequestMapping("/articles")
public class ArticleController {


    @Autowired
    private ArticleMapper articleMapper;

    // 查询所有文章
    @GetMapping("/list")
    public String findAll(Model model) {


        List<Article> articleList= articleMapper.findAll();
        model.addAttribute("articleList", articleList);
        return "article/list"; // 返回视图模板 "article/list"
    }

    // 根据 id 查询单篇文章
    @GetMapping("/{id}")
    public String findById(@PathVariable int id, Model model) {


        Article article = articleMapper.findById(id);
        model.addAttribute("article", article);
        return "article/detail"; // 返回视图模板 "article/detail"
    }

}
(10)在 config 包下创建 MyConfig 类,重写 WebMvcConfigurer 自动配置类,实现 articleList 页面的路由注册。
@Configuration
public class MyConfig implements WebMvcConfigurer {


    @Override
    public void addViewControllers(ViewControllerRegistry registry) {


        registry.addViewController("/articles/list").setViewName("articleList");
    }
}
当用户在浏览器中访问"/articles/list"时,Spring MVC将会自动将请求路由到"articleList.html"这个视图模板上,完成页面的渲染和展示。这个视图模板对应的是控制器方法中返回的字符串。在这个例子中,控制器方法返回"articleList"字符串,即"articleList.html"视图模板的名称,Spring MVC自动将该字符串解析为对应的视图模板,将其展示在用户浏览器上。