后端开发必须学习的优化思想!
1、算法逻辑优化
(1) 什么算法优化?
算法优化的思想就是,对于同一个问题,选择更好的办法去解决。
(2) 算法优化的详细解释
算法优化可以说是性能优化的关键点,一个好的算法和常规算法往往有一个数量级的差别,比如暴力的O(n2)和优化后的O(n*log(n)),在1000的数据量下差大概1000倍,在1000000的数据量下差的是1000000倍,性能的差距是幂次上升的,数据量越大,差距越明显。
本来1秒能出结果的,现在需要1000000秒约12天才能出结果,可以看到,不做算法优化的话这个服务基本是不可用的
算法千变万化,对于不同的问题需要采取不一样的方法,一些复杂的逻辑问题往往是需要专门的算法工程师去设计解决方案的,
2、redis缓存优化
(1) redis缓存优化的原理
把用户第一次查询的结果缓存起来,下次再查询的时候就不再跑程序,直接取缓存中的数据
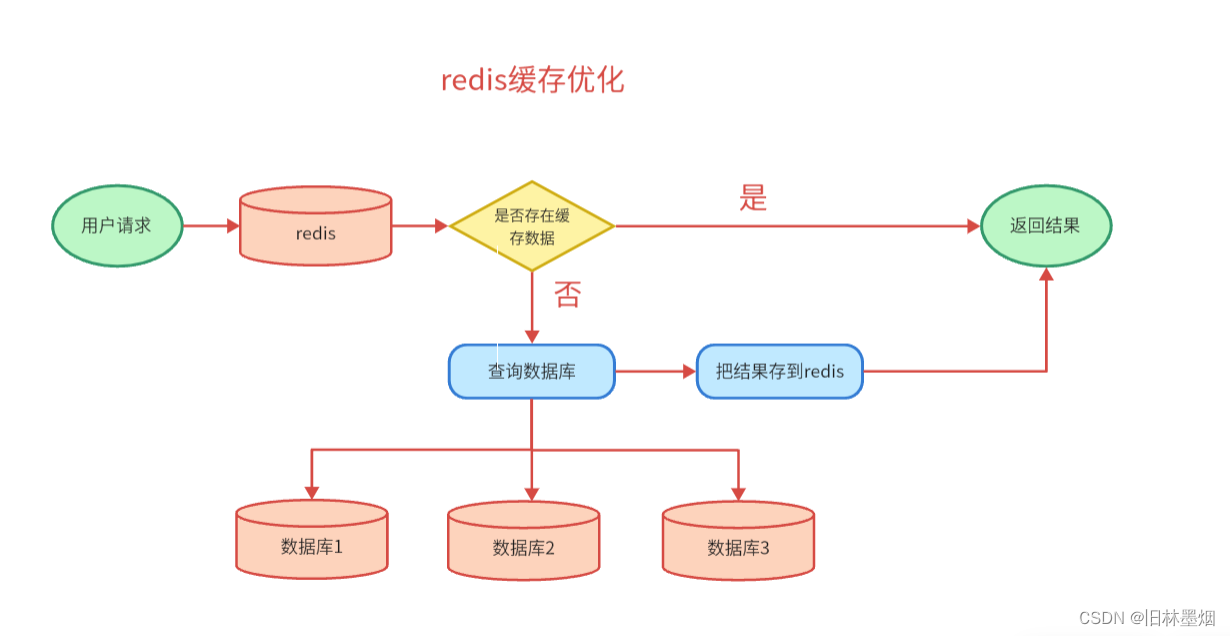
在查询数据时往往不止一次查询数据库,而且在封装数据的时候可能需要经过一定的算法处理。所以在在redis缓存中直接取数据会比查询数据库获取数据要快得多
(2) redis缓存优化的小例子
1、创建一个spring boot项目,导入web和redis依赖,配置application.yml文件,配置MyCacheConfig.java文件
pom文件依赖如下:
<?xml version="1.0" encoding="UTF-8"?>
<project xmlns="http://maven.apache.org/POM/4.0.0" xmlns:xsi="http://www.w3.org/2001/XMLSchema-instance"
         xsi:schemaLocation="http://maven.apache.org/POM/4.0.0 https://maven.apache.org/xsd/maven-4.0.0.xsd">
    <modelVersion>4.0.0</modelVersion>
    <parent>
        <groupId>org.springframework.boot</groupId>
        <artifactId>spring-boot-starter-parent</artifactId>
        <version>2.7.0</version>
        <relativePath/> <!-- lookup parent from repository -->
    </parent>
    <groupId>com.wu</groupId>
    <artifactId>hello</artifactId>
    <version>0.0.1-SNAPSHOT</version>
    <name>hello</name>
    <description>hello</description>
    <properties>
        <java.version>1.8</java.version>
    </properties>
    <dependencies>
        <dependency>
            <groupId>org.springframework.boot</groupId>
            <artifactId>spring-boot-starter-test</artifactId>
            <scope>test</scope>
        </dependency>
<!--        lombok-->
        <dependency>
            <groupId>org.projectlombok</groupId>
            <artifactId>lombok</artifactId>
        </dependency>
<!--        热部署-->
        <dependency>
            <groupId>org.springframework.boot</groupId>
            <artifactId>spring-boot-devtools</artifactId>
        </dependency>
<!--        web-->
        <dependency>
            <groupId>org.springframework.boot</groupId>
            <artifactId>spring-boot-starter-web</artifactId>
        </dependency>
<!--        spring使用缓存-->
        <dependency>
            <groupId>org.springframework.boot</groupId>
            <artifactId>spring-boot-starter-cache</artifactId>
        </dependency>
<!--        redis-->
        <dependency>
            <groupId>org.springframework.boot</groupId>
            <artifactId>spring-boot-starter-data-redis</artifactId>
        </dependency>
    </dependencies>


</project>
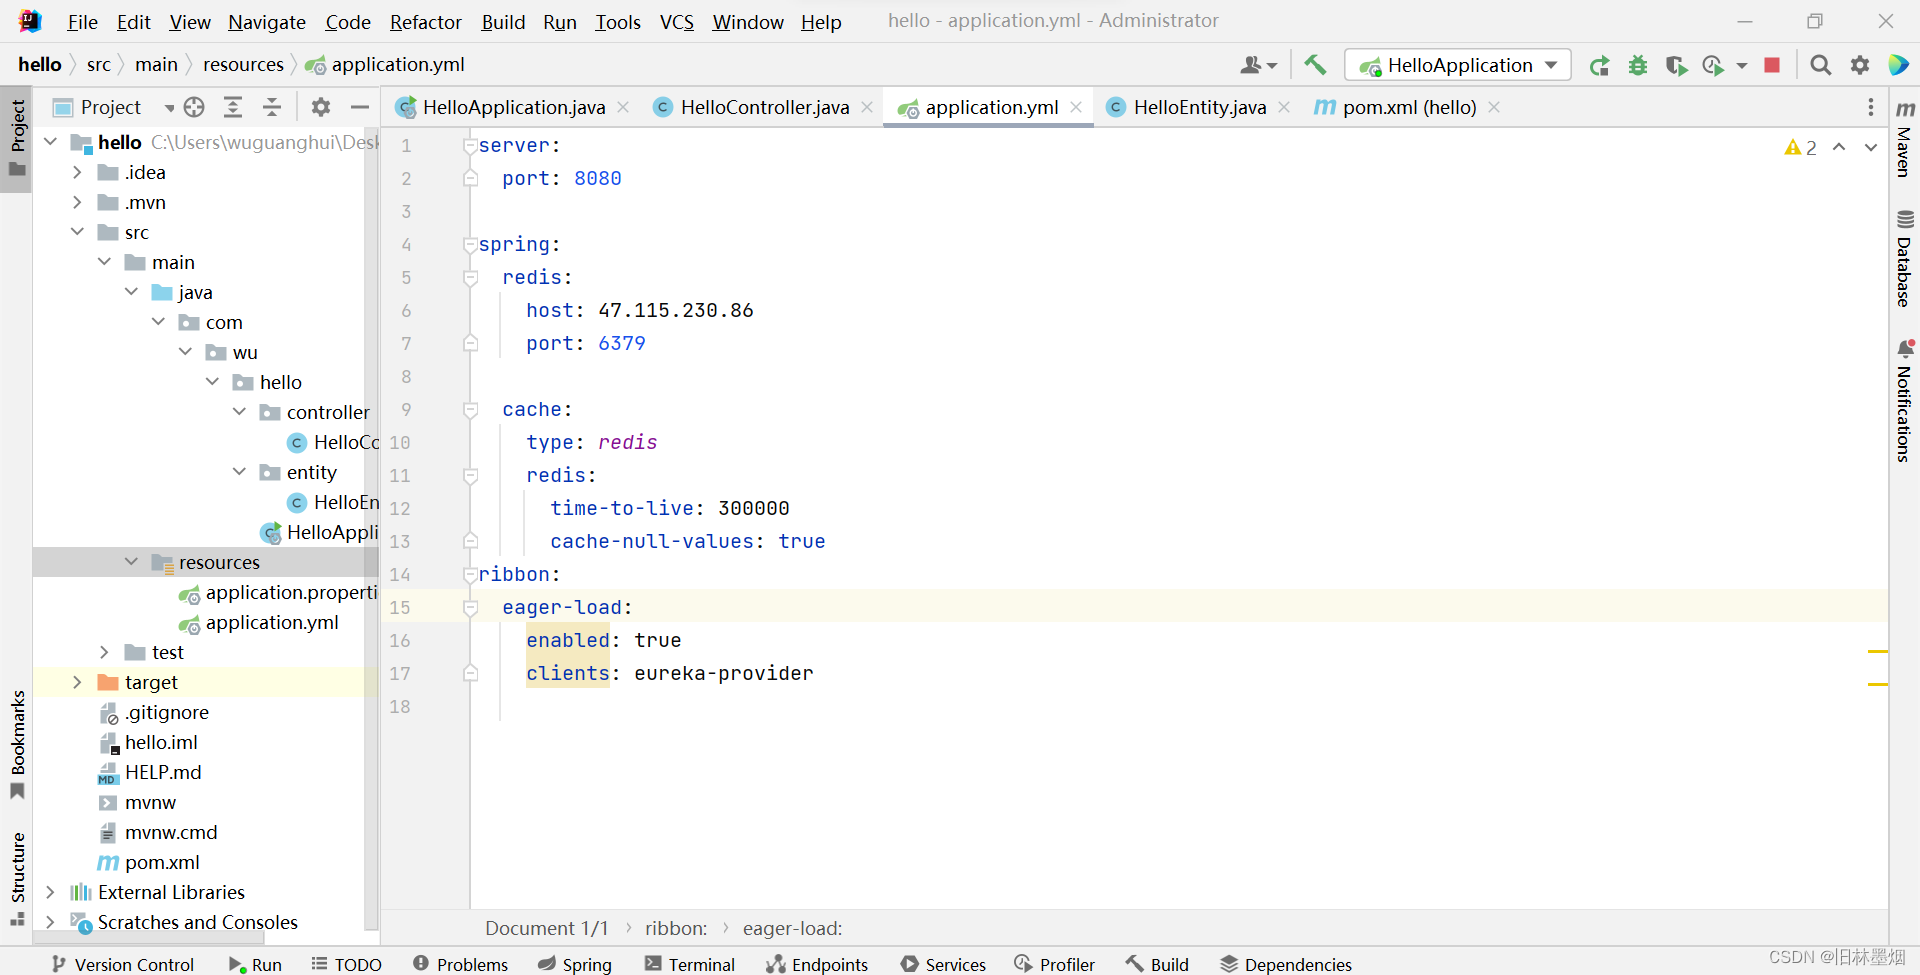
application.yml文件配置如下:
server:
  port: 8080

spring:
  redis:
    host: 47.115.230.86
    port: 6379

  cache:
    type: redis
    redis:
      time-to-live: 300000
      cache-null-values: true
ribbon:
  eager-load:
    enabled: true
    clients: eureka-provider
MyCacheConfig.java文件配置如下:
package com.wu.hello.config;

import org.springframework.boot.autoconfigure.cache.CacheProperties;
import org.springframework.boot.context.properties.EnableConfigurationProperties;
import org.springframework.cache.annotation.EnableCaching;
import org.springframework.context.annotation.Bean;
import org.springframework.context.annotation.Configuration;
import org.springframework.data.redis.cache.RedisCacheConfiguration;
import org.springframework.data.redis.serializer.GenericJackson2JsonRedisSerializer;
import org.springframework.data.redis.serializer.RedisSerializationContext;
import org.springframework.data.redis.serializer.StringRedisSerializer;


@EnableConfigurationProperties(CacheProperties.class)
@Configuration
@EnableCaching
public class MyCacheConfig {


    @Bean
    RedisCacheConfiguration redisCacheConfiguration(CacheProperties cacheProperties){


        RedisCacheConfiguration config  = RedisCacheConfiguration.defaultCacheConfig();
        //设置key用string类型保存,value用json格式保存
        config = config.serializeKeysWith(RedisSerializationContext.SerializationPair.fromSerializer(new StringRedisSerializer()));
        config = config.serializeValuesWith(RedisSerializationContext.SerializationPair.fromSerializer(new GenericJackson2JsonRedisSerializer()));

        CacheProperties.Redis redisProperties = cacheProperties.getRedis();
        //使配置文件中所有的配置都生效
        if (redisProperties.getTimeToLive() != null) {


            config = config.entryTtl(redisProperties.getTimeToLive());
        }
        if (redisProperties.getKeyPrefix() != null) {


            config = config.prefixKeysWith(redisProperties.getKeyPrefix());
        }
        if (!redisProperties.isCacheNullValues()) {


            config = config.disableCachingNullValues();
        }
        if (!redisProperties.isUseKeyPrefix()) {


            config = config.disableKeyPrefix();
        }

        return config;
    }

}
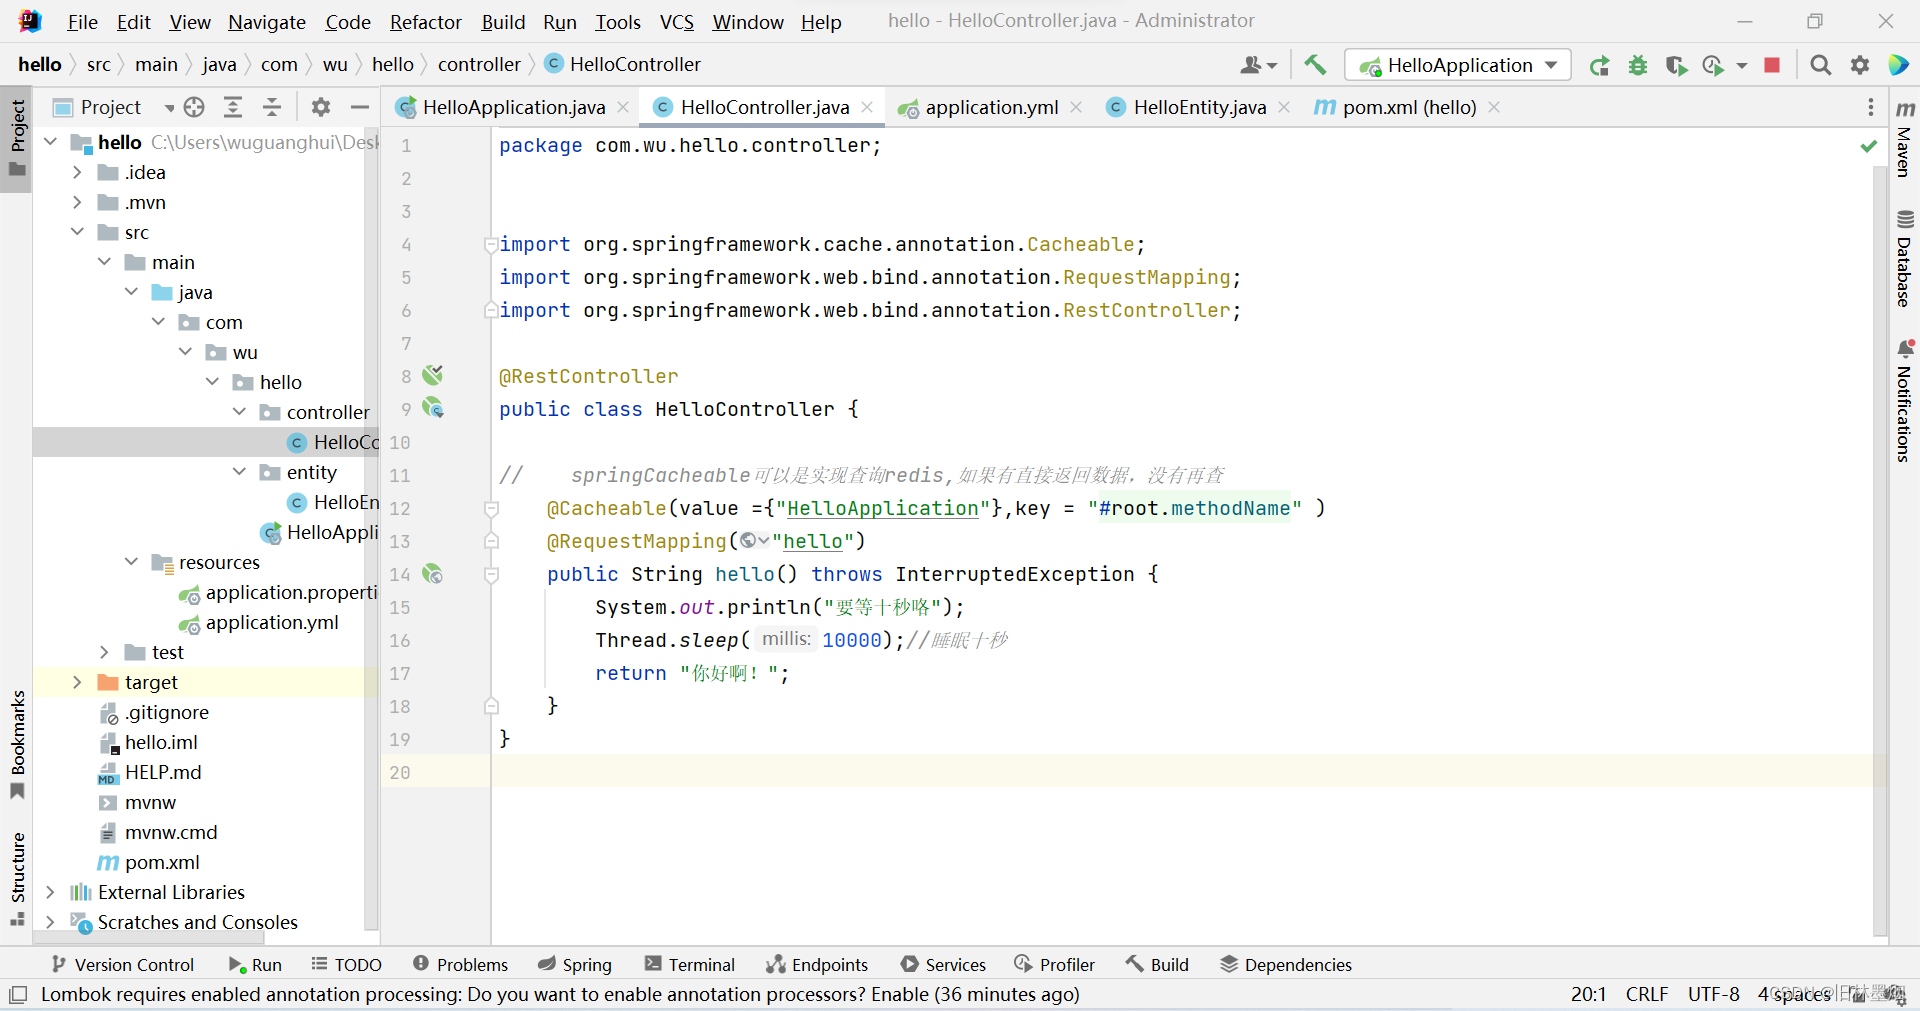
2、创建HelloController程序并启动项目
package com.wu.hello.controller;
import org.springframework.cache.annotation.Cacheable;
import org.springframework.web.bind.annotation.RequestMapping;
import org.springframework.web.bind.annotation.RestController;
@RestController
public class HelloController {
// springCacheable可以是实现查询redis,如果有直接返回数据,没有再查
@Cacheable(value ={
"HelloApplication"},key = "#root.methodName" )
@RequestMapping("hello")
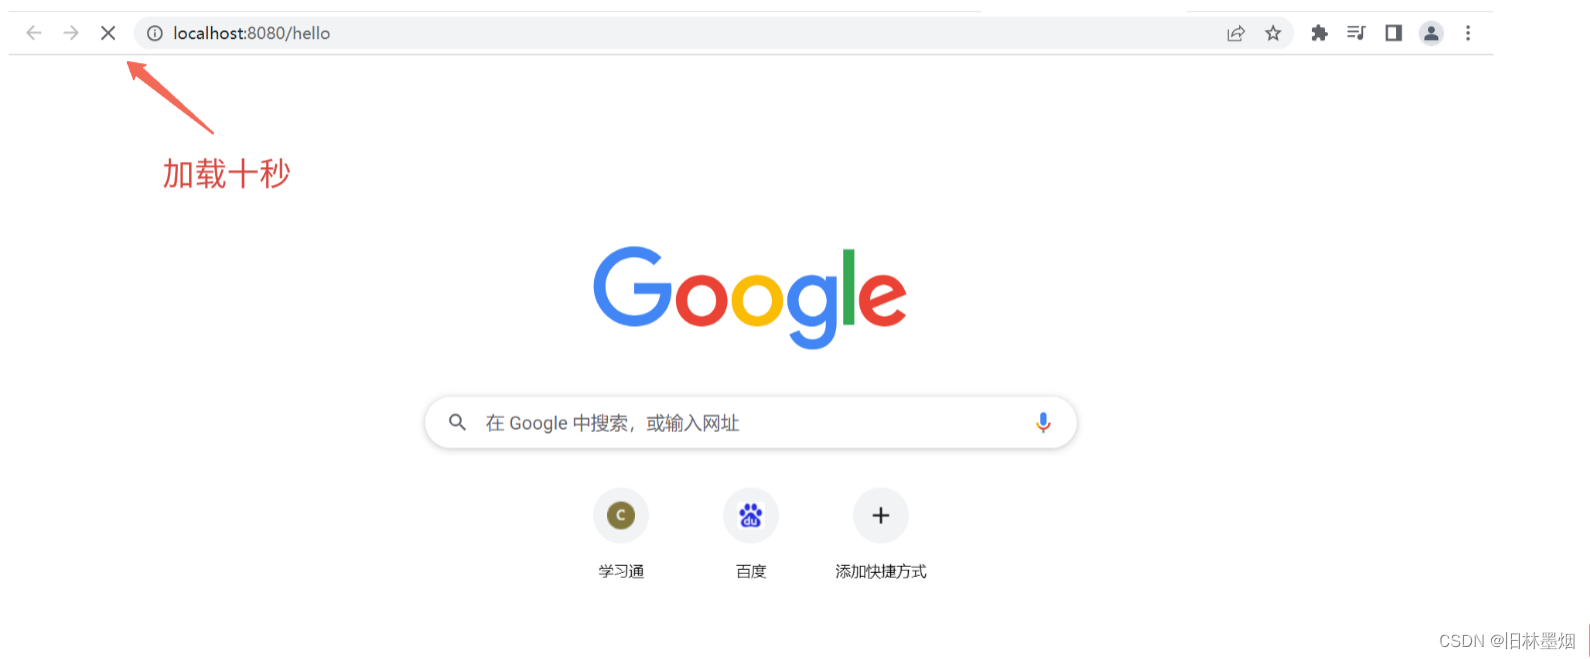
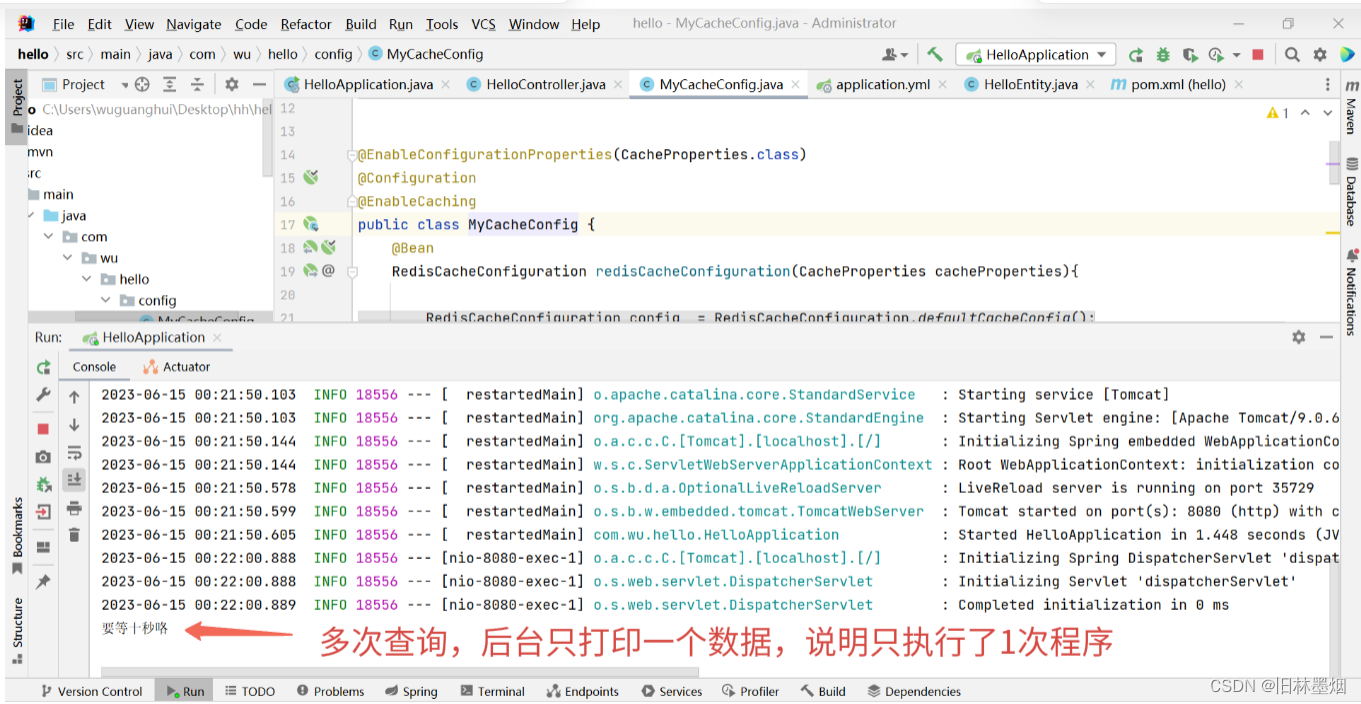
public String hello() throws InterruptedException {
System.out.println("要等十秒咯");
Thread.sleep(10000);//睡眠十秒
return "你好啊!";
}
}
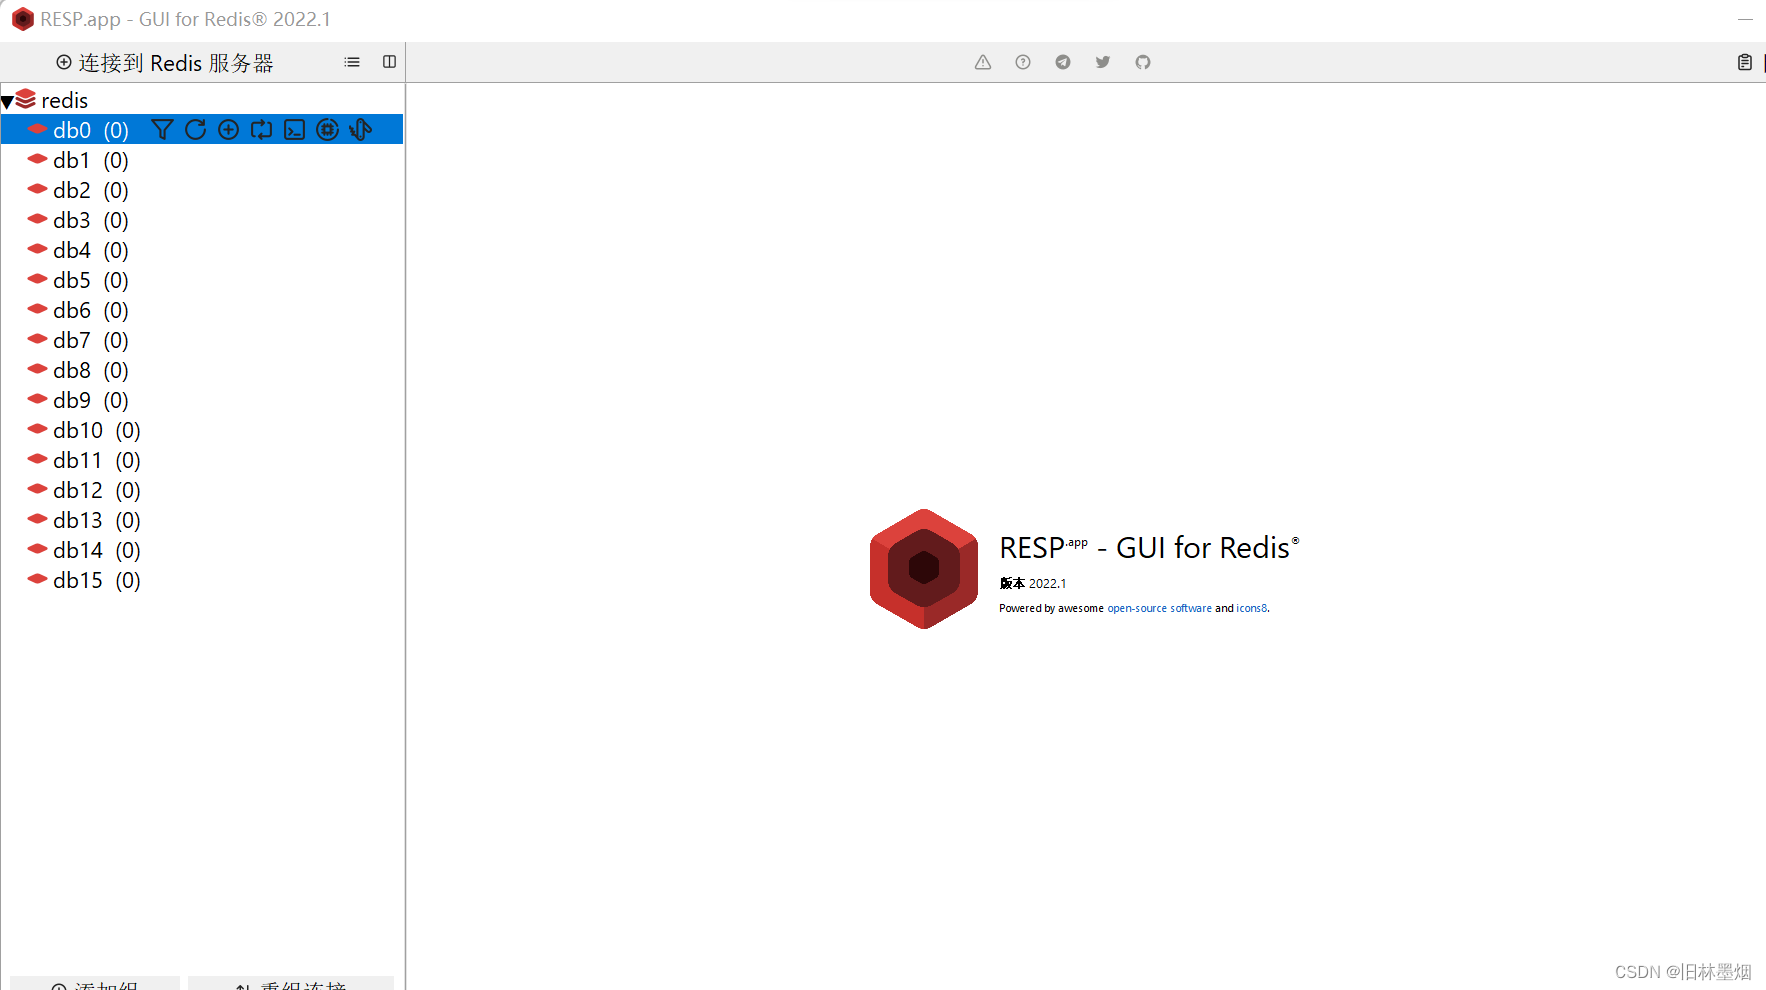
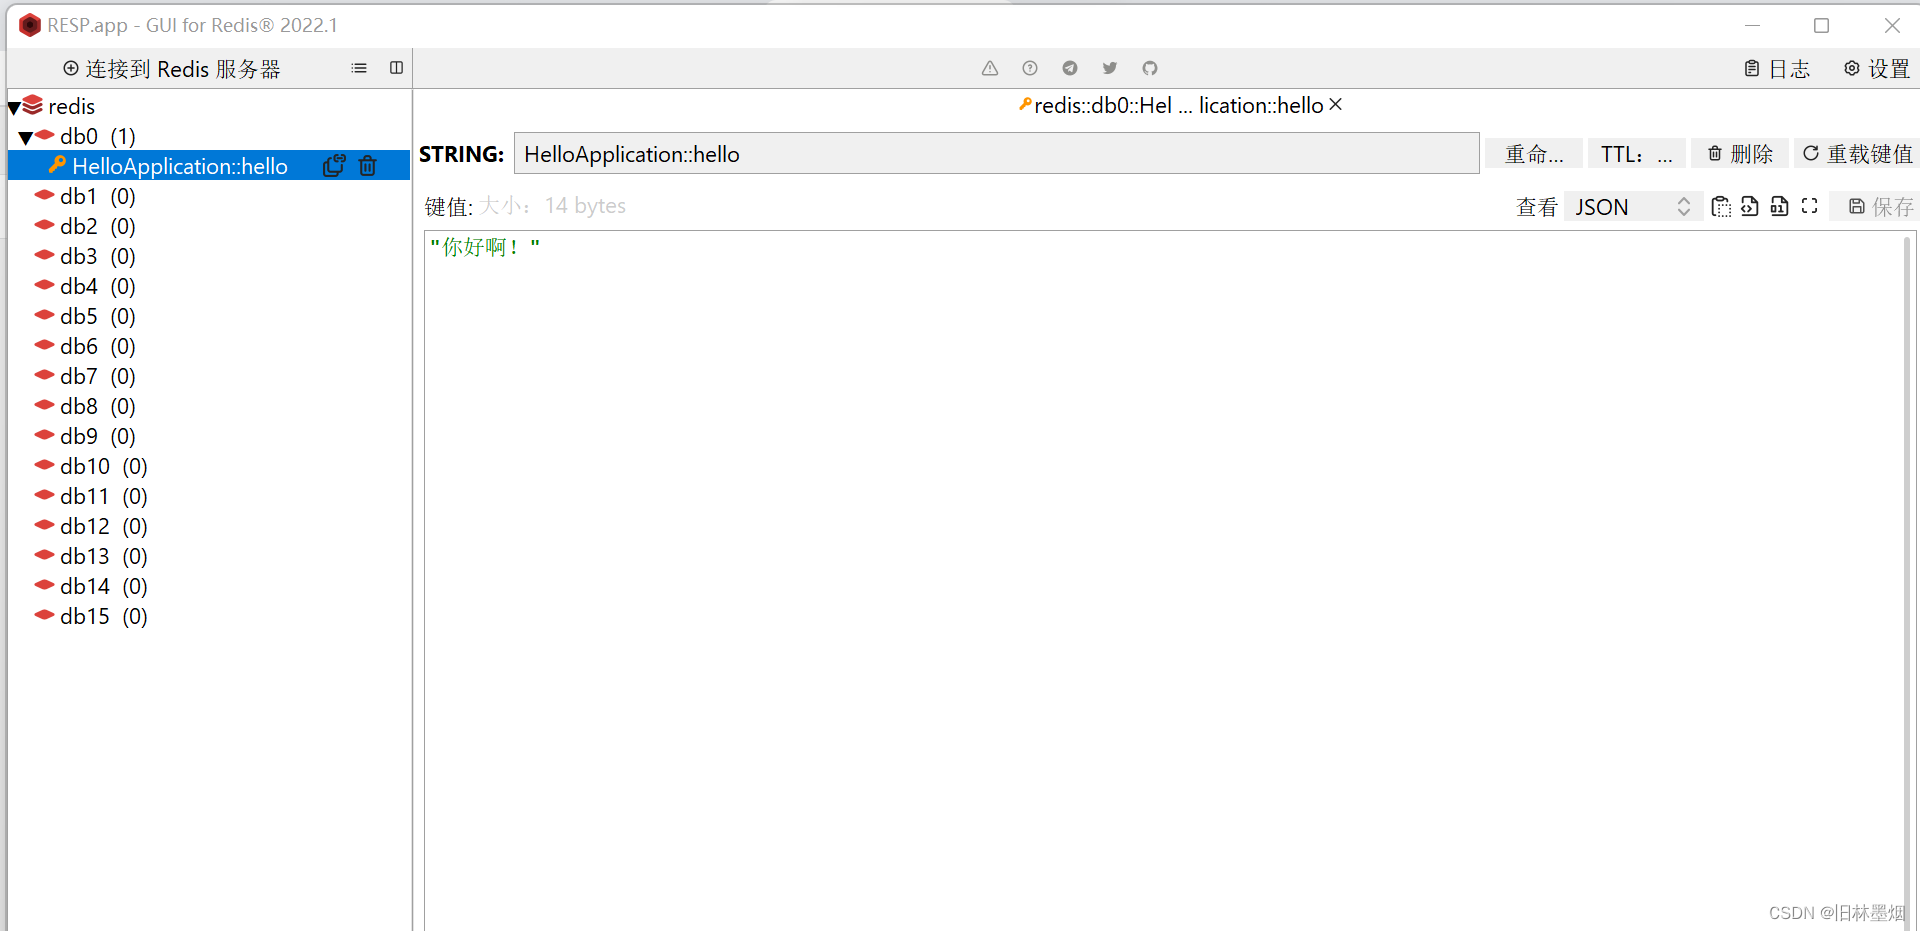
3、使用可视化工具连接redis
4、第一次访问发现需要等十秒
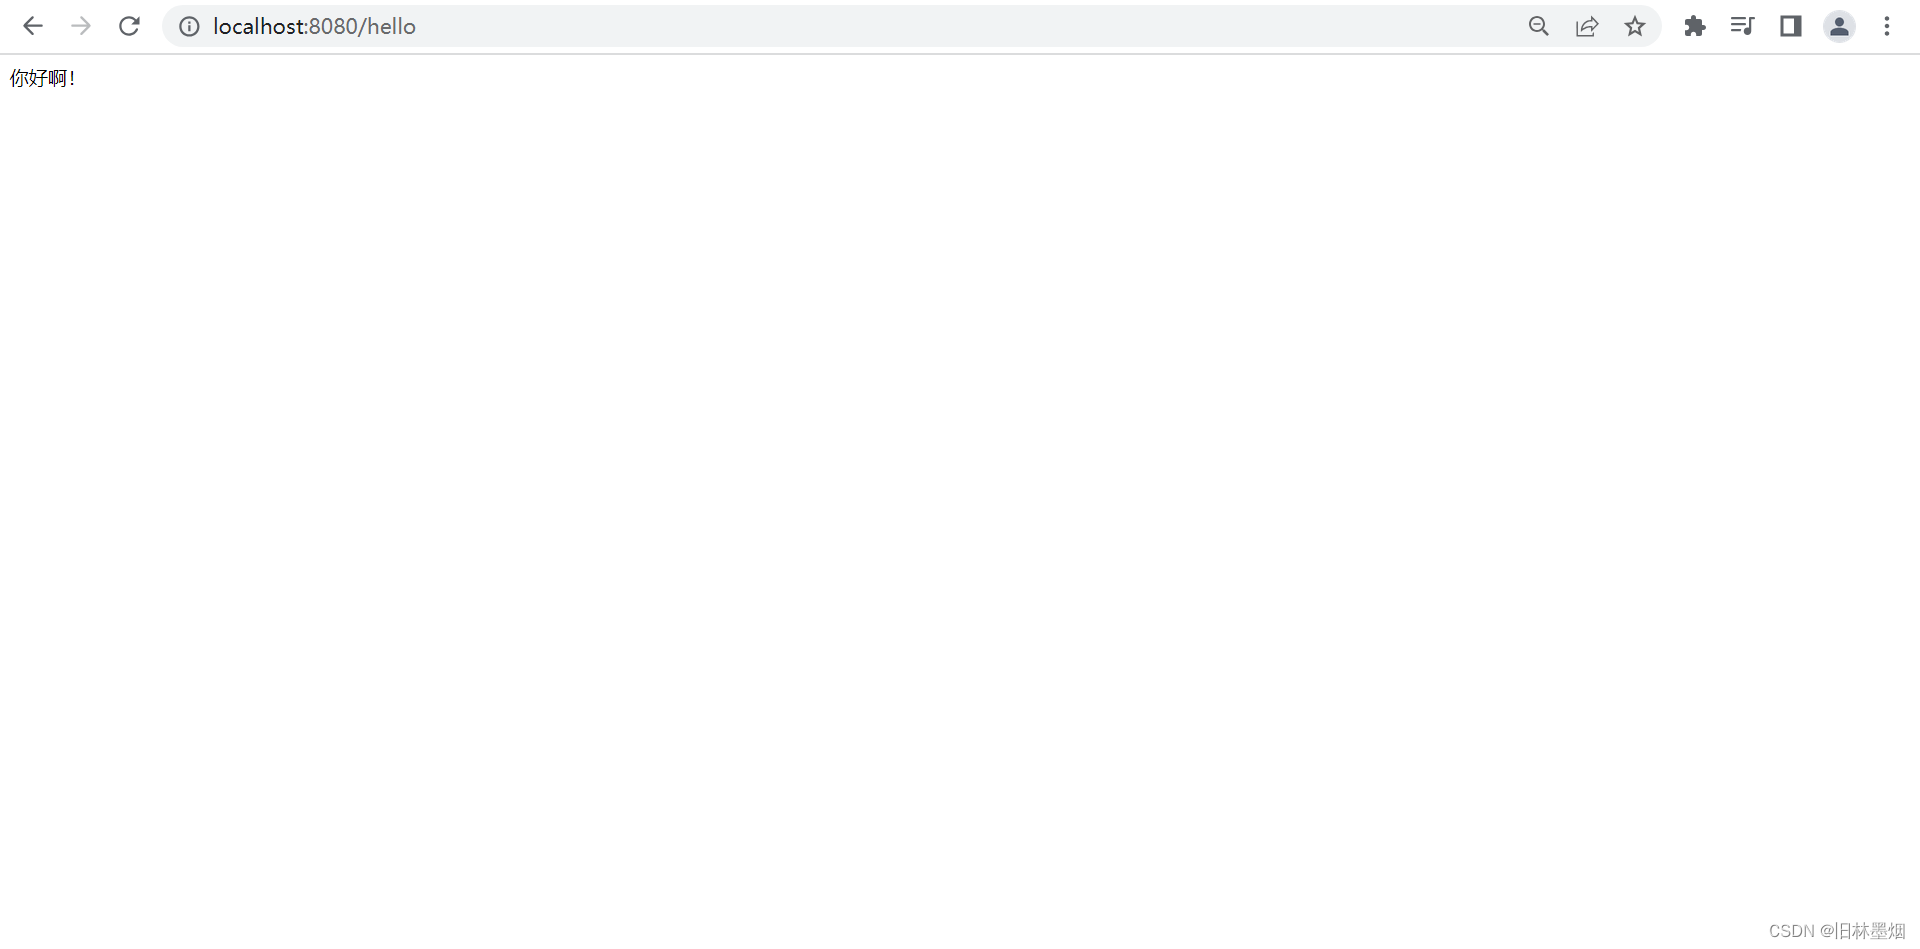
5、发现redis多了个数据,后面再请求时以下就请求到了!
3、异步编排
(1) 什么异步编排?
一个程序在不改变原本结果的情况下让其以异步的方式运行
(2) 异步的编排的小例子
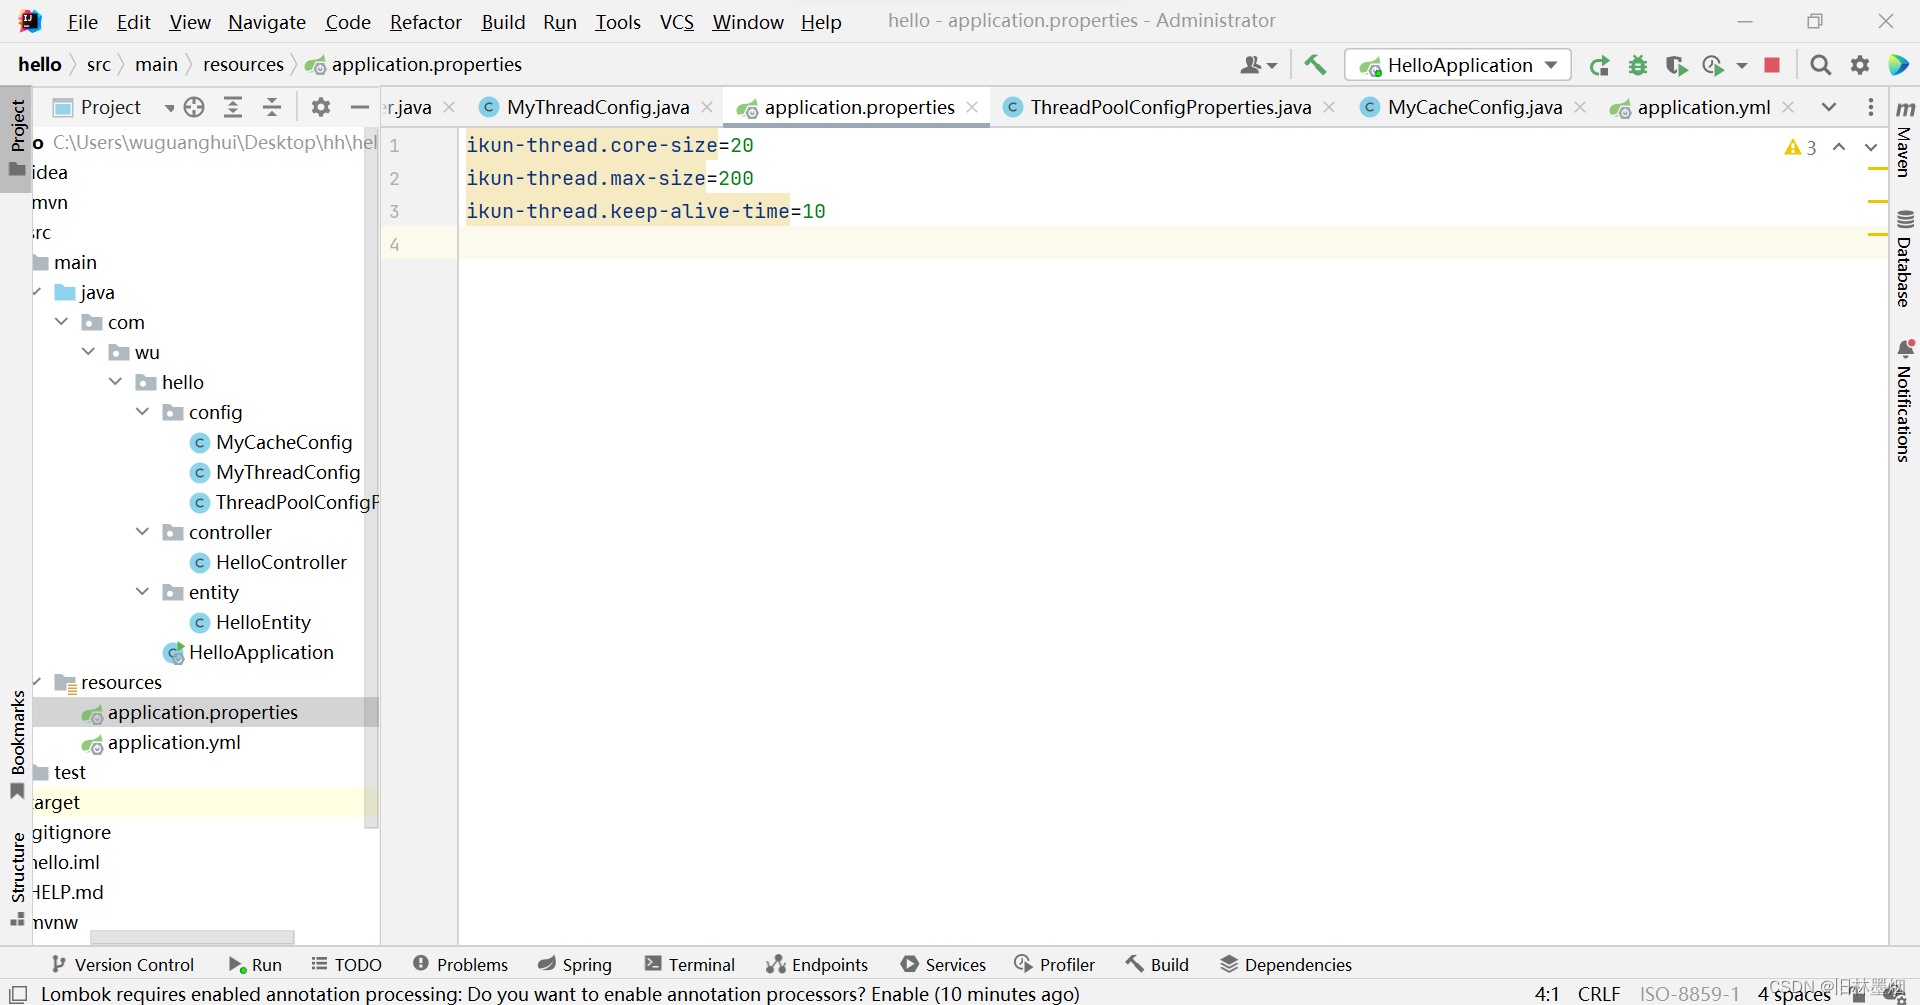
1、接着redis例子往下做,配置application.properties文件
ikun-thread.core-size=20
ikun-thread.max-size=200
ikun-thread.keep-alive-time=10
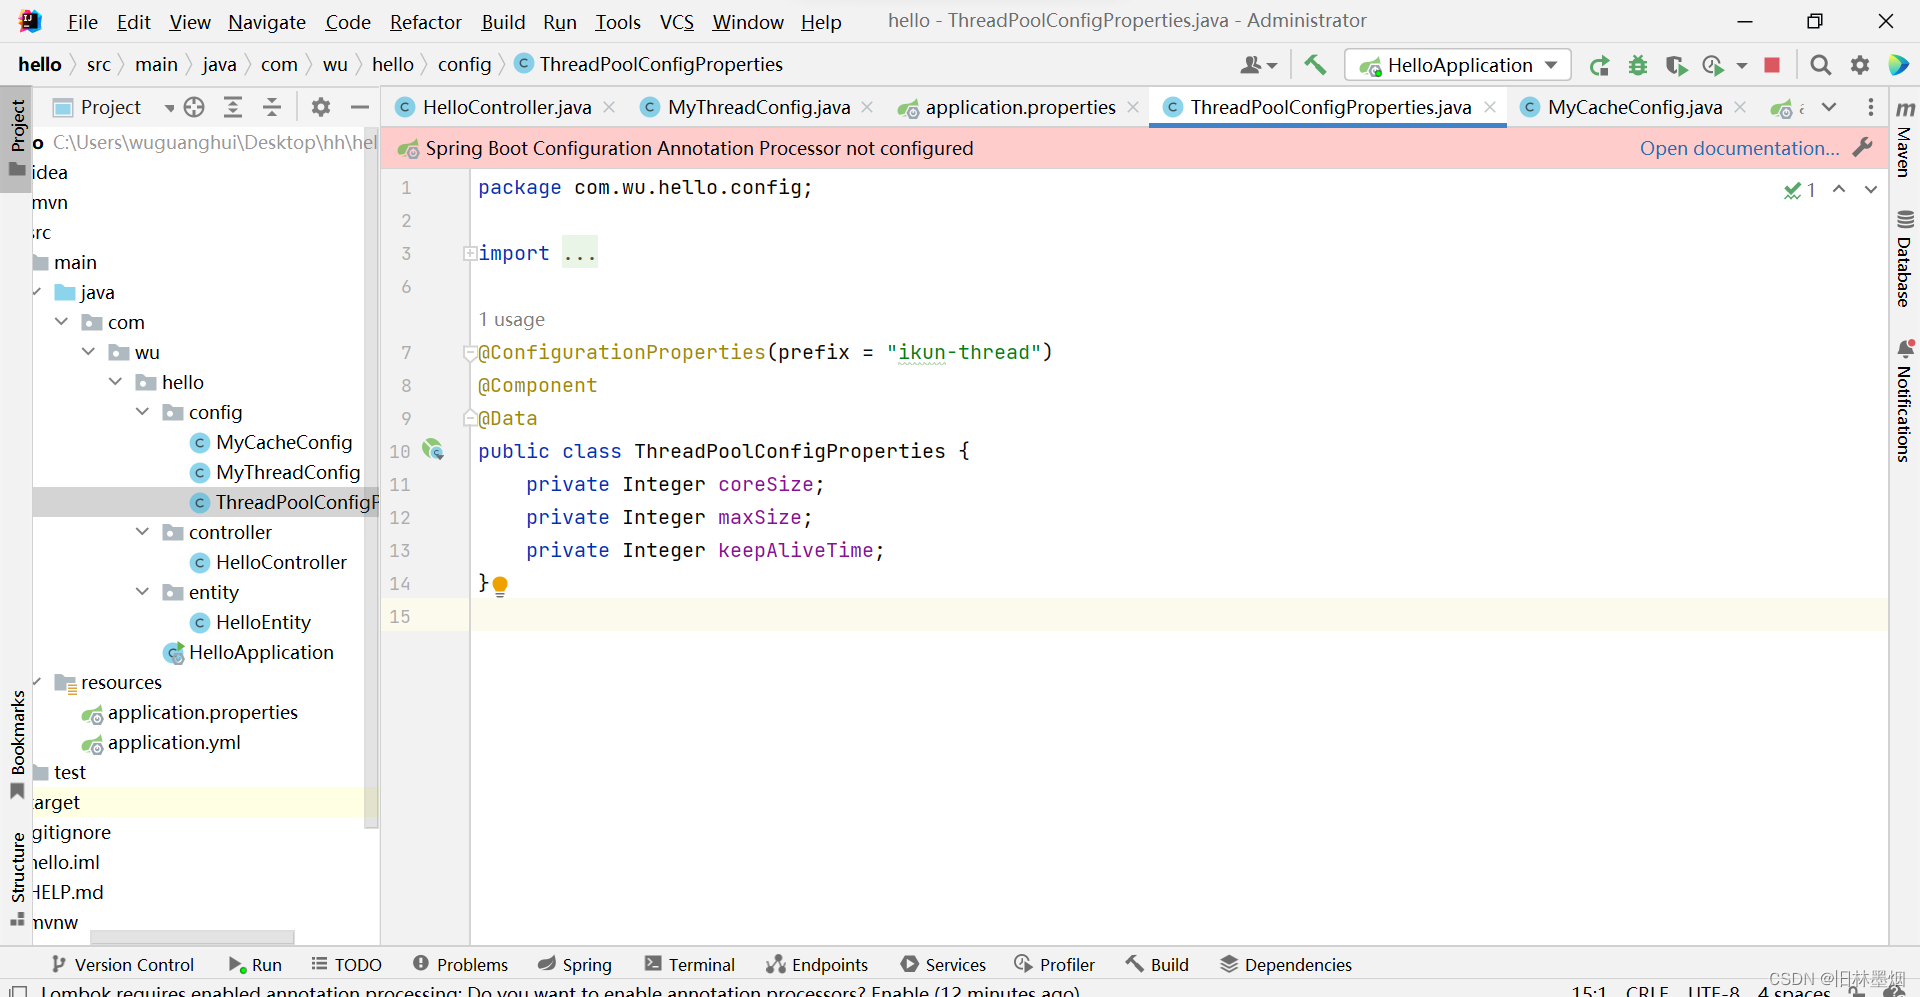
2、添加ThreadPoolConfigProperties.java配置文件
package com.wu.hello.config;

import lombok.Data;
import org.springframework.boot.context.properties.ConfigurationProperties;
import org.springframework.stereotype.Component;

@ConfigurationProperties(prefix = "ikun-thread")
@Component
@Data
public class ThreadPoolConfigProperties {


    private Integer coreSize;
    private Integer maxSize;
    private Integer keepAliveTime;
}
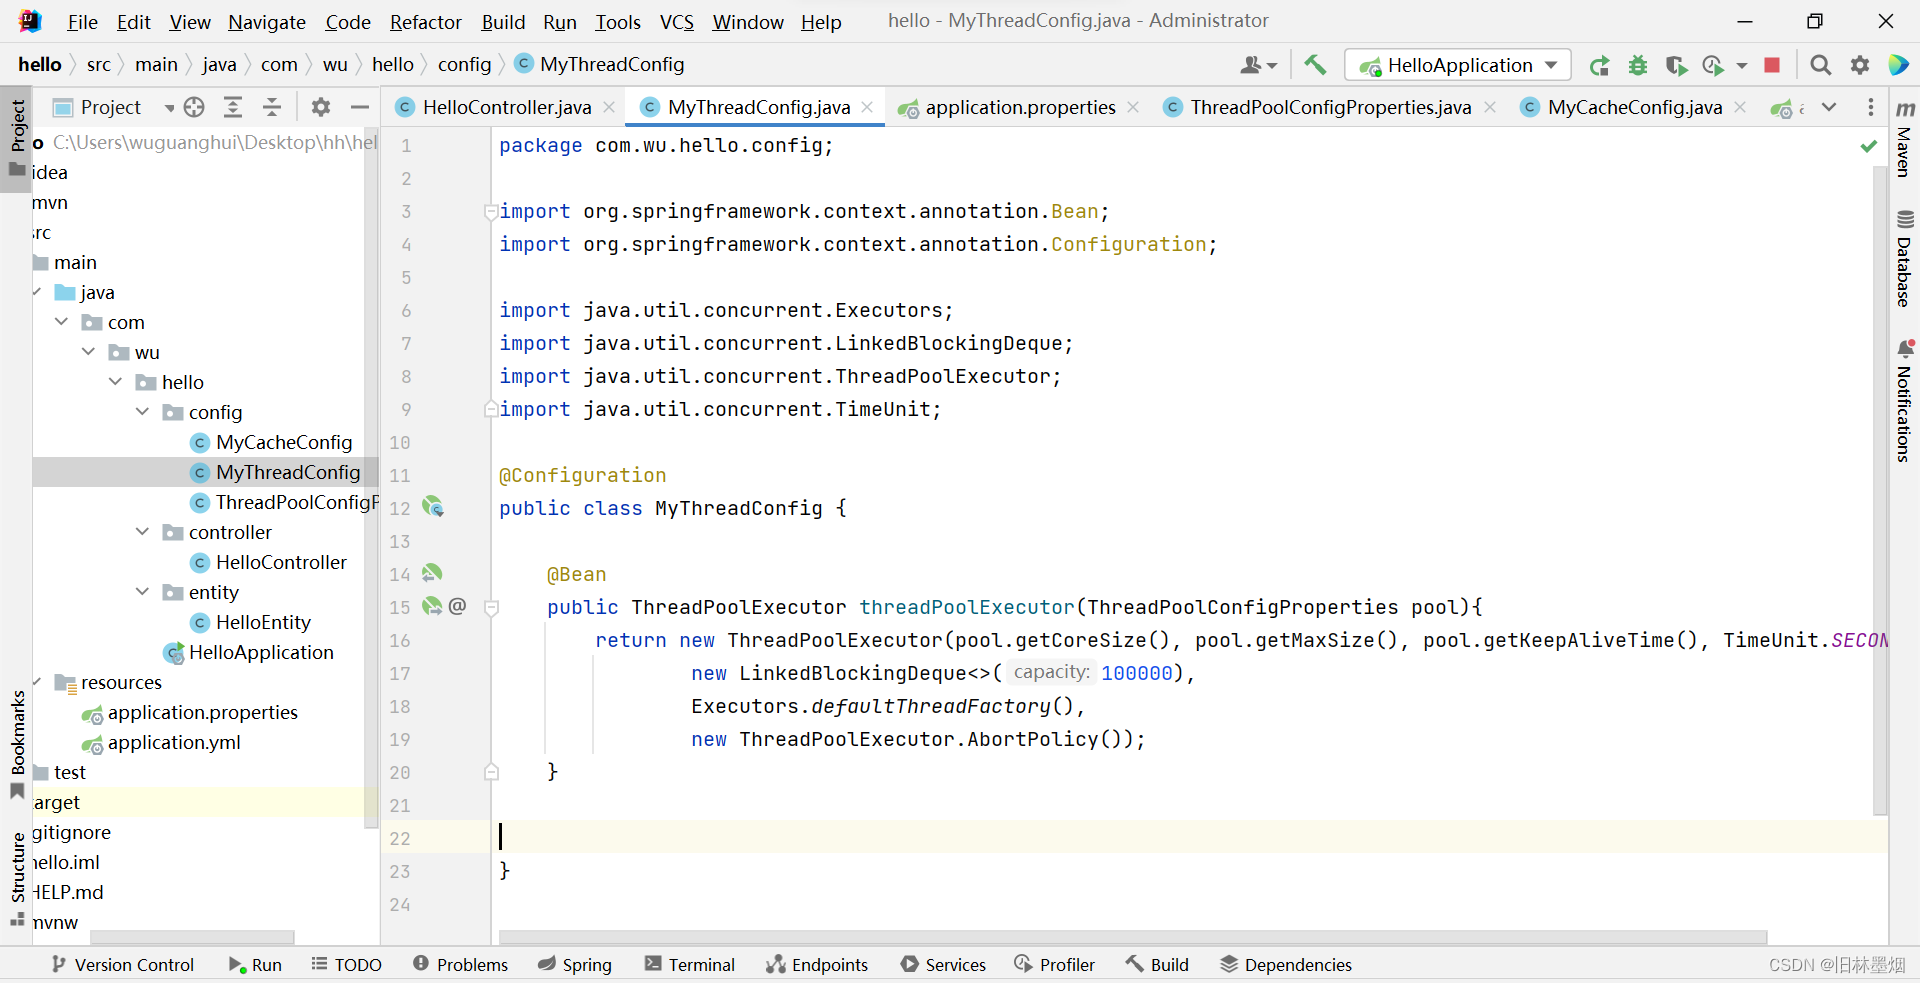
3、添加MyThreadConfig.java配置文件
package com.wu.hello.config;

import org.springframework.context.annotation.Bean;
import org.springframework.context.annotation.Configuration;

import java.util.concurrent.Executors;
import java.util.concurrent.LinkedBlockingDeque;
import java.util.concurrent.ThreadPoolExecutor;
import java.util.concurrent.TimeUnit;

@Configuration
public class MyThreadConfig {


    @Bean
    public ThreadPoolExecutor threadPoolExecutor(ThreadPoolConfigProperties pool){


        return new ThreadPoolExecutor(pool.getCoreSize(), pool.getMaxSize(), pool.getKeepAliveTime(), TimeUnit.SECONDS,
                new LinkedBlockingDeque<>(100000),
                Executors.defaultThreadFactory(),
                new ThreadPoolExecutor.AbortPolicy());
    }


}
5、HelloController.java修改为以下程序
package com.wu.hello.controller;


import org.springframework.beans.factory.annotation.Autowired;
import org.springframework.cache.annotation.Cacheable;
import org.springframework.web.bind.annotation.RequestMapping;
import org.springframework.web.bind.annotation.RestController;
import org.springframework.web.context.request.RequestAttributes;
import org.springframework.web.context.request.RequestContextHolder;

import javax.xml.crypto.Data;
import java.util.Date;
import java.util.concurrent.CompletableFuture;
import java.util.concurrent.ThreadPoolExecutor;

@RestController
public class HelloController {


    @Autowired
    ThreadPoolExecutor executor;

    @RequestMapping("hello1")
    public String hello1() throws InterruptedException {


        Date date1 = new Date();
        Thread.sleep(5000);
        Thread.sleep(5000);
        Thread.sleep(5000);
        Thread.sleep(5000);
        Date date2 = new Date();
        long t = (date2.getTime() - date1.getTime())/1000;
        return "您一共等待了"+t+"秒";
    }

    @RequestMapping("hello2")
    public String hello2() {


        Date date1 = new Date();
        RequestAttributes requestAttributes = RequestContextHolder.getRequestAttributes();

        CompletableFuture<Void> sleep1 = CompletableFuture.runAsync(() -> {


            try {


                Thread.sleep(5000);
            } catch (InterruptedException e) {


                throw new RuntimeException(e);
            }
        }, executor);
        CompletableFuture<Void> sleep2 = CompletableFuture.runAsync(() -> {


            try {


                Thread.sleep(5000);
            } catch (InterruptedException e) {


                throw new RuntimeException(e);
            }
        }, executor);
        CompletableFuture<Void> sleep3 = CompletableFuture.runAsync(() -> {


            try {


                Thread.sleep(5000);
            } catch (InterruptedException e) {


                throw new RuntimeException(e);
            }
        }, executor);
        CompletableFuture<Void> sleep4 = CompletableFuture.runAsync(() -> {


            try {


                Thread.sleep(5000);
            } catch (InterruptedException e) {


                throw new RuntimeException(e);
            }
        }, executor);
        CompletableFuture.allOf(sleep1,sleep2,sleep3,sleep4).join();
        Date date2 = new Date();
        long t = (date2.getTime() - date1.getTime())/1000;
        return "您一共等待了"+t+"秒";
    }

}
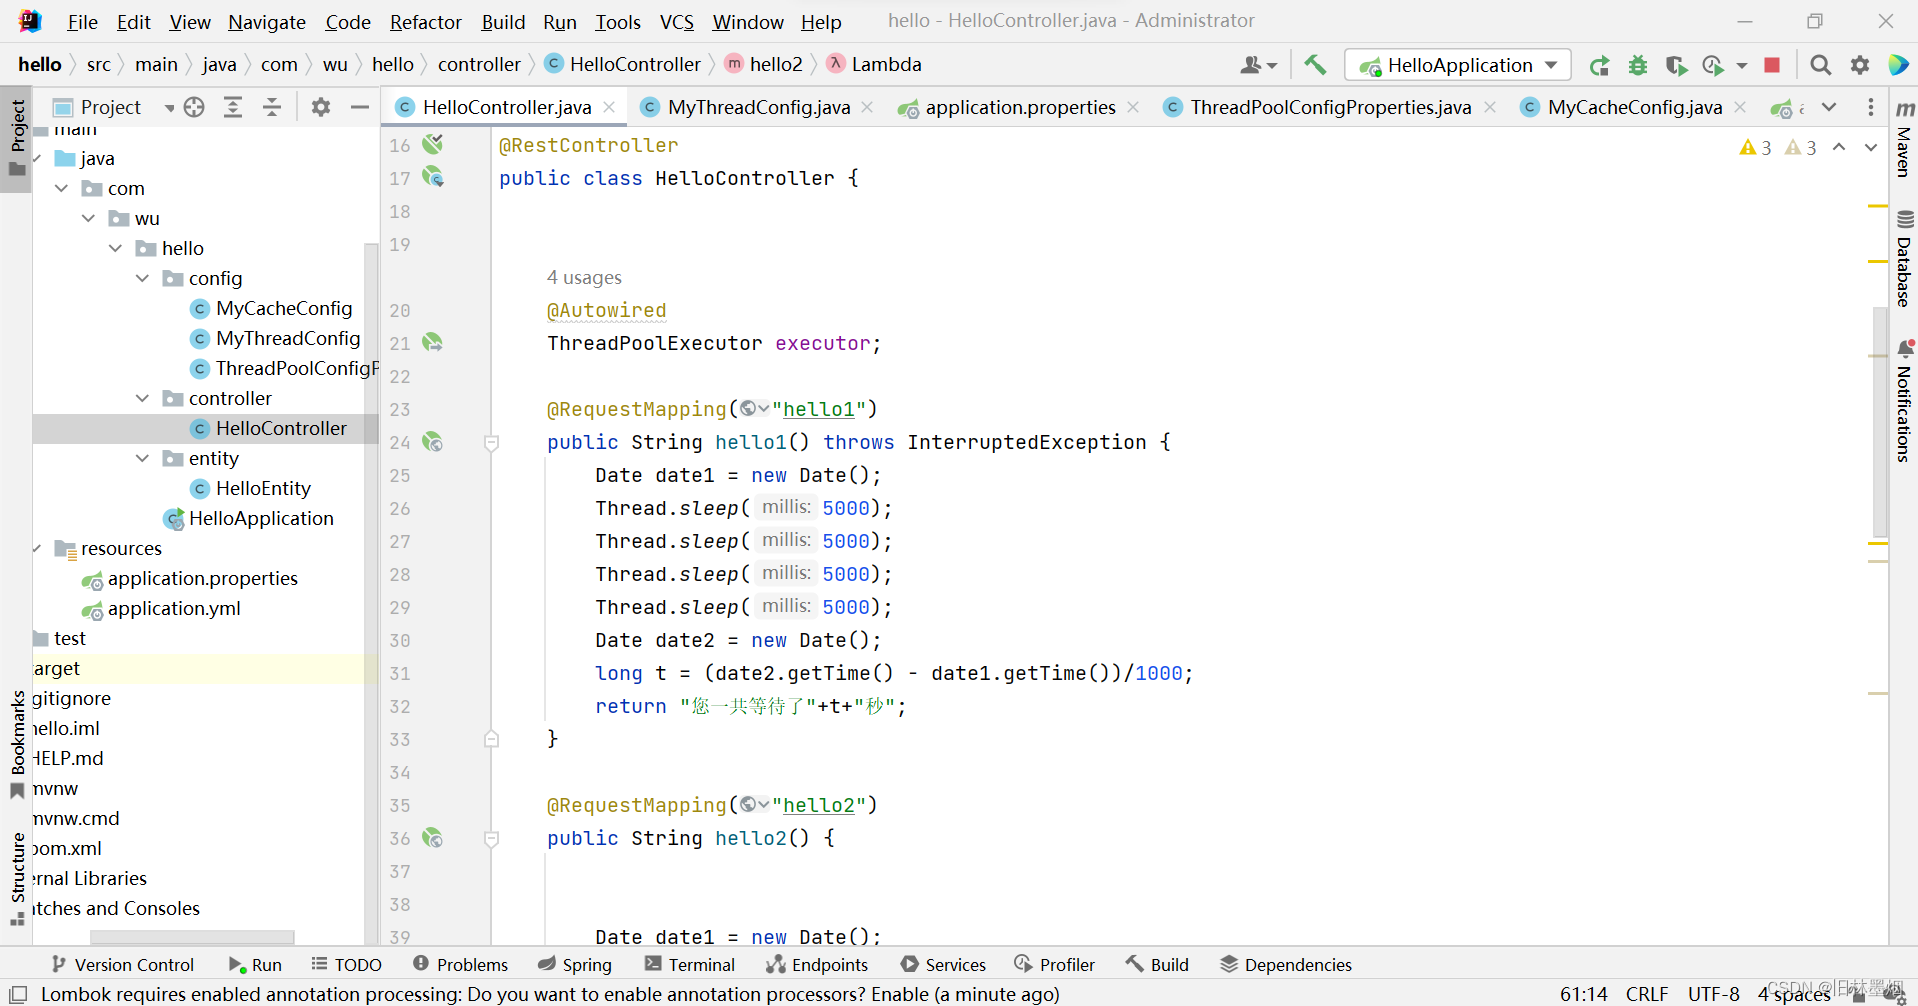
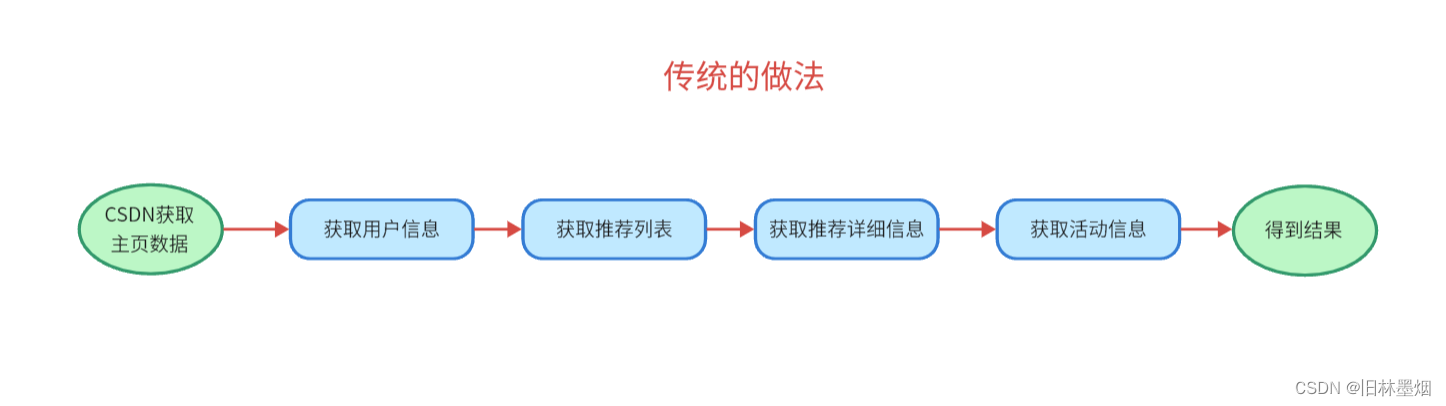
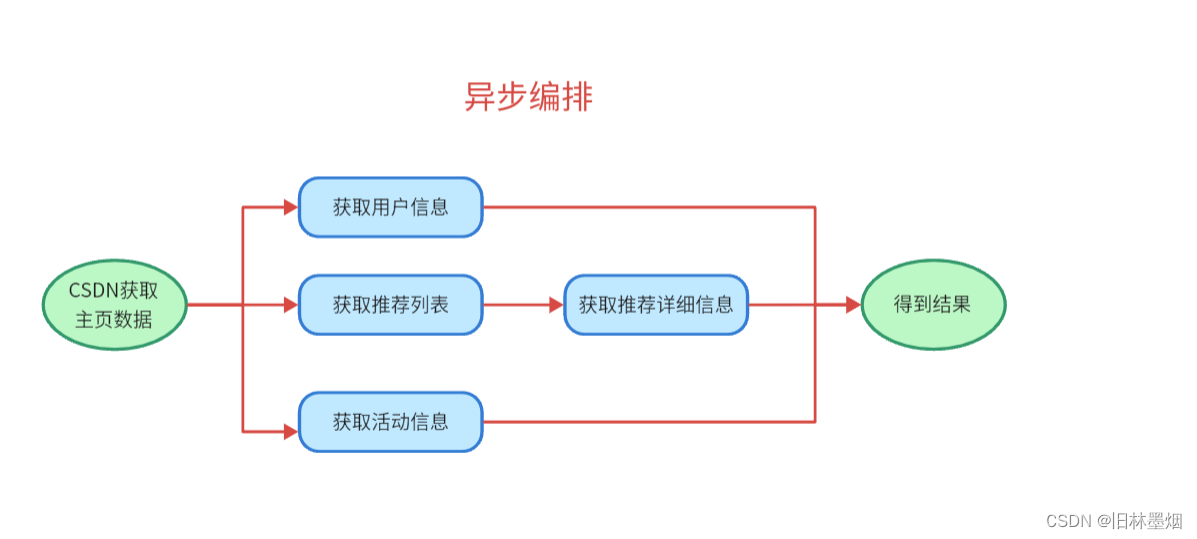
6、看传统和异步的区别

可以看到传统需要20秒,异步只需要5秒
4、MQ削峰填谷
(1) MQ优化原理
MQ(Message Queue)消息队列,把紧急的资源先处理了,不需要立马处理的请求先放到消息队列里面,空闲的时候再处理。
举个例子,淘宝京东等商品秒杀,瞬时间流量太大,如果开单、减库存、更新用户积分数据等等全部流程都跑完,那么用户那边就会感觉很卡顿,那么久还没有反馈信息。MQ优化之后就是,用户提交的信息我收到了,就立马和用户说我收到了,然后把请求的数据存到消息队列中,等服务器流量少的时候再去开单、减库存、更新用户积分数据。
(2) MQ优化的小例子
1、延时队列,假设秒杀活动1分钟结束,那么可以等一分钟之后再执行开单、减库存、更新用户积分数据
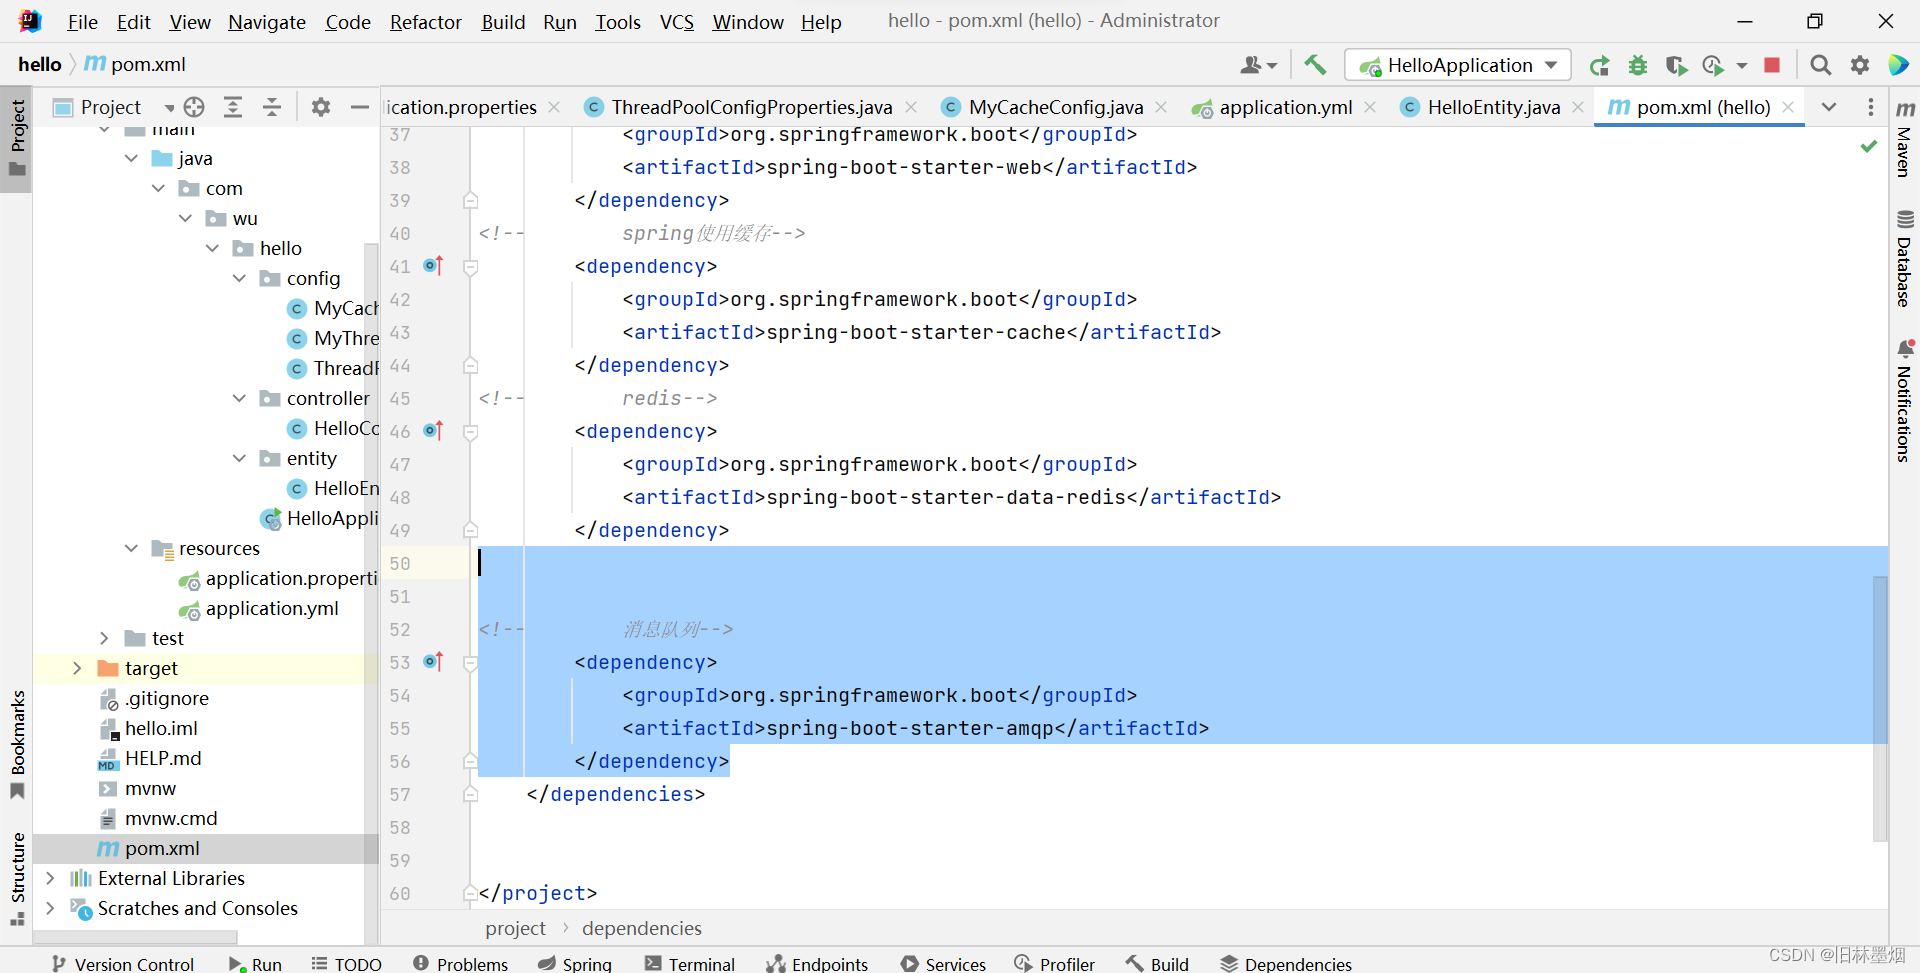
2、添加消息队列依赖
        <dependency>
            <groupId>org.springframework.boot</groupId>
            <artifactId>spring-boot-starter-amqp</artifactId>
        </dependency>
3、添加MQ配置文件MyRabbitConfig.java
package com.wu.ikun.skill.config;

import org.springframework.amqp.core.Message;
import org.springframework.amqp.rabbit.connection.CorrelationData;
import org.springframework.amqp.rabbit.core.RabbitTemplate;
import org.springframework.amqp.support.converter.Jackson2JsonMessageConverter;
import org.springframework.amqp.support.converter.MessageConverter;
import org.springframework.beans.factory.annotation.Autowired;
import org.springframework.context.annotation.Bean;
import org.springframework.context.annotation.Configuration;

import javax.annotation.PostConstruct;

@Configuration
public class MyRabbitConfig {


    @Autowired
    RabbitTemplate rabbitTemplate;

    @PostConstruct
    public void initRabbitTemplate(){


        rabbitTemplate.setConfirmCallback(new RabbitTemplate.ConfirmCallback() {


            @Override
            public void confirm(CorrelationData correlationData, boolean b, String s) {


//                System.out.println("confirm...correlation["+correlationData+"]==>ack["+b+"]");
            }
        });

        rabbitTemplate.setReturnCallback(new RabbitTemplate.ReturnCallback() {


            @Override
            public void returnedMessage(Message message, int i, String s, String s1, String s2) {


            }
        });
    }


    @Bean
    public MessageConverter messageConverter(){


        return new Jackson2JsonMessageConverter();
    }
}
4、添加MQ配置文件MyCacheConfig.java
package com.wu.hello.config;

import org.springframework.boot.autoconfigure.cache.CacheProperties;
import org.springframework.boot.context.properties.EnableConfigurationProperties;
import org.springframework.cache.annotation.EnableCaching;
import org.springframework.context.annotation.Bean;
import org.springframework.context.annotation.Configuration;
import org.springframework.data.redis.cache.RedisCacheConfiguration;
import org.springframework.data.redis.serializer.GenericJackson2JsonRedisSerializer;
import org.springframework.data.redis.serializer.RedisSerializationContext;
import org.springframework.data.redis.serializer.StringRedisSerializer;


@EnableConfigurationProperties(CacheProperties.class)
@Configuration
@EnableCaching
public class MyCacheConfig {


    @Bean
    RedisCacheConfiguration redisCacheConfiguration(CacheProperties cacheProperties){


        RedisCacheConfiguration config  = RedisCacheConfiguration.defaultCacheConfig();
        //设置key用string类型保存,value用json格式保存
        config = config.serializeKeysWith(RedisSerializationContext.SerializationPair.fromSerializer(new StringRedisSerializer()));
        config = config.serializeValuesWith(RedisSerializationContext.SerializationPair.fromSerializer(new GenericJackson2JsonRedisSerializer()));

        CacheProperties.Redis redisProperties = cacheProperties.getRedis();
        //使配置文件中所有的配置都生效
        if (redisProperties.getTimeToLive() != null) {


            config = config.entryTtl(redisProperties.getTimeToLive());
        }
        if (redisProperties.getKeyPrefix() != null) {


            config = config.prefixKeysWith(redisProperties.getKeyPrefix());
        }
        if (!redisProperties.isCacheNullValues()) {


            config = config.disableCachingNullValues();
        }
        if (!redisProperties.isUseKeyPrefix()) {


            config = config.disableKeyPrefix();
        }

        return config;
    }

}
5、修改配置文件application.yml
server:
  port: 8080

spring:
  redis:
    host: 47.115.230.86
    port: 6379

  cache:
    type: redis
    redis:
      time-to-live: 300000
      cache-null-values: true


  rabbitmq:
    host: 47.115.230.86
    port: 5672
    virtual-host: /
    template:
      mandatory: true
    publisher-returns: true
    publisher-confirm-type: simple
    listener:
      simple:
        acknowledge-mode: manual


ribbon:
  eager-load:
    enabled: true
    clients: eureka-provider
6、修改HelloController.java
package com.wu.hello.controller;
import com.rabbitmq.client.Channel;
//import io.seata.spring.annotation.GlobalTransactional;
import org.springframework.amqp.core.AmqpAdmin;
import org.springframework.amqp.core.Message;
import org.springframework.amqp.rabbit.annotation.RabbitListener;
import org.springframework.amqp.rabbit.core.RabbitTemplate;
import org.springframework.beans.factory.annotation.Autowired;
import org.springframework.web.bind.annotation.RequestMapping;
import org.springframework.web.bind.annotation.ResponseBody;
import org.springframework.web.bind.annotation.RestController;
import java.io.IOException;
import java.util.Date;
@RestController
public class HelloController {
@Autowired
RabbitTemplate rabbitTemplate;
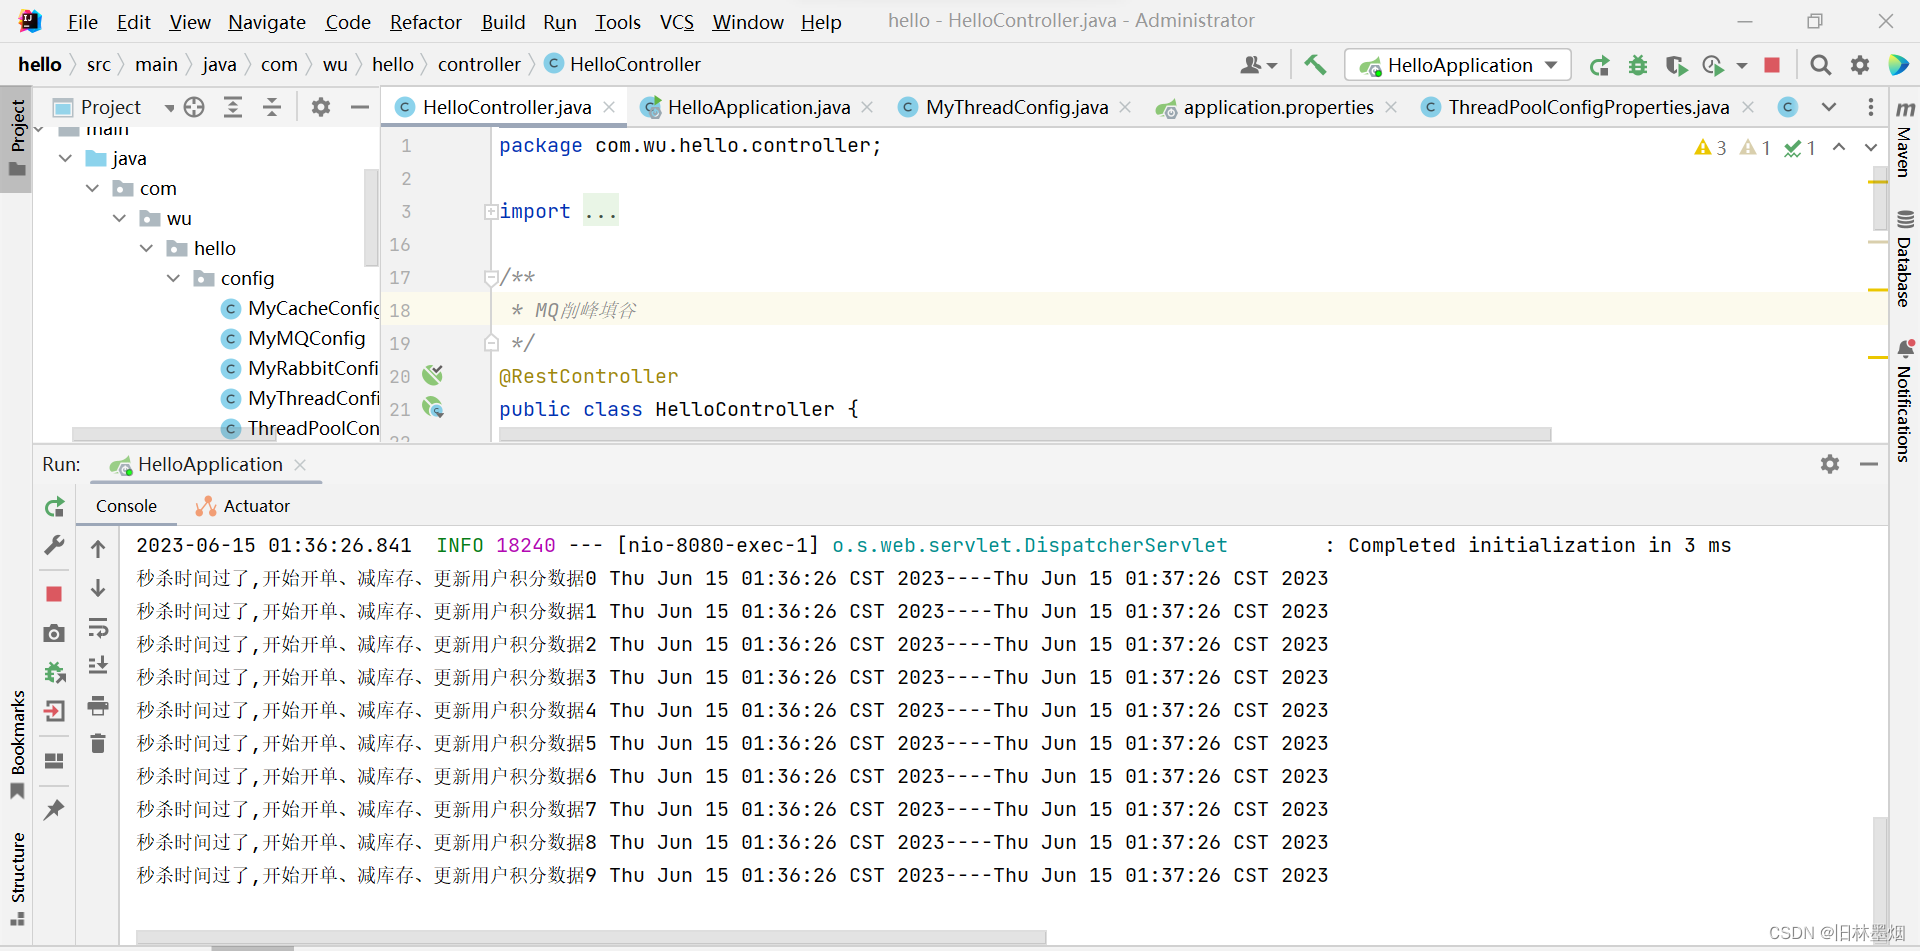
@RabbitListener(queues = "order.release.order.queue")
public void listener(String msg, Channel channel, Message message) throws IOException {
System.out.println("秒杀时间过来,开始开单、减库存、更新用户积分数据"+msg+ "----" + new Date().toString());
channel.basicAck(message.getMessageProperties().getDeliveryTag(),false);
}
@ResponseBody
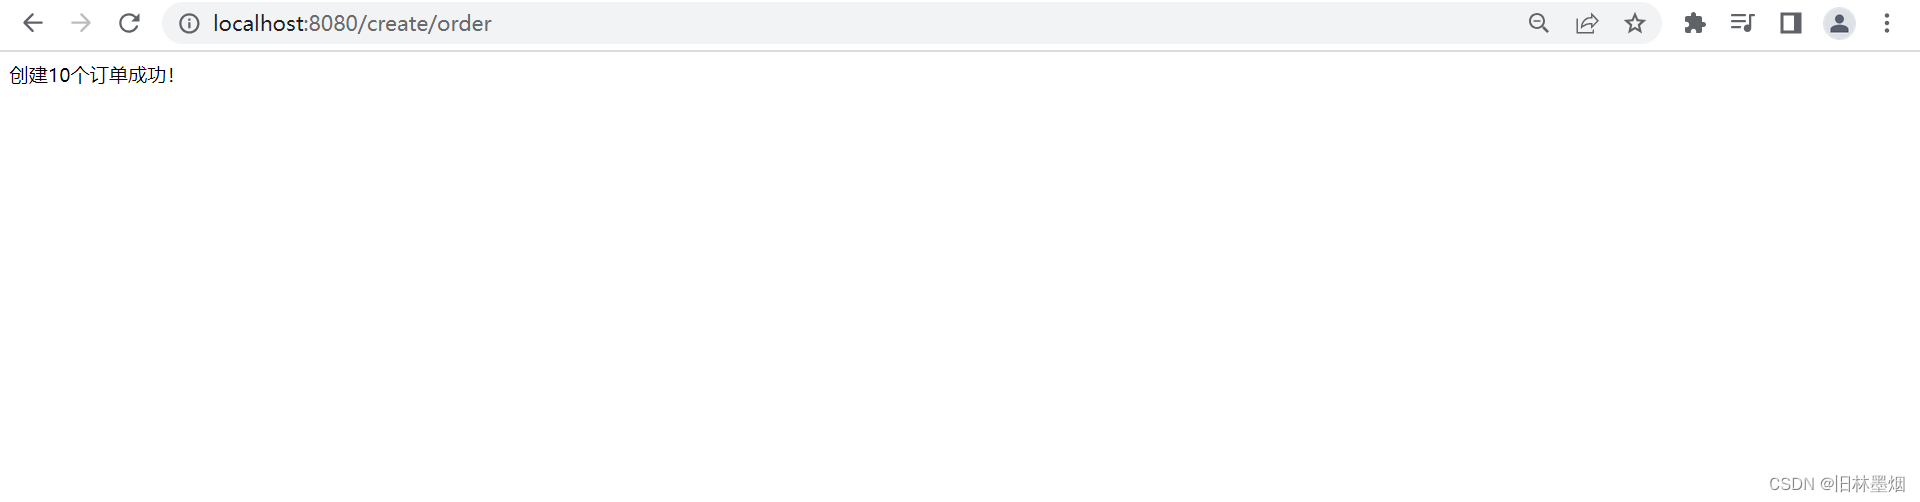
@RequestMapping("/create/order")
public String createOrderEntity(){
for (int i = 0; i < 10; i++) {
rabbitTemplate.convertAndSend("order-event-exchange","order.create.order",i + " " + new Date().toString());
}
return "创建10个订单成功!";
}
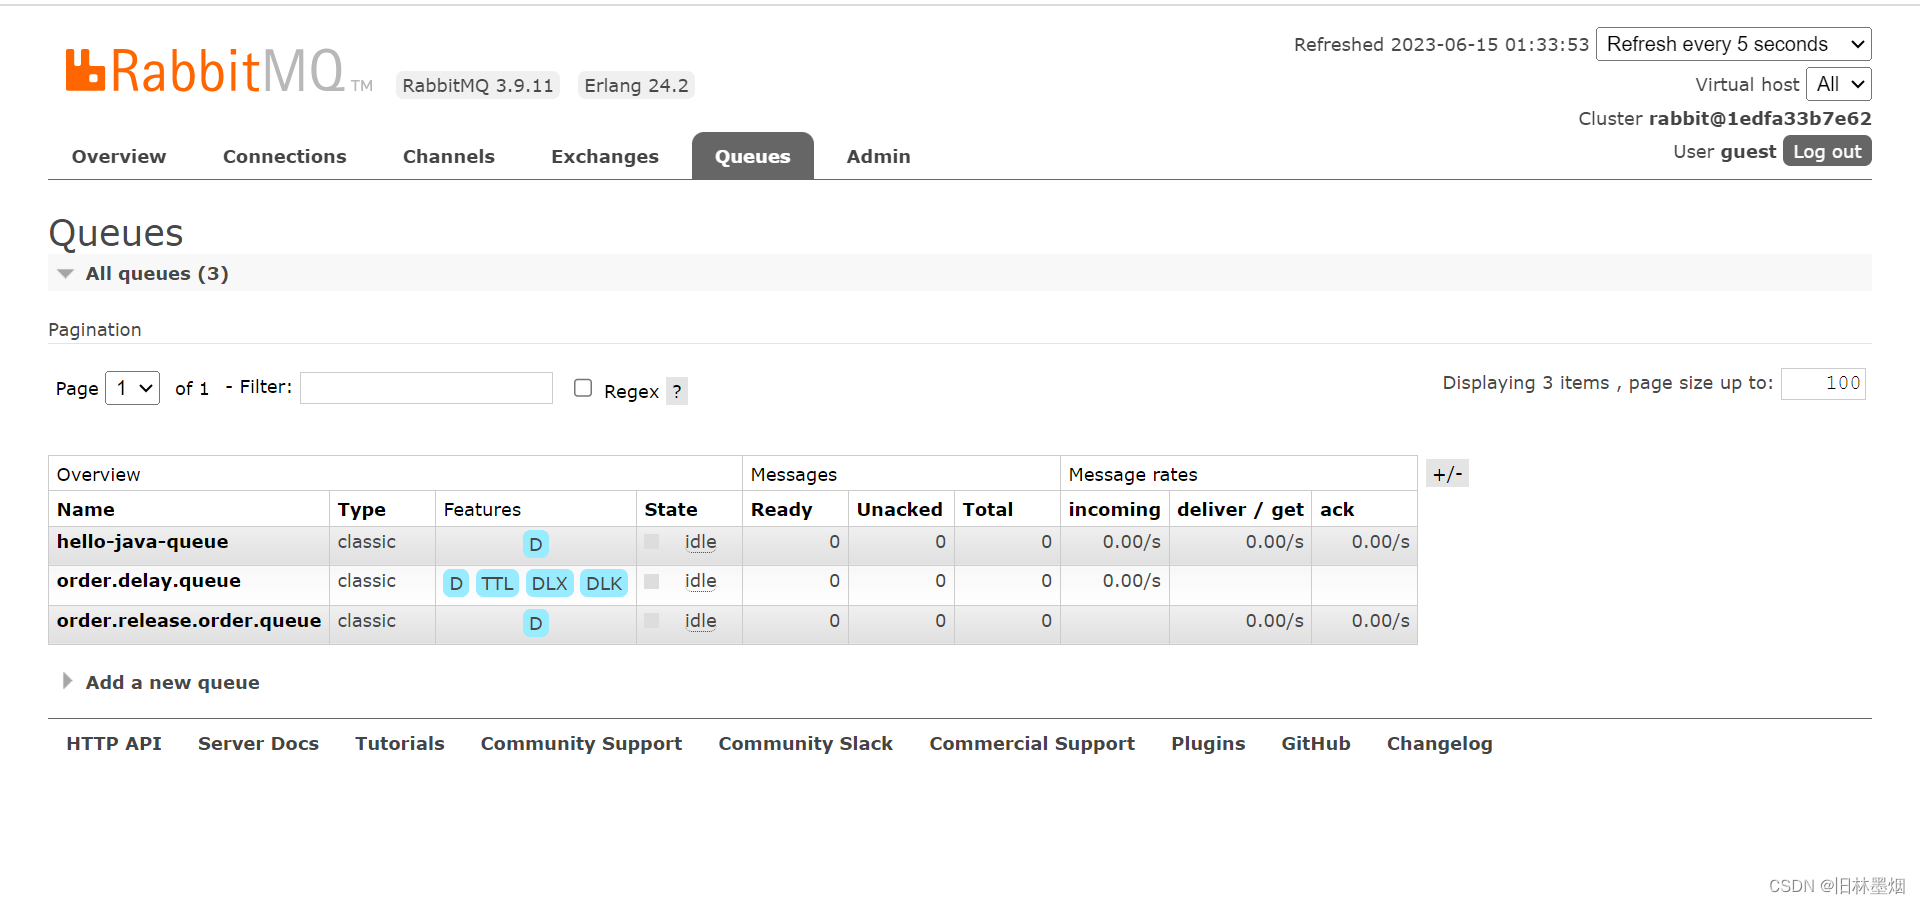
}
7、启动服务,发现MQ已经创建好配置的交换机、队列等等
8、模拟用户发单
9、1分钟后,后台收到用户信息,并开始开单等等
5、预加载
(1) 预加载优化原理
猜测出用户会发出请求,趁用户不注意先把数据查出来,放到缓存中,用户真正去请求数据的时候会感觉非常快!

6、sql调优
(1) sql调优原理
这个优化有很多方面:
sql代码方面: 坚决不使用联表查询
sql存储方面: 建索引,实际上就是底层用空间换时间,b+树把时间复杂度从O(n)优化到了O(log(n)),优化了一个数量级
编程方面: 坚决不循环查表,需要单个单个数据的时候,可以把数据先全部取出,存到map里面,用的时候在map里查,这样可以把时间复杂度从O(n2)优化到了O(n*log(n)),优化了一个数量级,并且优化的了数据库的连接时间
7、jvm调优
(1) jvm调优原理
找出最符合目前情况的jvm运行参数,最主要的就是分配内存。内存配过小,垃圾回收机制(Garbage Collection)会被频繁触发,导致程序性能下降。内存分配过大,资源浪费严重。
(2) jvm简介
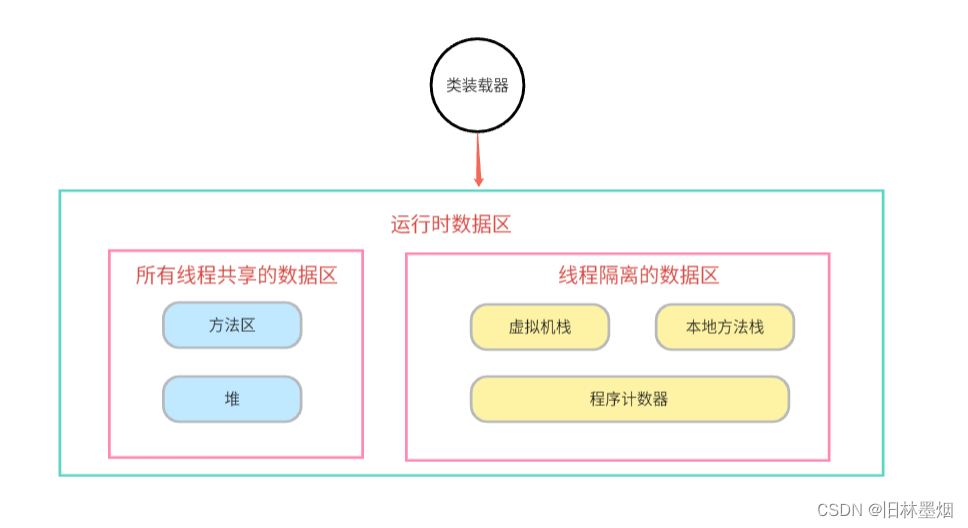
jvm(Java Virtual Machine),java虚拟机
Java虚拟机是一个想象中的机器,在实际的计算机上通过软件模拟来实现。Java虚拟机有自己想象中的硬件,如处理器、堆栈、寄存器等,还具有相应的指令系统。
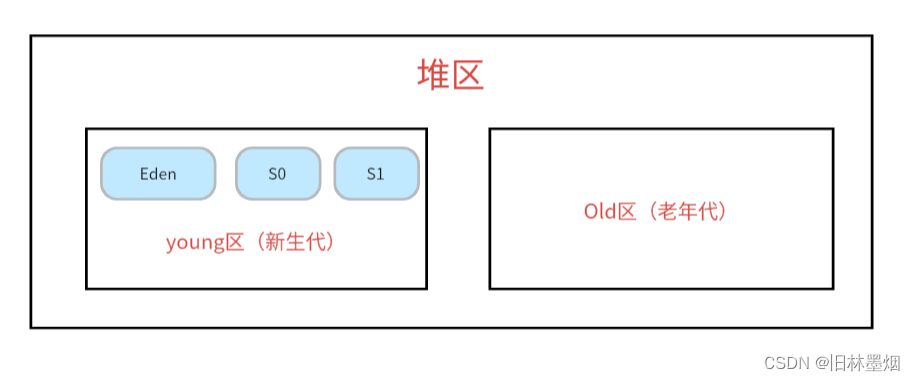
jvm的内存模型:
堆的垃圾回收分区:
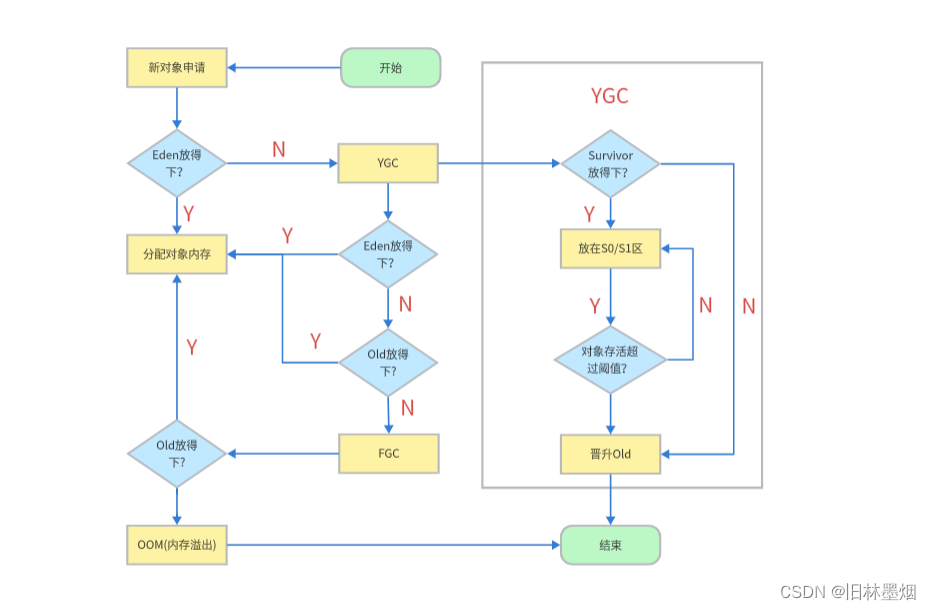
gc流程:
(3) jvm调优步骤
1、预测服务的平均被访问量,例如为300次
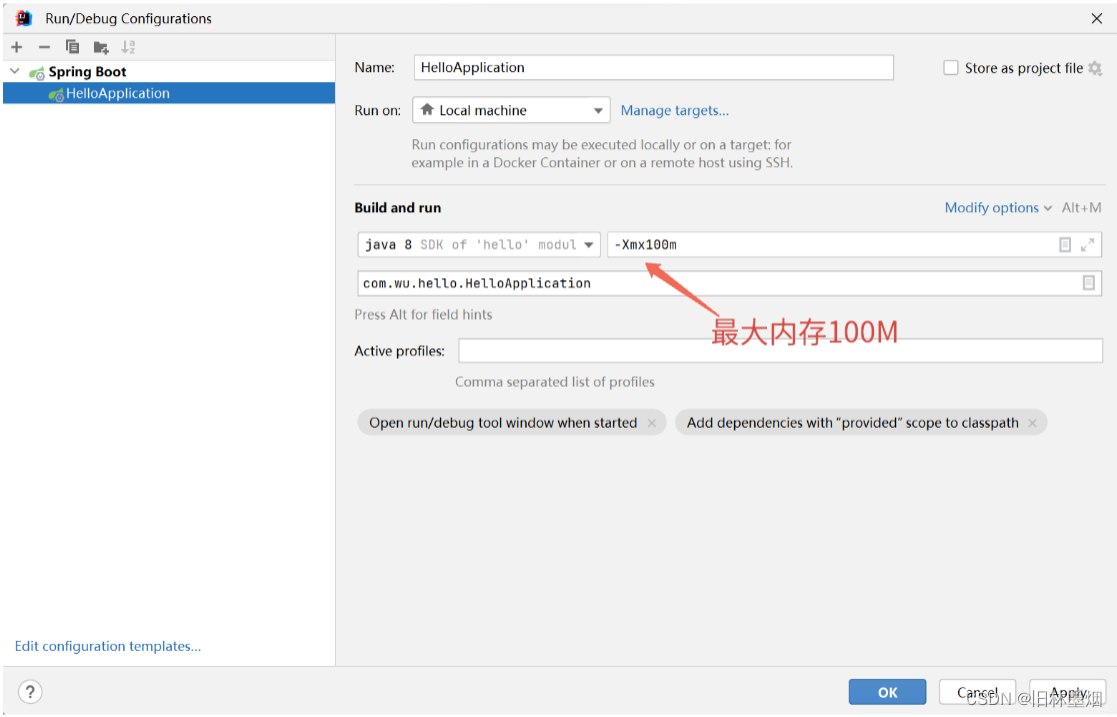
2、设置服务最大内存100M
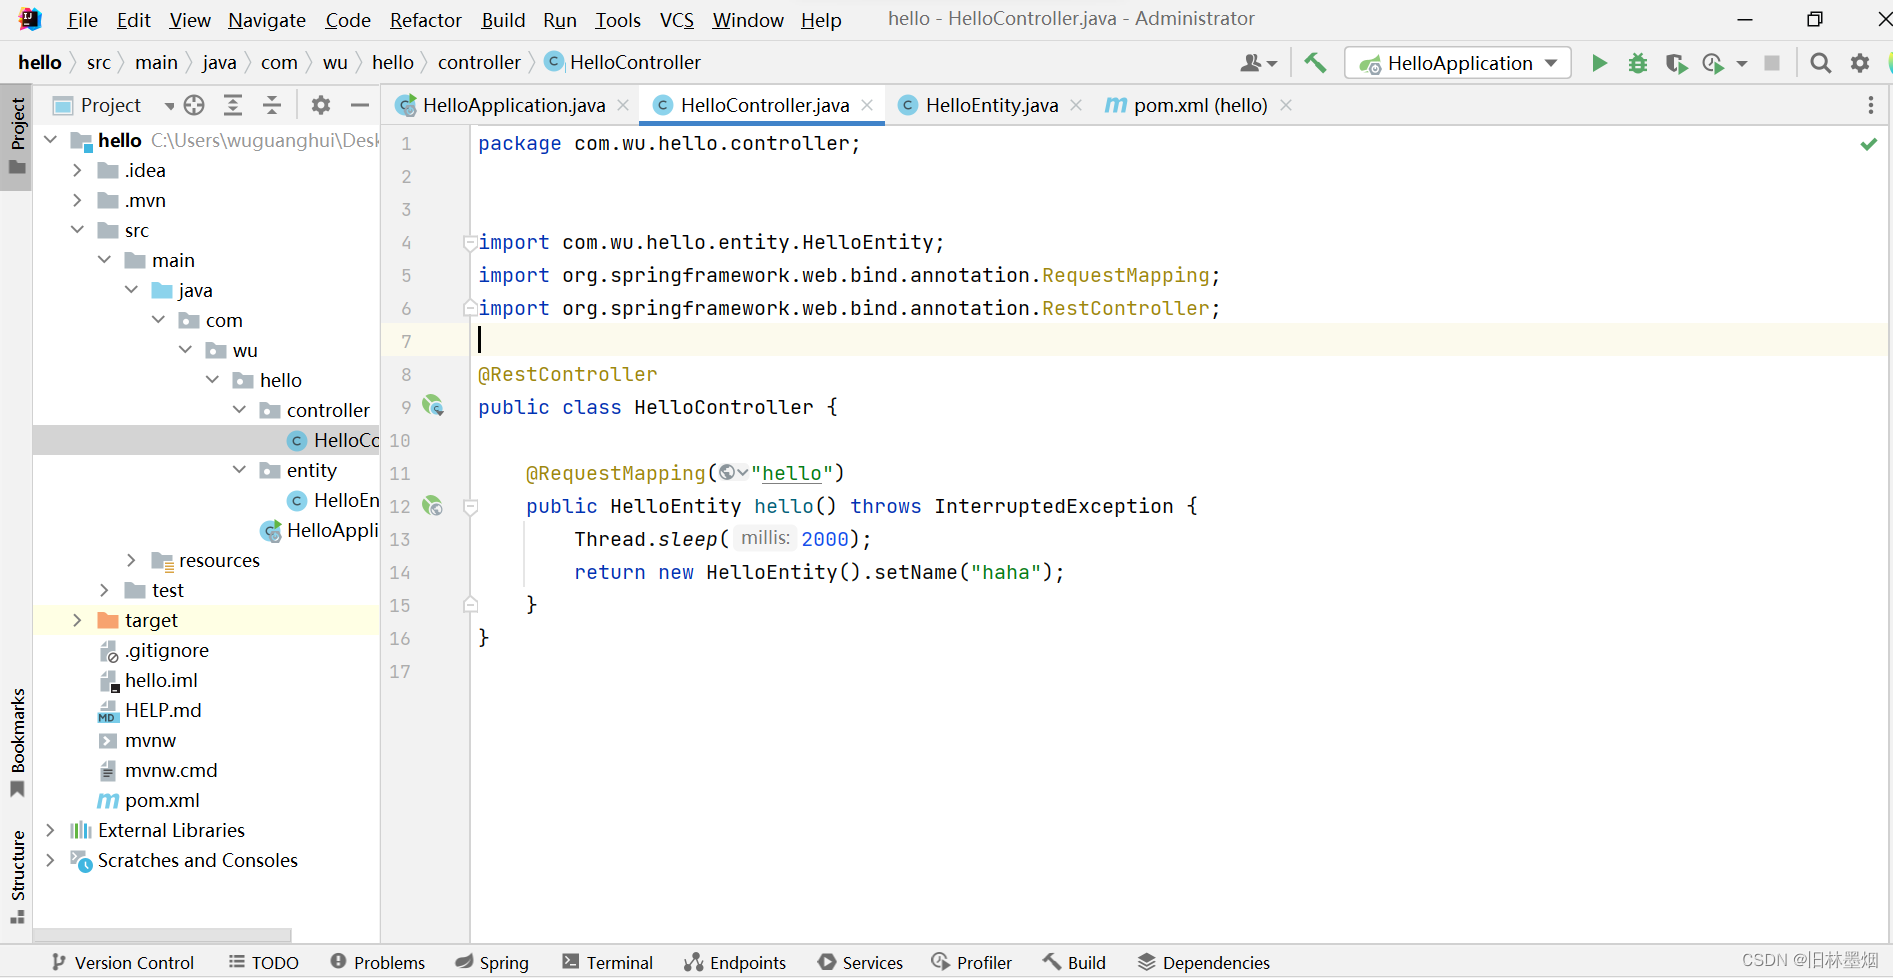
3、编写一个接口,睡眠两秒,并启动服务
4、使用测试工具JMeter对hello接口发起300个线程,每个线程无限请求
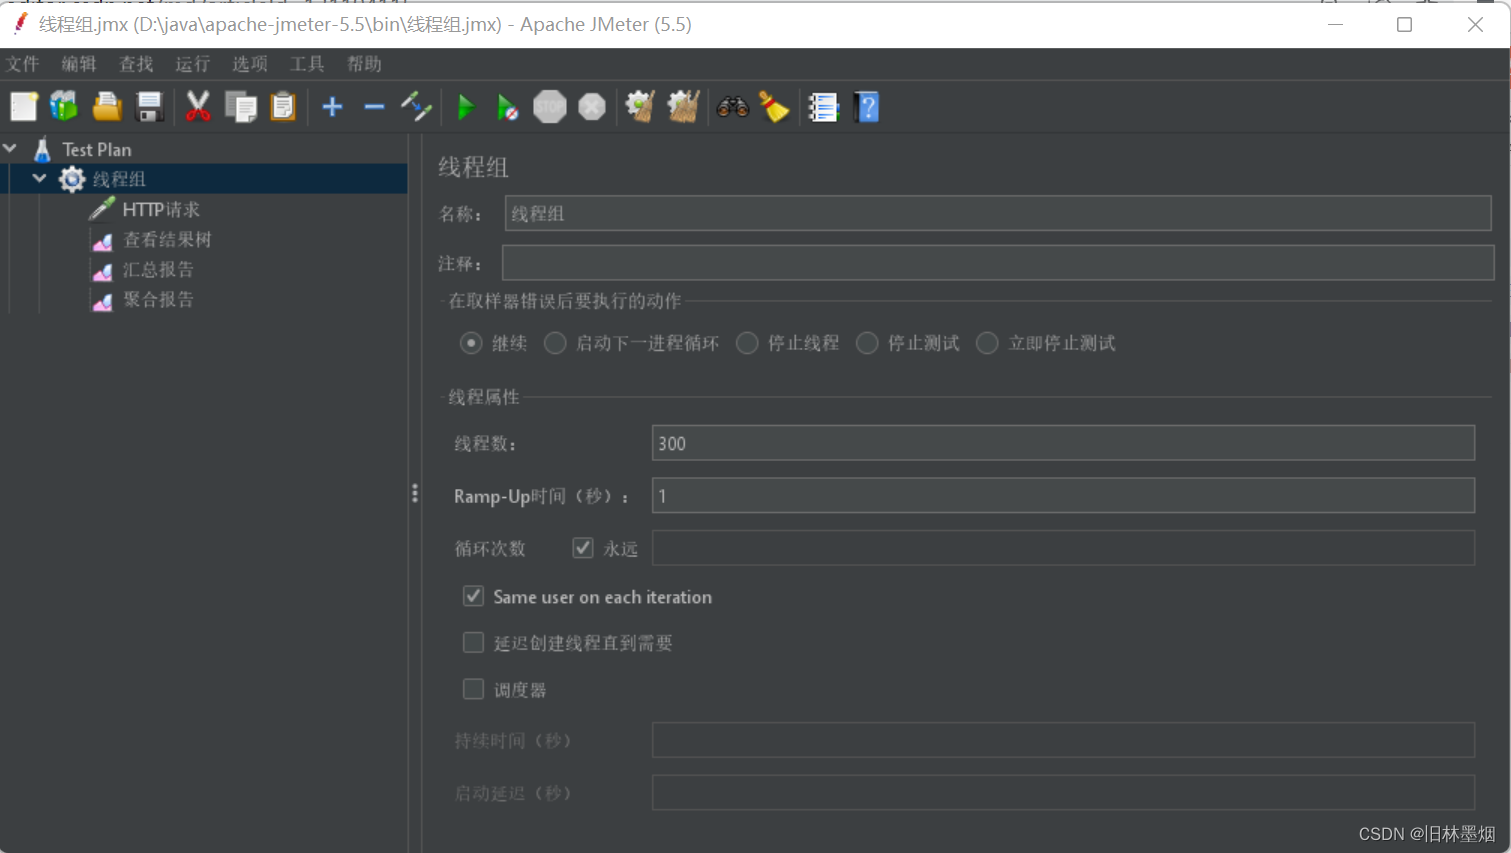
5、使用jvisualvm查看服务gc的情况
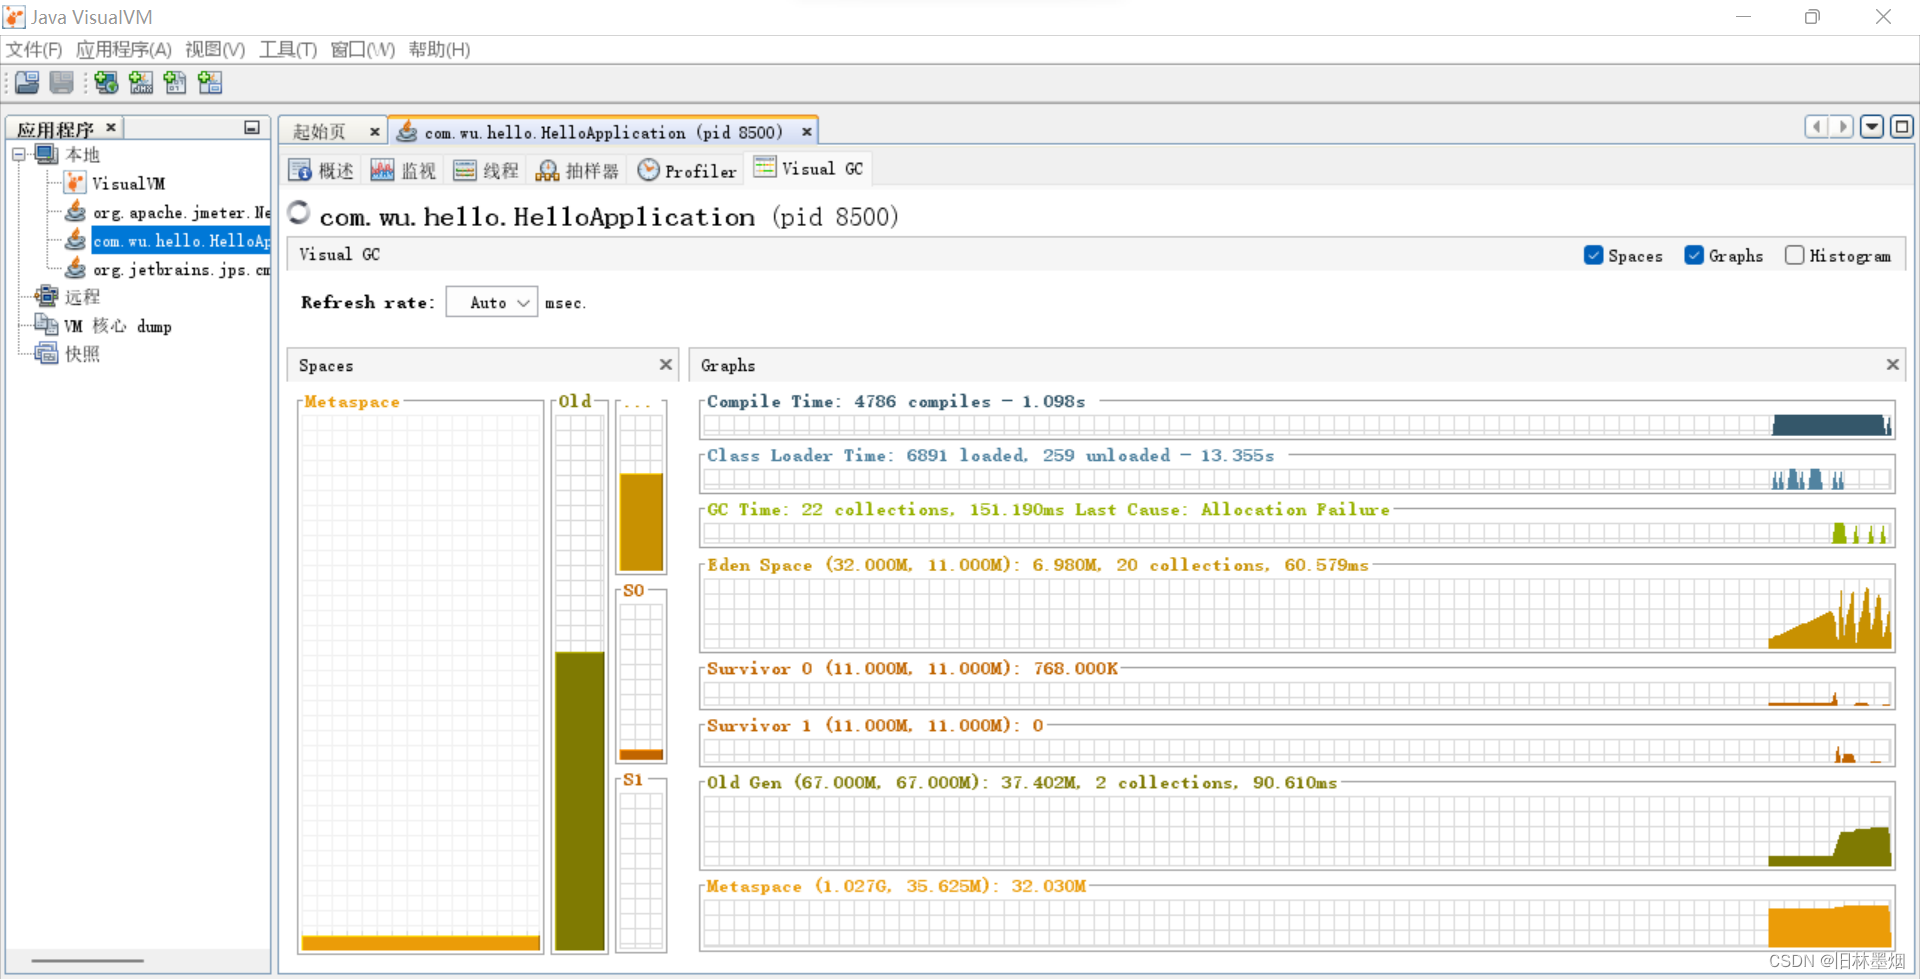
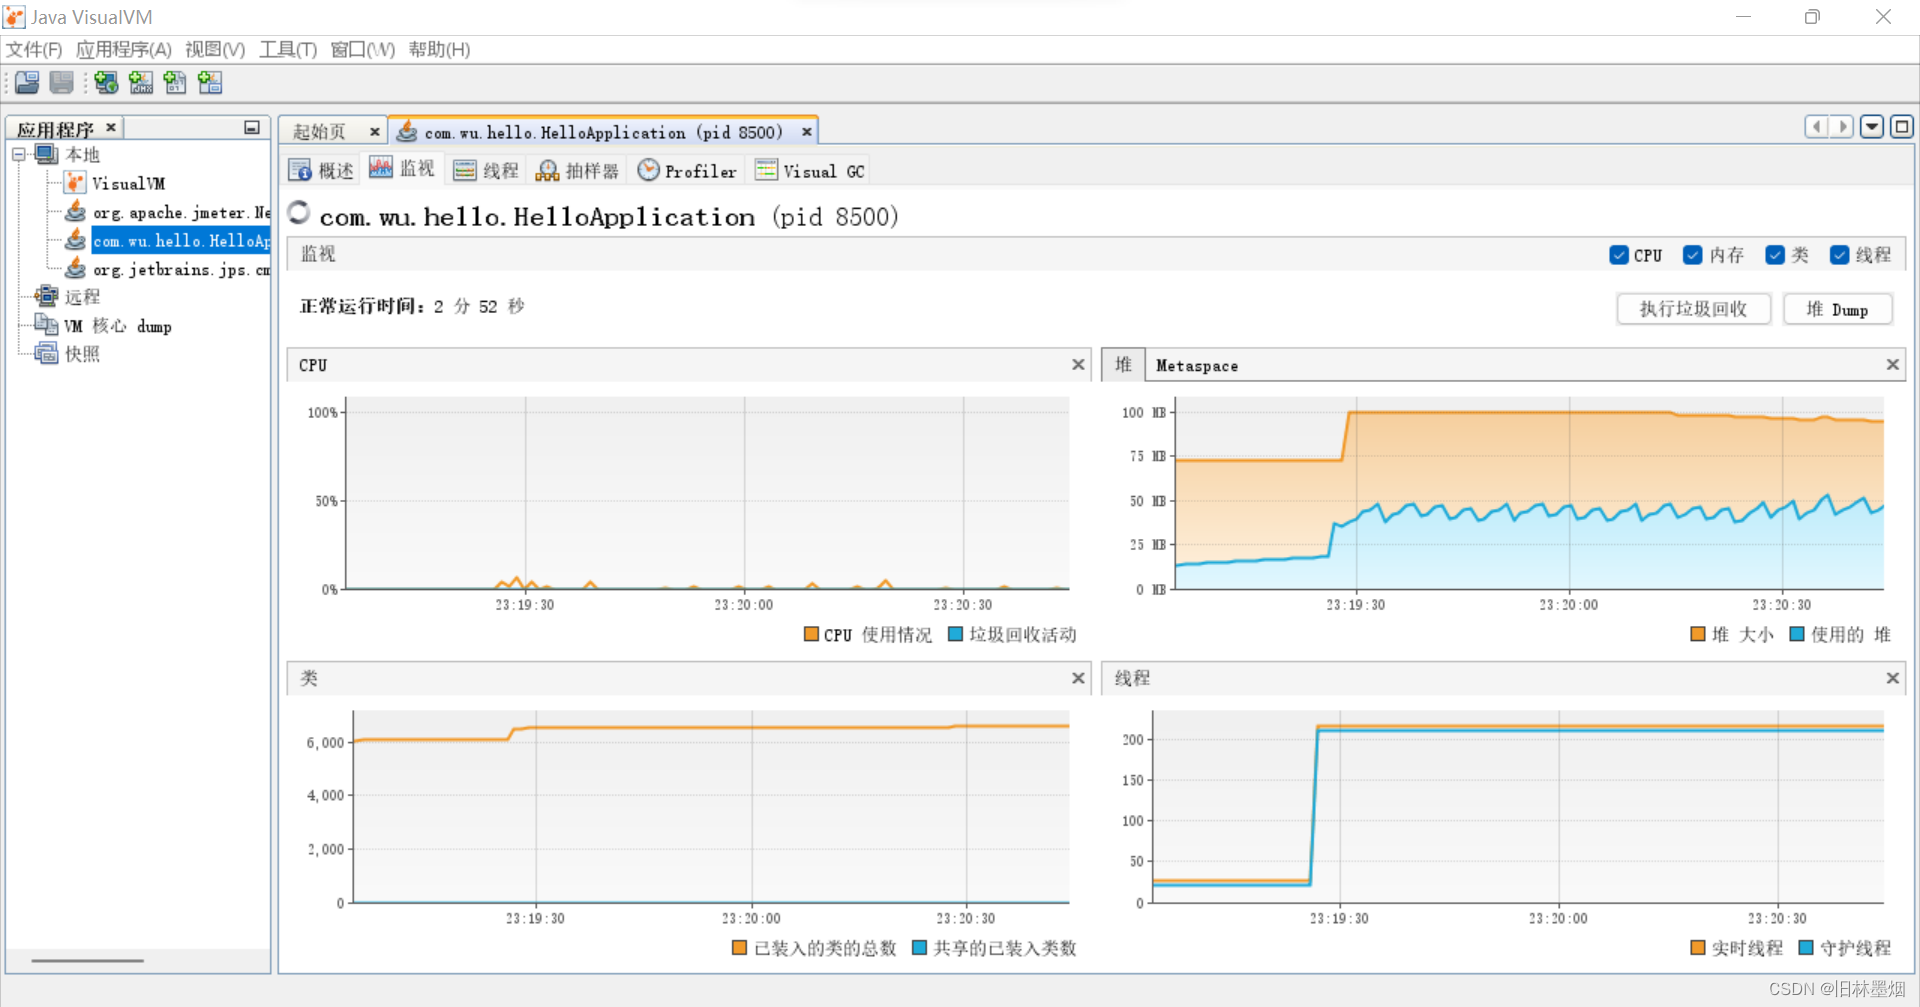
可以看到gc数据,堆的内存变化等,根据压力测试的结果不断去找到一组合适的jvm参数

在JMeter可以看到请求的一些信息,请求吞吐量、错误率等等,可以更好地分析哪个地方可以优化
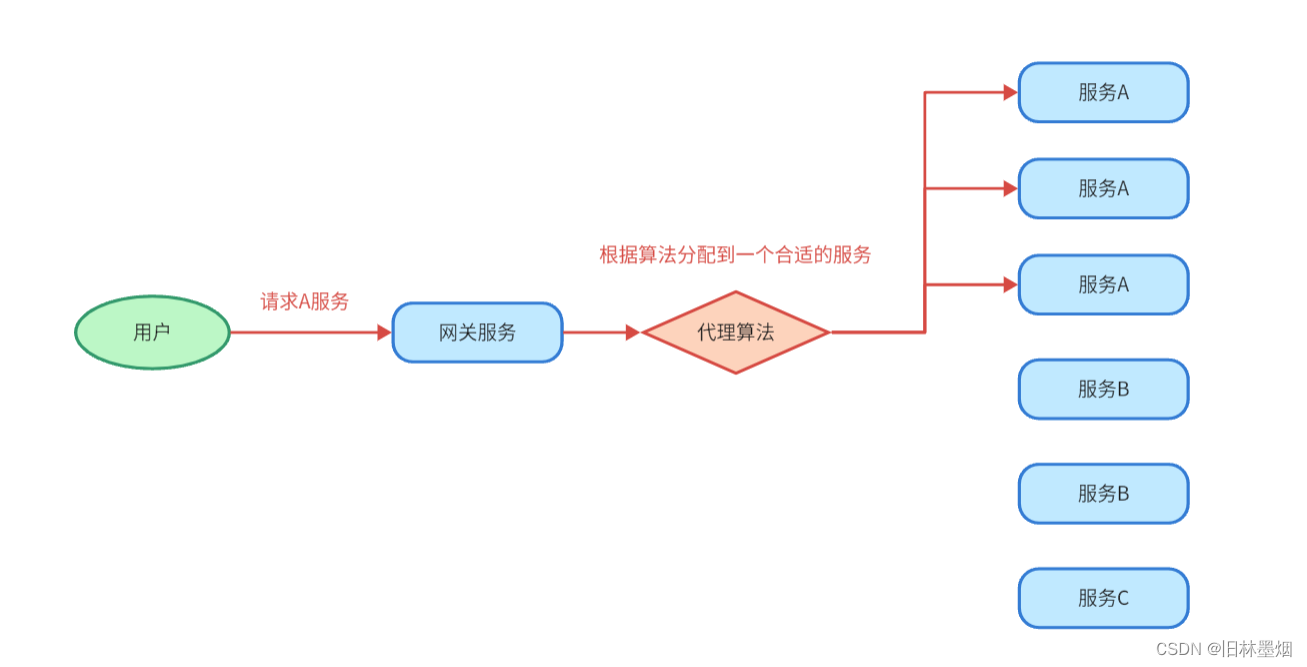
8、集群搭建
(1) 集群搭建优化原理
在服务器上启动多个相同的服务,这些服务都可以做相同的事情。用户请求过来的时候可以根据代理算法分配到较为空闲的服务上执行,解决服务器压力问题。
测试项目源码链接: https://pan.baidu.com/s/11LUO38lmnp7lBQTQaxCRcw?pwd=fkdu
提取码: fkdu
觉得还不错就点个赞吧!