mongocxx driver 是构建在 MongoDB C driver 之上的
1.首先需要安装mongo-c-driver
 wget https://github.com/mongodb/mongo-c-driver/releases/download/ 1.23.1/mongo-c-driver-1.23.1.tar.gz
tar xzf mongo-c-driver-1.23.1.tar.gz
cd mongo-c-driver-1.23.1
mkdir cmake-build
cd cmake-build
cmake -DENABLE_AUTOMATIC_INIT_AND_CLEANUP=OFF  ..
make && make install
2.编译mono-cxx-driver
mongo官方推荐
- 针对mongocxx-3.7.x,需要libmongoc 1.22.1或更高版本。
- 对于mongocxx-3.6.x,需要libmongoc 1.17.0或更高版本。
- 对于mongocxx-3.5.x,需要libmongoc 1.15.0或者更高版本。
- 对于mongocxx-3.4.x,需要libmongoc 1.13.0或者更高版本。
- 对于mongocxx-3.3.x,需要libmongoc 1.10.1或更高版本。
- 对于mongocxx-3.2.x,需要libmongoc 1.9.2或更高版本。
- 针对mongocxx-3.1.4+,需要libmongoc 1.7.0或更高版本。
- 对于mongocxx-3.1.[0-3],需要libmongoc 1.5.0或更高版本。
- 对于 mongocxx-3.0.x,我们推荐使用最新的 1.4.x 版本的 libmongoc
并且当前最稳定的版本是3.5,因此使用3.5.1支持
git config --global http.postBuffer 1048576000
git clone --recursive https://github.com/mongodb/mongo-cxx-driver.git
cd /mongo-cxx-driver
git checkout r3.5.1   #切换到3.5.1分支
cd build
cmake .. -DCMAKE_BUILD_TYPE=Release -DCMAKE_INSTALL_PREFIX=`pwd`/install
make
make install
编译后被安装到/mongo-cxx-driver/build/install,将include和lib拿出来使用即可
注意:
mongo-cxx-driver 使用了 C++17 的功能std::optional和 std::string_view
3.启动mongo
wget https://fastdl.mongodb.org/linux/mongodb-linux-x86_64-ubuntu2004-6.0.3.tgz
tar xf mongodb-linux-x86_64-ubuntu2004-6.0.3.tgz
mv mongodb-linux-x86_64-ubuntu2004-6.0.3/ /usr/local/mongodb
export PATH=/usr/local/mongodb/bin:$PATH
cd /usr/local/mongodb
此时/usr/local/mongodb/bin目录下包含三个:install_compass,mongod,mongos
install_compass:是MongoDB Compass的特定于平台的安装脚本 。mongod:mongoDB 服务端工具mongos:mongos 是 MongoDB shard 的缩写,它是一个为应用层提供查询请求并决定数据在 MongoDB 分片中位置的路由服务。
创建目录,mkdir -p /data/db 存储mongo数据,最终执行mongod即可启动mongo服务器
通过容器启动mongo
第一步:拉取镜像
docker pull mongo:latest第二步:启动容器

docker run -itd --name mongo -p 27017:27017 -v /xxx/mongodb:/data/db mongo --auth-p:映射容器服务的 27017 端口到宿主机的 27017 端口,mongodb 默认端口为 27017。容器外部可以通过宿主机 IP 27017 端口访问到容器内的 mongodb 服务-v:为设置容器的挂载目录,这里是将<LocalDirectoryPath>即本机中的目录挂载到容器中的/data/db中,作为 mongodb 的存储目录(建议为/mongodb/data)--name:为设置该容器的名称-d:设置容器以守护进程方式运行- --auto:需要密码才能访问服务
第三步:进入容器
docker exec -it mongo /bin/bash
第四步:创建用户
mongosh admin

db.createUser({ user:'admin',pwd:'123456',roles:[ { role:'userAdminAnyDatabase', db: 'admin'},"readWriteAnyDatabase"]});


db.auth('admin', '123456')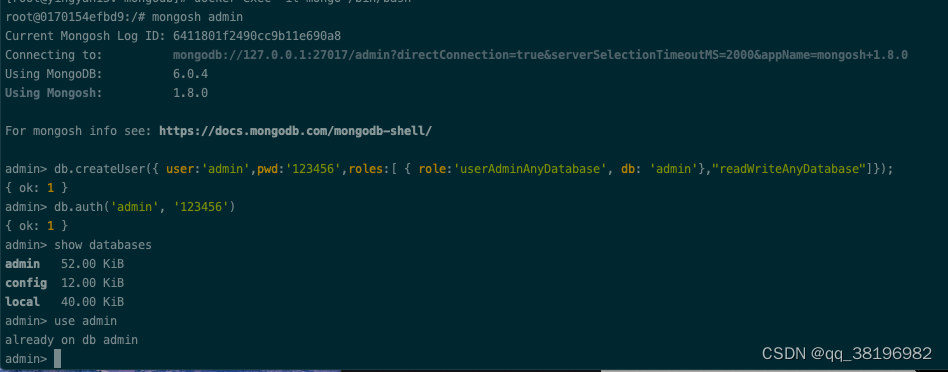
db.createUser的各个字段含义:
user字段,为新用户的名字;
pwd字段,用户的密码;
cusomData字段,为任意内容,例如可以为用户全名介绍;
roles字段,指定用户的角色,可以用一个空数组给新用户设定空角色;
在roles字段,可以指定内置角色和用户定义的角色。
Built-In Roles(内置角色):
1. 数据库用户角色:read、readWrite;
2. 数据库管理角色:dbAdmin、dbOwner、userAdmin;
3. 集群管理角色:clusterAdmin、clusterManager、clusterMonitor、hostManager;
4. 备份恢复角色:backup、restore;
5. 所有数据库角色:readAnyDatabase、readWriteAnyDatabase、userAdminAnyDatabase、dbAdminAnyDatabase
6. 超级用户角色:root
此时可以直接进入容器操作mongo

不用再安装mongodbshell
4.使用mongodb shell
MongoDB Shell 是mongosh一个功能齐备的 JavaScript 和 Node.js 16.x REPL环境,用于与 MongoDB 部分进行交互。您可以使用 MongoDB Shell 直接使用数据库测试查询和操作。
curl -O https://downloads.mongodb.com/compass/mongosh-1.6.1-linux-x64-openssl11.tgz?_ga=2.45979044.1274179345.1671708610-47372173.1671708610
tar xf mongosh-1.6.1-linux-x64-openssl11.tgz?_ga=2.45979044.1274179345.1671708610-47372173.1671708610
cd mongosh-1.6.1-linux-x64-openssl11/bin
chmod +x mongosh
终端执行mongosh,连接到mongodb服务器
默认连接到mongosh " mongodb://localhost:27017 "
注意:系统安装了openssl1故此处下载openssl111.tgz
4.1 mongodb shell操作
1)创建用户
test> use admin
switched to db admin
admin> db.createUser({user: 'test', pwd: 'admin1234', roles:[{ role: 'readWrite', db: 'test' }]})
{ ok: 1 }
1)创建数据库
test> use foundry_connector
switched to db foundry_connector
foundry_connector>
如果数据库不存在则创建,存在则切换到对应数据库
2)显示数据库
test> show dbs
admin   40.00 KiB
config  60.00 KiB
local   72.00 KiB
test> use foundry_connector
switched to db foundry_connector
foundry_connector> show dbs
admin    40.00 KiB
config  108.00 KiB
local    72.00 KiB
3)插入数据
发现创建的数据库不在数据库列表中,需要插入一些数据才能显示出来
foundry_connector> db.foundry_connector.insert({"id":"1","name":"face","tags":"face_recognize","desc":"hhh"})
DeprecationWarning: Collection.insert() is deprecated. Use insertOne, insertMany, or bulkWrite.
{
  acknowledged: true,
  insertedIds: { '0': ObjectId("63a519a6c5abf6f696548aa5") }
}
foundry_connector> show dbs
admin               40.00 KiB
config             108.00 KiB
foundry_connector   40.00 KiB
local               72.00 KiB
foundry_connector>
4)创建集合
在数据库foundry_connector中创建集合
5)查询
test> db.foundry_connector.find().pretty()
[
  {
    _id: ObjectId("63a52198f2ca74e6853755f3"),
    id: '1',
    name: 'face',
    tags: 'face_recognize',
    desc: 'hhh'
  }
]
删除
1)删除单个
db.data_set_source.deleteOne({'_id':'69'})
2)删除多个

5.C++ example
test.cc示例如下
#include <iostream>
#include <cstdint>

#include <bsoncxx/builder/stream/document.hpp>
#include <bsoncxx/json.hpp>

#include <mongocxx/client.hpp>
#include <mongocxx/instance.hpp>

using bsoncxx::builder::stream::close_array;
using bsoncxx::builder::stream::close_document;
using bsoncxx::builder::stream::document;
using bsoncxx::builder::stream::finalize;
using bsoncxx::builder::stream::open_array;
using bsoncxx::builder::stream::open_document;

int main() {

    std::cout<<"1.初始化"<<std::endl;
    const char* mongoURI = "mongodb://127.0.0.1:27017";
    mongocxx::instance inst{};
    mongocxx::uri uri(mongoURI);

    //2.连接mongo
    std::cout<<"2.连接mongo"<<std::endl;
    mongocxx::client conn{uri};
    auto collection = conn["foundry_connector"]["foundry_connector"];
    if(collection)
        std::cout<<"connect mongodb ok"<<std::endl;

    // 3.创建文档
    std::cout<<"3.创建并插入文档"<<std::endl;
    auto builder = bsoncxx::builder::stream::document{};
    bsoncxx::document::value doc_value = builder
            << "item" << "journal"
            << "qty" << 25
            << "tags" << bsoncxx::builder::stream::open_array
            << "blank" << "red"
            << close_array
            << "size" << bsoncxx::builder::stream::open_document
            << "h" << 14
            << "w" << 21
            << bsoncxx::builder::stream::close_document
            << bsoncxx::builder::stream::finalize;

    // 4.向集合插入文档
    bsoncxx::document::view doc_view = doc_value.view();
    bsoncxx::stdx::optional<mongocxx::result::insert_one> result = collection.insert_one(doc_view);

    // 5.插入另一个文档
    builder << "field_name" << "value_1";
    collection.insert_one(builder.view());

    // Find one with a query filter
    std::cout<<"4.查询"<<std::endl;
    bsoncxx::stdx::optional<bsoncxx::document::value> maybe_result = collection.find_one(document{} << "i" << 102 << finalize);
    if(maybe_result) {
        std::cout << bsoncxx::to_json(*maybe_result) << "\n";
    }

    // Find all in a collection
    std::cout<<"5.查看所有collection"<<std::endl;
    auto cursor = collection.find({});
    for (auto&& doc : cursor) {
        std::cout << bsoncxx::to_json(doc) << std::endl;
    }

    //删除
    bsoncxx::stdx::optional<mongocxx::result::delete_result> delete_result = collection.delete_many({});
    if(delete_result) {
        std::cout <<"Number of deleted document(s): "<< delete_result->deleted_count() << "\n";
    }

    std::cout << "Completed\n";
}
cmakelists.txt内容如下
cmake_minimum_required(VERSION 3.18)
SET(CMAKE_CXX_STANDARD 17)

project(test)
set(INCLUDE_PATH ${CMAKE_SOURCE_DIR}/3rdparty/include)
set(LIB_PATH ${CMAKE_SOURCE_DIR}/3rdparty/lib)

include_directories(${INCLUDE_PATH})
link_directories(${LIB_PATH})

add_executable(test test.cc)
target_link_libraries(test
    bsoncxx
    mongocxx
)