先把
dist包上传服务器
可以使用宝塔、FileZilla、手动上传等等方式
- 已有腾讯云服务器之后进入面板界面
然后安装Nginx
请一步一步,紧跟步骤
-
第一步
安装gcc-c++ 编译器。nginx依赖的 pcre 和 zlib 包
yum -y install gcc zlib zlib-devel pcre-devel openssl openssl-devel -
ok没问题 第二步
指令下载文件
wget http://nginx.org/download/nginx-1.18.0.tar.gz解压文件 tar -zxvf nginx-1.18.0.tar.gz 解压之后把nginx-1.18.0文件手动移动到 /usr/local目录中 进入安装目录 cd /usr/local/nginx-1.18.0进入目录之后 输入 ./configure
make && make install 编译并安装 会生成一个nginx文件在同级
cd /usr/local/nginx/sbin 进入目录
sudo ./nginx 启动测试
输入服务器地址,访问成功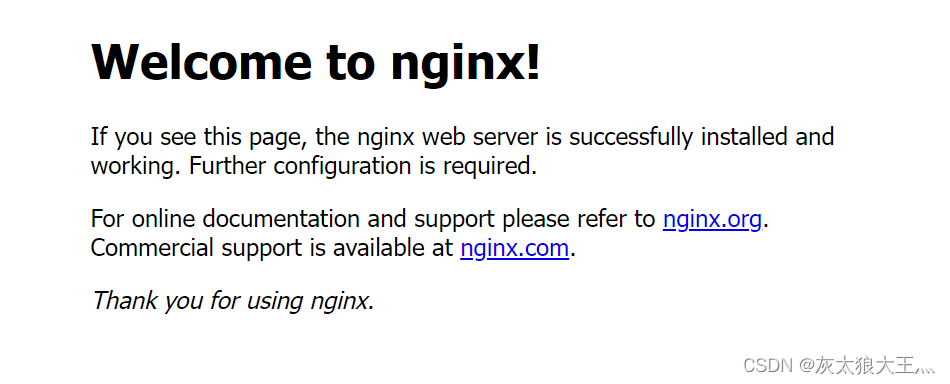
- 安装完成后进入nginx目录下的conf文件中 nginx.conf文件
- server可以当做是单独的一个vue项目配置
主要配置端口号 文件目录
  server {


          listen       8080;//端口号
        server_name  localhost;

        #charset koi8-r;

        #access_log  logs/host.access.log  main;

        location / {


            root   /root/gitee_go/deploy/dist;//文件目录
            index  index.html index.htm;
        }

        #error_page  404              /404.html;

        # redirect server error pages to the static page /50x.html
        #
        error_page   500 502 503 504  /50x.html;
        location = /50x.html {


            root   html;
        }
    }
若果需要是不同端口不同项目直接复制serve放至下边只需修改端口号、dist文件位置即可
ps 每次修改nginx.conf文件后都需要重启服务
先进入nginx下的sbin文件夹中 例如 cd local/nginx/sbin
重启指令 ==> sudo ./nginx -s reload
last.
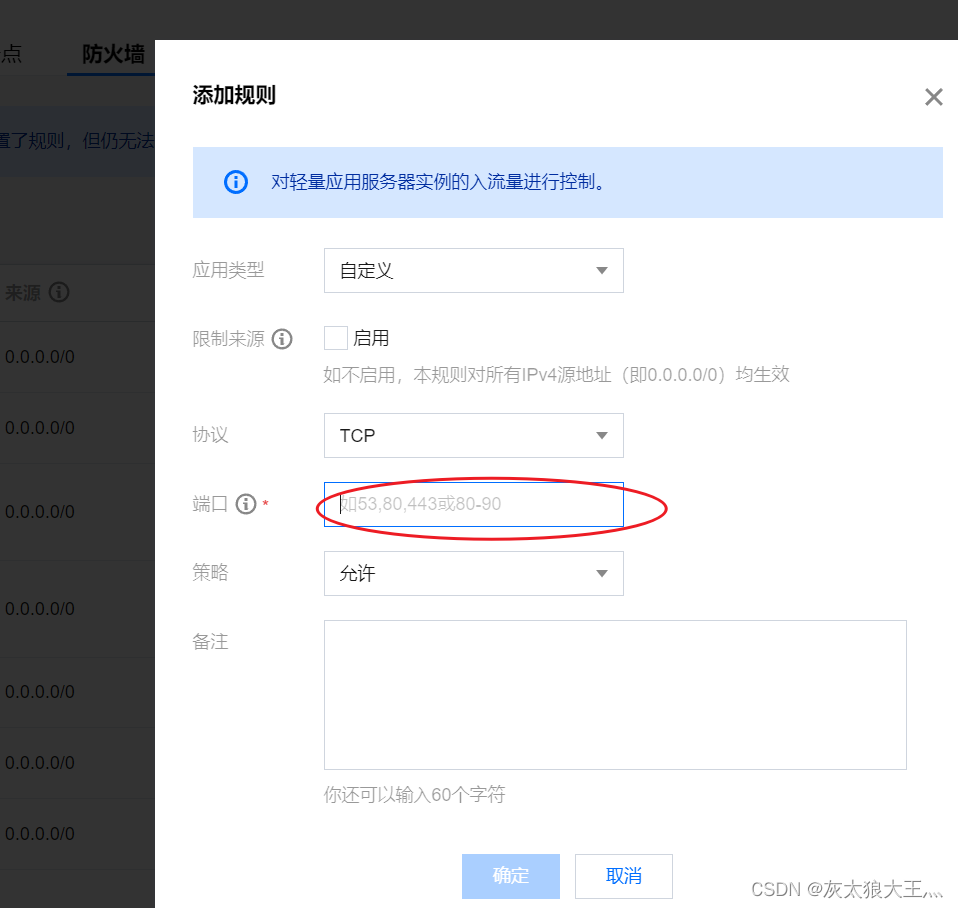
进入服务器界面、选择防火墙
添加对应端口号即可成功访问
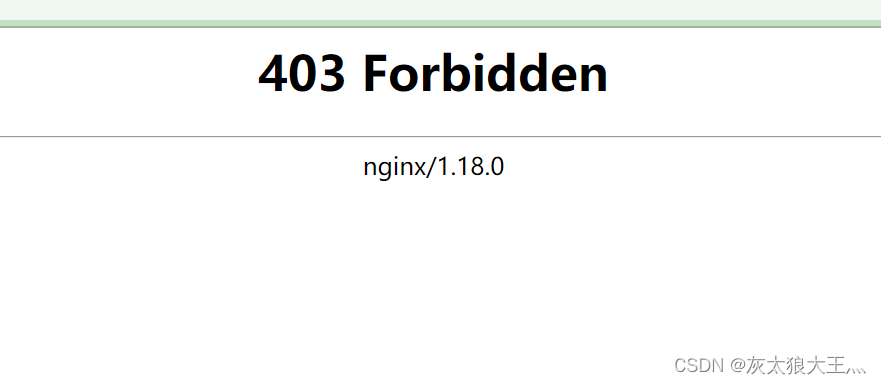
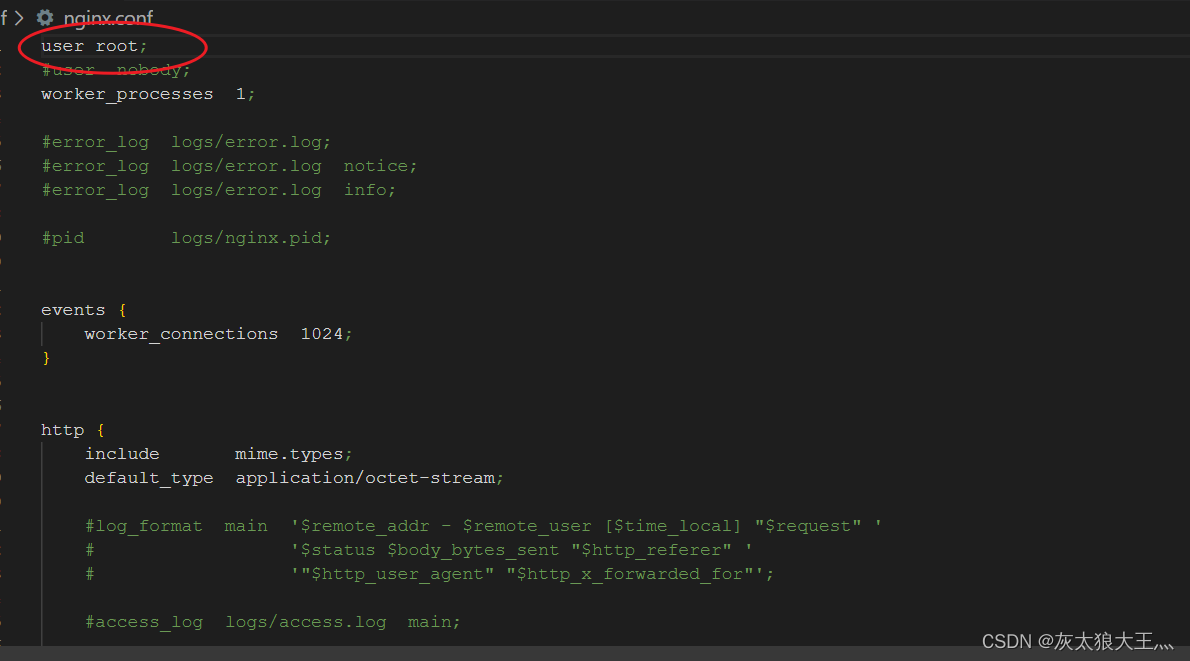
访问也有几率403
在conf文件中添加user root即可
ps 有时候服务器重启服务起不来报错 nginx: [error] open() "/usr/local/nginx/logs/nginx.pid" failed (2: No such file or directory)
输入 /usr/local/nginx/sbin/nginx -c /usr/local/nginx/conf/nginx.conf 指定目录后再重启nginx即可

============
存放静态资源文件至服务器
conf文件中再新建一个server
 # 资源文件
    server {
        listen       35;     端口
        server_name  localhost;
        # 存放文件的目录
        #charset koi8-r;

        #access_log  logs/host.access.log  main;

        location / {
            root   /root/gitee_go/deploy;     对应的资源文件夹
            # index  index.html index.htm;
            autoindex on;
        }

        #error_page  404              /404.html;

        # redirect server error pages to the static page /50x.html
        #
        error_page   500 502 503 504  /50x.html;
        location = /50x.html {
            root   html;
        }

        # proxy the PHP scripts to Apache listening on 127.0.0.1:80
        #
        #location ~ \.php$ {
        #    proxy_pass   http://127.0.0.1;
        #}

        # pass the PHP scripts to FastCGI server listening on 127.0.0.1:9000
        #
        #location ~ \.php$ {
        #    root           html;
        #    fastcgi_pass   127.0.0.1:9000;
        #    fastcgi_index  index.php;
        #    fastcgi_param  SCRIPT_FILENAME  /scripts$fastcgi_script_name;
        #    include        fastcgi_params;
        #}

        # deny access to .htaccess files, if Apache's document root
        # concurs with nginx's one
        #
        #location ~ /\.ht {
        #    deny  all;
        #}
    }
配置完之后重启服务即可访问
例如
