前言
对于源码中有些模糊的部分我会单独拿出来说一下,其他的基本上在主方法上注释
run
SpringBoot启动
@SpringBootApplication
public class App {


    public static void main(String[] args) {


        SpringApplication.run(App.class);
    }
}
对于注解@SpringBootApplication不会再进行说明,重点是 SpringApplication.run(App.class);,从SpringMvc到Spring Boot,通过主程序便可以启动web服务,所以在这个方法中,有启动tomcat的步骤,但初始化spring容器和servlet容器是否还是和tomcat+SpringMvc一样?
SpringApplication.run(App.class);进去之后是这里,这里它new了一个SpringApplication,并且把主类传了进去,再看这个方法的名字ConfigurableApplicationContext,它的作用应该加载环境了,再通过run方法来启动准备好的容器。
	public static ConfigurableApplicationContext run(Class<?>[] primarySources, String[] args) {


		return new SpringApplication(primarySources).run(args);
	}
public SpringApplication(ResourceLoader resourceLoader, Class<?>... primarySources) {
// 资源加载器,main启动的这里是null
this.resourceLoader = resourceLoader;
Assert.notNull(primarySources, "PrimarySources must not be null");
// primarySources就是我们的app.class
this.primarySources = new LinkedHashSet<>(Arrays.asList(primarySources));
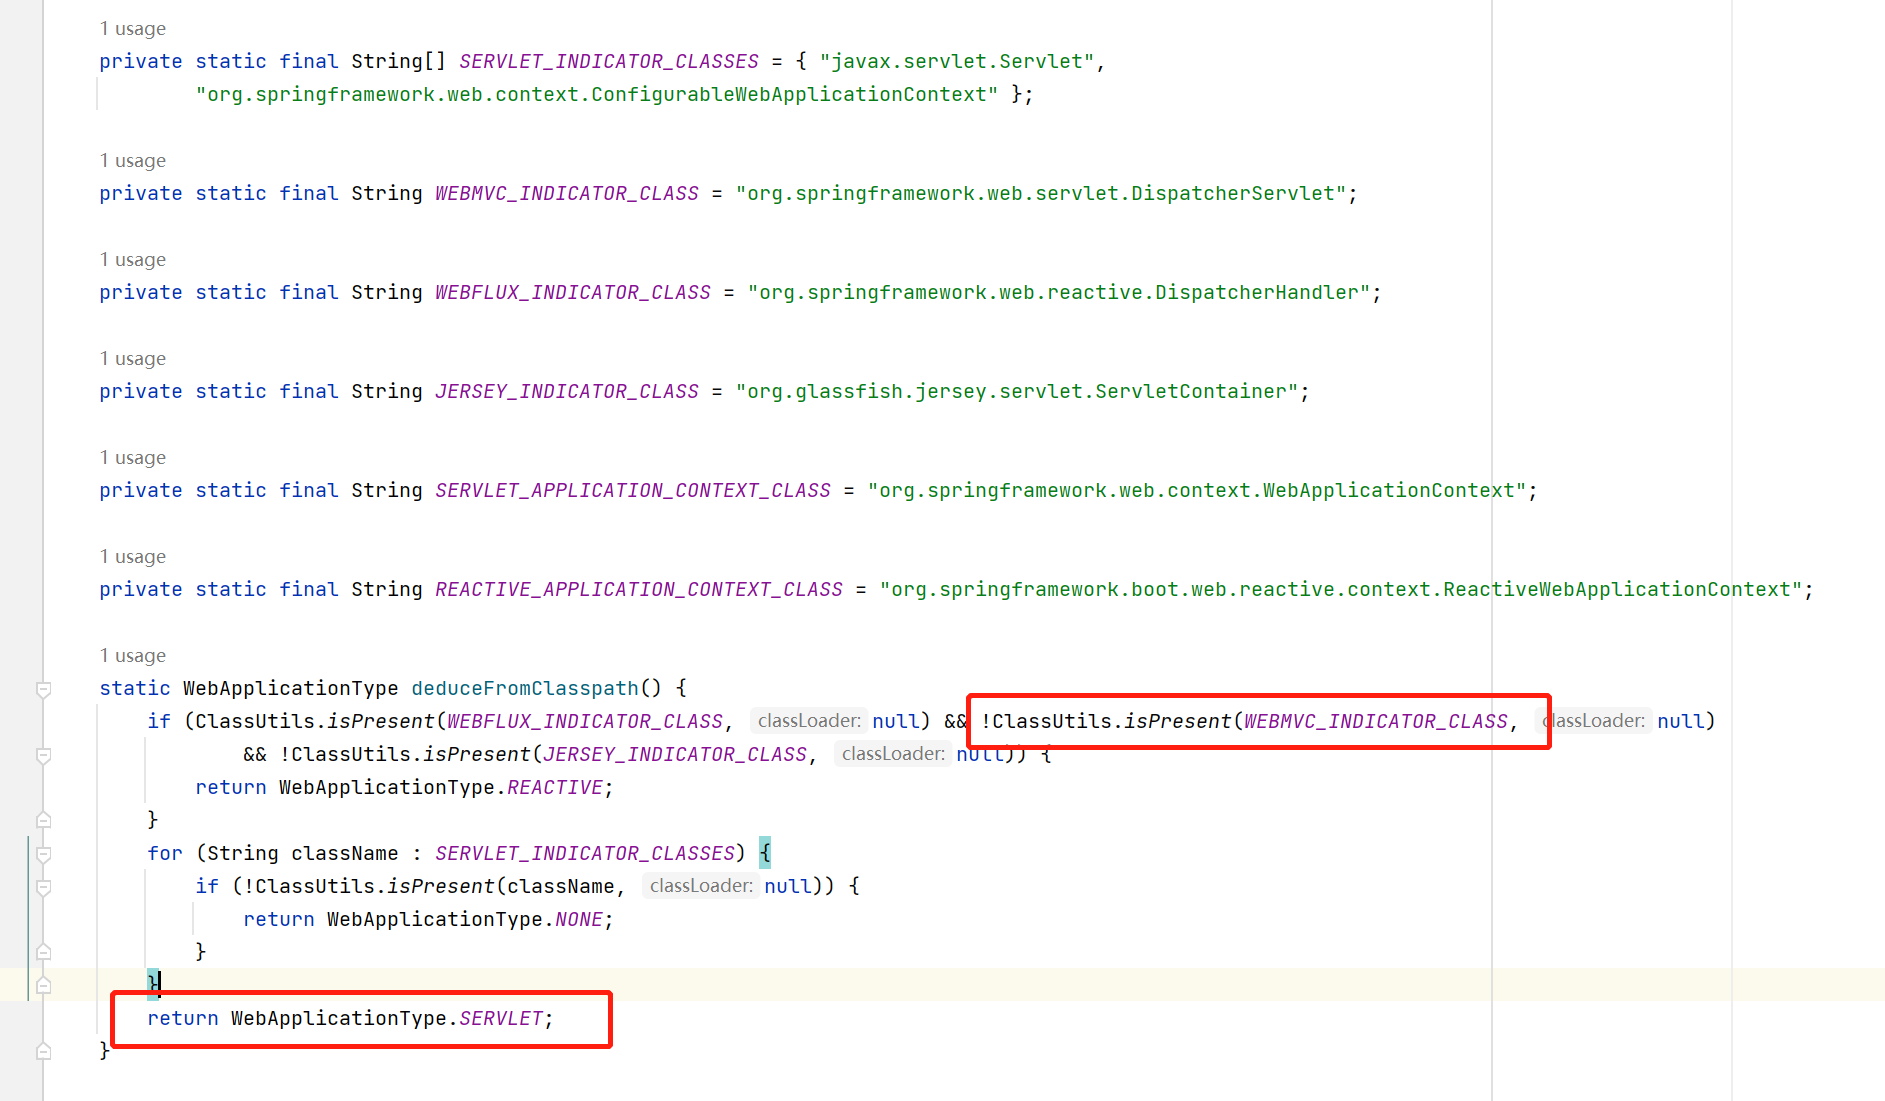
// 这里它会判断应用环境,有3中:none(无web程序),REACTIVE,SERVLET, 一般都是servlet环境
this.webApplicationType = WebApplicationType.deduceFromClasspath();
// 从META-INFO/spring.factories中获取启动注册器,帮助启动上下文注册对象
this.bootstrapRegistryInitializers = getBootstrapRegistryInitializersFromSpringFactories();
// 从META-INFO/spring.factories中获取ApplicationContextInitializer的实现类
setInitializers((Collection) getSpringFactoriesInstances(ApplicationContextInitializer.class));
// 从META-INFO/spring.factories中获取ApplicationListener的实现类
setListeners((Collection) getSpringFactoriesInstances(ApplicationListener.class));
// SpringBoot主程序类(App.class)
this.mainApplicationClass = deduceMainApplicationClass();
}
SpringBoot支持多种web应用,它通过 WebApplicationType.deduceFromClasspath();推断当前jvm中是否存在对应的类来确定web环境,当我们内嵌了Tomcat时,它会检索javax.servlet.Servlet, ConfigurableWebApplicationContext``DispatcherServlet这3个类
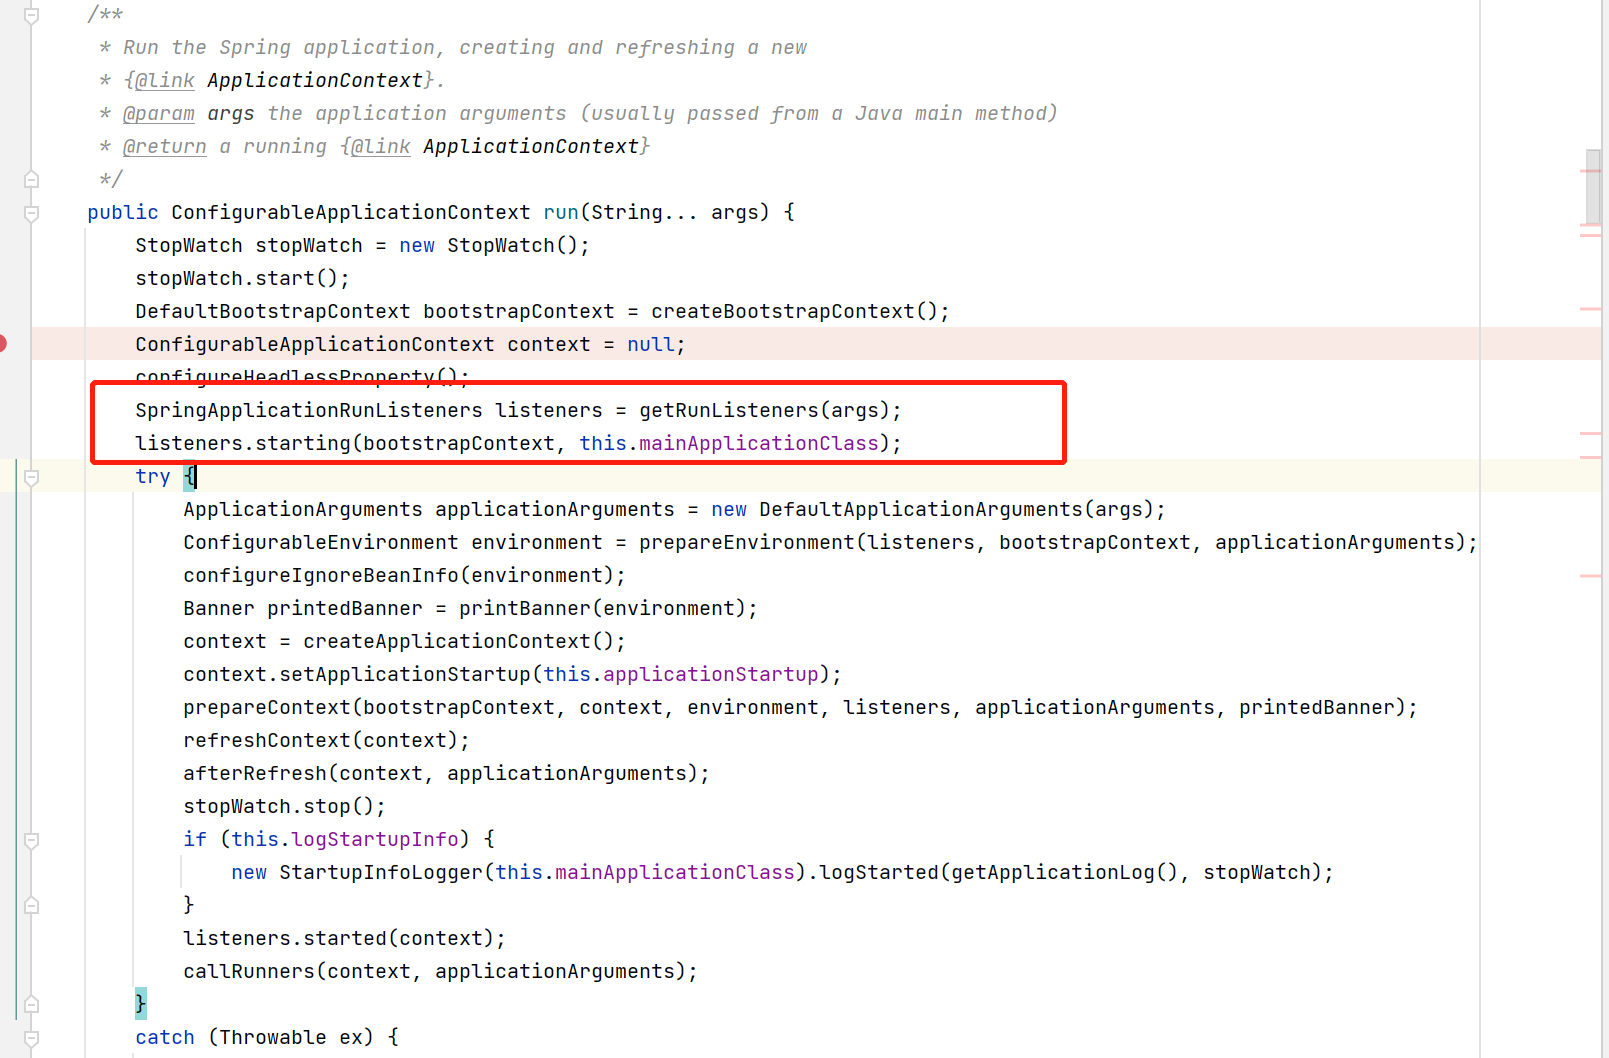
public ConfigurableApplicationContext run(String... args) {
// 监视器对象,记录开始时间,结束时间等
// 它记录了开始时间,结束时间,当前线程名称
StopWatch stopWatch = new StopWatch();
stopWatch.start();
// 创建bootstrapContext启动上下文对象
// 并执行启动初始程序方法(BootstrapRegistryInitializer.initialize)
DefaultBootstrapContext bootstrapContext = createBootstrapContext();
ConfigurableApplicationContext context = null;
// 设置无显示器也可以启动
configureHeadlessProperty();
// 从META-INFO/spring.factories中获取SpringApplicationRunListener的实现类(spring应用执行监听器)
// 这里获取完后,内置9个监听器
SpringApplicationRunListeners listeners = getRunListeners(args);
// 发布`ApplicationStartingEvent`事件并记录步骤
listeners.starting(bootstrapContext, this.mainApplicationClass);
try {
// 启动参数
ApplicationArguments applicationArguments = new DefaultApplicationArguments(args);
// 准备环境
ConfigurableEnvironment environment = prepareEnvironment(listeners, bootstrapContext, applicationArguments);
// 忽略的bean设置到System.property里
configureIgnoreBeanInfo(environment);
// 打印SpringBoot logo
Banner printedBanner = printBanner(environment);
// 它这里创建的是AnnotationConfigServletWebServerApplicationContext
// 1. 创建bean工厂beanFactory,
// 2. 创建AnnotatedBeanDefinitionReader并注册5个BeanDefinition
// 3. 创建ClassPathBeanDefinitionScanner用于加载环境变量、设置资源加载器、 注册默认的includeFilter
context = createApplicationContext();
context.setApplicationStartup(this.applicationStartup);
// 准备上下文
// 1. 环境配置设置到上下文
// 2. 执行ApplicationContext后置处理,设置beanName生成器,设置资源加载器
// 3. 执行初始化程序:执行实现了ApplicationContextInitializer的实现类
// 4. 发布ApplicationContextInitializedEvent
// 5. 应用上下文bootstrap发布BootstrapContextClosedEvent事件
// 6. 注册bean对象springApplicationArguments(这里是bean,不是beanDefinition)
// 7. 注册bean对象springBootBanner
// 8. 设置可重写属性设置allowBeanDefinitionOverriding
// 9. 添加懒加载的beanFactory后置处理器
// 10. 注册主函数类为bean
// 11. 发布ApplicationPreparedEvent事件
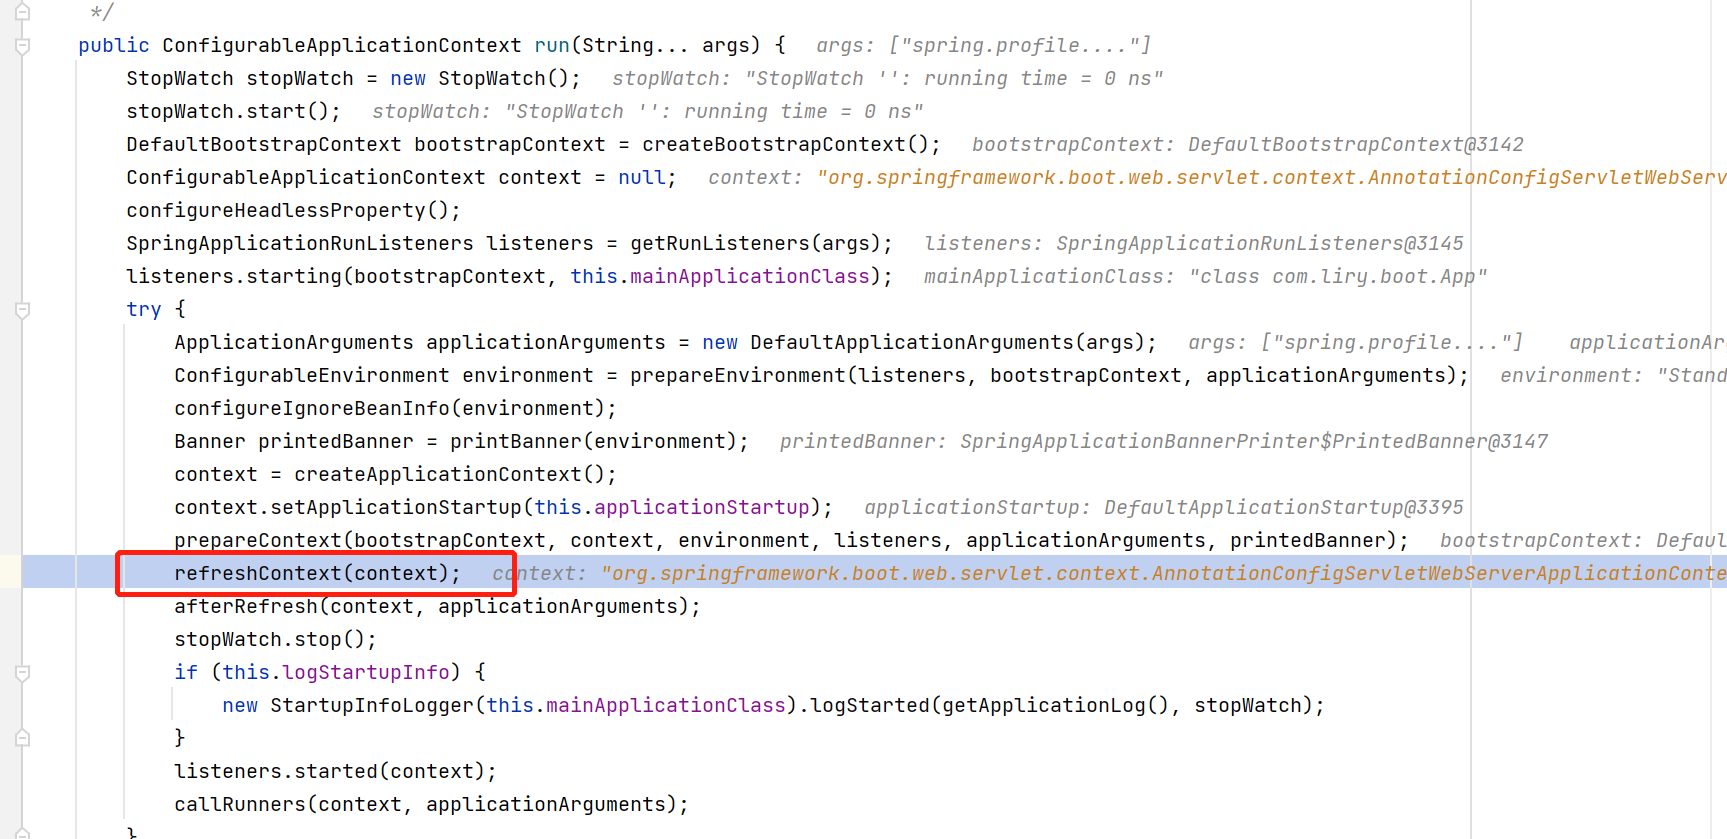
prepareContext(bootstrapContext, context, environment, listeners, applicationArguments, printedBanner);
// 刷新
// 在上面的一些了操作将环境,容器,解析器等准备好后,这里会刷新容器,也就是spring那一套:
// 创建beanFactory,render, classScan等
// 不过这里有一点不同,入口类是AnnotationConfigServletWebServerApplicationContext
// new Tomcat()
// 准备tomcat环境,配置(JspServlet,DefaultServlet),监听器,应用初始化程序等
// 创建server,并start(),真正启动
// 创建守护线程,阻塞
refreshContext(context);
// 刷新之后的操作
afterRefresh(context, applicationArguments);
// 应用启动完成,记录结束
stopWatch.stop();
if (this.logStartupInfo) {
new StartupInfoLogger(this.mainApplicationClass).logStarted(getApplicationLog(), stopWatch);
}
// 发布启动完成事件ApplicationStartedEvent
listeners.started(context);
// 启动完成回调
// 1. 找到所有ApplicationRunner的子类
// 2. 找到所有CommandLineRunner的子类
// 3. 回调执行找到的类的run方法
callRunners(context, applicationArguments);
}
catch (Throwable ex) {
// 处理启动失败
handleRunFailure(context, ex, listeners);
throw new IllegalStateException(ex);
}
try {
listeners.running(context);
}
catch (Throwable ex) {
handleRunFailure(context, ex, null);
throw new IllegalStateException(ex);
}
return context;
}
加载应用监听器并发布启动事件
	private SpringApplicationRunListeners getRunListeners(String[] args) {


		Class<?>[] types = new Class<?>[] {

     SpringApplication.class, String[].class };
		return new SpringApplicationRunListeners(logger,
 // 读取`META-INFO/spring.factories`文件中的SpringApplicationRunListener的实现类,并实例化
 // 这里传入了两个参数当前对象SpringApplication,和启动参数对象
 // 所以,最后他执行的监听器是内置的9个(ApplicationListener实现类)
				getSpringFactoriesInstances(SpringApplicationRunListener.class, types, this, args),
 // 默认是ApplicationStartup.DEFAULT
				this.applicationStartup);
	}
它读取META-INFO/spring.factories配置如下,有且只有一个EventPublishingRunListener,而且它只有一个有参构造,所以getSpringFactoriesInstances(SpringApplicationRunListener.class, types, this, args),这里获取方法支持传入参数,也就是我们的

EventPublishingRunListener可以看作里面有一个存储linstener的集合,执行监听时,会遍历这个集合找到对应的listener,然后执行,这是它的一个简单原理说明。
最后他会new SpringApplicationRunListeners返回
	SpringApplicationRunListeners(Log log, Collection<? extends SpringApplicationRunListener> listeners,
			ApplicationStartup applicationStartup) {


		this.log = log;
        // 从`META-INFO/spring.factories`文件中的SpringApplicationRunListener的实现类EventPublishingRunListener
		this.listeners = new ArrayList<>(listeners);
        // 应用步骤与指标记录
        // 每个步骤都有id,并且记录开始时间和结束时间
		this.applicationStartup = applicationStartup;
	}
监听器starting:listeners.starting(bootstrapContext, this.mainApplicationClass);
	void starting(ConfigurableBootstrapContext bootstrapContext, Class<?> mainApplicationClass) {


		doWithListeners("spring.boot.application.starting", (listener) -> listener.starting(bootstrapContext),
				(step) -> {


					if (mainApplicationClass != null) {


						step.tag("mainApplicationClass", mainApplicationClass.getName());
					}
				});
	}


	private void doWithListeners(String stepName, Consumer<SpringApplicationRunListener> listenerAction,
			Consumer<StartupStep> stepAction) {


		StartupStep step = this.applicationStartup.start(stepName);
		this.listeners.forEach(listenerAction);
		if (stepAction != null) {


			stepAction.accept(step);
		}
		step.end();
	}
这两个方法合起来看就比较清晰:
- 它创建了一个步骤对象“spring.boot.application.starting”
- 发布
ApplicationStartingEvent事件,参数是启动上下文对象ConfigurableBootstrapContext - 记录步骤mainApplicationClass
总结:
spring很多东西都是围绕事件驱动来完成的功能,启动发布事件,配置环境发布事件,所以这一步就相当于是加载事件驱动,并且还发布了一个应用启动事件;
它加载事件驱动,其实是加载META-INFO/spring.factories文件中的SpringApplicationRunListener的实现类EventPublishingRunListener,这个listener内部有一个SimpleApplicationEventMulticaster对象,执行监听器,就是执行这个类的multicastEvent,内部原理大概是这样子:他会根据参数也就是ApplicationEvent匹配对应的linstener,然后进行执行,匹配的过程就是遍历内部的listener列表,一个个匹配。
准备环境
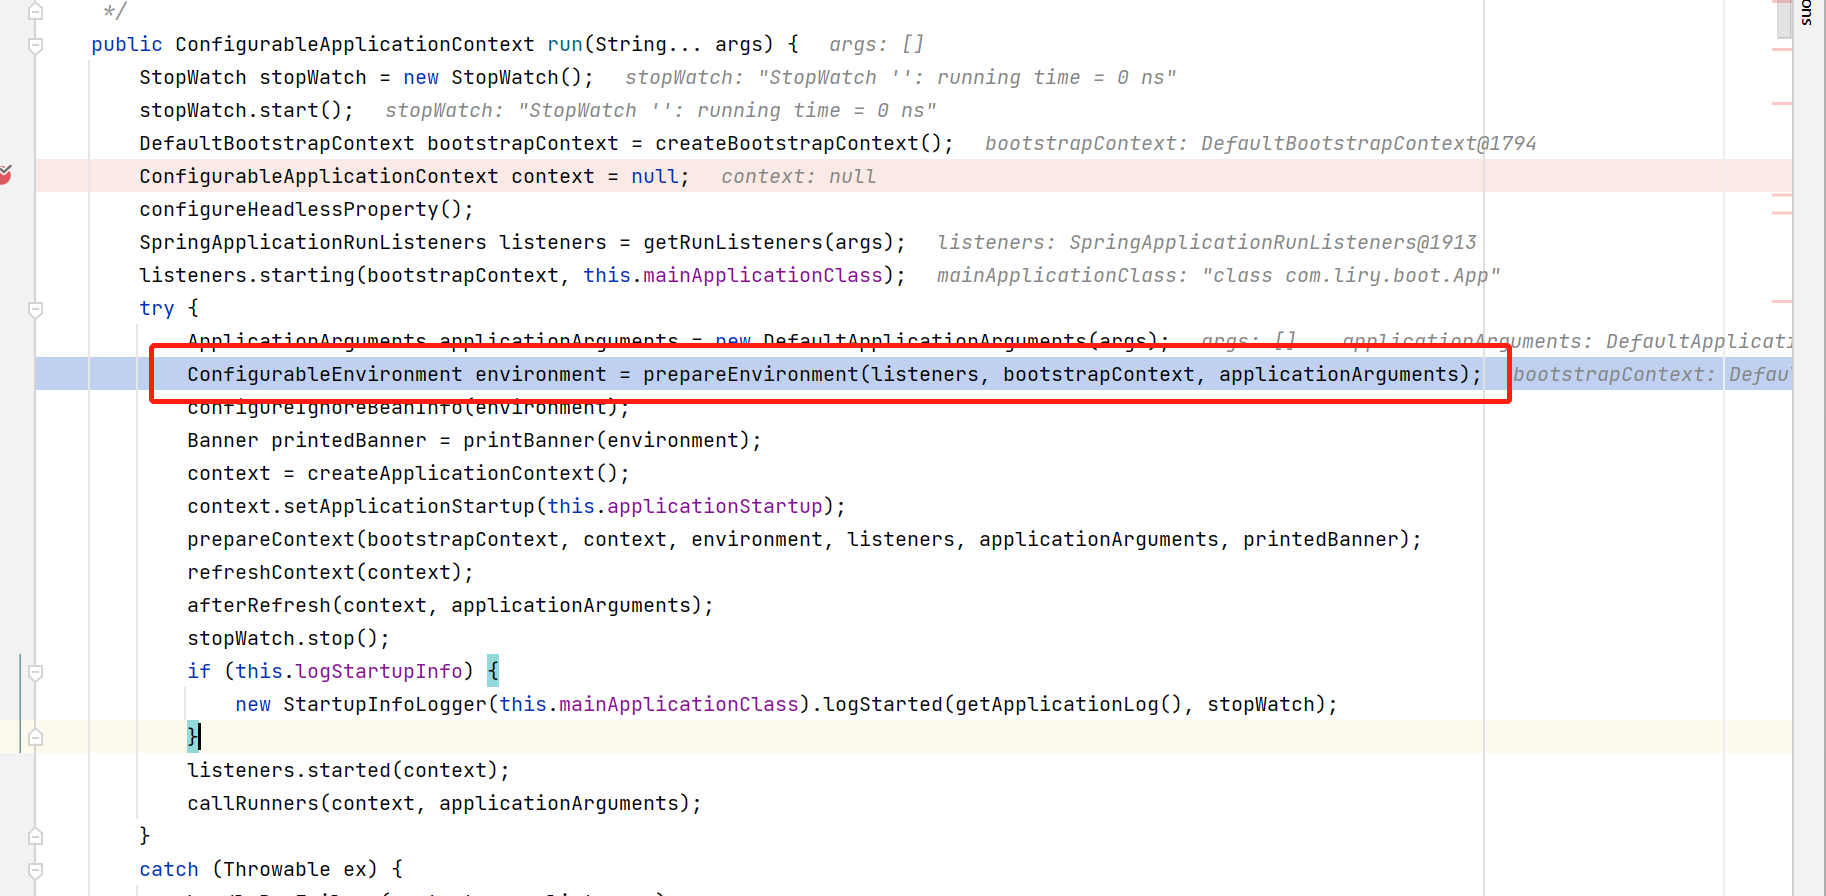
	private ConfigurableEnvironment prepareEnvironment(SpringApplicationRunListeners listeners,
			DefaultBootstrapContext bootstrapContext, ApplicationArguments applicationArguments) {


		// 创建web环境配置对象,这里根据webApplicationType,进行创建,默认StandardEnvironment,servlet是StandardServletEnvironment
        // 添加4个属性源:`servletContextInitParams,servletConfigInitParams,systemProperties,systemEnvironment`
		ConfigurableEnvironment environment = getOrCreateEnvironment();
        // 配置环境;启动时,如果有参数,那么会将参数封装成属性源对象(commandLineArgs),然后添加到environment
        // 加上这里的参数属性源有5个
		configureEnvironment(environment, applicationArguments.getSourceArgs());
        // 添加属性源(configurationProperties)
        // 6个属性源
		ConfigurationPropertySources.attach(environment);
        // 发布准备环境事件ApplicationEnvironmentPreparedEvent
        // EnvironmentPostProcessorApplicationListener会加载配置文件,作为属性源添加,包含激活的配置文件配置
        // 读取配置是由ConfigDataEnvironmentPostProcessor完成,他会读取激活的配置,比如application-dev.yml的配置,并设置激活的属性`activeProfiles`
        // 如果你在日志中看到:Setting active profiles ,就是这个地方执行的
        // 还要,这里每次执行都会记录步骤,因为都是走的方法doWithListeners
		listeners.environmentPrepared(bootstrapContext, environment);
        // 将默认属性源移动到属性源列表中的最后一个,没有就
		DefaultPropertiesPropertySource.moveToEnd(environment);
		configureAdditionalProfiles(environment);
        // 通过ConversionService将environment绑定到SpringApplication
		bindToSpringApplication(environment);
		if (!this.isCustomEnvironment) {


            // 将已经处理好的环境配置转换为StandardEnvironment
			environment = new EnvironmentConverter(getClassLoader()).convertEnvironmentIfNecessary(environment,
					deduceEnvironmentClass());
		}
        // 这里我不知道为什么又调了一遍
		ConfigurationPropertySources.attach(environment);
		return environment;
	}
这里getOrCreateEnvironment()会执行父类的构造器,然后执行下面这个方法,添加4个属性源:servletContextInitParams,servletConfigInitParamssystemProperties,systemEnvironment,如果时默认的,只有添加2个:systemProperties,systemEnvironment
	@Override
	protected void customizePropertySources(MutablePropertySources propertySources) {


		propertySources.addLast(new StubPropertySource(SERVLET_CONFIG_PROPERTY_SOURCE_NAME));
		propertySources.addLast(new StubPropertySource(SERVLET_CONTEXT_PROPERTY_SOURCE_NAME));
		if (JndiLocatorDelegate.isDefaultJndiEnvironmentAvailable()) {


			propertySources.addLast(new JndiPropertySource(JNDI_PROPERTY_SOURCE_NAME));
		}
        // 添加默认属性源配置信息
		super.customizePropertySources(propertySources);
	}
总结:
这一步是准备环境,在这一步,它会创建ConfigurableEnvironment环境配置对象,作为加载环境配置的载体,一开始会添加servlet属性源,系统的环境配置(systemEnvironment),java系统属性(systemProperties),之后在通过监听器去读取属性源,配置文件(比如application.yml),通过EnvironmentPostProcessorApplicationListener加载配置加载的ConfigDataEnvironmentPostProcessor读取的,最后得到一个完整的配置环境对象ConfigurableEnvironment。
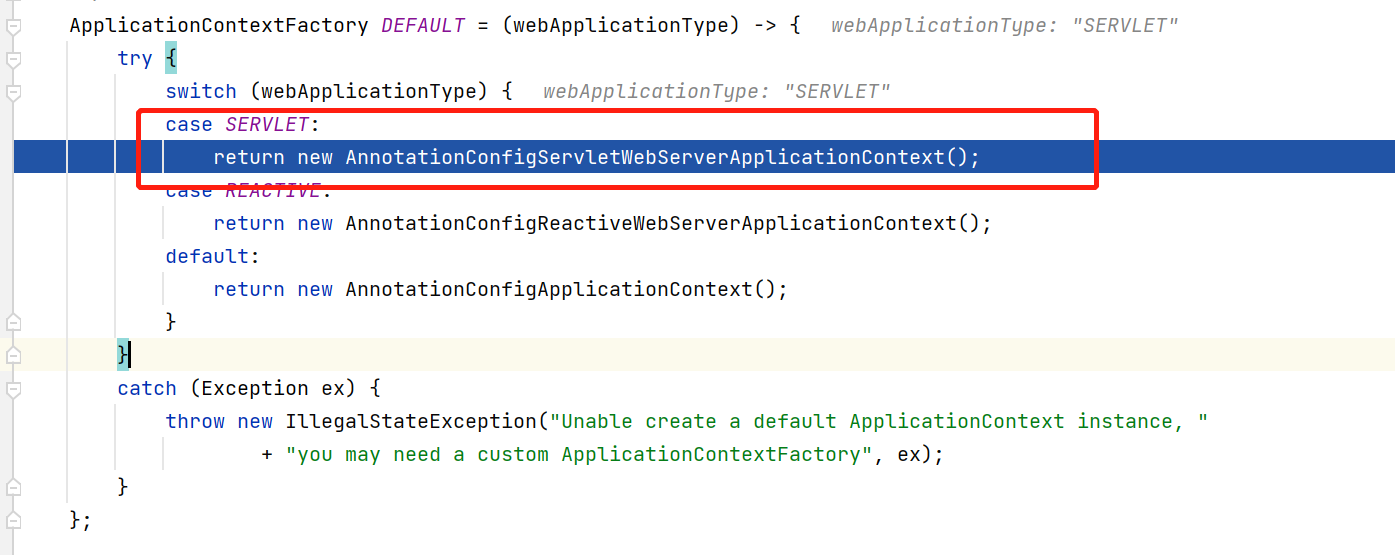
创建应用上下文对象ApplicationContext
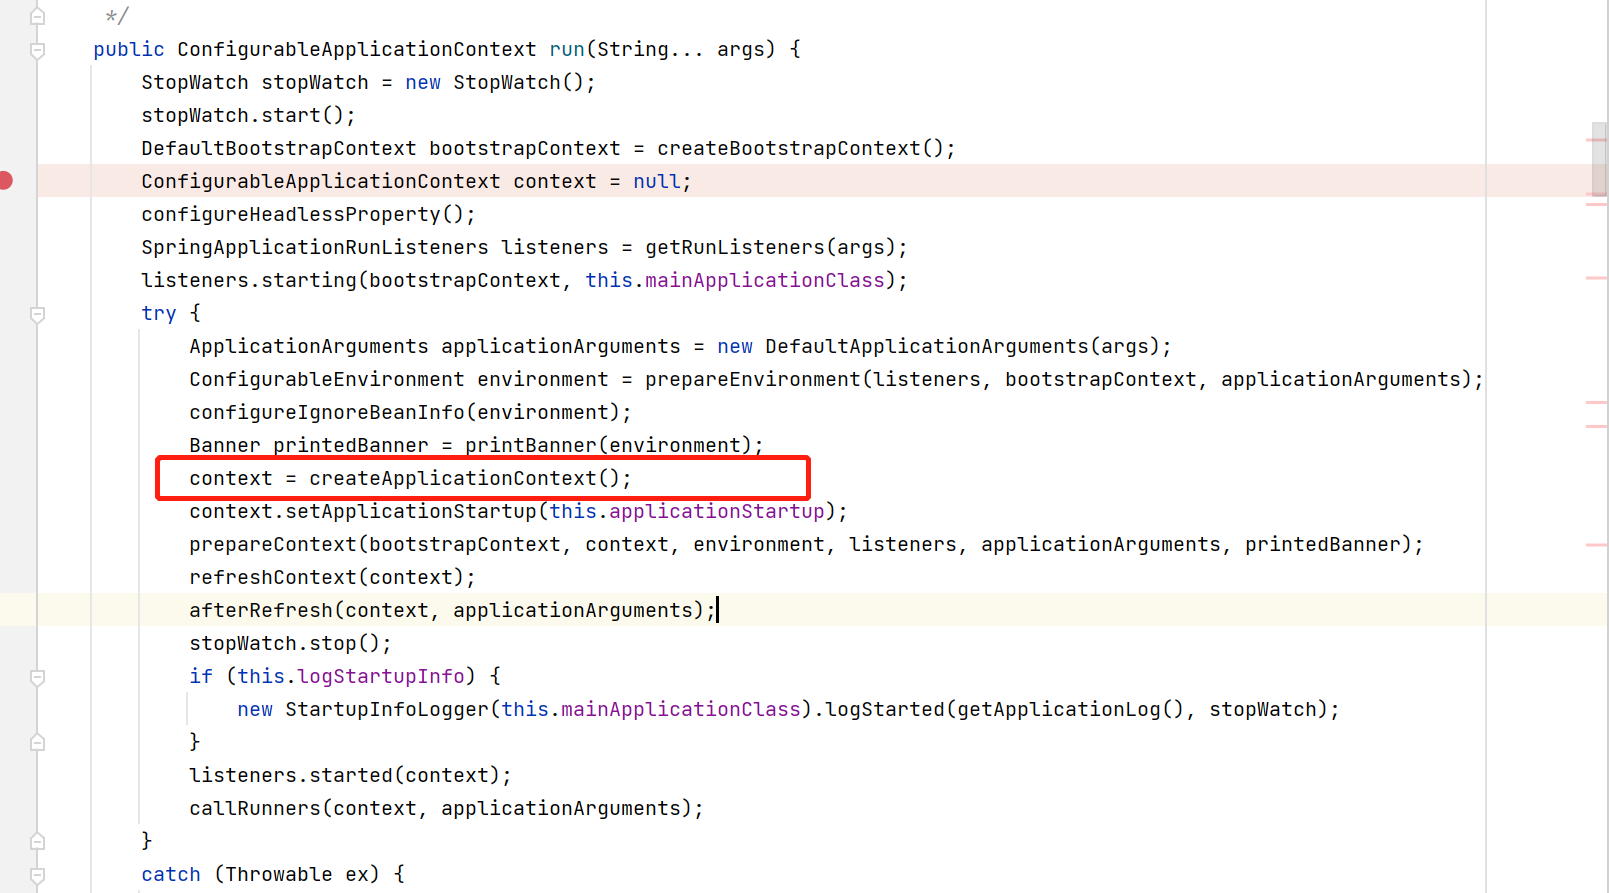

这里的this.applicationContextFactory会根据应用类型进行创建,所以这里是AnnotationConfigServletWebServerApplicationContext
private ApplicationContextFactory applicationContextFactory = ApplicationContextFactory.DEFAULT;

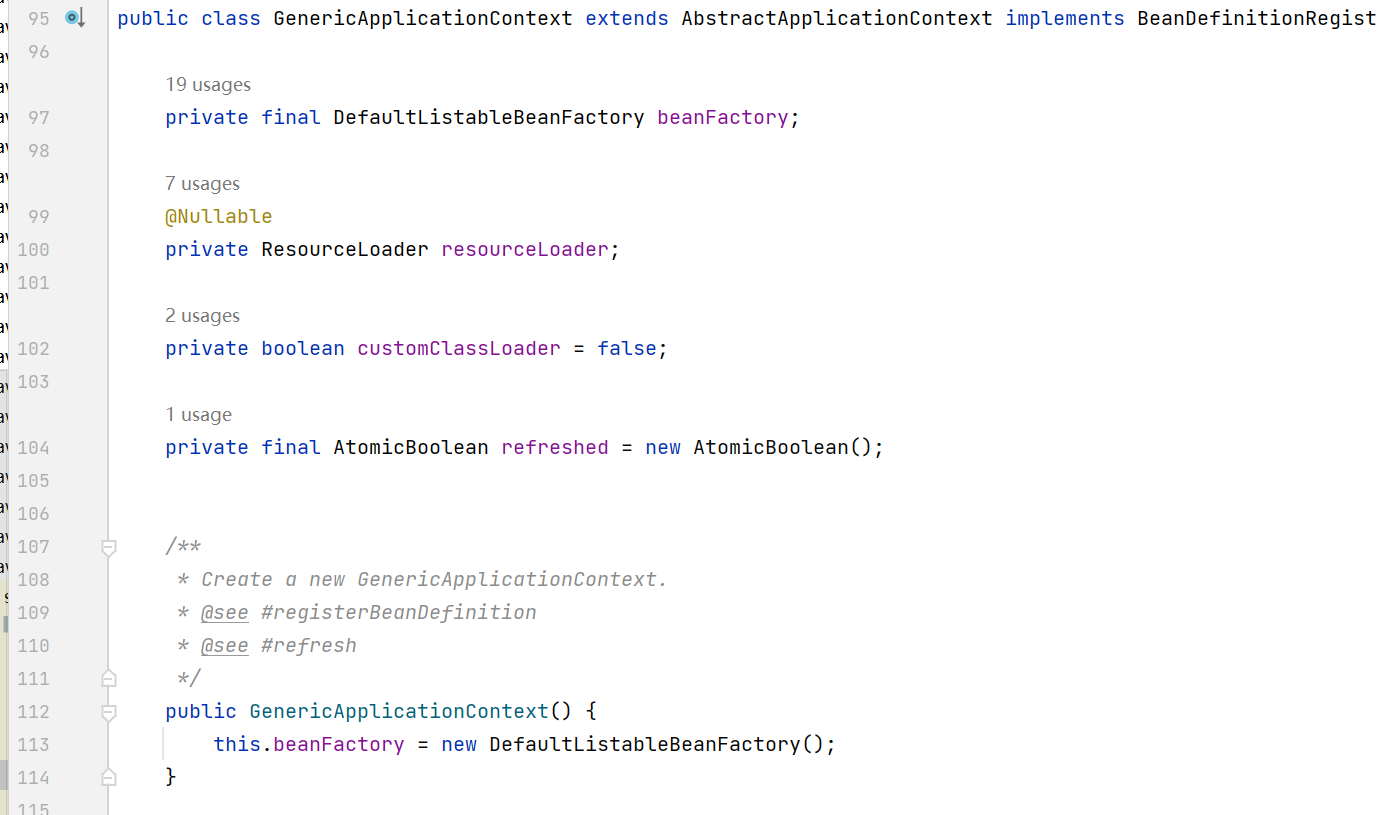
AnnotationConfigServletWebServerApplicationContext这个类是继承于GenericApplicationContext,所以它会先执行父类的构造器创建beanFactory
创建web server
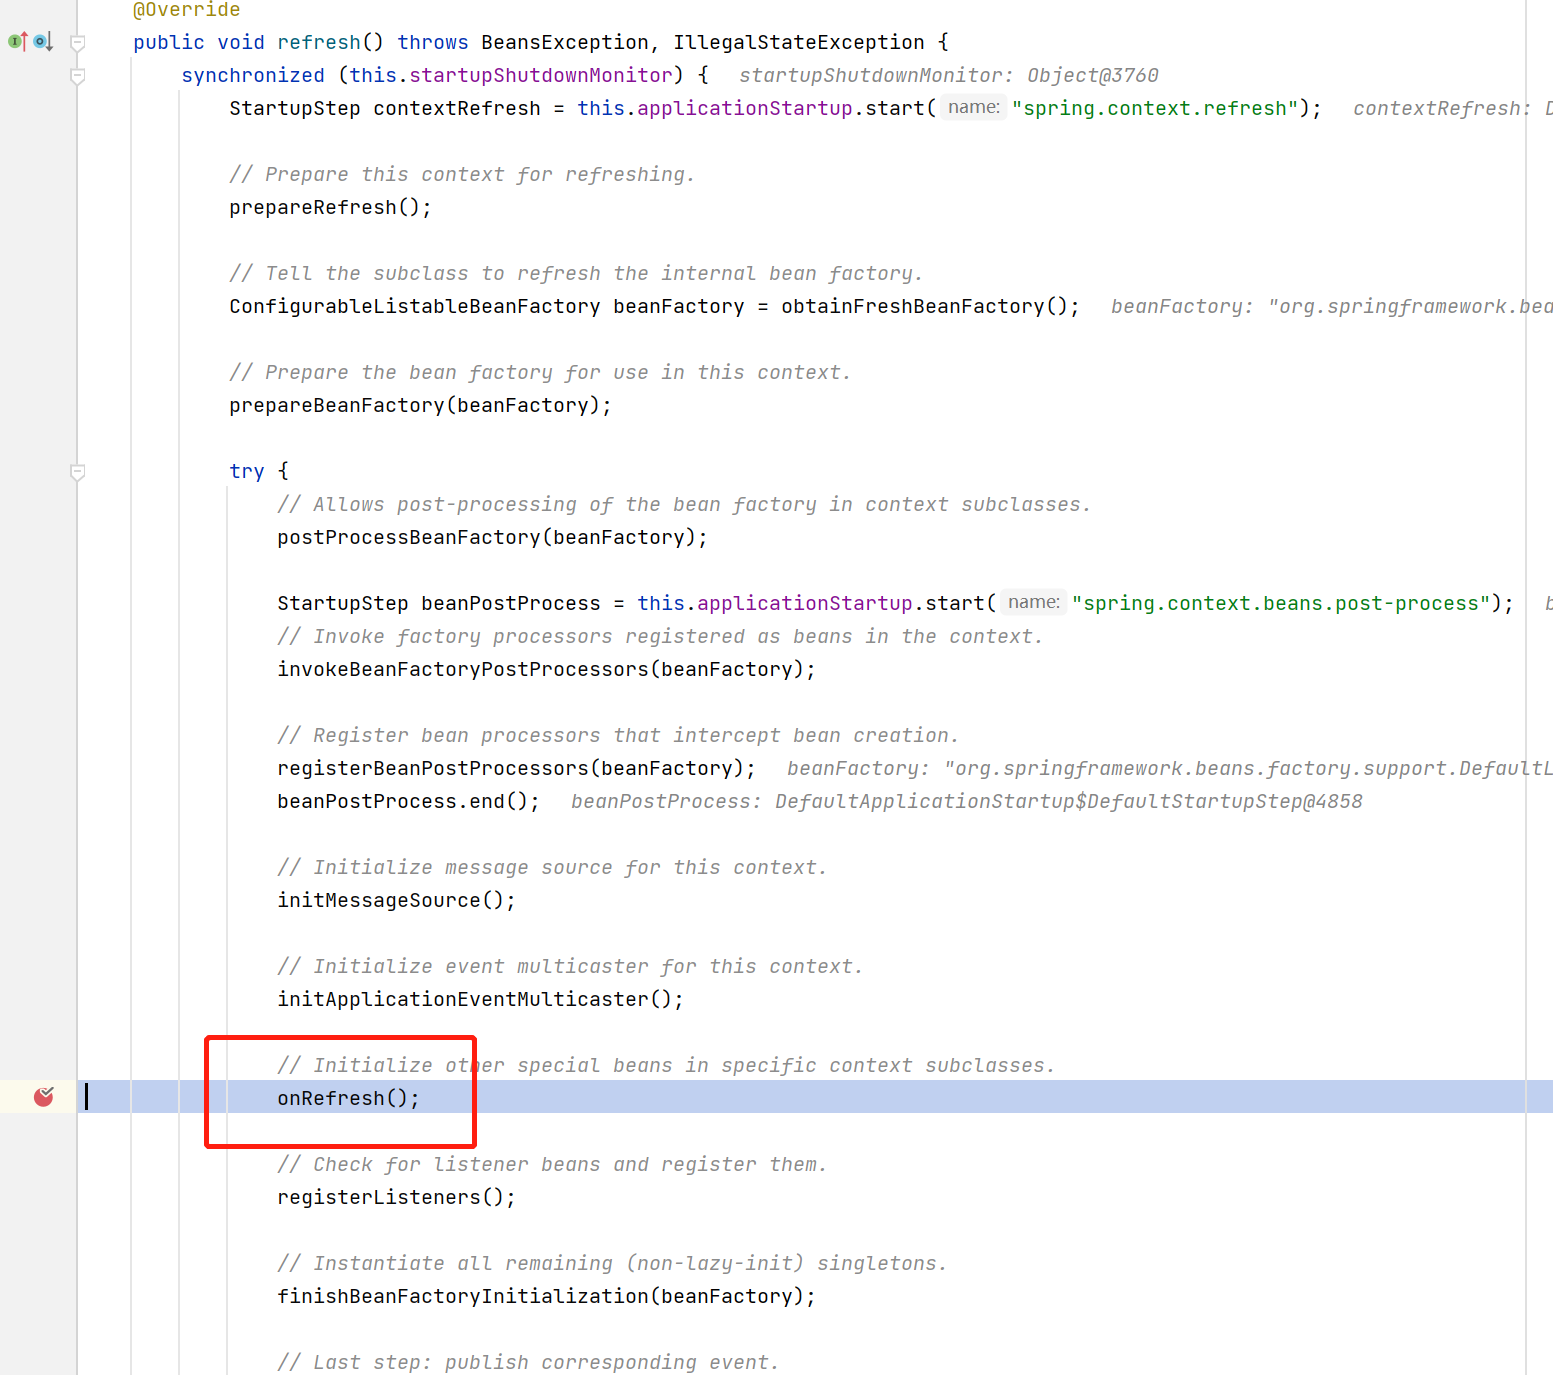
最后执行的是:org.springframework.boot.web.servlet.context.ServletWebServerApplicationContext#createWebServer
在这里,webServer 和ServletContext都是不存在的,所有这里会进行创建。
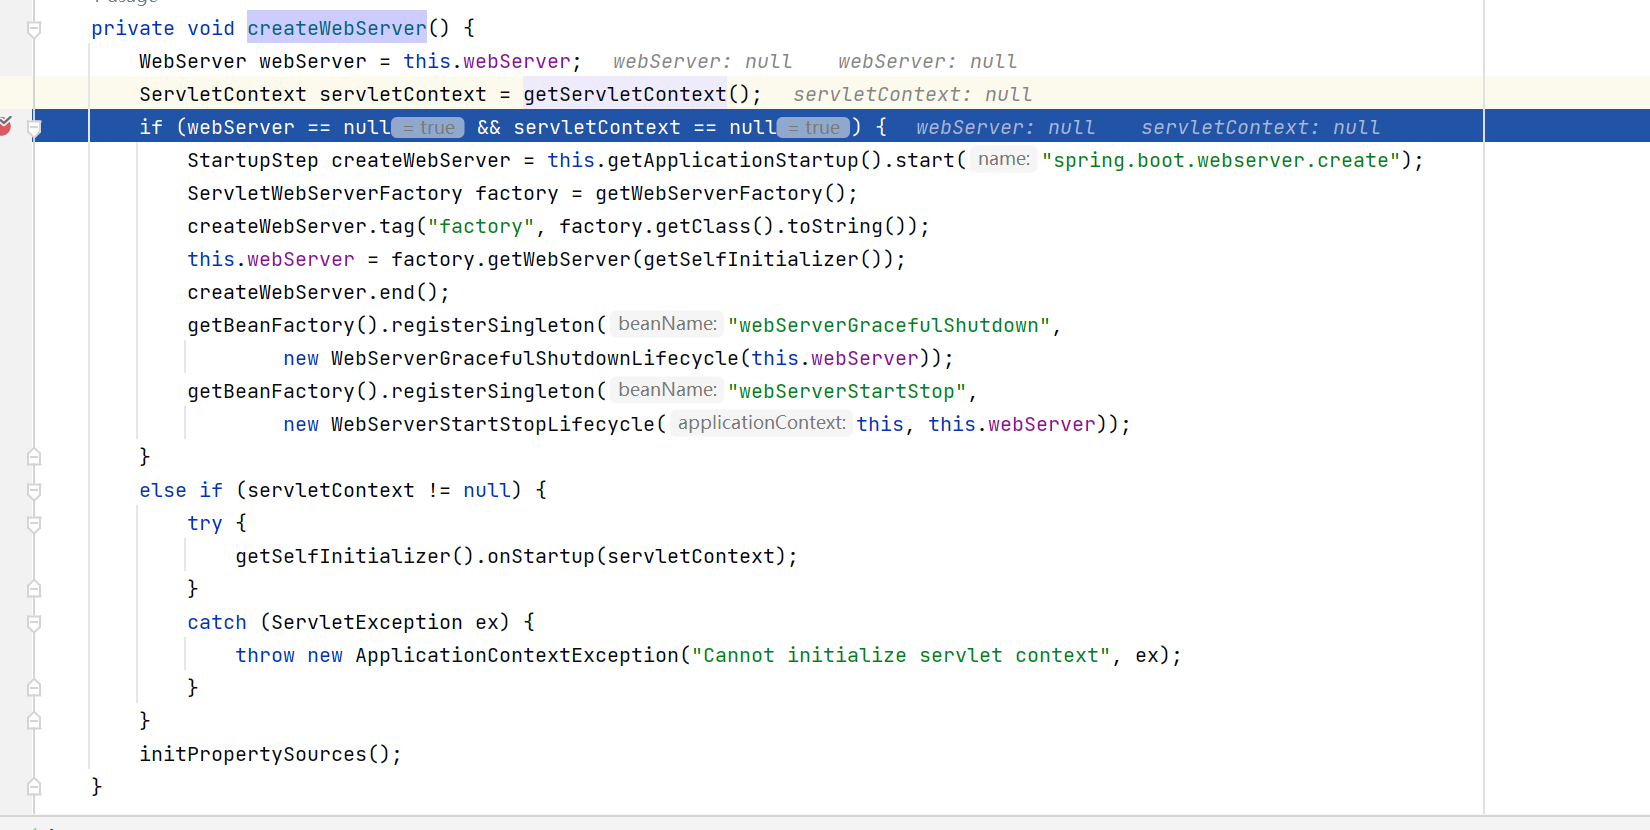
	private void createWebServer() {


		WebServer webServer = this.webServer;
		ServletContext servletContext = getServletContext();
       // 通过main方法执行
		if (webServer == null && servletContext == null) {


            // 创建一个步骤“创建spring.boot.webserver.create步骤”
			StartupStep createWebServer = this.getApplicationStartup().start("spring.boot.webserver.create");
            // 创建webServlet工厂,如果使用tomcat,那么这里会创建TomcatServletWebServerFactory
            // 创建原理是,在beanFactory中查找ServletWebServerFactory类型的beanName,因为在前面准备环境时,判别环境并创建了web环境对象,所有这里直接从beanFactory中查找
			ServletWebServerFactory factory = getWebServerFactory();
			createWebServer.tag("factory", factory.getClass().toString());
            // 创建web server(tomcat环境,就是new Tomcat,并启动)
			this.webServer = factory.getWebServer(getSelfInitializer());
            // 记录结束
			createWebServer.end();
            // 注册web服务关闭对象,它用来保证服务停止时接受请求时响应方式
			getBeanFactory().registerSingleton("webServerGracefulShutdown",
					new WebServerGracefulShutdownLifecycle(this.webServer));
			getBeanFactory().registerSingleton("webServerStartStop",
					new WebServerStartStopLifecycle(this, this.webServer));
		}
        // 通过war包,通过Tomcat运行的,上下文由Tomcat提供
		else if (servletContext != null) {


			try {


                // this.webServer = factory.getWebServer(getSelfInitializer());内部执行也是这一句
				getSelfInitializer().onStartup(servletContext);
			}
			catch (ServletException ex) {


				throw new ApplicationContextException("Cannot initialize servlet context", ex);
			}
		}
		initPropertySources();
	}
	public WebServer getWebServer(ServletContextInitializer... initializers) {


		if (this.disableMBeanRegistry) {


			Registry.disableRegistry();
		}
        // new了一个tomcat对象
		Tomcat tomcat = new Tomcat();
        // 创建基础目录
		File baseDir = (this.baseDirectory != null) ? this.baseDirectory : createTempDir("tomcat");
        // 设置目录
		tomcat.setBaseDir(baseDir.getAbsolutePath());
        // tomcat的内置对象Connector,负责处理请求,
        // 下面都是tomcat的一些配置
		Connector connector = new Connector(this.protocol);
		connector.setThrowOnFailure(true);
		tomcat.getService().addConnector(connector);
		customizeConnector(connector);
		tomcat.setConnector(connector);
		tomcat.getHost().setAutoDeploy(false);
		configureEngine(tomcat.getEngine());
		for (Connector additionalConnector : this.additionalTomcatConnectors) {


			tomcat.getService().addConnector(additionalConnector);
		}
        // 1. 设置容器名称,全局路径contextPath,基础路径
        // 2. 加载FixContextListener监听器
        // 3. 设置父加载器
        // 4. 覆盖Tomcat的默认语言环境映射以与其他服务器对齐。
        // 5. 加区域设置编码映射
        // ......
        // 找到tContextInitializer实现类集合,并添加
        // 设置errorPage,设置Mime映射
        //
		prepareContext(tomcat.getHost(), initializers);
        // server = new StandardServer
        // 初始化根目录
        // 配置文件加载
        // server.start() 真正启动
        // 创建守护线程startDaemonAwaitThread(),
		return getTomcatWebServer(tomcat);
	}
getSelfInitializer()执行如下,它并不是立即执行,而是返回了一个lambda表达式
// ServletContextInitializer是一个函数式方法(ServletContext) -> {实际方法体}
private org.springframework.boot.web.servlet.ServletContextInitializer getSelfInitializer() {


		return this::selfInitialize;
	}
// 实际方法体
private void selfInitialize(ServletContext servletContext) throws ServletException {


		prepareWebApplicationContext(servletContext);
		registerApplicationScope(servletContext);
		WebApplicationContextUtils.registerEnvironmentBeans(getBeanFactory(), servletContext);
		for (ServletContextInitializer beans : getServletContextInitializerBeans()) {


			beans.onStartup(servletContext);
		}
	}
当执行getSelfInitializer().onStartup(servletContext);时,才真正执行:
private void selfInitialize(ServletContext servletContext) throws ServletException {


		prepareWebApplicationContext(servletContext);
		registerApplicationScope(servletContext);
		WebApplicationContextUtils.registerEnvironmentBeans(getBeanFactory(), servletContext);
		for (ServletContextInitializer beans : getServletContextInitializerBeans()) {


			beans.onStartup(servletContext);
		}
	}
总结
这篇没什么总结,看run方法就行