文章目录
一、用非注解的方式生成excel
1.引入依赖
        <dependency>
            <groupId>com.alibaba</groupId>
            <artifactId>easyexcel</artifactId>
            <version>2.2.6</version>
        </dependency>
2.创建存储数据的实体类
@Data
public class Detail {


    //姓名
    private String name;

    //地址
    private String address;

    //电话
    private String phone;

    //备注
    private String remark;
}
3.自定义excel的列宽和行高
public class CustomizeColumnWidth extends AbstractColumnWidthStyleStrategy {


    //自定义列宽
    @Override
    protected void setColumnWidth(WriteSheetHolder writeSheetHolder, List<CellData> list, Cell cell, Head head, Integer integer, Boolean isHead) {


        // 测试为 COLUMN 宽度定制.
        if (isHead && cell.getRowIndex() == 2) {


            int columnWidth = cell.getStringCellValue().getBytes().length;
            int cellIndex = cell.getColumnIndex();
            switch (cellIndex) {


                case 0:
                case 2:
                case 3:
                    columnWidth = 10;
                    break;
                case 1:
                    columnWidth = 12;
                    break;
                case 4:
                    columnWidth = 15;
                    break;
                case 5:
                    columnWidth = 50;
                    break;
                default:
                    break;
            }

            if (columnWidth > 255) {


                columnWidth = 255;
            }
            writeSheetHolder.getSheet().setColumnWidth(cellIndex, columnWidth * 256);
        }
    }

    //自定义行高
    @Override
    public void beforeCellCreate(WriteSheetHolder writeSheetHolder, WriteTableHolder writeTableHolder, Row row, Head head, Integer columnIndex, Integer relativeRowIndex, Boolean isHead) {


        // 设置行高测试
        int rowIndex = row.getRowNum();
        System.out.println("当前行: " + rowIndex);
        short height = 600;
        row.setHeight(height);
    }
}
4.生成excel的表头以及生成excel
在controller类中加入以下几个方法
 public void exportDataDemo(HttpServletResponse response) throws IOException {


        //创建测试数据
        List<Detail> list = new ArrayList<>();
        for (int i = 0; i < 6; i++) {


            Detail detail = new Detail();
            detail.setName("姓名" + i);
            detail.setAddress("地址" + i);
            detail.setPhone("电话" + i);
            detail.setRemark("备注" + i);
            list.add(detail);
        }
        //设置返回数据的类型
        response.setContentType("application/msexcel");
        //设置返回数据的字符集编码
        response.setCharacterEncoding("utf-8");
        // 这里URLEncoder.encode可以防止中文乱码 当然和easyexcel没有关系
        String fileName = URLEncoder.encode("报表详情", "UTF-8").replaceAll("\\+", "%20");
        response.setHeader("Content-disposition", "attachment;filename*=utf-8''" + fileName + ".xlsx");
        //Detail.class是上面定义的实体类,用来做数据映射的,必须要有
        EasyExcel.write(response.getOutputStream(), Detail.class)
                 .head(getHeaderReport())
                 .registerWriteHandler(new CustomizeColumnWidth())
                 .registerWriteHandler(getStyleStrategy())
                 .sheet("sheet名称")
                 .doWrite(list);
    }

	//获取自定义表头思路:1.表头总共占用几行,就要在定义的每个list中添加几条数据 2.表头总共有几列就
	//要定义几个list
    private List<List<String>> getHeaderReport() {


        List<List<String>> list = new ArrayList<>();
        List<String> head0 = new ArrayList<>();
        head0.add("姓名");

        List<String> head1 = new ArrayList<>();
        head1.add("地址");

        List<String> head2 = new ArrayList<>();
        head2.add("电话");

        List<String> head3 = new ArrayList<>();
        head3.add("备注");
        list.add(head0);
        list.add(head1);
        list.add(head2);
        list.add(head3);
        return list;
    }
	//表格样式策略
    private HorizontalCellStyleStrategy getStyleStrategy() {


        // 头的策略
        WriteCellStyle headWriteCellStyle = new WriteCellStyle();
        // 设置对齐(左对齐)
        //headWriteCellStyle.setHorizontalAlignment(HorizontalAlignment.LEFT);
        // 设置对齐(居中对齐)
        headWriteCellStyle.setHorizontalAlignment(HorizontalAlignment.CENTER);
        // 背景色, 设置为白色,也是默认颜色
        headWriteCellStyle.setFillForegroundColor(IndexedColors.WHITE.getIndex());
        // 字体
        WriteFont headWriteFont = new WriteFont();
        headWriteFont.setFontHeightInPoints((short) 12);
        headWriteCellStyle.setWriteFont(headWriteFont);

        // 内容的策略
        WriteCellStyle contentWriteCellStyle = new WriteCellStyle();
        // 这里需要指定 FillPatternType 为FillPatternType.SOLID_FOREGROUND 不然无法显示背景颜色.头默认了 FillPatternType所以可以不指定
        contentWriteCellStyle.setFillPatternType(FillPatternType.SOLID_FOREGROUND);
        contentWriteCellStyle.setFillPatternType(FillPatternType.SOLID_FOREGROUND);

        // 背景绿色
        contentWriteCellStyle.setFillForegroundColor(IndexedColors.GREEN.getIndex());
        // 字体策略
        WriteFont contentWriteFont = new WriteFont();
        contentWriteFont.setFontHeightInPoints((short) 12);
        contentWriteCellStyle.setWriteFont(contentWriteFont);
        //设置 自动换行
        contentWriteCellStyle.setWrapped(true);
        //设置 垂直居中
        contentWriteCellStyle.setVerticalAlignment(VerticalAlignment.CENTER);
        //设置 水平居中
        contentWriteCellStyle.setHorizontalAlignment(HorizontalAlignment.CENTER);
        //设置边框样式
        contentWriteCellStyle.setBorderLeft(BorderStyle.THIN);
        contentWriteCellStyle.setBorderTop(BorderStyle.THIN);
        contentWriteCellStyle.setBorderRight(BorderStyle.THIN);
        contentWriteCellStyle.setBorderBottom(BorderStyle.THIN);

        // 这个策略是 头是头的样式 内容是内容的样式 其他的策略可以自己实现
        HorizontalCellStyleStrategy horizontalCellStyleStrategy = new HorizontalCellStyleStrategy(headWriteCellStyle, contentWriteCellStyle);
        return horizontalCellStyleStrategy;
    }
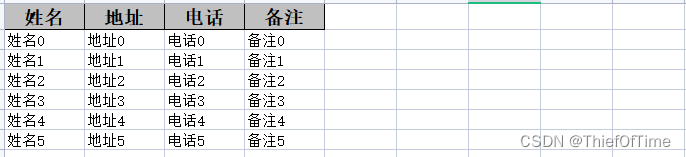
5.测试导出结果

二、用注解的方式生成excel
1.引入依赖(和非注解的依赖相同)
2.创建存储数据的实体类
@Data
@ContentRowHeight(15)
@HeadRowHeight(20)
public class Detail {


    //姓名
    @ExcelProperty("姓名")
    @ColumnWidth(10)
    private String name;

    //地址
    @ExcelProperty("地址")
    @ColumnWidth(10)
    private String address;

    //电话
    @ExcelProperty("电话")
    @ColumnWidth(10)
    private String phone;

    //备注
    @ExcelProperty("备注")
    @ColumnWidth(10)
    private String remark;
}
注解说明:
- @ContentRowHeight(15)表示excel内容的行高
- @HeadRowHeight(20)表示表头的行高
- @ExcelProperty(“姓名”)表示列的名称
- @ColumnWidth(10)表示当前列的宽度
*以上用注解方式代替了非注解中的 (3)自定义exce的列宽和行高以及(4)中的生成表头
3.生成excel
在controller类接口中放入一下内容,注意格式:
public void exportDataDemo(HttpServletResponse response) throws IOException {


        //创建测试数据
        List<Detail> list = new ArrayList<>();
        for (int i = 0; i < 6; i++) {


            Detail detail = new Detail();
            detail.setName("姓名" + i);
            detail.setAddress("地址" + i);
            detail.setPhone("电话" + i);
            detail.setRemark("备注" + i);
            list.add(detail);
        }
        //设置返回数据的类型
        response.setContentType("application/msexcel");
        //设置返回数据的字符集编码
        response.setCharacterEncoding("utf-8");
        // 这里URLEncoder.encode可以防止中文乱码 当然和easyexcel没有关系
        String fileName = URLEncoder.encode("报表详情", "UTF-8").replaceAll("\\+", "%20");
        response.setHeader("Content-disposition", "attachment;filename*=utf-8''" + fileName + ".xlsx");
        EasyExcel.write(response.getOutputStream(), Detail.class)
        		 .sheet("sheet名称")
        		 .doWrite(list);
    }
4.测试导出的结果
如果要导出的是复杂表头的excel,请点击此链接https://blog.csdn.net/qq_41774102/article/details/128254052
说明:本文章内容为笔者亲测有效,若有不当之处,希望各位大佬不吝赐告,笔者定当虚心接收并改正。