本篇主要介绍HyperLedger Explorer 0.3.9版本的环境搭建和运行过程。文章若有错误之处欢迎指出,如果你有其他心得体会,感谢与我分享交流。
目录
简介
- HyperledgerExplorer是一个简单、强大、易于使用、维护良好的开源实用工具,可以浏览底层区块链网络上的活动。
- 官方文档和下载地址: https://github.com/hyperledger/blockchain-explorer/tree/v0.3.9 若有困惑的地方直接看官方文档
- 下载的版本要对应:
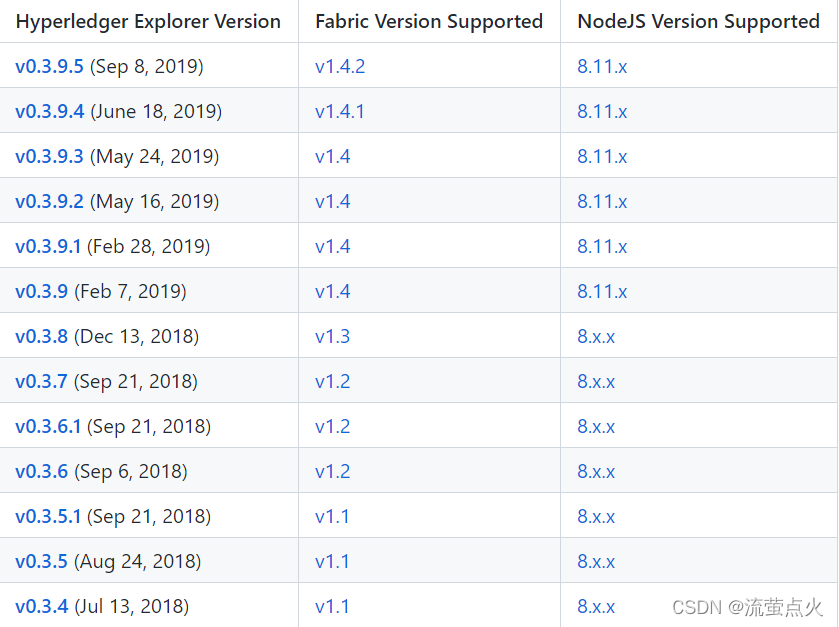
Fabric1.4搭建和first-network示例测试见另一篇博文:Hyperledger Fabric1.4环境搭建及示例测试
HyperLedger Explorer安装前置条件:
- nodejs 8.11.x (Note that v9.x is not yet supported)
- PostgreSQL 9.5 or greater
- Jq
- gcc-c++
一、nodejs安装
#下载压缩包
wget https://nodejs.org/dist/v8.11.4/node-v8.11.4-linux-x64.tar.xz
#解压
tar xvf node-v8.11.4.tar.gz
#可将解压后的文件移动到/usr/local/src/
#配置环境变量
vi /etc/profile
添加如下内容:

#立即生效
source /etc/profile
查看版本

二、PostgreSQL10安装
详见博文: Linux(CentOS)下安装 PostgreSQL
三、Jq安装
yum install epel-release
yum install jq
四、gcc安装
yum install -y gcc-c++
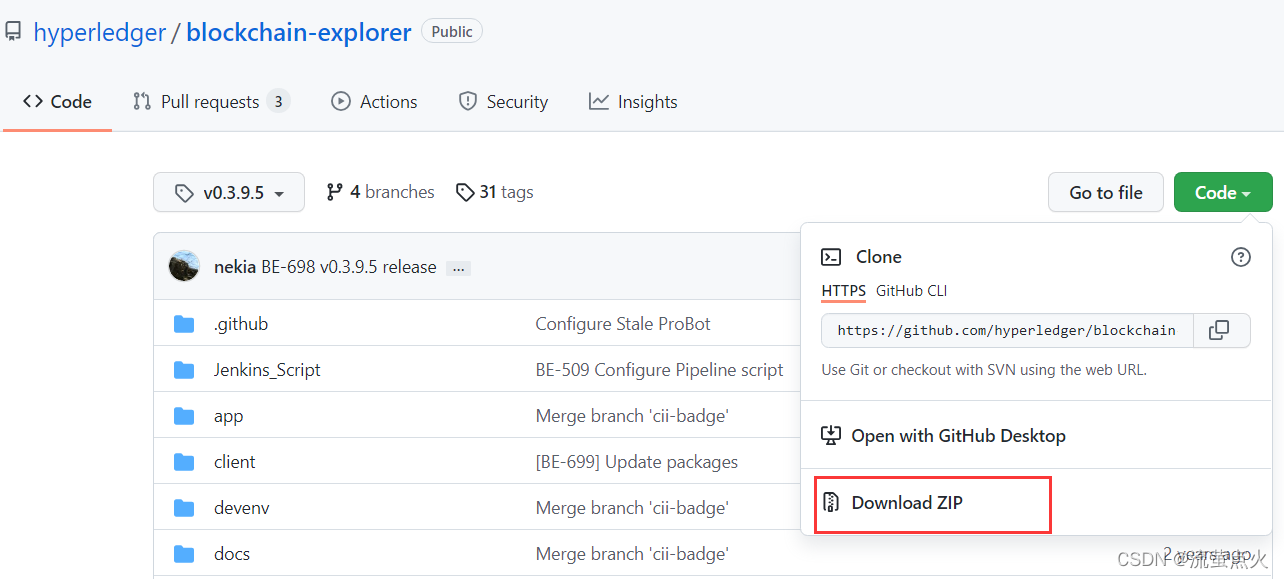
五、Explorer下载
#下载源码
# cd /opt/gopath/src/github.com/hyperledger
# git clone https://github.com/hyperledger/blockchain-explorer.git
#切换Fabric版本
# git checkout -b release-3.9 origin/release-3.9
下载可能很慢,我是直接在官网下载0.3.9版本的explorer源码的压缩文件,再上传到Linux然后解压,位置放在/opt/gopath/src/github.com/hyperledger/

六、修改数据库配置(下面的工作要很细心)
可以将文件夹名blockchain-explorer-0.3.9修改为blockchain-explorer
1、修改数据库配置
cd blockchain-explorer/app
vi explorerconfig.json
#官方默认的配置如下。用户名username和密码passwd可以自行修改
"postgreSQL": {


"host": "127.0.0.1",
"port": "5432",
"database": "fabricexplorer",
"username": "hppoc",
"passwd": "password"
}
cd persistence/fabric/postgreSQL
chmod -R 775 db/
cd db
2、创建postpresSQL数据库
官方文档是执行脚本./createdb.sh来创建。
我这里会出问题,因此我采用的是手动创建。如果你可以用./createdb.sh命令创建,感想跟我分享。
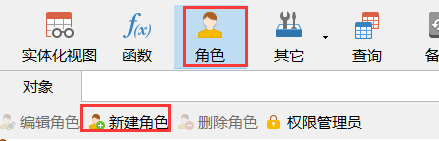
首先用客户端Navicat连接到postpresSQL
1)创建角色
角色的用户名和密码,就是xplorerconfig.json配置中的username,passwd
2)创建数据库
数据库名称为fabricexplorer,并将数据库的所有者owner设置为username这个用户
这里可能会报错:ERROR: source database “template1” is being accessed by other users
#查看模板数据库“template1”的进程号
ps -ef|grep postg
#杀掉进程
kill -9 进程号
#再尝试创建数据库
从来没用过postpresSQL,有些问题实在生疏,这个问题的解决是参考文章:https://blog.csdn.net/design321/article/details/24740769
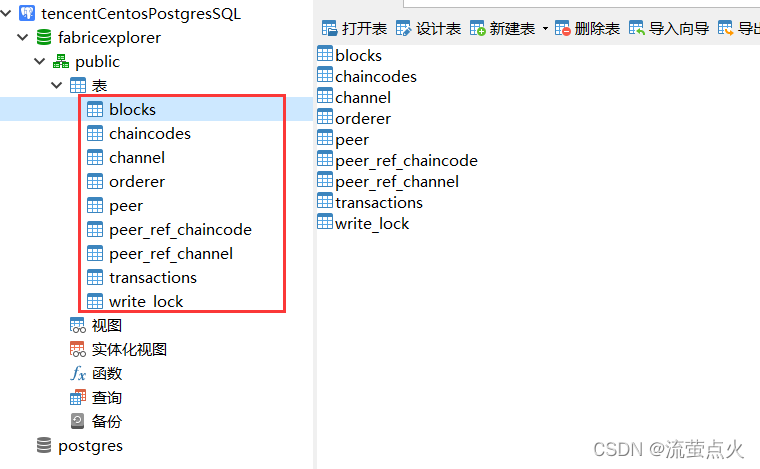
3)创建表
将blockchain-explorer/app/persistence/fabric/postgreSQL/db目录下的explorerpg.sql下载到本地,在Navicat上执行,并将所有的:user改为对应的username
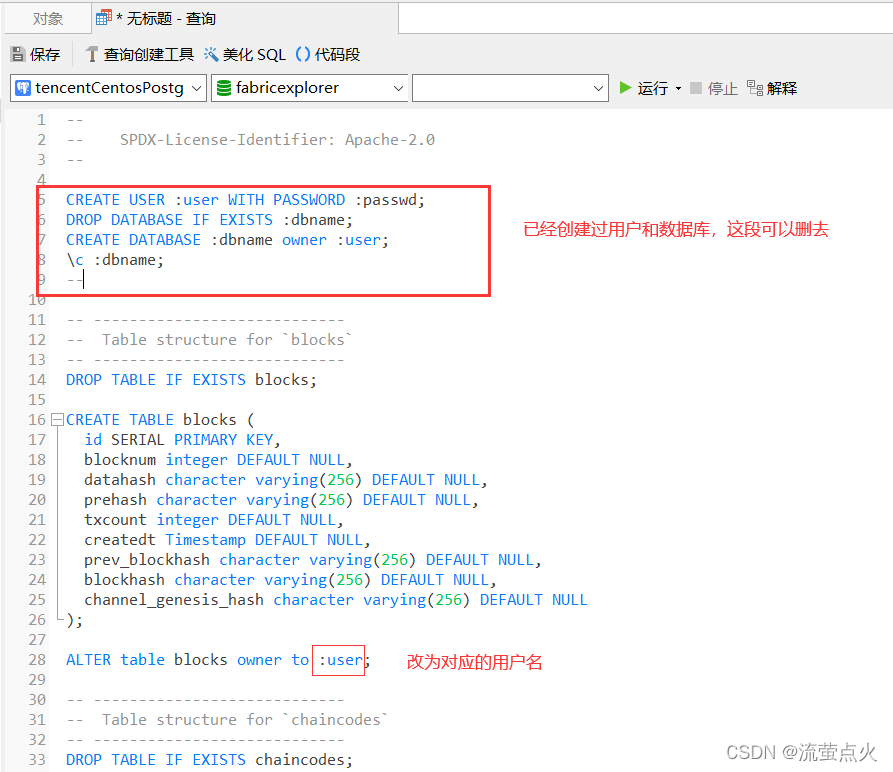
完成后如图:
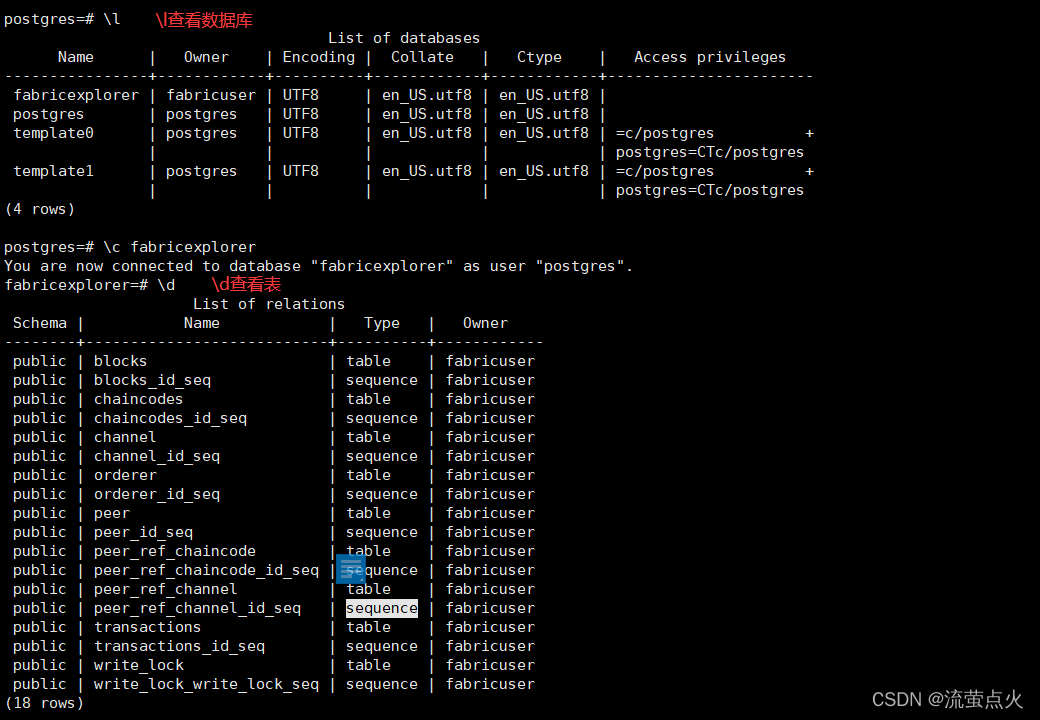
4)都创建完毕后在服务器上检查
postpresSQL中文教程:https://www.runoob.com/postgresql/postgresql-create-table.html
七、Explorer配置Fabric网络
以官方测试网络first-network为例
cd /opt/gopath/src/github.com/hyperledger/blockchain-explorer/app/platform/fabric
vi config.json
#所有的fabric-path修改为自己的路径
如:
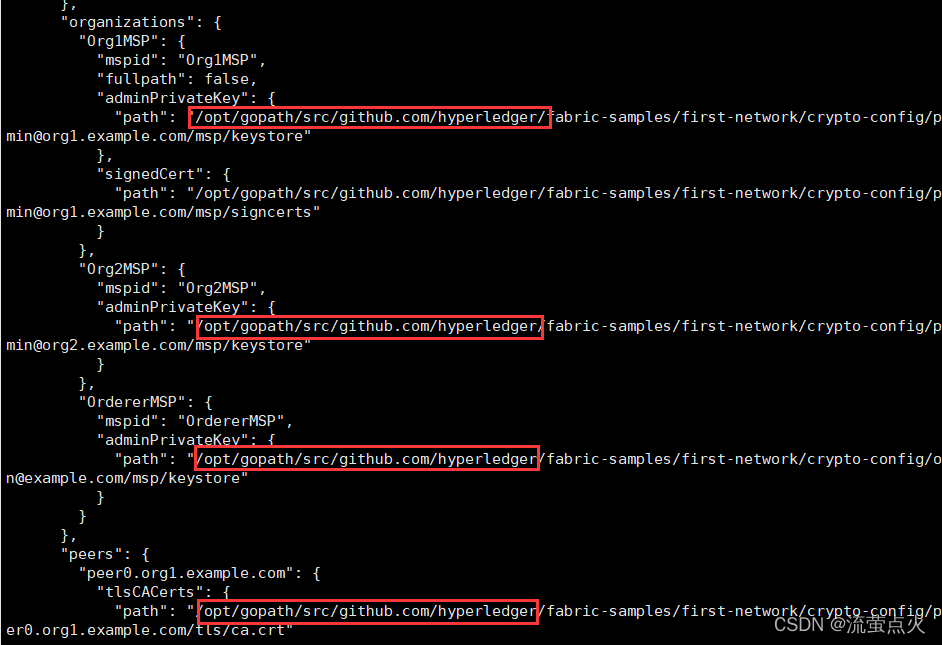
八、Explorer编译
cd blockchain-explorer
npm install
cd client/
npm install
npm run build
若遇到权限不足,赋予权限
chmod  -R 755 所在目录
九、启动Explorer
先启动first-network网络
cd blockchain-explorer
#启动
./start.sh
日志位于blockchain-explorer/logs/console/
启动成功的日志如:

打开网页:

如果是云服务器,记得在安全组中开放8080端口
#停止
./stop.sh
十、问题汇总
1、启动explorer不成功,日志文件显示
Error: The gRPC binary module was not installed. This may be fixed by running "npm rebuild"

解决:
npm rebuild grpc
如果遇到提示:
nodejs gyp WARN EACCES user “root” does not have permission to access the dev dir
则执行
npm rebuild grpc --unsafe-perm
2、其他:待补充…
参考博文:
https://cloud.tencent.com/developer/article/1697210
官方文档:
https://github.com/hyperledger/blockchain-explorer