添加include所在的包含目录
D:\Program\OpenCV\build\include
D:\Program\OpenCV\build\include\opencv2


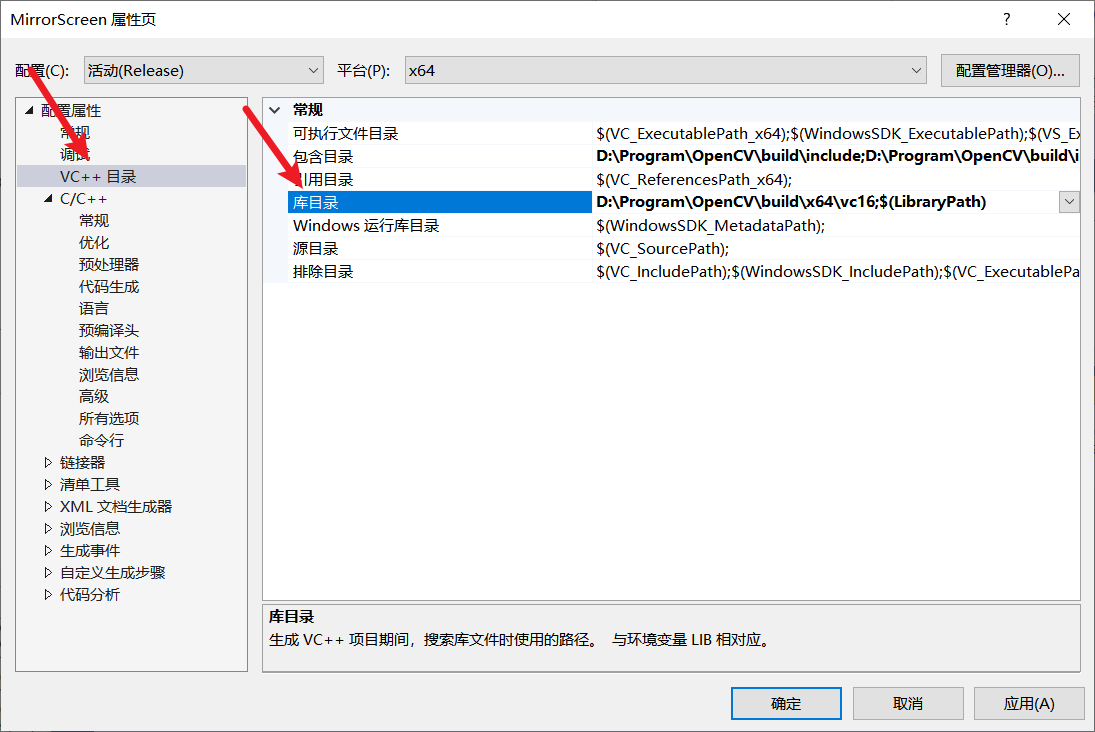
添加库目录
- 2015版本的VS选vc14,2017版本的VS选vc15,2019版本的VS选vc16,2022版本的VS选vc17,
D:\Program\OpenCV\build\x64\vc16
D:\Program\OpenCV\build\x64\vc16\lib

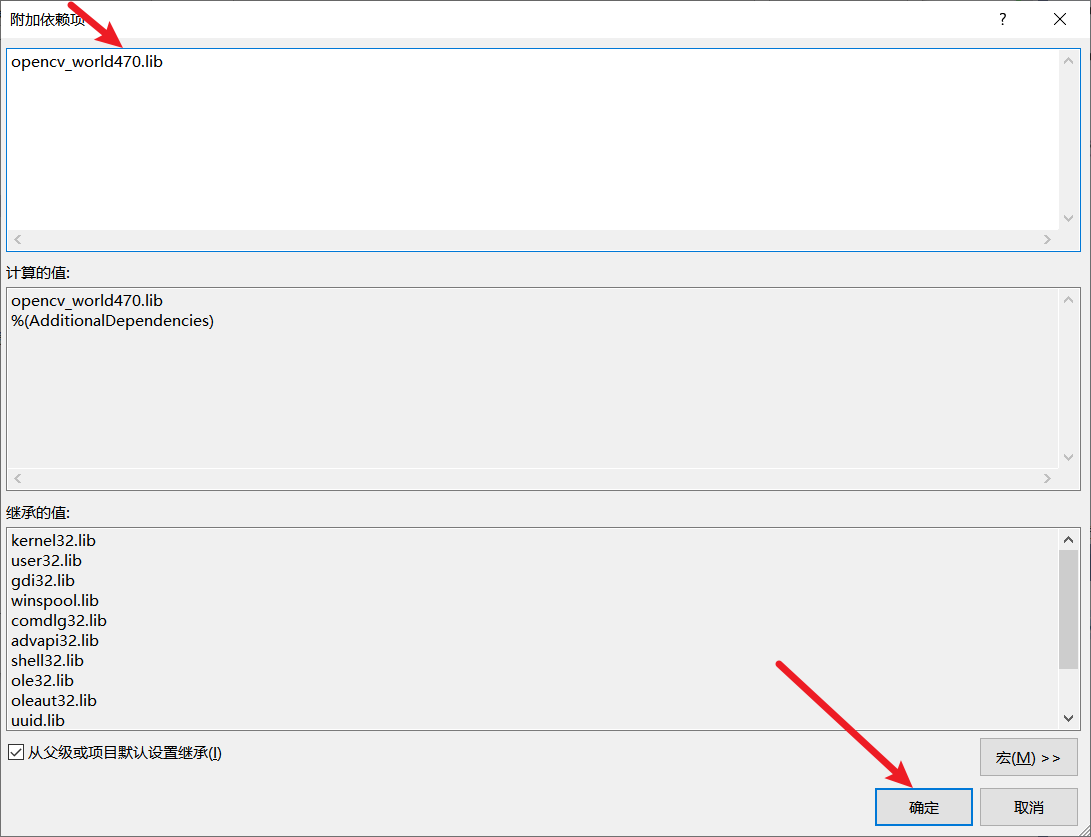
添加依赖项
- 属性-链接器-输入-附加依赖项

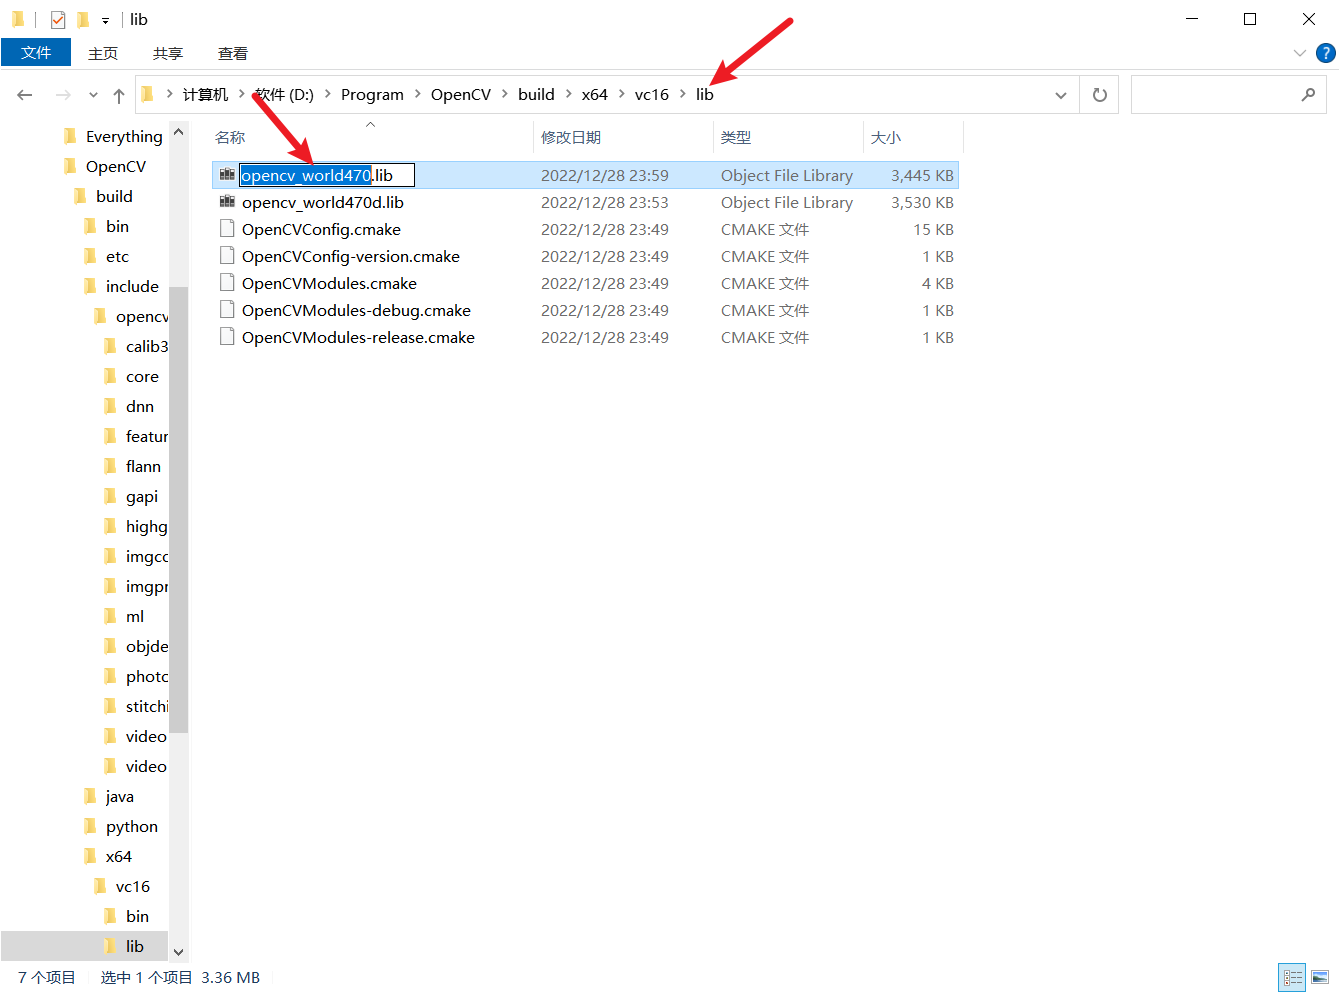
- 在D:\Program\OpenCV\build\x64\vc16\lib 路径下找到 OpenCV的版本,
- “附加依赖项”填入“opencv_world470.lib”,带d.lib在Debug模式使用,不带d.lib在Release模型使用,我直接使用的是release,所以选择不带d的那个 ,复制文件名opencv_world470.lib,粘贴到这里
- 以上opencv环境配置完成,注意在编程时选择Debug的x64
最终使用下面的代码进行测试
#include <opencv2/core.hpp>
#include <opencv2/imgcodecs.hpp>
#include <opencv2/highgui.hpp>
#include <iostream>
using namespace cv;
using namespace std;

int main()
{
    Mat image;
    image = imread("D:/VScode/luna.jpg", IMREAD_COLOR); // Read the file
    if (image.empty()) // Check for invalid input
    {
        cout << "Could not open or find the image" << std::endl;
        return -1;
    }
    namedWindow("Display window", WINDOW_AUTOSIZE); // Create a window for display.
    imshow("Display window", image); // Show our image inside it.
    waitKey(0); // Wait for a keystroke in the window
    return 0;
}

n 0;
}
- [外链图片转存中...(img-vDV4aVEi-1686379503455)]
##