文章目录
一:基础环境介绍:
- Centos:7.8(cat /etc/redhat-release查看版本号)
- Python:3.9.5(python -V查看版本号)
- Django:4.2(django-admin --version查看版本号)
- Uwsgi:2.0.21(uwsgi --version查看版本号)
- Nginx:1.20.1 (nginx -v查看版本号)
- mysql-community-common-8.0(可自行安装)
二:部署环境安装配置:
1.基础依赖环境安装
yum -y groupinstall "Development tools"
yum -y install zlib-devel bzip2-devel openssl-devel
ncurses-devel sqlite-devel readline-devel tk-devel
 gcc make gdbm-devel db4-devel libpcap-devel xz-devel libffi-devel
2.安装wegt,vim,unzip等必须命令
yum -y install wget vim unzip
3.安装python与pip(或者python多版本管理工具pyenv等)
## 1.下载自己需要版本的python版本包
wget https://www.python.org/ftp/python/3.9.5/Python-3.9.5.tar.xz

## 2.新建python3目录
mkdir /usr/local/python3

## 3.安装Python3压缩包,进入解压目录,指定安装目录,安装Python3
tar -xvf  Python-3.9.5.tar.xz
cd Python-3.9.5
./configure --prefix=/usr/local/python3
make && make install

## 4.安装Python3时,会自动安装pip,如果没有就手动安装
yum -y install python-pip

## 5.pip配置(更换pip的源)
(1)编辑pip.conf
[root@localhost ~]# cd ~
[root@localhost ~]# mkdir .pip
[root@localhost ~]# vim pip.conf


[global]
index-url = https://mirrors.aliyun.com/pypi/simple/
[install]
trusted-host=mirrors.aliyun.com


(2) 安装依赖安装好pip
[root@localhost ~]# yum -y install epel-release
[root@localhost ~]# yum install python-pip
[root@localhost ~]# pip install --upgrade pip

## 6.升级下pip
pip install --upgrade pip


## 7.创建软链接
ln -s /usr/local/python3/bin/python3 /usr/bin/python3
ln -s /usr/local/python3/bin/pip3 /usr/bin/pip3


## 输入python3测试是否安装成功
python -V
4.安装nginx
## 1.yum方式安装nginx
yum -y install nginx

## 2.查看nginx版本
nginx -v

## 3.启动nginx
systemctl status nginx  ## 查看nginx状态

systemctl start nginx   ## 开启nginx服务

systemctl stop nginx     ## 关闭nginx服务
5.安装uwsgi
## 1.安装uwsgi
pip3 install uwsgi

## 2.建立软链接
ln -s /usr/local/python3/bin/uwsgi /usr/bin/uwsgi

## 3.查看uwsgi版本
uwsgi --version
三:部署django项目:
1.上传项目并安装项目模块并启动测试
## 1.pip导出项目依赖包
pip freeze > requirements.txt

## 2.上传文件到服务器

## 3.解压项目
unzaip tman.zip

## 4.pip安装项目依赖模块
pip3 install -r requirements.txt

## 5.通过python3 manage.py runserver运行一下项目,如果能正常启动则进行下一步,不能正常运行往上检查。
这里需要注意使用python3来执行manage.py,否则会出现报错情况!
2.在项目里配置uwsgi.ini配置文件
(1)在settings.py所在目录vim新文件项目名称.ini

(2)配置项目名称.ini文件
[uwsgi]
master=true
chdir=/var/tman
module=tman.wsgi
py-autoreload=1
lazy-apps=true
socket=127.0.0.1:8000
processes=4
# pid文件,用于脚本启动,停止
pidfile=uwsgi.pid
buffer-size=32768
daemonize=uwsgi.log
log-maxsize = 5000000
vacuum = true
disable-logging = true
(3)检查settings.py配置并收集项目静态文件
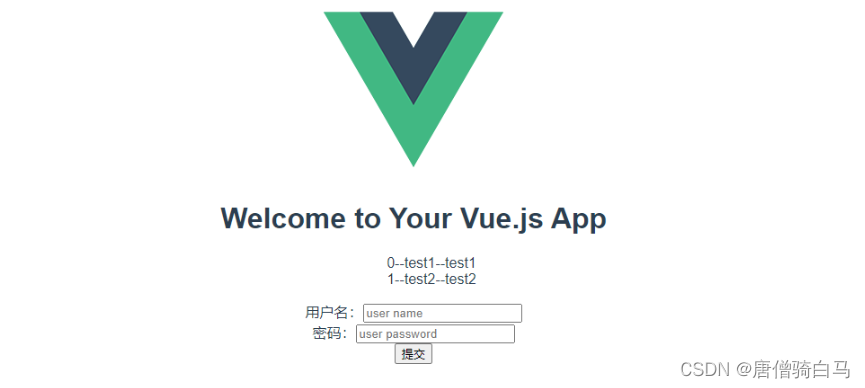
一般都是这个配置,我的是基于vue的前后端分离项目:
STATICFILES_DIRS = [
    os.path.join(BASE_DIR, 'dist/static'),
]

STATIC_URL = 'static/'
url.py配置:
from django.contrib import admin
from django.urls import path, include
from django.views.generic.base import TemplateView
urlpatterns = [
    path('admin/', admin.site.urls),
    path('api/v1/', include('tadmin.urls')),
    path('', TemplateView.as_view(template_name='index.html'))
]
非前后端分离项目可以使用如下命令收集静态文件:
python manage.py collectstatic
基于vue使用如下命令进行前端打包:
npm run build
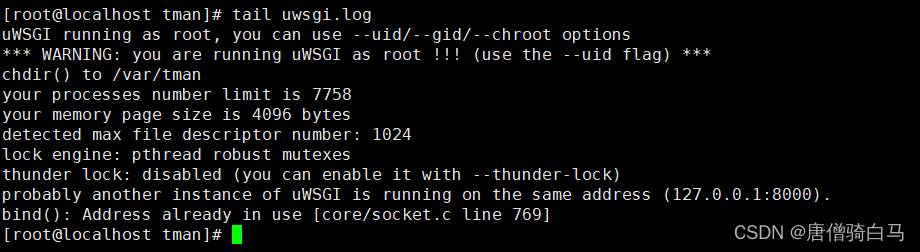
(4)启动测试,并查看日志
## 在当前目录启动
uwsgi -i tman.ini

## 启动之后查看进程
ps -ef | grep uwsgi

查看进程

查看日志
3.配置nginx
vim /etc/nginx/nginx.conf
nginx.conf配置
 server {


        listen       80;
        listen       [::]:80;
        server_name 192.168.75.188;
        charset utf-8;

        location /static/ {


          alias /var/tman/dist/static/;
          index index.html index.htm;
        }

        location / {


          include uwsgi_params;
          uwsgi_pass 127.0.0.1:8000;
        }
        # Load configuration files for the default server block.
        include /etc/nginx/default.d/*.conf;

        error_page 404 /404.html;
        location = /404.html {


        }

        error_page 500 502 503 504 /50x.html;
        location = /50x.html {


        }
    }
(4)启动nginx
[root@localhost tman]# nginx -t
nginx: the configuration file /etc/nginx/nginx.conf syntax is ok
nginx: configuration file /etc/nginx/nginx.conf test is successful
[root@localhost tman]# nginx -s reload
(5)访问项目http://192.168.75.188/#/
四:备注
之后项目重启只需要重启uwsgi之后再重启nginx即可,切记正式环境要关掉django的debug模式,防止报错源码被看到。
## 项目重启
killall -9  uwsgi
uwsgi -i tman.ini
nginx -s reload
uwsgi操作
uwsgi --ini uwsgi.ini
# 重启uswgi
uwsgi --reload uwsgi.pid
# 停止uwsgi
uwsgi --stop uwsgi.pid
五、部署报错:
(1)pip3安装mysqlclient==2.1.1报错
/bin/sh: mysql_config: command not found
/bin/sh: mariadb_config: command not found
/bin/sh: mysql_config: command not found
解决办法:
yum -y install mysql-devel
Error: MariaDB-compat conflicts with 1:mariadb-libs-5.5.68-1.el7.x86_64
Error: Package: 1:mariadb-devel-5.5.68-1.el7.x86_64 (base)
           Requires: mariadb-libs(x86-64) = 1:5.5.68-1.el7
           Installed: MariaDB-compat-10.4.25-1.el7.centos.x86_64 (@mariadb)
               mariadb-libs(x86-64) = 1:10.1.48-1.el7.centos
 You could try using --skip-broken to work around the problem
 You could try running: rpm -Va --nofiles --nodigest
解决办法:
yum remove MariaDB-common
(2)open() "/root/tman/dist/static/js/vendor.652814051b5133caa1e9.js" failed (13: Permission denied)
原因,nginx目录权限问题,我将项目放在root下,导致nginx权限不足,解决办法,将项目移到其他目录,如/var等