第【1】章前言:
AI的训练和设计似乎ubuntu是必要的,而且,GPU的配置似乎也是要在Ubuntu下,某些模式版本才能兼容。单独搞一个编译服务器是个思路,但是,如果资金不够,也许要考虑在Windwos和Linux的系统共生下做点文章。
Windows 开始提供了内嵌的对Linux的子系统兼容模式。利用这个模式可以在windows操作系统环境直接用应用软件的方式,操作子系统。很显然,这种方式比之前的双操作系统,重复启动,和利用Vmware在一个摆烂的环境里面运行要好的多。
【案】作者安装windows的guide做了很多实验,发现遇到很多问题,这里大致给出来思路和笔者实际采用的解决办法。
一个工具准备:
-
在微软应用仓库下载多系统支持的CMD命令程序:

-
以后用这个终端Terminal启动ubuntu的方法:

【案,笔者安装ubuntu,也曾经尝试过用windows的应用仓库安装ubuntu,启动应该是本章,2.4段落小节所示】
-
如果是用应用商店安装的ubuntu,启动方法如2.4小结,当然,也可以在终端里面启动,如下:

毫无疑问,先安装WSL(windows subsystem linux是必须的)
1 WSL(适用于 Linux 的 Windows 子系统)的安装:
开发人员可以在 Windows 计算机上同时访问 Windows 和 Linux 的强大功能。 通过适用于 Linux 的 Windows 子系统 (WSL),开发人员可以安装 Linux 发行版(例如 Ubuntu、OpenSUSE、Kali、Debian、Arch Linux 等),并直接在 Windows 上使用 Linux 应用程序、实用程序和 Bash 命令行工具,不用进行任何修改,也无需承担传统虚拟机或双启动设置的费用。
1.1 管理员模式运行 PowerShell 或 Windows CMD

1.2 确认一下,自己的电脑以前有没有装WSL
wsl -l -v如果命令无法执行,或者找不到linux的版本,那就是没装过,继续下面的步骤:
1.3 wsl安装
输入下面命令
wsl --install
dism.exe /online /enable-feature /featurename:Microsoft-Windows-Subsystem-Linux /all /norestart
dism.exe /online /enable-feature /featurename:VirtualMachinePlatform /all /norestart
wsl --set-default-version 2
1.4 注意,每次安装后,要重启电脑,否则步骤白做。
2 安装LINUX系统,@Ubuntu:【命令行方式下载】
2.1 方法一
这里微软的guide给了很多可能的方法,最傻的办法,就是用windows的软件商店,下载一个ubuntu。这看起来时候很完美,但是,笔者的电脑因为资源的原因,C盘已经很紧张了,在C盘里面挤进去任何东西,都会音响整个系统的效率。用windows软件商店直接下载安装的办法,因为笔者完全不知道windows给装哪里去了,因为没有选择项,可以,预计,大概率就是C盘user\appdata之类地方,所以,这个方法笔者就不用了,这里参考了:装到D盘的自己定制的方法。笔者自己做了一遍,亲测可用【详见参考2】
2.1.1 在D盘要安装的位置新建linux文件夹:
(base) PS C:\WINDOWS\system32> d:
(base) PS D:\> cd .\Linux\
新建,并进入这个文件夹
2.1.2 下载Ubuntu:
Invoke-WebRequest -Uri https://wsldownload.azureedge.net/Ubuntu_2004.2020.424.0_x64.appx -OutFile Ubuntu20.04.appx -UseBasicParsing下载需要一定的时间,泡个咖啡:========================================也许你可以找一个其他更快的网站
(base) PS D:\Linux> ls
目录: D:\Linux
Mode LastWriteTime Length Name
---- ------------- ------ ----
-a---- 2022/12/29 1:17 452997756 Ubuntu20.04.appx
(base) PS D:\Linux> Rename-Item .\Ubuntu20.04.appx Ubuntu.zip(base) PS D:\Linux> Expand-Archive .\Ubuntu.zip -Verbose
详细信息: 正在准备扩展...
详细信息: 正在目标“D:\Linux\Ubuntu.zip”上执行操作“Expand-Archive”。
详细信息: 正在目标“目标: D:\Linux\Ubuntu”上执行操作“创建目录”。
详细信息: 已创建“D:\Linux\Ubuntu\Assets\SmallTile.scale-200.png”。
详细信息: 已创建“D:\Linux\Ubuntu\Assets\SplashScreen.scale-200.png”。
详细信息: 已创建“D:\Linux\Ubuntu\Assets\Square150x150Logo.scale-200.png”。
详细信息: 已创建“D:\Linux\Ubuntu\Assets\LargeTile.scale-200.png”。
详细信息: 已创建“D:\Linux\Ubuntu\Assets\Square44x44Logo.altform-unplated_targetsize-16.png”。
详细信息: 已创建“D:\Linux\Ubuntu\Assets\Square44x44Logo.altform-unplated_targetsize-256.png”。
详细信息: 已创建“D:\Linux\Ubuntu\Assets\Square44x44Logo.altform-unplated_targetsize-32.png”。
详细信息: 已创建“D:\Linux\Ubuntu\Assets\Square44x44Logo.altform-unplated_targetsize-48.png”。
详细信息: 已创建“D:\Linux\Ubuntu\Assets\Square44x44Logo.scale-200.png”。
详细信息: 已创建“D:\Linux\Ubuntu\Assets\Square44x44Logo.targetsize-16.png”。
详细信息: 已创建“D:\Linux\Ubuntu\Assets\Square44x44Logo.targetsize-24.png”。
详细信息: 已创建“D:\Linux\Ubuntu\Assets\Square44x44Logo.targetsize-24_altform-unplated.png”。
详细信息: 已创建“D:\Linux\Ubuntu\Assets\Square44x44Logo.targetsize-256.png”。
详细信息: 已创建“D:\Linux\Ubuntu\Assets\Square44x44Logo.targetsize-32.png”。
详细信息: 已创建“D:\Linux\Ubuntu\Assets\Square44x44Logo.targetsize-48.png”。
详细信息: 已创建“D:\Linux\Ubuntu\Assets\StoreLogo.scale-200.png”。
详细信息: 已创建“D:\Linux\Ubuntu\Assets\Wide310x150Logo.scale-200.png”。
详细信息: 已创建“D:\Linux\Ubuntu\resources.pri”。
详细信息: 已创建“D:\Linux\Ubuntu\install.tar.gz”。
详细信息: 已创建“D:\Linux\Ubuntu\ubuntu2004.exe”。
详细信息: 已创建“D:\Linux\Ubuntu\AppxManifest.xml”。
详细信息: 已创建“D:\Linux\Ubuntu\AppxBlockMap.xml”。
详细信息: 已创建“D:\Linux\Ubuntu\[Content_Types].xml”。
详细信息: 已创建“D:\Linux\Ubuntu\AppxMetadata\CodeIntegrity.cat”。
详细信息: 已创建“D:\Linux\Ubuntu\AppxSignature.p7x”。然后执行下面四条命令。如下图
Rename-Item .\Ubuntu20.04.appx Ubuntu.zip
Expand-Archive .\Ubuntu.zip -Verbose
cd .\Ubuntu\
.\ubuntu2004.exe
(base) PS D:\Linux> cd .\Ubuntu\
(base) PS D:\Linux\Ubuntu> .\ubuntu2004.exe
Installing, this may take a few minutes...由于第一次安装,这时候,会询问你的用户名:
Please create a default UNIX user account. The username does not need to match your Windows username.
For more information visit: https://aka.ms/wslusers
Enter new UNIX username:
我们是给donkeycar,用的,用donkeycar01,密码:123456【案,笔者自己的笔记,以后怕自己忘了,密码不密呵呵】
Enter new UNIX username: donkeycar01
New password:
Retype new password:
passwd: password updated successfully
Installation successful!
适用于 Linux 的 Windows 子系统现已在 Microsoft Store 中可用!
你可以通过运行“wsl.exe --update”或通过访问 https://aka.ms/wslstorepage 进行升级
从 Microsoft Store 安装 WSL 将可以更快地获取最新的 WSL 更新。
有关详细信息,请访问 https://aka.ms/wslstoreinfoTo run a command as administrator (user "root"), use "sudo <command>".
See "man sudo_root" for details.Welcome to Ubuntu 20.04 LTS (GNU/Linux 5.10.16.3-microsoft-standard-WSL2 x86_64)
* Documentation: https://help.ubuntu.com
* Management: https://landscape.canonical.com
* Support: https://ubuntu.com/advantageSystem information as of Thu Dec 29 08:06:48 CST 2022
System load: 0.05 Processes: 8
Usage of /: 0.4% of 250.98GB Users logged in: 0
Memory usage: 0% IPv4 address for eth0: 172.26.219.242
Swap usage: 0%0 updates can be installed immediately.
0 of these updates are security updates.
The list of available updates is more than a week old.
To check for new updates run: sudo apt update
This message is shown once once a day. To disable it please create the
/home/donkeycar01/.hushlogin file.
2.2 方法2:
2.2.2 命令行的方法:
- 【案,我们在2.2已经做了这个工作,但是,我感觉官网的方法更好,所以,还是有必要搞出来,做参考】
- 先打开:Powershell
- 然后用,去看一下所有支持WSL的linux的版本
wsl --list --online
- 找到一个版本,然后安装
wsl --install -d Ubuntu-20.04
【这个方法是搞到了C盘里面,不知道,如果先进到一个D盘的目录,然后安装会不会好一点?】
安装成功后,windows会提示你以后可以做那些事情。而且直接进到你刚才的系统里面:

这样就已经安装好了一个ubuntu的版本,但是,这个版本是不带GUI,这个很不方便,后面,我们要把他搞成带GUI的。
2.3 查看安装的版本:
因为刚才已经自动进入我们的linux系统了,要查看安装,需要打开一个新的Powershell,然后,在windows的命令行查看:
【案,当完成了linux安装后,有两个命令行,一个是windows,一个是linux,和操控linux发行版本有关的wsl都在windows cmd里面,别弄错了】
wsl -l -v
【案,笔者还是尝试了用微软的软件商店去安装的方式,结果发现,两个版本好像会冲突,anyway,最终失败了,步骤记录如下,大家可以跳过】
Ubuntu官网先给出了windows应用商店的方式,由于笔者这部分没有做,大家自己去看一下官网:Download Ubuntu
3 安装LINUX系统,@Ubuntu:【在微软的应用商店】,下载安装Ubuntu 20.04.5 LTS:

这样在windows开始菜单,就可以访问:

打开后,注意,现在是带ubuntu的图标。

4 给WSL安装图形的界面:
【案,在运行linux@windows之前,需要在windows安装一个displayer,这个displayer是跑在windows里面,然后,linux发行版本,例如ubuntu跑起来,要设置到display的设备,这样就可以在windows里面虚拟显示了,这个能显示的软件库和版本很多,VcXsrv似乎用的很多,笔者这里也就随大流了】
【案,也有不用安装displayer,安装一个远程访问,似乎也可以,我们先看本地搞一个虚拟显示器的方法,这样可以避免去配置网络的东西】
4.1 步骤1:在windows安装VcXsrv


【案,对第一个显示实例,注意Display number 要设置为0】【案,注意选择显示方式,One large window】


[案,为避免没法,访问控制也去掉] ,点击完成,应该是一个黑色的窗口。以后,ubuntu的GUI界面就在里面显示。


【上面的访问控制要勾选,否则有时候会报错】
【报错例子】
donkeycar@DESKTOP-M4INDEG:~$ Authorization required, but no authorization protocol specified
Error: Can't open display: 172.31.48.1:0.0
^C
[1]+  Exit 1
4.2 步骤2:开始在ubuntu下安装图形界面:
ubuntu下的图形界面支持的方式很多,有一些很简单包就可以实现,也有需要比较反正的整合的库和包
4.2.1 简单的图形界面支持:
官网强调了,更新需要更新所有的最新的包,这点是前面忽略掉的
先在ubuntu下做:
sudo apt update然后,做一个彻底更新:
sudo apt full-upgradesudo nano /etc/wsl.conf在wsl.conf里面增加下面这段:
[boot]
systemd=true
然后,通过在windows 下用powershell运行命令:
wsl --shutdown重启ubuntu,在ubuntu下
- 先更新最新的包:
sudo apt update- 先试试看X11的小应用
sudo apt install x11-apps5 运行简单的GUI程序
5.1 亲测@Ubuntu最新版本,如果你的电脑WSL是版本2,但不是windows的软件仓库版本:
【案,笔者亲测,如果你的 WSL不是微软仓库版本,那么,一定要借助一些工具Xlaunch等来做GUI的显示】
5.1.1 运行前准备:
电脑版本wsl,需要通过Xlaunch,来显示,Xlaunch需要先设置一下防火墙,以免被墙。
否则会报错【Can't open display:的报错解决】问题解决1:
donkeycar01@DESKTOP-M4INDEG:~$ xcalc
Error: Can't open display: 172.17.80.1:0.0Error: Can't open display: 172.17.80.1:0.0
[1]+ Exit 1 xeyes
【案,笔者在这里找了很久的原因,
1 怀疑配置错误了,DISPLAY 0.0的配置错误?结果不是,在vi ~/.bashrc的配置是正确的
2 怀疑是内部网址不对?172.17.80.1 用ipconfig 查了,没错
3 防火墙的问题吗?
】
确实是windows防火墙问题:解决办法:


【案,在“允许应用通过防火墙,这个设置里面,我们点击后出现了豁免的程序列表,我们之前装上,用于显示ubuntu的VcXsrv,某些权限没有开,如下图,我们勾选两个xserver的权限都放开,然后,我们再运行”】
打开了权限后,刚才x11的GUI的应用可以跑了,这样GUI的运行环境准备好了。
5.1.1 运行:
运行:xeyes, a “follow the mouse” application
xeyes &【案,&是异步运行的意思,命令行响应是即使的,但是程序的运行是后台的,运行的时候遇到了一个无法显示的问题】
【Can't open display:的报错解决】问题解决2:
我们还有可能遇到下面这个原因:显示设备没有绑定,导致,ubuntu和windows的displayer 没有连接起来:
解决步骤:1,把这段代码,加入到~/.bashrc的最后,
export DISPLAY=localhost:0.0
export DISPLAY=`cat /etc/resolv.conf | grep nameserver | awk '{print $2}'`:0.0
【案,注意啊,0.0 和 0是有区别的,笔者被坑了两次】
然后,别忘了执行下面的语句,使能,
source ~/.bashrc然后,记得打开,Xlaunch。


5.2 亲测@Ubuntu20.04版本,且如果你的电脑WSL是在微软软件仓库下的:【所谓有版本的版本】
【在微软的仓库下载WSL安装后,微软会自动把你安装的LINUX的东西嵌在windwos里面,比如下面的图】

【ok,这看起来非常的...乱对吧,但是,他有效,能工作,而且就不需要XLaunch了,也不要搞一堆配置,什么编辑~/.bashrc,加入WSL的IP配置啥的,通通都不要做了】
wsl -- version 有反应的版本,那么,正如微软官网说的,你直接运行就可以了
xeyes &直接就有结果啊:


6 完整的桌面图形界面支持:
方法1:Xfce4 + Xlaunch
【在进行完整的图形界面之前,因为有很多配置,笔者,建议先备份一些当前的镜像,具体方法,可以看我的另外一篇博客】
【案,由于我们选的是ubuntu的最新更新版本,所以apt update我看可以省略,别搞了,直接装了】
donkeycar@DESKTOP-M4INDEG:~$ sudo apt-get install xfce4【会自动弹出一个配置窗口,可见Xfc4其实可以选择两种显示管理器gdm3或者Lightdm,下面这篇安装说明是取于安装包的配置说明,里面提到X window系统只能有一个显示管理来对应,你可以安装多显示管理器,但是默认的只能有一个,可以通过/etc/init.d去配置】
A display manager is a program that provides graphical login capabilities for the X Window System. Only one display manager can manage a given X server, but multiple display manager packages are installed. Please select which display manager should run by default. Multiple display managers can run simultaneously if they are configured to manage different servers; to achieve this, configure the display managers accordingly, edit each of their init scripts in/etc/init.d, and disable the check for a default display manager. Default display manager:

【案,gdm3是gdm-gnome display Mananger的继承者,其实呀也是GNOME,只不过是更轻量级的gnome-shell版本】有关多个桌面版本的安装和说明看这篇博客
通过以下命令可以查询你的桌面版本
cat /etc/X11/default-display-manager
通过以下命令可以关闭某个桌面版本
sudo service gdm3 stop
笔者没有遇到任何问题,安装好后,最好给出几个处理的目标服务的版本号,这个大概要记录一下
Processing triggers for dbus (1.12.16-2ubuntu2.3) ...
Processing triggers for systemd (245.4-4ubuntu3.19) ...
Processing triggers for sgml-base (1.29.1) ...
[1]+ Done xeyes
条件1:WLS windows仓库版本[email protected]版本Ubutu,
然后,直接运行:
donkeycar@DESKTOP-M4INDEG:~$ startxfce4- 报错1:【这个是因为,笔者开路Xlaunch...,反而搞不好了....】

/usr/bin/startxfce4: X server already running on display :0
_IceTransmkdir: ERROR: euid != 0,directory /tmp/.ICE-unix will not be created.
/usr/bin/iceauth:  creating new authority file /run/user/1000//ICEauthority
gpg-agent[14629]: WARNING: "--write-env-file" is an obsolete option - it has no effect
gpg-agent[14629]: directory '/home/donkeycar/.gnupg' created
gpg-agent[14629]: directory '/home/donkeycar/.gnupg/private-keys-v1.d' created
gpg-agent: a gpg-agent is already running - not starting a new one
【解决,干掉Xlaunch就好了】
- 报错2,【这个是因为我没有用root权限,】

donkeycar@DESKTOP-M4INDEG:~$ startxfce4
/usr/bin/startxfce4: X server already running on display :0
_IceTransmkdir: Owner of /tmp/.ICE-unix should be set to root
gpg-agent[15891]: WARNING: "--write-env-file" is an obsolete option - it has no effect
gpg-agent: a gpg-agent is already running - not starting a new one
【解决,加root权限设定】
donkeycar@DESKTOP-M4INDEG:~$ sudo gnome-session然后,就可以了,这个版本非常完美的嵌入在你现在的windows程序里面了,完全没有违和感。

【案,这是笔者的多窗口的windwos桌面和Ubuntu的东西在一起】

- 如果你非要用一个独立的窗口界面,那就要用Launch软件,而且ubuntu也有配置:(可以参考这个博客:Xfce4 Desktop Environment and X Server for Ubuntu on WSL 2)
你首先要查一下windows给WSL分配的IP地址:【在PowerShell里面查】
(base) PS D:\Linux\Ubuntu> ipconfig

Windows IP 配置


以太网适配器 vEthernet (WSL):

   连接特定的 DNS 后缀 . . . . . . . :
   本地链接 IPv6 地址. . . . . . . . : fe80::ebdb:9de8:6cfa:6bfe%61
   IPv4 地址 . . . . . . . . . . . . : 172.19.96.1
   子网掩码  . . . . . . . . . . . . : 255.255.240.0
   默认网关. . . . . . . . . . . . . :
然后 在ubuntu里面,你要搞一下配置
nano .bashrc
在文件末尾加入,export DISPLAY=172.19.96.1:0
然后运行:
source ~/.bashrc然后, 参考 本章4.1小结,打开XLaunch,再执行 【案,这里XLaunch的配置用多窗口,然后,勾选不用用户验证即可,不需要配置Display port,因为默认-1表述系统自动搞】

Xlaunch会自动寄存在windows任务里面,你再执行,就会得到一个独立完整的GUI的ubuntu界面
donkeycar@DESKTOP-M4INDEG:~$ sudo startxfce4 &当然,你也可以选一个大窗口的,都可以,

【默认的浏览器不能工作,sudo apt-get install firefox 装一个就可以了】
条件2:WLS 非windows仓库版本+@版本Ubutu22.04,
这个配置下,必须用全面安装的Xlaunch工具才可了。
donkeycar@DESKTOP-M4INDEG:~$ sudo startxfce4
感觉,Xfce4,还是很轻巧的界面,可以一用啊。

6.2 完整的图形界面支持:方法2:gnome + Xlaunch
准备工作1:准备快速下载工具APT-FAST
【案,现在我们尝试搞一下ubuntu官方默认的gnome,这个GUI的包和系统systemd的配置紧密结合的,所以,先备份,然后再安装】
(base) PS C:\Users\frank_sj> wsl -t Ubuntu
(base) PS C:\Users\frank_sj> wsl --list --verbose
NAME STATE VERSION
* Ubuntu Running 2
(base) PS C:\Users\frank_sj> wsl -t Ubuntu
(base) PS C:\Users\frank_sj> wsl --list --verbose
NAME STATE VERSION
* Ubuntu Stopped 2
(base) PS C:\Users\frank_sj> wsl --export Ubuntu D:\WSLvm\Ubuntu-xfce4ok.tar开始安装,
sudo apt install ubuntu-desktop花的时间有的长啊, 笔者,后面有一个可选的更好的方法,大家请看后面借鉴一下。

【方法升级,用apt-fast 多线程下载】
【案,这个配置是可选的,笔者亲测,ubuntu的服务器,有时候现在速度也挺快的,每秒10M,没太有必要非要用APT-FAST】
步骤1: 安装Axel多线程下载工具
donkeycar@DESKTOP-M4INDEG:~$ sudo apt install axel步骤2:安装apt-fast
将PPA添加到资源列表
donkeycar@DESKTOP-M4INDEG:~$ sudo add-apt-repository ppa:apt-fast/stable安装apt-fast
sudo apt -y install apt-fast 设定你要升级的安装程序,当然,选apt,因为ubuntu用他,

然后,我的CPU是4核8线程,我们搞个8连接不过啊,回车确认

然后,选yes,

然后,配置一下,apt-fast,
donkeycar@DESKTOP-M4INDEG:~$ sudo nano /etc/apt-fast.conf把MIRRORS使能

这样我们就安装好了APT-FAST,提高了速度。
然后,我们用新的方法,下载gnome看看,
sudo apt-fast install ubuntu-desktop gnome
这是8线程的结果,希望快一点啊

非常给力,大约半分钟,下完了,开始安装

八倍速度就是快啊,
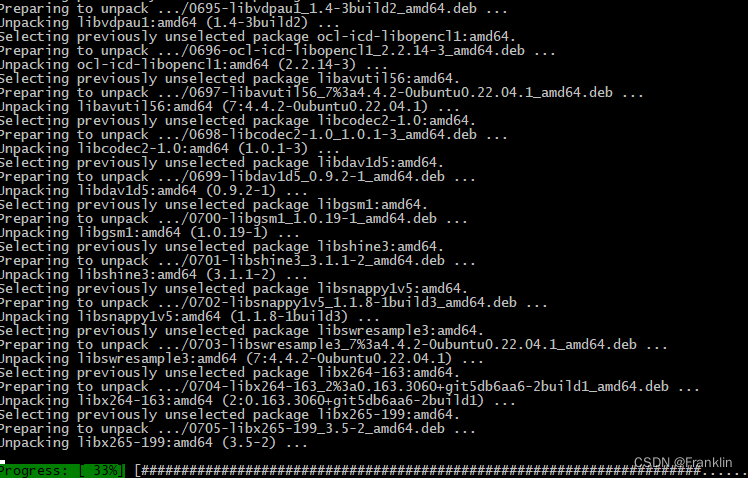
安装成功了,
Creating config file /etc/gdm3/greeter.dconf-defaults with new version
update-alternatives: using /etc/pam.d/gdm-smartcard-sssd-exclusive to provide /etc/pam.d/gdm-smartcard (gdm-smartcard) in auto mode
invoke-rc.d: could not determine current runlevel
* Scheduling reload of GNOME Display Manager configuration gdm3 [ OK ]
Setting up gnome-todo (3.28.1-6ubuntu1) ...
Setting up libfolks-eds26:amd64 (0.15.5-2) ...
Setting up evolution-plugin-pstimport (3.44.4-0ubuntu1) ...
Setting up gnome-shell-extension-prefs (42.5-0ubuntu1) ...
Setting up gnome-shell-extension-desktop-icons-ng (43-2ubuntu1) ...
Setting up gnome-session (42.0-1ubuntu2) ...
Setting up gnome-shell-extensions (42.1-0ubuntu1) ...
Setting up chrome-gnome-shell (10.1-5) ...
Setting up gnome-contacts (41.0-2) ...
Setting up gnome-shell-extension-ubuntu-dock (72~ubuntu5.22.04.1) ...
Setting up gnome-core (1:42+3) ...
Setting up ubuntu-desktop-minimal (1.481) ...
Setting up gnome (1:42+3) ...
Setting up ubuntu-desktop (1.481) ...
Processing triggers for dictionaries-common (1.28.14) ...
Processing triggers for initramfs-tools (0.140ubuntu13.1) ...
Processing triggers for rygel (0.40.3-1ubuntu2) ...
Processing triggers for libc-bin (2.35-0ubuntu3.1) ...
/sbin/ldconfig.real: Can't link /usr/lib/wsl/lib/libnvoptix_loader.so.1 to libnvoptix.so.1
/sbin/ldconfig.real: /usr/lib/wsl/lib/libcuda.so.1 is not a symbolic linkProcessing triggers for dbus (1.12.20-2ubuntu4.1) ...
然后,这个配置和之前有没有冲突呢,试试看:如果,我们现在直接运行,gnome-session

【案,由于gnome需要systemD的支持,所以,我们必须先安装SYSTEMD,具体看准备工作2】
【案,笔者是先安装SYSTEMD-理由是笔者需要备份还原,以免安装失败,安装gnome后,镜像会很大,太慢了。在安装gnome,在ubuntu22.0的版本上,有一个systemd和install gnome的冲突问题,会导致安装失败,这个在我的另外一篇博客WSL[06]里面记录了,感兴趣可去看看,不过我们先回答正常步骤,在安装好gnome之后,再安装systemd】
准备工作2:准备好系统工具SYSTEMD
安装systemd,需要下载SystemD的包,并执行一下脚本:
git clone https://github.com/DamionGans/ubuntu-wsl2-systemd-script.git
然后,要注意,22版本的ubuntu要修改一下配置,否则,会出现,系统启动挂机的现象。

【遇到问题:】
【Sleeping for 1 second to let systemd settle
nsenter: cannot open /proc/30/ns/time: No such file or directory】

原因是,开机脚本有问题,这里,
解决办法,具体参阅笔者的一篇博客:[WSL] [05] 配置systemD 和解决nsenter: cannot open /proc/320/ns/time: No such file or directory 的问题_Franklin的博客-CSDN博客
我们进去文件夹:
donkeycar@DESKTOP-M4INDEG:~$ cd ubuntu-wsl2-systemd-script/
donkeycar@DESKTOP-M4INDEG:~/ubuntu-wsl2-systemd-script$ ls
README.md  enter-systemd-namespace  start-systemd-namespace  ubuntu-wsl2-systemd-script.sh
donkeycar@DESKTOP-M4INDEG:~/ubuntu-wsl2-systemd-script$ sudo nano enter-systemd-namespace 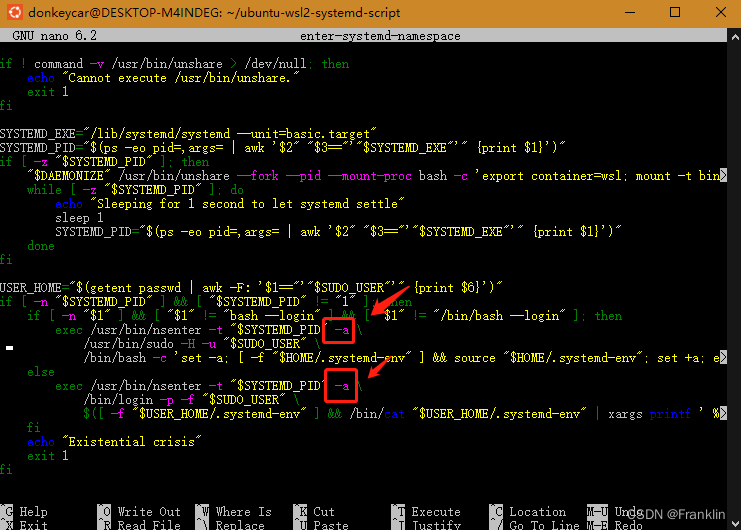
把-a,都改掉为 -m,-p
也就是

然后 ,我们再执行脚本安装systemd
bash ubuntu-wsl2-systemd-script.sh通过WSL,重启机器,
(base) PS C:\Users\frank_sj\AppData\Local\Microsoft\WindowsApps> wsl --list --verbose
  NAME      STATE           VERSION
* Ubuntu    Running         2
(base) PS C:\Users\frank_sj\AppData\Local\Microsoft\WindowsApps> wsl -t Ubuntu
(base) PS C:\Users\frank_sj\AppData\Local\Microsoft\WindowsApps> wsl -t Ubuntu
(base) PS C:\Users\frank_sj\AppData\Local\Microsoft\WindowsApps> wsl --list --verbose
  NAME      STATE           VERSION
* Ubuntu    Stopped         2
从菜单重启,或者WLS命令行重启都可以

2023-01-03T07:24:42+08:00 INFO failed to update "gtk-common-themes", will not have required content "gtk-3-themes, icon-themes, sound-themes": snap has no updates available
Progress: [ 0%] [..................................................................................................]
Progress: [ 0%] [.................................................................................................]Progress: [ 0%] [................................................................................................]
Progress: [ 0%] [...............................................................................................]
error: cannot perform the following tasks:......................................................................]
- Run configure hook of "firefox" snap if present (run hook "configure": cannot perform operation: mount --rbind /dev /tmp/snap.rootfs_pG0HfN//dev: No such file or directory).........................................................]
dpkg: error processing archive /var/cache/apt/archives/firefox_1%3a1snap1-0ubuntu2_amd64.deb (--unpack):
new firefox package pre-installation script subprocess returned error exit status 1
E: Sub-process /usr/bin/dpkg returned an error code (1)
git clone https://github.com/DamionGans/ubuntu-wsl2-systemd-script.git
cd ubuntu-wsl2-systemd-script/
bash ubuntu-wsl2-systemd-script.sh
(base) PS C:\Users\frank_sj> wsl bash --norc
nsenter: cannot open /proc/30/ns/time: No such file or directory
(base) PS C:\Users\frank_sj>
3.5 运行ubuntu的桌面:
先打开:XLaunch,
在ubuntu命令行里面输入:
gnome-session 

【案,上来就是一对基础设置,然后,就是你见到的界面了】

【其他报错】

[出现错误 2147942402 (0x80070002) (启动“ubuntu2004.exe”时)]
【案,原因:之前配置的Ubuntu,似乎搞串了,这里把ubuntu.exe改成下图这个就可以】

C:\WINDOWS\system32\wsl.exe -d Ubuntu-20.04
参考:
2 重要参考:
Windows10/11 三步安装wsl2 Ubuntu20.04(任意盘) - 知乎 (zhihu.com)
https://zhuanlan.zhihu.com/p/4660018383
3 Ubuntu安装图形界面:
WSL2+Ubuntu18.04+gnome图形界面+docker搭建开发环境_ElasticForce的博客-CSDN博客_wsl安装gnome图形界面
4 (1条消息) win10 WSL2 Ubuntu图像化界面安装和配置_到瑞米法扫拉西的博客-CSDN博客_wsl图像
5 Install Ubuntu on WSL2 and get started with graphical applications | Ubuntu