清空日志
cat /dev/null > 文件路径\\file_name
查看tomcat运行日志
tail -f /路径../tomcat/logs/catalina.out
修改文件或者文件夹的拥有者
chown将指定文件的拥有者改为指定的用户或组
chown -R webuser.webuser /../文件夹或者文件名
chown -R root.root/../文件夹或者文件名
更改文件9个属性chmod
- linux 文件的基本权限就有9个,分别是owner/group/others 三种身份,各有自己的read/write/execute权限
- 文件权限是三个为一组,例如【-rwxrwxrwx】,我们用数字来代替
r:4 w:2 x:1
每种身份(owner/group/others)各自的三个权限(r/w/x)都需要累加,上述权限即是:
owner = rwx = 4+2+1=7
group = rwx = 4+2+1=7
others = rwx = 4+2+1=7
即:
chmod 777 filename
重启tomcat 服务
service tomcat restart
查看tomcat 版本
进入tomcat的bin目录下:使用 ./version.sh
linux 基本命令失效1(临时有效)
当ls、vim 失效的时候,可以通过:
[root@chenxingen /]# export PATH=/usr/local/sbin:/usr/local/bin:/sbin:/bin:/usr/sbin:/usr/bin:/root/bin
[root@chenxingen /]# ls
linux 基本命令失效1(永久有效)

重新执行刚修改的初始化文件,使之立即生效,而不必注销并重新登录
filename必须是可执行的脚本文件
source filename
或者
注意“.”号后面还有一个空格. filename
linux 进入oracle
[root@...]# su oracle
[oracle@...]$ sqlplus /nolog
SQL>connect /as sysdba;
SQL>connected;
显示connected;表示已经连接成功;需要注意的问题就是

例如我们在输入sql语句的时候,发现我们输入错误了字符,此时我们使用 backspace键想进行删除,就会发生上述问题,我们正确的做法因该是:ctrl按住,再按backspace,就能够进行删除了
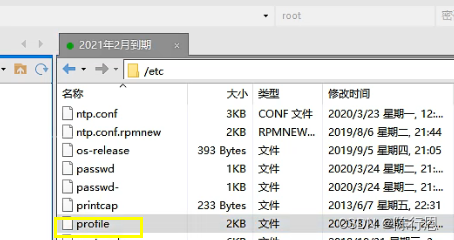
修改目录
[root@dbserver248068 /]# cd /usr/local/etc
[root@dbserver248068 etc]#
回退到上一个目录
[root@dbserver248068 ~]# cd ..
[root@dbserver248068 /]#
直接进入/Root目录
[root@dbserver248068 etc]# cd
[root@dbserver248068 ~]#
列出当前目录中的所有文件与文件名
[root@dbserver248068 /]# ls
bin   dev  home  lib64       media  opt   root  selinux  sys  u01  var
boot  etc  lib   lost+found  mnt    proc  sbin  srv      tmp  usr
重命名目录名或文件名
[root@localhost etc]# ls
IMG_20220714_205450.jpg  img.jpg  img.zip  test.txt  usr
[root@localhost etc]# mv test.txt test2.txt
[root@localhost etc]# ls
IMG_20220714_205450.jpg  img.jpg  img.zip  test2.txt  usr
[root@localhost etc]# mv usr usr2
[root@localhost etc]# ls
IMG_20220714_205450.jpg  img.jpg  img.zip  test2.txt  usr2
[root@localhost etc]#
列出当前目录中的所有文件(详细)
[root@dbserver248068 /]# ll
total 98
dr-xr-xr-x.   2 root   root      4096 Dec 30  2019 bin
dr-xr-xr-x.   5 root   root      1024 Dec 30  2019 boot
drwxr-xr-x   19 root   root      3700 Aug  9 13:52 dev
drwxr-xr-x.  93 root   root      4096 Aug  9 13:52 etc
drwxr-xr-x.   7 root   root      4096 Jun 20 19:49 home
dr-xr-xr-x.   9 root   root      4096 Dec 30  2019 lib
dr-xr-xr-x.  10 root   root     12288 Dec 30  2019 lib64
drwx------.   2 root   root     16384 Dec 30  2019 lost+found
drwxr-xr-x.   2 root   root      4096 Nov  1  2011 media
drwxr-xr-x.   2 root   root      4096 Nov  1  2011 mnt
drwxr-xr-x.   4 root   root      4096 Dec 30  2019 opt
dr-xr-xr-x  148 root   root         0 Aug  9 13:52 proc
dr-xr-x---.  21 root   root      4096 Jun 20 20:05 root
dr-xr-xr-x.   2 root   root     12288 Dec 30  2019 sbin
drwxr-xr-x.   2 root   root      4096 Dec 30  2019 selinux
drwxr-xr-x.   2 root   root      4096 Nov  1  2011 srv
dr-xr-xr-x   13 root   root         0 Aug  9 13:52 sys
drwxrwxrwt.  19 root   root      4096 Aug 22 23:03 tmp
drwxrwxr-x    3 oracle oinstall  4096 Dec 30  2019 u01
drwxr-xr-x.  15 root   root      4096 Mar 12  2020 usr
drwxr-xr-x.  20 root   root      4096 Dec 30  2019 var
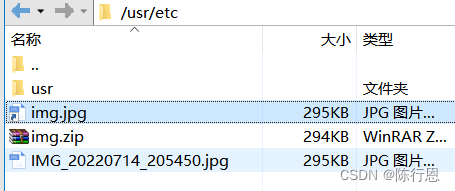
查找文件(某目录下查找)
[root@localhost etc]# tree /usr/etc/
/usr/etc/
├── IMG_20220714_205450.jpg
├── img.jpg -> /usr/etc/usr/etc/IMG_20220714_205450.jpg
├── img.zip
└── usr
    └── etc
        └── IMG_20220714_205450.jpg

2 directories, 4 files
[root@localhost etc]# find /usr/etc/ -name IMG_20220714_205450.jpg
/usr/etc/IMG_20220714_205450.jpg
/usr/etc/usr/etc/IMG_20220714_205450.jpg
查找指定用户新建或上传的文件
[root@localhost nginx]# ll
总用量 4
drwx------. 2 nobody root    6 8月  23 17:20 client_body_temp
drwxr-xr-x. 2 root   root 4096 8月  23 15:35 conf
drwx------. 2 nobody root    6 8月  23 17:20 fastcgi_temp
drwxr-xr-x. 2 root   root   40 8月  23 15:35 html
drwxr-xr-x. 2 root   root   41 8月  24 01:56 logs
drwx------. 2 nobody root    6 8月  23 17:20 proxy_temp
drwxr-xr-x. 2 root   root   19 8月  23 15:35 sbin
drwx------. 2 nobody root    6 8月  23 17:20 scgi_temp
drwx------. 2 nobody root    6 8月  23 17:20 uwsgi_temp
[root@localhost nginx]# find /usr/local/nginx/ -user root
/usr/local/nginx/
/usr/local/nginx/sbin
/usr/local/nginx/sbin/nginx
/usr/local/nginx/conf
/usr/local/nginx/conf/koi-win
/usr/local/nginx/conf/koi-utf
/usr/local/nginx/conf/win-utf
/usr/local/nginx/conf/mime.types
/usr/local/nginx/conf/mime.types.default
/usr/local/nginx/conf/fastcgi_params
/usr/local/nginx/conf/fastcgi_params.default
/usr/local/nginx/conf/fastcgi.conf
/usr/local/nginx/conf/fastcgi.conf.default
/usr/local/nginx/conf/uwsgi_params
/usr/local/nginx/conf/uwsgi_params.default
/usr/local/nginx/conf/scgi_params
/usr/local/nginx/conf/scgi_params.default
/usr/local/nginx/conf/nginx.conf
/usr/local/nginx/conf/nginx.conf.default
/usr/local/nginx/logs
/usr/local/nginx/logs/error.log
/usr/local/nginx/logs/access.log
/usr/local/nginx/html
/usr/local/nginx/html/50x.html
/usr/local/nginx/html/index.html
新建文件
[root@dbserver248068 etc]# ls
[root@dbserver248068 etc]# touch test.txt
[root@dbserver248068 etc]# ls
test.txt
[root@dbserver248068 etc]#
编辑文件
[root@localhost etc]# ls
IMG_20220714_205450.jpg  img.jpg  img.zip  test.txt  usr
[root@localhost etc]# cat test.txt
[root@localhost etc]# vi test.txt
[root@localhost etc]# cat test.txt
chenxingen
hello linux
[root@localhost etc]#
查看文件前几行数据
[root@localhost etc]# cat test.txt
chenxingen
hello linux
[root@localhost etc]# head -n 1 test.txt
chenxingen
[root@localhost etc]#
查看文件全部内容
[root@localhost etc]# cat test.txt
chenxingen
hello linux
[root@localhost etc]# cat -n test.txt
     1	chenxingen
     2	hello linux
[root@localhost etc]#
删除文件
[root@dbserver248068 etc]# rm test.txt
rm: remove regular empty file `test.txt'? y
[root@dbserver248068 etc]# ls
[root@dbserver248068 etc]#
新建一个目录
[root@dbserver248068 etc]# mkdir test
[root@dbserver248068 etc]# ls
test
删除文件夹
[root@dbserver248068 etc]# ls
test
[root@dbserver248068 etc]# rm -r test
rm: remove directory `test'? y
[root@dbserver248068 etc]# ls
[root@dbserver248068 etc]#
[root@localhost etc]# rm -r usr3
rm:是否进入目录"usr3"? y
rm:是否进入目录"usr3/etc"? y
rm:是否删除普通文件 "usr3/etc/IMG_20220714_205450.jpg"?y
rm:是否删除目录 "usr3/etc"?y
rm:是否删除目录 "usr3"?y
[root@localhost etc]# ls
IMG_20220714_205450.jpg  img.jpg  img.zip  test2.txt  usr2
复制目录并重命名
-r 表示操作日志,如果是文件则不需要加-r
[root@localhost etc]# cp -r usr2 usr3
[root@localhost etc]# ls
IMG_20220714_205450.jpg  img.jpg  img.zip  test2.txt  usr2  usr3
删除目录
[root@localhost etc]# ls
IMG_20220714_205450.jpg  img.jpg  img.zip  test2.txt  usr2  usr3
[root@localhost etc]# rmdir usr3
rmdir: 删除 "usr3" 失败: 目录非空
移动文件
[root@dbserver248068 etc]# ls
test
[root@dbserver248068 etc]# cd test
[root@dbserver248068 test]# touch test.txt
[root@dbserver248068 test]# ls
test.txt
[root@dbserver248068 test]# mv /usr/local/etc/test/test.txt /usr/local/etc
[root@dbserver248068 test]# ls
[root@dbserver248068 test]# cd ..
[root@dbserver248068 etc]# ls
test  test.txt
将 /usr/local/etc/test/test.txt 下的文件移动进 /usr/local/etc目录下
清屏
[root@dbserver248068 etc]# clear
或

[root@dbserver248068 etc]# reset
查看命令历史
[root@dbserver248068 etc]# history
    1  rm -rf /home/oracle/.bash_history
    2  rm -rf /root/.bash_history
    3  poweroff
    4  vi /etc/hosts
帮助
[root@dbserver248068 etc]# help
查看某命令的用法
[root@localhost etc]# rm --help
用法:rm [选项]... 文件...
Remove (unlink) the FILE(s).

  -f, --force           ignore nonexistent files and arguments, never prompt
  -i                    prompt before every removal
  -I                    prompt once before removing more than three files, or
	......
退出
[root@dbserver248068 etc]# exit
# 添加注释
检查是否安装了某种套件(工具)
[root@localhost ~]# rpm -qa python
python-2.7.5-90.el7.x86_64
[root@localhost ~]# rpm -qa zlib
zlib-1.2.7-19.el7_9.x86_64
[root@localhost ~]# rpm -qa gcc
gcc-4.8.5-44.el7.x86_64
[root@localhost ~]# rpm -qa pcre
pcre-8.32-17.el7.x86_64
查看当前路径(绝对路径)
[root@dbserver248068 usr]# pwd
/usr
以树状查看目录结构
[root@localhost usr]# tree /usr/tomcat/apache-tomcat-8.5.82/webapps/ssm_demo_war/WEB-INF/classes/
/usr/tomcat/apache-tomcat-8.5.82/webapps/ssm_demo_war/WEB-INF/classes/
├── applicationContext.xml
├── com
│   └── chenxingen
│       ├── APP.class
│       ├── controller
│       │   └── BookController.class
│       ├── dao
│       │   ├── BookMapper.class
│       │   └── BookMapper.xml
│       ├── pojo
│       │   └── Books.class
│       └── service
│           ├── BookService.class
│           └── BookServiceImpl.class
├── database.properties
├── mybatis-config.xml
├── spring-dao.xml
├── spring-mvc.xml
└── spring-service.xml
如果tree 是无效命令,请安装yum install tree
tar 实现解压缩 tar.gz
tar参数有
-z 表示压缩操作类型是 .tar.gz
-c 表示当前行为是打包
-x 表示当前行为是解压文件包
-v 参数要求显示命令执行过程
-f 指定打包后文件名
-C 解压到指定路径
常用压缩打包命令:
tar -zcvf tarname.tar.gz dir/file
常用解压命令:
tar -zxvf traname.tar.gz -C 指定解压后文件存放的位置
[root@localhost etc]# ls
IMG_20220714_205450.jpg
[root@localhost etc]# tar -zcvf img.tar.gz IMG_20220714_205450.jpg
IMG_20220714_205450.jpg
[root@localhost etc]# ls
IMG_20220714_205450.jpg  img.tar.gz
[root@localhost etc]# tar -zxvf img.tar.gz -C /usr/
IMG_20220714_205450.jpg
[root@localhost etc]# ls
IMG_20220714_205450.jpg  img.tar.gz
[root@localhost etc]# cd ..
[root@localhost usr]# ll
总用量 588
dr-xr-xr-x.   2 root root  53248 8月  24 14:50 bin
drwxr-xr-x.   2 root root     55 8月  24 16:37 etc
drwxr-xr-x.   2 root root      6 4月  11 2018 games
-rw-r--r--.   1 root root 302459 8月  24 16:03 IMG_20220714_205450.jpg
drwxr-xr-x.  60 root root   8192 8月  23 11:02 include
dr-xr-xr-x.  44 root root   4096 9月   3 2021 lib
dr-xr-xr-x. 148 root root  86016 9月   3 2021 lib64
drwxr-xr-x.  51 root root  12288 9月   3 2021 libexec
drwxr-xr-x.  14 root root    159 8月  23 15:35 local
dr-xr-xr-x.   2 root root  20480 9月   3 2021 sbin
drwxr-xr-x. 246 root root   8192 9月   3 2021 share
drwxr-xr-x.   4 root root     34 8月  31 2021 src
lrwxrwxrwx.   1 root root     10 8月  31 2021 tmp -> ../var/tmp
drwxr-xr-x.   3 root root     69 8月  24 02:06 tomcat
[root@localhost usr]#
gzip 实现解压缩 gz
gzip常用参数:
-d 解压gz压缩包
-c 控制台窗口打印压缩后文件内容,源文件不变,执行后不生成压缩包
-v 显示压缩百分比
-t 测试已压缩文件是否正确,需要文件压缩成压缩文件后执行
常用压缩命令:
gzip -c fileName > fileName.gz
常用解压缩命令:
gzip -dc fileName.gz > fileName
[root@localhost etc]# ls
IMG_20220714_205450.jpg
[root@localhost etc]# gzip -c IMG_20220714_205450.jpg > img.gz
[root@localhost etc]# ls
IMG_20220714_205450.jpg  img.gz
[root@localhost usr]# gzip -dc img.gz > /usr/img.jpg
[root@localhost usr]# ls
bin  etc  games  img.jpg  include  lib  lib64  libexec  local  sbin  share  src  tmp  tomcat
zip 实现解压缩 zip
zip常用参数:
-r 压缩文件夹,递归执行,压缩文件夹下所有文件
-q 不显示压缩过程,默认会在控制台打印压缩文件过程
-d 压缩过程中剔除指定文件, -d参数后跟随的文件不打包到压缩包里
-r 参数表示递归打包包含子目录的全部内容,
-o 表示输出文件,需在其后紧跟打包输出文件名或路径名。
压缩文件夹且排除指定文件不压缩:
zip -r -o zipname dirpath/ -d a.txt b.text
[root@localhost etc]# ls
IMG_20220714_205450.jpg
[root@localhost etc]# zip -r -o img.zip  /usr/etc/IMG_20220714_205450.jpg
  adding: usr/etc/IMG_20220714_205450.jpg (deflated 1%)
[root@localhost etc]# ls
IMG_20220714_205450.jpg  img.zip
unzip常用参数:
-n 解压后不覆盖已存在文件,如果压缩包文件中与解压路径有同名文件,跳过该文件
-v 控制台打印显示压缩包内容,但是不解压,-v参数只进行查看
-d 指定解压后文件存放路径
unzip常直接使用,解压到当前路径,覆盖同名文件:
unzip file.zip
解压到指定路径,不覆盖已有同名文件:
unzip -n file.zip -d dirpath/
[root@localhost etc]# unzip -n img.zip
Archive:  img.zip
   creating: usr/etc/
  inflating: usr/etc/IMG_20220714_205450.jpg
[root@localhost etc]# ls
IMG_20220714_205450.jpg  img.zip  usr
[root@localhost etc]# cd usr
[root@localhost usr]# ls
etc
[root@localhost usr]# cd etc
[root@localhost etc]# ls
IMG_20220714_205450.jpg
如果zip命令无效:
yum install zip -y
yum install unzip -y
如果需要加密打包:
[root@localhost etc]# ls
IMG_20220714_205450.jpg
[root@localhost etc]# zip -r -e -o img.zip /usr/etc/
Enter password:
Verify password:
  adding: usr/etc/ (stored 0%)
  adding: usr/etc/IMG_20220714_205450.jpg (deflated 1%)
[root@localhost etc]# ls
IMG_20220714_205450.jpg  img.zip
[root@localhost etc]# unzip -n img.zip
Archive:  img.zip
   creating: usr/etc/
[img.zip] usr/etc/IMG_20220714_205450.jpg password:
  inflating: usr/etc/IMG_20220714_205450.jpg
[root@localhost etc]# ls
IMG_20220714_205450.jpg  img.zip  usr
创建快捷方式
ln -s 源文件或目录 软链接名
[root@localhost etc]# tree /usr/etc/
/usr/etc/
├── IMG_20220714_205450.jpg
├── img.zip
└── usr
    └── etc
        └── IMG_20220714_205450.jpg

2 directories, 3 files
[root@localhost etc]# ln -s /usr/etc/usr/etc/IMG_20220714_205450.jpg /usr/etc/img.jpg
[root@localhost etc]# ll
总用量 592
-rw-r--r--. 1 root root 302459 8月  24 16:03 IMG_20220714_205450.jpg
lrwxrwxrwx. 1 root root     40 8月  24 17:39 img.jpg -> /usr/etc/usr/etc/IMG_20220714_205450.jpg
-rw-r--r--. 1 root root 301074 8月  24 16:03 img.zip
drwxr-xr-x. 3 root root     17 8月  24 17:23 usr
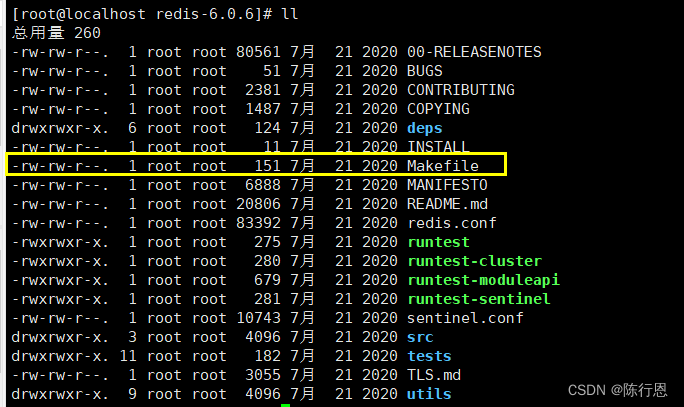
make 自动编译更新程序
例如在下载redis 之后,进入redis 安装目录,需要下载c/c++,环境,之后就需要使用make 进行自动编译更新程序,这个过程需要存在makefile目录
查看开启了那些端口
[root@localhost ~]# netstat -aptn