write less do more ——写得少做的多
通过 封装技巧,把原生DOM操作进行了封装
- 代码简化
- 自动遍历
- 函数重载机制-制作多功能的函数
用法:
- $:万能的函数
- $(字符串):当成是选择器来使用,找到元素里面的JQ对象
- $(DOM):元素封装到JQ对象里面
- JQ对象的原型中-存在很多的方法
- css:操作style内联样式
- click:批量点击事件
- class
- addClass :添加
- removeClass:删除
- toggleClass:切换
- 显示与隐藏
- show :显示
- hide:删除
- toggle :切换
- 选择器
- eq=(n):找出查询结果中序号n的元素
- parent():父元素
- siblings():兄弟元素
- next():下一个兄弟
jquery动画
我们知道动画主要分为两种
动画方式1:补间动画 transition
动画方式2:animation动画:专业的
而query是通过style来修改样式实现动画的
首先我们来尝试最基本的动画来尝试一下
案例:位置调整动画
查询出标签
const $box=$('#box')
注意:如果是jq对象则变量名用我们一般以$作为前缀,以区分(这是大家认可的规范
找到第一个button标签
$('button').eq(0).click(function() {


})
// 找到第一个button标签
然后设置动画
动画属性animate
第一个参数为style样式可以使用小驼峰的写法也可以直接写原版样式
第二个参数为动画时间单位为毫秒
参数三是动画完毕之后的回调函数
$box.animate({


	borderRadius:'50%'
})
当然也支持动画队列
$("button")
.eq(0)
.click(function () {


	// 让盒子变圆
	// animate:以动画的形式修改元素的style
	// 参数1:style样式
	$box.animate({


		borderRadius: "50%",
	});
	// 参数12
	$box.animate({


		top: "100px"
	},2000);
	// 参数123
	$box.animate({


		left: "100px"
	},2000,function(){


		alert("动画结束")
	});
});
动画停止使用stop的方法
参数1:清空动画队列(false/true)默认是关的
参数2:结束时是否跳转到动画结束时的状态(false/true)默认是关的
$('button').eq(1).click(function () {


	$box.stop(true,true)
})
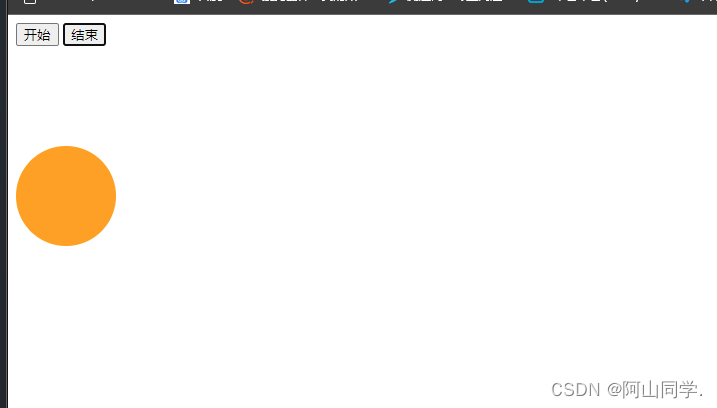
效果图:
主体框架代码:
<!DOCTYPE html>
<html lang="en">
	<head>
		<meta charset="UTF-8" />
		<meta http-equiv="X-UA-Compatible" content="IE=edge" />
		<meta name="viewport" content="width=device-width, initial-scale=1.0" />
		<title>Document</title>
		<style>
			#box {


				width: 100px;
				height: 100px;
				background-color: orange;
				position: relative;
			}
		</style>
	</head>
	<body>
		<button>开始</button>
		<button>结束</button>
		<div id="box"></div>
		<script src="./js/jquery-3.6.0.js"></script>
		<script>
			// 查询出标签
			const $box = $("#box");
			// 如果是jq对象则变量名用$作为前缀,以区分
			$("button")
				.eq(0)
				.click(function () {


					// 让盒子变圆
					// animate:以动画的形式修改元素的style
					// 参数1:style样式
					$box.animate({


						borderRadius: "50%",
					});
					// 参数12
					$box.animate(
						{


							top: "100px",
						},
						2000
					);
					// 参数123
					$box.animate(
						{


							left: "100px",
						},
						2000,
						function () {


							alert("动画结束");
						}
					);
				});
			$("button")
				.eq(1)
				.click(function () {


					$box.stop(true, true);
				});
			// 找到第一个button标签
		</script>
	</body>
</html>
jquery轮播图
首先准备好图片,不好准备的可以直接去下载我准备的图片
点击下载
轮播图的原理
图片如下图排列,当要切换的时候移动他的位置来达到切换的效果
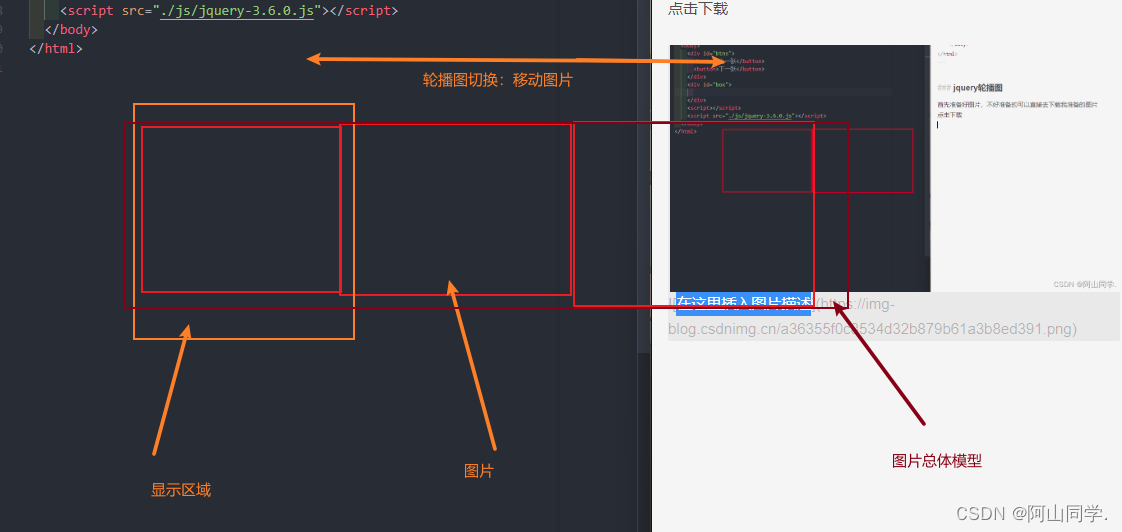
下面我们来制作一个轮播图
首先制作出框架然后再去写控件

代码如下
<!DOCTYPE html>
<html lang="en">
	<head>
		<meta charset="UTF-8" />
		<meta http-equiv="X-UA-Compatible" content="IE=edge" />
		<meta name="viewport" content="width=device-width, initial-scale=1.0" />
		<title>轮播图</title>
		<style>
			/* 样式 */
			/* 换页按钮 */
			* {


				margin: 0;
			}
			#img_box {


				width: 480px;
				height: 320px;
				/* overflow: hidden; */
				border-radius: 10px;
			}
			#img_box > #img_item {


				/* width: 480px; */
				height: 320px;
				overflow: hidden;
				border-radius: 10px;
				display: flex;
			}
			#img_box > #img_item > img {


				width: 480px;
				height: 320px;
			}
			#btn_too {


				width: 480px;
				height: 320px;
				position: fixed;
				top: 0;
        display: flex;
        justify-content: space-between;
        align-items: center;
			}
      #btn_too >button{


				width: 40px;
        height: 60px;
			}
			#btn_too > #list_item {


				width: 480px;
				height: 20px;
				display: flex;
				justify-content: center;
				position: absolute;
				bottom: 0;
			}
			#btn_too > #list_item > span {


				width: 12px;
				height: 12px;
				background-color: rgb(184, 182, 89);
				border-radius: 50%;
				display: inline-block;
        margin-left: 10px;
        margin-right: 10px;
				/* position: relative; */
				/* top: 0; */
			}
			#btn_too > #list_item > span.active {


				width: 12px;
				height: 12px;
				background-color: rgb(31, 31, 21);
				border-radius: 50%;
				display: inline-block;
        margin-left: 10px;
        margin-right: 10px;
			}
		</style>
	</head>
	<body>
		<div id="img_box">
			<div id="img_item">
				<img src="./img/1.jpg" alt="" />
				<img src="./img/2.jpg" alt="" />
				<img src="./img/3.jpg" alt="" />
				<img src="./img/4.jpg" alt="" />
			</div>
			<div id="btn_too">
				<button>上一张</button>
				<button>下一张</button>
				<div id="list_item">
					<span class="active"></span>
					<span></span>
					<span></span>
					<span></span>
				</div>
			</div>
		</div>
		<script src="./js/jquery-3.6.0.js"></script>
    <script>

    </script>
	</body>
</html>
现在我们开始来写控件
首先我们要给小圆点添加悬浮上去就高亮
 $('span').mouseover(function(){


    // 添加上class他的兄弟去除掉active状态
    $(this).addClass('active').siblings().removeClass('active');
})
不知道API的可以先去看我上一篇的jquery的文章
传送门:
我们实现了切换了之后接下来我们就要实现点击之后切换了
首先我们要获取
示意图:
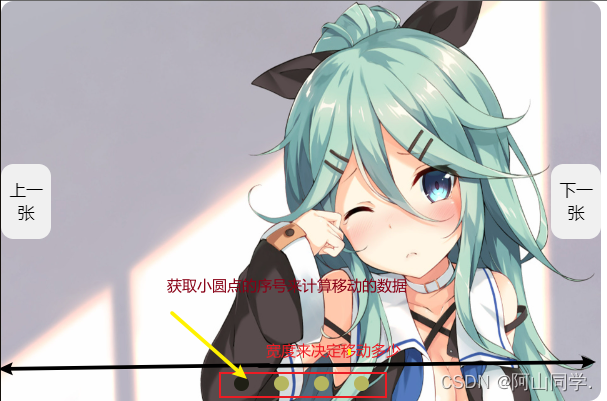
获取数据的代码:
// 获取轮播的宽度
const width = $('#img_item').width();
console.log(width);
// 获取当前小圆点的序号
const index=$(this).index();
console.log(index);
然后我们就可以实现获取他的数据

既然获取数据了我们要实现切换就简单了
我们先计算需要移动的数据然后去操作就可以了
	$("#img_item").animate({

     left: -(index * width) }, 1000);
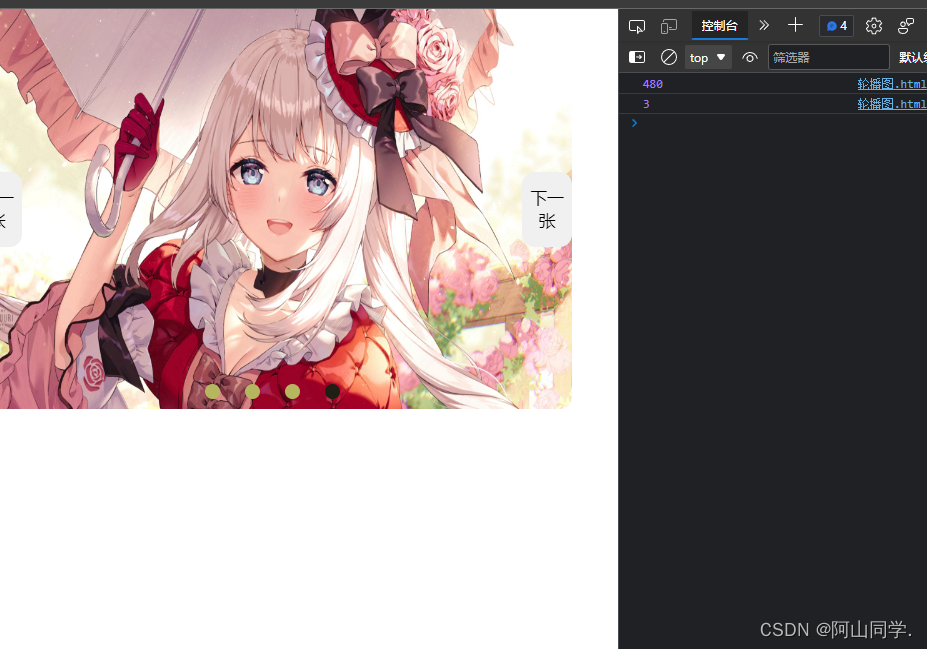
效果如下:
但是下面又出现了新的问题:
为什么我都没有放到导航栏上面他都还会继续动画呢?
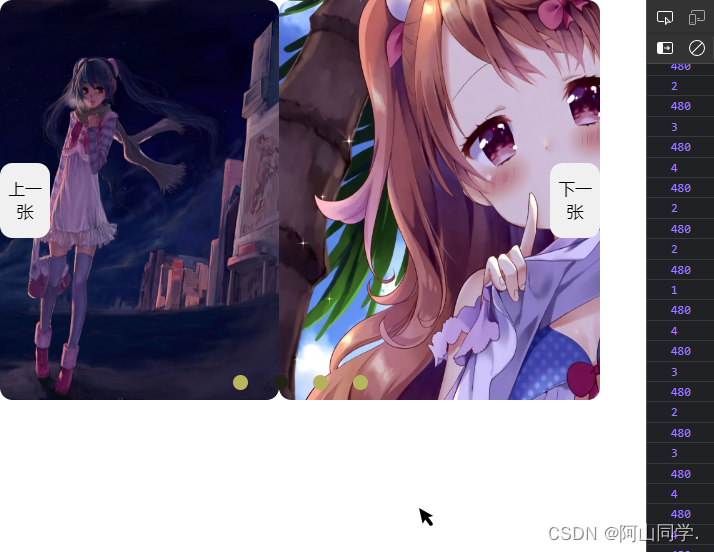
这是由于动画序列,要解决的话就需要在新的动画开始之前先移除之前的动画
现在我们实现了鼠标聚焦切换的操作了,现在我们要实现点击切换按钮切换的方式了
首先获取点击
$('#btn_too>button').eq(1).click(function () {


});
触发:首先获取当前激活小圆点的序号然后跳转 下一个小圆点的激活时间
但是现在是最后一个了我们要跳回第一个,所以我们需要判断一下
所以条件就是当前激活项与最后一个项目的时候
$('#btn_too>button').eq(1).click(function () {


  if($('span.active').index()==$('span:last-child').index()){


    $('span:first-child').mouseover();
    return 1
    // 终止函数执行,防止下面的执行之后跳到下面去(1=》2)
  }
    $("span.active").next().mouseover()
});
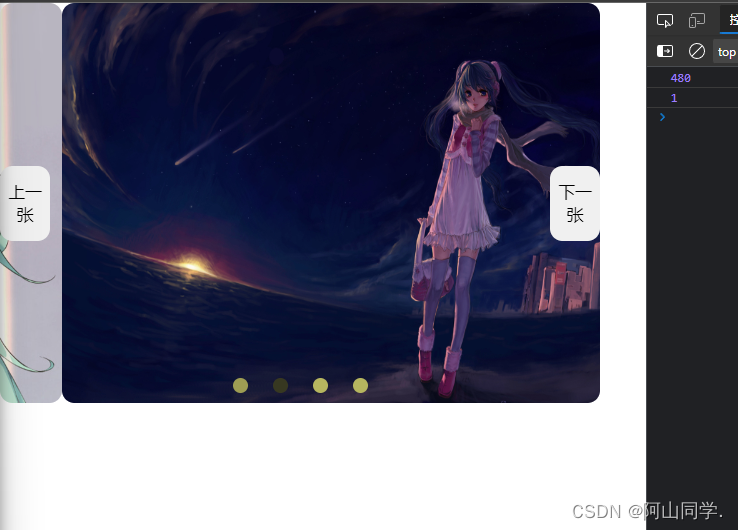
效果:

现在我们成功制作了点击和聚焦导航切换了,但是一个合格的轮播图就必须要有定时器才合格所以接下来我们制作定时器
实现代码:
// 定时器每xx秒触发下一页的活动
setInterval(() => {


  $('button').eq(1).click();
}, 3000);
完全代码:

jquery属性值的操作
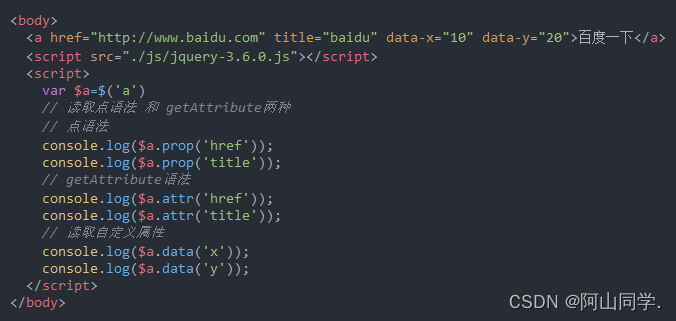
点语法
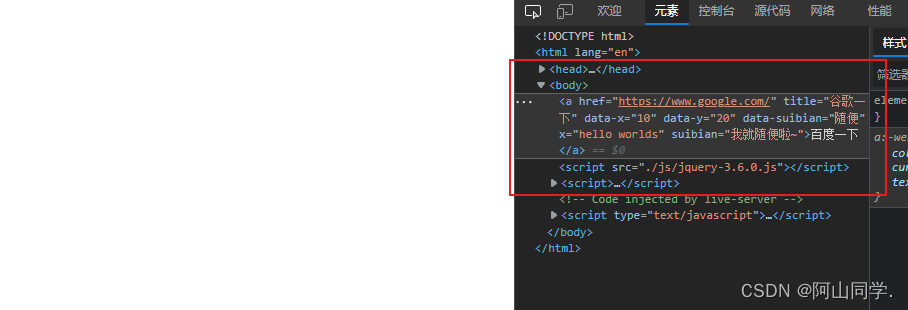
<body>
  <a href="http://www.baidu.com" title="baidu" data-x="10" data-y="20">百度一下</a>
  <script src="./js/jquery-3.6.0.js"></script>
  <script>
    var $a=$('a')
    // 读取点语法 和 getAttribute两种
    console.log($a.prop('href'));
    console.log($a.prop('title'));
  </script>
</body>

getAttribute方法

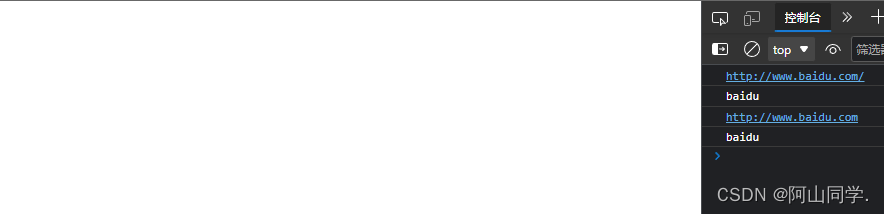
自定义属性——存在dataset里的属性
data方法:读取自定义属性
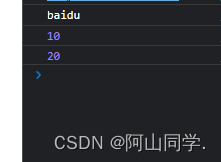
当然这些属性除了前面的data其他的都不是固定的
所以写的话就可以为
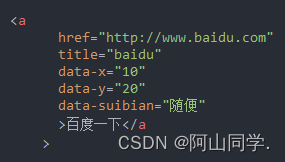
修改固定的属性
第一个参数:属性名
第二个参数:更新值
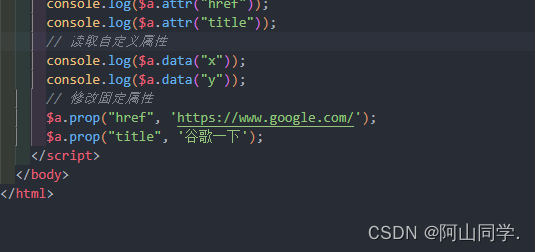
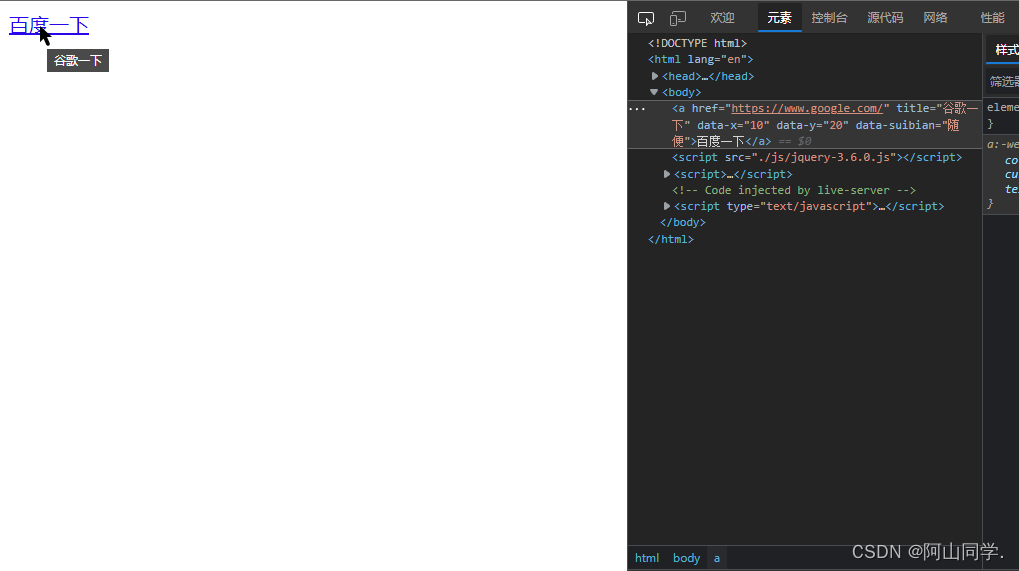
修改自定义属性