本文讲述spring-boot工程中使用spring-session机制进行安全认证,并且通过redis存储session,满足集群部署、分布式系统的session共享。
原文链接:https://www.jianshu.com/p/cdf327a6a5a4
java工程中,说到权限管理和安全认证,我们首先想到的是Spring Security和Apache Shiro,这两者均能实现用户身份认证和复杂的权限管理功能。但是如果我们只是想实现身份认证(如是否登录、会话是否超时),使用session管理即可满足。本文目录如下:
目录:
1. 创建spring-boot项目
2. 用户管理
3. 用户身份认证
4. spring-session配置
5. 使用redis共享session
一、创建spring-boot项目
1、工程使用idea+gradle搭建,jdk1.8,spring-boot版本2.0.2.RELEASE,数据库postgreSQL,持久层spring-data-jpa;
2、新建spring-boot项目,工程type选择Gradle Project;
3、勾选初始化依赖如下:
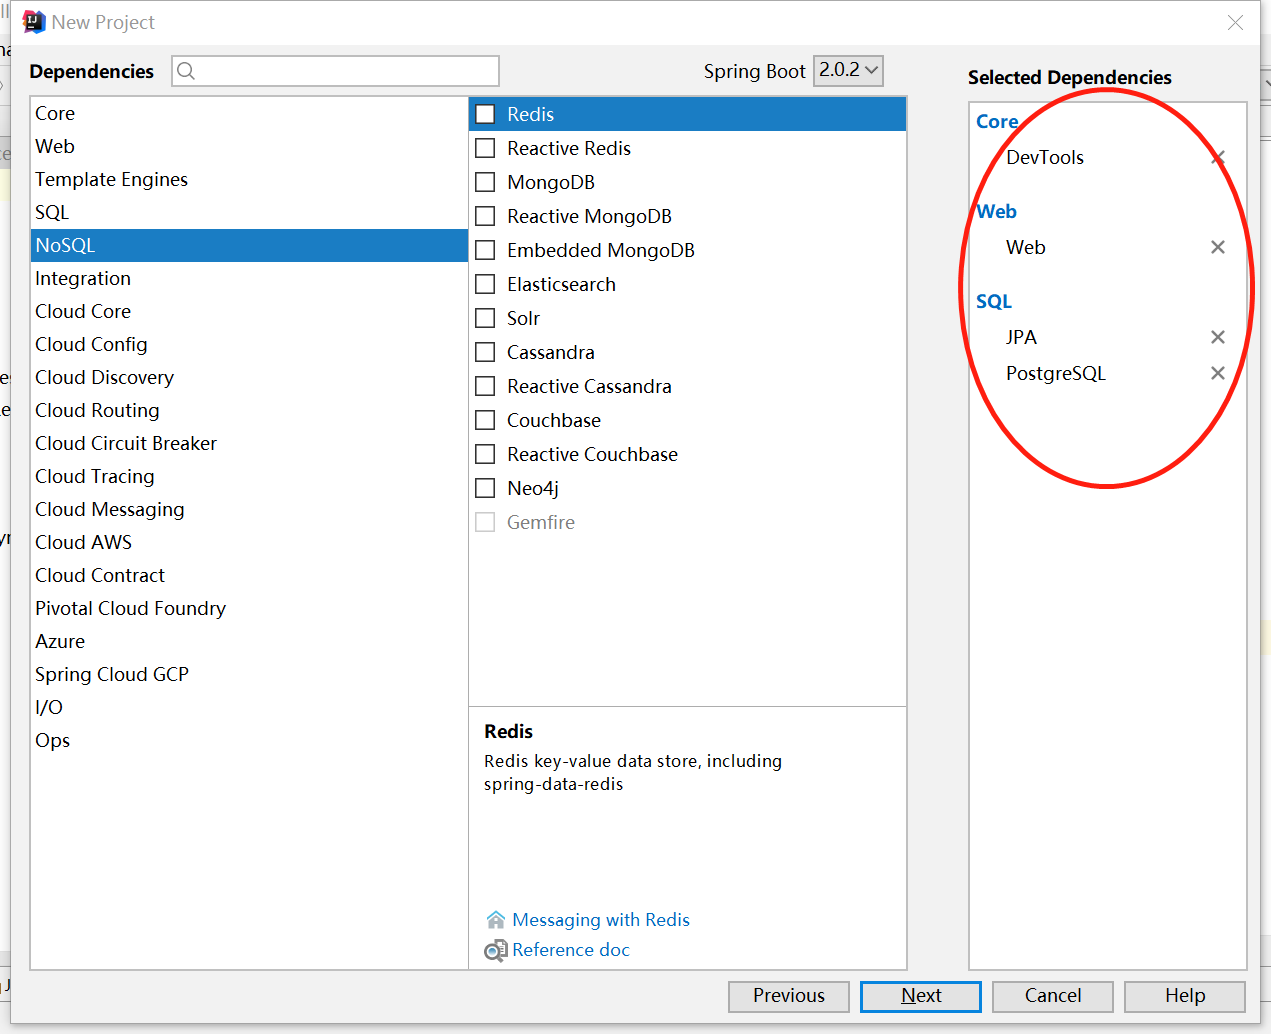
创建完成后gradle.build文件内容如下:
buildscript {
    ext {
        springBootVersion = '2.0.2.RELEASE'
    }
    repositories {
        mavenCentral()
    }
    dependencies {
        classpath("org.springframework.boot:spring-boot-gradle-plugin:${springBootVersion}")
    }
}

apply plugin: 'java'
apply plugin: 'idea' apply plugin: 'org.springframework.boot' apply plugin: 'io.spring.dependency-management' group = 'louie.share' version = '0.0.1-SNAPSHOT' sourceCompatibility = 1.8 targetCompatibility = 1.8 repositories { mavenCentral() } dependencies { compile('org.springframework.boot:spring-boot-starter-data-jpa') compile('org.springframework.boot:spring-boot-starter-web') runtime('org.springframework.boot:spring-boot-devtools') runtime('org.postgresql:postgresql') testCompile('org.springframework.boot:spring-boot-starter-test') }
4、application.yml配置数据库及jpa
spring:
  datasource:
    driver-class-name: org.postgresql.Driver
    url: jdbc:postgresql://127.0.0.1:5432/louie
    data-username: louie
    password: louie1234
  jpa:
    database: postgresql
    hibernate:
      ddl-auto: update
二、用户管理
1、创建User实体类
import org.hibernate.annotations.GenericGenerator;

import javax.persistence.Entity;
import javax.persistence.GeneratedValue;
import javax.persistence.Id;
import javax.persistence.Table; import java.io.Serializable; /** * 用户实体 * @author louie * @date created in 2018-5-12 17:28 */ @Entity @Table(name = "b_id_user") public class User implements Serializable{ @Id @GenericGenerator(name = "idGenerator",strategy = "uuid") @GeneratedValue(generator = "idGenerator") private String id; @NotBlank(message = "account can not be empty") private String account; @NotBlank(message = "password can not be empty") private String password; @NotBlank(message = "name can not be empty") private String name; //省略getter、setter }
2、用户服务接口
import louie.share.sessionredis.bean.User;

/**
 * 用户服务接口
 * @author louie
 * @date created in 2018-5-12 17:40
 */
public interface UserService { /** * save user * @param user * @return 保存后的用户信息 */ User saveUser(User user); /** * find user by account * @param account * @return */ User findByAccount(String account); /** * user login * @param account * @param password * @return */ BaseResponse login(String account,String password); }
这里省略接口的实现,您可以访问我的github和码云查看该工程的源代码(代码地址见文档底部)。
3、用户管理控制器
import louie.share.sessionredis.bean.BaseResponse;
import louie.share.sessionredis.bean.User;
import louie.share.sessionredis.service.UserService;
import org.springframework.beans.factory.annotation.Autowired;
import org.springframework.web.bind.annotation.PathVariable; import org.springframework.web.bind.annotation.RequestMapping; import org.springframework.web.bind.annotation.RequestMethod; import org.springframework.web.bind.annotation.RestController; /** * 用户管理相关控制器 * @author louie * @date created in 2018-5-12 17:26 */ @RestController @RequestMapping(value = "/user") public class UserController { @Autowired private UserService userService; /** * save user * @param user * @return */ @RequestMapping(value = "/save",method = RequestMethod.POST) public User save(User user){ return userService.saveUser(user); } /** * find user by account * @param account * @return */ @RequestMapping(value = "/find/{account}",method = RequestMethod.GET) public User find(@PathVariable String account){ return userService.findByAccount(account); } /** * user login * @param account * @param password * @return */ @RequestMapping(value = "/login",method = RequestMethod.POST) public BaseResponse login(String account,String password){ return userService.login(account,password); } }
4、创建用户
运行Application类启动服务,使用postMan访问http://localhost:8080/user/save服务创建用户:
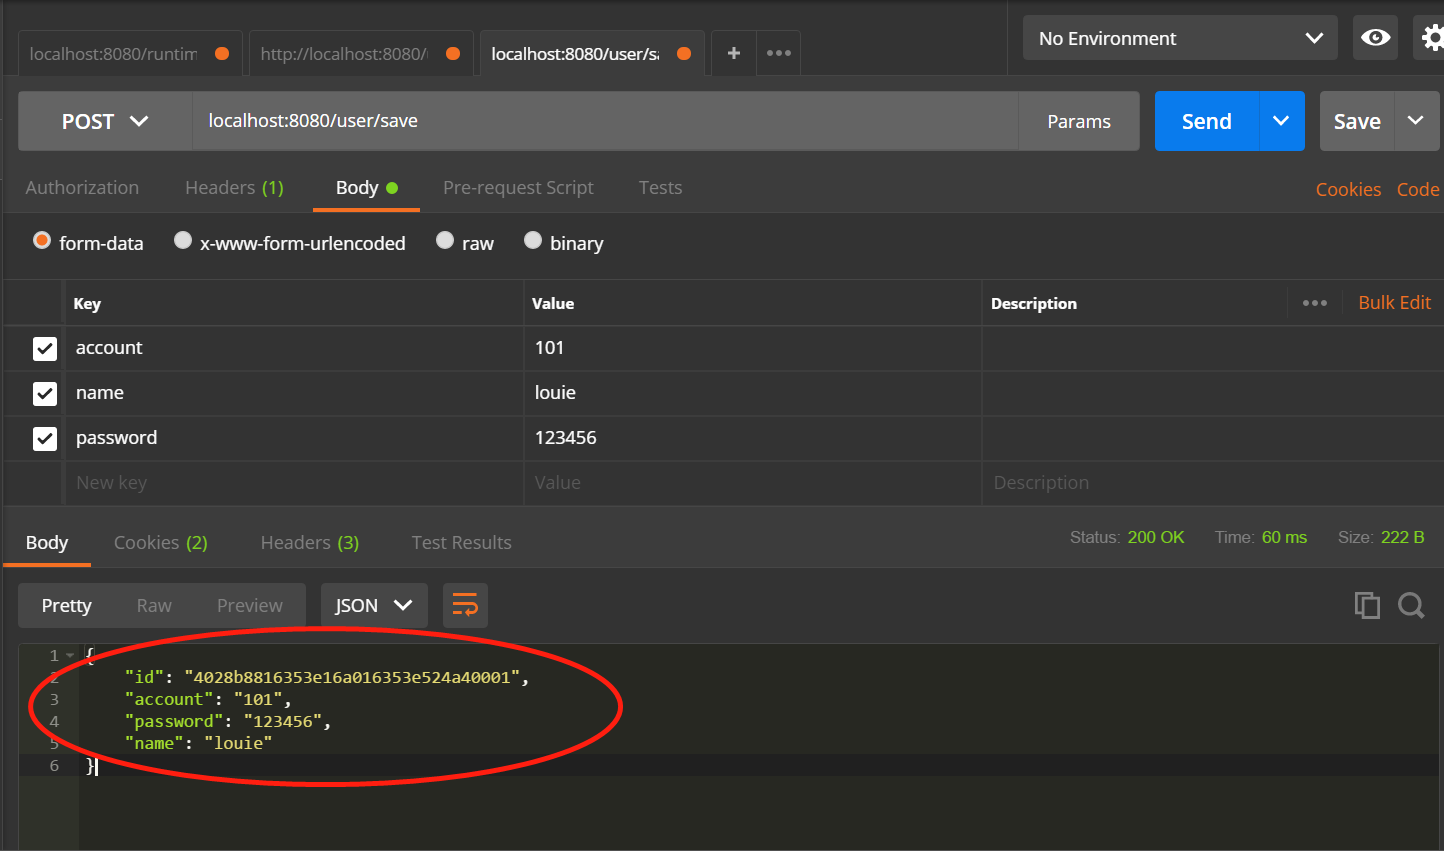
三、用户身份认证
1、使用postMan访问http://localhost:8080/user/login进行用户登录校验:
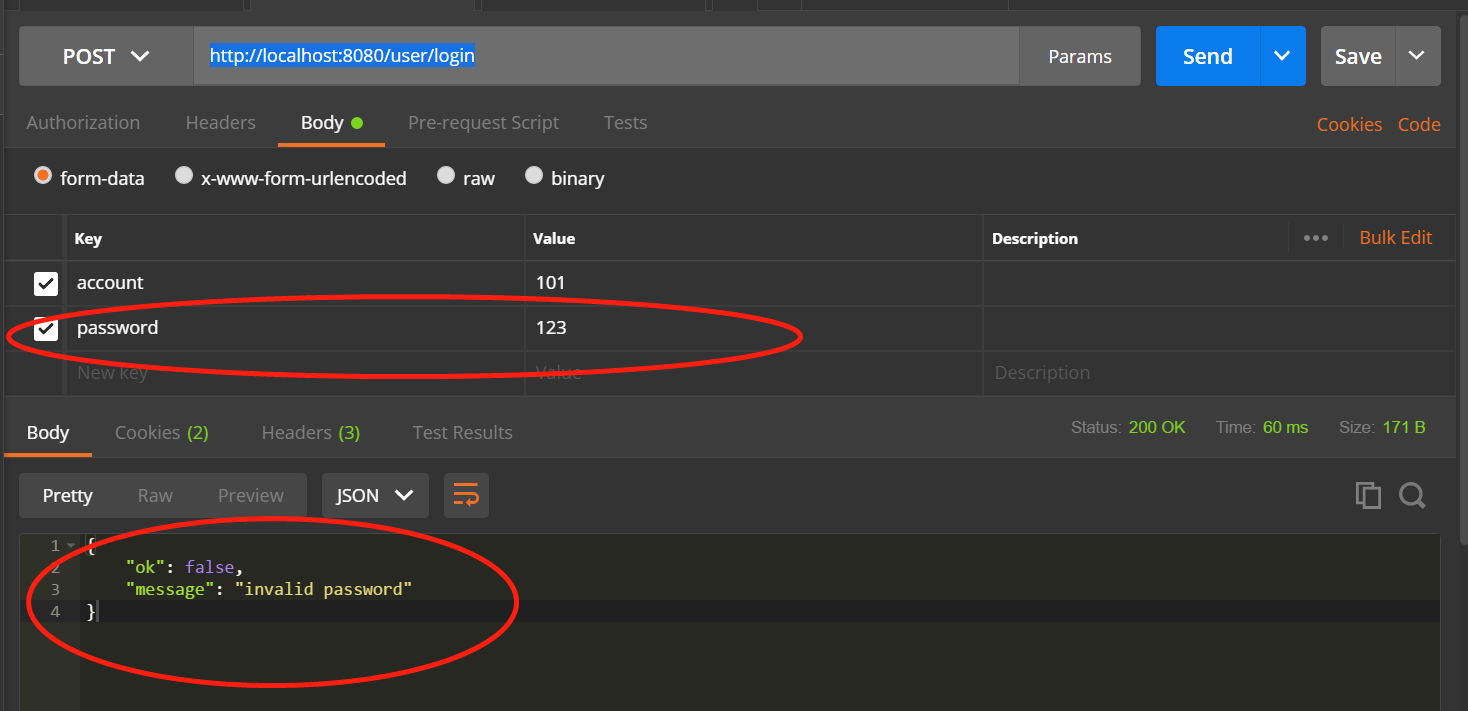
四、spring-session配置
该部分为重点内容了,目的是实现访问资源时的安全认证、超时控制和用户登出功能。
1、修改用户登录login控制,登录成功后将用户信息写入session
/**
     * user login
     * @param account
     * @param password
     * @return
     */
    @RequestMapping(value = "/login",method = RequestMethod.POST) public BaseResponse login(String account, String password,HttpSession session){ BaseResponse response = userService.login(account,password); if (response.isOk()){ session.setAttribute(session.getId(),response.getData()); } return response; }
2、新增用户登出logout功能,将用户信息移除session
/**
* user logout
* @param session
* @return
*/
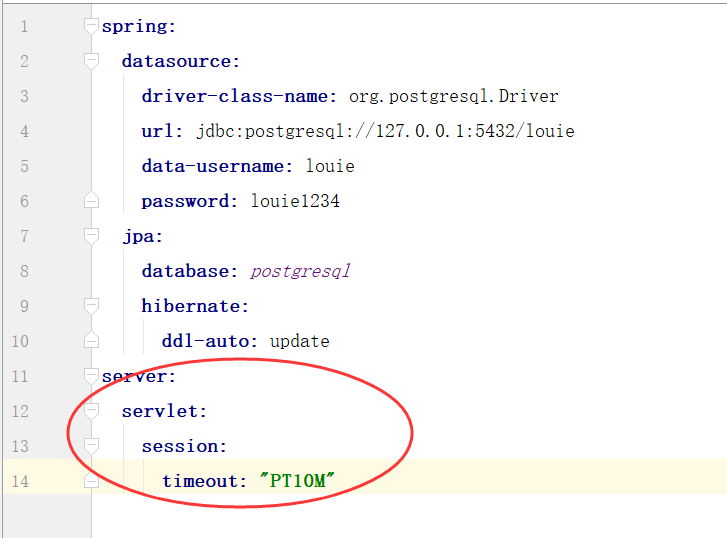
@RequestMapping(value = "/logout") public String logout(HttpSession session){ session.removeAttribute(session.getId()); return "user logout success"; } 3、设置session过期时间
spring:
  datasource:
    driver-class-name: org.postgresql.Driver
    url: jdbc:postgresql://127.0.0.1:5432/louie
    data-username: louie
    password: louie1234
  jpa:
    database: postgresql
    hibernate:
      ddl-auto: update server: servlet: session: timeout: "PT10M"
以下是为session有效时长为10分钟:
4、添加拦截器,通过session判断用户是否有效
import com.alibaba.fastjson.JSON;
import louie.share.sessionredis.bean.BaseResponse;
import org.springframework.context.annotation.Configuration;
import org.springframework.web.servlet.HandlerInterceptor;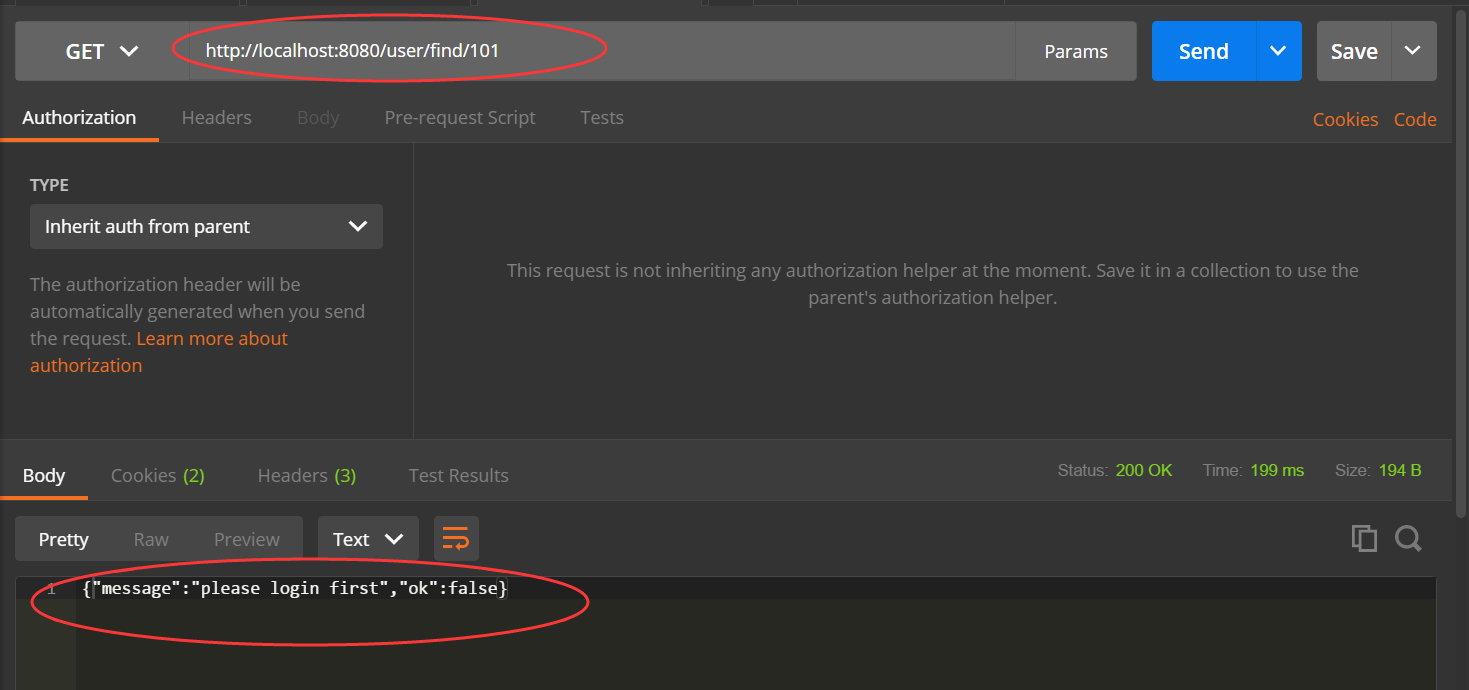
import org.springframework.web.servlet.config.annotation.InterceptorRegistry; import org.springframework.web.servlet.config.annotation.WebMvcConfigurer; import javax.servlet.http.HttpServletRequest; import javax.servlet.http.HttpServletResponse; import javax.servlet.http.HttpSession; import java.io.IOException; /** * @author louie * @date created in 2018-5-12 19:02 */ @Configuration public class SessionCofig implements WebMvcConfigurer{ @Override public void addInterceptors(InterceptorRegistry registry) { registry.addInterceptor(new SecurityInterceptor()) //排除拦截 .excludePathPatterns("/user/login") .excludePathPatterns("/user/logout") //拦截路径 .addPathPatterns("/**"); } @Configuration public class SecurityInterceptor implements HandlerInterceptor{ @Override public boolean preHandle(HttpServletRequest request, HttpServletResponse response, Object handler) throws IOException { HttpSession session = request.getSession(); if (session.getAttribute(session.getId()) != null){ return true; } response.getWriter().write(JSON.toJSONString( new BaseResponse(){{ setOk(false); setMessage("please login first"); }} )); return false; } } } 5、使用postMan访问http://localhost:8080/user/find/101,用户未登录,被拦截:
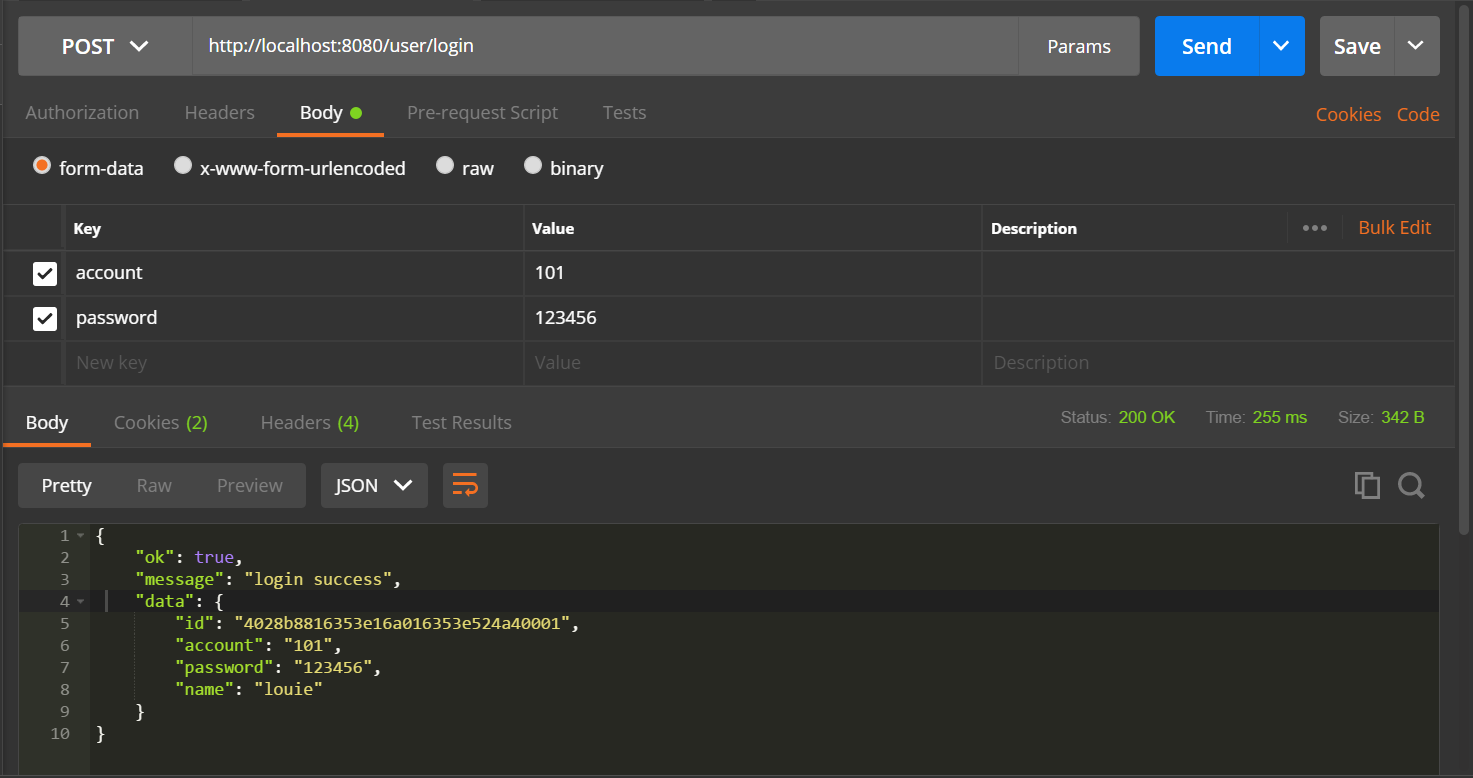
访问http://localhost:8080/user/login登录:
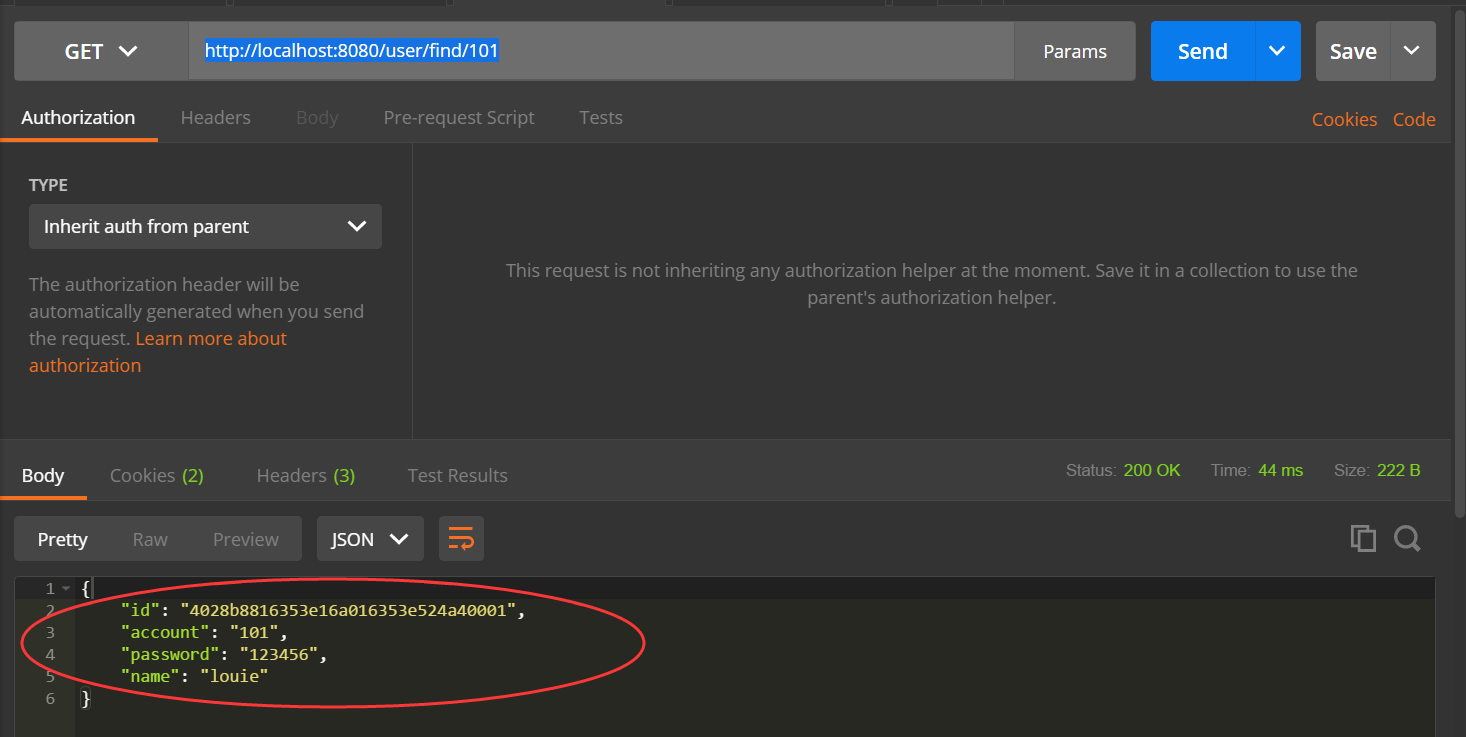
再次访问访问http://localhost:8080/user/find/101:
五、使用redis存储session
1、添加依赖
compile('org.springframework.boot:spring-boot-starter-data-redis')
compile('org.springframework.session:spring-session-data-redis')
2、application.yml中添加配置
源代码:
spring:
datasource:
driver-class-name: org.postgresql.Driver
url: jdbc:postgresql://127.0.0.1:5432/louie
data-username: louie
password: louie1234
jpa:
database: postgresql
hibernate:
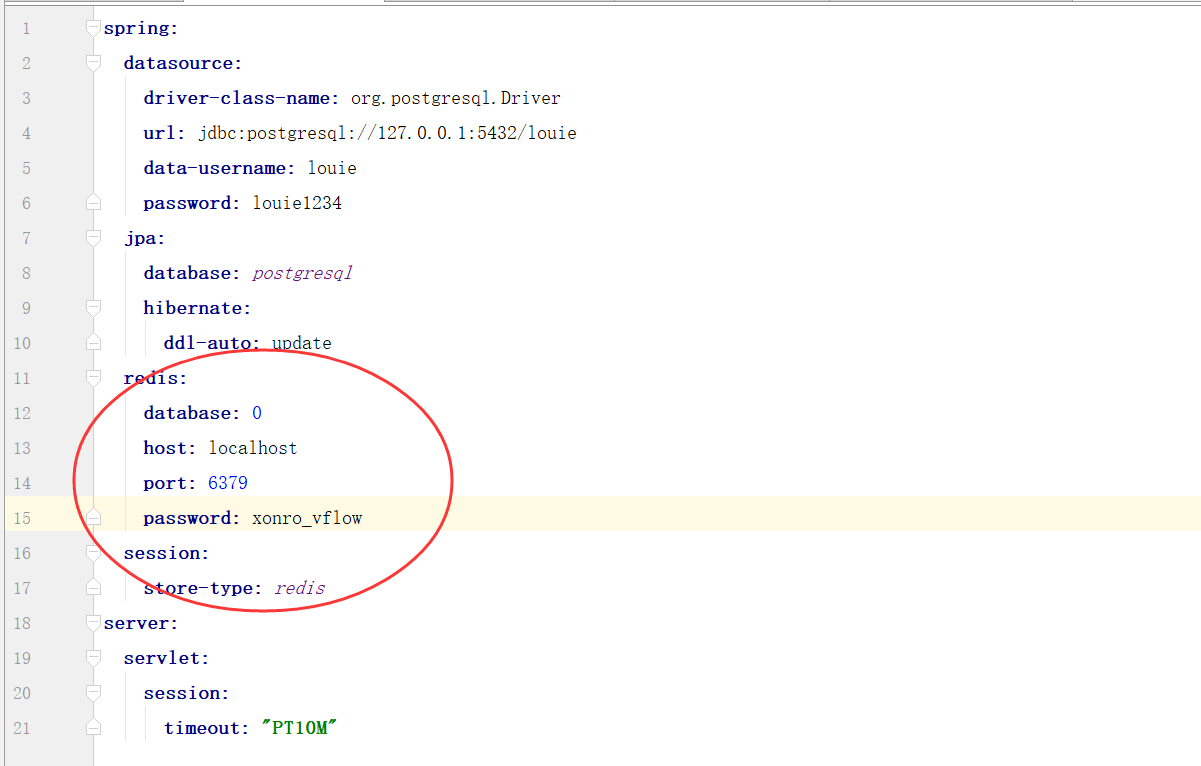
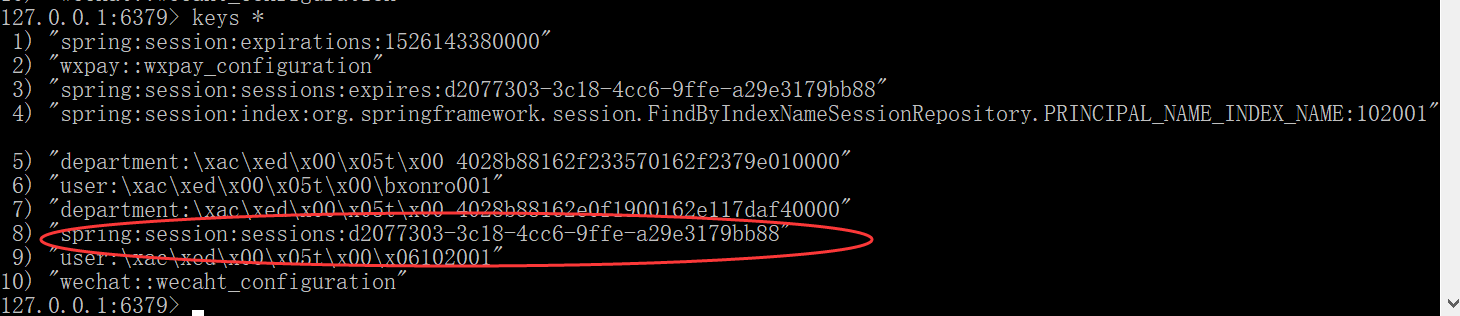
ddl-auto: update redis: database: 0 host: localhost port: 6379 password: xonro_vflow session: store-type: redis server: servlet: session: timeout: "PT10M" 3、启动redis和application类,用户登录,查看redis内容:
debug查看:
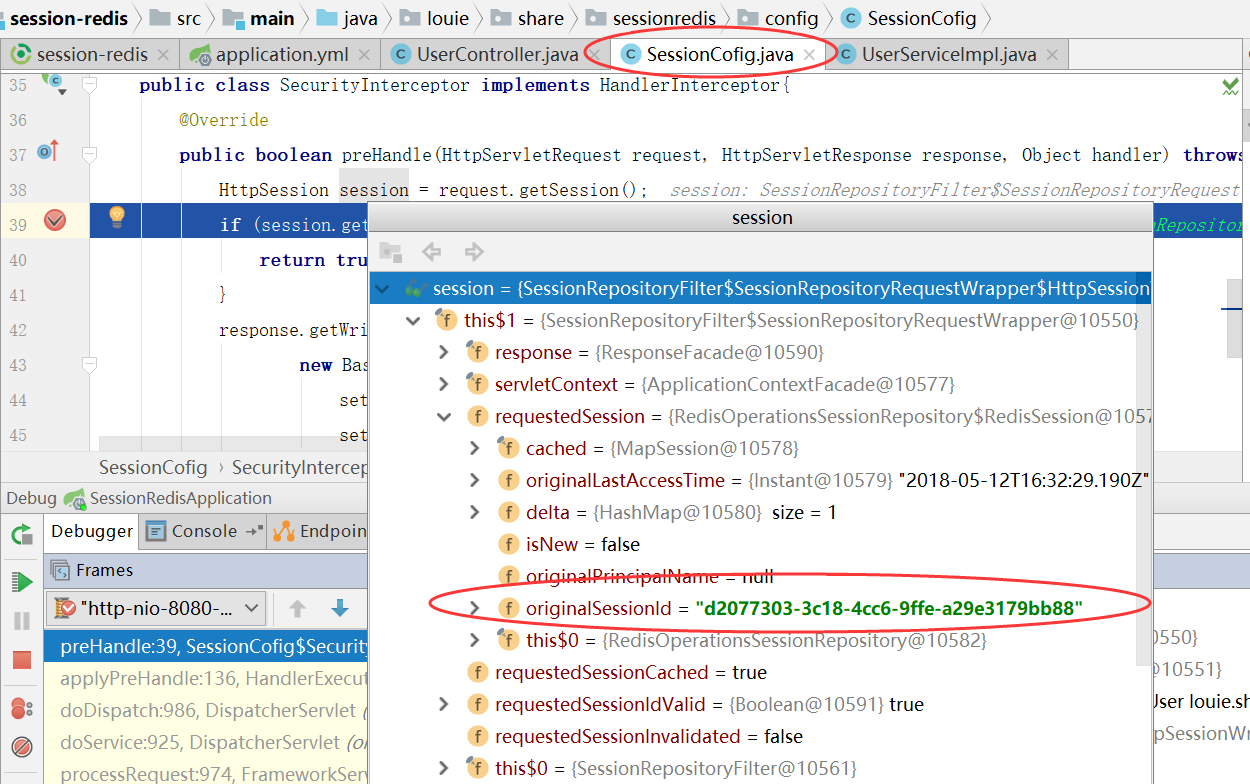
redis内容:
工程代码已共享至github和码云,欢迎探讨学习。
链接:https://www.jianshu.com/p/cdf327a6a5a4