文章目录
SID dataset
1. SID dataset 概述
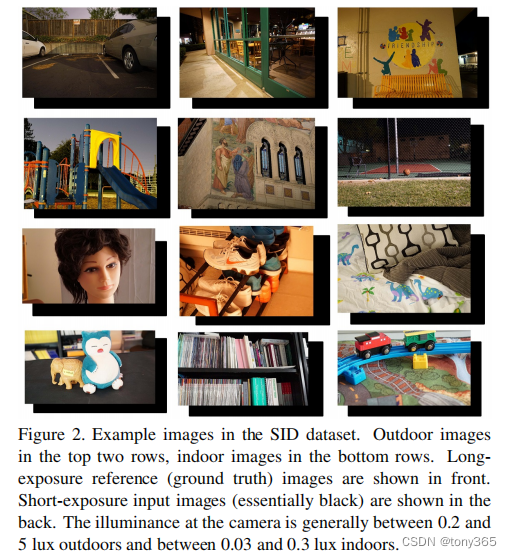
SID 是Learning to See in the Dark 论文中提出的暗光raw数据集
其中包括两个相机的拍摄数据 Sony alpha7S II 和 Fujifilm X-T2.
下面主要介绍下sony camera的数据
拍摄照度:
室外 0.2-5 lux
室内 0.03-0.3 lux
一共包括short和long两个文件夹:
long文件夹共231个ARW文件,其中20208__00_10s.ARW表示的是场景20208,第00次拍摄,曝光时间是10s
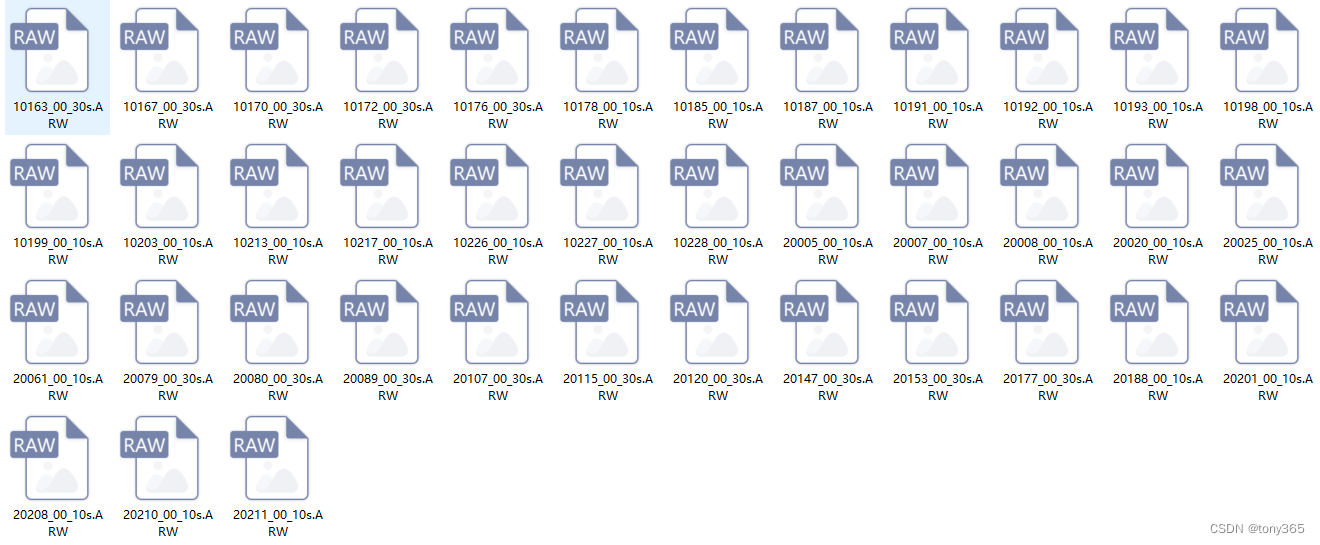
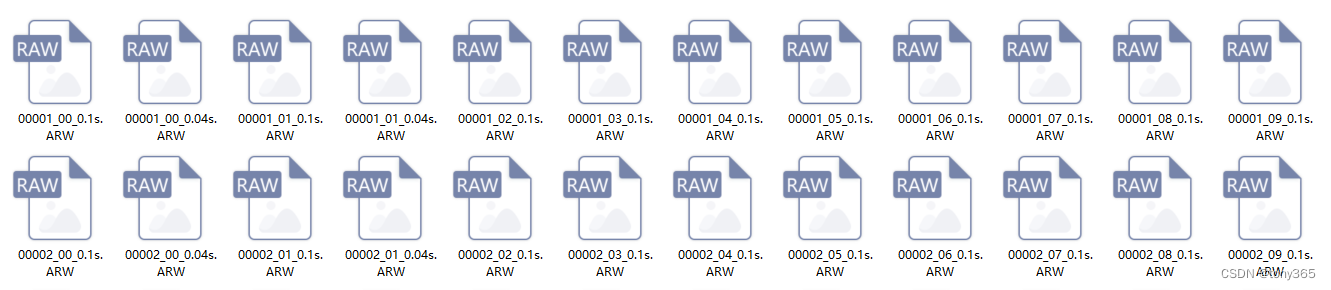
short文件夹对应的 短曝光 的拍摄图像, 一共2697张图像
short的曝光时间设置为 参考图像的 1/100, 1/250, 1/300。比如参考groundtruth 曝光是10s, 则short图像的曝光可能被设置为 0.1s, 0.04s, 0.033s。 相同设置可能被拍摄多张,可以用来开发 burst multiframe相关算法。
2. SID 读取和显示代码
利用rawpy 库
import glob
import os
import matplotlib.pyplot as plt
import numpy as np
import rawpy
import colour
from colour_demosaicing import demosaicing_CFA_Bayer_Menon2007
def pack_raw(raw):
# pack Bayer image to 4 channels
im = raw.raw_image_visible.astype(np.float32)
im = np.maximum(im - 512, 0) / (16383 - 512) # subtract the black level
im = np.expand_dims(im, axis=2)
img_shape = im.shape
H = img_shape[0]
W = img_shape[1]
out = np.concatenate((im[0:H:2, 0:W:2, :],
im[0:H:2, 1:W:2, :],
im[1:H:2, 1:W:2, :],
im[1:H:2, 0:W:2, :]), axis=2)
return out
def pack_raw_bayer(raw):
# 和上面的函数功能一样,都是减去black level,然后分成4 channnel图像
# pack Bayer image to 4 channels
im = raw.raw_image_visible.astype(np.float32)
raw_pattern = raw.raw_pattern
R = np.where(raw_pattern == 0)
G1 = np.where(raw_pattern == 1)
B = np.where(raw_pattern == 2)
G2 = np.where(raw_pattern == 3)
white_point = 16383
img_shape = im.shape
H = img_shape[0]
W = img_shape[1]
out = np.stack((im[R[0][0]:H:2, R[1][0]:W:2], # RGBG
im[G1[0][0]:H:2, G1[1][0]:W:2],
im[B[0][0]:H:2, B[1][0]:W:2],
im[G2[0][0]:H:2, G2[1][0]:W:2]), axis=0).astype(np.float32)
black_level = np.array(raw.black_level_per_channel)[:, None, None].astype(np.float32)
out = (out - black_level) / (white_point - black_level)
out = np.clip(out, 0, 1)
return out
if __name__ == "__main__":
input_dir = r'D:\dataset\ELD\sid\Sony\Sony\short'
gt_dir = r'D:\dataset\ELD\sid\Sony\Sony\long'
train_id = 1
in_files = glob.glob(os.path.join(input_dir, '%05d_00*.ARW' % train_id))
gt_files = glob.glob(os.path.join(gt_dir, '%05d_00*.ARW' % train_id))
print(in_files, gt_files)
in_path = in_files[0]
gt_path = gt_files[0]
print(in_path, gt_path)
# 获取曝光时间
in_fn = os.path.basename(in_path)
gt_fn = os.path.basename(gt_path)
in_exposure = float(in_fn[9:-5])
gt_exposure = float(gt_fn[9:-5])
ratio = min(gt_exposure / in_exposure, 300)
print('exp time:', in_exposure, gt_exposure, ratio)
raw = rawpy.imread(in_path)
gt_raw = rawpy.imread(gt_path)
print('raw meta info :', raw.black_level_per_channel, raw.raw_pattern)
im = raw.raw_image_visible.astype(np.float32)
im = np.maximum(im - 512, 0) / (16383 - 512) * ratio # subtract the black level
im1 = demosaicing_CFA_Bayer_Menon2007(im, 'RGGB')
im11 = raw.postprocess(use_camera_wb=True, half_size=False, no_auto_bright=True, output_bps=8)
im2 = gt_raw.postprocess(use_camera_wb=True, half_size=False, no_auto_bright=True, output_bps=8)
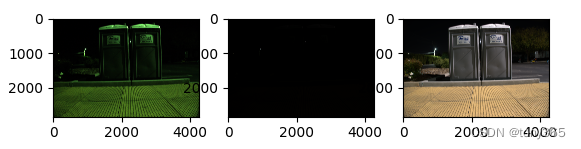
# im1 raw数据乘上一个ratio, 然后 demosaicing, 显示绿色的raw图
# im11 对raw数据 应用isp, 由于曝光时间短, 没有乘上ratio, 可能显示sRGB 全黑
# im2 是groundtruth 参考图,曝光充分,正常显示sRGB图
plt.figure()
plt.subplot(131)
plt.imshow(im1)
plt.subplot(132)
plt.imshow(im11)
plt.subplot(133)
plt.imshow(im2)
plt.show()
# noise image
im11 = im11 / im11.max()
im11 = im11 * ratio
im11 = np.clip(im11, 0, 1)
plt.figure()
plt.imshow(im11)
plt.show()
# process all
gt_files = glob.glob(os.path.join(gt_dir, '*.ARW'))
for file in gt_files:
print(file)
gt_raw = rawpy.imread(file)
im2 = gt_raw.postprocess(use_camera_wb=True, half_size=False, no_auto_bright=True, output_bps=8)
cv2.imwrite(file[:-4] + '.png', im2[..., ::-1])
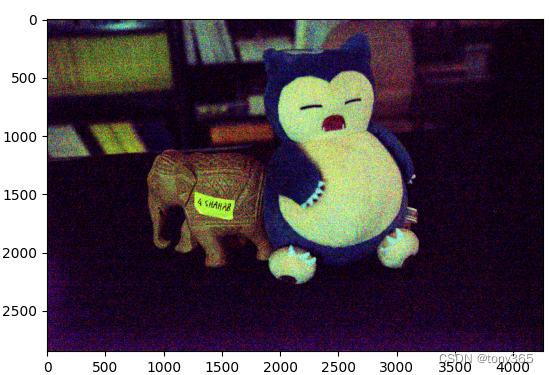
3. 一些示例
gt 和 noise:

将中间的黑色图乘上ratio显示noise image(只是为了显示,这样操作是不对的):
SIDD dataset
link:https://www.eecs.yorku.ca/~kamel/sidd/dataset.php
论文 A High-Quality Denoising Dataset for Smartphone Cameras 提出的一个数据集
利用多张有噪声图像,利用对齐技术和fusion技术,生成 无噪声图像作为ground truth.
官方网站上有 small , medium, full三个版本的数据集。我下载了medium的数据集, full的太大内存。
medium 版本包含raw 和 sRGB两个文件夹

命名方式:
<scene-instance-number>_<scene_number>_<smartphone-code>_<ISO-level>_<shutter-speed>_<illuminant-temperature>_<illuminant-brightness-code>
raw:
160 x (2 + 2) = 640 张图像
sRGB:
对应raw的 640张 sRGB 图像。
下载的数据集中有详细说明。
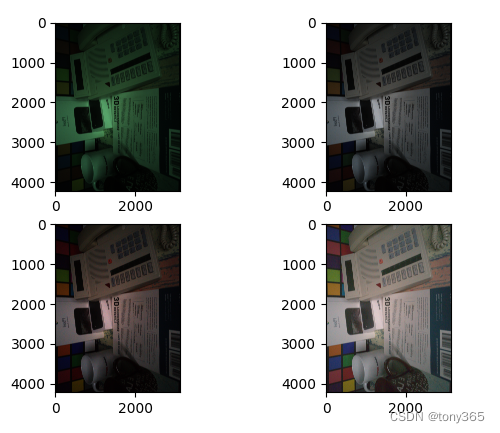
对应的mat数据, wb, ccm, gamma后的图像如下:
code:
import colour_demosaicing
import scipy.io as sio
import glob
import os

import cv2
import matplotlib.pyplot as plt
import numpy as np
import rawpy

import colour
from colour_demosaicing import demosaicing_CFA_Bayer_Menon2007
import h5py


def extract_metainfo(path='0151_METADATA_RAW_010.MAT'):
    meta = sio.loadmat(path)['metadata']
    mat_vals = meta[0][0]
    mat_keys = mat_vals.dtype.descr

    keys = []
    for item in mat_keys:
        keys.append(item[0])

    py_dict = {

    }
    for key in keys:
        py_dict[key] = mat_vals[key]

    device = py_dict['Model'][0].lower()
    bitDepth = py_dict['BitDepth'][0][0]
    if 'iphone' in device or bitDepth != 16:
        noise = py_dict['UnknownTags'][-2][0][-1][0][:2]
        iso = py_dict['DigitalCamera'][0, 0]['ISOSpeedRatings'][0][0]
        pattern = py_dict['SubIFDs'][0][0]['UnknownTags'][0][0][1][0][-1][0]
        time = py_dict['DigitalCamera'][0, 0]['ExposureTime'][0][0]

    else:
        noise = py_dict['UnknownTags'][-1][0][-1][0][:2]
        iso = py_dict['ISOSpeedRatings'][0][0]
        pattern = py_dict['UnknownTags'][1][0][-1][0]
        time = py_dict['ExposureTime'][0][0]  # the 0th row and 0th line item

    rgb = ['R', 'G', 'B']
    pattern = ''.join([rgb[i] for i in pattern])

    asShotNeutral = py_dict['AsShotNeutral'][0]
    b_gain, _, r_gain = asShotNeutral

    # only load ccm1
    ccm = py_dict['ColorMatrix1'][0].astype(float).reshape((3, 3))

    return {

    'device': device,
            'pattern': pattern,
            'iso': iso,
            'noise': noise,
            'time': time,
            'wb': np.array([r_gain, 1, b_gain]),
            'ccm': ccm, }


def extract_metainfo2(file):
    meta = sio.loadmat(file)['metadata']
    mat_vals = meta[0][0]
    mat_keys = mat_vals.dtype.descr

    keys = []
    for item in mat_keys:
        keys.append(item[0])

    py_dict = {

    }
    for key in keys:
        py_dict[key] = mat_vals[key]

    return py_dict


def fix_orientation(image, orientation):
    # 1 = Horizontal(normal)
    # 2 = Mirror horizontal
    # 3 = Rotate 180
    # 4 = Mirror vertical
    # 5 = Mirror horizontal and rotate 270 CW
    # 6 = Rotate 90 CW
    # 7 = Mirror horizontal and rotate 90 CW
    # 8 = Rotate 270 CW

    if type(orientation) is list:
        orientation = orientation[0]

    if orientation == 1:
        pass
    elif orientation == 2:
        image = cv2.flip(image, 0)
    elif orientation == 3:
        image = cv2.rotate(image, cv2.ROTATE_180)
    elif orientation == 4:
        image = cv2.flip(image, 1)
    elif orientation == 5:
        image = cv2.flip(image, 0)
        image = cv2.rotate(image, cv2.ROTATE_90_COUNTERCLOCKWISE)
    elif orientation == 6:
        image = cv2.rotate(image, cv2.ROTATE_90_CLOCKWISE)
    elif orientation == 7:
        image = cv2.flip(image, 0)
        image = cv2.rotate(image, cv2.ROTATE_90_CLOCKWISE)
    elif orientation == 8:
        image = cv2.rotate(image, cv2.ROTATE_90_COUNTERCLOCKWISE)

    return image

def process_mat_img(file, py_dict, pattern='bggr'):
    '''
    :param file: 输入 mat 文件
    :return: srgb image
    '''
    data = {

    }
    f = h5py.File(file)
    for k, v in f.items():
        data[k] = np.array(v)
    data0 = data['x']  # [1000:2000,2000:3000]
    data = fix_orientation(data0, py_dict['Orientation'])

    rgb = colour_demosaicing.demosaicing_CFA_Bayer_Menon2007(data, pattern)

    wb_gain = 1 / py_dict['AsShotNeutral']
    wb_gain = wb_gain.astype(np.float32).reshape(-1, 1, 3)
    rgb_wb = rgb * wb_gain
    rgb_wb = np.clip(rgb_wb, 0, 1)

    xyz2cam1 = np.reshape(np.asarray(py_dict['ColorMatrix1']),
                          (3, 3))  # 不同光源的标定矩阵,这里xyz2cam1应该是D65, 对应py_dict['CalibrationIlluminant1']
    xyz2cam2 = np.reshape(np.asarray(py_dict['ColorMatrix2']), (3, 3))
    # normalize rows (needed?)
    xyz2cam1 = xyz2cam1 / np.sum(xyz2cam1, axis=1, keepdims=True)
    xyz2cam2 = xyz2cam2 / np.sum(xyz2cam1, axis=1, keepdims=True)
    # inverse
    cam2xyz1 = np.linalg.inv(xyz2cam1)
    cam2xyz2 = np.linalg.inv(xyz2cam2)
    # for now, use one matrix  # TODO: interpolate btween both
    rgb_xyz = rgb_wb.reshape(-1, 3) @ cam2xyz1.T
    rgb_xyz = rgb_xyz.reshape(rgb_wb.shape)
    rgb_xyz = np.clip(rgb_xyz, 0.0, 1.0)
    xyz2srgb = np.array([[3.2404542, -1.5371385, -0.4985314],
                         [-0.9692660, 1.8760108, 0.0415560],
                         [0.0556434, -0.2040259, 1.0572252]])

    # normalize rows (needed?)
    rgb_ccm = rgb_xyz.reshape(-1, 3) @ xyz2srgb.T
    rgb_ccm = rgb_ccm.reshape(rgb_wb.shape)
    rgb_ccm = np.clip(rgb_ccm, 0.0, 1.0)

    rgb_gamma = rgb_ccm ** (1 / 2.2)
    rgb_gamma = np.clip(rgb_gamma, 0, 1)

    # rgb_gamma_save = np.clip(rgb_gamma * 255, 0, 255).astype(np.uint8)
    # cv2.imwrite('dd.png', rgb_gamma_save[::-1, :, ::-1])

    plt.figure()
    plt.subplot(221)
    plt.imshow(rgb)
    plt.subplot(222)
    plt.imshow(rgb_wb)
    plt.subplot(223)
    plt.imshow(rgb_ccm)
    plt.subplot(224)
    plt.imshow(rgb_gamma)
    plt.show()

if __name__ == "__main__":
    file1 = r'D:\dataset\SIDD_Medium_Raw_Parts\SIDD_Medium_Raw\Data\0055_003_N6_00800_01000_5500_N\0055_GT_RAW_010.MAT'
    file2 = r'D:\dataset\SIDD_Medium_Raw_Parts\SIDD_Medium_Raw\Data\0055_003_N6_00800_01000_5500_N\0055_GT_RAW_011.MAT'

    file3 = r'D:\dataset\SIDD_Medium_Raw_Parts\SIDD_Medium_Raw\Data\0055_003_N6_00800_01000_5500_N\0055_METADATA_RAW_010.MAT'
    file4 = r'D:\dataset\SIDD_Medium_Raw_Parts\SIDD_Medium_Raw\Data\0055_003_N6_00800_01000_5500_N\0055_METADATA_RAW_011.MAT'

    file5 = r'D:\dataset\SIDD_Medium_Raw_Parts\SIDD_Medium_Raw\Data\0055_003_N6_00800_01000_5500_N\0055_NOISY_RAW_010.MAT'
    file6 = r'D:\dataset\SIDD_Medium_Raw_Parts\SIDD_Medium_Raw\Data\0055_003_N6_00800_01000_5500_N\0055_NOISY_RAW_011.MAT'

    metainfo = extract_metainfo(file3)
    print(metainfo)
    py_dict = extract_metainfo2(file3)

    # isp: wb, ccm, gamma
    process_mat_img(file5, py_dict, metainfo['pattern'])
    print('py_dict info:', py_dict)
    print(py_dict['AsShotNeutral'], py_dict['ColorMatrix1'], py_dict['ColorMatrix2'])
    print(py_dict['CalibrationIlluminant1'], py_dict['CalibrationIlluminant2'])
    print(py_dict['Orientation'])
    print(py_dict['Height'], py_dict['Width'], py_dict['BitDepth'])
ELD dataset
下载地址:https://github.com/Vandermode/ELD
以其中一个场景的文件夹举例:
iso level 设置为100, 曝光时间3.2为正常, gain = 100 * 3.2
另外生成iso level 分布为 800, 1600, 3200的
曝光时间满足:gain_noise = gain / factor(factor = 1, 10, 100, 200)
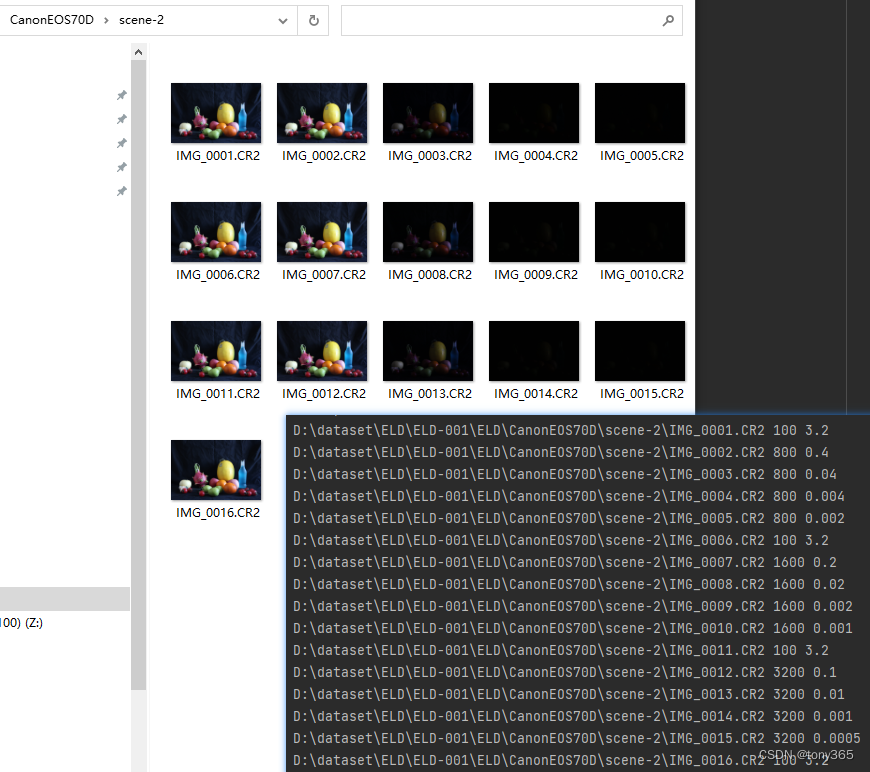
camera:SonyA7S2, NikonD850, CanonEOS70D, CanonEOS700D
DNG camera pipeline
https://github.com/AbdoKamel/sidd-ground-truth-image-estimation
sidd 论文中给出了处理dng raw图的pipiline python程序