用自己的训练集训练YOLOv7网络
前言
上一篇文章讲了YOLOv7的环境搭建和如何用网络进行检测(文章链接),今天我们要用自己的训练集去训练一个属于自己的网络。
一、训练集格式
想要训练网络,首先自己的数据集要满足人家规定的格式。
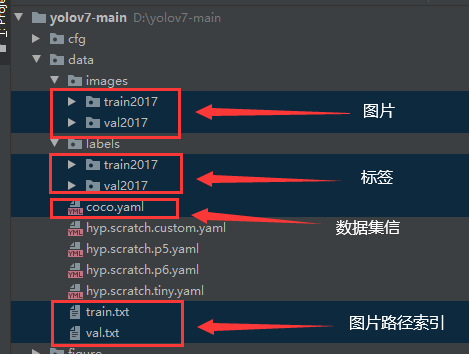
我们需要准备三部分:图片、标签、图片路径索引文件、coco.yaml
-
图片和标签:标签的制作可以使用labelme进行标注,标注后要将数据集转化为YOLO的格式
-
图片路径索引文件:里面有训练集中每个图片的路径(要用绝对路径),如图。

-
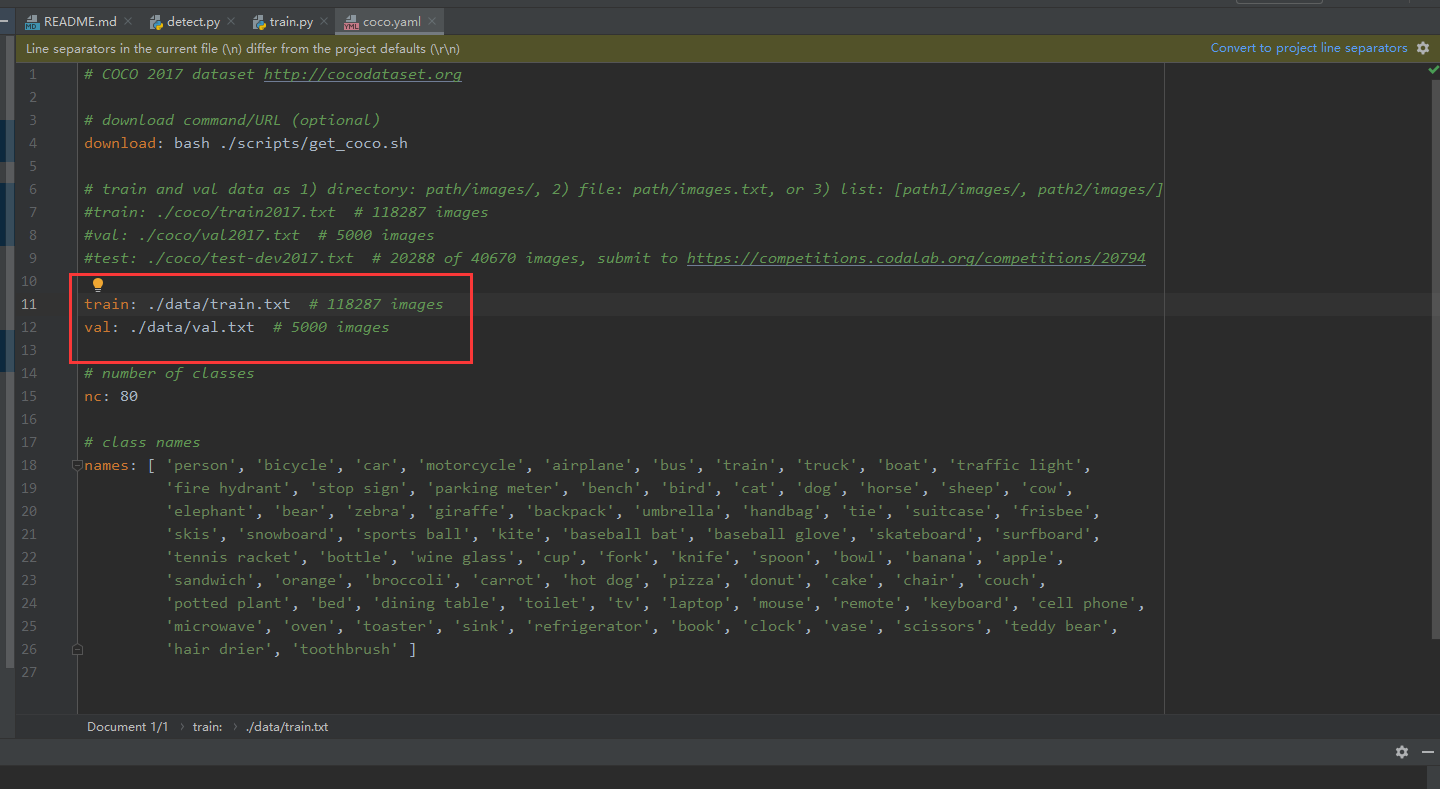
coco.yaml:这个文件是项目工程里面自带的,我们要将红框部分改为图片路径索引文件的地址。红框下面是数据集目标的类别总数和具体每个类的名字,这部分要根据我们数据集自行更改。
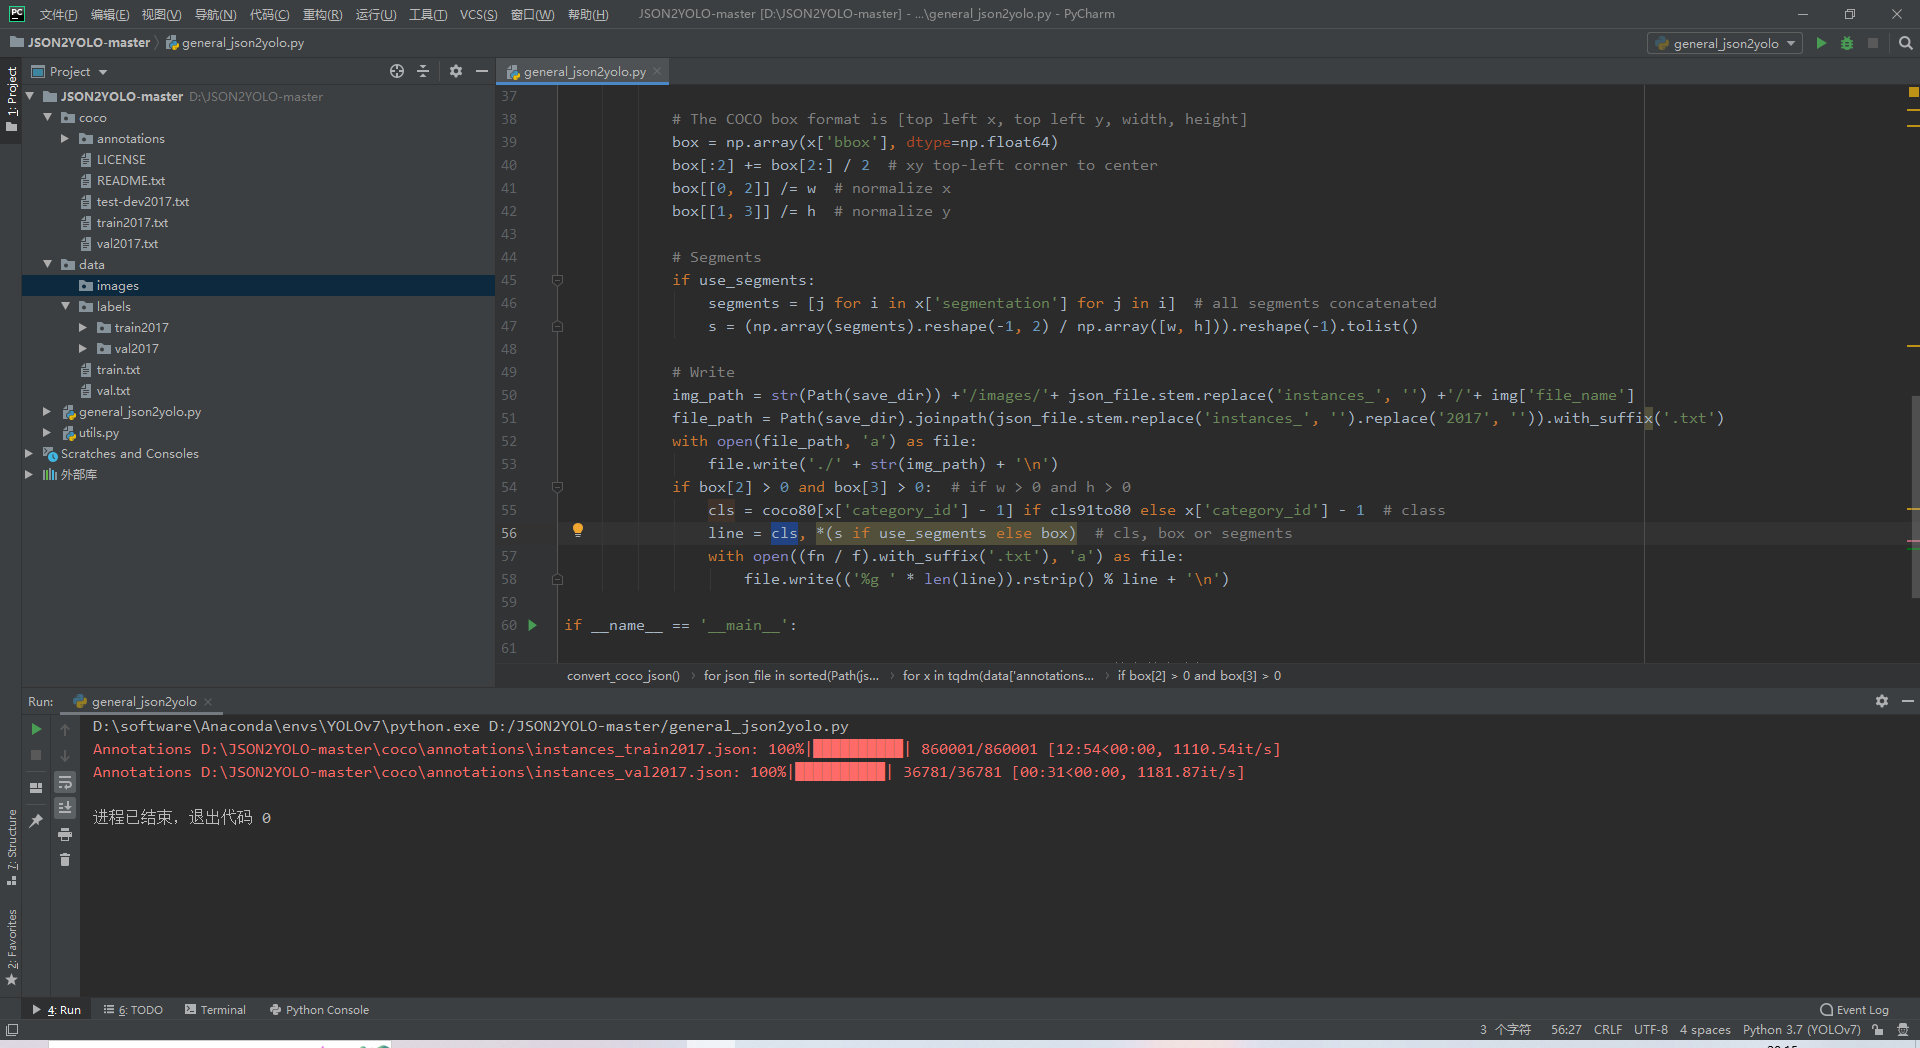
1.1 标签格式转换
我是用COCO2017的数据集进行试验的,下面是转化代码COCO->YOLO,(使用YOLOv7的环境就可以运行)仅供参考:
import json
import shutil
import numpy as np
from pathlib import Path
from tqdm import tqdm

def make_dirs(dir='new_dir/'):
    # Create folders
    dir = Path(dir)
    if dir.exists():
        shutil.rmtree(dir)  # delete dir
    for p in dir, dir / 'labels', dir / 'images':
        p.mkdir(parents=True, exist_ok=True)  # make dir
    return dir

def coco91_to_coco80_class():  # converts 80-index (val2014) to 91-index (paper)
    # https://tech.amikelive.com/node-718/what-object-categories-labels-are-in-coco-dataset/
    x = [0, 1, 2, 3, 4, 5, 6, 7, 8, 9, 10, None, 11, 12, 13, 14, 15, 16, 17, 18, 19, 20, 21, 22, 23, None, 24, 25, None,
         None, 26, 27, 28, 29, 30, 31, 32, 33, 34, 35, 36, 37, 38, 39, None, 40, 41, 42, 43, 44, 45, 46, 47, 48, 49, 50,
         51, 52, 53, 54, 55, 56, 57, 58, 59, None, 60, None, None, 61, None, 62, 63, 64, 65, 66, 67, 68, 69, 70, 71, 72,
         None, 73, 74, 75, 76, 77, 78, 79, None]
    return x

def convert_coco_json(json_dir='./coco/annotations/', use_segments=False, cls91to80=False):  # directory with *.json
    save_dir = Path.cwd() / Path(make_dirs(dir='data/'))  # output directory
    coco80 = coco91_to_coco80_class()

    # Import json
    for json_file in sorted(Path(json_dir).resolve().glob('*.json')):
        fn = Path(save_dir) / 'labels' / json_file.stem.replace('instances_', '')  # folder name
        fn.mkdir()
        with open(json_file) as f:
            data = json.load(f)

        # Create image dict
        images = {

    '%g' % x['id']: x for x in data['images']}

        # Write labels file
        for x in tqdm(data['annotations'], desc=f'Annotations {

      json_file}'):
            if x['iscrowd']:
                continue

            img = images['%g' % x['image_id']]
            h, w, f = img['height'], img['width'], img['file_name']

            # The COCO box format is [top left x, top left y, width, height]
            box = np.array(x['bbox'], dtype=np.float64)
            box[:2] += box[2:] / 2  # xy top-left corner to center
            box[[0, 2]] /= w  # normalize x
            box[[1, 3]] /= h  # normalize y

            # Segments
            if use_segments:
                segments = [j for i in x['segmentation'] for j in i]  # all segments concatenated
                s = (np.array(segments).reshape(-1, 2) / np.array([w, h])).reshape(-1).tolist()

            # Write
            img_path = Path(save_dir).joinpath('images').joinpath(json_file.stem.replace('instances_', '')).joinpath(img['file_name'])
            file_path = Path(save_dir).joinpath(json_file.stem.replace('instances_', '').replace('2017', '')).with_suffix('.txt')
            with open(file_path, 'a') as file:
                file.write(str(img_path) + '\n')
            if box[2] > 0 and box[3] > 0:  # if w > 0 and h > 0
                cls = coco80[x['category_id'] - 1] if cls91to80 else x['category_id'] - 1  # class
                line = cls, *(s if use_segments else box)  # cls, box or segments
                with open((fn / f).with_suffix('.txt'), 'a') as file:
                    file.write(('%g ' * len(line)).rstrip() % line + '\n')

if __name__ == '__main__':

    convert_coco_json(json_dir='./coco/annotations/')  # json的文件夹路径
1.2 标签数据格式
我们是在做的目标检测,标签中主要存储了bbox的信息,具体例子如下:
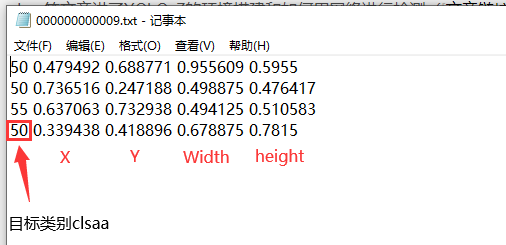
x,y是目标的中心坐标,width,height是目标的宽和高。这些坐标是经过了归一化的,即x,width /= 原图的width;而y,height /= 原图的height。
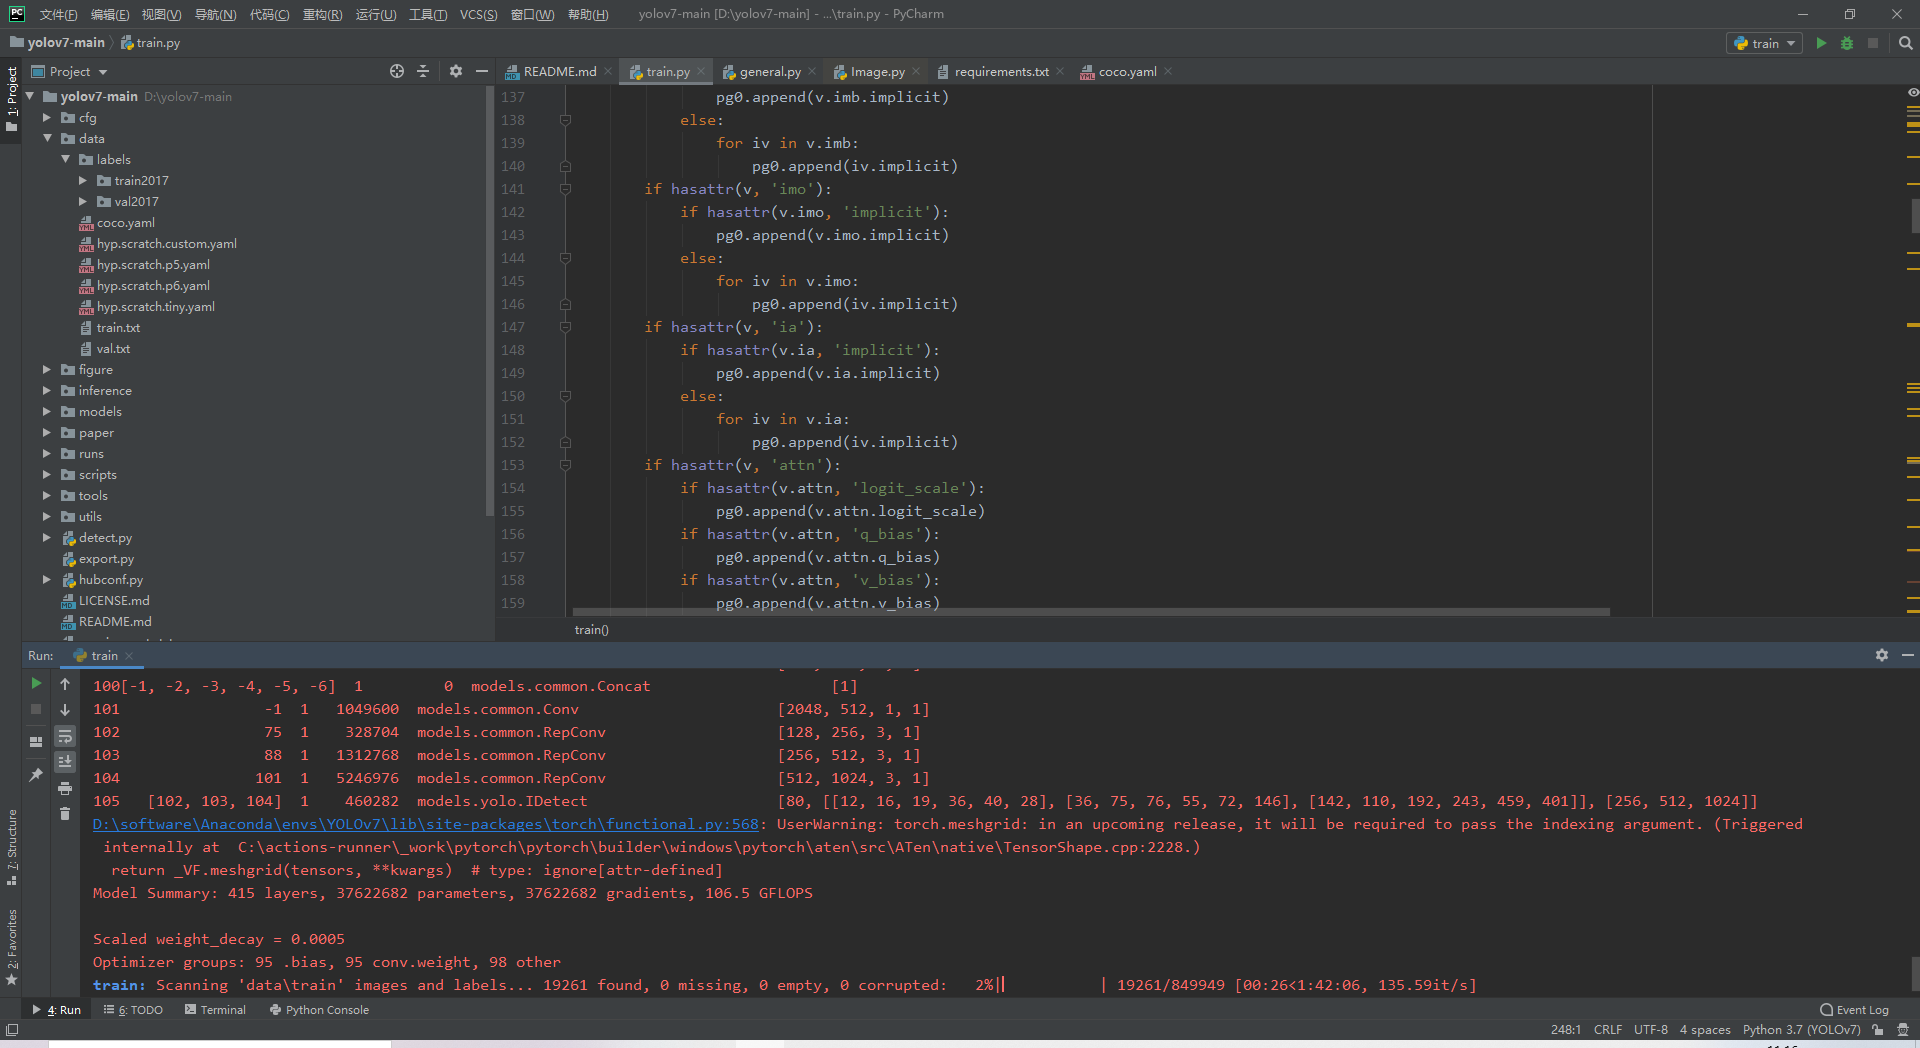
二、开始训练
在终端中输入命令开始训练。
下面是原指令:
python train.py --workers 8 --device 0 --batch-size 32 --data data/coco.yaml --img 640 640 --cfg cfg/training/yolov7.yaml --weights '' --name yolov7 --hyp data/hyp.scratch.p5.yaml
因为我用的笔记本上面没有GPU而且内存较小,所以将代码做出了更改。
python train.py --workers 1 --device cpu --batch-size 32 --data data/coco.yaml --img 640 640 --cfg cfg/training/yolov7.yaml --weights '' --name yolov7 --hyp data/hyp.scratch.p5.yaml
将指令输入到终端中就可以运行。
或者点击运行->调试配置将指令输入到parameters中(将python train.py去掉),点击运行后就可以开始训练了。

YOLOv7开始训练。