本次实验较为综合,主要是用到了RecyclerView、okhttp库(用于网络访问)、gson库(解析json数据)、tomacat(服务器存放图片、文字等),所以代码较多,但知识点常用,如果毕设、工作接触安卓可以深入学习。我也会在本章深入讲解
首先列表的数据都是来源于Tomcat,所以在这里引用一下别人Tomcat的安装使用办法,在后面代码中我的Tomcat目录为:D:\Tomcat\apache-tomcat-8.5.89,大家也可装到D盘。
Tomcat安装步骤及详细配置教程(2022最新版)_tomcat安装及配置教程_Java程序员-张凯的博客-CSDN博客
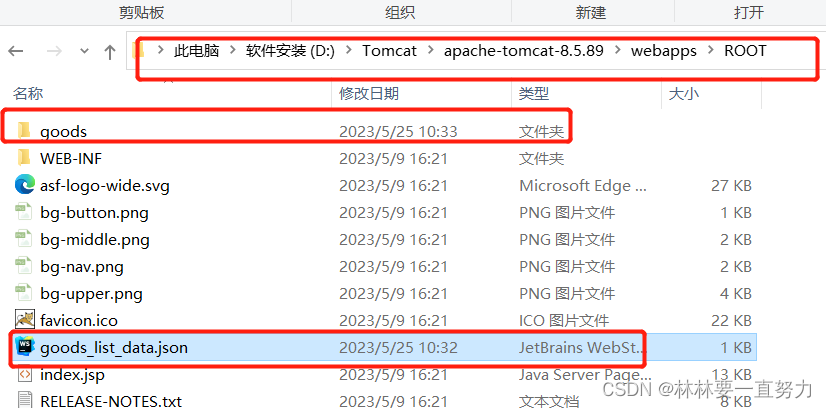
添加文件到D:\Tomcat\apache-tomcat-8.5.89\webapps\ROOT目录下,
这里添加了两个文件:goods文件夹、goods_list_data.json(文件后续我可能会发布到资源里包括源码),一个json文件以及一个包含了图片、json的文件夹
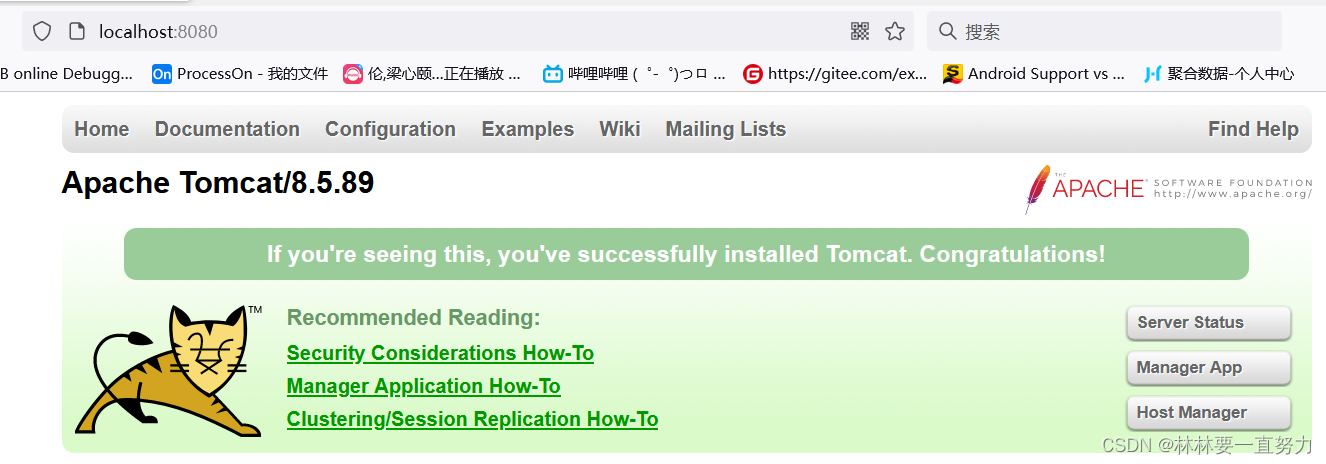
在D:\Tomcat\apache-tomcat-8.5.89\bin目录下找到startup.bat双击,即运行tomcat,出现一个弹窗,请勿关闭,否则访问不到,为了测试tomcat是否正确开启,可以本地访问
http://localhost:8080/出现页面则代表启动成功
准备Android Studio一些配置
在AndroidManifest.xml文件中添加语句:声明网络权限
<uses-permission android:name="android.permission.INTERNET" />此外高版本的android还需要完成网络安全访问配置
在res文件夹下创建xml文件夹,并新建文件network_config.xml

内容为:
<?xml version="1.0" encoding="utf-8"?>
<network-security-config>
    <base-config cleartextTrafficPermitted="true"/>
</network-security-config>
并还需要返回到AndroidManifest.xml,添加一句话
android:networkSecurityConfig="@xml/network_config"

在build.gradle文件中添加第三方库(app下的build.gradle)

在dependencies {}花括号中添加如下代码:
//okhttp
    implementation("com.squareup.okhttp3:okhttp:4.10.0")
//gson
    implementation 'com.google.code.gson:gson:2.6.2'
//glide
    implementation 'com.github.bumptech.glide:glide:4.4.0'
OK,准备环节结束,下面来看看效果图:


首先该页面的XML布局代码,可以看到页面很明显的有一个两列的列表,所以肯定是无法使用ListView的(难道你要和我杠,用两个ListView横向排列~~~),所以我们肯定采用能横向显示、能竖向显示、能瀑布流、能多行等等的RecyclerView,在高版本中RecyclerView已经无需添加依赖什么的,所以直接打RecyclerView就出现androidx.recyclerview.widget.RecyclerView选择即可
activity_main69.xml(名字不一定和我一样)
<?xml version="1.0" encoding="utf-8"?>
<LinearLayout xmlns:android="http://schemas.android.com/apk/res/android"
    android:layout_width="match_parent"
    android:layout_height="match_parent"
    android:orientation="vertical">
    <LinearLayout
        android:layout_width="match_parent"
        android:layout_height="wrap_content"
        android:layout_marginLeft="20dp"
        android:layout_marginTop="20dp"
        android:layout_marginRight="20dp"
        android:background="@drawable/title_bg"
        android:gravity="center_vertical"
        android:orientation="horizontal">
        <TextView
            android:layout_width="wrap_content"
            android:layout_height="wrap_content"
            android:layout_marginLeft="25dp"
            android:text="一刀砍成卡"
            android:textColor="#ce4032"
            android:textSize="24sp"
            android:textStyle="bold" />
        <View
            android:layout_width="1dp"
            android:layout_height="match_parent"
            android:layout_margin="20dp"
            android:background="#af560e" />
        <TextView
            android:layout_width="wrap_content"
            android:layout_height="wrap_content"
            android:text="商品直接带回家"
            android:textColor="#875a1e"
            android:textSize="18sp"
            android:textStyle="bold" />
    </LinearLayout>
    <androidx.recyclerview.widget.RecyclerView
        android:id="@+id/rv_list"
        android:layout_width="match_parent"
        android:layout_height="match_parent" />
</LinearLayout>
然后还有一个XML文件,因为使用到了RecyclerView列表控件,所以还需要一个item界面,布局和控件就不说了,线性布局、ImageView、TextView等控件。
goods_item.xml
<?xml version="1.0" encoding="utf-8"?>
<LinearLayout xmlns:android="http://schemas.android.com/apk/res/android"
    android:layout_width="wrap_content"
    android:layout_height="250dp"
    android:layout_gravity="center_horizontal"
    android:orientation="vertical">
    <LinearLayout
        android:layout_width="match_parent"
        android:layout_height="match_parent"
        android:background="@drawable/goods_bg"
        android:gravity="center_horizontal"
        android:orientation="vertical">
        <TextView
            android:id="@+id/tv_count"
            android:layout_width="wrap_content"
            android:layout_height="27dp"
            android:layout_gravity="center_horizontal"
            android:gravity="center"
            android:padding="5dp"
            android:textColor="#573516"
            android:textSize="12sp" />
        <TextView
            android:id="@+id/tv_goods_name"
            android:layout_width="wrap_content"
            android:layout_height="wrap_content"
            android:layout_marginTop="10dp"
            android:textColor="#573516"
            android:textSize="16sp"
            android:textStyle="bold" />
        <ImageView
            android:id="@+id/iv_img"
            android:layout_width="100dp"
            android:layout_height="100dp"
            android:layout_marginTop="10dp" />
        <Button
            android:id="@+id/btn_free"
            android:layout_width="110dp"
            android:layout_height="35dp"
            android:layout_margin="10dp"
            android:background="@drawable/btn_free_bg"
            android:text="点击免费拿"
            android:textColor="@android:color/white"
            android:textSize="14sp"
            android:textStyle="bold" />
    </LinearLayout>
</LinearLayout>
另外显然是一个较全的小项目,所以需要面向对象编程,在本次实例中有一个对象:砍价商品,然后包含了商品id、砍价数量、商品名称、商品图片,然后使用alt+insert快速构造构造方法、get方法、set方法。
GoodsInfo
public class GoodsInfo {
    private int id;             // id
    private String count;      // 已砍数
    private String name; // 名称
    private String image;  // 图片

    public GoodsInfo(int id, String count, String name, String image) {
        this.id = id;
        this.count = count;
        this.name = name;
        this.image = image;
    }

    public int getId() {
        return id;
    }

    public void setId(int id) {
        this.id = id;
    }

    public String getCount() {
        return count;
    }

    public void setCount(String count) {
        this.count = count;
    }

    public String getName() {
        return name;
    }

    public void setName(String name) {
        this.name = name;
    }

    public String getImage() {
        return image;
    }

    public void setImage(String image) {
        this.image = image;
    }
}
接下来是列表RecyclerView适配器
GoodsAdapter
import android.content.Context;
import android.view.LayoutInflater;
import android.view.View;
import android.view.ViewGroup;
import android.widget.Button;
import android.widget.ImageView;
import android.widget.TextView;

import androidx.recyclerview.widget.RecyclerView;

import com.bumptech.glide.Glide;

import java.util.ArrayList;
import java.util.List;

public class GoodsAdapter extends RecyclerView.Adapter<RecyclerView.ViewHolder> {
    private Context mContext;
    private List<GoodsInfo> GoodsList = new ArrayList<>();

    //构造方法 传递获取的上下文
    public GoodsAdapter(Context context) {
        this.mContext = context;
    }
    //设置数据 并更新列表
    public void setData(List<GoodsInfo> GoodsList) {
        this.GoodsList = GoodsList;
        notifyDataSetChanged();
    }

    //加载布局文件   LayoutInflater.from(mContext).inflate
    //可以类比一下ListView中 View view = inflater.inflate这个方法 也是加载布局文件(其实是一样的)
    @Override
    public RecyclerView.ViewHolder onCreateViewHolder(ViewGroup parent, int viewType) {
        //获取加载item界面文件  这里是R.layout.goods_item
        View view = LayoutInflater.from(mContext).inflate(R.layout.goods_item, parent, false);
        //new 一个viewholder  到时候复用用
        RecyclerView.ViewHolder holder  = new MyViewHolder(view);
        return holder;
    }

    //    数据绑定,将数据绑定到视图上
    @Override
    public void onBindViewHolder(RecyclerView.ViewHolder holder, int position) {
        GoodsInfo bean = GoodsList.get(position);
//        将已砍的商品数量和商品名称设置到界面控件上
        ((MyViewHolder) holder).tv_count.setText("已砍" + bean.getCount() + "件");
        ((MyViewHolder) holder).tv_goods_name.setText(bean.getName());
//        将商品图片数据设置到图片控件iv_img上
        Glide.with(mContext)
                .load(bean.getImage())
//                .error(R.mipmap.ic_launcher)
                .into(((MyViewHolder) holder).iv_img);
    }

    //    获取条目总数
    @Override
    public int getItemCount() {
        return GoodsList.size();
    }
    //zi定义的viewhlder

    class MyViewHolder extends RecyclerView.ViewHolder {
        TextView tv_count, tv_goods_name;
        ImageView iv_img;
        Button btn_free;

        public MyViewHolder(View view) {
            super(view);
            tv_count = view.findViewById(R.id.tv_count);
            tv_goods_name = view.findViewById(R.id.tv_goods_name);
            iv_img = view.findViewById(R.id.iv_img);
            btn_free = view.findViewById(R.id.btn_free);
        }
    }
}
另外 最主要的逻辑代码
MainActivity69
import androidx.appcompat.app.AppCompatActivity;
import androidx.recyclerview.widget.GridLayoutManager;
import androidx.recyclerview.widget.RecyclerView;

import android.os.Bundle;


import android.os.Bundle;
import android.os.Handler;
import android.os.Message;


import com.google.gson.Gson;
import com.google.gson.reflect.TypeToken;

import java.io.IOException;
import java.lang.reflect.Type;
import java.util.List;

import okhttp3.Call;
import okhttp3.Callback;
import okhttp3.OkHttpClient;
import okhttp3.Request;
import okhttp3.Response;

public class MainActivity69 extends AppCompatActivity {
    private GoodsAdapter adapter;             // 列表的适配器
    public static final int MSG_GOODS_OK = 1; // 获取数据
    private MHandler mHandler;
    // 内网接口
    public static final String WEB_SITE = "http://192.168.128.1:8080/goods";
    // 商品列表接口
    public static final String REQUEST_GOODS_URL = "/goods_list_data.json";
    private RecyclerView rv_list;

    @Override
    protected void onCreate(Bundle savedInstanceState) {
        super.onCreate(savedInstanceState);
        setContentView(R.layout.activity_main69);
        mHandler = new MHandler();
        init();
        initData();
    }

    private void init() {
        rv_list = findViewById(R.id.rv_list);
//设置上下文以及  RecyclerView列数
        GridLayoutManager manager = new GridLayoutManager(this, 2);
//        将manager对象设置到控件rv_list上
        rv_list.setLayoutManager(manager);
        adapter = new GoodsAdapter(MainActivity69.this);
//        将数据适配器的对象adapter设置到控件rv_list上
        rv_list.setAdapter(adapter);
    }

    private void initData() {
        //okhttp
        OkHttpClient okHttpClient = new OkHttpClient();
        Request request = new Request.Builder().url(WEB_SITE +
                REQUEST_GOODS_URL).build();
        Call call = okHttpClient.newCall(request);
        // 开启异步线程访问网络,从服务器上获取商品列表的数据
        //okhttp不需要 new新线程
        call.enqueue(new Callback() {
            @Override
            public void onResponse(Call call, Response response) throws IOException {
                String res = response.body().string(); // 获取商品数据
                Message msg = new Message();
                msg.what = MSG_GOODS_OK;
                msg.obj = res;
                mHandler.sendMessage(msg);
            }

            @Override
            public void onFailure(Call call, IOException e) {
            }
        });
    }

    /**
     * 事件捕获
     */
    class MHandler extends Handler {
        @Override
        public void dispatchMessage(Message msg) {
            super.dispatchMessage(msg);
            switch (msg.what) {
                case MSG_GOODS_OK:
                    if (msg.obj != null) {
//                        获取传递过来的JSON数据vlResult
                        String vlResult = (String) msg.obj;
                        // 解析获取的JSON数据vlResult,并将解析后的数据存放在集合goodsInfos中
                        List<GoodsInfo> goodsInfos = getGoodsList(vlResult);
//                        将集合goodsInfos设置到数据适配器的对象adapter中
                        adapter.setData(goodsInfos);
                    }
                    break;
            }
        }
    }

    public List<GoodsInfo> getGoodsList(String json) {
        Gson gson = new Gson(); // 使用gson库解析JSON数据
        // 创建一个TypeToken的匿名子类对象,并调用对象的getType()方法
        Type listType = new TypeToken<List<GoodsInfo>>() {
        }.getType();
        // 把获取到的集合数据存放到goodsInfos中
        List<GoodsInfo> goodsInfos = gson.fromJson(json, listType);
        return goodsInfos;
    }
}