别人写的平台再垃圾,也是用来淘汰你的。
代码更新地址:https://github.com/ahu965/api-automator.git
Python环境没有的,请自行安装,本教程采用的是python 3.9。
Django官网 https://www.djangoproject.com/
Node环境没有的,请自行安装,本教程采用的是node v17.6.0。
Vue.js官网 https://cn.vuejs.org/
本节将进入接口管理模块的开发,页面参考是postman,左侧用于显示接口列表,层级关系,右侧展示接口具体信息,参照如下:
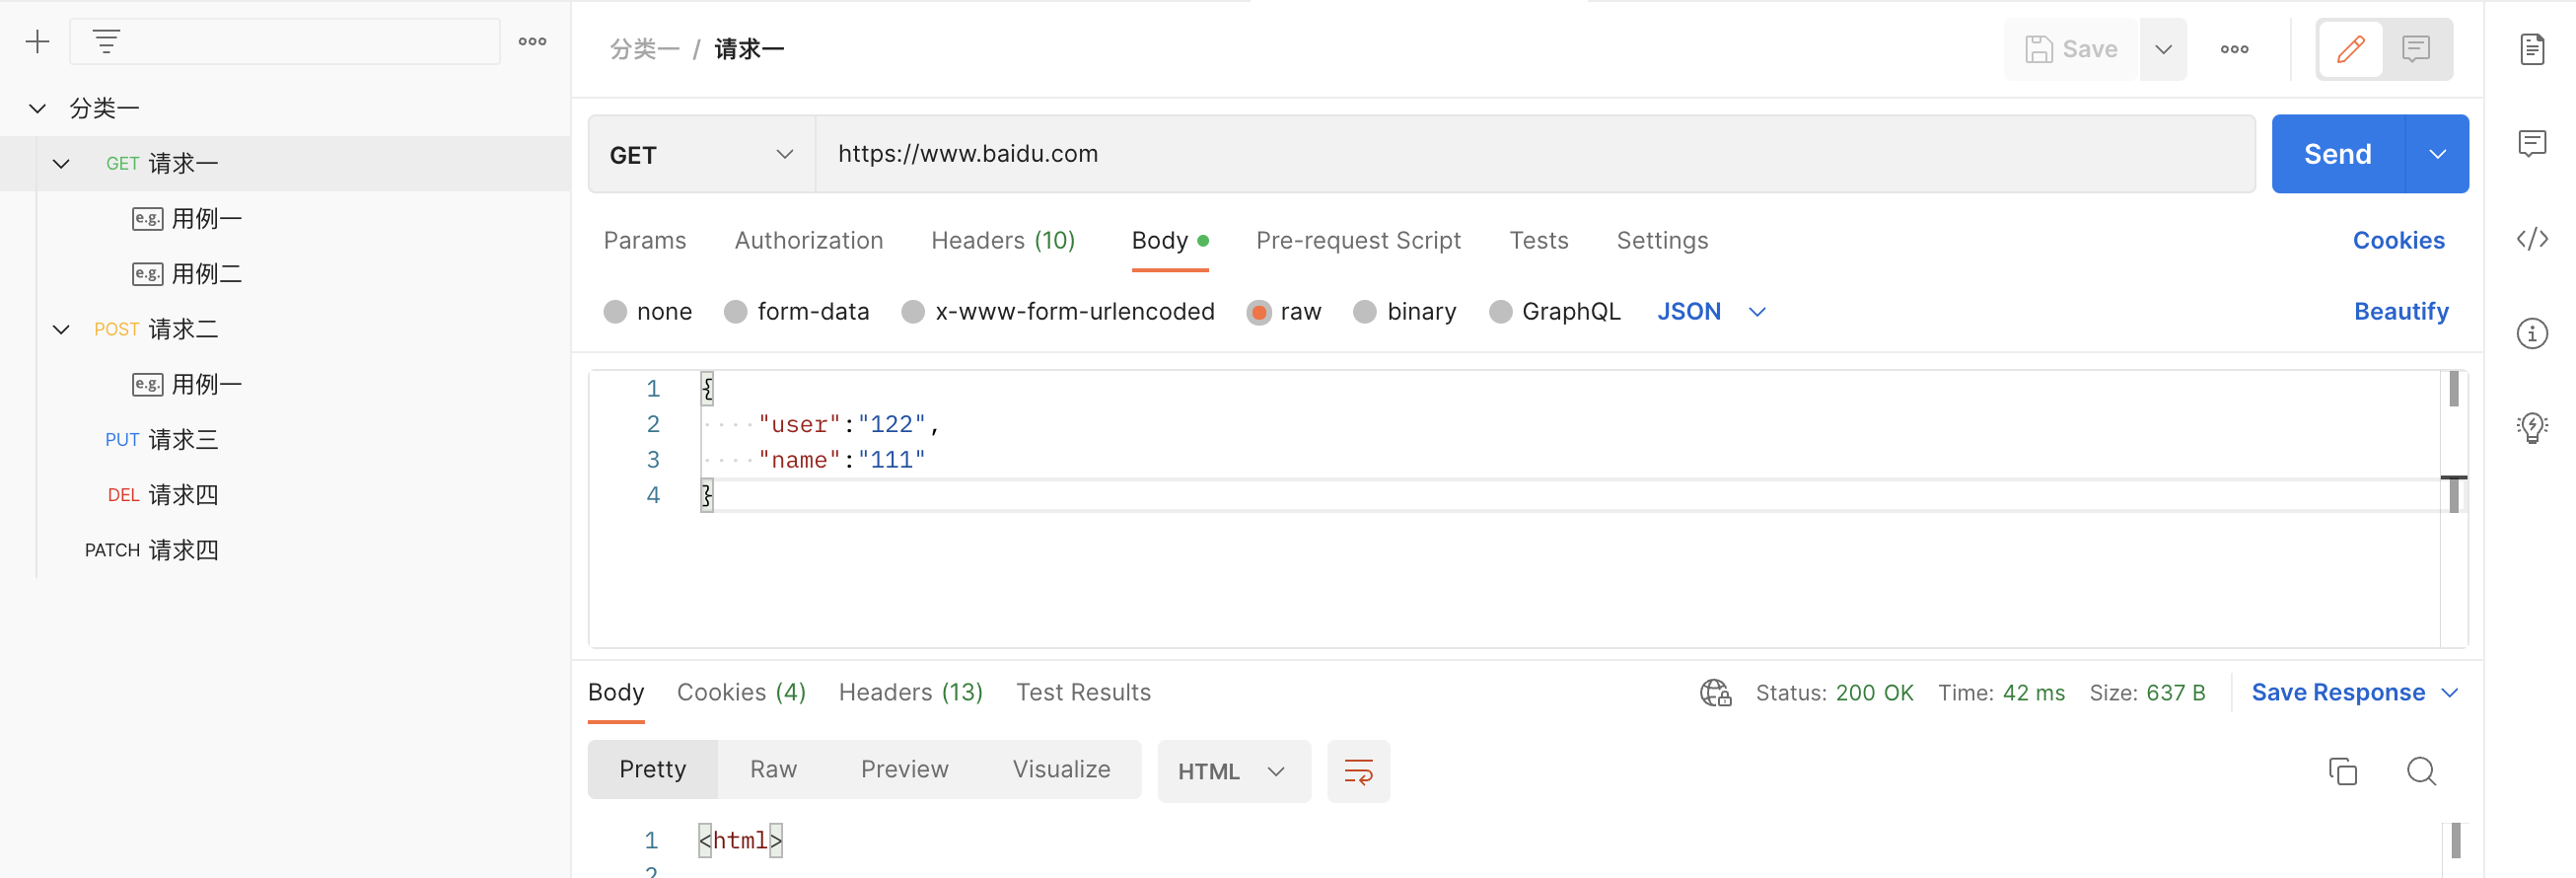
接口自动化 接口管理模块开发(一)
接着上节,点击项目管理列表上,对应项目的名称,进入到「接口管理」页面,因此需要一个新的路由指向新的页面,在点击目管理列表的名称时跳转到对应项目的「接口管理」页面,并且展示出对应的接口列表,本节先不做这个跳转,直接创建一个菜单,然后先进行简单的进行页面布局规划。
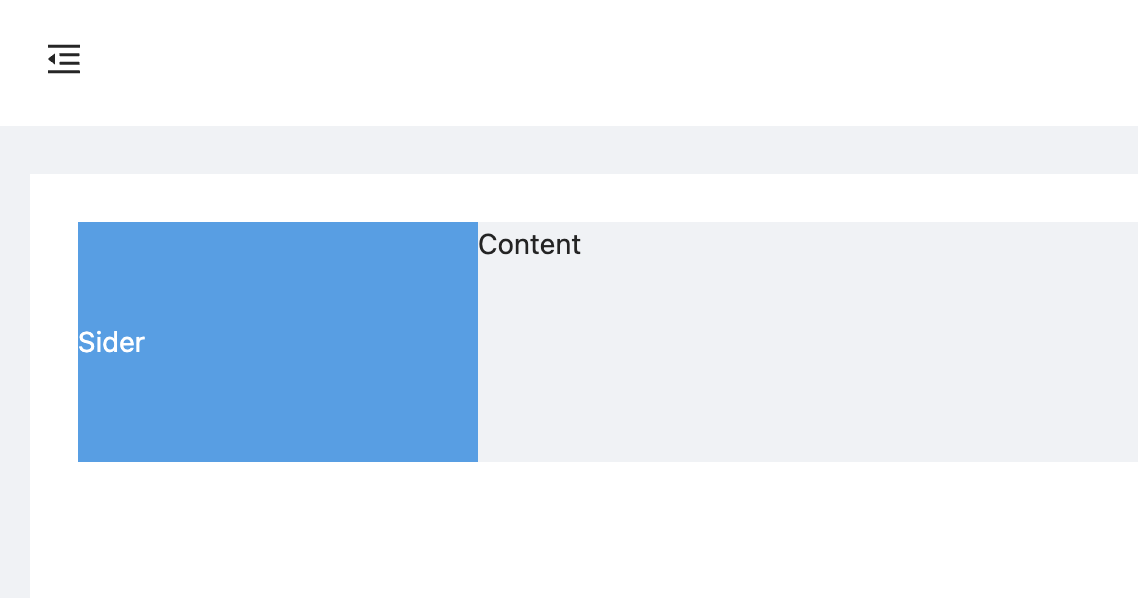
前端页面布局
- 创建一个新的页面,并且设置路由指向这个新页面。

- 再次重启前端项目,刷新页面,就可以看到新路由,并且能够访问到接口管理页面了,接下来就是在这个页面进行页面布局规划
前端页面布局
为了实现左右结构的布局,同样可以使用Ant Design Vue的Layout组件,效果如下:
因为接口管理页面的功能比较多,为避免一个文件中的代码量太大,因此将区域进行划分,作为组件进行引入。
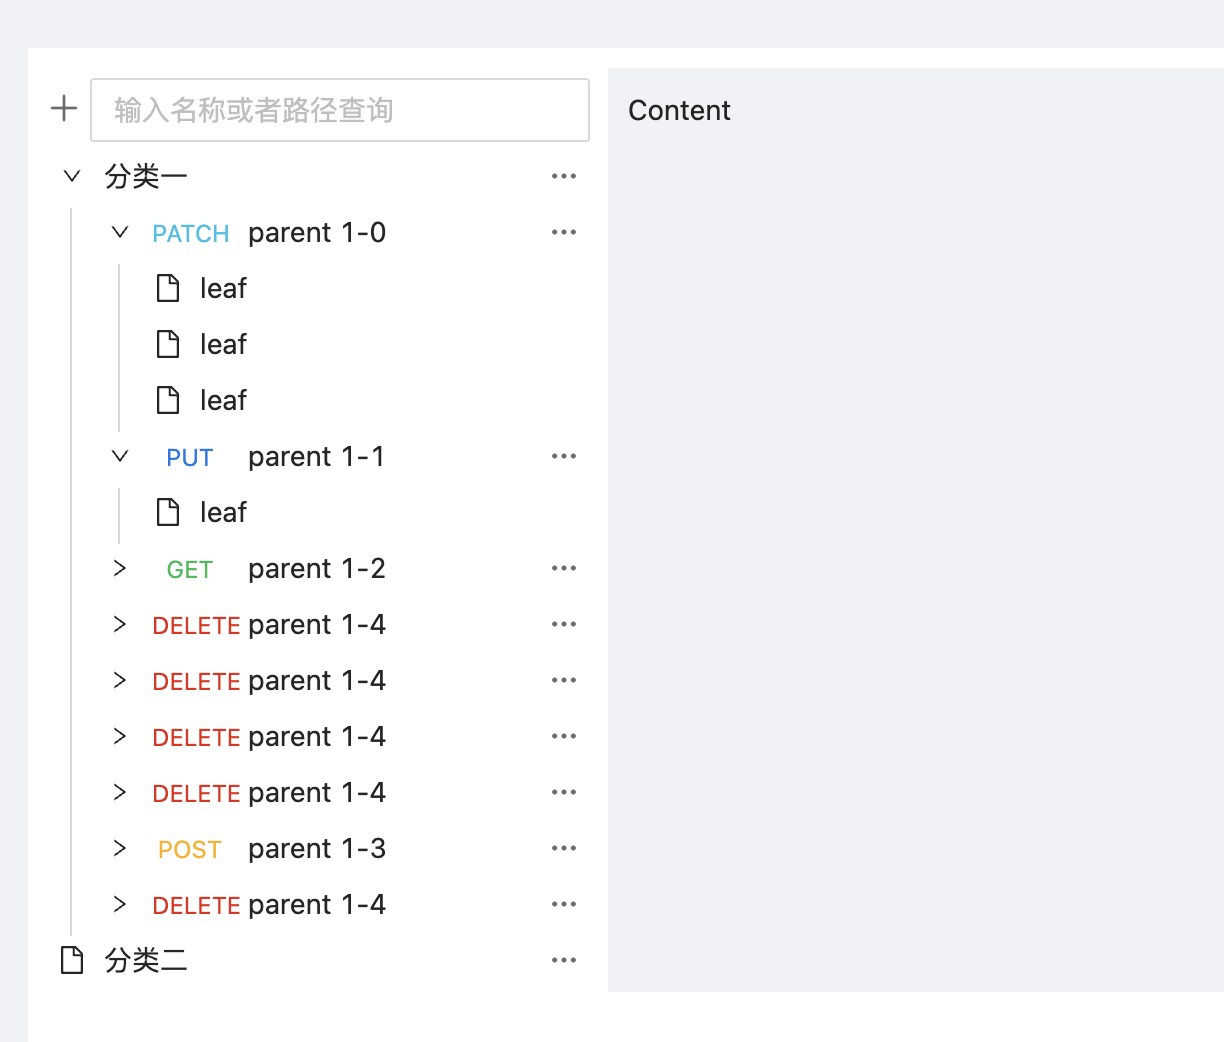
左侧的Sider区域,在src/components下新增一个组件ApiListSider.vue,然后在ApiListView.vue中引入。
<template>
  <div class="api">
    <a-layout>
      <a-layout-sider>
        <api-list-sider></api-list-sider>
      </a-layout-sider>
      <a-layout-content>Content</a-layout-content>
    </a-layout>
  </div>
</template>
同样ApiListSider.vue中的树形结构可以采用Ant Design Vue提供的tree组件。
右侧的Content区域,在src/components下新增一个组件ApiListContent.vue,然后在ApiListView.vue中引入。
<template>
  <div class="api">
    <a-layout>
      <a-layout-sider>
        <api-list-sider></api-list-sider>
      </a-layout-sider>
      <a-layout-content>
        <api-list-content></api-list-content>
      </a-layout-content>
    </a-layout>
  </div>
</template>
如下图,ApiListContent.vue中的最外层使用了Ant Design Vue提供的Card组件,然后右上角使用Button组件,然后是Form组件,最后是两个Tab组件。使用步骤同样是找到组件的示例代码,拷贝到本地后进行调试。

因为两个Tabs当中,不同Tab页的内容也是很多的,这里同样将不同的tab定义为不同的组件,然后在ApiListContent.vue中进行引用。
首先是「请求参数」Tab页,使用Table组件,然后使用插槽将字段全部设置为Input组件,然后在右侧将字段设置为两个按钮,分别用来新增和删除,因为「请求头」Tab页,也需要这个样式,可以再将这个可输入的表格提取作为一个单独的组件,这样就可以达到代码的复用。
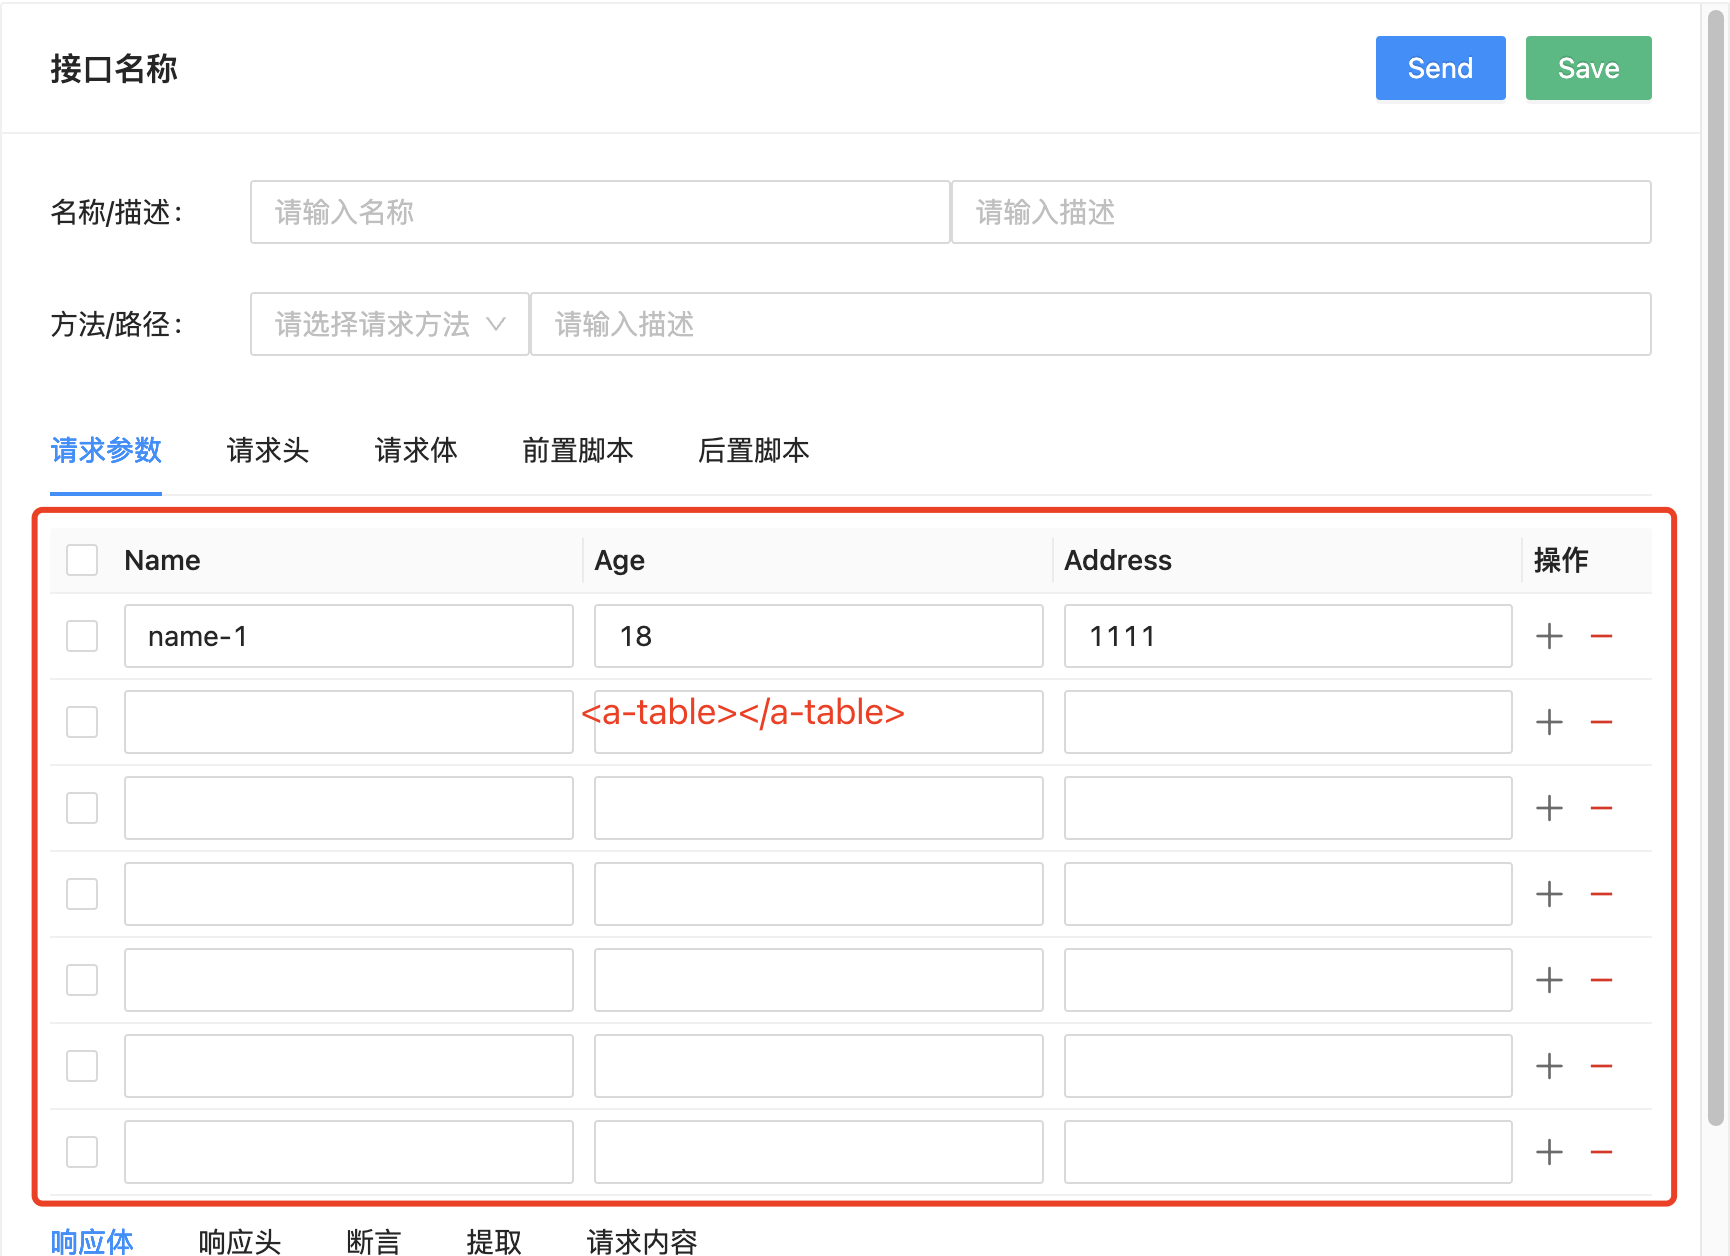
在src/components下创建新组件TableForm.vue,然后将Table的逻辑迁移到TableForm中,然后将变化的部分定义为变量,如下定义了三个变量 columns、initData和dataStruct。
<template>
  <div class="table-form">
    <a-table
      :row-selection="rowSelection"
      :columns="columns"
      :data-source="data"
      :pagination="false"
    >
      <template #bodyCell="{ column, record, index }">
        <template v-if="column.key !== 'action'">
          <a-input v-model:value="record[column.key]"></a-input>
        </template>
        <template v-if="column.key === 'action'">
          <span>
            <a-icon
              class="iconfont icon-jia"
              style="color: #6b6b6b; cursor: pointer; margin-right: 10px"
              @click="addParam"
            />
            <a-icon
              class="iconfont icon-jianhao"
              style="color: #e71f12; cursor: pointer"
              @click="deleteParam(index)"
            />
          </span>
        </template>
      </template>
    </a-table>
  </div>
</template>

<script setup>
import {

       computed, onMounted, ref, unref } from "vue";

const props = defineProps({


  // 表头
  columns: {


    type: Array,
    default: () => {


      return [
        {


          title: "key",
          dataIndex: "key",
          key: "key",
        },
        {


          title: "value",
          dataIndex: "value",
          key: "value",
        },
        {


          title: "描述",
          dataIndex: "desc",
          key: "desc",
        },
        {


          title: "操作",
          key: "action",
        },
      ];
    },
  },
  // 表格初始化数据
  initData: {


    type: Array,
  },
  // 表格数据结构
  dataStruct: {


    type: Object,
    default: () => {


      return {


        key: "",
        value: "",
        desc: "",
      };
    },
  },
});
const data = ref([]);
onMounted(() => {


  data.value = props.initData;
});

const selectedRowKeys = ref([]);
const rowSelection = computed(() => {


  return {


    selectedRowKeys: unref(selectedRowKeys),
    onChange: onSelectChange,
    hideDefaultSelections: true,
  };
});
const onSelectChange = () => {

      };
const addParam = () => {


  data.value.push(props.dataStruct);
};
const deleteParam = (index) => {


  data.value.splice(index, 1);
};
</script>

<style lang="scss">
.table-form {


  .ant-table-cell {


    padding: 5px 5px;
  }
}
</style>
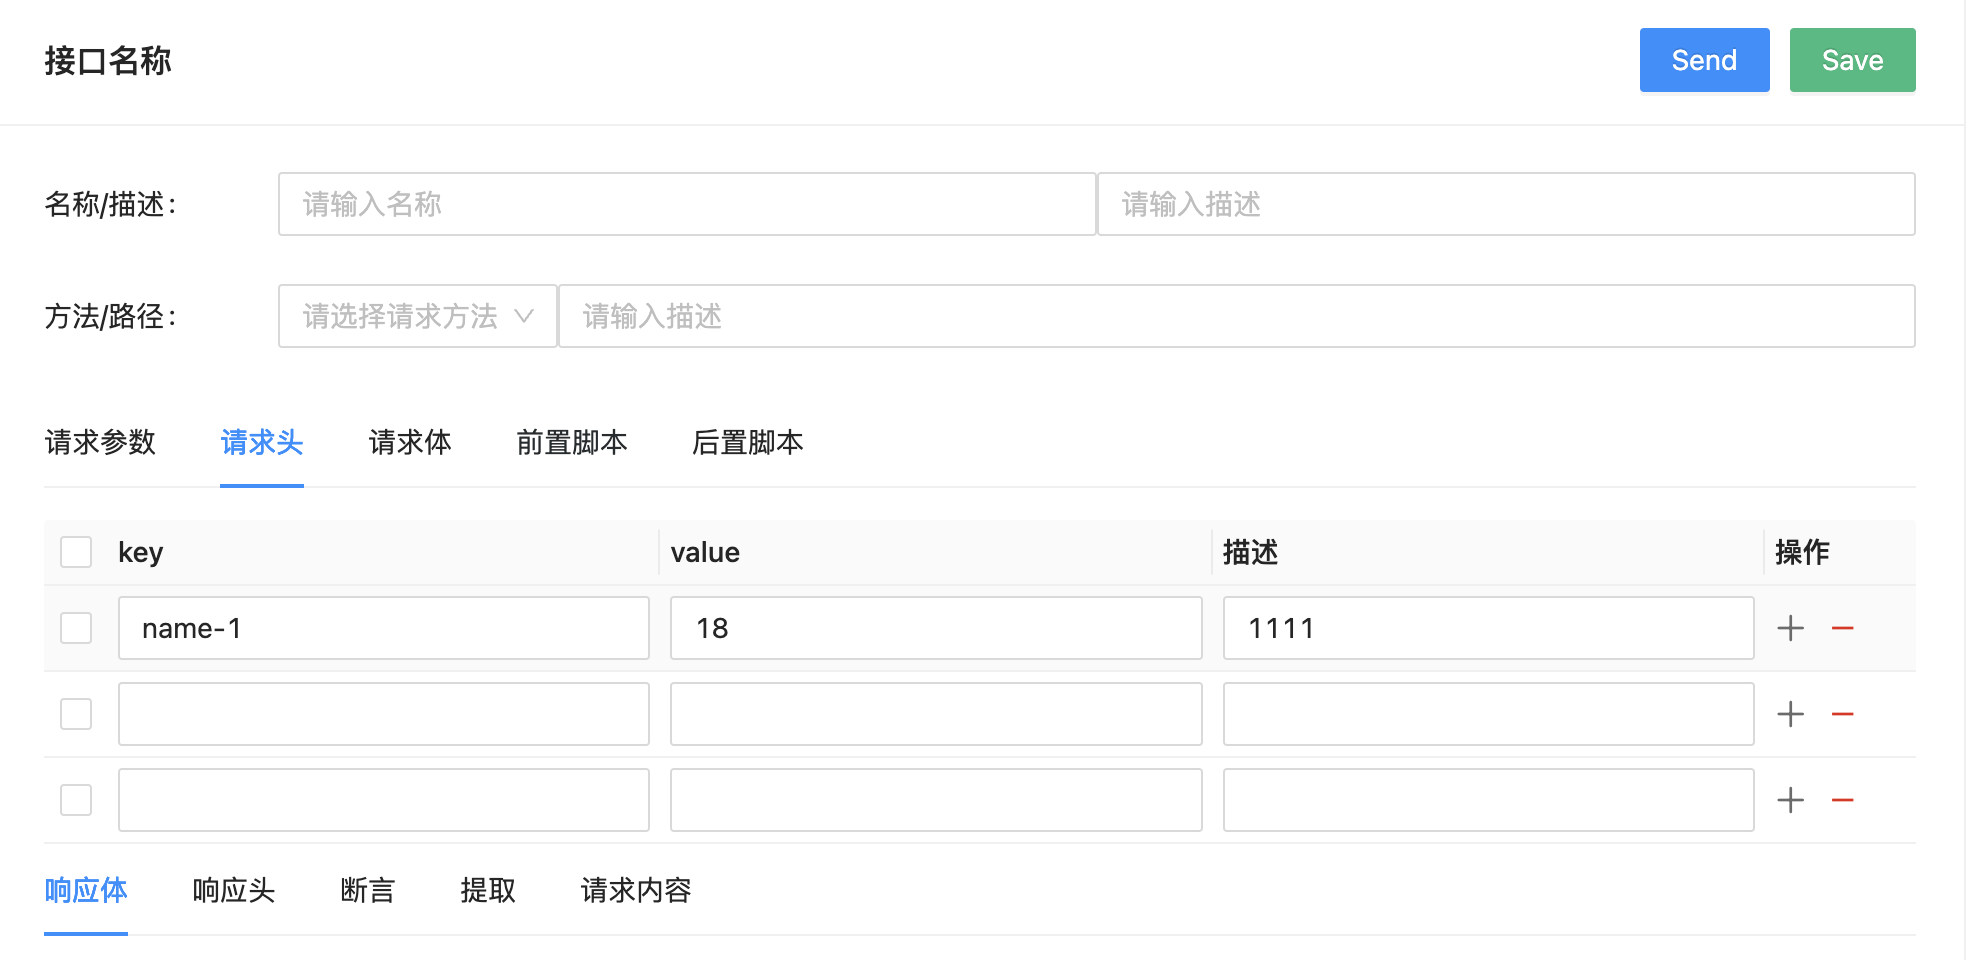
最后在src/components下分别创建组件ApiParams.vue和ApiHeaders.vue,并在分别在两个组件中引用自定义的组件TableForm。
<template>
  <div class="api-header">
    <table-form :initData="initData"></table-form>
  </div>
</template>

<script setup>
import {

       ref } from "vue";
import TableForm from "@/components/TableForm.vue";

const initData = ref([
  {


    key: "name-1",
    value: "18",
    desc: "1111",
  },
]);
</script>

<style scoped></style>
重启项目,刷新页面可以看到「请求参数」和「请求头」Tab页都有内容了,如下:
本节到此结束,下节将继续完成剩下Tab页的样式布局。