基础配置
#关闭防火墙
[root@node2 ~]# systemctl stop firewalld
[root@node2 ~]# systemctl disable firewalld
#清空iptables规则
[root@node2 ~]# iptables -F
[root@node2 ~]# iptables -X
[root@node2 ~]# iptables -Z
[root@node2 ~]# /usr/sbin/iptables-save
#关闭selinux
[root@node2 ~]# setenforce 0
[root@node2 ~]# getenforce
Permissive
安装Nginx
前面说到Nginx是由c语言编写的,因此我们在编译时需要gcc的包
1、下载Nginx源码包,选择1.19.1版本即可
网站:http://nginx.org/download/

[root@node2 ~]# wget http://nginx.org/download/nginx-1.19.1.tar.gz
#如果虚拟机不支持访问外网,那先把包下载到windows中,在传到Linux中
2、解压,编译,
#解压
[root@node2 ~]# tar xzvf nginx-1.19.1.tar.gz
#安装编译Nginx所需要的工具包
[root@node2 ~]# yum -y install gcc zlib zlib-devel pcre-devel openssl
[root@node2 ~]# cd nginx-1.19.1
[root@node2 nginx-1.19.1]# ./configure           #进行编译,在这里可以通过--prefix=目录路径来指定关于Nginx相关的文件安装到具体的目录中,如果不加--prefix=参数,默认安装到/usr/local/nginx/目录下
[root@node2 nginx-1.19.1]# make && make install  #安装
说明源码包安装Nginx,的网页文件和主配置文件所在的目录
[root@node2 ~]# cd /usr/local/nginx/
[root@node2 nginx]# ll
total 4
drwxr-xr-x. 2 root root 4096 Jan 15 07:15 conf
drwxr-xr-x. 2 root root   40 Jan 15 07:15 html
drwxr-xr-x. 2 root root    6 Jan 15 07:15 logs
drwxr-xr-x. 2 root root   19 Jan 15 07:15 sbin
/usr/local/nginx/html         #网页目录
/usr/local/nginx/conf/nginx.conf     #主配置文件
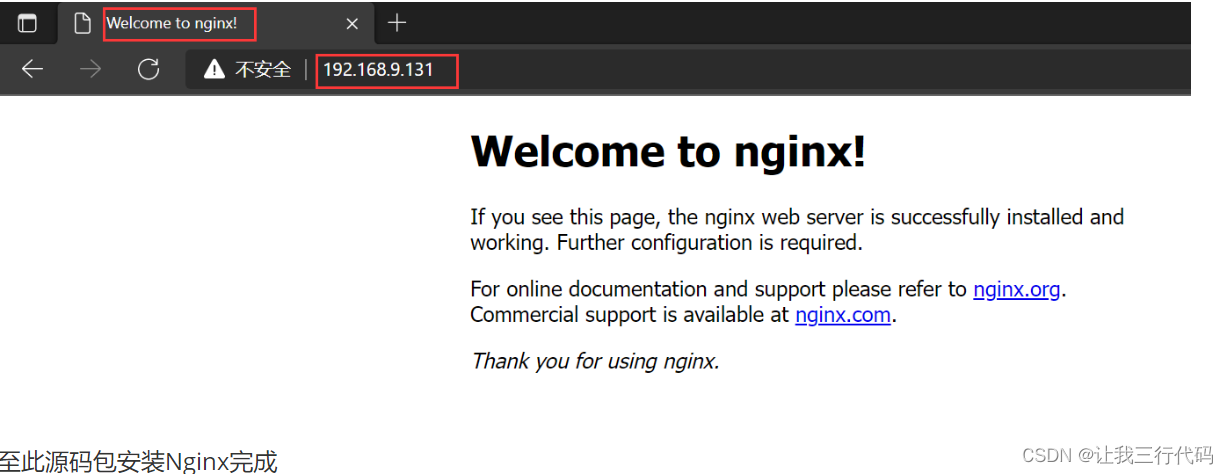
3、启动Nginx,并浏览器测试
虚拟主机
下来解释一下虚拟主机:早期的Linux服务器上,一个服务器只能运行一个网站,也就是说只能跑一个域名,随着技术的发展一个服务器和跑多个域名,这样节省了成本,而且方便管理。这里的服务器叫做主机,虚拟主机就是说在一个服务器行虚拟出多个主机来。也就是说可以跑多个域名。
实现思路:在Nignx的副配置文件行中,添加相应的字段,使其创建出多个虚拟主机:
1、先修改主配置文件,使其加载虚拟主机的配置文件:
[root@node3 ~]# vi /usr/local/nginx/conf/nginx.conf
...
http {


    include       mime.types;
    default_type  application/octet-stream;
    include vhost/*.conf;                    #添加这一行,等会我们把关于虚拟主机的配置全部写在/usr/local/nginx/vhost/以.conf结尾的文件,加载即可。
...

#测试配置文件是否修改正确
[root@node3 ~]# /usr/local/nginx/sbin/nginx -t
nginx: the configuration file /usr/local/nginx/conf/nginx.conf syntax is ok
nginx: configuration file /usr/local/nginx/conf/nginx.conf test is successful
#启动nginx服务
[root@node3 ~]# /usr/local/nginx/sbin/nginx
2、编写配置文件
#将nginx的可执行命令加入环境变量
[root@node3 ~]# vi ~/.bash_profile
# .bash_profile

# Get the aliases and functions
if [ -f ~/.bashrc ]; then
        . ~/.bashrc
fi

# User specific environment and startup programs

PATH=$PATH:$HOME/bin:/usr/local/nginx/sbin/            #添加/usr/local/nginx/sbin/内容

export PATH
mkdir /usr/local/nginx/conf/vhost
#刷新环境变量
[root@node3 ~]# source ~/.bash_profile
#创建目录
mkdir /usr/local/nginx/conf/vhost
#编写虚拟主机配置文件
[root@node3 ~]# vi /usr/local/nginx/conf/vhost/default.conf
server {


        listen 80 default_server;         #default_server表示此虚拟主机是默认虚拟主机,我们访问任何域名都能访问到它的内容
        server_name aaa.com;
        index index.html index.htm index.php;
        root /data/nginx/default;
}
#测试配置文件是否编写正确
[root@node3 ~]# nginx -t
nginx: the configuration file /usr/local/nginx/conf/nginx.conf syntax is ok
nginx: configuration file /usr/local/nginx/conf/nginx.conf test is successful
#重启服务
[root@node3 ~]# nginx -s reload
#编写虚拟主机网页文件
[root@node3 ~]# echo "aaa" > /data/nginx/default/index.html
3、访问虚拟主机网页文件
[root@node3 ~]# curl -x192.168.9.132:80 aaa.com          #访问配置文件中定义的aaa.com域名
aaa
[root@node3 ~]# curl -x192.168.9.132:80 111.com          #访问一个没有定义过的域名,也会访问到aaa.com,因为aaa.com是默认虚拟主机,凡是没有找到域名的都交给aaa.com来处理。
aaa
用户认证
在生产环境中,我们为了网站内容的安全性,我们可以设置相应的用户认证,也就是访问我的网站需要先输入用户名和密码,否则是访问不到网站的。
我们可以如下操作:
1、再来创建一个新的虚拟机
[root@node3 ~]# vi /usr/local/nginx/conf/vhost/test.conf
server {


        listen 80;
        server_name test.com;
        index index.html index.htm index.php;
        root /data/nginx/test;

        location /
        {


                auth_basic      "Auth";
                auth_basic_user_file    /usr/local/nginx/conf/htpasswd;
        }
}
#测试配置是否有错
[root@node3 ~]# nginx -t        #小狐仙如下内容表示无错
nginx: the configuration file /usr/local/nginx/conf/nginx.conf syntax is ok
nginx: configuration file /usr/local/nginx/conf/nginx.conf test is successful
#重启Nginx服务
[root@node3 ~]# nginx -s reload
解释一下配置文件的含义:
核心语句就两行:auth_basic打开认证,auth_basic_user_file指定用户密码,当然前提是这个用户密码文件存在。而生成用户密码文件的工具需要借助httpd的htpasswd工具,Nginx不自带这个工具,需要额外安装。
2、安装httpd-tools工具,目的之安装下面的htpasswd密码
[root@node3 ~]# yum install -y httpd-tools
[root@node3 ~]# htpasswd -cm /usr/local/nginx/conf/htpasswd bo         #创建"bo"用户
New password:         #输入密码
Re-type new password:       #确认密码
Adding password for user bo
3、来解释一下上面命令的含义:
- htpasswd命令为创建用户的工具,-c为create(创建),-m指定密码加密的方式(md5)
- /usr/local/nginx/conf/htpasswd问密码文件,也就是配置文件指定的密码文件,"bo"为要创建的用户。
- 第一次执行上述命令需要加-c,第二次在创建新的用户时,就不用加-c了,否则密码文件会被重置,之前的用户被清空。
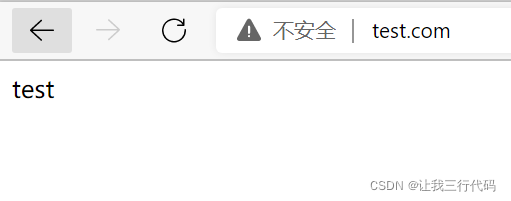
4、生成索引文件,并验证效果
[root@node3 ~]# mkdir /data/nginx/test
[root@node3 ~]# echo "test" > /data/nginx/test/index.html
#访问此网页
[root@node3 ~]# curl -I -x 127.0.0.1:80 test.com
HTTP/1.1 401 Unauthorized             #状态码为401,说明该网站需要验证
Server: nginx/1.19.1
Date: Sun, 24 Apr 2022 01:20:29 GMT
Content-Type: text/html
Content-Length: 179
Connection: keep-alive
WWW-Authenticate: Basic realm="Auth"

#指定参数进行访问
[root@node3 ~]# curl -ubo:123 -x127.0.0.1:80 test.com        #可以看到能正常访问了
test
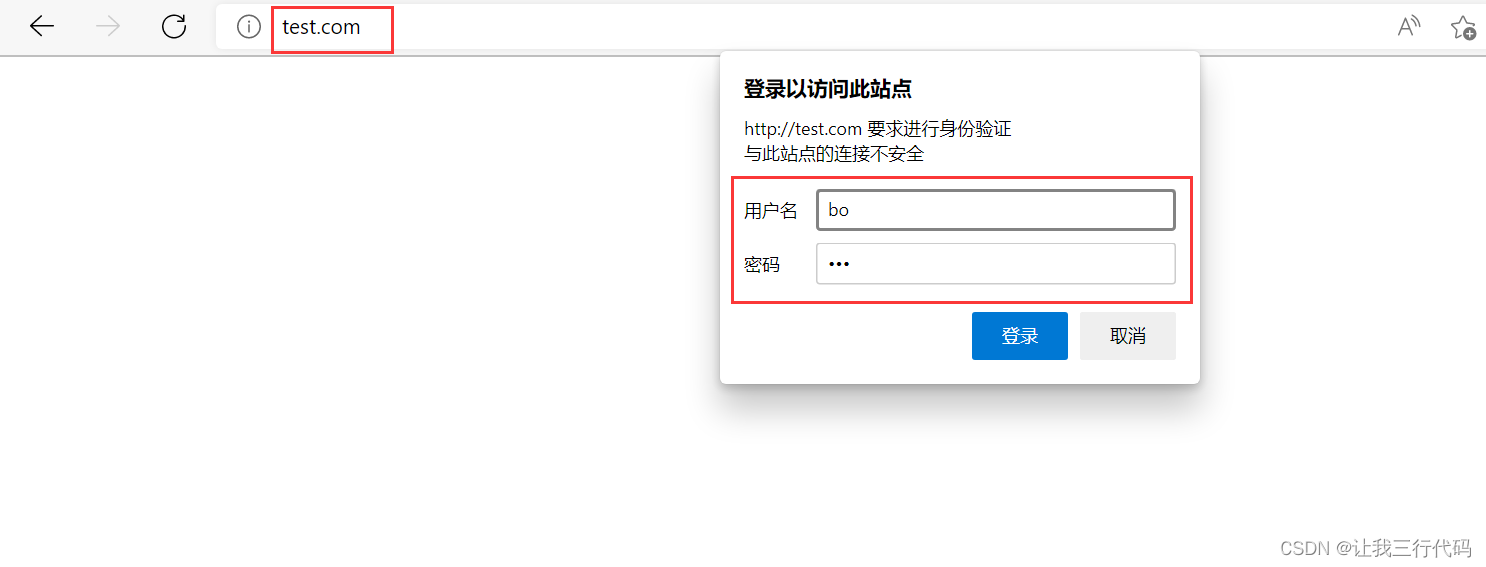
5、使用命令行不太直观,我们在浏览器中进行访问:
(1)首先在Win的host文件中,添加192.168.9.132 test.com的映射,注:192.168.9.132是虚拟机的IP
host文件地址:C:\Windows\System32\drivers\etc\hosts
添加:192.168.9.132 test.com
(2)浏览器访问:
域名或链接重定向
重定向也可以叫作跳转,这个用法比较普通。一个网站可能会有多个域名,比如现在有bo网站,可以通过两个域名访问:域名A或域名B,用域名A访问的时候,浏览器里面的网址直接变成了域名B,这其实就是域名跳转的过程。
那域名跳转有哪些作用呢?
(1)、对搜索引擎优化( search engine optimization,SEO)友好,利于搜索引擎抓取网站页面
(2)、如果之前的某个域名不在使用了,但搜素引擎还留着之前老域名的链接,这样用户可能会访问的之前的网站和老域名,故需要把老域名跳转到新域名,这样新用搜索的时候也可以访问到此网站。
1、域名重定向,下面将test1.com和test2.com重定向到test.com,也就是访问test1.com和test2.com,跳转访问到test.com配置如下:
[root@node3 vhost]# /usr/local/nginx/conf/vhost/hha.conf
server {


        listen 80;
        server_name test.com test1.com test2.com;
        index index.html index.htm index.php;
        root /data/nginx/test;

        if ($host != 'test.com') {


                rewrite ^/(.*)$ http://test.com/$1 permanent;
        }
}

#测试配置文件内容
[root@node3 vhost]# nginx -t
nginx: the configuration file /usr/local/nginx/conf/nginx.conf syntax is ok
nginx: configuration file /usr/local/nginx/conf/nginx.conf test is successful
[root@node3 vhost]# nginx -s reload
注:在Nginx配置中,server_name后面可以跟多个域名,permanent为永久重定向,状态码为301。另外还有一个常用的redirect,叫做临时重定向,状态码302,那什么时候用permanent,redirect呢?
简单的法则:如果跳转域名就用301,如果仅跳转链接就用302,测试如下:
[root@node3 ~]# curl -x127.0.0.1:80 test1.com/123.txt -I
HTTP/1.1 301 Moved Permanently              #可以看到状态码为301
Server: nginx/1.19.1
Date: Sun, 24 Apr 2022 01:59:07 GMT
Content-Type: text/html
Content-Length: 169
Connection: keep-alive
Location: http://test.com/123.txt
2、链接重定向,需求:将http://test.com/a.html跳转到http://test.com/b.html
[root@node3 vhost]# vi /usr/local/nginx/conf/vhost/uua.conf
server {


        listen 80;
        server_name test.com;
        index index.html index.htm index.php;
        root /data/nginx/test;

        rewrite /a.html /b.html redirect;           #这里因为我们是相同域名跳转。可以省略域名,如果不同域名则不可省略,比如:qqq.com/a.html qqq.com/b.html
}

#测试配置文件内容
[root@node3 ~]# nginx -t
nginx: the configuration file /usr/local/nginx/conf/nginx.conf syntax is ok
nginx: configuration file /usr/local/nginx/conf/nginx.conf test is successful
[root@node3 ~]# nginx -s reload
测试:
[root@node3 ~]# curl -I -x127.0.0.1:80 test.com/a.html
HTTP/1.1 302 Moved Temporarily                         #状态码显示302,表示链接跳转
Server: nginx/1.19.1
Date: Sun, 24 Apr 2022 02:06:40 GMT
Content-Type: text/html
Content-Length: 145
Location: http://test.com/b.html
Connection: keep-alive
防盗链
防盗链,通俗的讲,就是不让别人盗用你网站的资源。这个资源,通常是指:图片,视频,音乐,文档等。我们通过一些配置,达到此效果。防盗链中有个referer的概念。比如:通过A网站的一个页面http://a.com/a.html里面的链接去访问B网站的一个页面http://b.com/b.html,那么这个B网站页面的referer就是http://a.com/a.html。也就是说
,一个referer其实就是一个网址。
1、配置如下:
[root@node3 vhost]# vi eea.conf
server {


        listen 80;
        server_name test.com;
        index index.html index.htm index.php;
        root /data/nginx/test;
        location ~* \.(gif|jpg|png|swf|flv|rar|zip|doc|pdf|gz|bz2|jpeg|bmp|xls)$
        {


                expires 7d;         #设置有效期时间,这里为7day
                valid_referers none blocked server_name *.test.com test.com;       #设置信任的网站,设置这个网站可以获取图片
                if ($invalid_referer)                                     #做个判断,如果不是上面字段规定的网站,就返回下面定义的结果
                {


                        return 403;                                       #返回403
                        rewrite ^/ http://test.com/error.png;             #或者返回一个error的图片(提示),注意这里是png格式的图片,那location定义的就要取消png
                }
        }
        access_log off;                            #表示以上操作不记录在日志中。
}
2、检测结果
(1)定义不匹配的referer来获取资源:
[root@node3 ~]# curl -x127.0.0.1:80 -I -e "http://aaa.com/" test.com/a.png
HTTP/1.1 403 Forbidden
Server: nginx/1.19.1
Date: Sun, 24 Apr 2022 06:29:11 GMT
Content-Type: text/html
Content-Length: 153
Connection: keep-alive
解析命令参数:-e,使用-e来定义referer的,在上面的配置文件中也写了,只有当访问到www.test.com或者是test.com时,才会访问到相应的资源,而上面-e我指定的referer时aaa.com和test.com或者www.test.com不匹配,那就返回我们定义的403界面。
注意:使用-e来定义referer,这个referer一定要以http://开头,否则不管用。
(2)定义匹配的referer来获取资源:
[root@node3 ~]# curl -x127.0.0.1:80 -I -e "http:/test.com/" test.com/a.png             #这时referer使用的时test.com,和配置文件中的匹配
HTTP/1.1 200 OK                  #看到状态码为200
Server: nginx/1.19.1
Date: Sun, 24 Apr 2022 06:33:48 GMT
Content-Type: image/png
Content-Length: 0
Last-Modified: Sun, 24 Apr 2022 06:13:43 GMT
Connection: keep-alive
ETag: "6264ea97-0"
Expires: Sun, 01 May 2022 06:33:48 GMT              #这个是过期时间,它对应的是"expires 7d"字段。
Cache-Control: max-age=604800
Accept-Ranges: bytes
访问控制
对于一些比较重要的网站内容,除了可以使用用户认证限制之外,我们也可以通过其它的方法做到限制,比如IP限制,user_agent限制,IP限制指的是限制访问网站的来源,而限制user_agent,它通常用来限制恶意或者部长长的请求的,这一点学过爬虫的都应该知道。
下面来介绍以user_agent。user_agent中文意思:用户代理,其实可以理解为浏览器标识,当用curl访问时,user_agent为"curl/7.29.0",用Edge浏览器访问时,user_agent为:Mozilla/5.0 (Linux; Android 6.0; Nexus 5 Build/MRA58N) AppleWebKit/537.36 (KHTML, like Gecko) Chrome/100.0.4896.127 Mobile Safari/537.36 Edg/100.0.1185.50。
使用浏览器访问的user_agent是正常的,其余的都是非正常的。
1、下面来配置基于IP的限制
比如现在有个需求:至允许IP:192.168.9.133,和127.0.0.1访问admin目录,其余的IP全部拒绝访问,配置文件如下:
[root@node3 vhost]# vi /usr/local/nginx/conf/vhost/b.conf
server {


        listen 80;
        server_name bbb.com;
        index index.html index.htm index.php;
        root /data/nginx/test;

        location /admin/
        {


                allow 192.168.9.133;
                allow 127.0.0.1;
                deny all;
        }
}
加入来源IP为:192.168.9.132,它会从上往下逐行去匹配,第一个IP(192.168.9.133)不匹配,第二个IP(127.0.0.1)不匹配,第三行(all)的时候匹配到了,匹配的规则是deny(拒绝),所以访问会返会一个403的状态码,测试如下:
[root@node3 vhost]# nginx -s reload
[root@node3 vhost]# mkdir /data/nginx/test/admin/
[root@node3 vhost]# echo admin >> /data/nginx/test/admin/index.html
#访问检测
[root@node3 ~]# curl -x127.0.0.1:80 test.com/admin/          #可以看到能匹配到IP,并且是允许的操作
admin
[root@node3 ~]# curl -x192.168.9.132:80 test.com/admin/      #可以看到返回403,这个IP匹配到deny all这一条,拒绝访问。
<html>
<head><title>403 Forbidden</title></head>
<body>
<center><h1>403 Forbidden</h1></center>
<hr><center>nginx/1.19.1</center>
</body>
</html>
2、当然我们也可以在location部分写一个网段,用来对一个网段进行访问控制:
location /admin/
        {


                allow 192.168.9.0/24;
                allow 127.0.0.1;
                deny all;
        }
3、如果想要达到黑名单的效果直接:
location /admin/
        {


                deny all;                   #全部拒绝。
        }
Nginx配置SSL
1、SSL(安全套接字层)简介:
SSL由Netscape公司于1994年创建,它旨在通过Web创建安全的Internet通信。它是一种标准协议,用于加密浏览器和服务器之间的通信。它允许通过Internet安全轻松地传输账号密码、银行卡、手机号等私密信息。
SSL证书就是遵守SSL协议,由受信任的CA机构颁发的数字证书。
2、HTTPS(安全超文本传输协议)
HTTPS是HTTP的安全版本,它可以通过SSL / TLS连接保护在线传输的任何通信。简而言之,HTTP+SSL/TLS=HTTPS。如果想要建立HTTPS连接,则首先必须从受信任的证书颁发机构(CA)购买SSL证书。安装SSL证书后,网站地址栏HTTP后面就会多一个“S”,还有绿色安全锁标志。
- SSL:安全套接字层(SSL1.0,SSL2.0,SSL3.0(主流))
- TLS:传输层安全(tls1.0,tls1.1,tls1.2,tls1.3(主流))
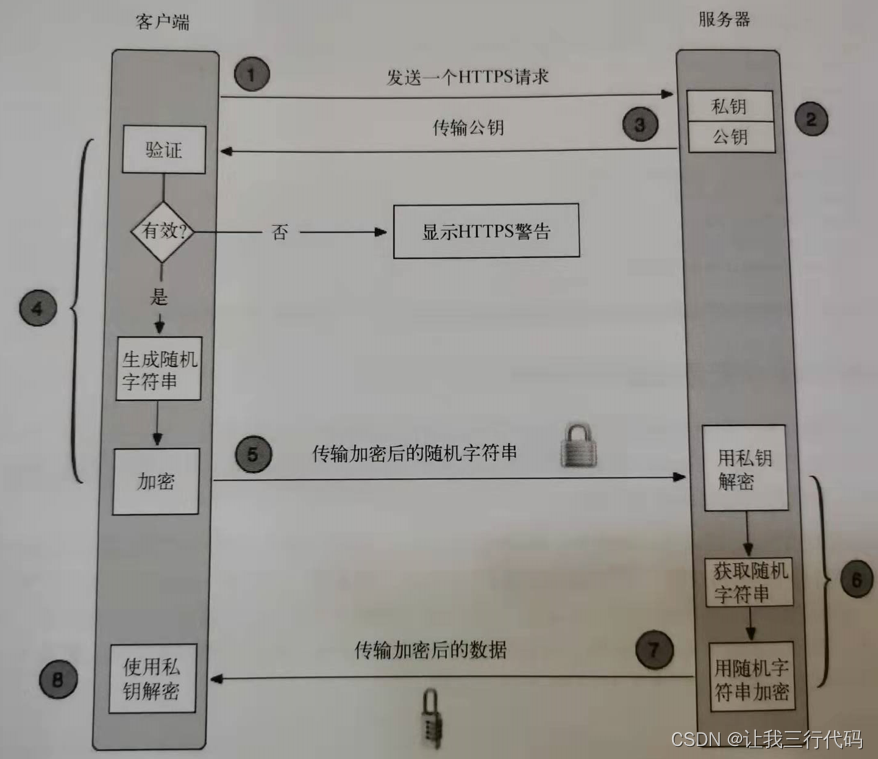
采用HTTPS通信过程大致如下:
(1)浏览器(客户端)发送一个HTTPS请求给服务端。
(2)服务端要有一套数字证书,这个证书刻可以自己制作(等会的证书就是我们自己制作),也可以向组织申请,区别就是自己颁发的证书需要客户端(浏览器)验证通过后才可以继续访问,而是用受信任的公司申请的证书则不需要手动验证了。这套证书其实就是一对私钥和公钥。
(3)服务端把公钥传输至客户端。
(4)客户端(浏览器)收到公钥后,会验证其合法性,若无效会有警告(我们手动去验证可以把无效变为有效),若有效则会生成一串随机字符串,并用收到的公钥加密。
(5)客户端把加密后的随机字符串传输给服务端。
(6)服务端把加密后的随机字符串,采用私钥进行解密(切记公钥加密,私钥解密),获取这一串随机字符串后,再用这串随机字符串加密传输的数据(该加密称为:对称加密。所谓对称加密,就是将数据和私钥,也就是那个随机字符串通过某种算法混合在一起,这样除非知道私钥,否则无法获取到数据内容)。
(7)服务端把加密后的数据传输给客户端。
(8)客户端接收到数据后,再用自己的私钥(注意:这个私钥不是证书里面的私钥,而是那个随机生成的字符串)
流程图如下:
3、任何一个协议想要被应用,必须要有实现程序。比如:http协议的实现需要httpd,Nginx服务。那么SSL协议的开源实现就是:OpenSSL。
OpenSSL主要有三个组件:
- libcrypto库:主要用来实现加密,解密的,各种加密解密算法全部在这里。
- libssl:主要实现ssl功能的
- openssl:多用途命令行工具
通过上文的分析,我们可以确定服务器上必须有一对公钥和公钥,也就是后文提到到SSL证书。因我们这是生产环境,就自己手动生成来使用吧。
4、从0创建私有CA
前置知识
KEY 通常指私钥。
CSR 是 Certificate Signing Request 的缩写,即证书签名请求,这不是证书,只是包含申请证书的基本信息。生成证书时要把这个提交给权威的证书颁发机构,颁发机构审核通过之后,再根据这些申请信息生成相应的证书。
CRT 即 certificate的缩写,即证书。
X.509 是一种证书格式。对X.509证书来说,认证者总是CA或由CA指定的人,一份X.509证书是一些标准字段的集合,这些字段包含有关用户或设备及其相应公钥的信息。
X.509的证书文件,一般以.crt结尾,根据该文件的内容编码格式,可以分为以下二种格式:
PEM - Privacy Enhanced Mail,打开看文本格式,以"-----BEGIN…“开头,”-----END…"结尾,内容是 BASE64 编码。Apache 和 *NIX 服务器偏向于使用这种编码格式。
DER - Distinguished Encoding Rules,打开看是二进制格式,不可读。Java 和 Windows 服务器偏向于使用这种编码格式。
#CA:
分类:公共信任的CA,私有CA
建立私有CA:
OpenSSL来实现
#构建私有CA:
在确定配置CA的服务器上生成一个自签证书,并为CA提供所需要的目录文件即可。
步骤:
1、生成一个密钥
#-des3代表使用那个加密算法,这个是可选的,此时需要设置密码,后续使用该密钥时需要验证密码才能使用。
[root@node3 ~]# openssl genrsa -des3 -out bo.key 2048
Generating RSA private key, 2048 bit long modulus
.................................+++
....................+++
e is 65537 (0x10001)
Enter pass phrase for bo.key:       #1a1a
Verifying - Enter pass phrase for bo.key:      #1a1a

#导出私钥(去除私钥密码)
[root@node3 ~]# openssl rsa -in bo.key -out aa.key
2、生成CSR(证书签名请求),它不是证书,而是包含申请证书的基本信息:
#参数讲解:-req表示requests请求的意思,-new表示新的申请
[root@node3 ~]# openssl req -new -key aa.key -out aa.csr
You are about to be asked to enter information that will be incorporated
into your certificate request.
What you are about to enter is what is called a Distinguished Name or a DN.
There are quite a few fields but you can leave some blank
For some fields there will be a default value,
If you enter '.', the field will be left blank.
-----
Country Name (2 letter code) [XX]:CN           #中国的缩写
State or Province Name (full name) []:Beijing      #那个省份,那个区
Locality Name (eg, city) [Default City]:Beijing    #城市名
Organization Name (eg, company) [Default Company Ltd]:BoEdu    #公司/机构名称
Organizational Unit Name (eg, section) []:Ops                  #那个部门?运维
Common Name (eg, your name or your server's hostname) []:www.test.com    #注意这这个不能瞎写,需要写服务器的域名
Email Address []:[email protected]     #电子邮箱

Please enter the following 'extra' attributes
to be sent with your certificate request
A challenge password []:123456            #设置个密码
An optional company name []:aa            #公司名
3、创建CA证书
#参数解析:-x509生成自签证书,专用于自签证书时使用,-key:生成证书请求用到的私钥文件,-out:生成的CA证书文件路径,如果是自签操作将直接生成签署过的CA证书
[root@node3 ~]# openssl x509 -req -days 365 -in aa.csr -signkey aa.key -out aa.crt
Signature oks
subject=/C=CN/ST=Beijing/L=Beijing/O=BoEdu/OU=Ops/CN=www.test.com/emailAddress=[email protected]
Getting Private key
4、其实第2,3步可以合并在一起,也就是说有个私钥以后,就可以自签证书了:
[root@node3 ~]# openssl req -new -x509 -sha256 -days 3650 -key ca.key -out ca.crt
这样就创建好了CA,这个CA就是上图中的公钥,现在私钥:aa.key,公钥:aa.crt都有了。
其实购买的SSL证书主要是得到这两个文件,有了这两个文件就可以配置Nginx了。
5、编写ssl文件
server {


        listen       443 ssl;
        server_name  192.168.9.132;
        #ssl on;
        #index index.html index.htm index.php;
        #root /data/nginx/ssl/;

        ssl_certificate      /root/aa.crt;
        ssl_certificate_key  /root/aa.key;

    #    ssl_session_cache    shared:SSL:1m;
    #    ssl_session_timeout  5m;

    #    ssl_ciphers  HIGH:!aNULL:!MD5;
    #    ssl_prefer_server_ciphers  on;

        location / {


            root   html;
            index  index.html index.htm index.php;
       }
    }
6、安装ssl依赖
yum -y install openssl openssl-devel
#nginx是不自带ssl模块的,因此我们需要重新编译此模块,
./configure --prefix=/usr/local/nginx/ --with-http_ssl_module
make
make install
7、创建测试网页
echo "ssl" > /usr/local/nginx/html/index.html