当我的组长给了我一个深度相机,倒霉的事情就开始了,在使用的过程中遇到的某些问题搜不到,头秃啊呜呜呜呜呜呜呜呜
配置:
ubuntu20.04(我实在是懒得去升级了,一旦升级就可能会出现找不到教程的可能性)
另外,这个系统已经被我玩坏了,都不记得下载了多少奇怪的东西进去了,所以报错的时候我都麻了
深度相机:OAK-D-PRO
这里只是根据官方的教程来测试一下相机的使用方法,具体在这里
一、确认依赖关系
Python 3.6 (Ubuntu) or Python 3.7 (Raspbian)。

安装或升级 DepthAI Python API安装详解

需要用到 cv2 和 numpy Python 模块。
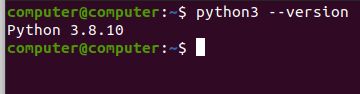
1.1 测试一下python环境:
python3 --version
1.2 安装或升级 DepthAI Python API
这里参考了这篇博客
运行命令之前保证你的深度相机已经链接上了
lsusb | grep MyriadX

终端 运行下方命令,克隆 depthai 存储库
git clone https://github.com/luxonis/depthai.git

终端 运行 cd depthai 命令 ,将目录更改为该目录
终端 运行下方命令,安装依赖项
python3 install_requirements.py
终端 运行下方命令,从 DepthAI 内部运行演示脚本,以确保一切正常
python3 depthai_demo.py
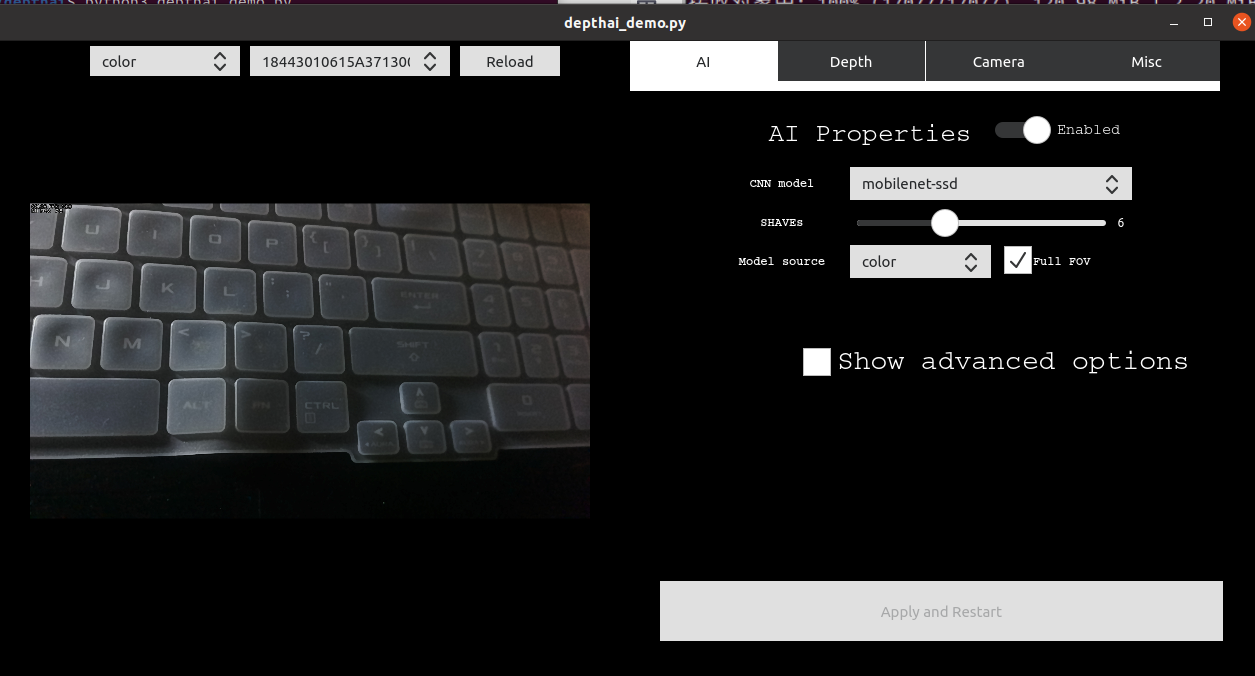
这样就证明你成功了。
1.3 最后一个依赖一般不会缺
二、开始配置文件
2.1 在你的计算机上设置以下文件结构:
cd ~
mkdir -p depthai-tutorials-practice/1-hello-world
touch depthai-tutorials-practice/1-hello-world/hello-world.py
cd depthai-tutorials-practice/1-hello-world
2.2 安装 pip 依赖
要显示 DepthAI 彩色视频流,我们需要导入少量的软件包。 下载并安装本教程所需的包:
python3 -m pip install numpy opencv-python depthai --user -i https://pypi.tuna.tsinghua.edu.cn/simple

2.3 测试你的环境
让我们验证一下是否能够加载所有的依赖项。 在你的代码编辑器中打开你之前 创建 的 hello-world.py 文件。 复制并粘贴以下内容到 hello-world.py 中:
import numpy as np # numpy - manipulate the packet data returned by depthai
import cv2 # opencv - display the video stream
import depthai # access the camera and its data packets
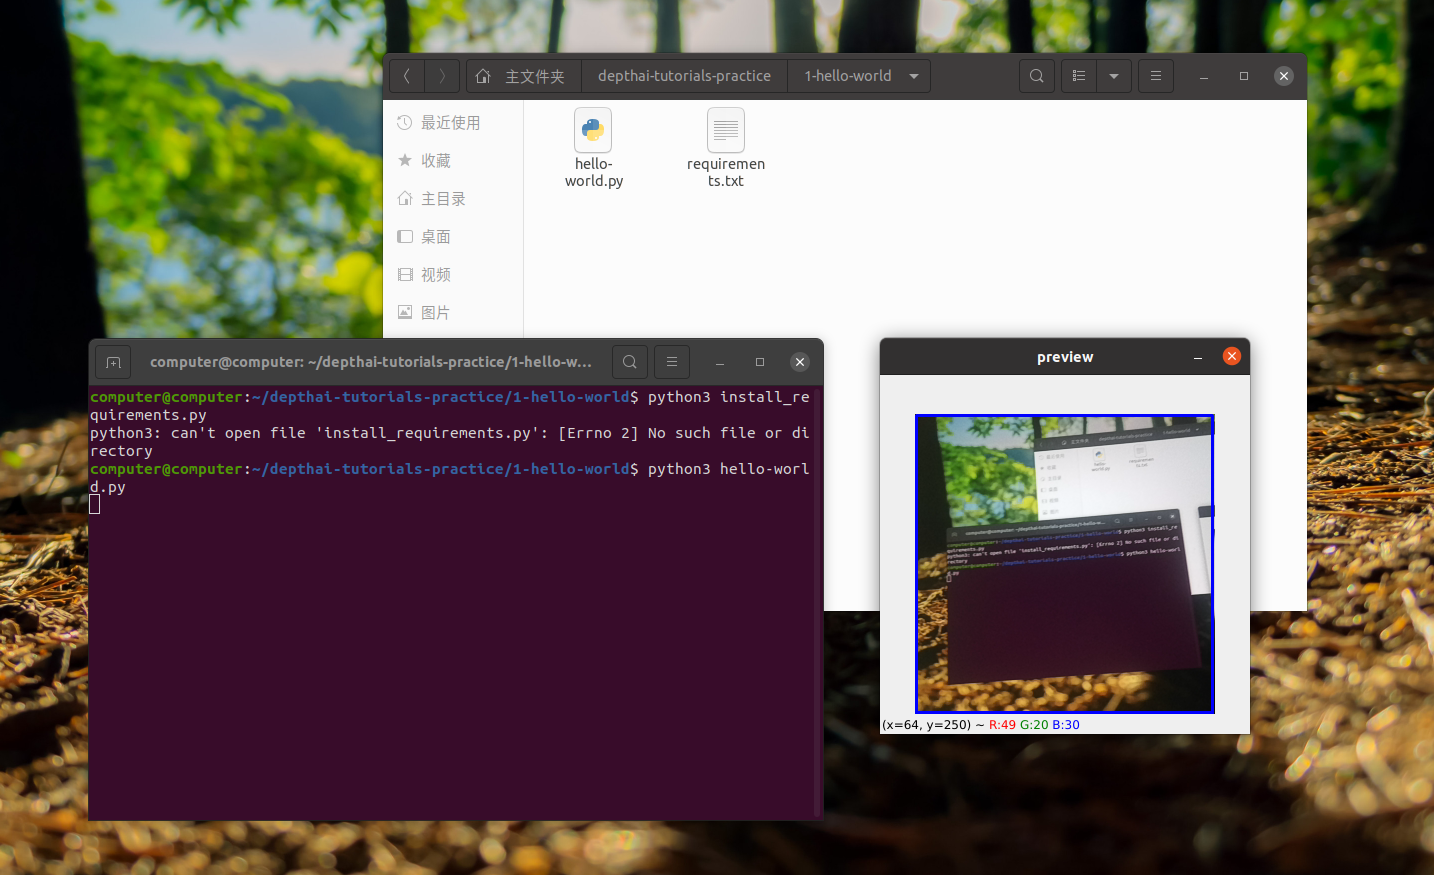
尝试运行脚本并确保其执行无误:
python3 hello-world.py
确认无误就开始下一步
2.4 开始hello world
具体的步骤可以在这里看,这里只贴上hello-world.py 中的具体代码
# first, import all necessary modules
from pathlib import Path

import blobconverter
import cv2
import depthai
import numpy as np

# Pipeline tells DepthAI what operations to perform when running - you define all of the resources used and flows here
pipeline = depthai.Pipeline()

# First, we want the Color camera as the output
cam_rgb = pipeline.createColorCamera()
cam_rgb.setPreviewSize(300, 300)  # 300x300 will be the preview frame size, available as 'preview' output of the node
cam_rgb.setInterleaved(False)

# Next, we want a neural network that will produce the detections
detection_nn = pipeline.createMobileNetDetectionNetwork()
# Blob is the Neural Network file, compiled for MyriadX. It contains both the definition and weights of the model
# We're using a blobconverter tool to retreive the MobileNetSSD blob automatically from OpenVINO Model Zoo
detection_nn.setBlobPath(blobconverter.from_zoo(name='mobilenet-ssd', shaves=6))
# Next, we filter out the detections that are below a confidence threshold. Confidence can be anywhere between <0..1>
detection_nn.setConfidenceThreshold(0.5)
# Next, we link the camera 'preview' output to the neural network detection input, so that it can produce detections
cam_rgb.preview.link(detection_nn.input)

# XLinkOut is a "way out" from the device. Any data you want to transfer to host need to be send via XLink
xout_rgb = pipeline.createXLinkOut()
# For the rgb camera output, we want the XLink stream to be named "rgb"
xout_rgb.setStreamName("rgb")
# Linking camera preview to XLink input, so that the frames will be sent to host
cam_rgb.preview.link(xout_rgb.input)

# The same XLinkOut mechanism will be used to receive nn results
xout_nn = pipeline.createXLinkOut()
xout_nn.setStreamName("nn")
detection_nn.out.link(xout_nn.input)

# Pipeline is now finished, and we need to find an available device to run our pipeline
# we are using context manager here that will dispose the device after we stop using it
with depthai.Device(pipeline) as device:
    # From this point, the Device will be in "running" mode and will start sending data via XLink

    # To consume the device results, we get two output queues from the device, with stream names we assigned earlier
    q_rgb = device.getOutputQueue("rgb")
    q_nn = device.getOutputQueue("nn")

    # Here, some of the default values are defined. Frame will be an image from "rgb" stream, detections will contain nn results
    frame = None
    detections = []

    # Since the detections returned by nn have values from <0..1> range, they need to be multiplied by frame width/height to
    # receive the actual position of the bounding box on the image
    def frameNorm(frame, bbox):
        normVals = np.full(len(bbox), frame.shape[0])
        normVals[::2] = frame.shape[1]
        return (np.clip(np.array(bbox), 0, 1) * normVals).astype(int)


    # Main host-side application loop
    while True:
        # we try to fetch the data from nn/rgb queues. tryGet will return either the data packet or None if there isn't any
        in_rgb = q_rgb.tryGet()
        in_nn = q_nn.tryGet()

        if in_rgb is not None:
            # If the packet from RGB camera is present, we're retrieving the frame in OpenCV format using getCvFrame
            frame = in_rgb.getCvFrame()

        if in_nn is not None:
            # when data from nn is received, we take the detections array that contains mobilenet-ssd results
            detections = in_nn.detections

        if frame is not None:
            for detection in detections:
                # for each bounding box, we first normalize it to match the frame size
                bbox = frameNorm(frame, (detection.xmin, detection.ymin, detection.xmax, detection.ymax))
                # and then draw a rectangle on the frame to show the actual result
                cv2.rectangle(frame, (bbox[0], bbox[1]), (bbox[2], bbox[3]), (255, 0, 0), 2)
            # After all the drawing is finished, we show the frame on the screen
            cv2.imshow("preview", frame)

        # at any time, you can press "q" and exit the main loop, therefore exiting the program itself
        if cv2.waitKey(1) == ord('q'):
            break
效果如下:
三、总结
运气使然,之前一直报错来着,突然就可以运行了,太快乐了我