1、项目说明
1.1、业务说明
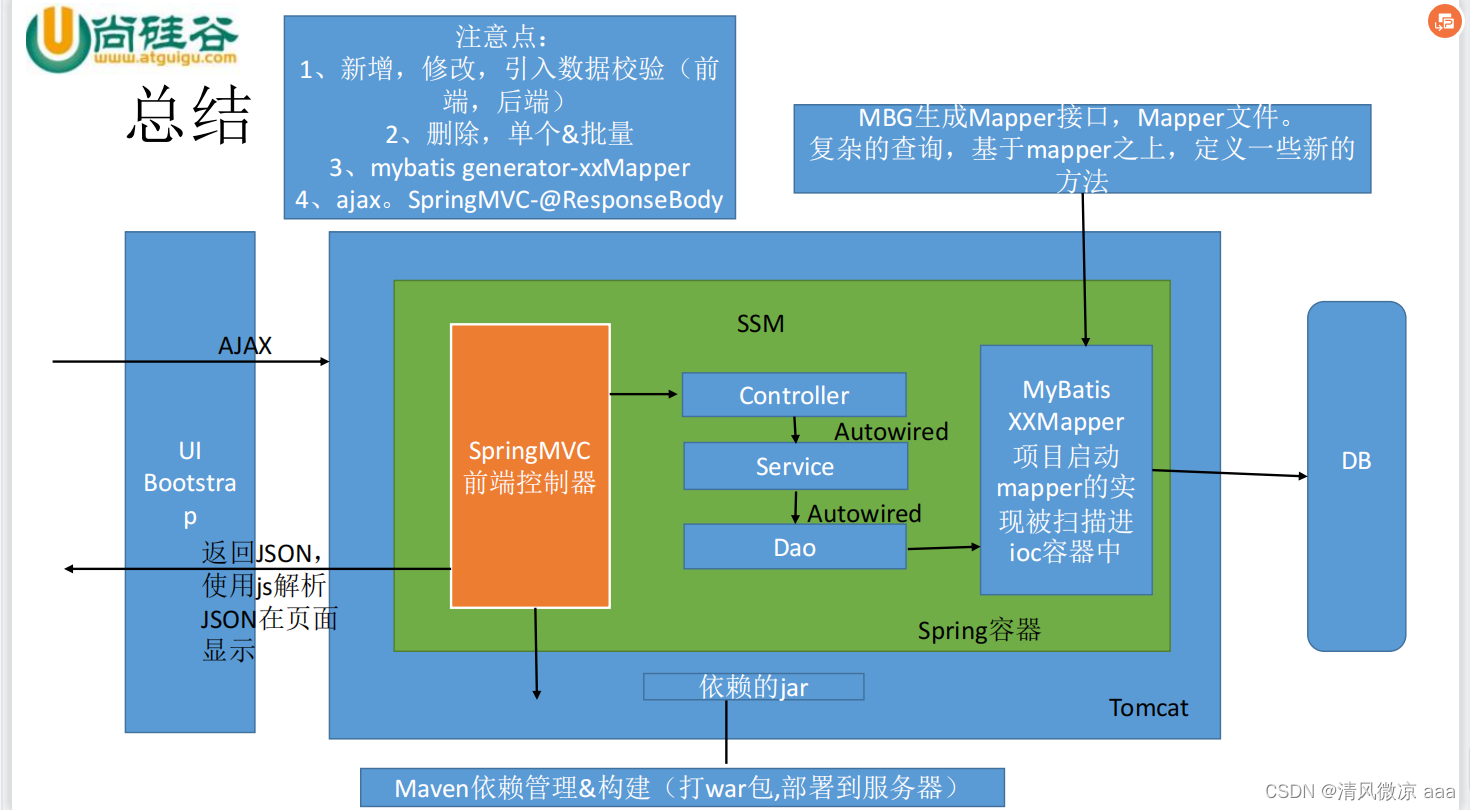
- SSM:SpringMVC+Spring+MyBatis
- CRUD:
- Create(创建)
- Retrieve(查询)
- Update(更新)
- Delete(删除)
- 总结:通过SSM框架来完成一个CRUD的操作。
1.2、功能点
- 1、分页
- 2、数据校验
- jquery前端校验+JSR303后端校验
- 3、ajax
- 4、Rest风格的URI;使用HTTP协议请求方式的动词,来表示对资源的操作(GET(查询),POST(新增),PUT(修改),DELETE(删除))
1.3、技术点
- 基础框架-ssm(SpringMVC+Spring+MyBatis)
- 数据库-MySQL
- 前端框架-bootstrap快速搭建简洁美观的界面
- 项目的依赖管理-Maven
- 分页-pagehelper
- 逆向工程-MyBatis Generator
2、基础环境搭建
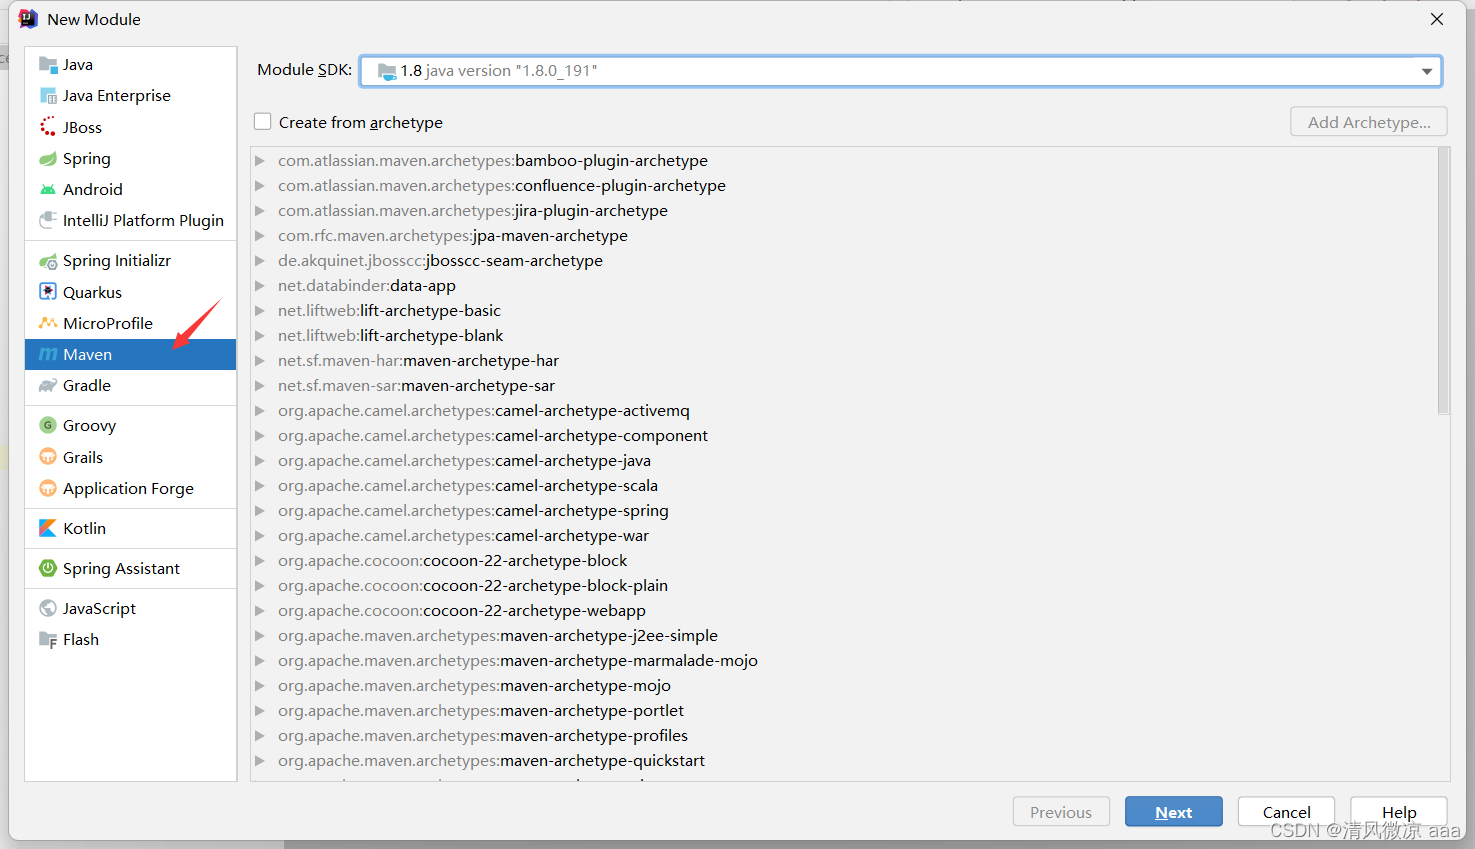
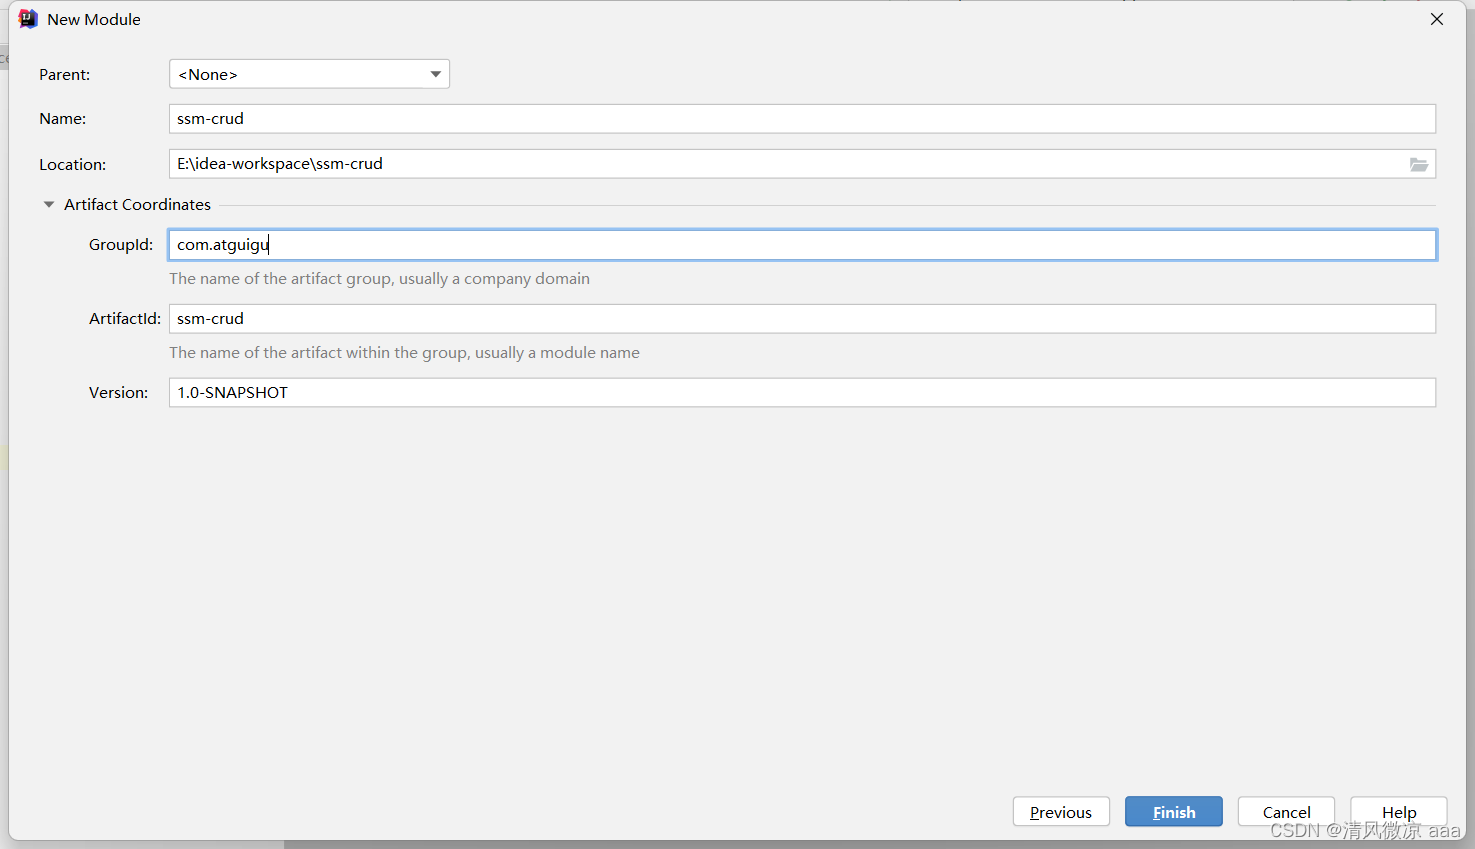
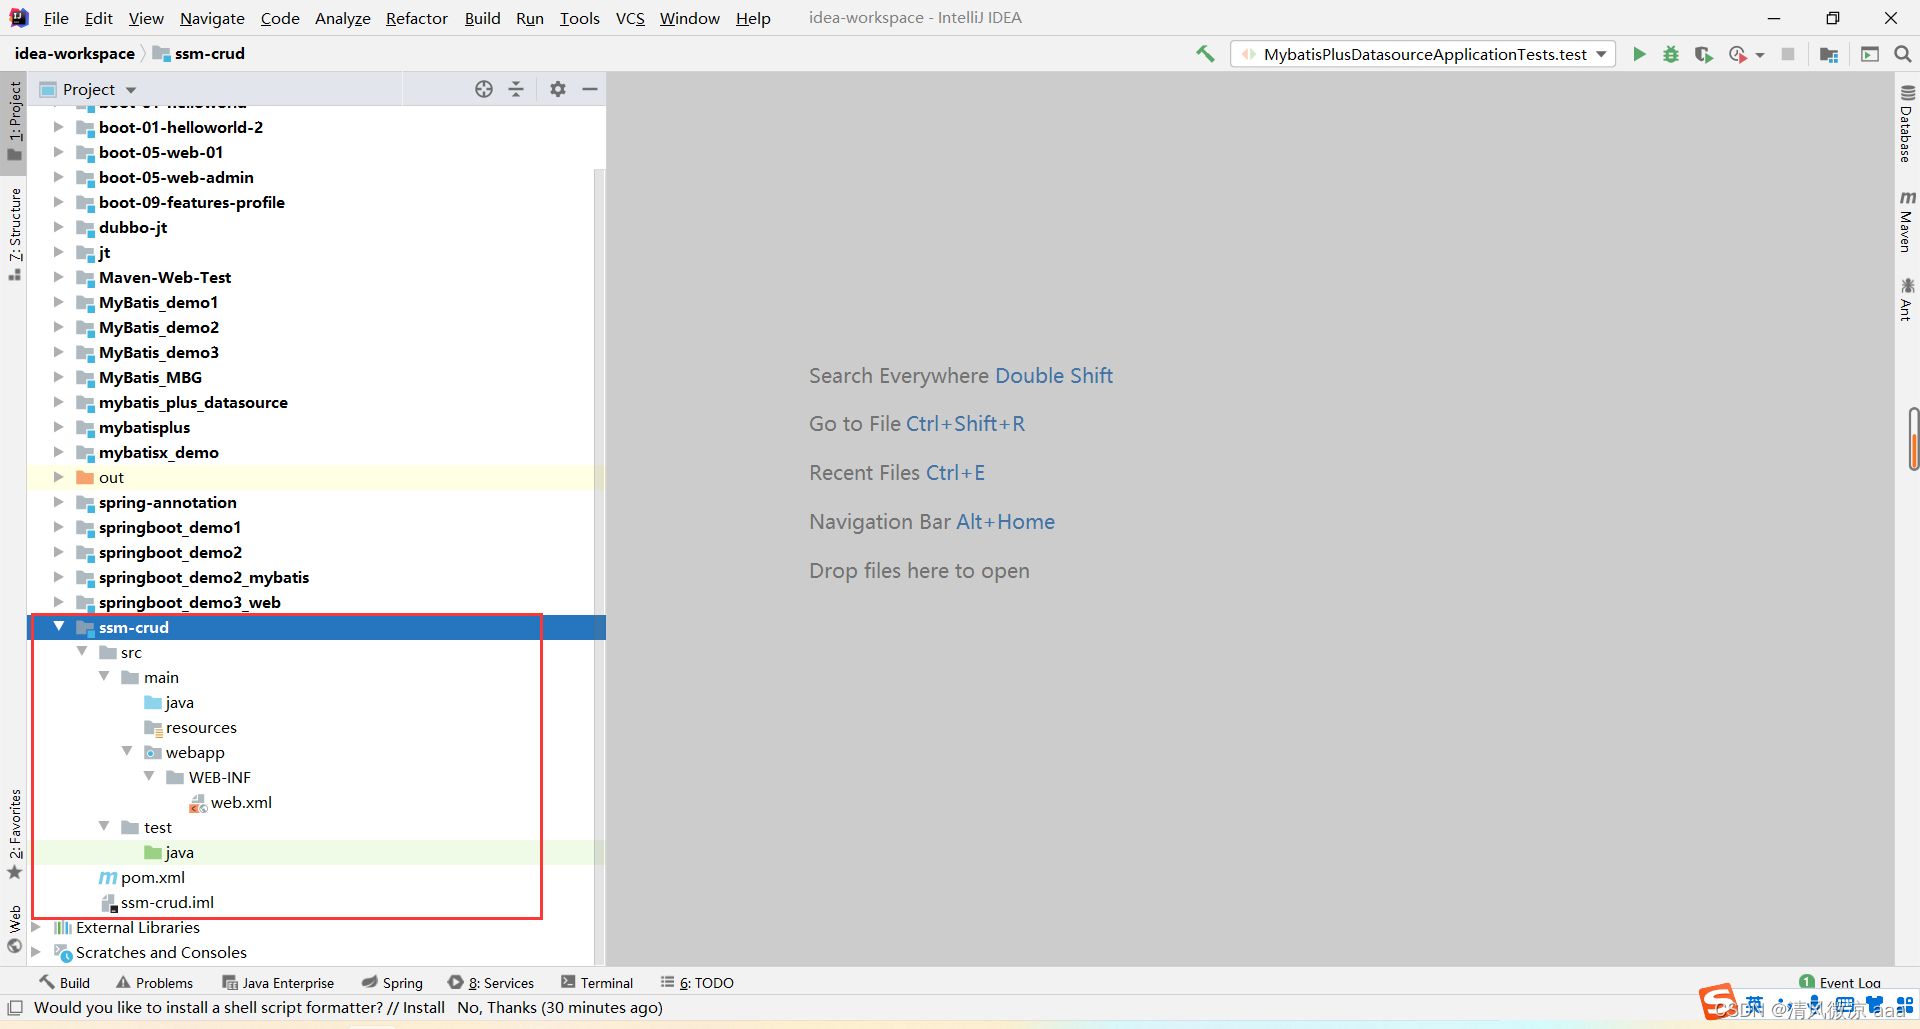
2.1、创建一个maven工程
2.2、引入项目依赖的jar包
• spring
• springmvc
• mybatis
• 数据库连接池,驱动包
• 其它(jstl,servlet-api,junit)
<?xml version="1.0" encoding="UTF-8"?>
<project xmlns="http://maven.apache.org/POM/4.0.0"
         xmlns:xsi="http://www.w3.org/2001/XMLSchema-instance"
         xsi:schemaLocation="http://maven.apache.org/POM/4.0.0 http://maven.apache.org/xsd/maven-4.0.0.xsd">
    <modelVersion>4.0.0</modelVersion>

    <groupId>com.atguigu</groupId>
    <artifactId>ssm-crud</artifactId>
    <version>1.0-SNAPSHOT</version>

    <packaging>war</packaging>

    <!--引入项目依赖的jar包 -->
    <dependencies>

        <!-- SpringMVC、Spring -->
        <dependency>
            <groupId>org.springframework</groupId>
            <artifactId>spring-webmvc</artifactId>
            <version>4.3.7.RELEASE</version>
        </dependency>

        <!-- Spring-Jdbc -->
        <dependency>
            <groupId>org.springframework</groupId>
            <artifactId>spring-jdbc</artifactId>
            <version>4.3.7.RELEASE</version>
        </dependency>

        <!-- Spring面向切面编程 -->
        <dependency>
            <groupId>org.springframework</groupId>
            <artifactId>spring-aspects</artifactId>
            <version>4.3.7.RELEASE</version>
        </dependency>

        <!--MyBatis -->
        <dependency>
            <groupId>org.mybatis</groupId>
            <artifactId>mybatis</artifactId>
            <version>3.4.2</version>
        </dependency>

        <!-- MyBatis整合Spring的适配包 -->
        <dependency>
            <groupId>org.mybatis</groupId>
            <artifactId>mybatis-spring</artifactId>
            <version>1.3.1</version>
        </dependency>

        <!-- 数据库连接池、驱动 -->
        <dependency>
            <groupId>c3p0</groupId>
            <artifactId>c3p0</artifactId>
            <version>0.9.1</version>
        </dependency>
        <dependency>
            <groupId>mysql</groupId>
            <artifactId>mysql-connector-java</artifactId>
            <version>5.1.41</version>
        </dependency>

        <!-- (jstl,servlet-api,junit) -->
        <dependency>
            <groupId>jstl</groupId>
            <artifactId>jstl</artifactId>
            <version>1.2</version>
        </dependency>
        <dependency>
            <groupId>javax.servlet</groupId>
            <artifactId>javax.servlet-api</artifactId>
            <version>3.0.1</version>
            <scope>provided</scope>
        </dependency>
        <!-- junit -->
        <dependency>
            <groupId>junit</groupId>
            <artifactId>junit</artifactId>
            <version>4.12</version>
        </dependency>


    </dependencies>

</project>
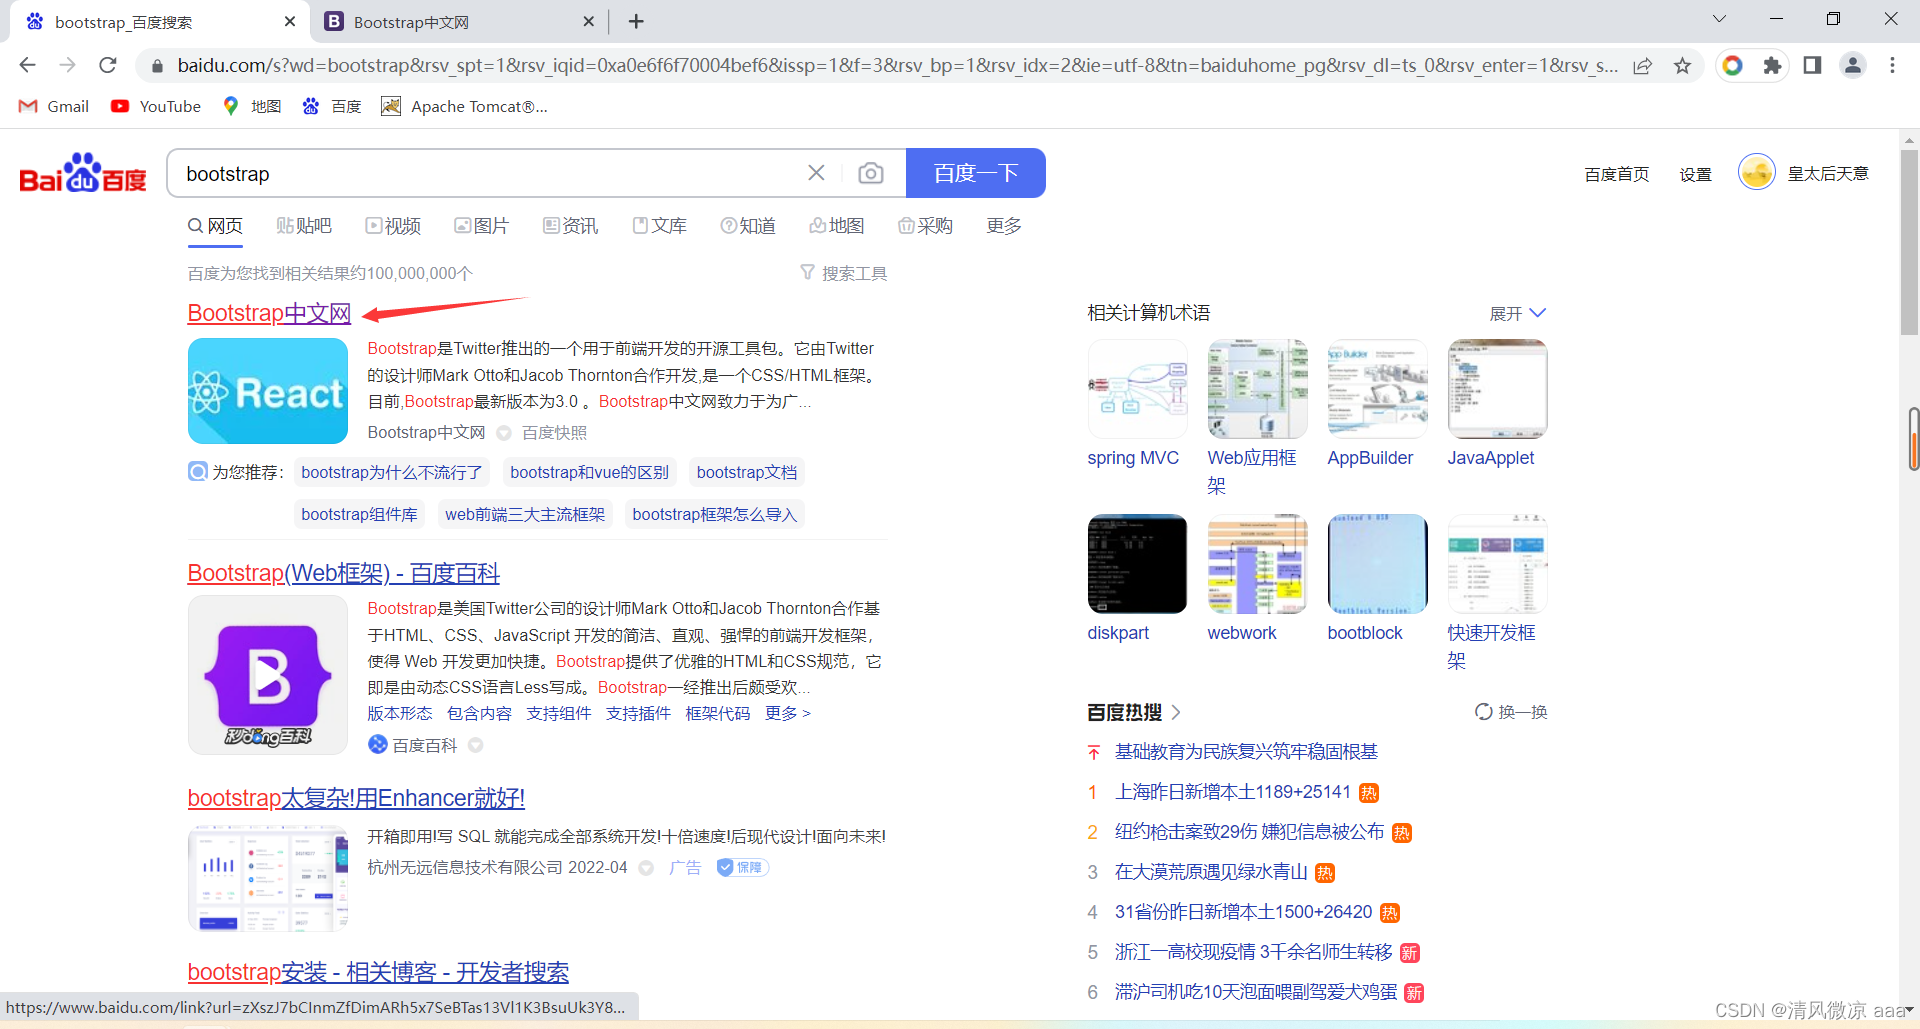
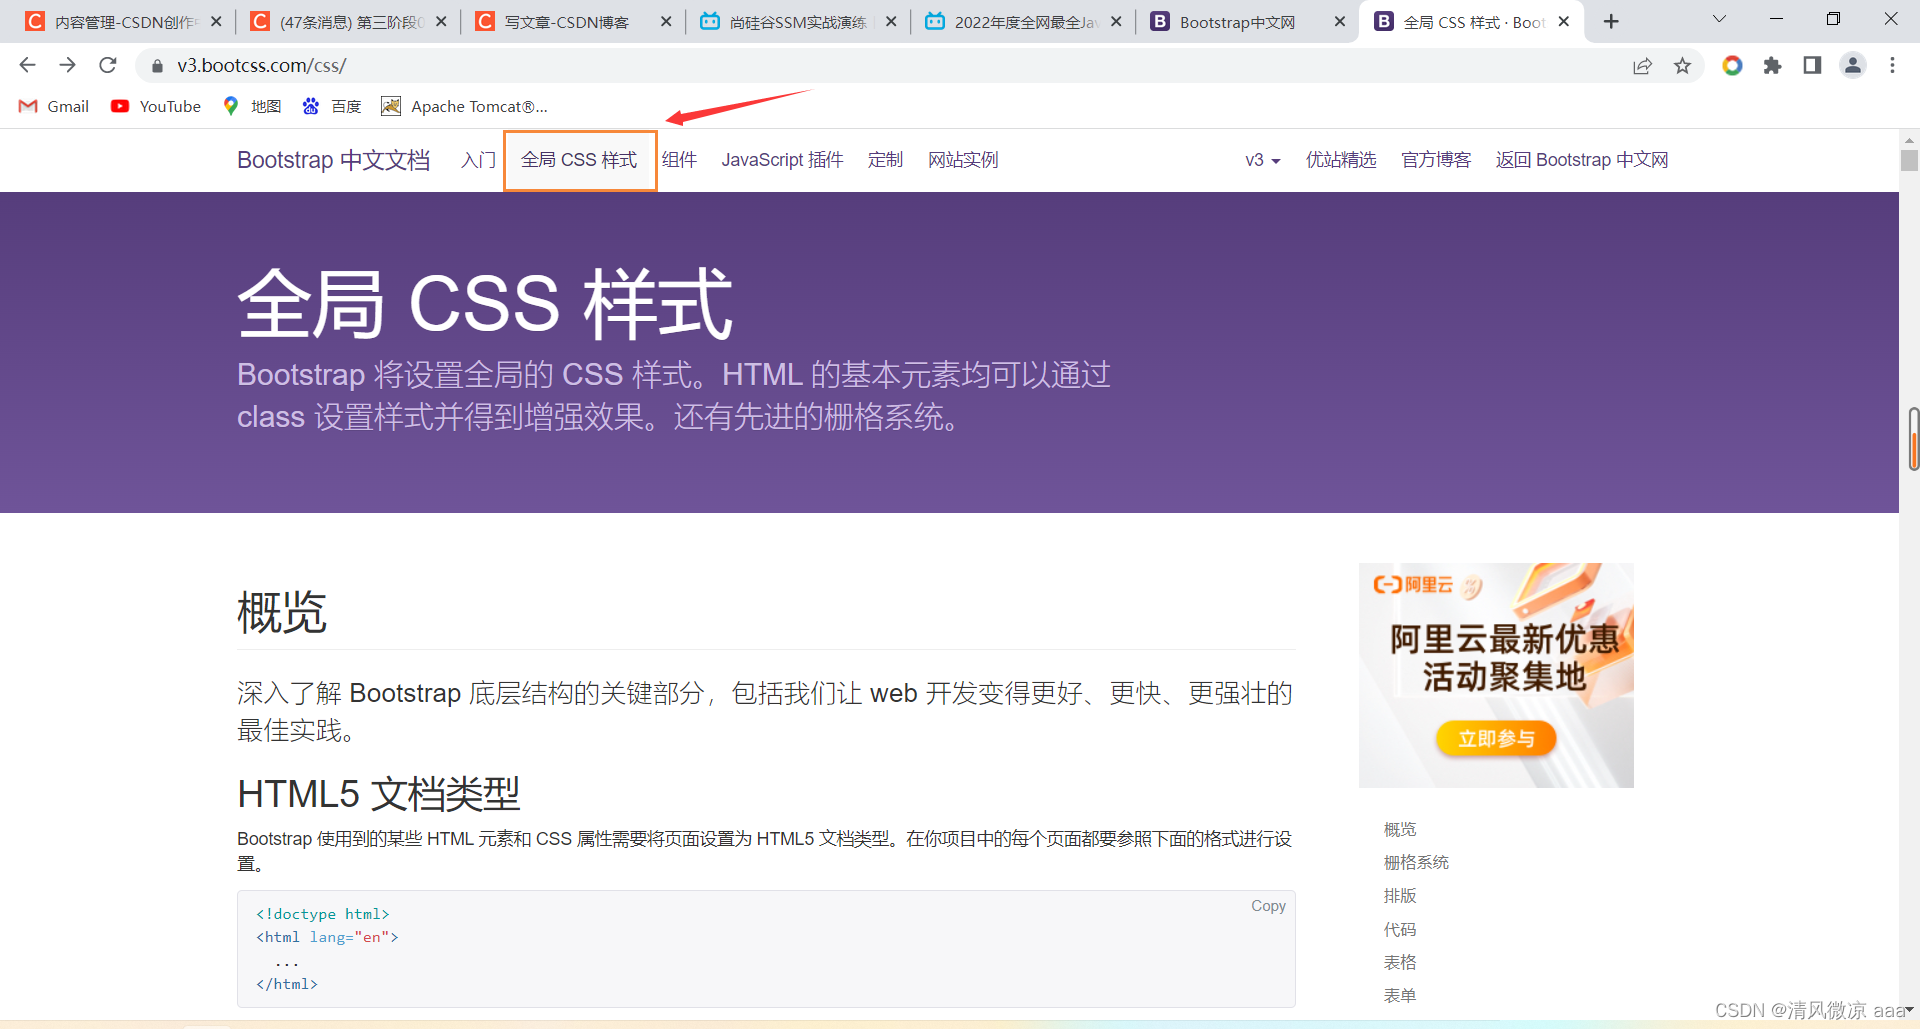
2.3、引入bootstrap前端框架
2.3.1、官网下载

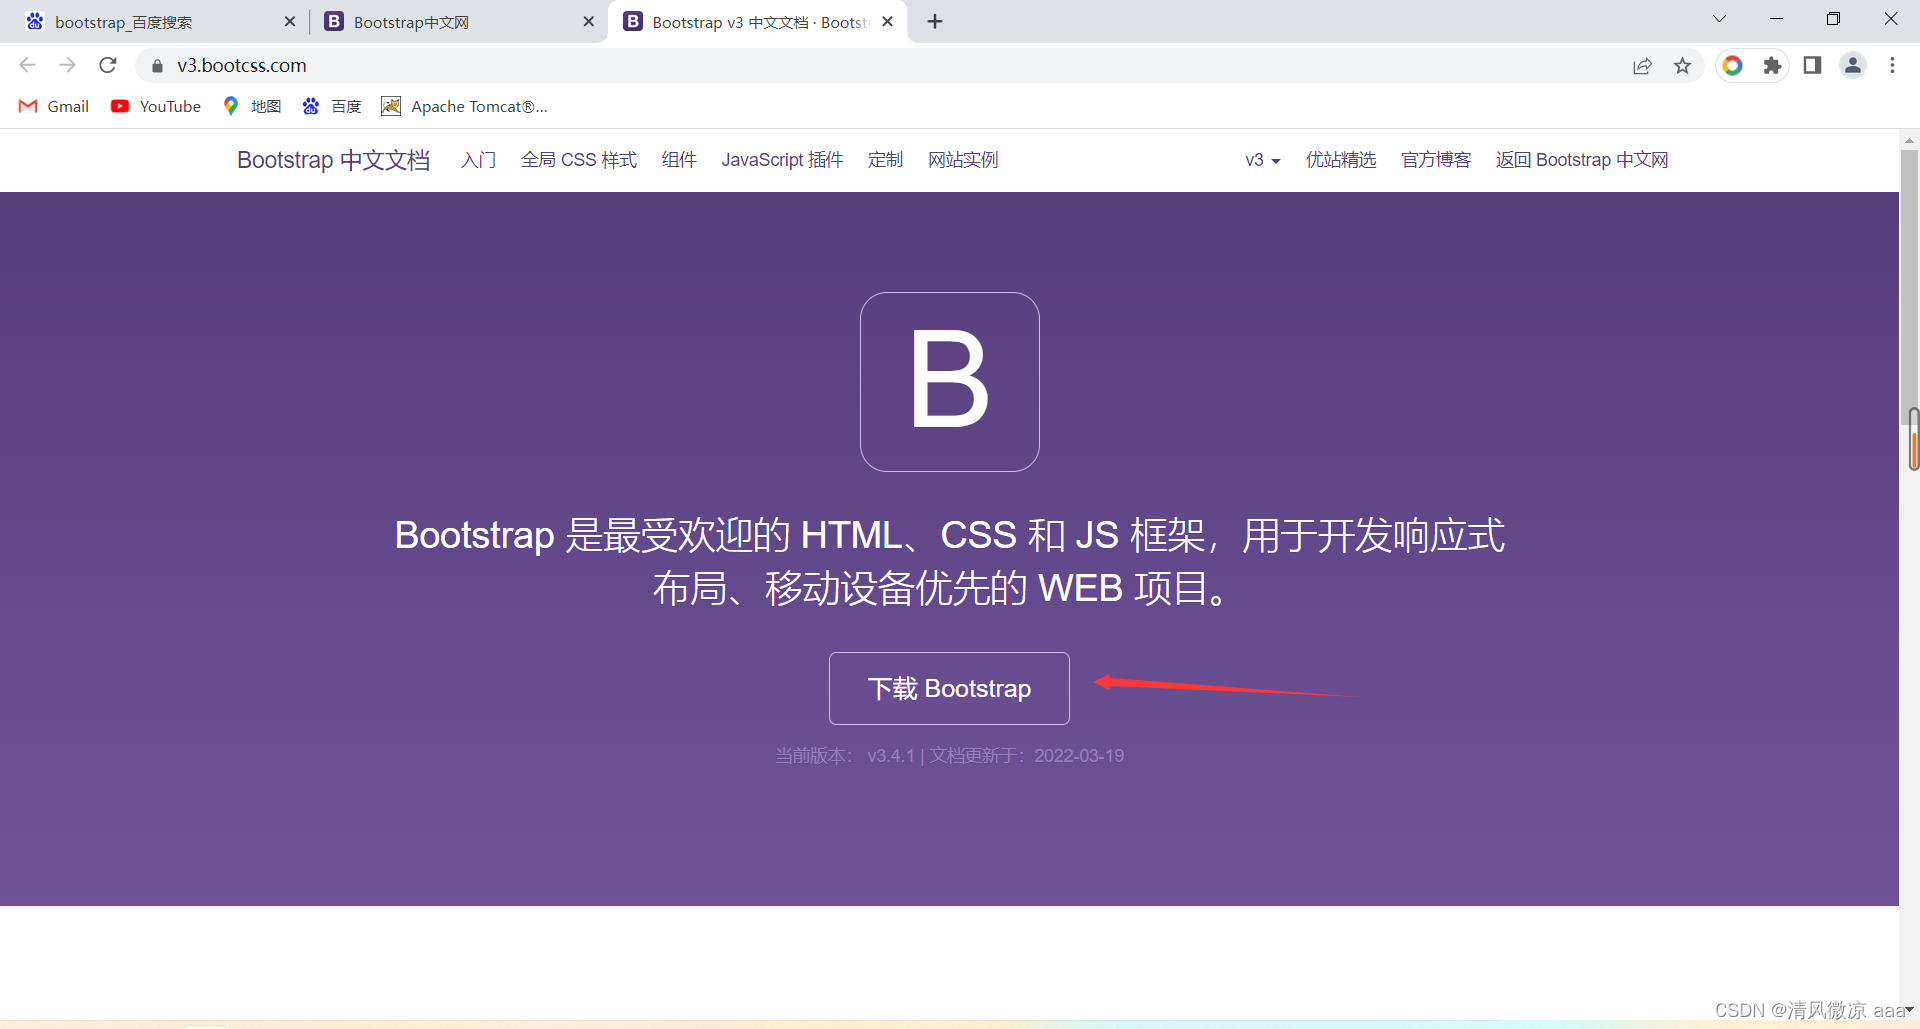

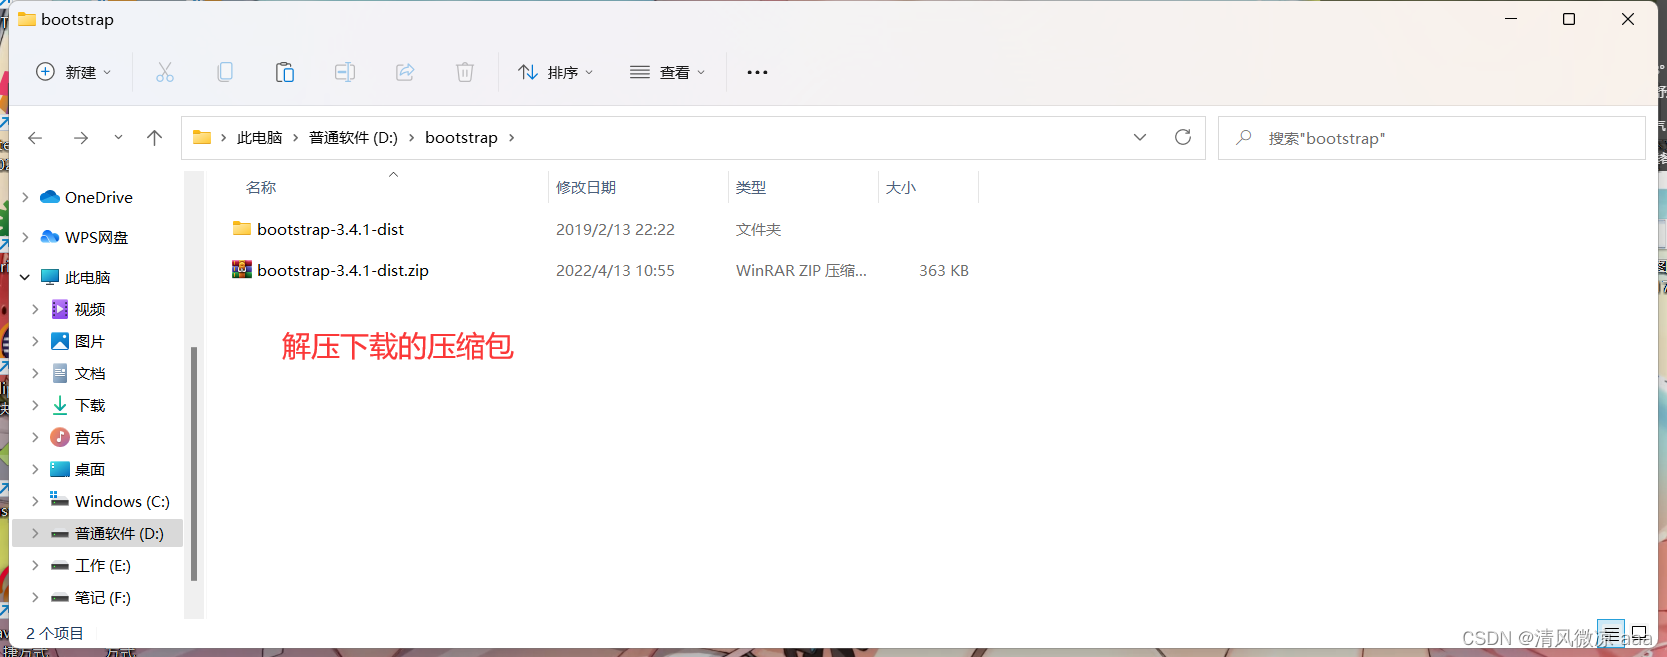
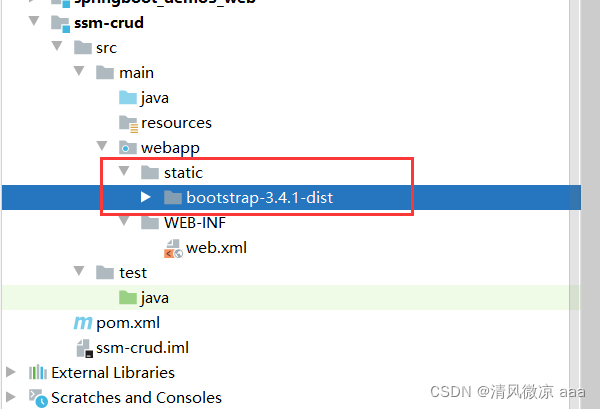
2.3.2、引入boostrap
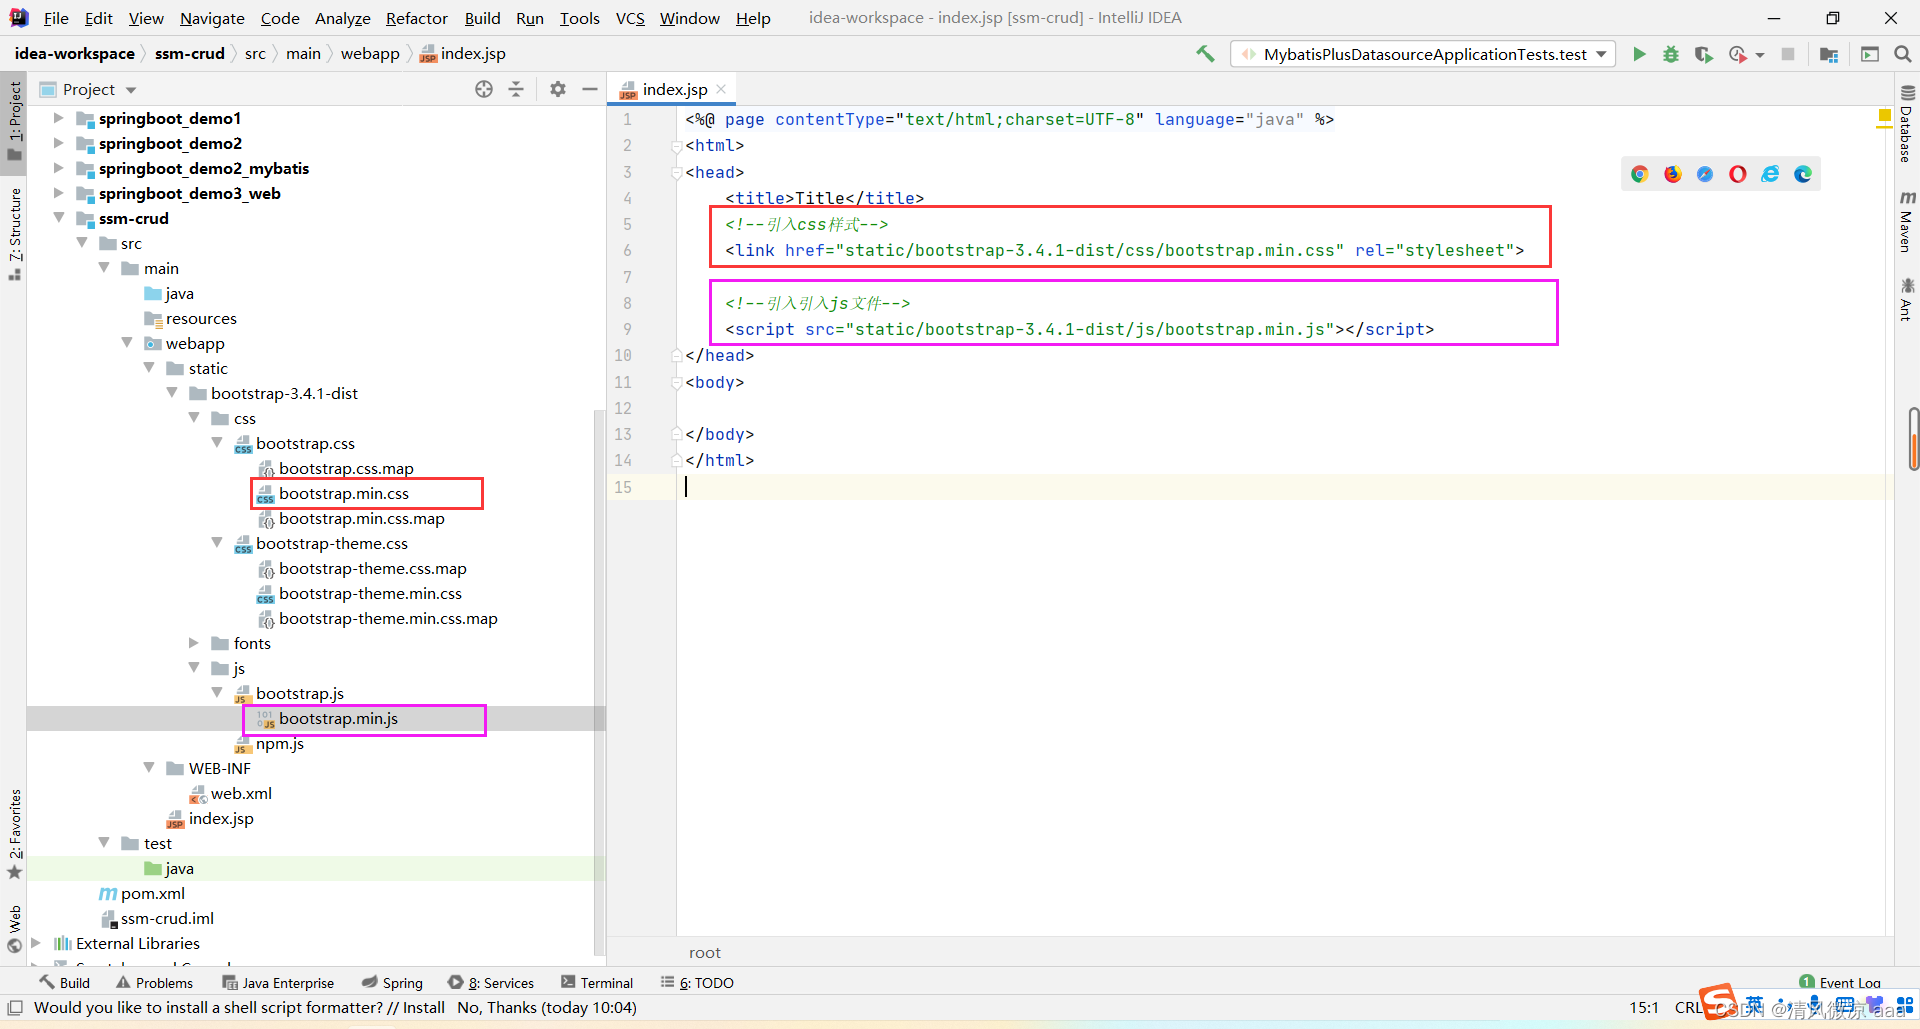
步骤1:创建static目录保存解压后的boostrap文件。
步骤2:需要在创建好的index.jsp文件中引入:Bootstrap 核心 CSS 文件、Bootstrap 核心 JavaScript 文件 。
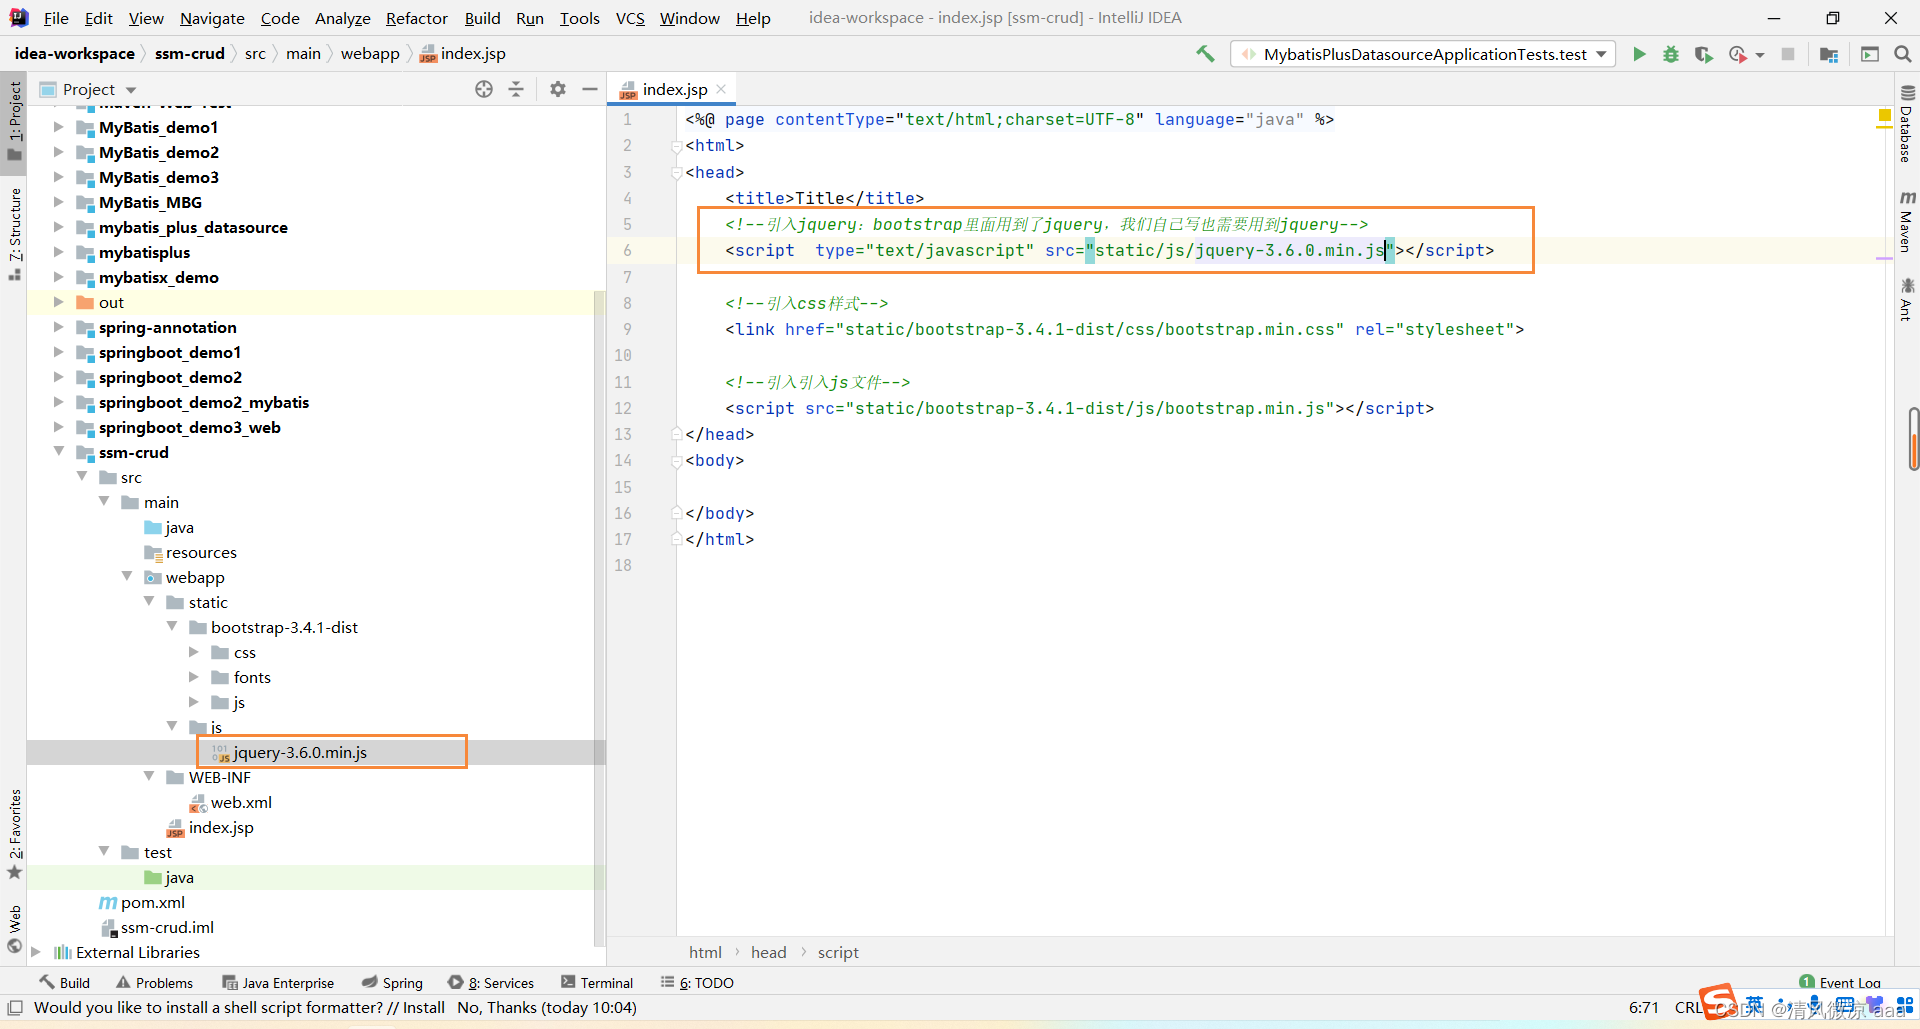
步骤3:引入jquery。
<%@ page contentType="text/html;charset=UTF-8" language="java" %>
<html>
<head>
    <title>Title</title>
    <!--引入jquery:bootstrap里面用到了jquery,我们自己写也需要用到jquery-->
    <script  type="text/javascript" src="static/js/jquery-3.6.0.min.js"></script>

    <!--引入css样式-->
    <link href="static/bootstrap-3.4.1-dist/css/bootstrap.min.css" rel="stylesheet">

    <!--引入引入js文件-->
    <script src="static/bootstrap-3.4.1-dist/js/bootstrap.min.js"></script>
</head>
<body>

</body>
</html>
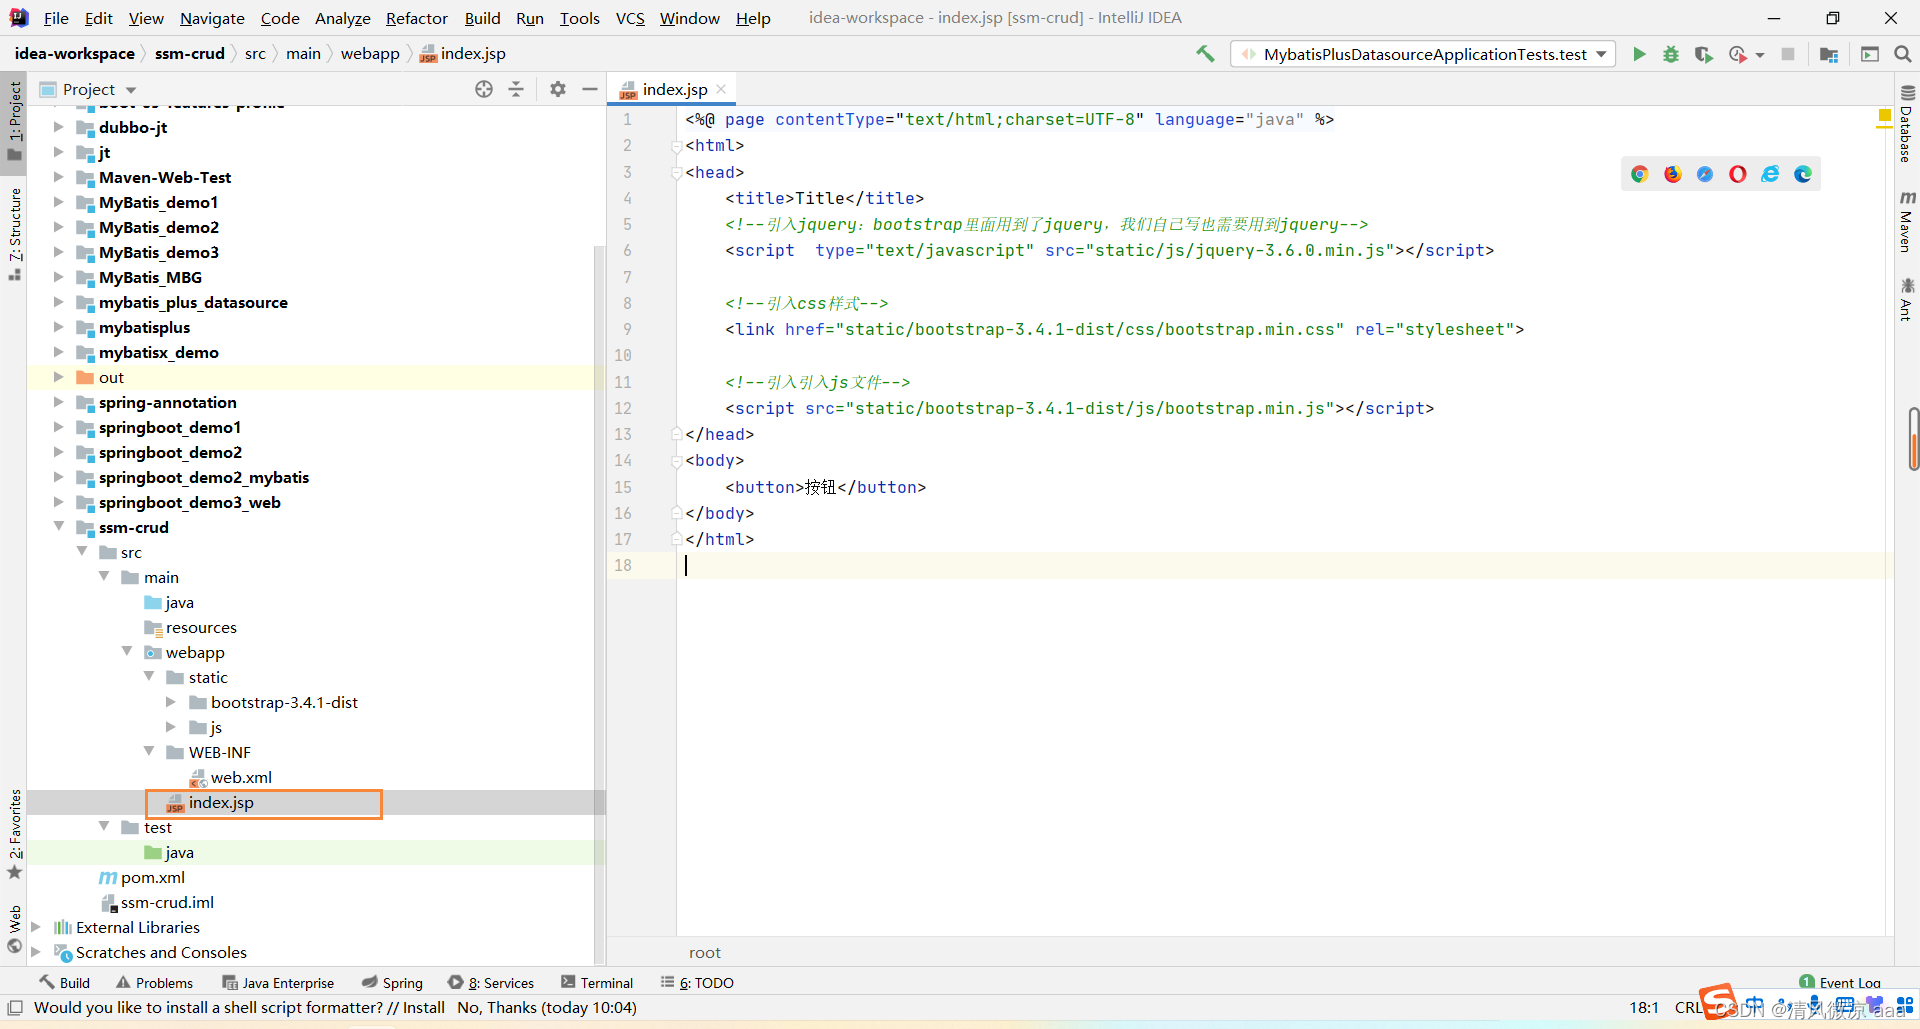
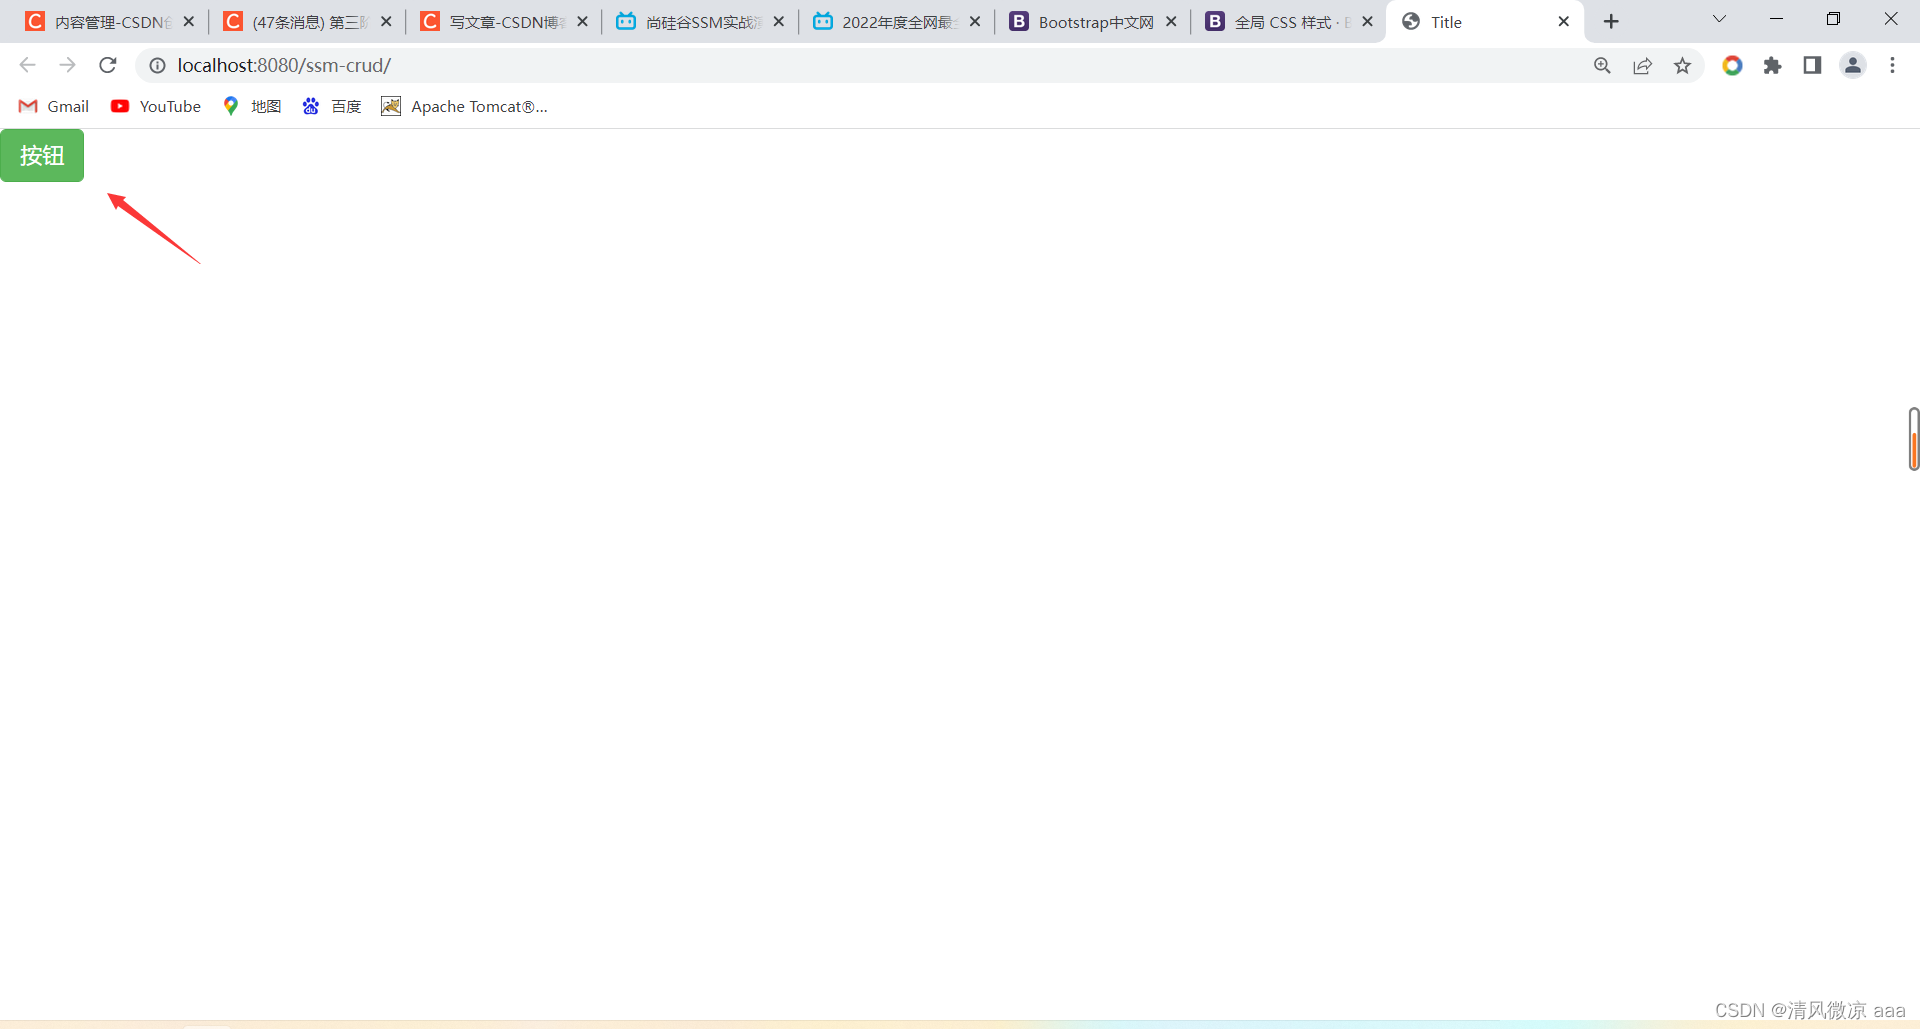
2.3.3、测试:按钮使用bootstrap风格
步骤1:配置tomact实例,详情查看sping-mvc.
步骤2:原来的方式添加按钮。
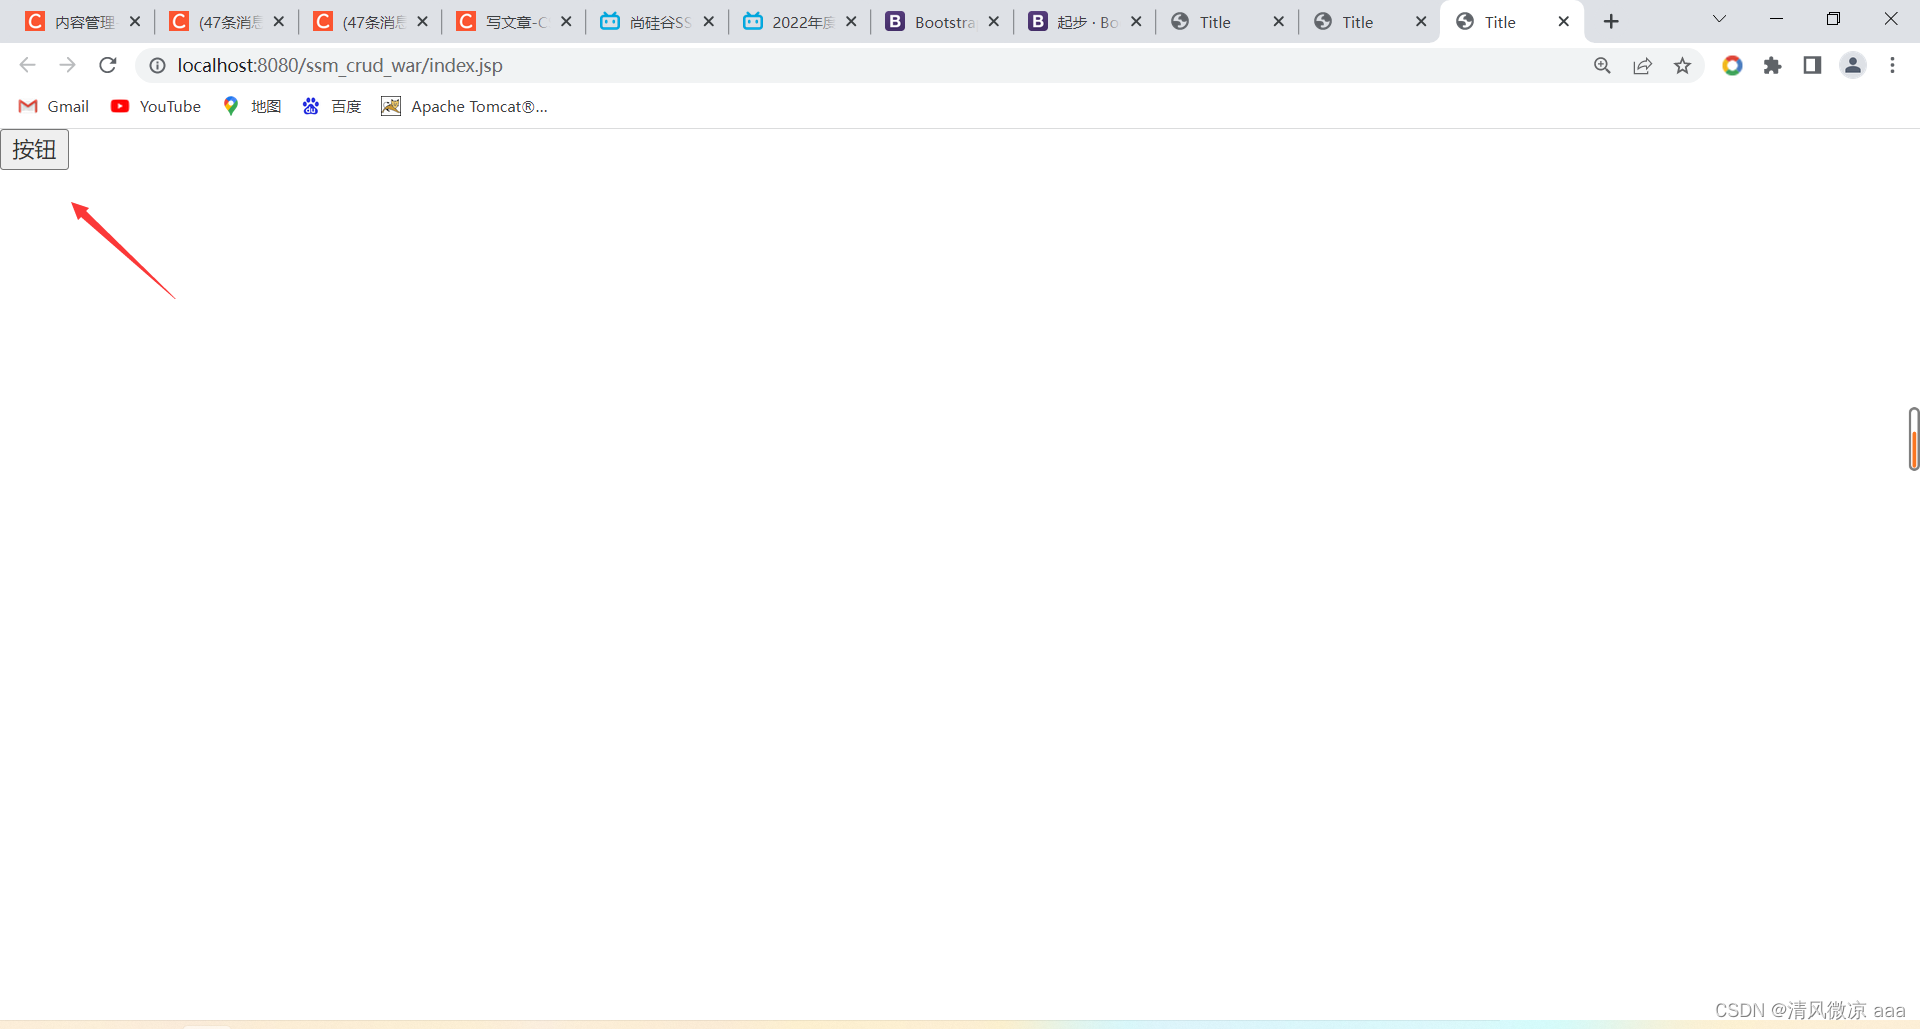
步骤3:使用boostrap风格的按钮。
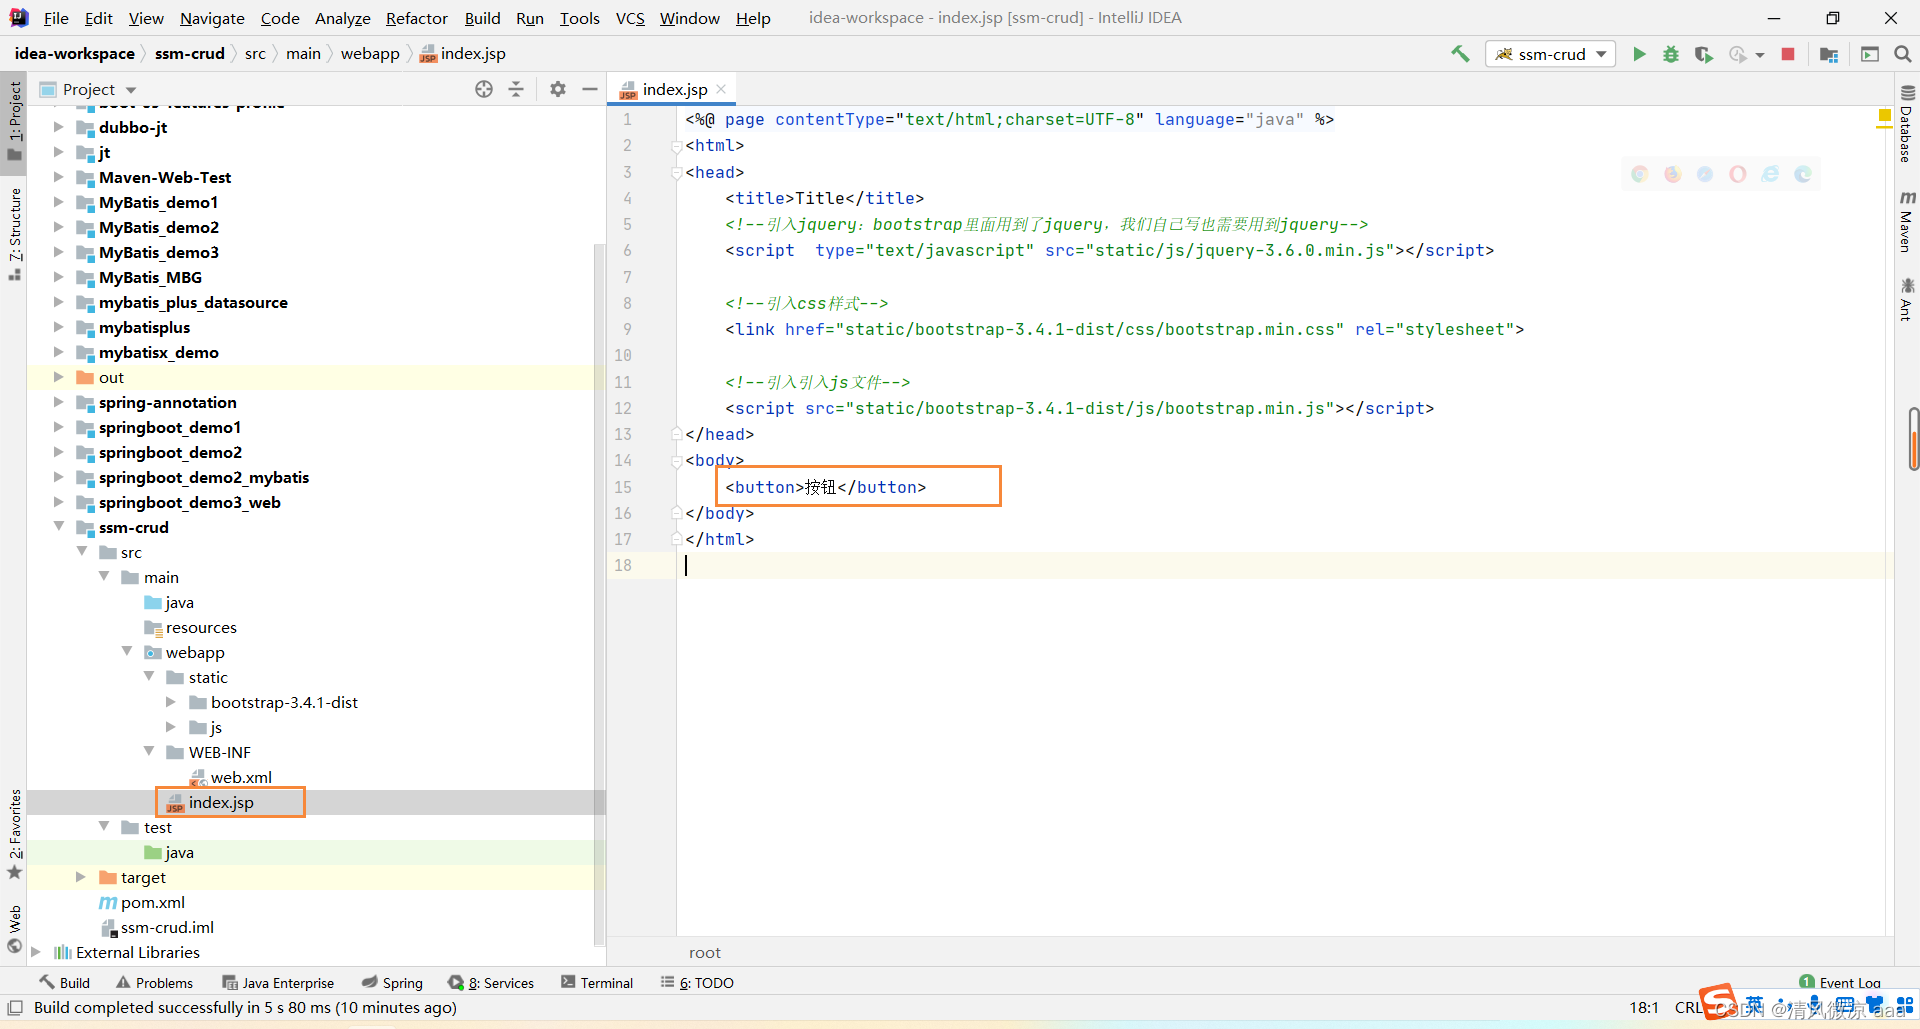
找到官网案例:
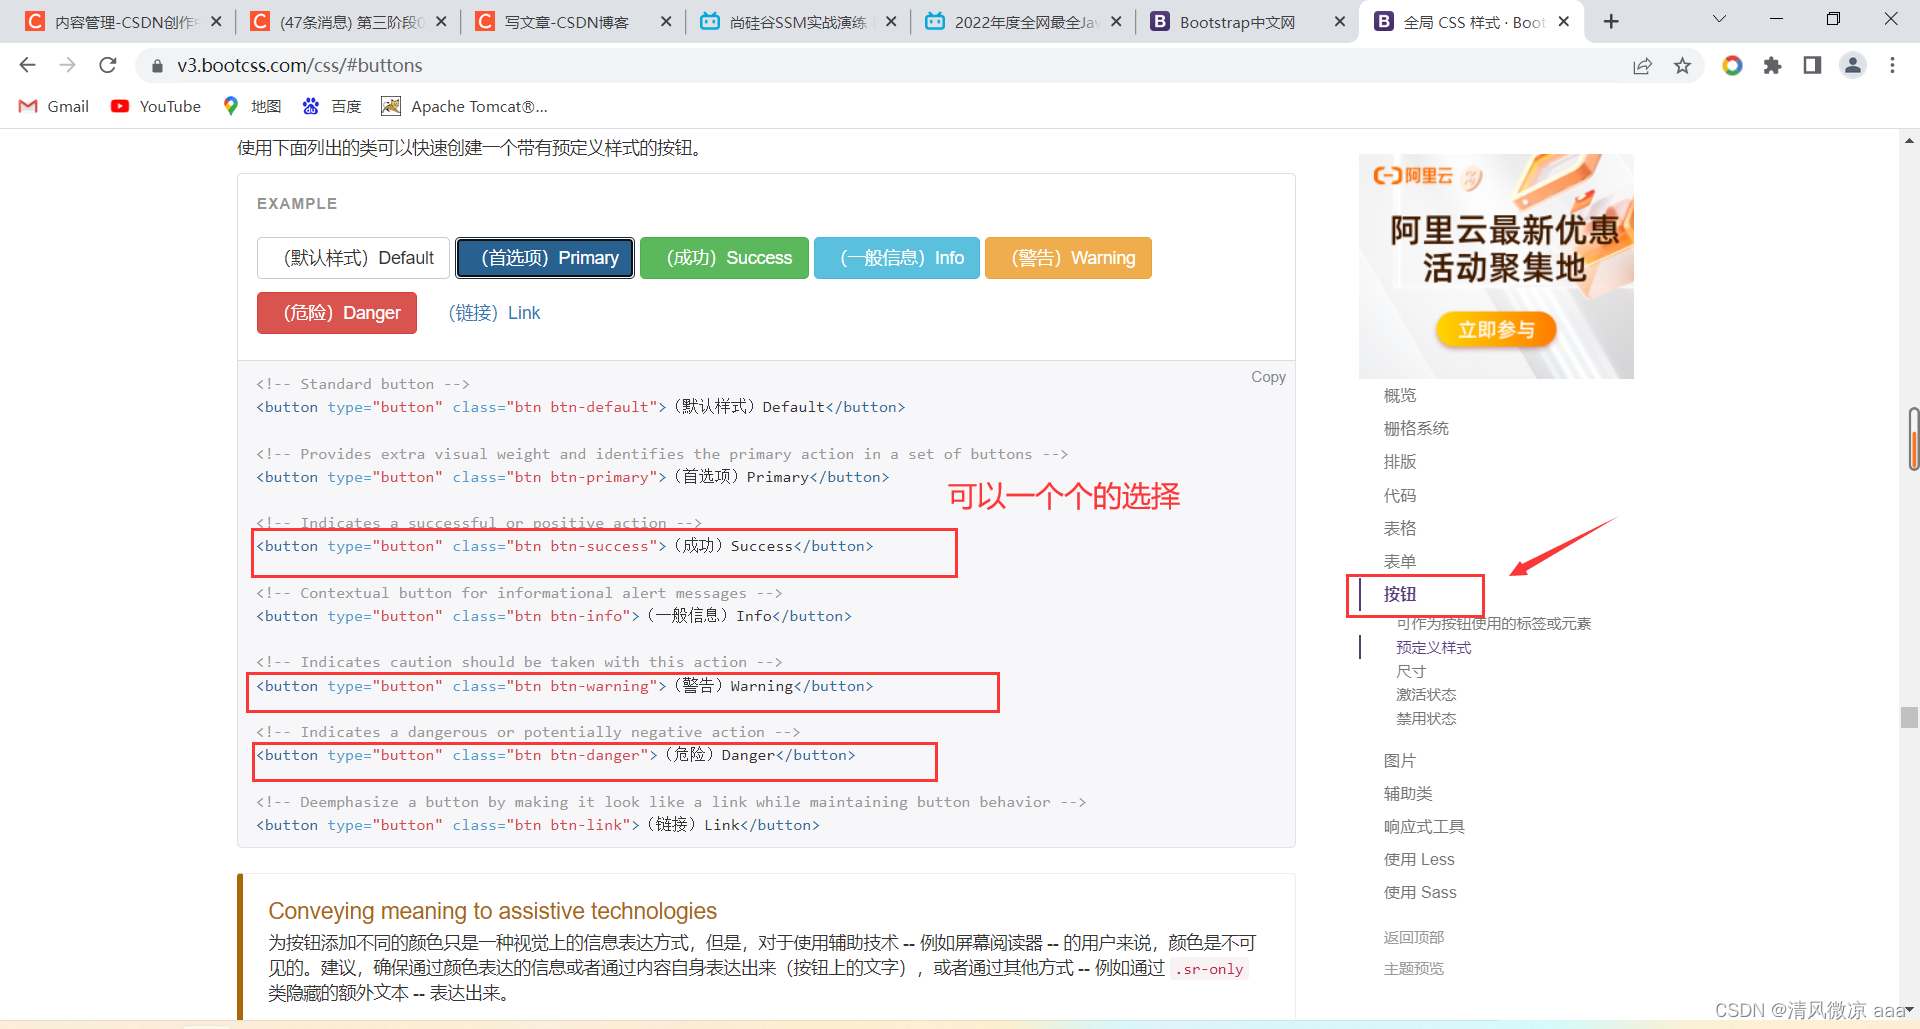
之后在自己写的按钮标签上添加不同的属性来改变样式:
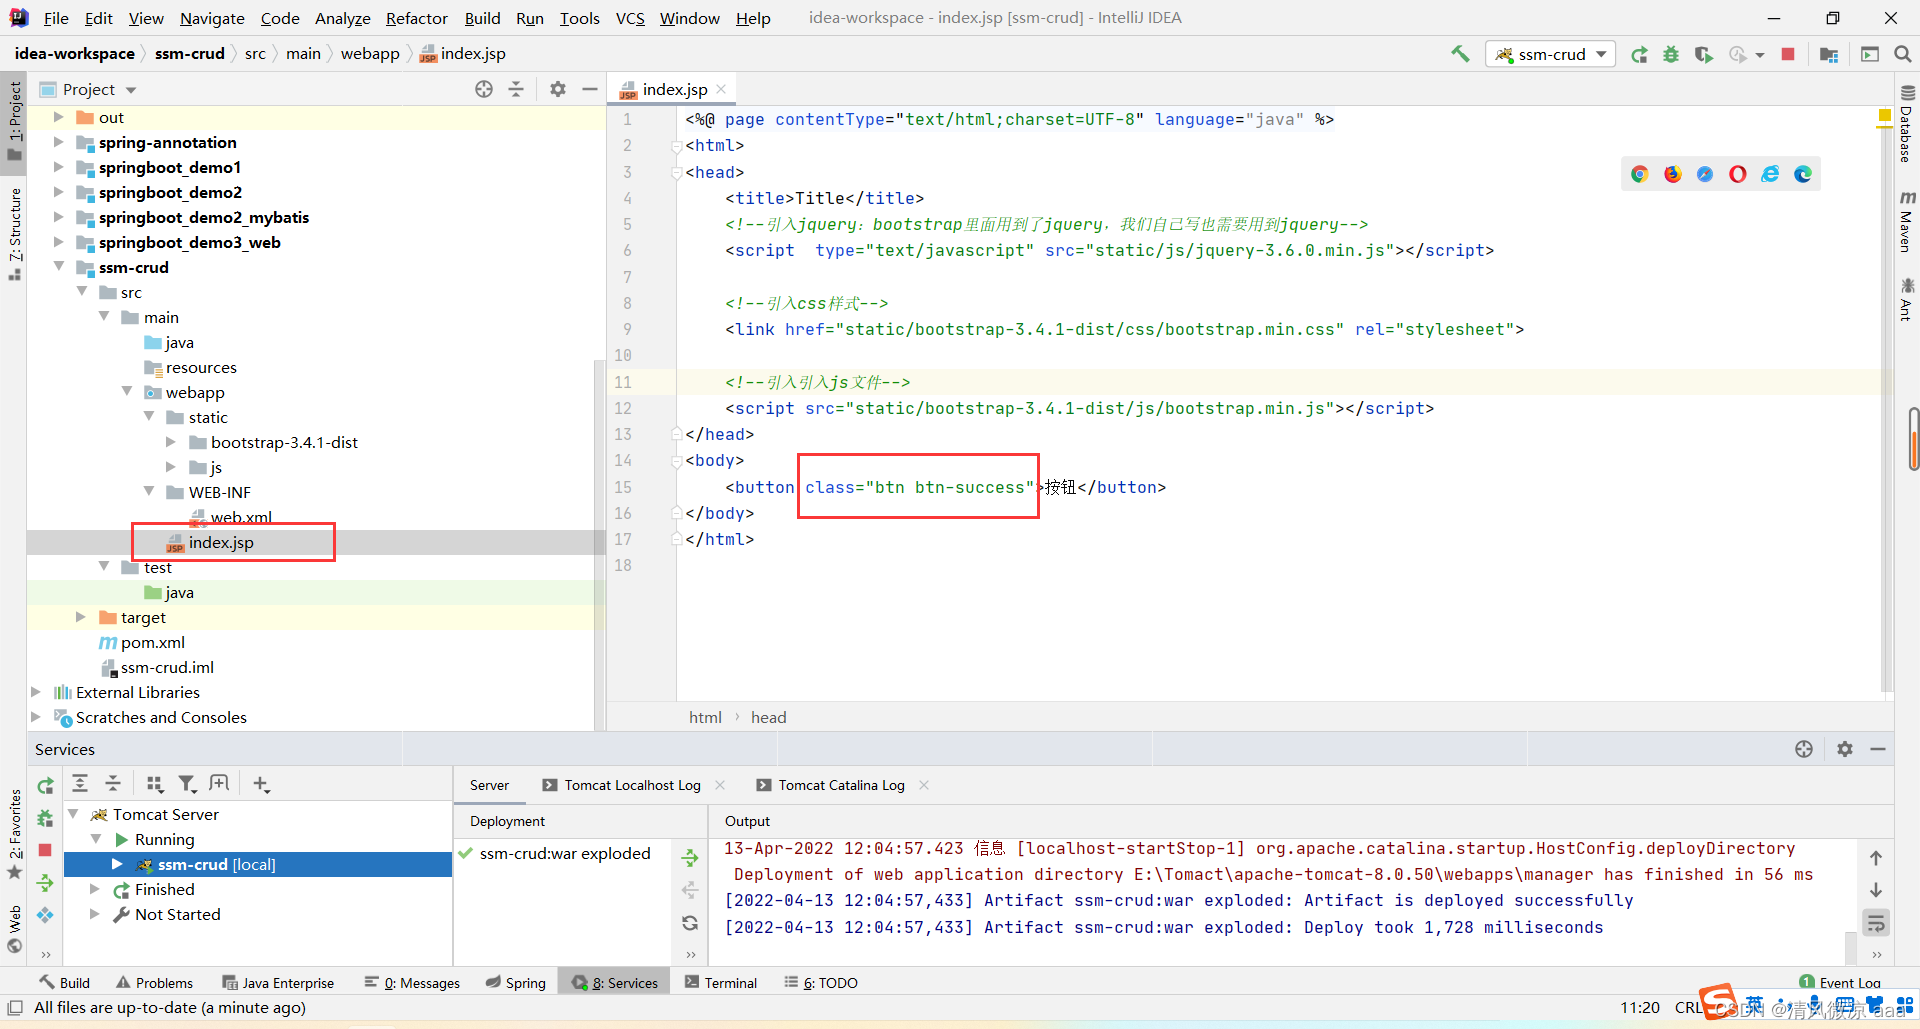
启动tomact服务器再次访问测试,发现按钮样式发生变化。
2.4、编写ssm整合的关键配置文件
• web.xml,spring,springmvc,mybatis,使用mybatis的逆向工程生成对应的bean以及mapper
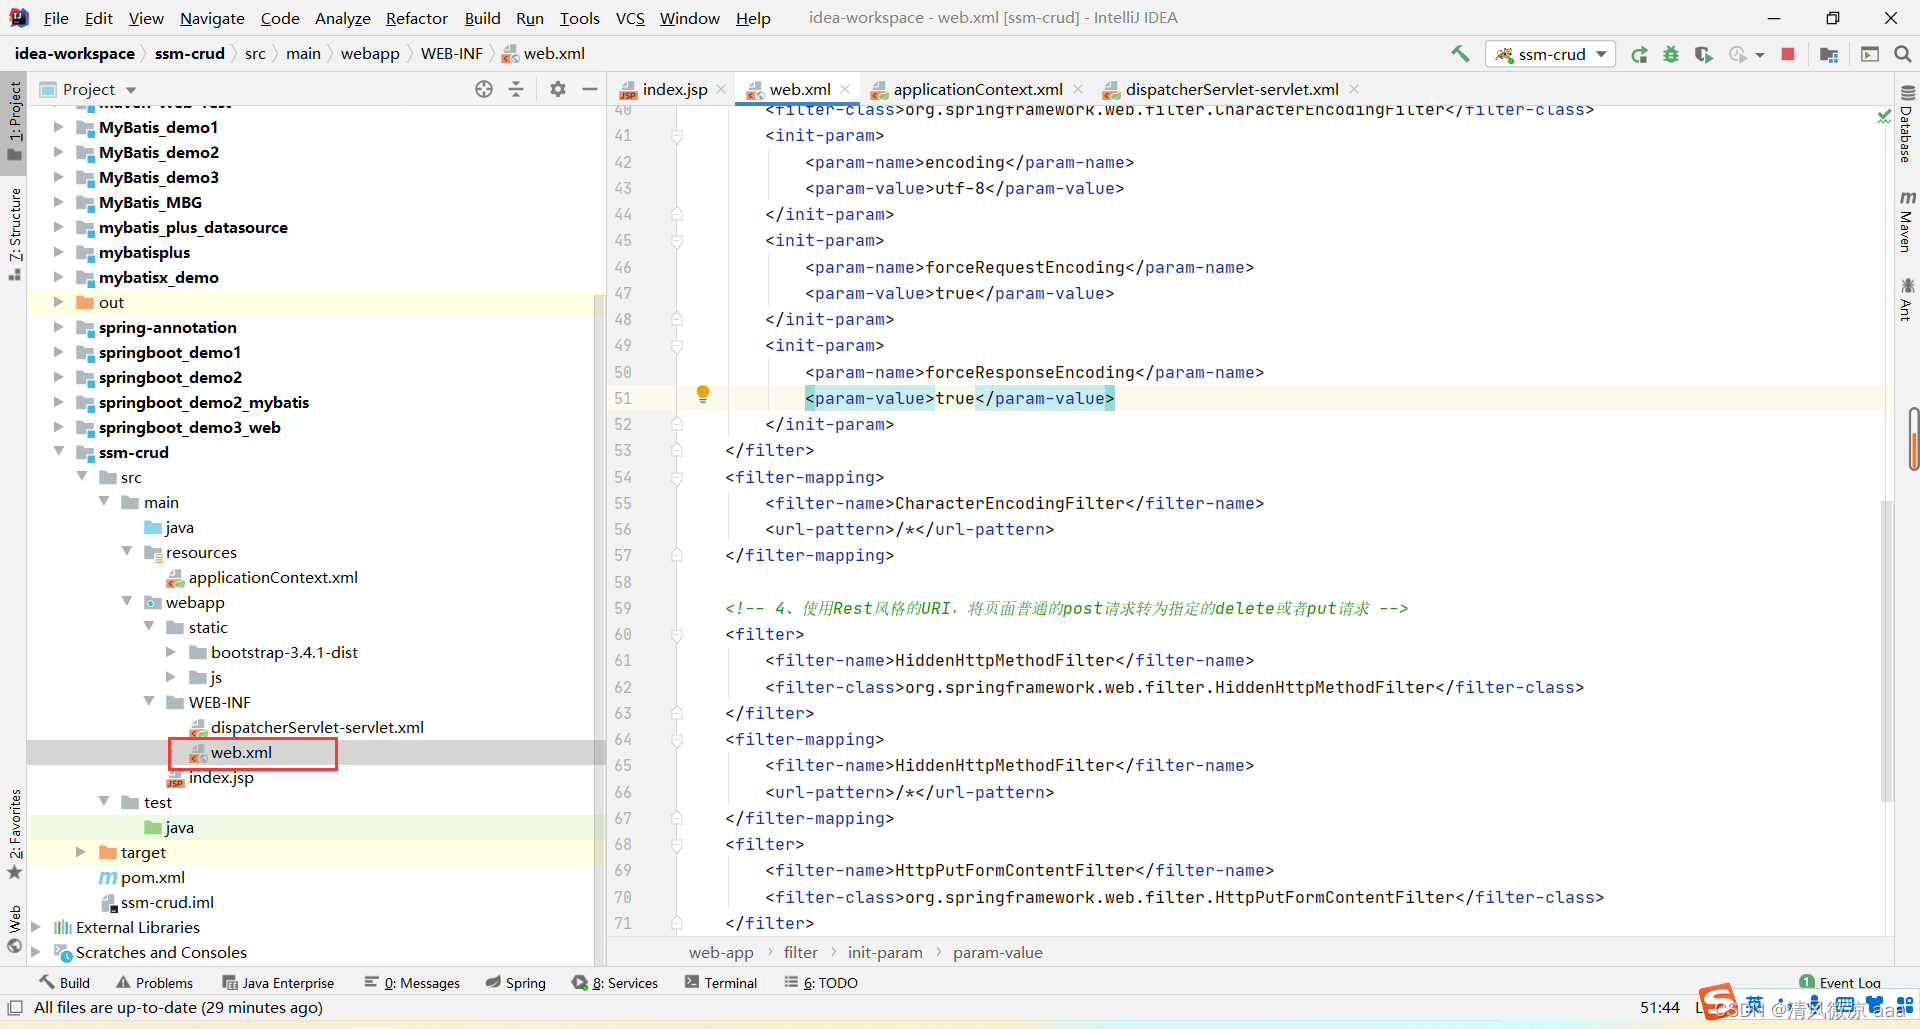
2.4.1、配置web.xml
<?xml version="1.0" encoding="UTF-8"?>
<web-app xmlns="http://java.sun.com/xml/ns/javaee"
           xmlns:xsi="http://www.w3.org/2001/XMLSchema-instance"
           xsi:schemaLocation="http://java.sun.com/xml/ns/javaee
		  http://java.sun.com/xml/ns/javaee/web-app_2_5.xsd"
           version="2.5">

    <!--1、启动Spring的容器  -->
    <!-- needed for ContextLoaderListener -->
    <context-param>
        <param-name>contextConfigLocation</param-name>
        <!--指定加载spring配置文件的位置-->
        <param-value>classpath:applicationContext.xml</param-value>
    </context-param>

    <!-- Bootstraps the root web application context before servlet initialization -->
    <listener>
        <listener-class>org.springframework.web.context.ContextLoaderListener</listener-class>
    </listener>

    <!--2、springmvc的前端控制器,拦截所有请求  -->
    <!-- The front controller of this Spring Web application, responsible for handling all application requests -->
    <servlet>
        <servlet-name>dispatcherServlet</servlet-name>
        <servlet-class>org.springframework.web.servlet.DispatcherServlet</servlet-class>
        <!--可以再init-param标签中的属性中指定springmvc配置文件的位置,如果不指定要求:在web.xml同级的目录下
                有一个spring的配置文件,文件名叫做当前servlet+(-servlet.xml),即:dispatcherServlet-servlet.xml -->
        <load-on-startup>1</load-on-startup>
    </servlet>

    <!-- Map all requests to the DispatcherServlet for handling -->
    <servlet-mapping>
        <servlet-name>dispatcherServlet</servlet-name>
        <url-pattern>/</url-pattern>
    </servlet-mapping>

    <!-- 3、字符编码过滤器,一定要放在所有过滤器之前 -->
    <filter>
        <filter-name>CharacterEncodingFilter</filter-name>
        <filter-class>org.springframework.web.filter.CharacterEncodingFilter</filter-class>
        <init-param>
            <param-name>encoding</param-name>
            <param-value>utf-8</param-value>
        </init-param>
        <init-param>
            <param-name>forceRequestEncoding</param-name>
            <param-value>true</param-value>
        </init-param>
        <init-param>
            <param-name>forceResponseEncoding</param-name>
            <param-value>true</param-value>
        </init-param>
    </filter>
    <filter-mapping>
        <filter-name>CharacterEncodingFilter</filter-name>
        <url-pattern>/*</url-pattern>
    </filter-mapping>

    <!-- 4、使用Rest风格的URI,将页面普通的post请求转为指定的delete或者put请求 -->
    <filter>
        <filter-name>HiddenHttpMethodFilter</filter-name>
        <filter-class>org.springframework.web.filter.HiddenHttpMethodFilter</filter-class>
    </filter>
    <filter-mapping>
        <filter-name>HiddenHttpMethodFilter</filter-name>
        <url-pattern>/*</url-pattern>
    </filter-mapping>
    <filter>
        <filter-name>HttpPutFormContentFilter</filter-name>
        <filter-class>org.springframework.web.filter.HttpPutFormContentFilter</filter-class>
    </filter>
    <filter-mapping>
        <filter-name>HttpPutFormContentFilter</filter-name>
        <url-pattern>/*</url-pattern>
    </filter-mapping>


</web-app>
2.4.2、配置SpringMVC的配置文件:dispatcherServlet-servlet.xml
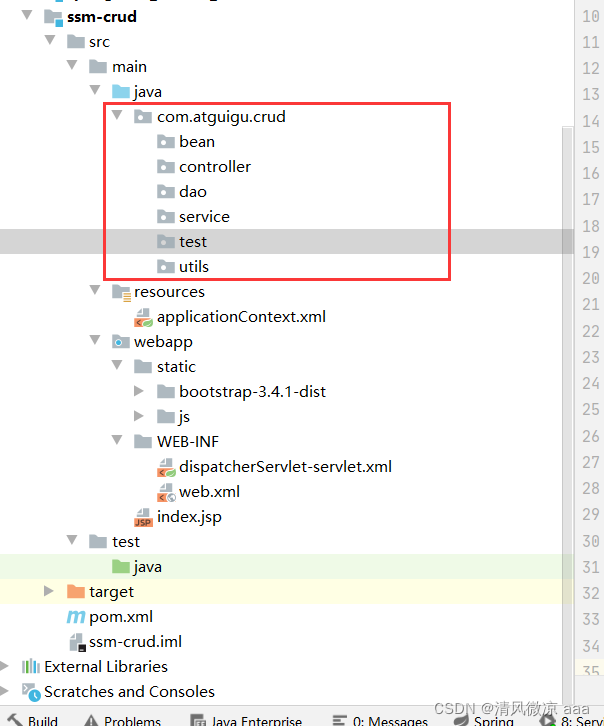
创建包结构:
创建存放jsp页面的目录:
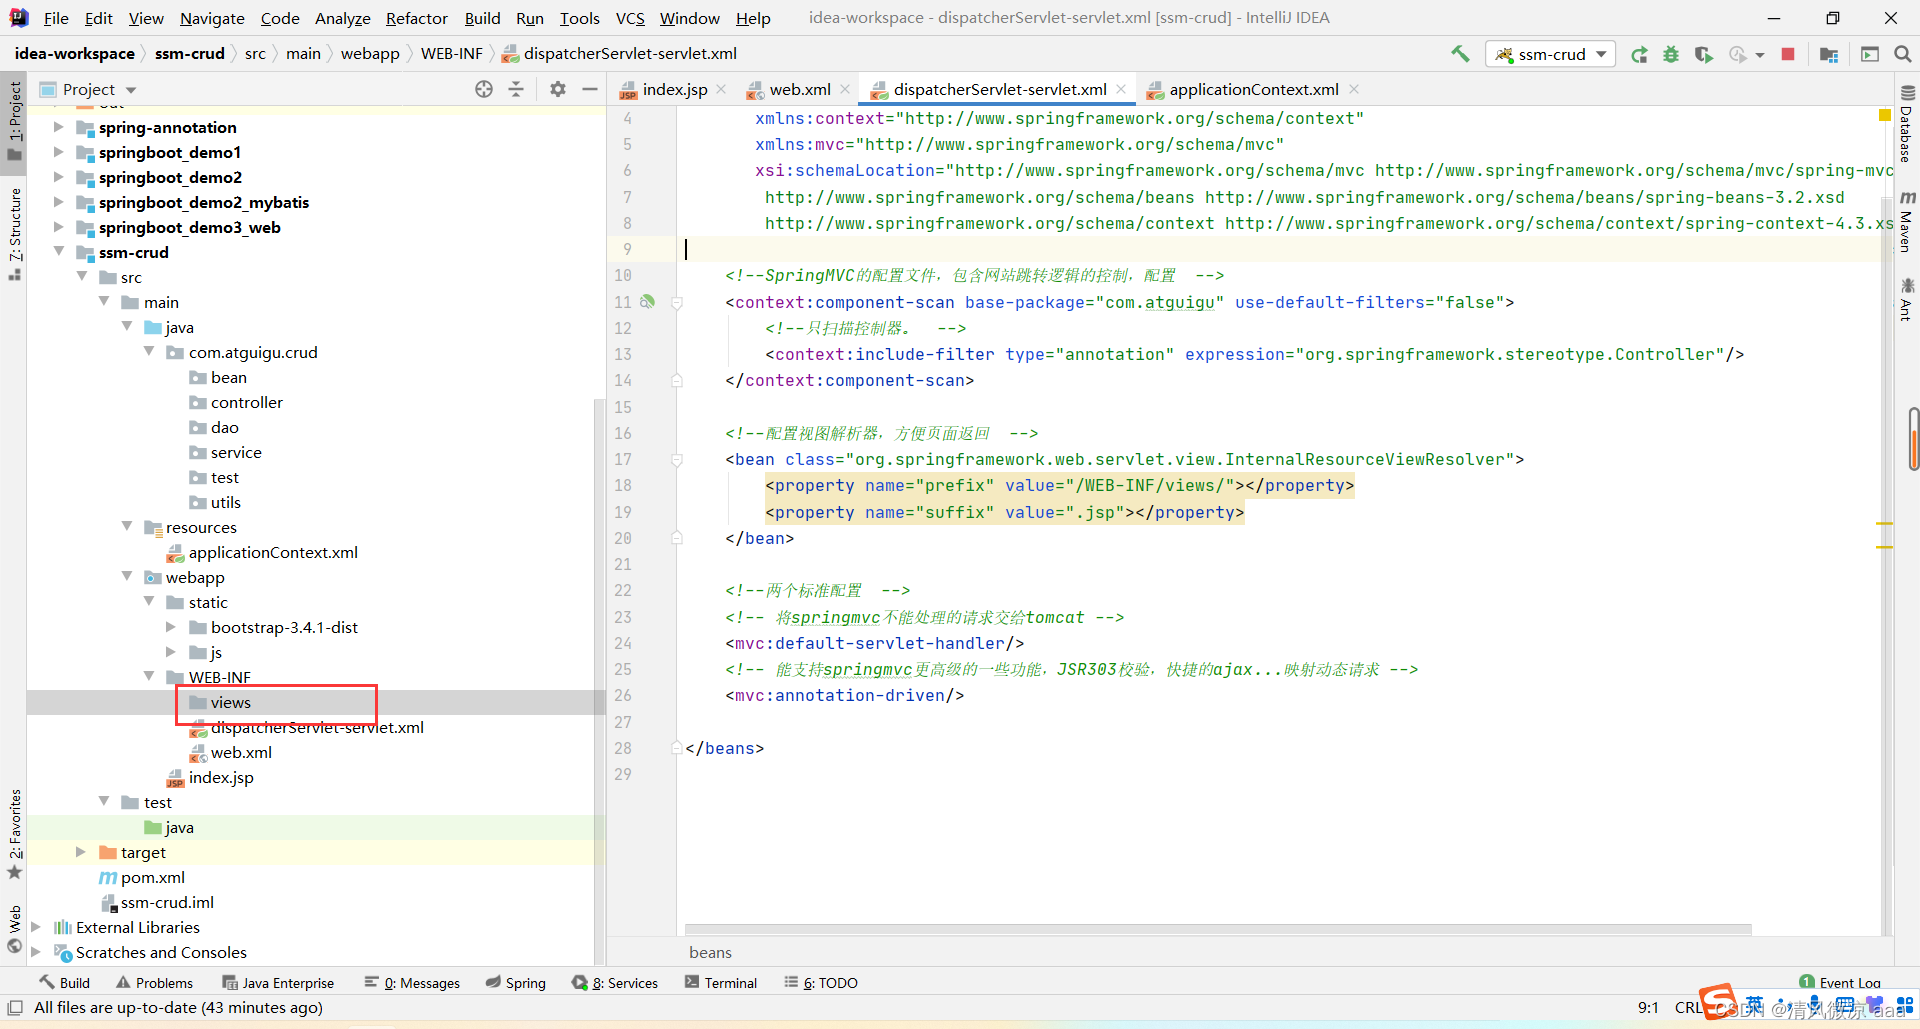
创建:SpringMVC的配置文件:dispatcherServlet-servlet.xml
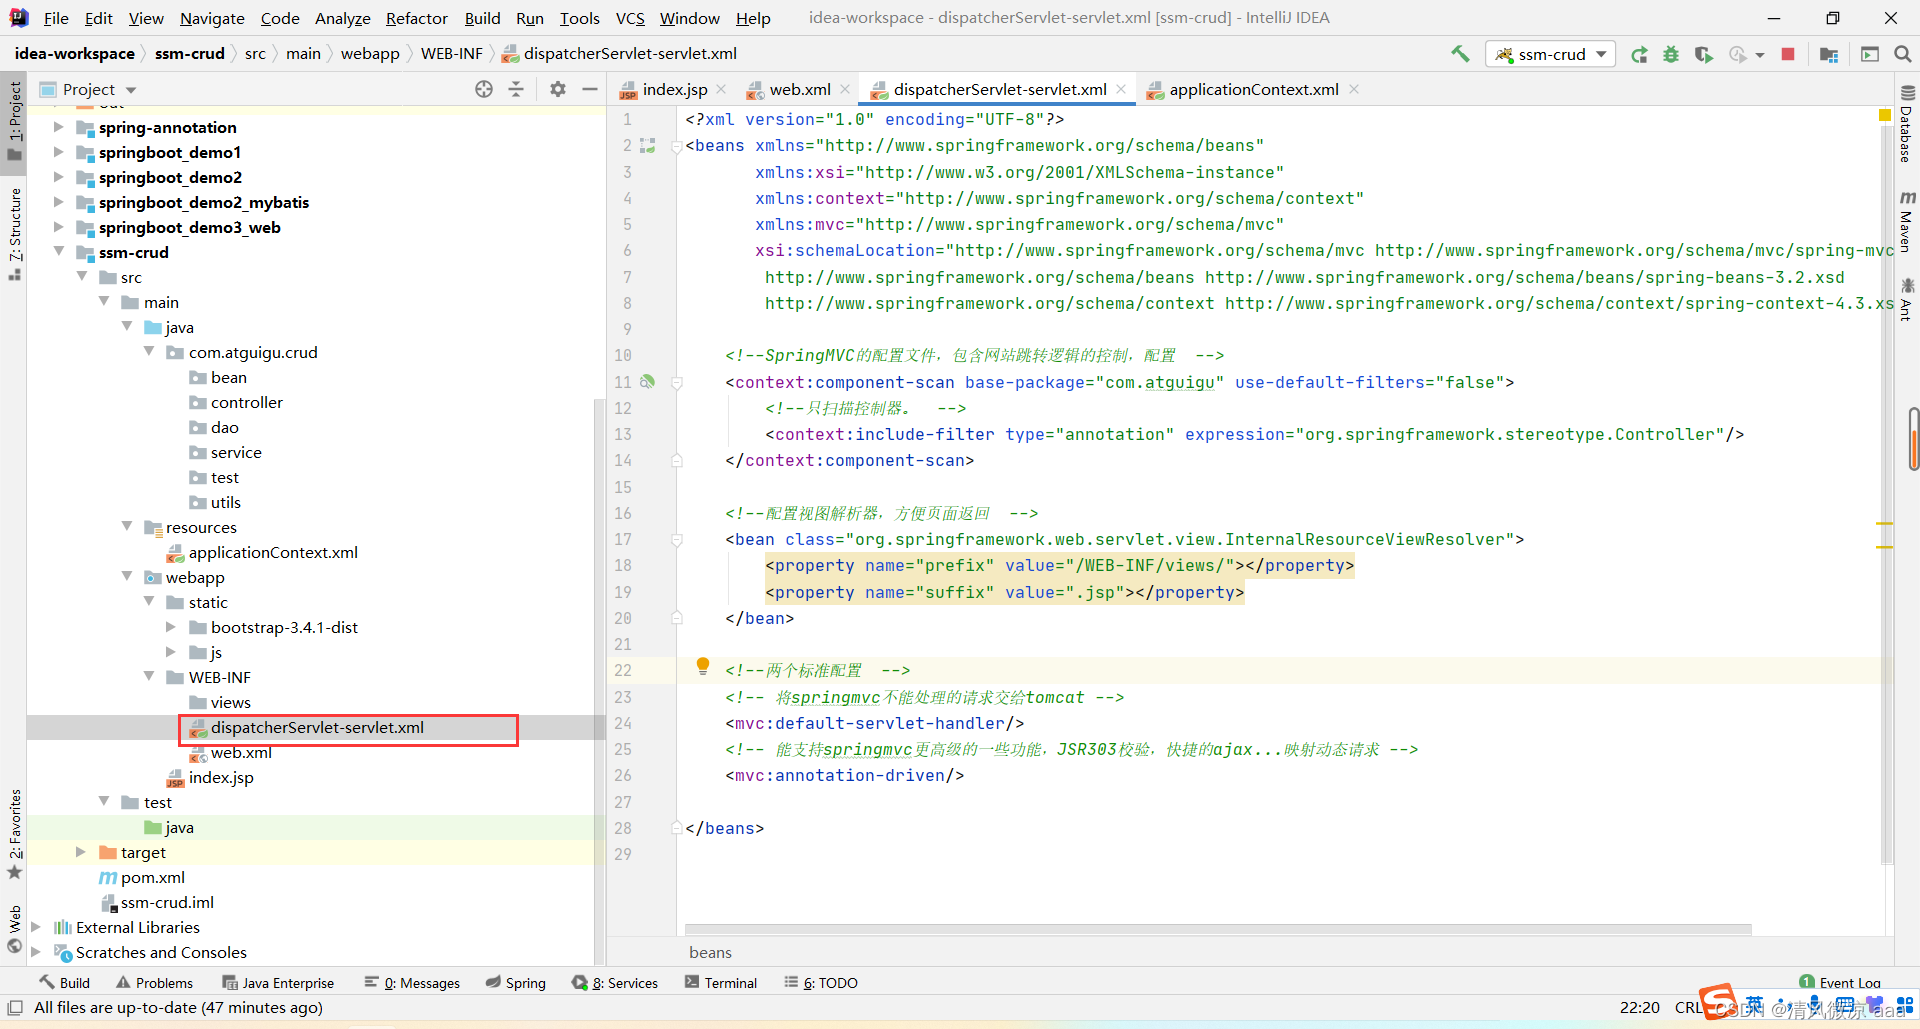
<?xml version="1.0" encoding="UTF-8"?>
<beans xmlns="http://www.springframework.org/schema/beans"
       xmlns:xsi="http://www.w3.org/2001/XMLSchema-instance"
       xmlns:context="http://www.springframework.org/schema/context"
       xmlns:mvc="http://www.springframework.org/schema/mvc"
       xsi:schemaLocation="http://www.springframework.org/schema/mvc http://www.springframework.org/schema/mvc/spring-mvc-4.3.xsd
		http://www.springframework.org/schema/beans http://www.springframework.org/schema/beans/spring-beans-3.2.xsd
		http://www.springframework.org/schema/context http://www.springframework.org/schema/context/spring-context-4.3.xsd">

    <!--SpringMVC的配置文件,包含网站跳转逻辑的控制,配置  -->
    <context:component-scan base-package="com.atguigu" use-default-filters="false">
        <!--只扫描控制器。  -->
        <context:include-filter type="annotation" expression="org.springframework.stereotype.Controller"/>
    </context:component-scan>

    <!--配置视图解析器,方便页面返回  -->
    <bean class="org.springframework.web.servlet.view.InternalResourceViewResolver">
        <property name="prefix" value="/WEB-INF/views/"></property>
        <property name="suffix" value=".jsp"></property>
    </bean>

    <!--两个标准配置  -->
    <!-- 将springmvc不能处理的请求交给tomcat -->
    <mvc:default-servlet-handler/>
    <!-- 能支持springmvc更高级的一些功能,JSR303校验,快捷的ajax...映射动态请求 -->
    <mvc:annotation-driven/>

</beans>
2.4.3、配置Spring的配置文件:applicationContext.xml
创建dbconfig.properties配置文件:
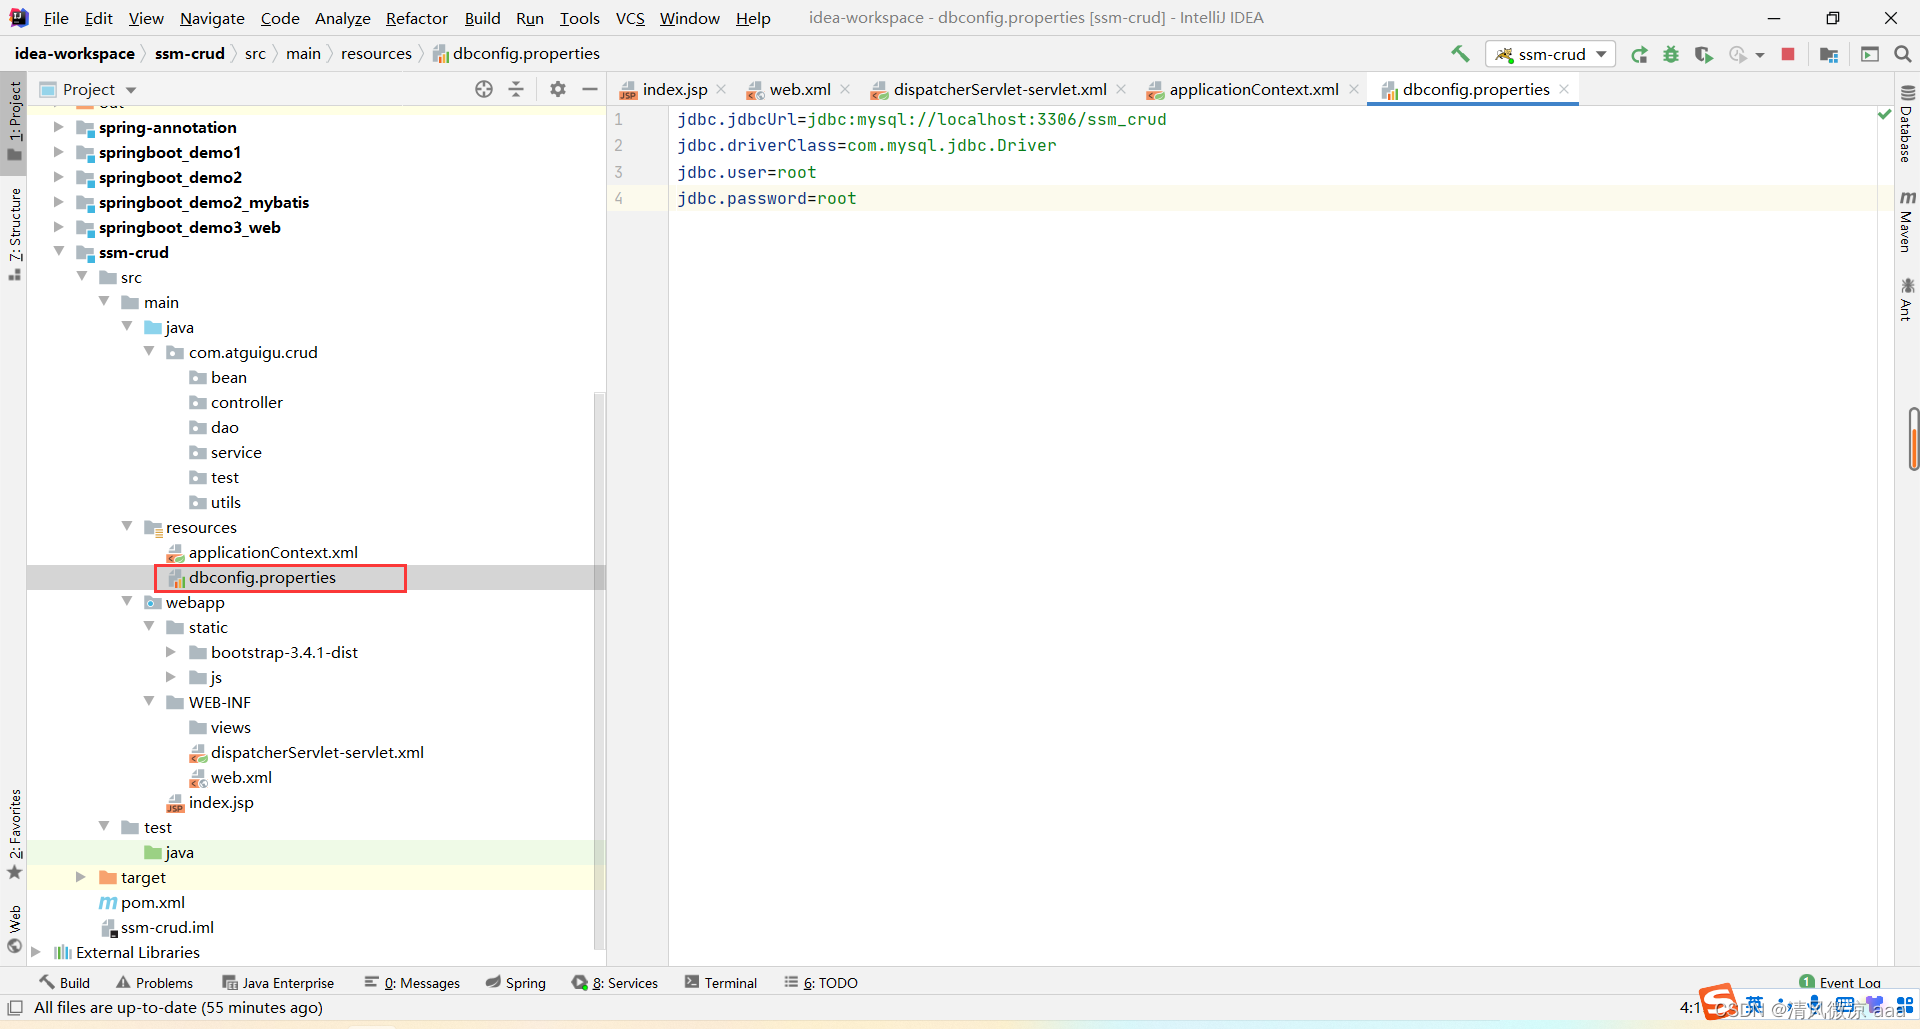
jdbc.jdbcUrl=jdbc:mysql://localhost:3306/ssm_crud
jdbc.driverClass=com.mysql.jdbc.Driver
jdbc.user=root
jdbc.password=root
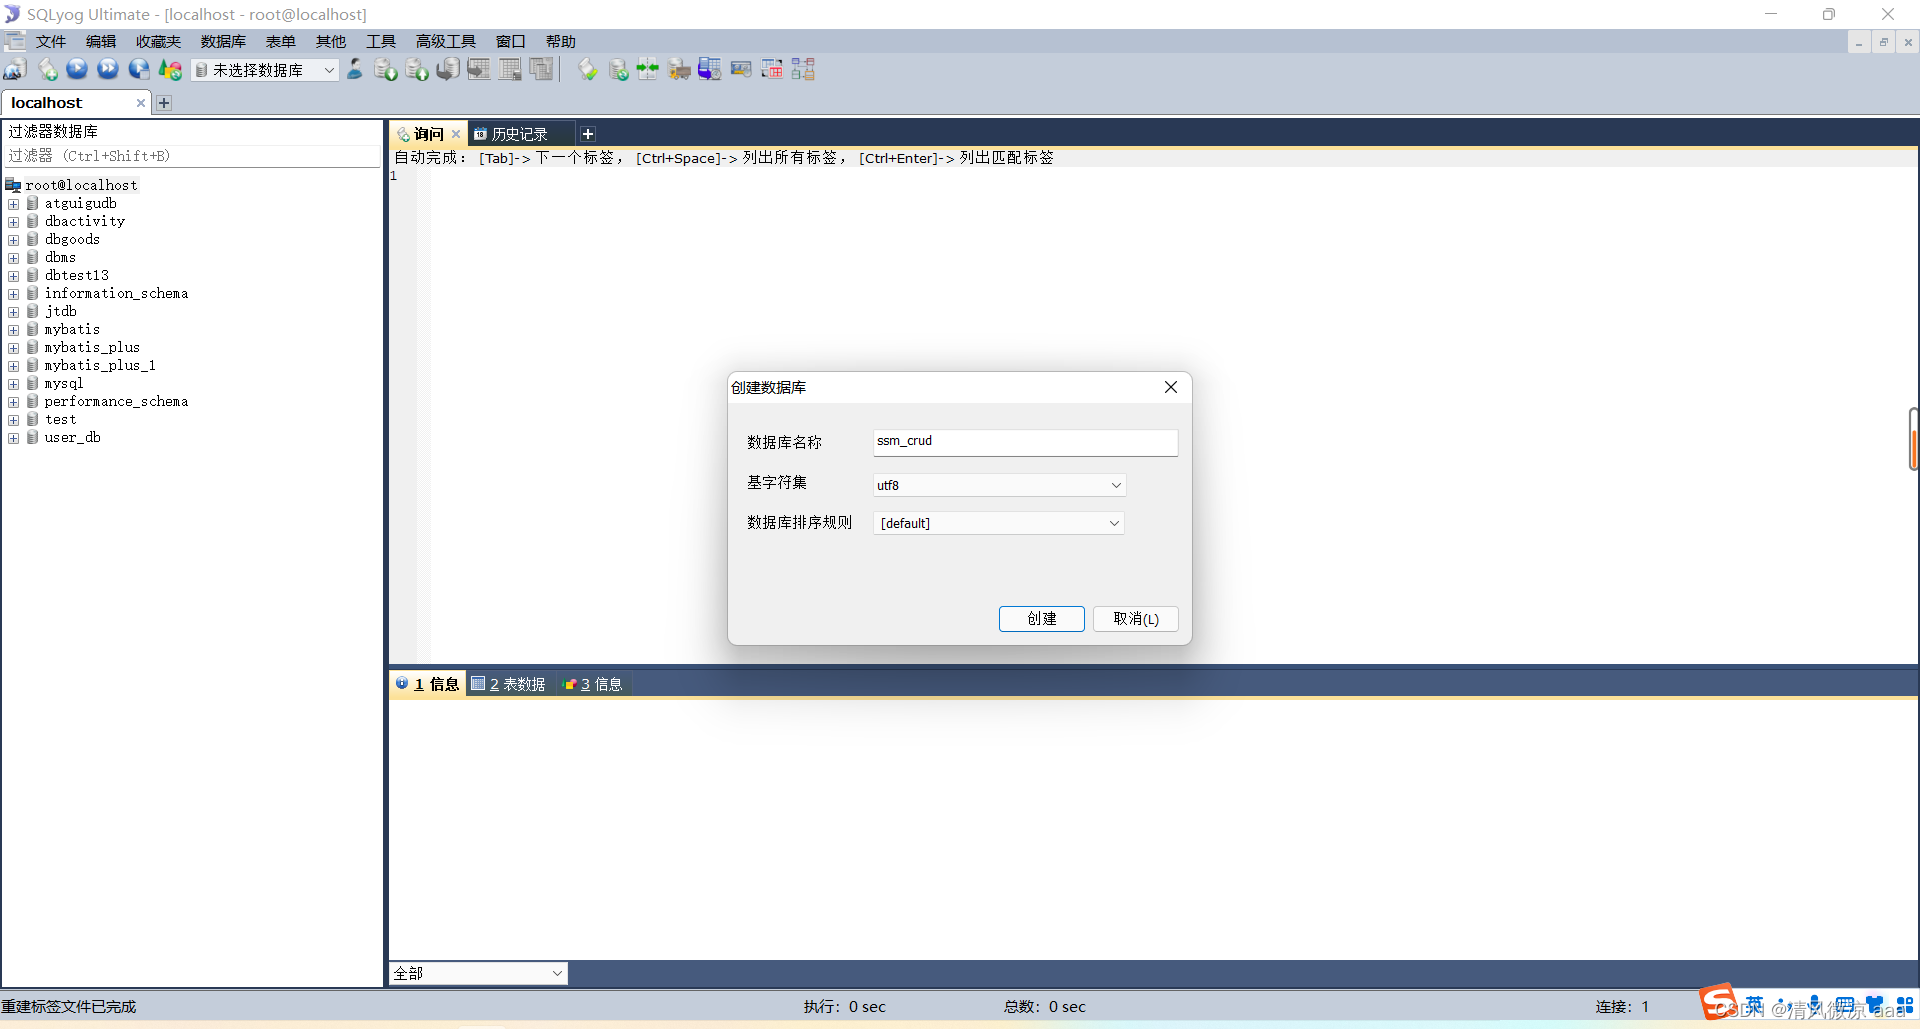
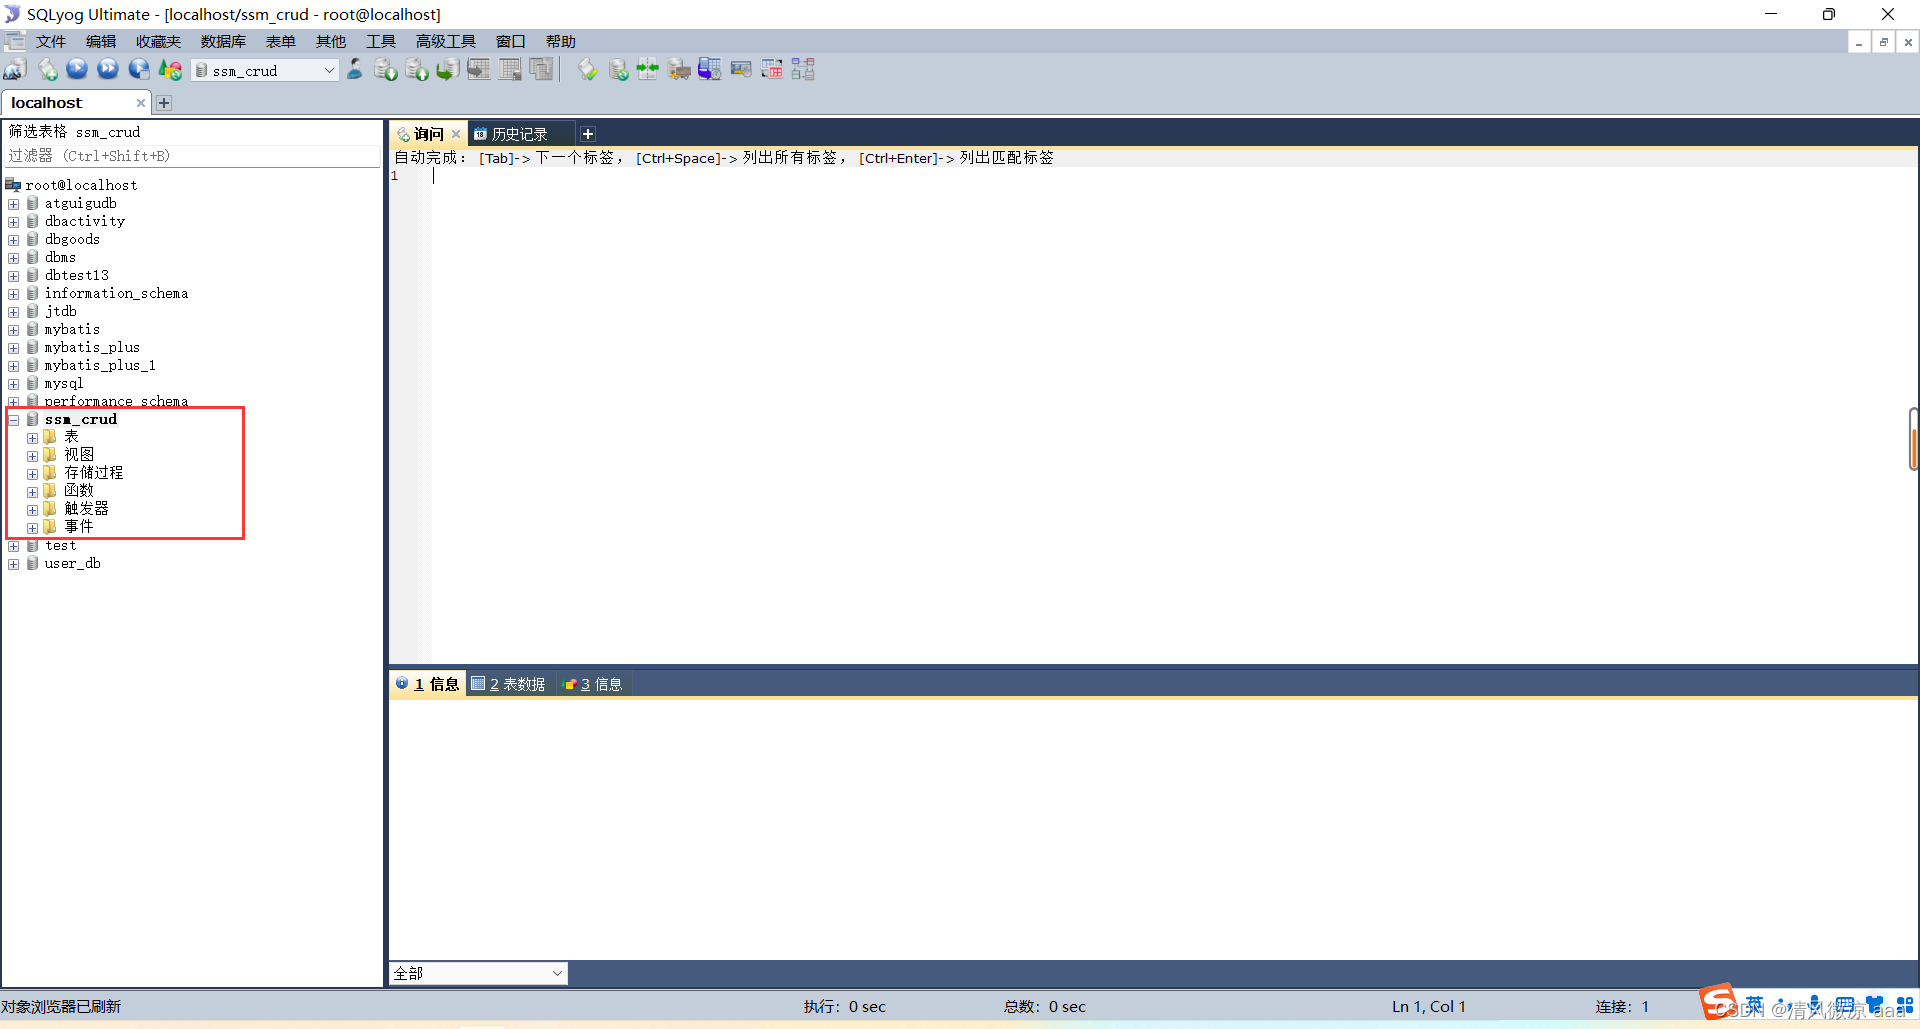
创建数据库:
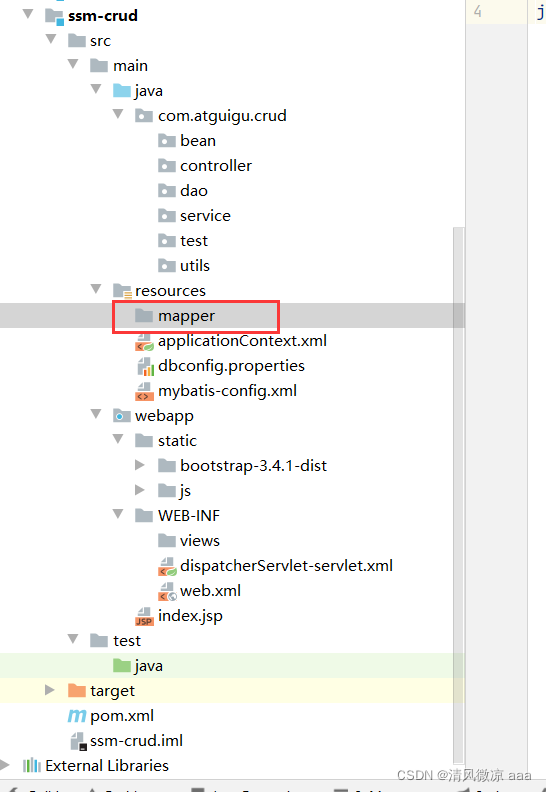
创建存放mapper映射文件的目录:
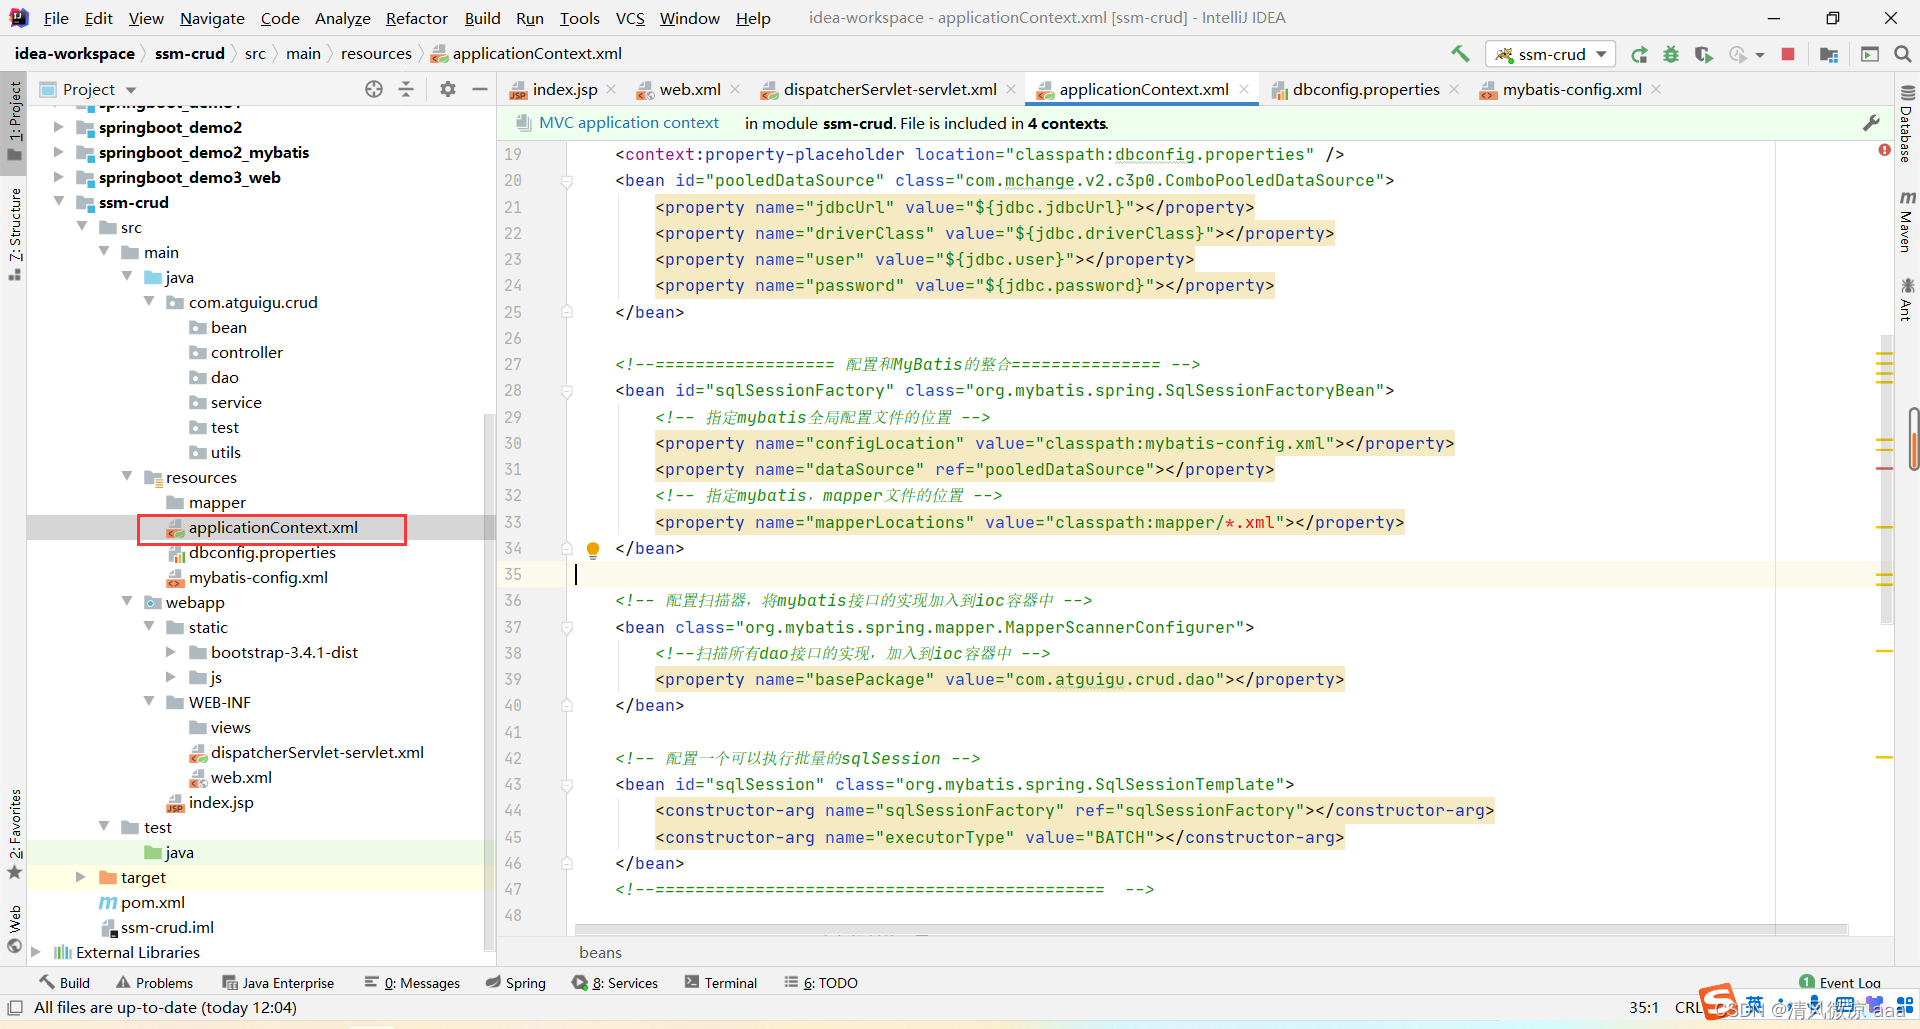
创建:Spring的配置文件:applicationContext.xml
<?xml version="1.0" encoding="UTF-8"?>
<beans xmlns="http://www.springframework.org/schema/beans"
xmlns:xsi="http://www.w3.org/2001/XMLSchema-instance"
xmlns:context="http://www.springframework.org/schema/context"
xmlns:aop="http://www.springframework.org/schema/aop"
xmlns:tx="http://www.springframework.org/schema/tx"
xsi:schemaLocation="http://www.springframework.org/schema/aop http://www.springframework.org/schema/aop/spring-aop-4.3.xsd
http://www.springframework.org/schema/beans http://www.springframework.org/schema/beans/spring-beans-3.2.xsd
http://www.springframework.org/schema/tx http://www.springframework.org/schema/tx/spring-tx-4.3.xsd
http://www.springframework.org/schema/context http://www.springframework.org/schema/context/spring-context-4.3.xsd">
<context:component-scan base-package="com.atguigu">
<context:exclude-filter type="annotation"
expression="org.springframework.stereotype.Controller" />
</context:component-scan>
<!-- Spring的配置文件,这里主要配置和业务逻辑有关的 -->
<!--=================== 数据源,事务控制,xxx ================-->
<context:property-placeholder location="classpath:dbconfig.properties" />
<bean id="pooledDataSource" class="com.mchange.v2.c3p0.ComboPooledDataSource">
<property name="jdbcUrl" value="${jdbc.jdbcUrl}"></property>
<property name="driverClass" value="${jdbc.driverClass}"></property>
<property name="user" value="${jdbc.user}"></property>
<property name="password" value="${jdbc.password}"></property>
</bean>
<!--================== 配置和MyBatis的整合=============== -->
<bean id="sqlSessionFactory" class="org.mybatis.spring.SqlSessionFactoryBean">
<!-- 指定mybatis全局配置文件的位置 -->
<property name="configLocation" value="classpath:mybatis-config.xml"></property>
<property name="dataSource" ref="pooledDataSource"></property>
<!-- 指定mybatis,mapper文件的位置 -->
<property name="mapperLocations" value="classpath:mapper/*.xml"></property>
</bean>
<!-- 配置扫描器,将mybatis接口的实现加入到ioc容器中 -->
<bean class="org.mybatis.spring.mapper.MapperScannerConfigurer">
<!--扫描所有dao接口的实现,加入到ioc容器中 -->
<property name="basePackage" value="com.atguigu.crud.dao"></property>
</bean>
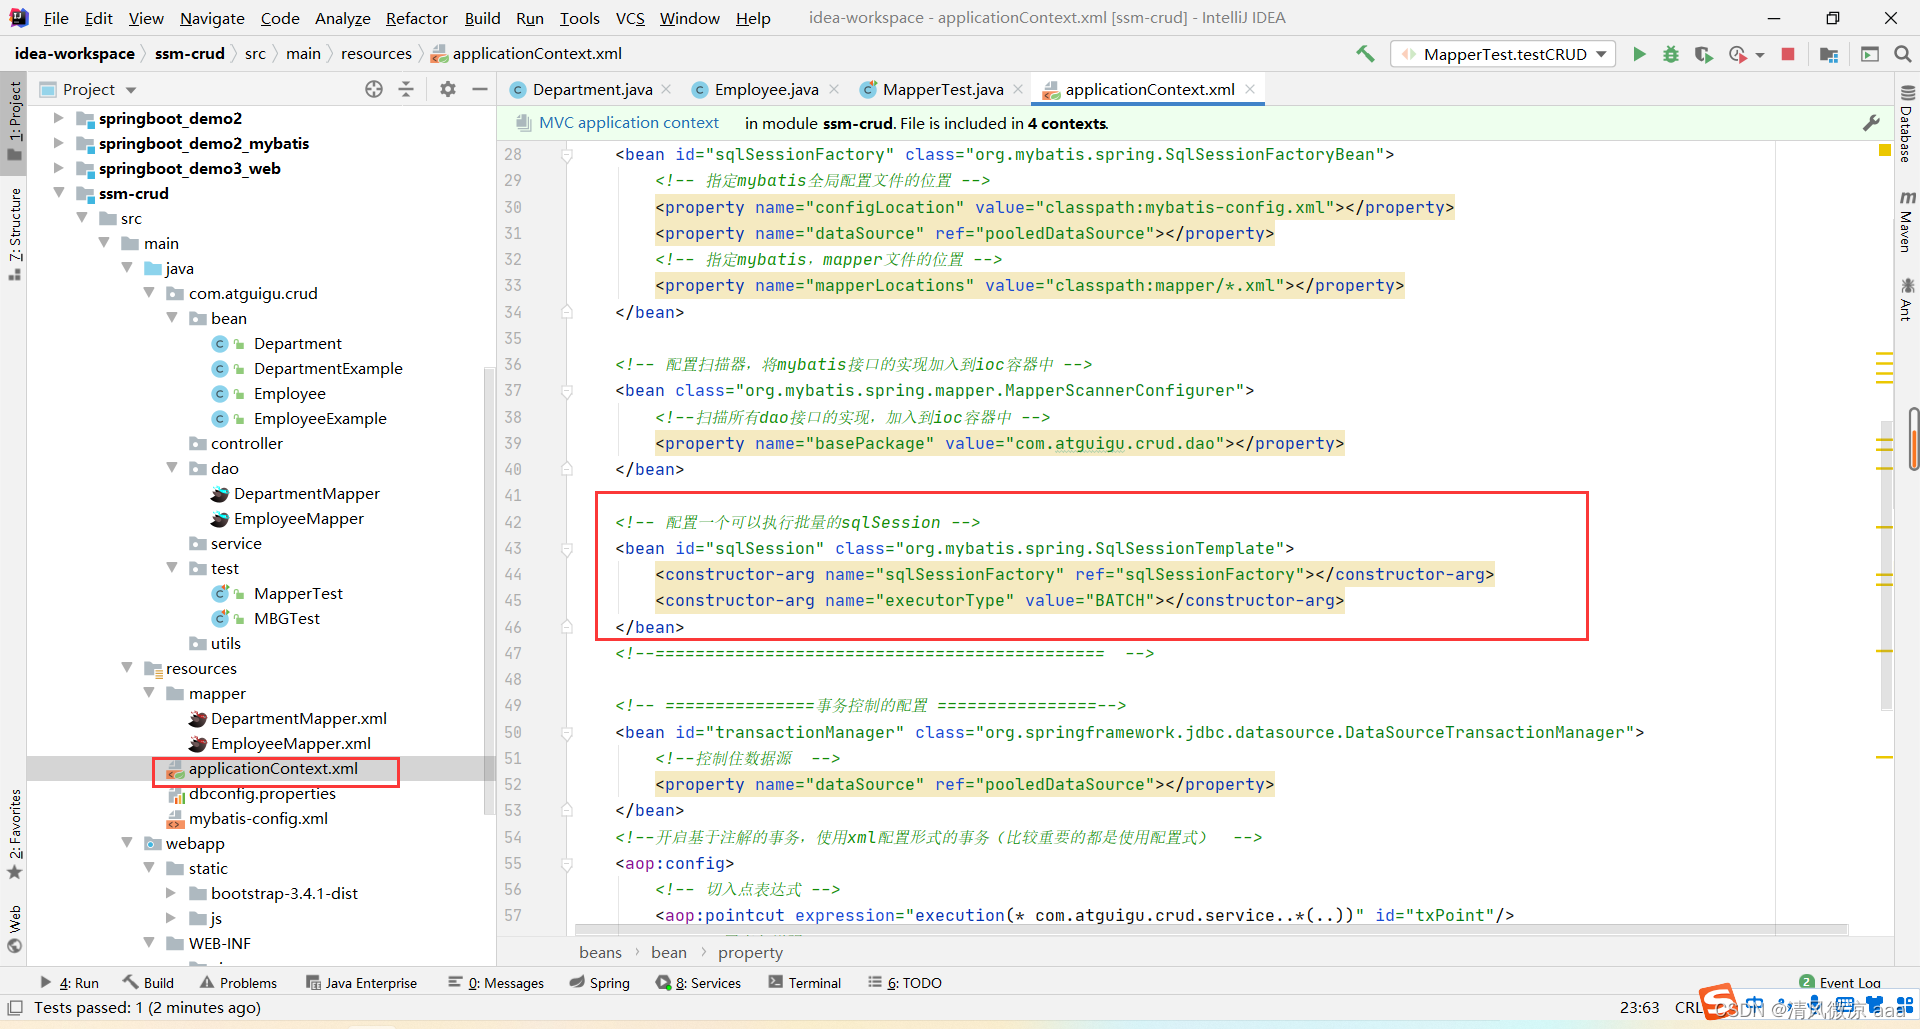
<!-- 配置一个可以执行批量的sqlSession -->
<bean id="sqlSession" class="org.mybatis.spring.SqlSessionTemplate">
<constructor-arg name="sqlSessionFactory" ref="sqlSessionFactory"></constructor-arg>
<constructor-arg name="executorType" value="BATCH"></constructor-arg>
</bean>
<!--============================================= -->
<!-- ===============事务控制的配置 ================-->
<bean id="transactionManager" class="org.springframework.jdbc.datasource.DataSourceTransactionManager">
<!--控制住数据源 -->
<property name="dataSource" ref="pooledDataSource"></property>
</bean>
<!--开启基于注解的事务,使用xml配置形式的事务(比较重要的都是使用配置式) -->
<aop:config>
<!-- 切入点表达式 -->
<aop:pointcut expression="execution(* com.atguigu.crud.service..*(..))" id="txPoint"/>
<!-- 配置事务增强 -->
<aop:advisor advice-ref="txAdvice" pointcut-ref="txPoint"/>
</aop:config>
<!--配置事务增强,事务如何切入 -->
<tx:advice id="txAdvice" transaction-manager="transactionManager">
<tx:attributes>
<!-- 所有方法都是事务方法 -->
<tx:method name="*"/>
<!--以get开始的所有方法 -->
<tx:method name="get*" read-only="true"/>
</tx:attributes>
</tx:advice>
<!-- Spring配置文件的核心点(数据源、与mybatis的整合,事务控制) -->
</beans>
2.4.4、配置mybatis的全局配置文件
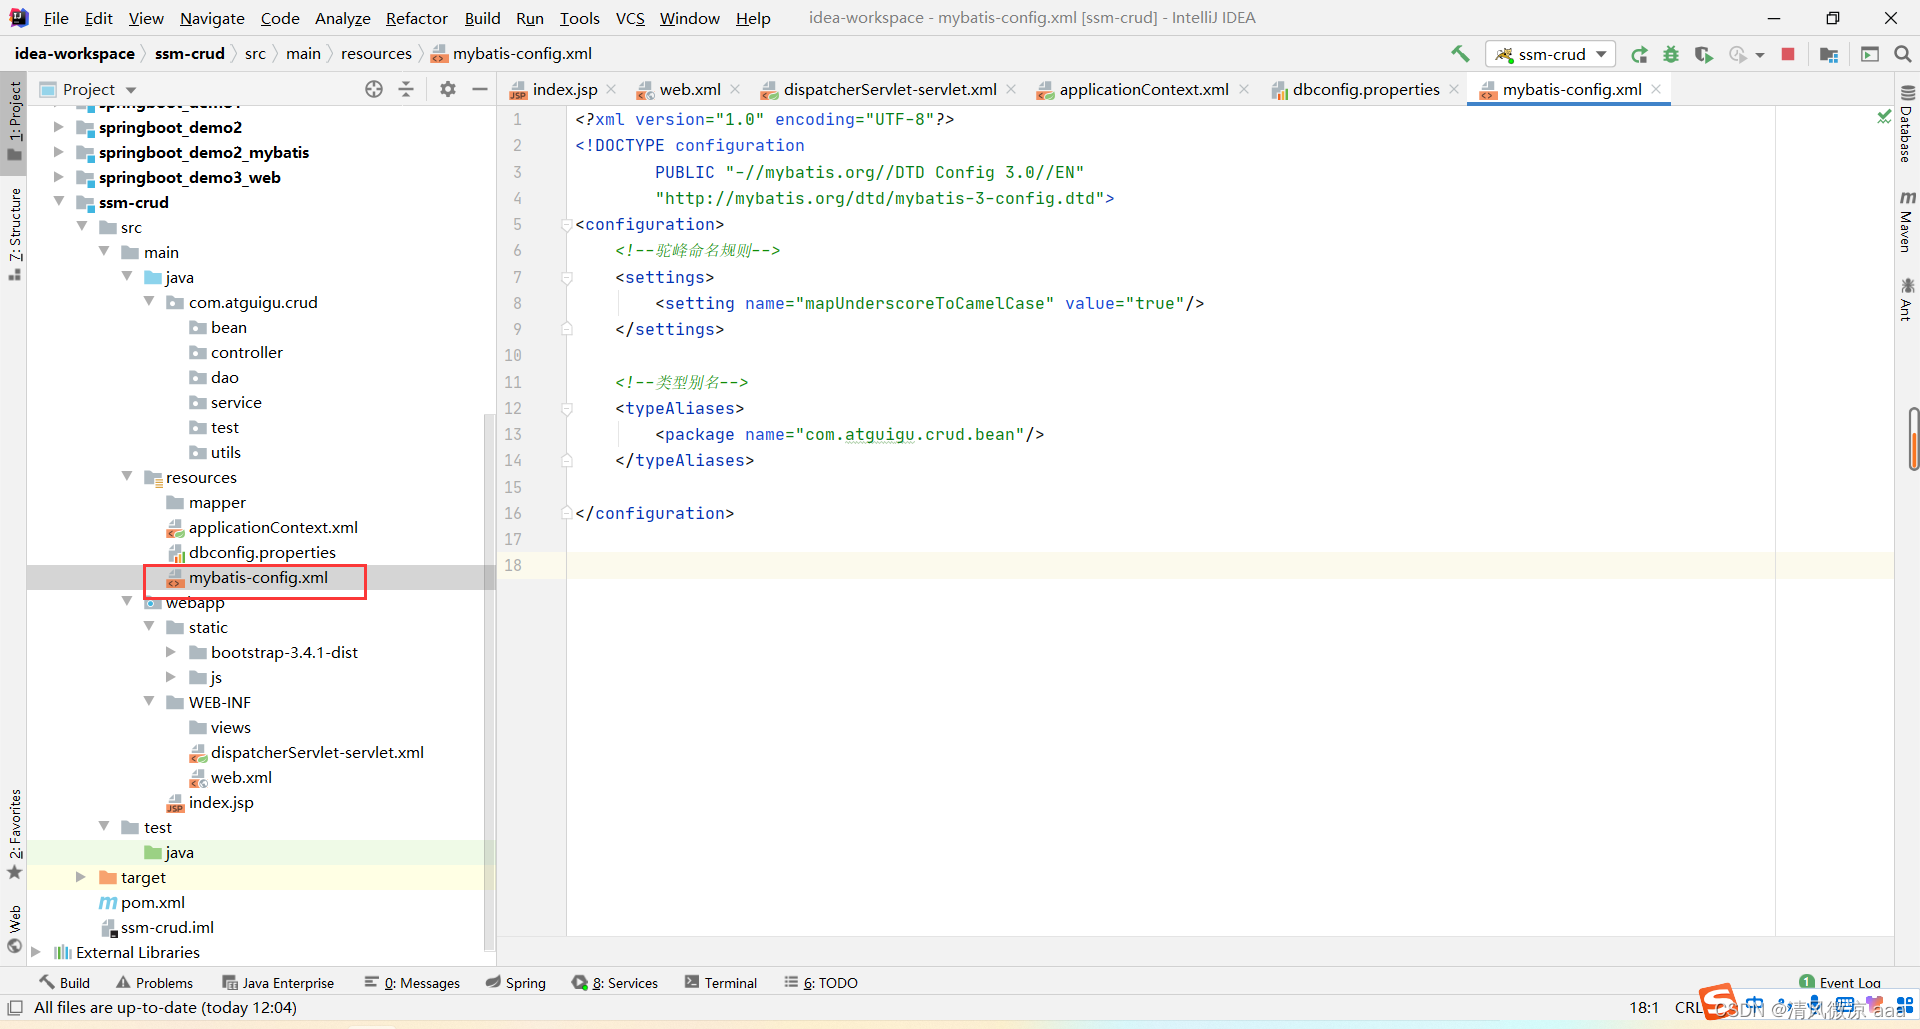
<?xml version="1.0" encoding="UTF-8"?>
<!DOCTYPE configuration
        PUBLIC "-//mybatis.org//DTD Config 3.0//EN"
        "http://mybatis.org/dtd/mybatis-3-config.dtd">
<configuration>
    <!--驼峰命名规则-->
    <settings>
        <setting name="mapUnderscoreToCamelCase" value="true"/>
    </settings>

    <!--类型别名-->
    <typeAliases>
        <package name="com.atguigu.crud.bean"/>
    </typeAliases>

</configuration>
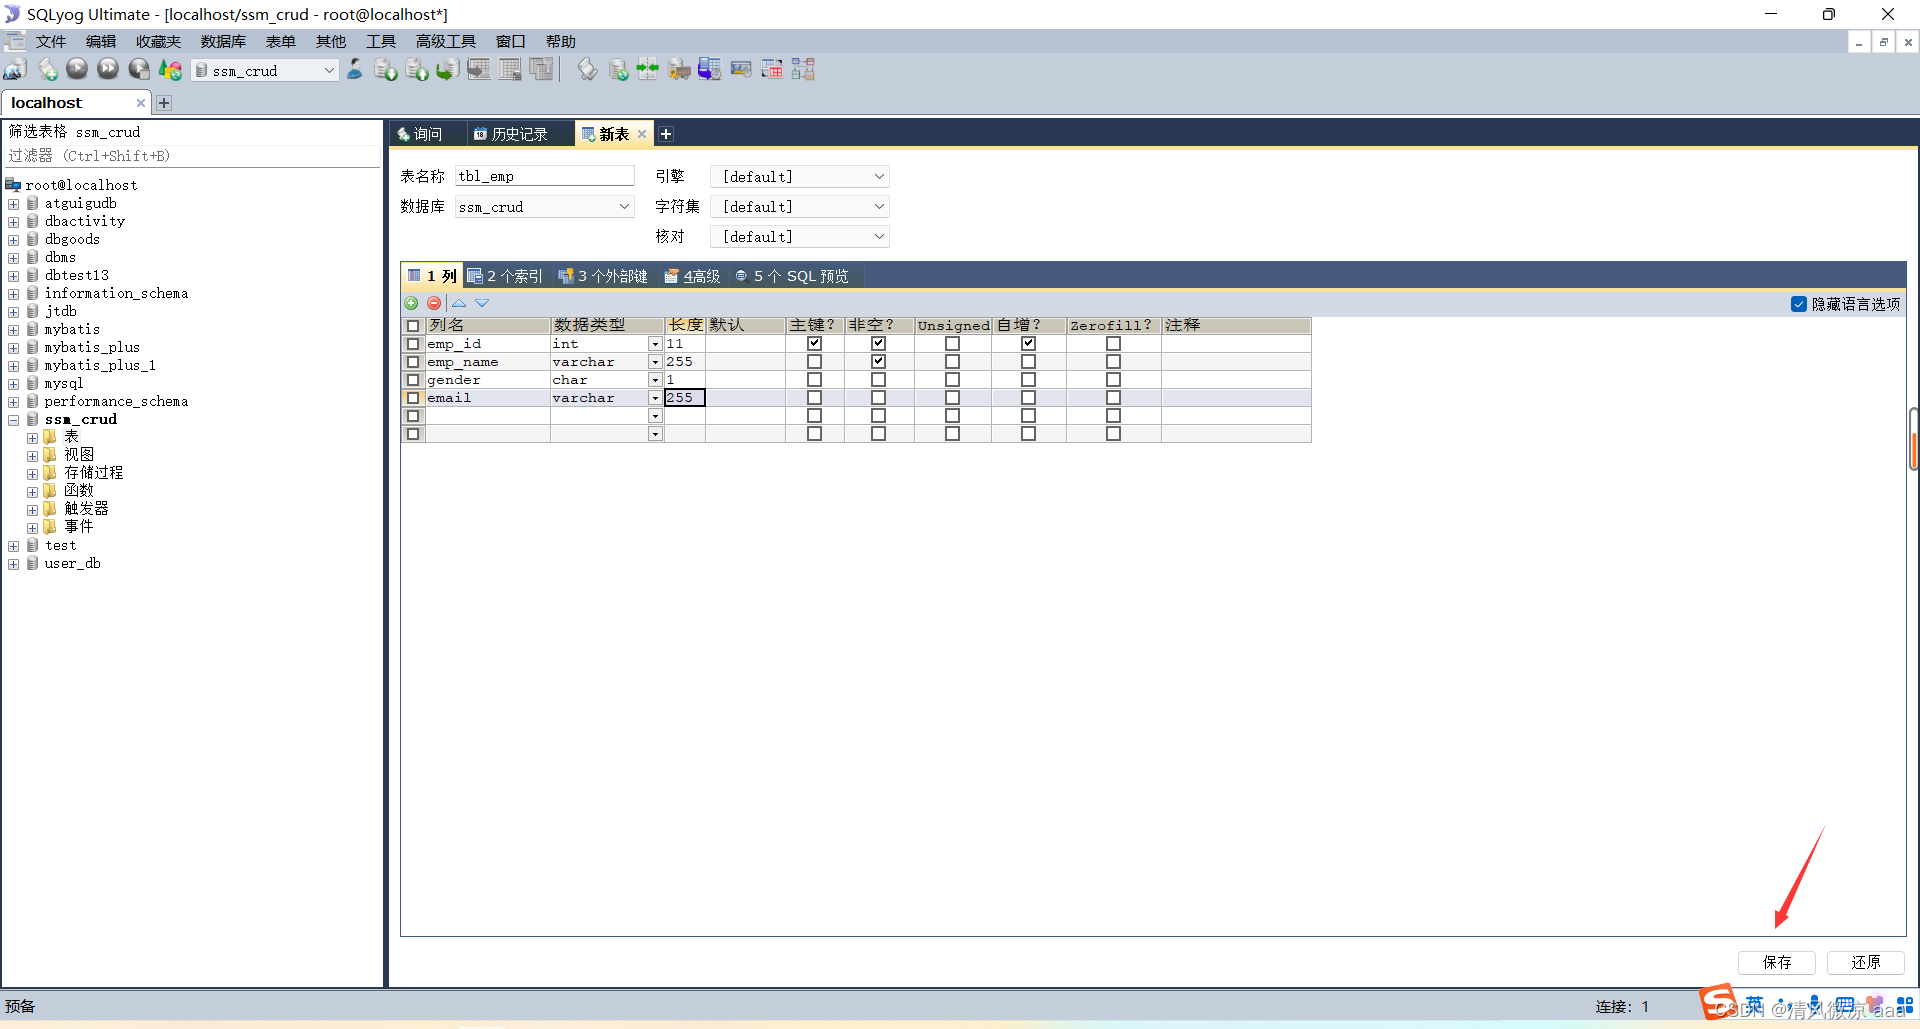
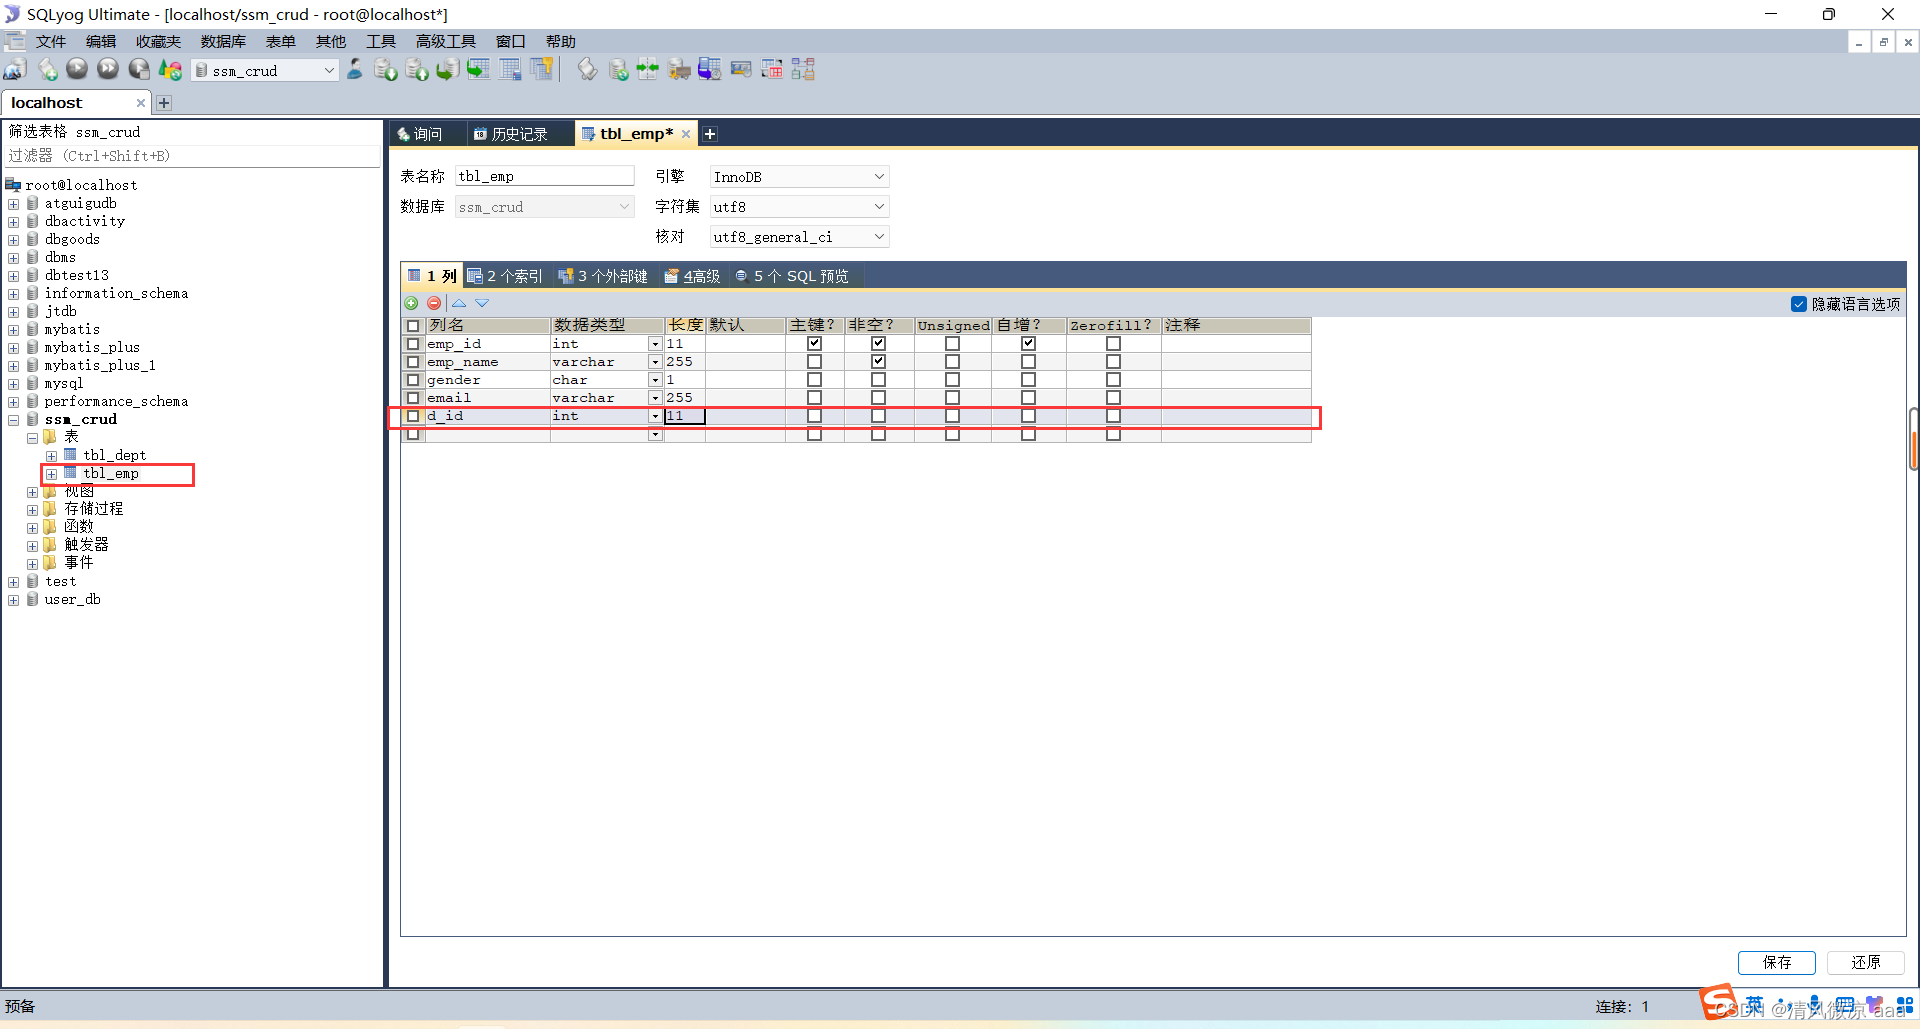
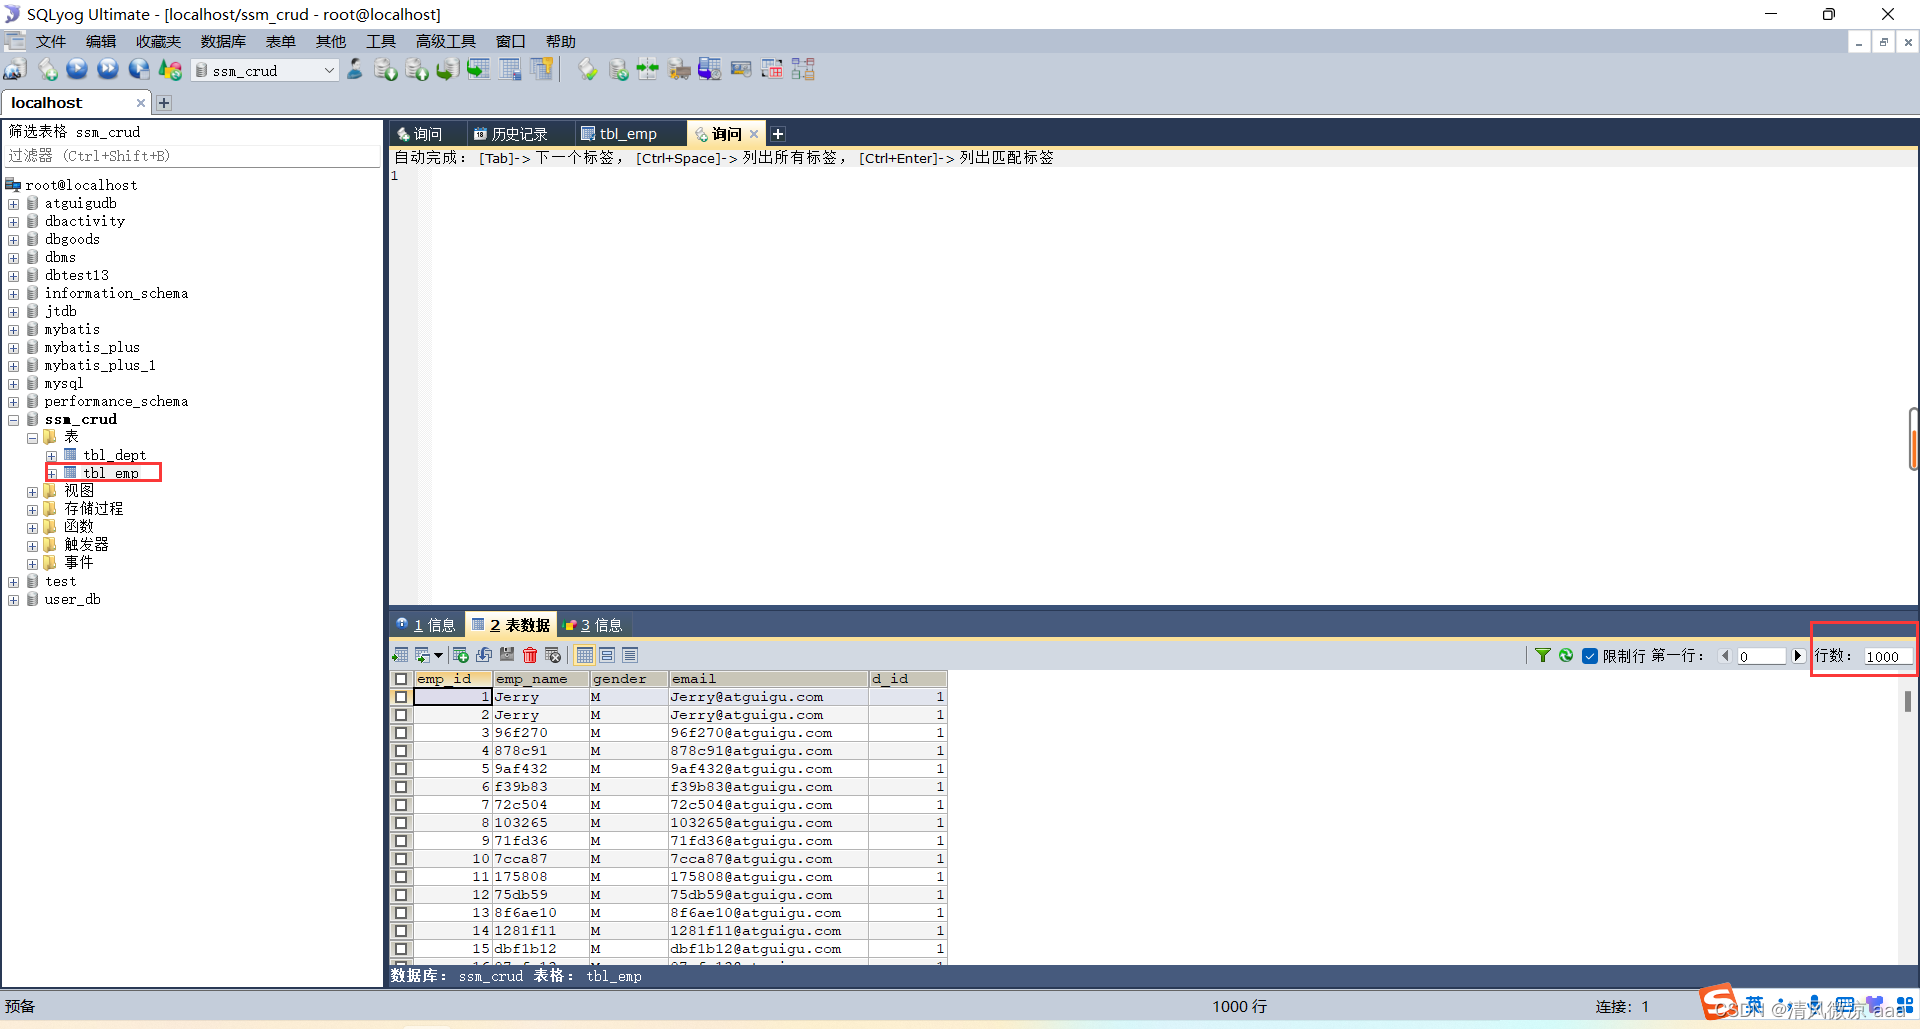
2.4.5、创建数据库中的表
创建员工表:tbl_emp.
创建部门表:tbl_dept.
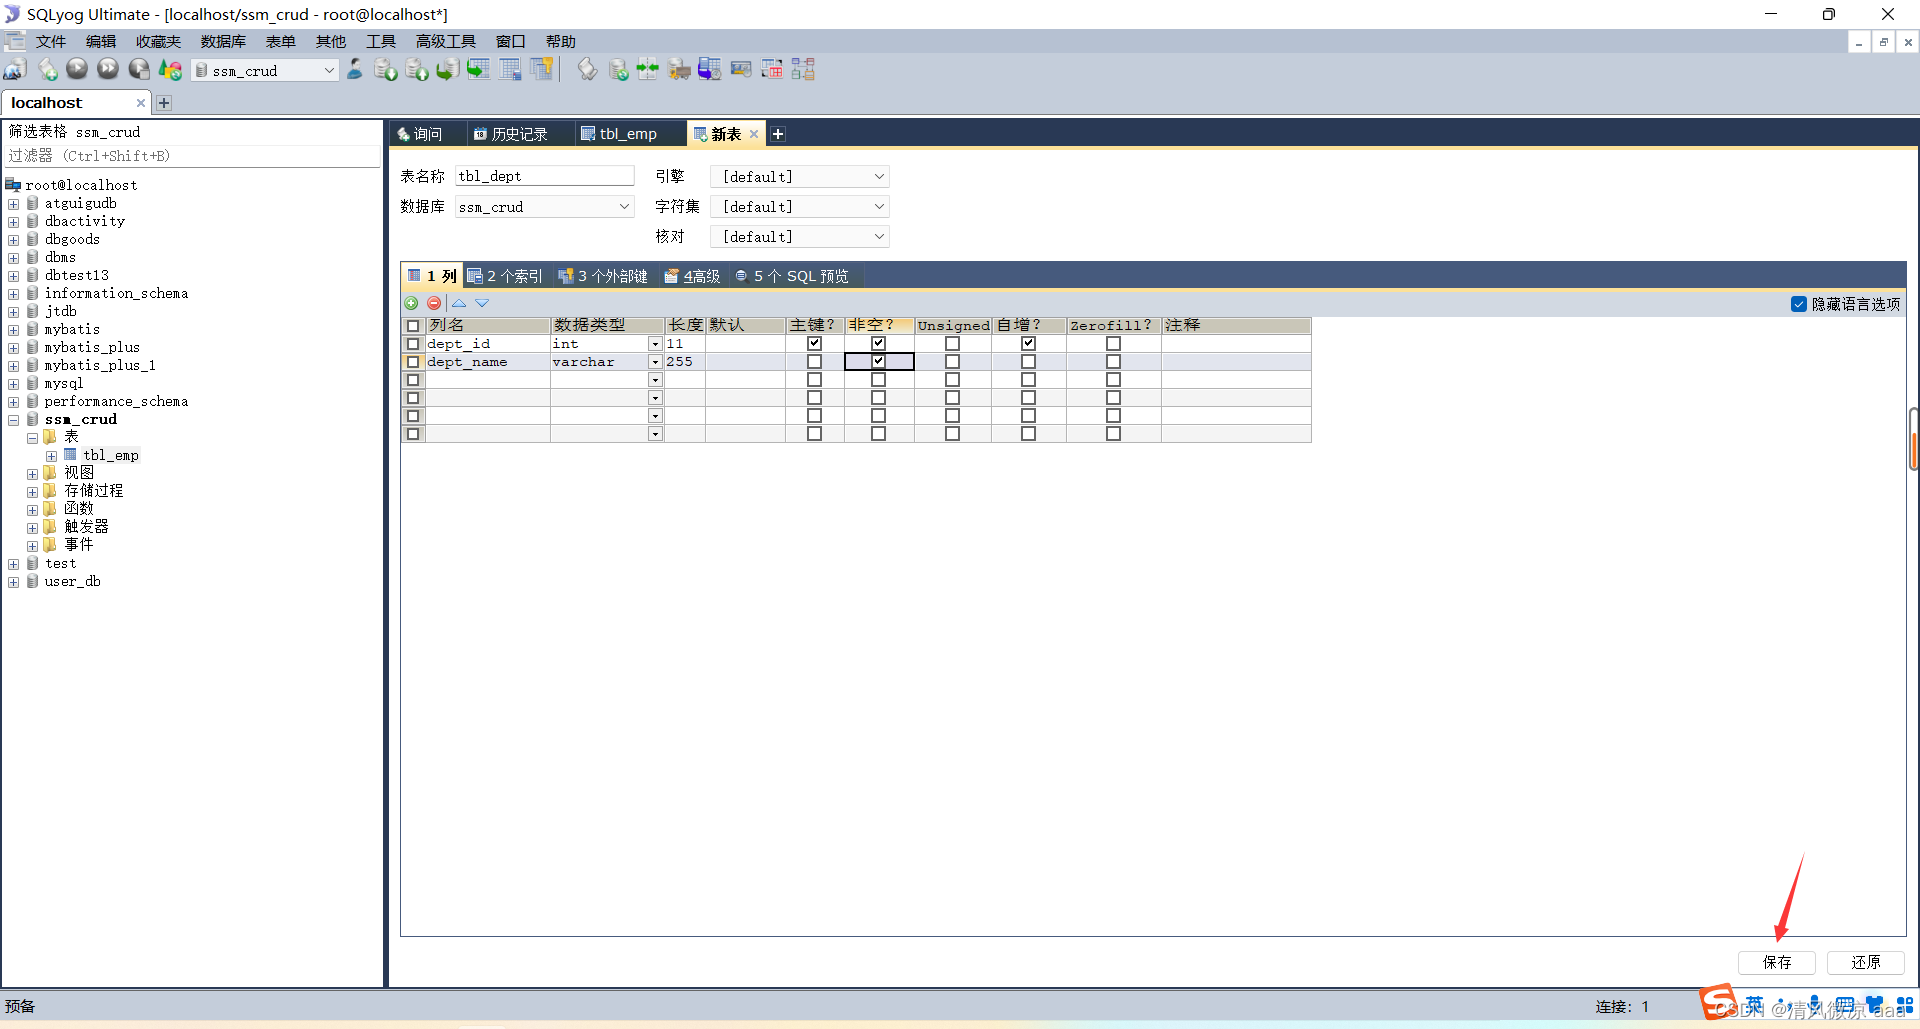
在员工表添加一列来保存部门表的主键,用来表示表关系。
说明:也可以建立外键关联,数据的安全会有保证,但是效率会降低,这里就不在添加外键了。
2.4.6、使用mybatis的逆向工程生成对应的bean以及mapper
说明:当然也可以自己写,不过太麻烦。
步骤1:引入jar包:
		<!-- MBG -->
		<!-- https://mvnrepository.com/artifact/org.mybatis.generator/mybatis-generator-core -->
		<dependency>
			<groupId>org.mybatis.generator</groupId>
			<artifactId>mybatis-generator-core</artifactId>
			<version>1.3.5</version>
		</dependency>
步骤2:在当前工程下创建mbg.xml文件:
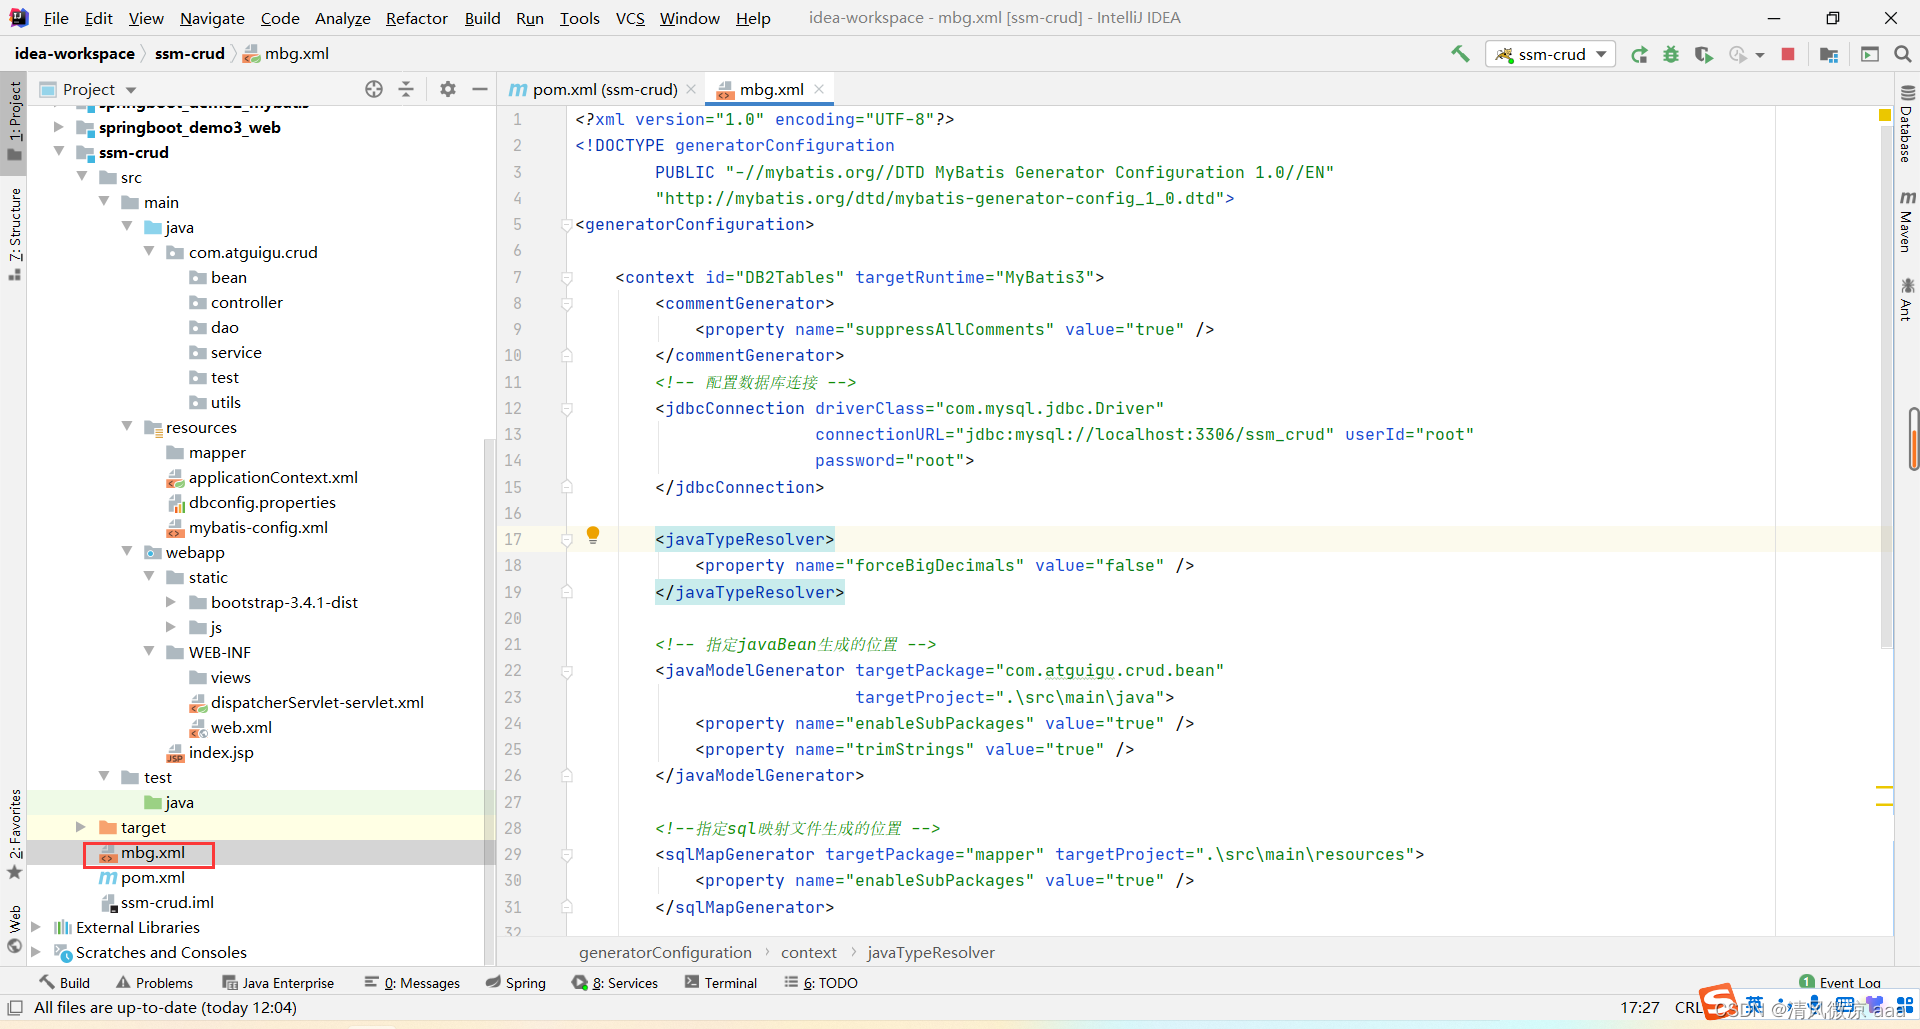
<?xml version="1.0" encoding="UTF-8"?>
<!DOCTYPE generatorConfiguration
        PUBLIC "-//mybatis.org//DTD MyBatis Generator Configuration 1.0//EN"
        "http://mybatis.org/dtd/mybatis-generator-config_1_0.dtd">
<generatorConfiguration>

    <context id="DB2Tables" targetRuntime="MyBatis3">
        <commentGenerator>
          <!--suppressAllComments:阻止生成注释-->
            <property name="suppressAllComments" value="true" />
        </commentGenerator>
        <!-- 配置数据库连接 -->
        <jdbcConnection driverClass="com.mysql.jdbc.Driver"
                        connectionURL="jdbc:mysql://localhost:3306/ssm_crud" userId="root"
                        password="root">
        </jdbcConnection>

        <javaTypeResolver>
            <property name="forceBigDecimals" value="false" />
        </javaTypeResolver>

        <!-- 指定javaBean生成的位置 -->
        <javaModelGenerator targetPackage="com.atguigu.crud.bean"
                            targetProject=".\src\main\java">
            <property name="enableSubPackages" value="true" />
            <property name="trimStrings" value="true" />
        </javaModelGenerator>

        <!--指定sql映射文件生成的位置 -->
        <sqlMapGenerator targetPackage="mapper" targetProject=".\src\main\resources">
            <property name="enableSubPackages" value="true" />
        </sqlMapGenerator>

        <!-- 指定dao接口生成的位置,mapper接口 -->
        <javaClientGenerator type="XMLMAPPER"
                             targetPackage="com.atguigu.crud.dao" targetProject=".\src\main\java">
            <property name="enableSubPackages" value="true" />
        </javaClientGenerator>


        <!-- table指定每个表的生成策略 -->
        <table tableName="tbl_emp" domainObjectName="Employee"></table>
        <table tableName="tbl_dept" domainObjectName="Department"></table>
    </context>
</generatorConfiguration>
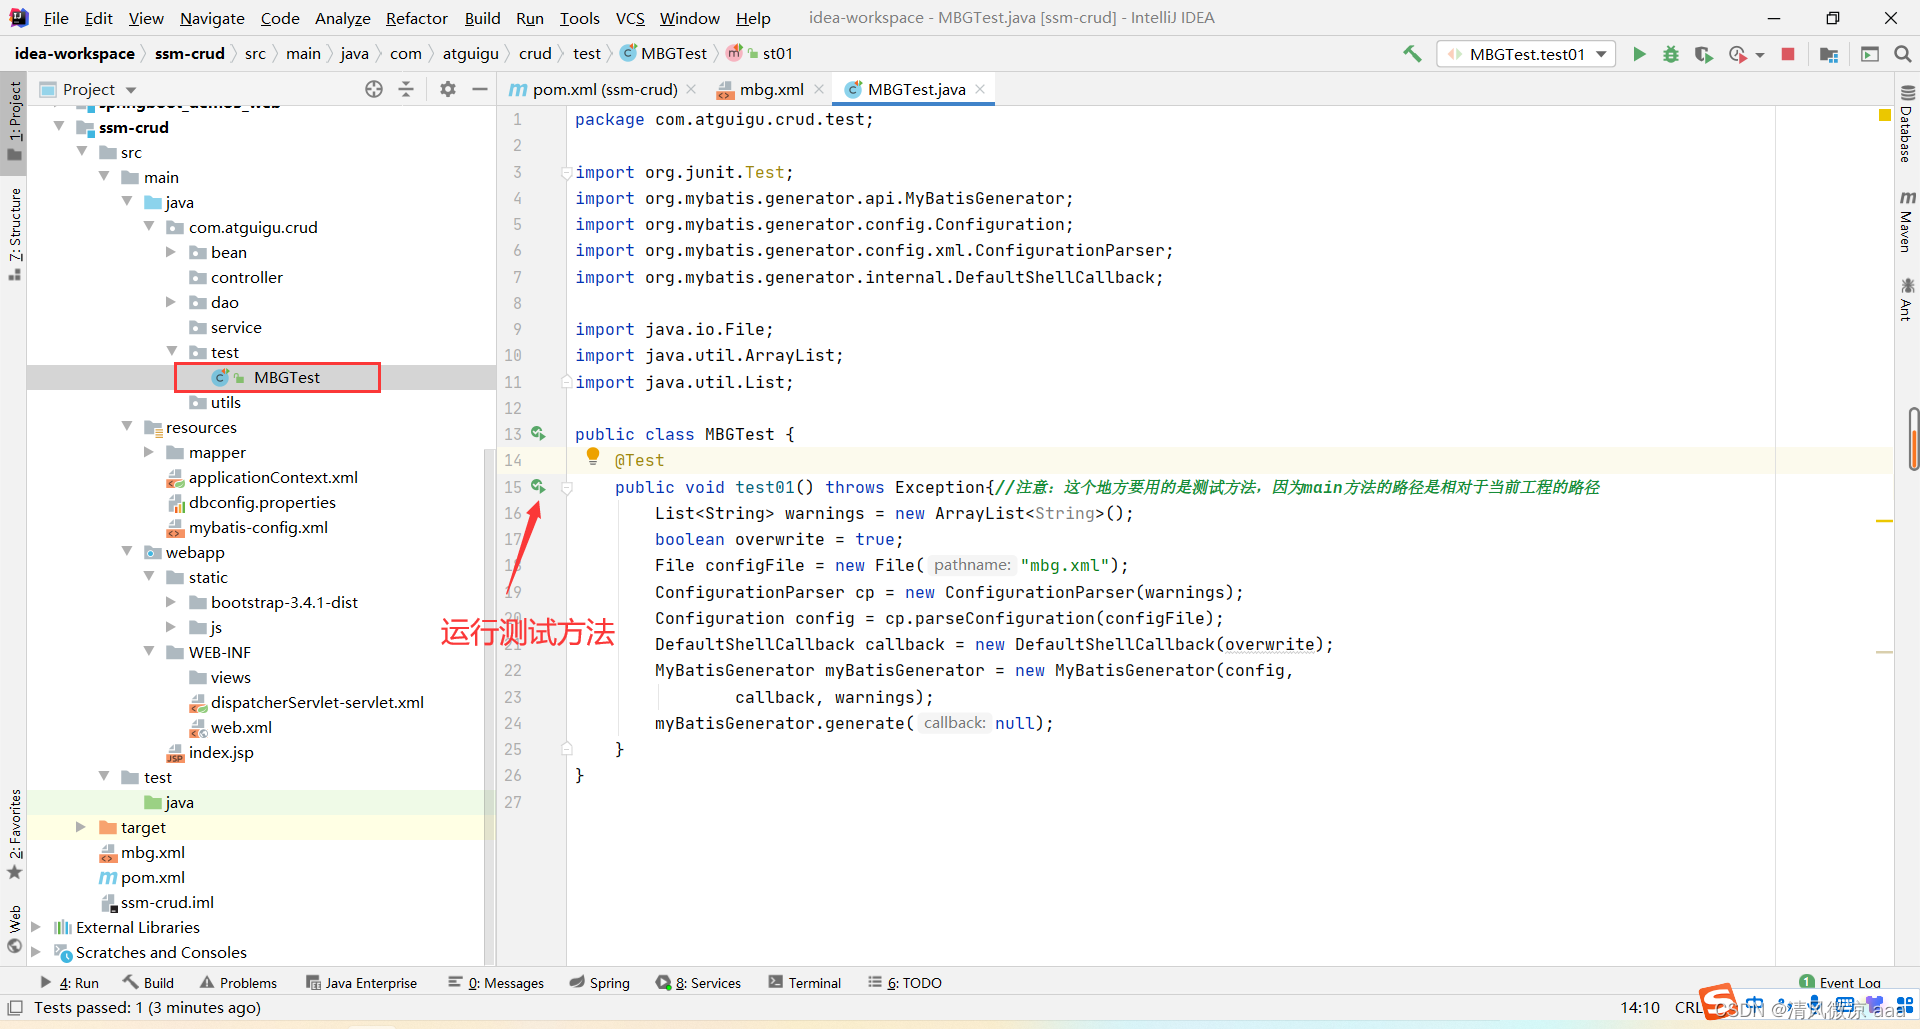
步骤3:创建测试类:
package com.atguigu.crud.test;

import org.junit.Test;
import org.mybatis.generator.api.MyBatisGenerator;
import org.mybatis.generator.config.Configuration;
import org.mybatis.generator.config.xml.ConfigurationParser;
import org.mybatis.generator.internal.DefaultShellCallback;

import java.io.File;
import java.util.ArrayList;
import java.util.List;

public class MBGTest {


    @Test
    public void test01() throws Exception{

    //注意:这个地方要用的是测试方法,因为main方法的路径是相对于当前工程的路径
        List<String> warnings = new ArrayList<String>();
        boolean overwrite = true;
        File configFile = new File("mbg.xml");
        ConfigurationParser cp = new ConfigurationParser(warnings);
        Configuration config = cp.parseConfiguration(configFile);
        DefaultShellCallback callback = new DefaultShellCallback(overwrite);
        MyBatisGenerator myBatisGenerator = new MyBatisGenerator(config,
                callback, warnings);
        myBatisGenerator.generate(null);
    }
}
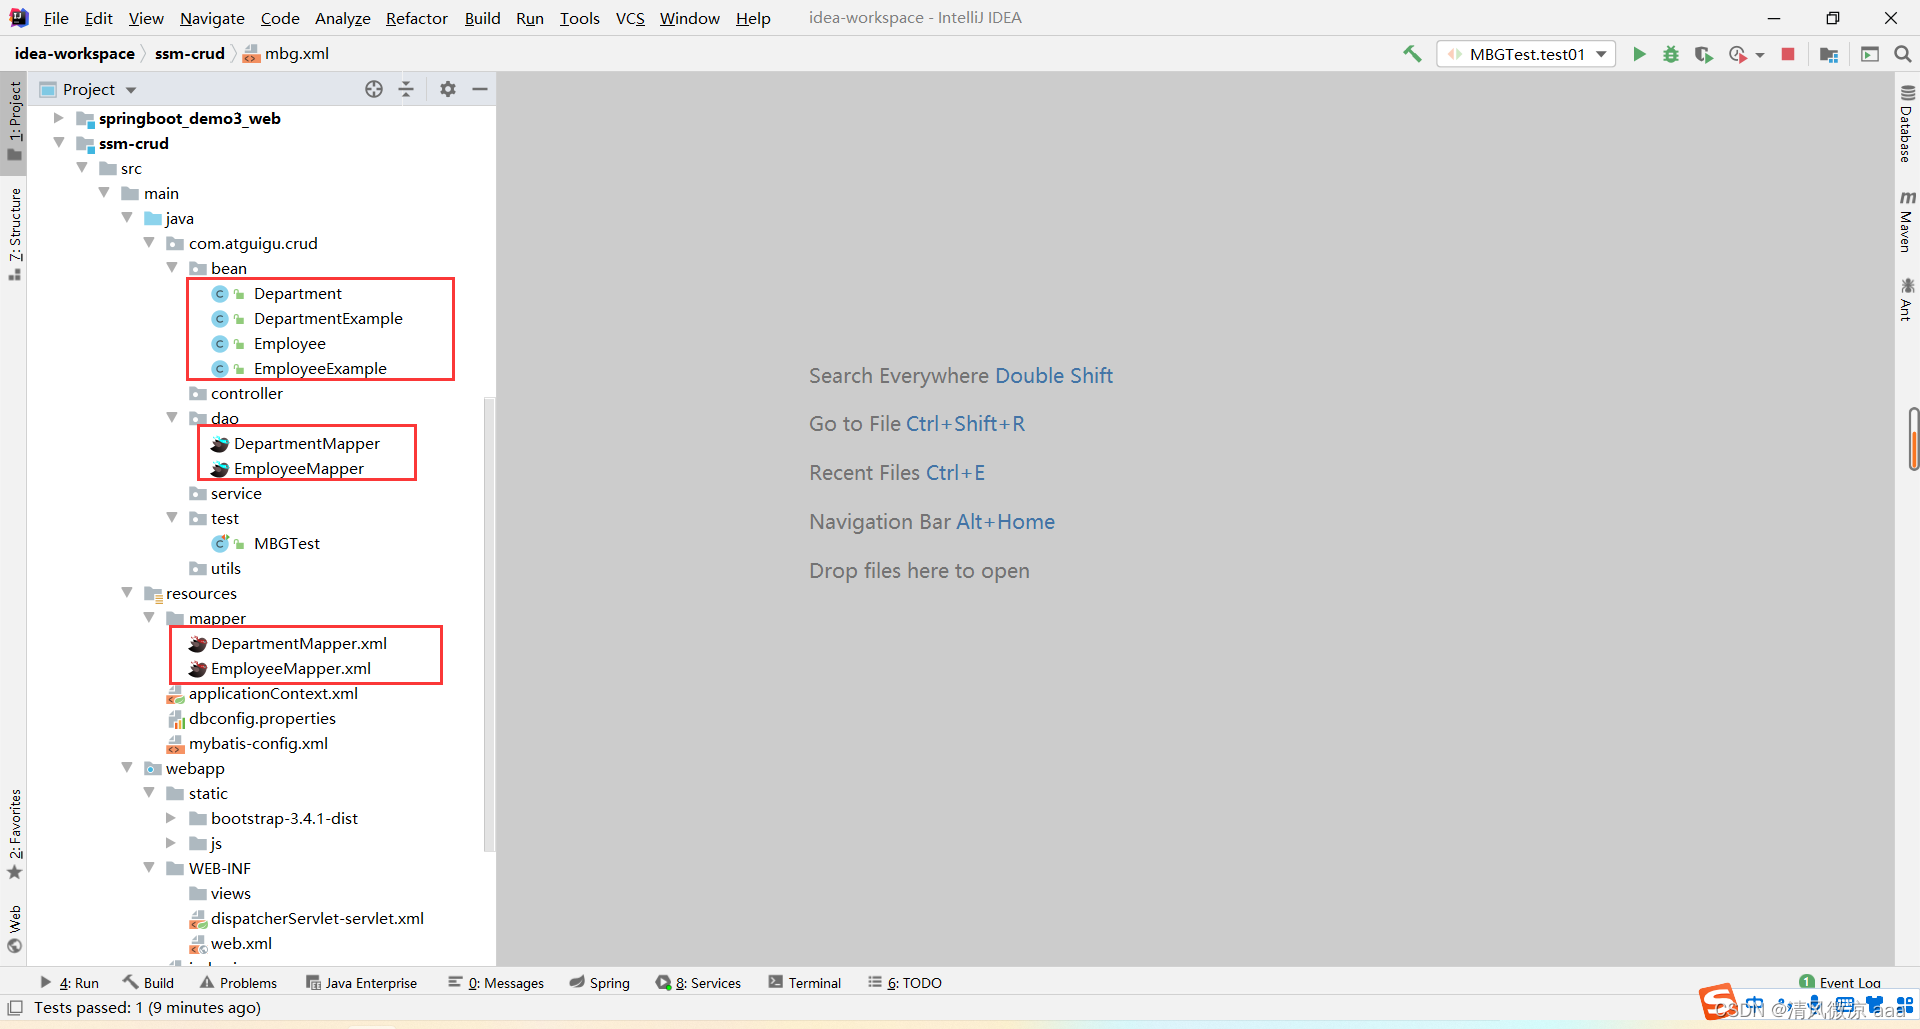
生成的文件结构:
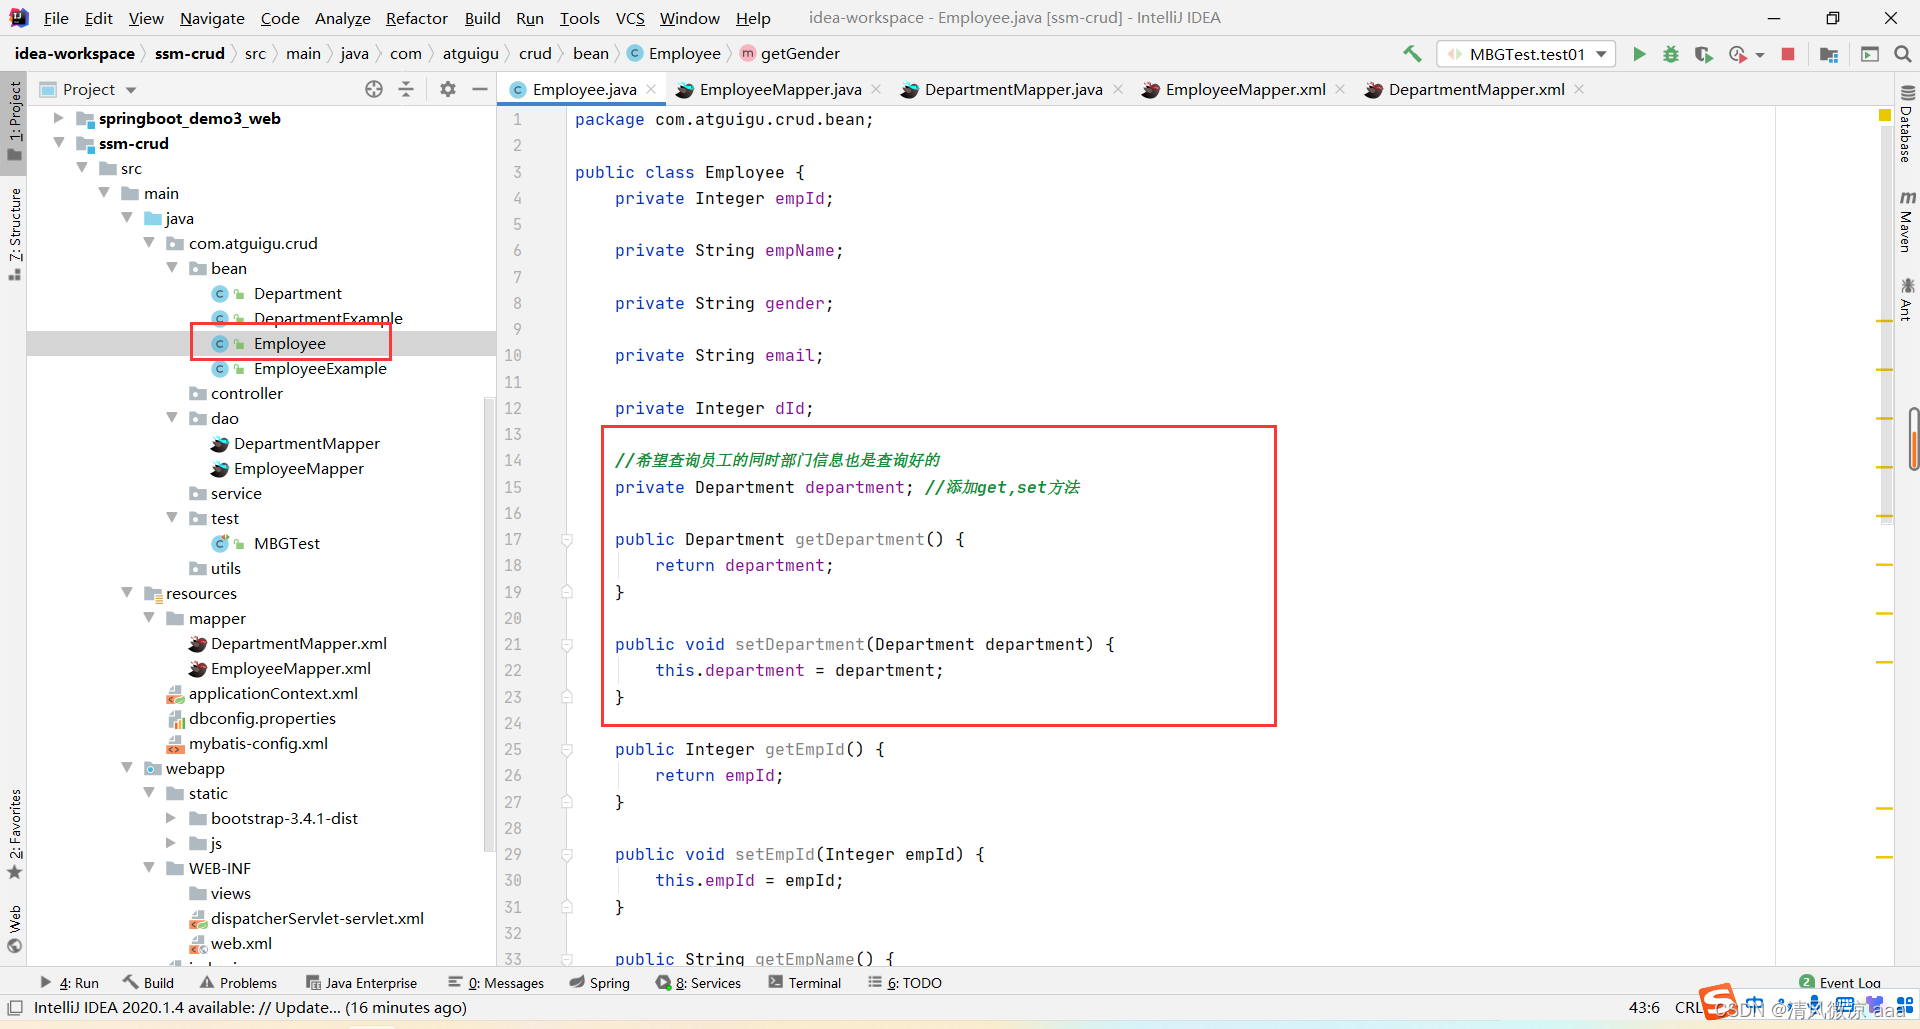
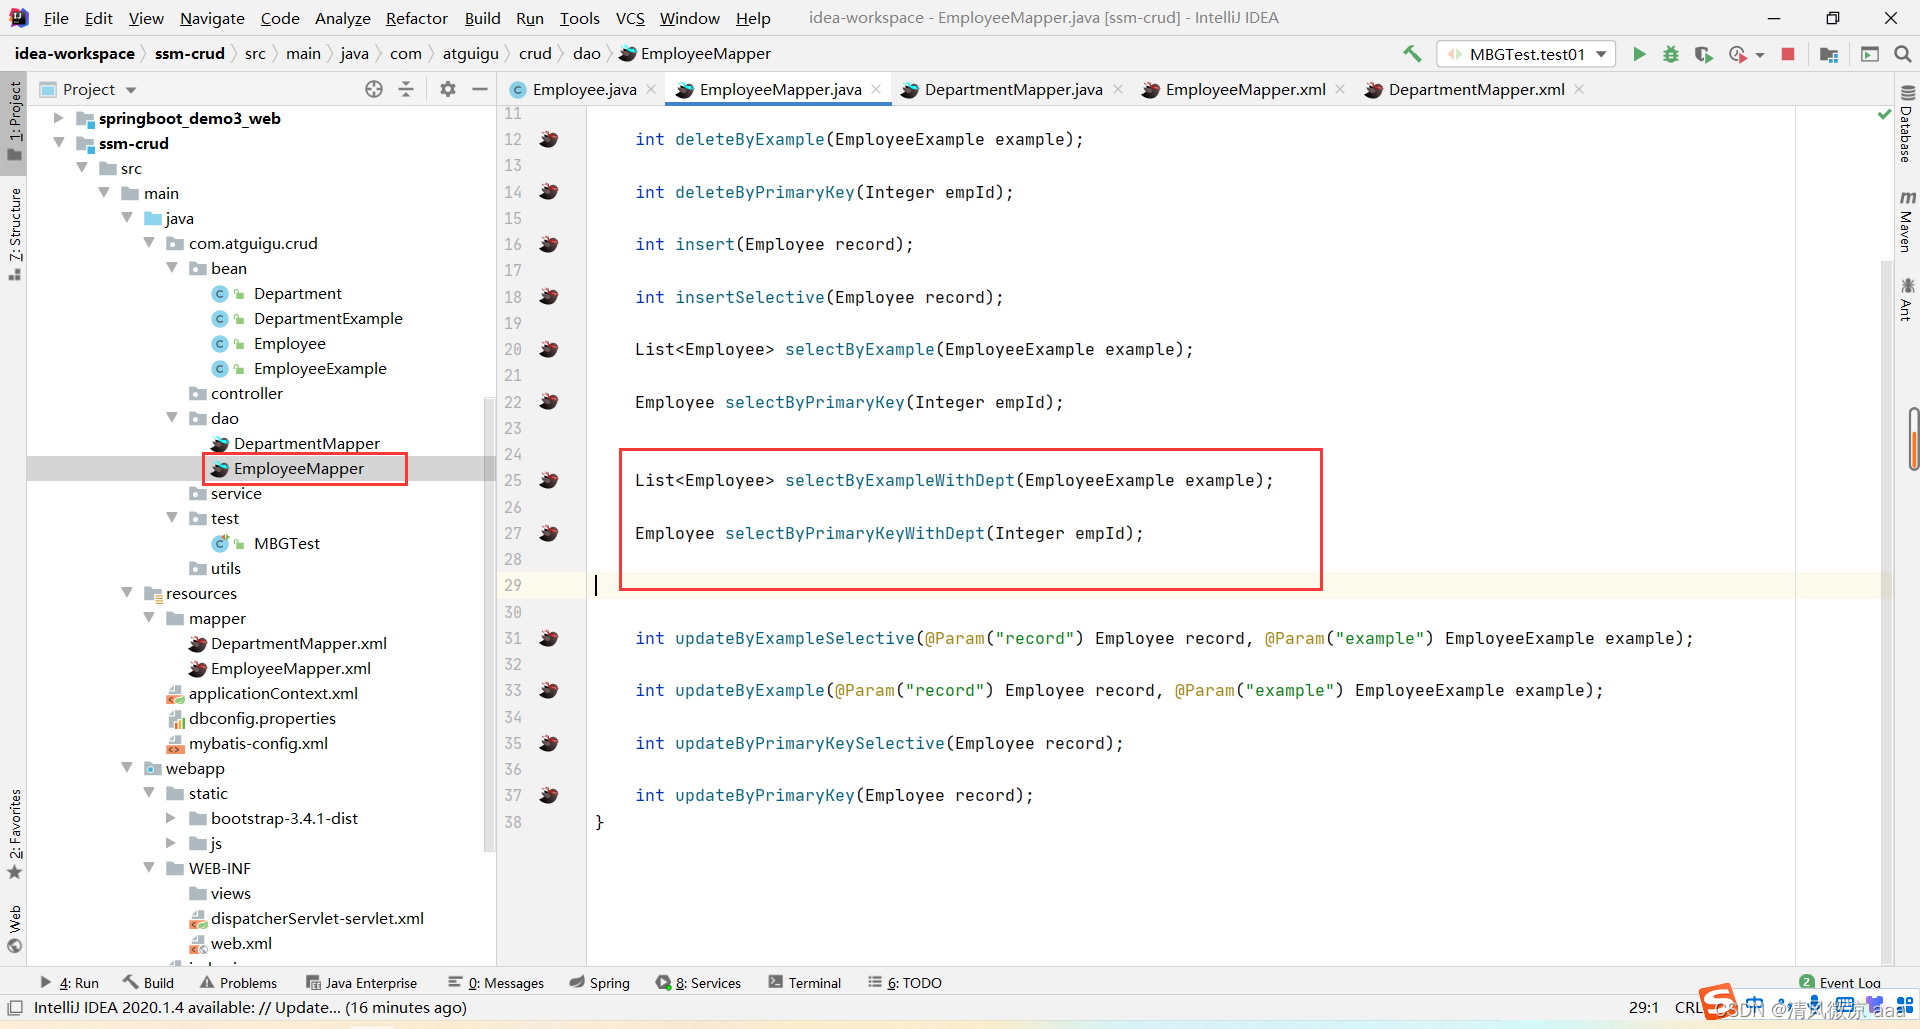
2.4.7、修改mapper文件
说明:生成的mapper文件里面有些不符合业务逻辑,所以要进行修改。
<?xml version="1.0" encoding="UTF-8"?>
<!DOCTYPE mapper PUBLIC "-//mybatis.org//DTD Mapper 3.0//EN" "http://mybatis.org/dtd/mybatis-3-mapper.dtd">
<mapper namespace="com.atguigu.crud.dao.EmployeeMapper">
<resultMap id="BaseResultMap" type="com.atguigu.crud.bean.Employee">
<id column="emp_id" jdbcType="INTEGER" property="empId" />
<result column="emp_name" jdbcType="VARCHAR" property="empName" />
<result column="gender" jdbcType="CHAR" property="gender" />
<result column="email" jdbcType="VARCHAR" property="email" />
<result column="d_id" jdbcType="INTEGER" property="dId" />
</resultMap>
<resultMap type="com.atguigu.crud.bean.Employee" id="WithDeptResultMap">
<id column="emp_id" jdbcType="INTEGER" property="empId" />
<result column="emp_name" jdbcType="VARCHAR" property="empName" />
<result column="gender" jdbcType="CHAR" property="gender" />
<result column="email" jdbcType="VARCHAR" property="email" />
<result column="d_id" jdbcType="INTEGER" property="dId" />
<!-- 指定联合查询出的部门字段的封装 -->
<association property="department" javaType="com.atguigu.crud.bean.Department">
<id column="dept_id" property="deptId"/>
<result column="dept_name" property="deptName"/>
</association>
</resultMap>
<sql id="Example_Where_Clause">
<where>
<foreach collection="oredCriteria" item="criteria" separator="or">
<if test="criteria.valid">
<trim prefix="(" prefixOverrides="and" suffix=")">
<foreach collection="criteria.criteria" item="criterion">
<choose>
<when test="criterion.noValue">
and ${criterion.condition}
</when>
<when test="criterion.singleValue">
and ${criterion.condition} #{criterion.value}
</when>
<when test="criterion.betweenValue">
and ${criterion.condition} #{criterion.value} and #{criterion.secondValue}
</when>
<when test="criterion.listValue">
and ${criterion.condition}
<foreach close=")" collection="criterion.value" item="listItem" open="(" separator=",">
#{listItem}
</foreach>
</when>
</choose>
</foreach>
</trim>
</if>
</foreach>
</where>
</sql>
<sql id="Update_By_Example_Where_Clause">
<where>
<foreach collection="example.oredCriteria" item="criteria" separator="or">
<if test="criteria.valid">
<trim prefix="(" prefixOverrides="and" suffix=")">
<foreach collection="criteria.criteria" item="criterion">
<choose>
<when test="criterion.noValue">
and ${criterion.condition}
</when>
<when test="criterion.singleValue">
and ${criterion.condition} #{criterion.value}
</when>
<when test="criterion.betweenValue">
and ${criterion.condition} #{criterion.value} and #{criterion.secondValue}
</when>
<when test="criterion.listValue">
and ${criterion.condition}
<foreach close=")" collection="criterion.value" item="listItem" open="(" separator=",">
#{listItem}
</foreach>
</when>
</choose>
</foreach>
</trim>
</if>
</foreach>
</where>
</sql>
<sql id="Base_Column_List">
emp_id, emp_name, gender, email, d_id
</sql>
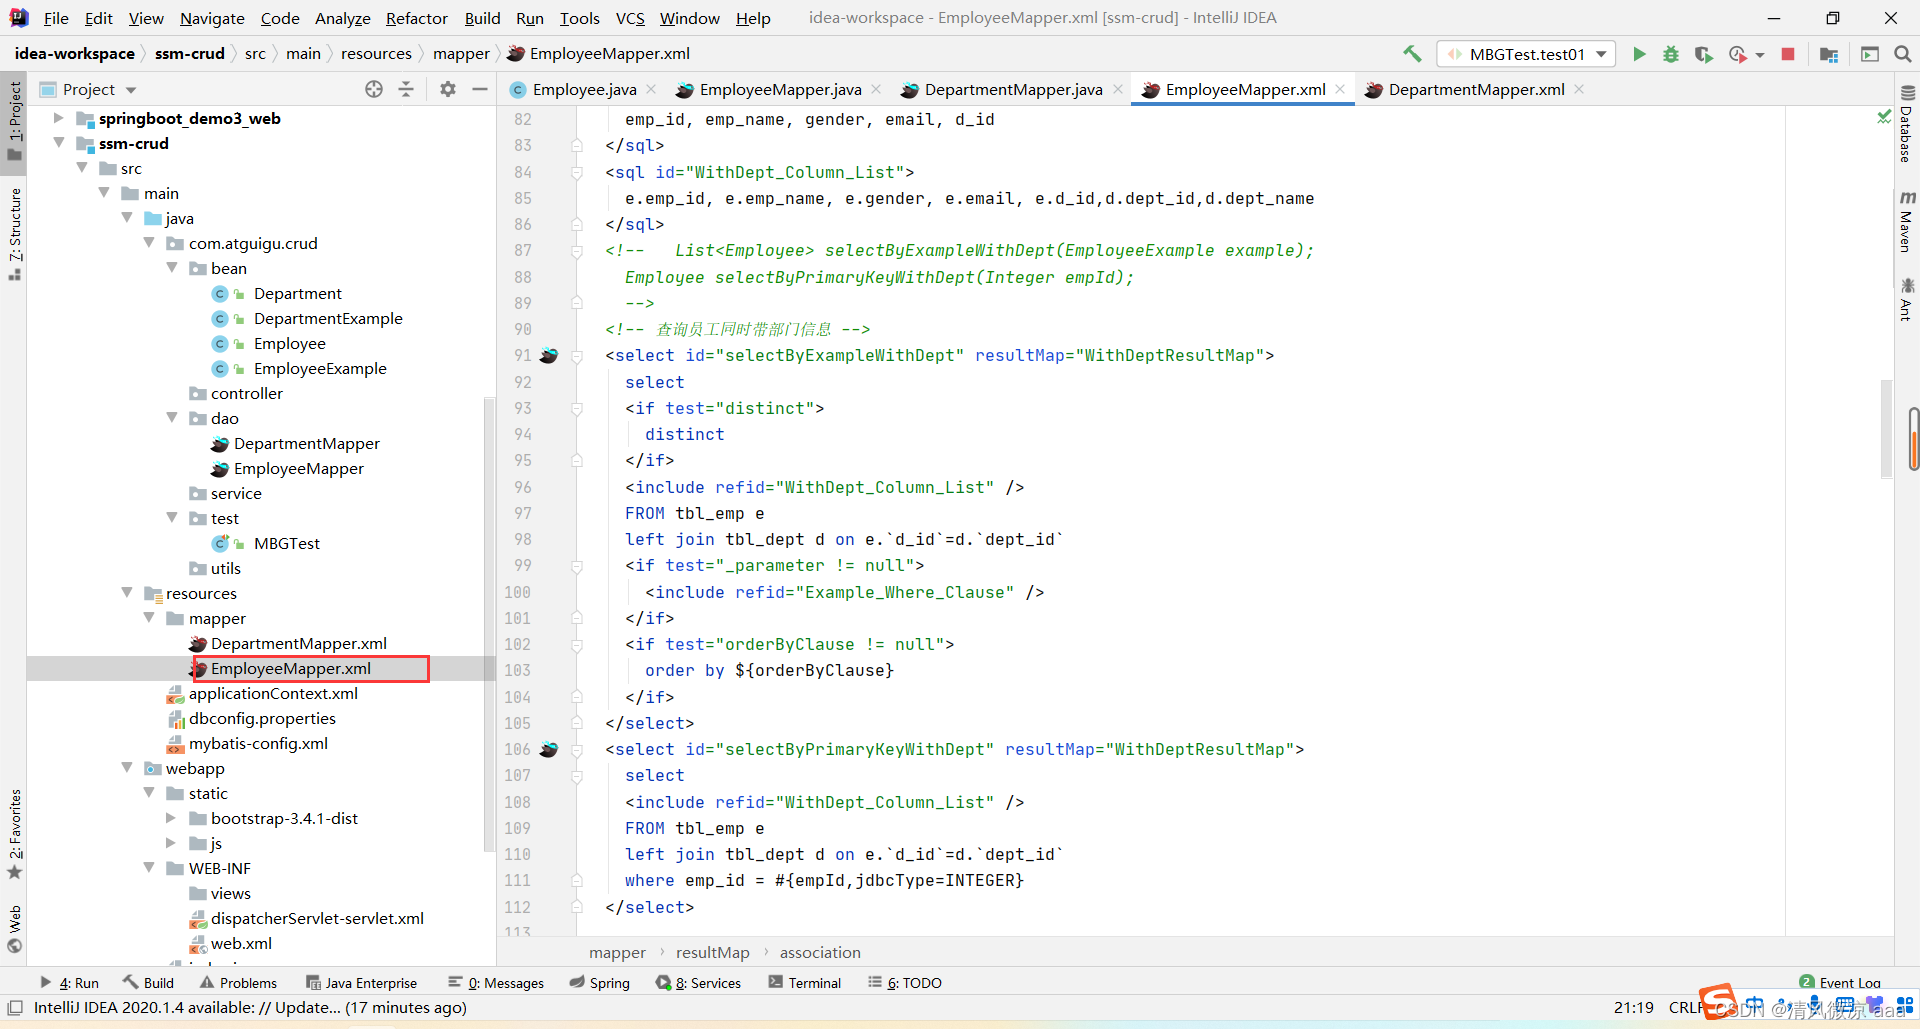
<sql id="WithDept_Column_List">
e.emp_id, e.emp_name, e.gender, e.email, e.d_id,d.dept_id,d.dept_name
</sql>
<!-- List<Employee> selectByExampleWithDept(EmployeeExample example);
Employee selectByPrimaryKeyWithDept(Integer empId);
-->
<!-- 查询员工同时带部门信息 -->
<select id="selectByExampleWithDept" resultMap="WithDeptResultMap">
select
<if test="distinct">
distinct
</if>
<include refid="WithDept_Column_List" />
FROM tbl_emp e
left join tbl_dept d on e.`d_id`=d.`dept_id`
<if test="_parameter != null">
<include refid="Example_Where_Clause" />
</if>
<if test="orderByClause != null">
order by ${orderByClause}
</if>
</select>
<select id="selectByPrimaryKeyWithDept" resultMap="WithDeptResultMap">
select
<include refid="WithDept_Column_List" />
FROM tbl_emp e
left join tbl_dept d on e.`d_id`=d.`dept_id`
where emp_id = #{empId,jdbcType=INTEGER}
</select>
<!-- 查询员工不带部门信息的 -->
<select id="selectByExample" parameterType="com.atguigu.crud.bean.EmployeeExample" resultMap="BaseResultMap">
select
<if test="distinct">
distinct
</if>
<include refid="Base_Column_List" />
from tbl_emp
<if test="_parameter != null">
<include refid="Example_Where_Clause" />
</if>
<if test="orderByClause != null">
order by ${orderByClause}
</if>
</select>
<select id="selectByPrimaryKey" parameterType="java.lang.Integer" resultMap="BaseResultMap">
select
<include refid="Base_Column_List" />
from tbl_emp
where emp_id = #{empId,jdbcType=INTEGER}
</select>
<delete id="deleteByPrimaryKey" parameterType="java.lang.Integer">
delete from tbl_emp
where emp_id = #{empId,jdbcType=INTEGER}
</delete>
<delete id="deleteByExample" parameterType="com.atguigu.crud.bean.EmployeeExample">
delete from tbl_emp
<if test="_parameter != null">
<include refid="Example_Where_Clause" />
</if>
</delete>
<insert id="insert" parameterType="com.atguigu.crud.bean.Employee">
insert into tbl_emp (emp_id, emp_name, gender,
email, d_id)
values (#{empId,jdbcType=INTEGER}, #{empName,jdbcType=VARCHAR}, #{gender,jdbcType=CHAR},
#{email,jdbcType=VARCHAR}, #{dId,jdbcType=INTEGER})
</insert>
<insert id="insertSelective" parameterType="com.atguigu.crud.bean.Employee">
insert into tbl_emp
<trim prefix="(" suffix=")" suffixOverrides=",">
<if test="empId != null">
emp_id,
</if>
<if test="empName != null">
emp_name,
</if>
<if test="gender != null">
gender,
</if>
<if test="email != null">
email,
</if>
<if test="dId != null">
d_id,
</if>
</trim>
<trim prefix="values (" suffix=")" suffixOverrides=",">
<if test="empId != null">
#{empId,jdbcType=INTEGER},
</if>
<if test="empName != null">
#{empName,jdbcType=VARCHAR},
</if>
<if test="gender != null">
#{gender,jdbcType=CHAR},
</if>
<if test="email != null">
#{email,jdbcType=VARCHAR},
</if>
<if test="dId != null">
#{dId,jdbcType=INTEGER},
</if>
</trim>
</insert>
<select id="countByExample" parameterType="com.atguigu.crud.bean.EmployeeExample" resultType="java.lang.Long">
select count(*) from tbl_emp
<if test="_parameter != null">
<include refid="Example_Where_Clause" />
</if>
</select>
<update id="updateByExampleSelective" parameterType="map">
update tbl_emp
<set>
<if test="record.empId != null">
emp_id = #{record.empId,jdbcType=INTEGER},
</if>
<if test="record.empName != null">
emp_name = #{record.empName,jdbcType=VARCHAR},
</if>
<if test="record.gender != null">
gender = #{record.gender,jdbcType=CHAR},
</if>
<if test="record.email != null">
email = #{record.email,jdbcType=VARCHAR},
</if>
<if test="record.dId != null">
d_id = #{record.dId,jdbcType=INTEGER},
</if>
</set>
<if test="_parameter != null">
<include refid="Update_By_Example_Where_Clause" />
</if>
</update>
<update id="updateByExample" parameterType="map">
update tbl_emp
set emp_id = #{record.empId,jdbcType=INTEGER},
emp_name = #{record.empName,jdbcType=VARCHAR},
gender = #{record.gender,jdbcType=CHAR},
email = #{record.email,jdbcType=VARCHAR},
d_id = #{record.dId,jdbcType=INTEGER}
<if test="_parameter != null">
<include refid="Update_By_Example_Where_Clause" />
</if>
</update>
<update id="updateByPrimaryKeySelective" parameterType="com.atguigu.crud.bean.Employee">
update tbl_emp
<set>
<if test="empName != null">
emp_name = #{empName,jdbcType=VARCHAR},
</if>
<if test="gender != null">
gender = #{gender,jdbcType=CHAR},
</if>
<if test="email != null">
email = #{email,jdbcType=VARCHAR},
</if>
<if test="dId != null">
d_id = #{dId,jdbcType=INTEGER},
</if>
</set>
where emp_id = #{empId,jdbcType=INTEGER}
</update>
<update id="updateByPrimaryKey" parameterType="com.atguigu.crud.bean.Employee">
update tbl_emp
set emp_name = #{empName,jdbcType=VARCHAR},
gender = #{gender,jdbcType=CHAR},
email = #{email,jdbcType=VARCHAR},
d_id = #{dId,jdbcType=INTEGER}
where emp_id = #{empId,jdbcType=INTEGER}
</update>
</mapper>
2.5、测试mapper
2.5.1、添加spring的单元测试依赖
	<!--Spring-test -->
		<!-- https://mvnrepository.com/artifact/org.springframework/spring-test -->
		<dependency>
			<groupId>org.springframework</groupId>
			<artifactId>spring-test</artifactId>
			<version>4.3.7.RELEASE</version>
		</dependency>
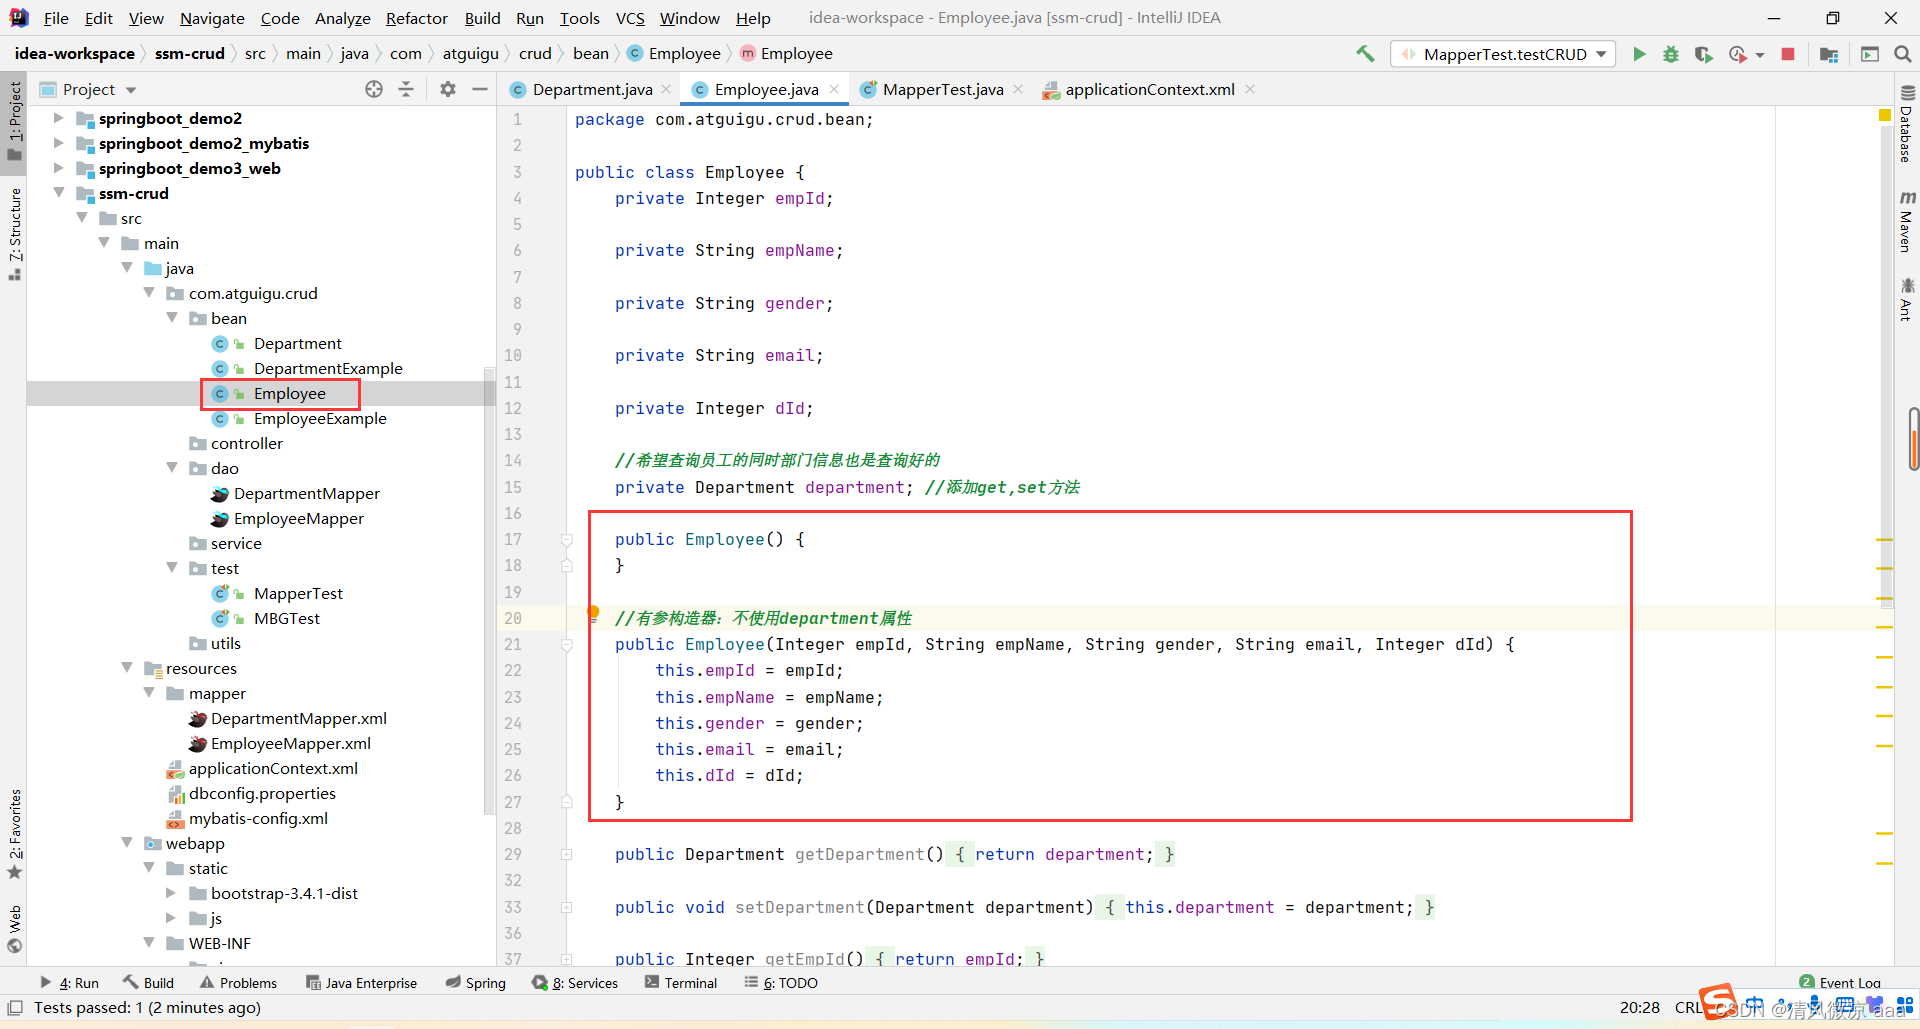
2.5.2、编写单元测试类
添加对应的有参无参构造器:
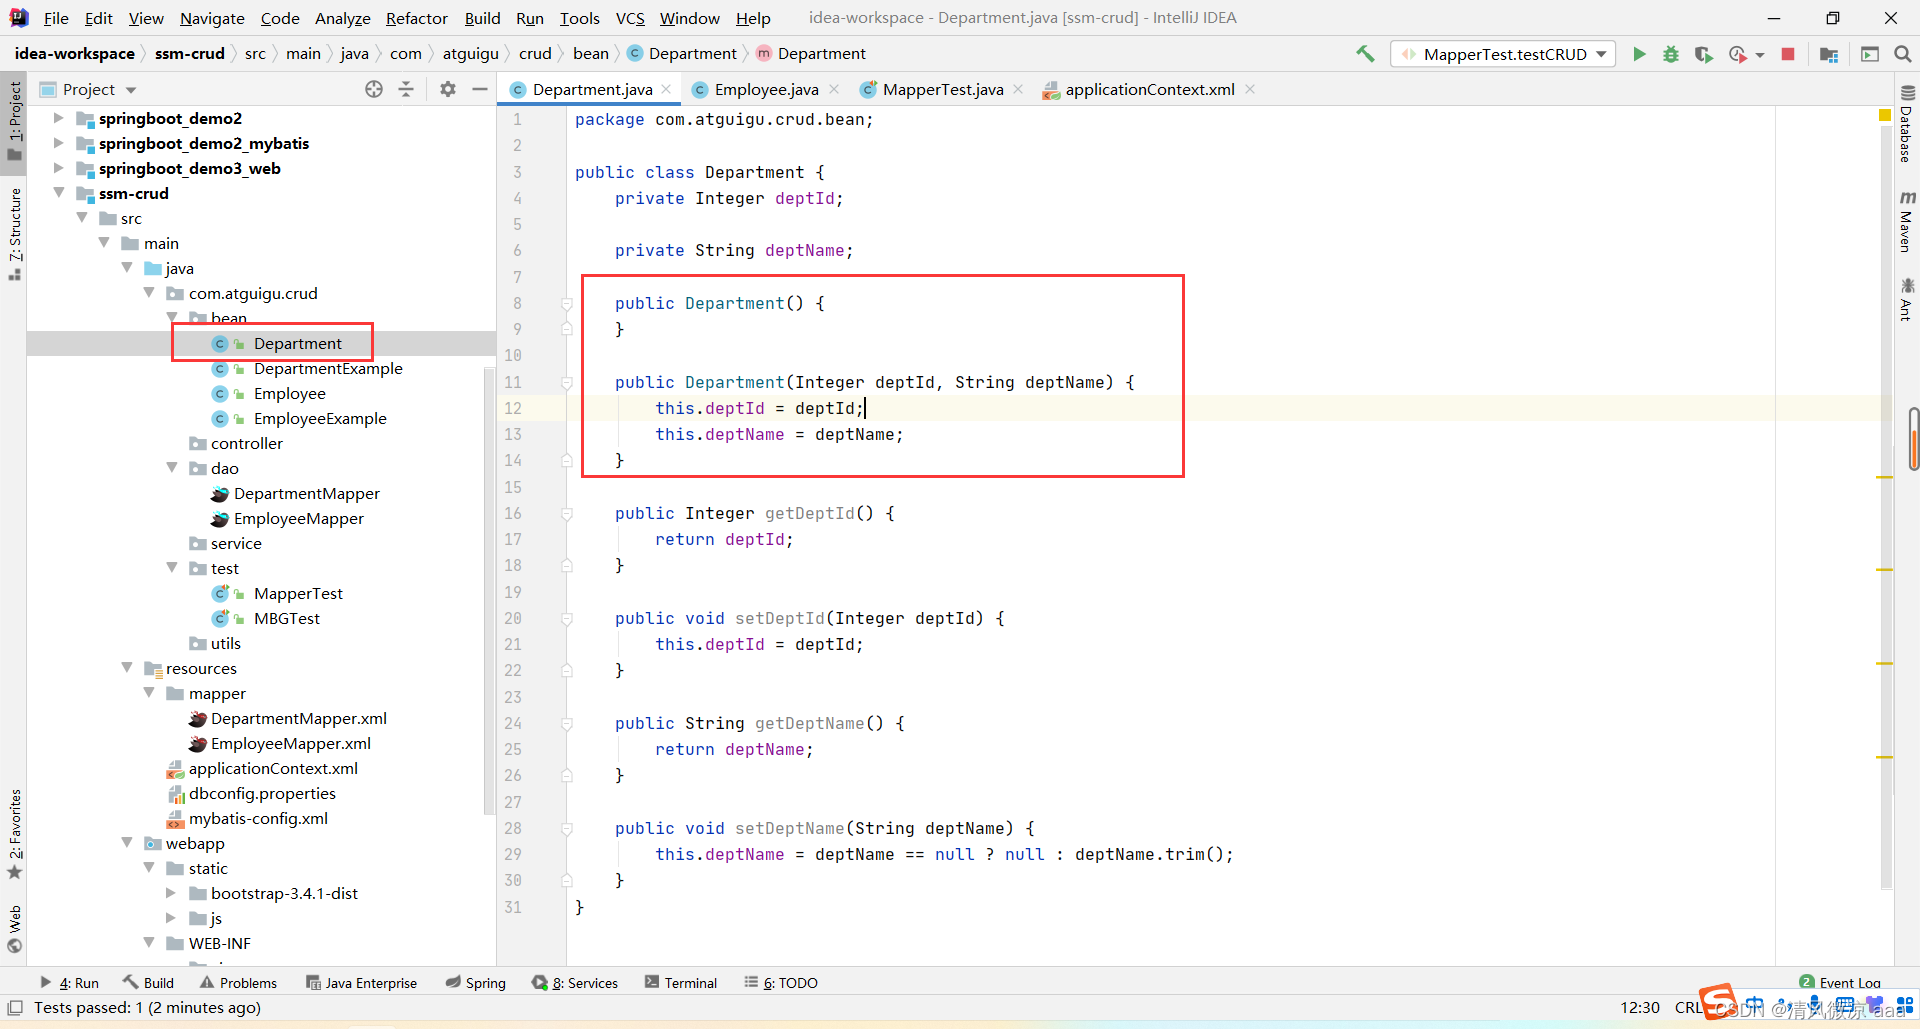
配置批量的sqlsession:
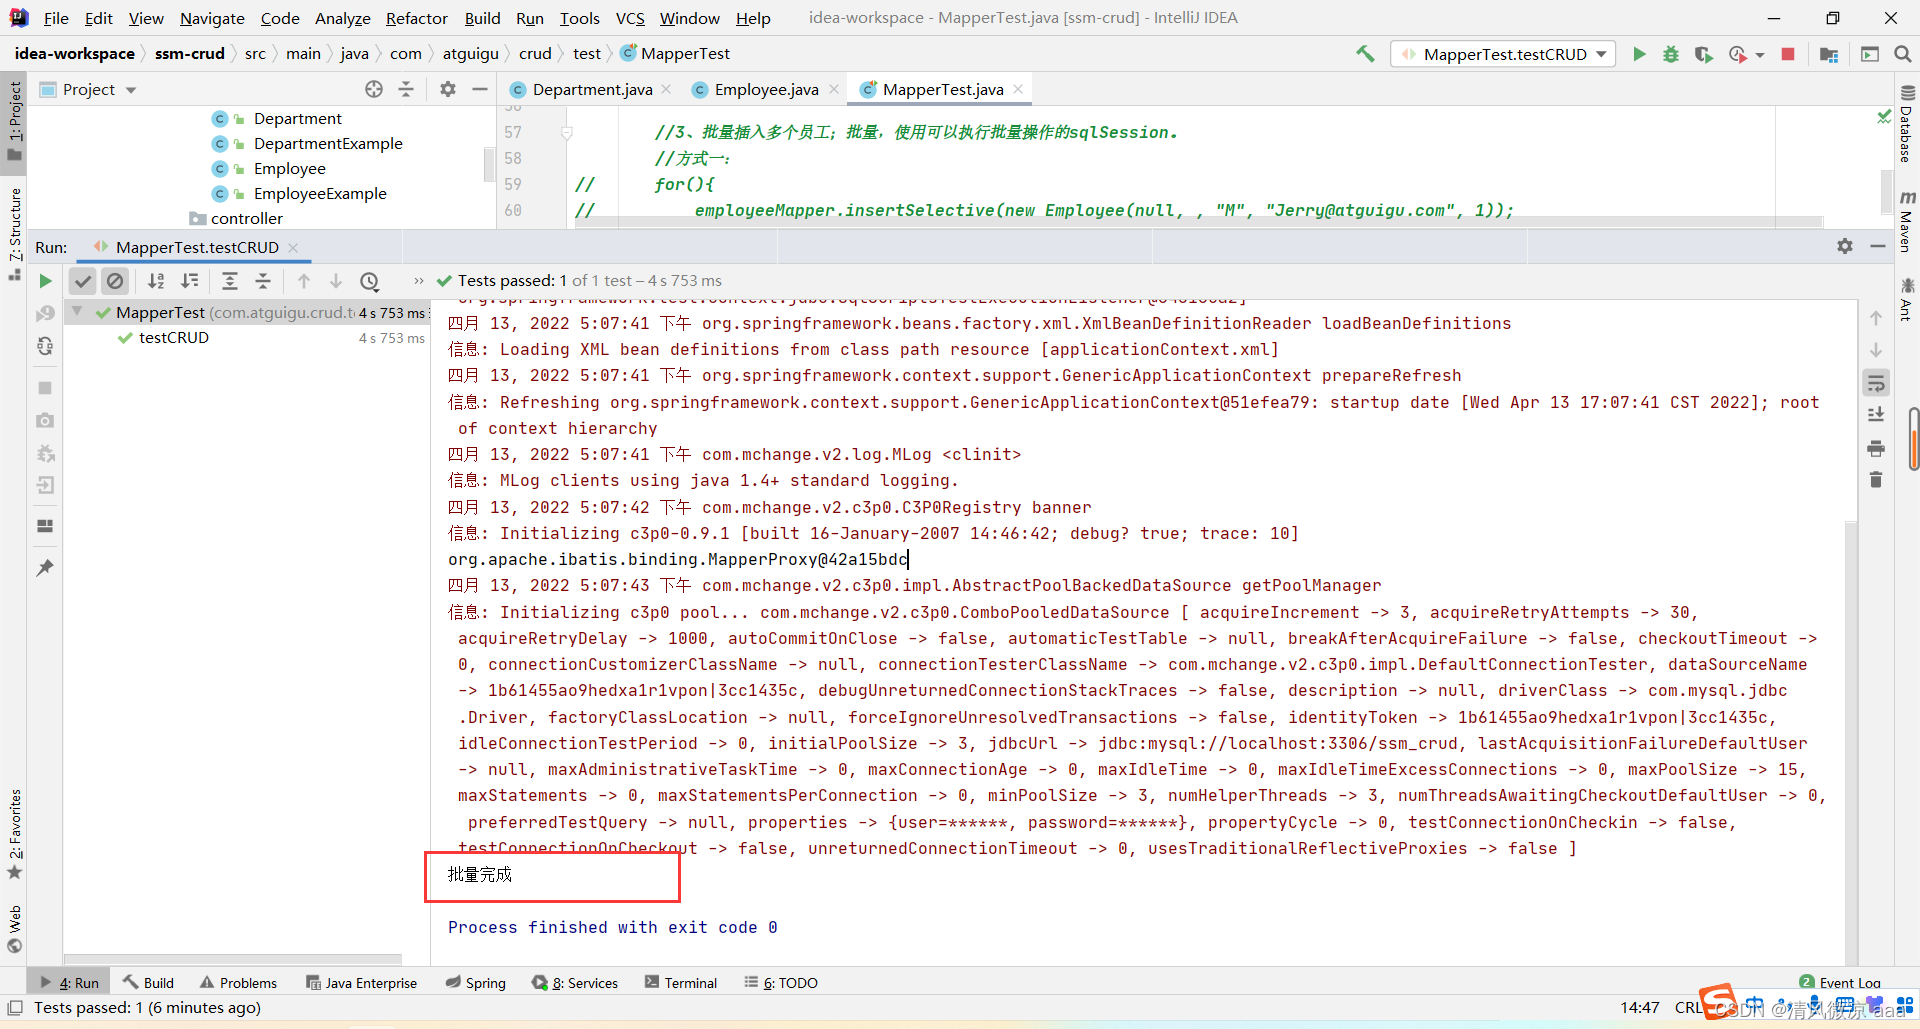
单元测试类:批量添加1000数据。
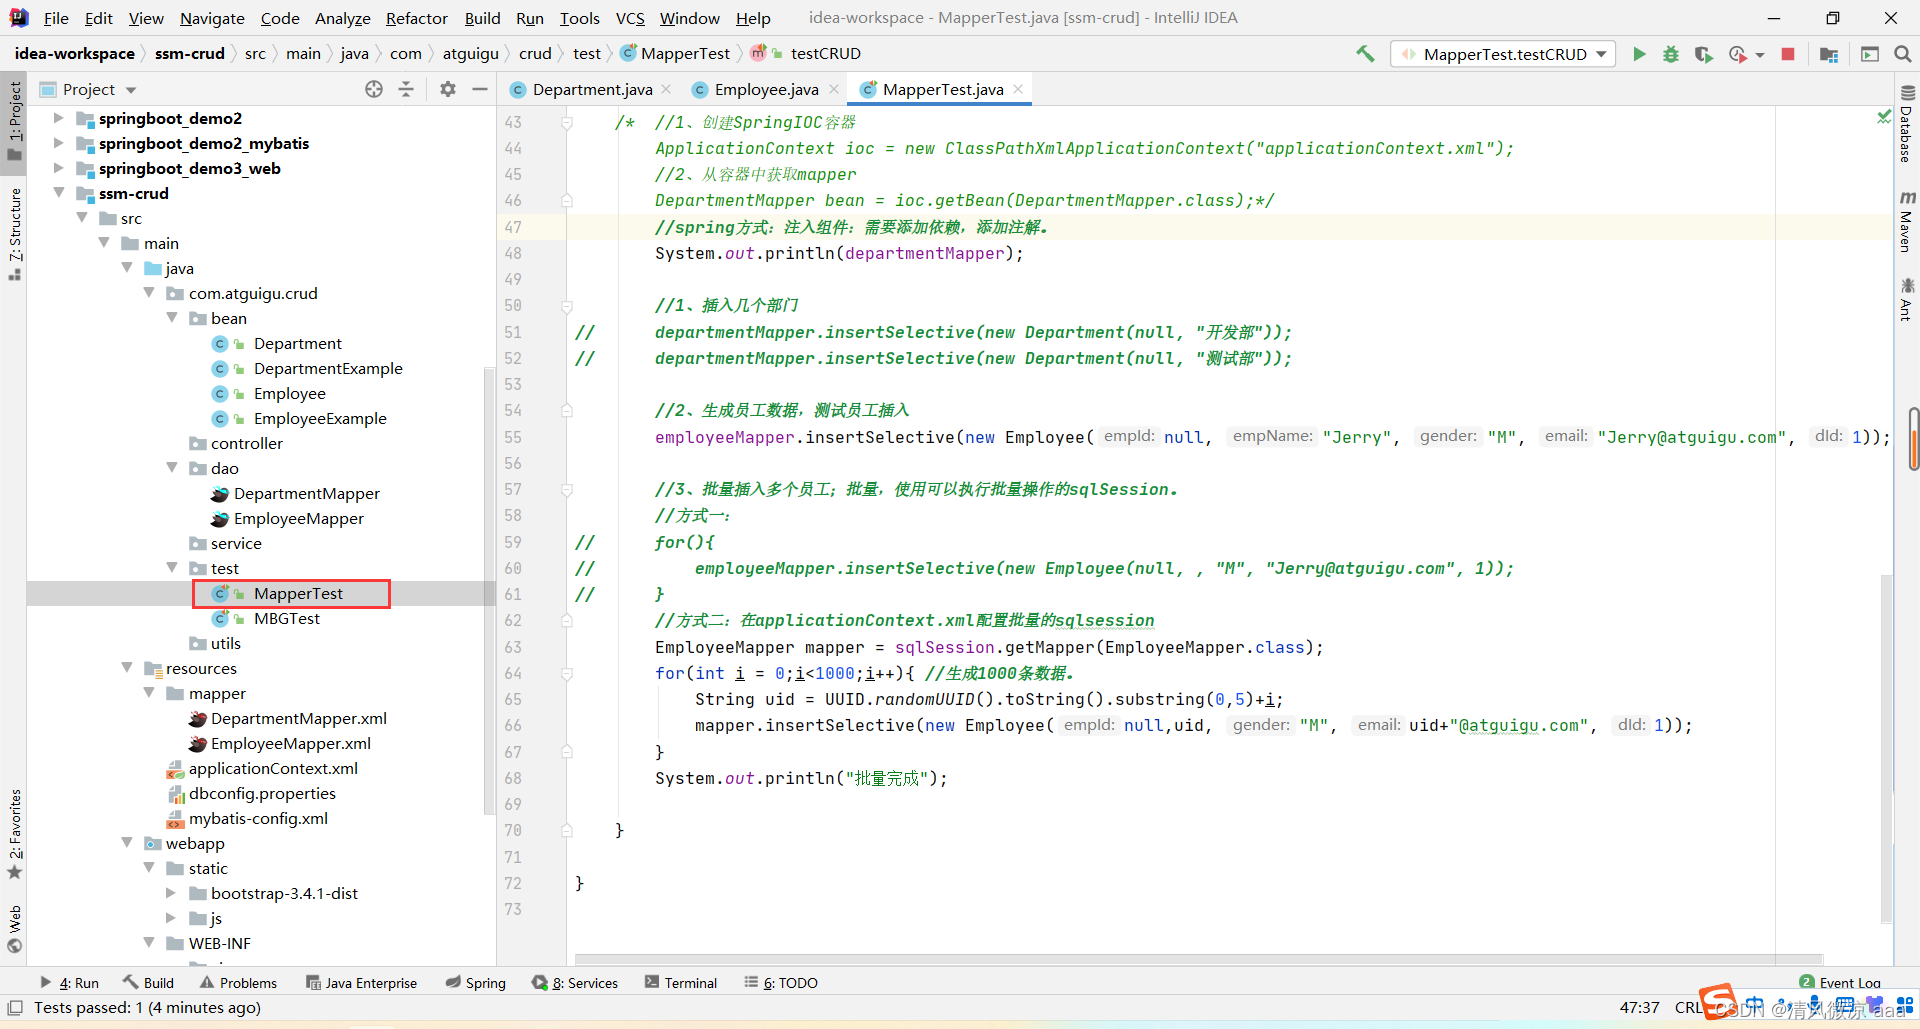
运行测试类:
package com.atguigu.crud.test;

import com.atguigu.crud.bean.Employee;
import com.atguigu.crud.dao.DepartmentMapper;
import com.atguigu.crud.dao.EmployeeMapper;
import org.apache.ibatis.session.SqlSession;
import org.junit.Test;
import org.junit.runner.RunWith;
import org.springframework.beans.factory.annotation.Autowired;
import org.springframework.test.context.ContextConfiguration;
import org.springframework.test.context.junit4.SpringJUnit4ClassRunner;

import java.util.UUID;

/**
 * 测试dao层的工作
 * @author lfy
 *推荐Spring的项目就可以使用Spring的单元测试,可以自动注入我们需要的组件
 *1、导入SpringTest模块
 *2、@ContextConfiguration指定Spring配置文件的位置
 *3、直接autowired要使用的组件即可
 */

@RunWith(SpringJUnit4ClassRunner.class)
@ContextConfiguration(locations={

    "classpath:applicationContext.xml"})
public class MapperTest {


    @Autowired
    DepartmentMapper departmentMapper;

    @Autowired
    EmployeeMapper employeeMapper;

    @Autowired
    SqlSession sqlSession;

    /**
     * 测试DepartmentMapper
     */
    @Test
    public void testCRUD(){


        //原生方式:
	/*	//1、创建SpringIOC容器
		ApplicationContext ioc = new ClassPathXmlApplicationContext("applicationContext.xml");
		//2、从容器中获取mapper
		DepartmentMapper bean = ioc.getBean(DepartmentMapper.class);*/
        //spring方式:注入组件:需要添加依赖,添加注解。
        System.out.println(departmentMapper);

        //1、插入几个部门
//		departmentMapper.insertSelective(new Department(null, "开发部"));
//		departmentMapper.insertSelective(new Department(null, "测试部"));

        //2、生成员工数据,测试员工插入
        employeeMapper.insertSelective(new Employee(null, "Jerry", "M", "[email protected]", 1));

        //3、批量插入多个员工;批量,使用可以执行批量操作的sqlSession。
        //方式一:
//		for(){


//			employeeMapper.insertSelective(new Employee(null, , "M", "[email protected]", 1));
//		}
        //方式二:在applicationContext.xml配置批量的sqlsession
        EmployeeMapper mapper = sqlSession.getMapper(EmployeeMapper.class);
        for(int i = 0;i<1000;i++){

     //生成1000条数据。
            String uid = UUID.randomUUID().toString().substring(0,5)+i;
            mapper.insertSelective(new Employee(null,uid, "M", uid+"@atguigu.com", 1));
        }
        System.out.println("批量完成");

    }

}
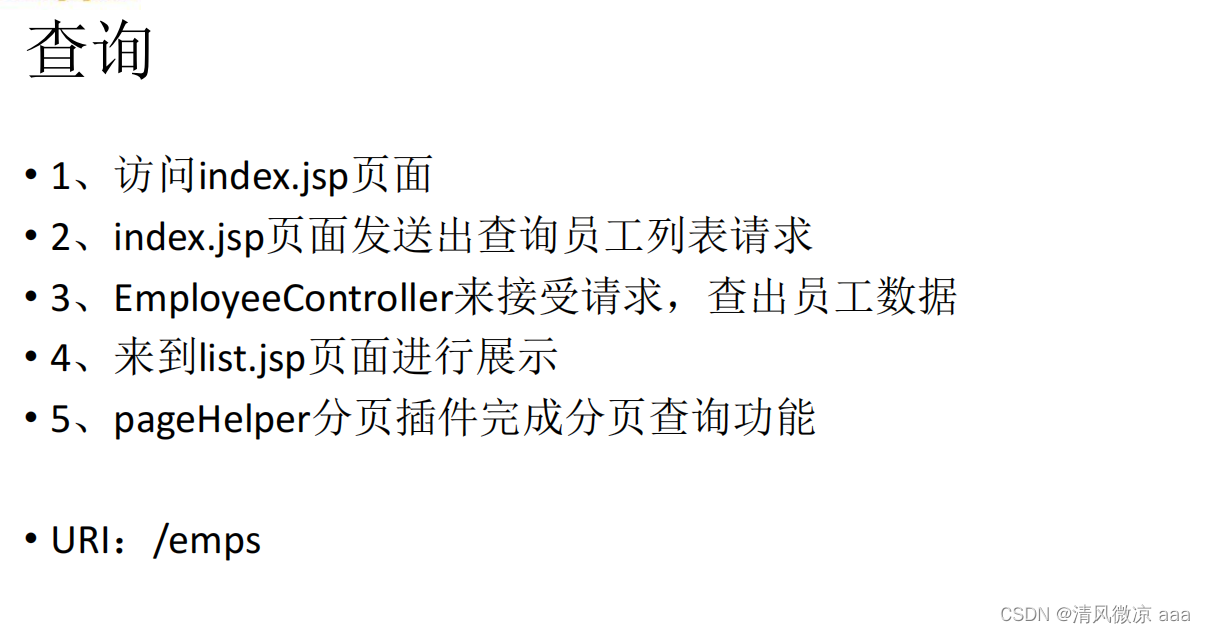
3、查询功能实现
3.1、查询:分页后台代码的完成
3.1.1、功能分析
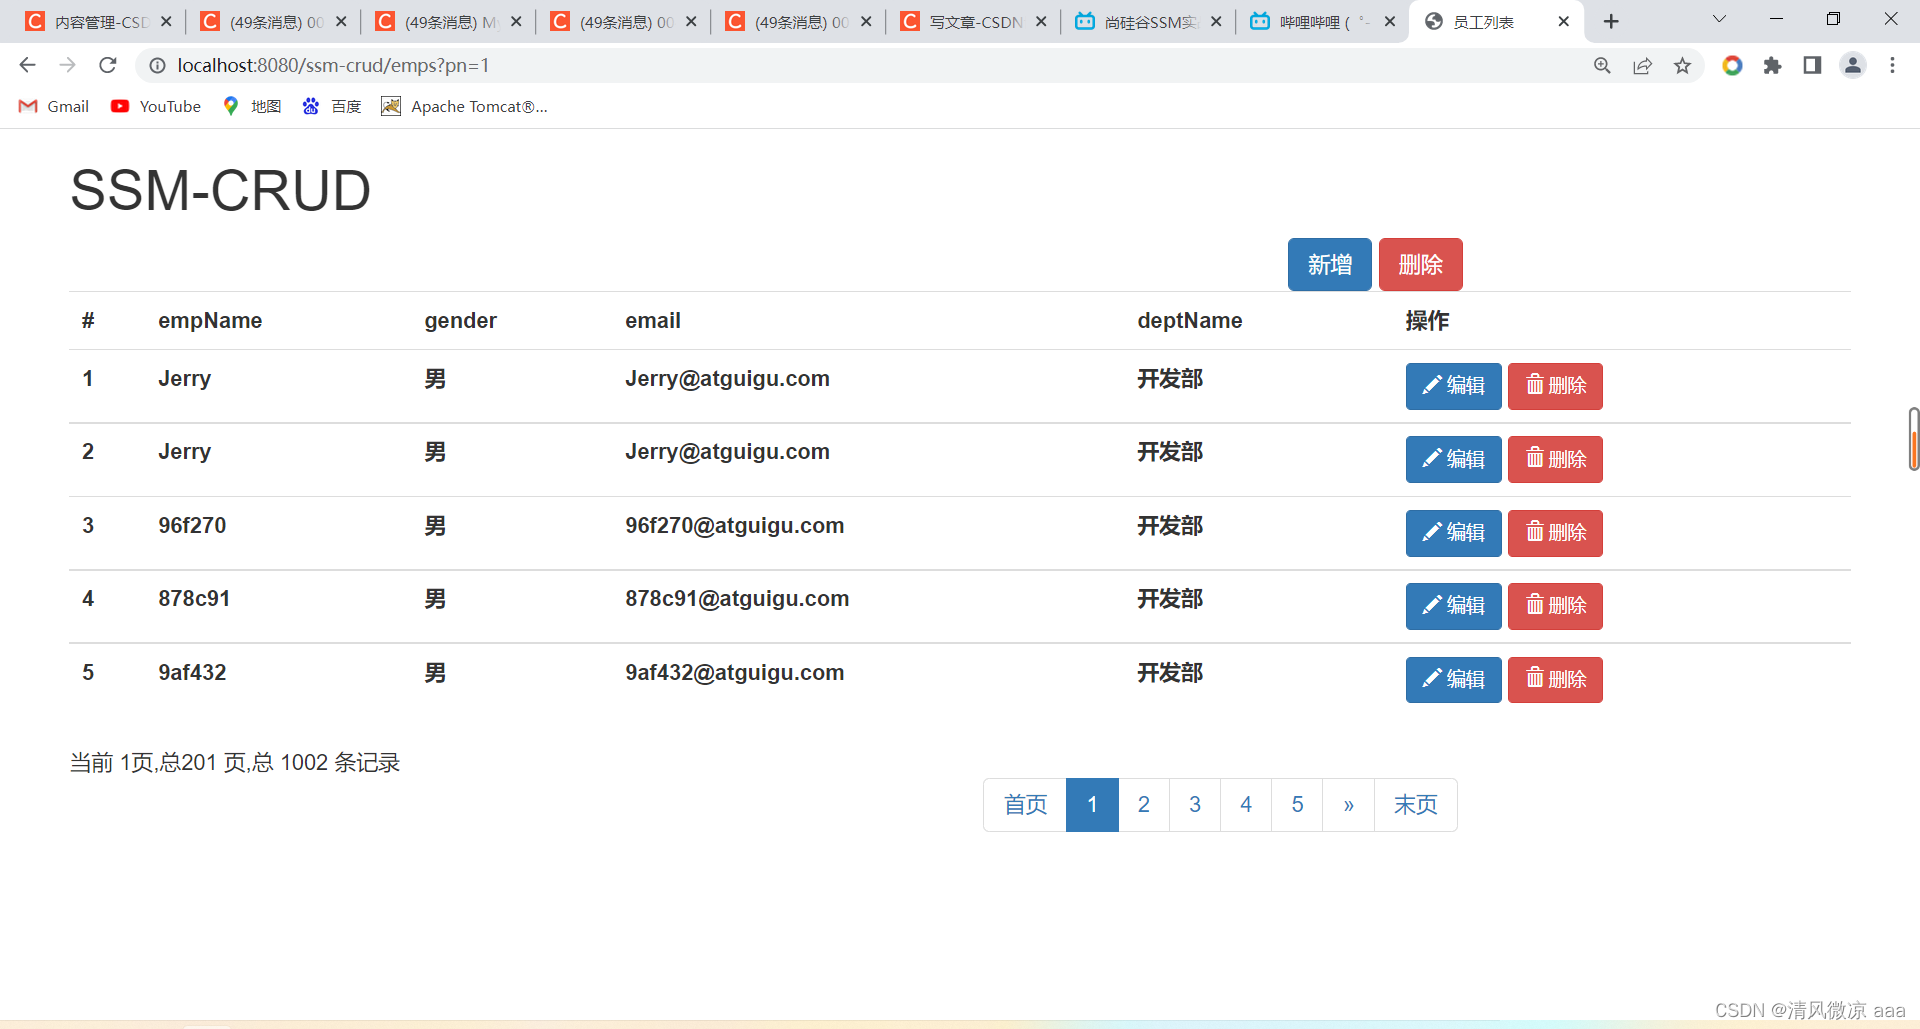
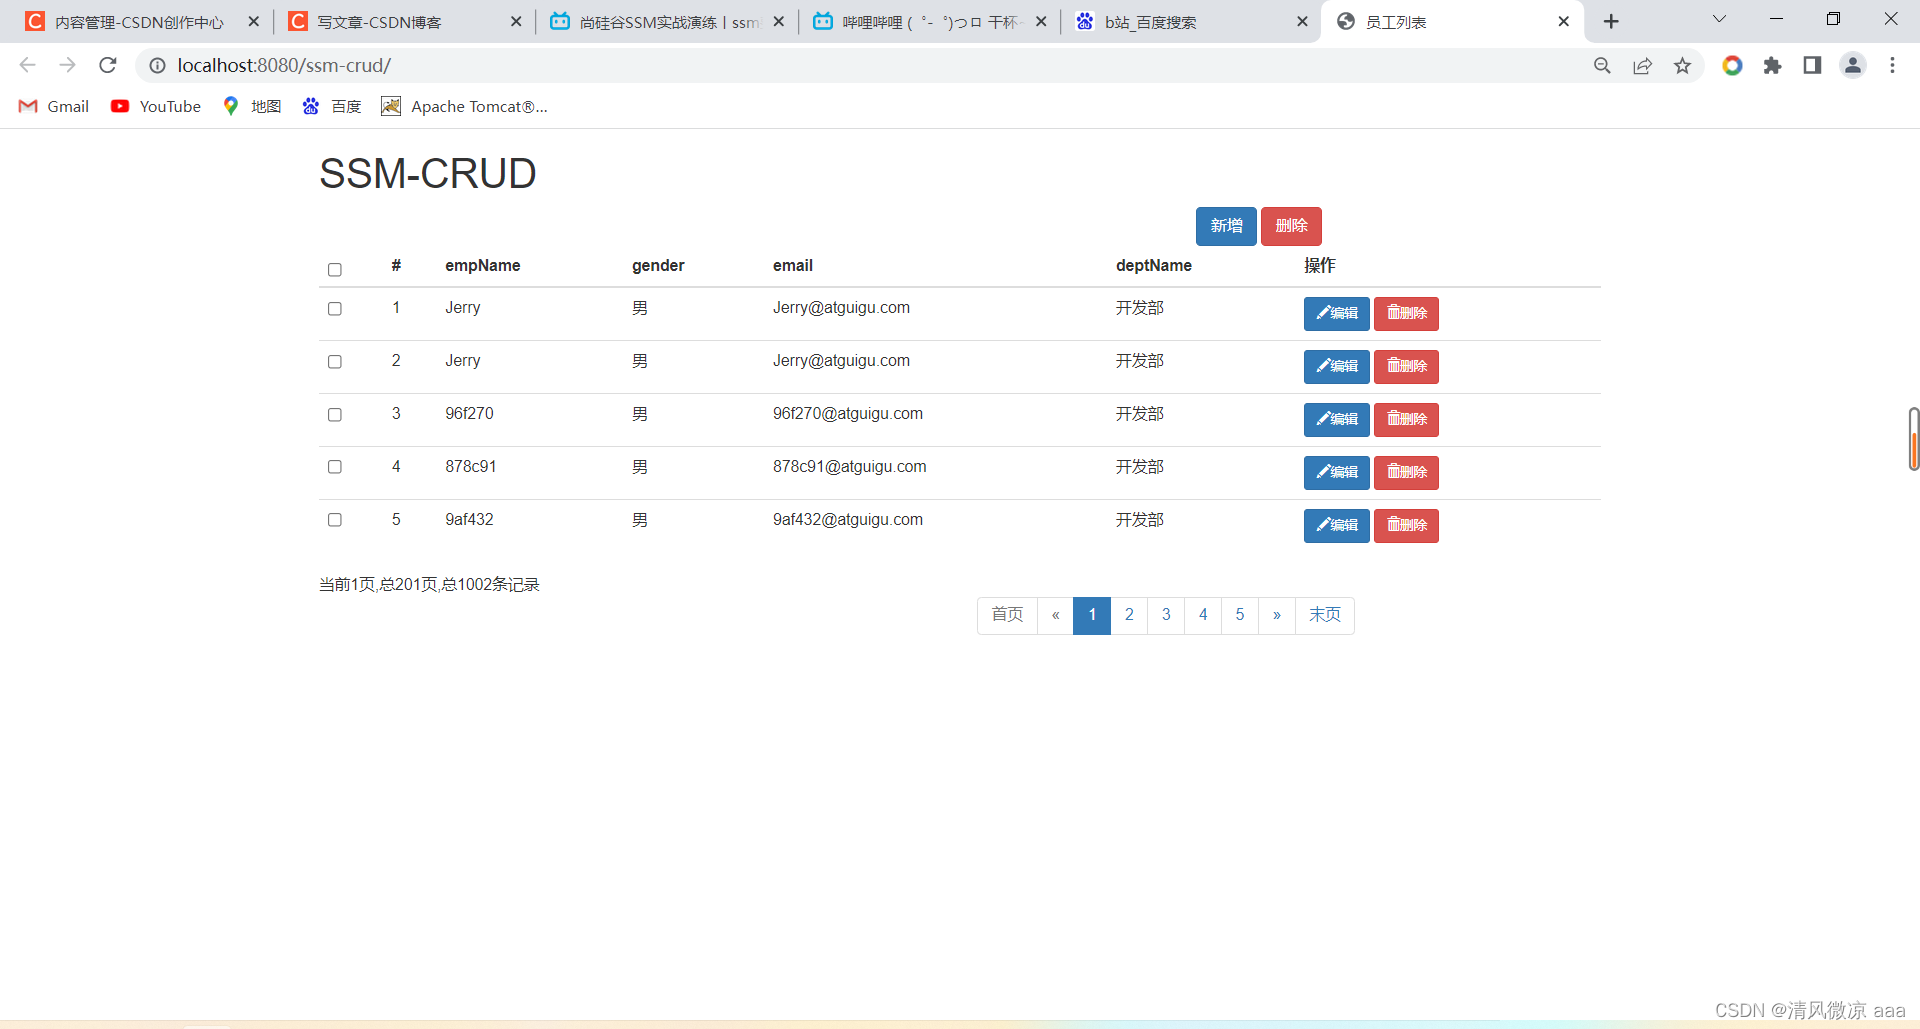
说明:项目一启动,来到首页直接展示员工列表数据。
3.1.2、业务逻辑分析
3.1.3、使用MyBatis–分页插件相关配置
步骤1:引入依赖:
<!--引入pageHelper分页插件 -->
<dependency>
	<groupId>com.github.pagehelper</groupId>
	<artifactId>pagehelper</artifactId>
	<version>5.0.0</version>
</dependency>
步骤2:在mybatis-config.xml核心配置文件中添加分页的配置:

	<plugins>
        <plugin interceptor="com.github.pagehelper.PageInterceptor">
            <!--分页参数合理化  -->
            <property name="reasonable" value="true"/>
        </plugin>
    </plugins>
3.1.4、index.jsp页面添加请求
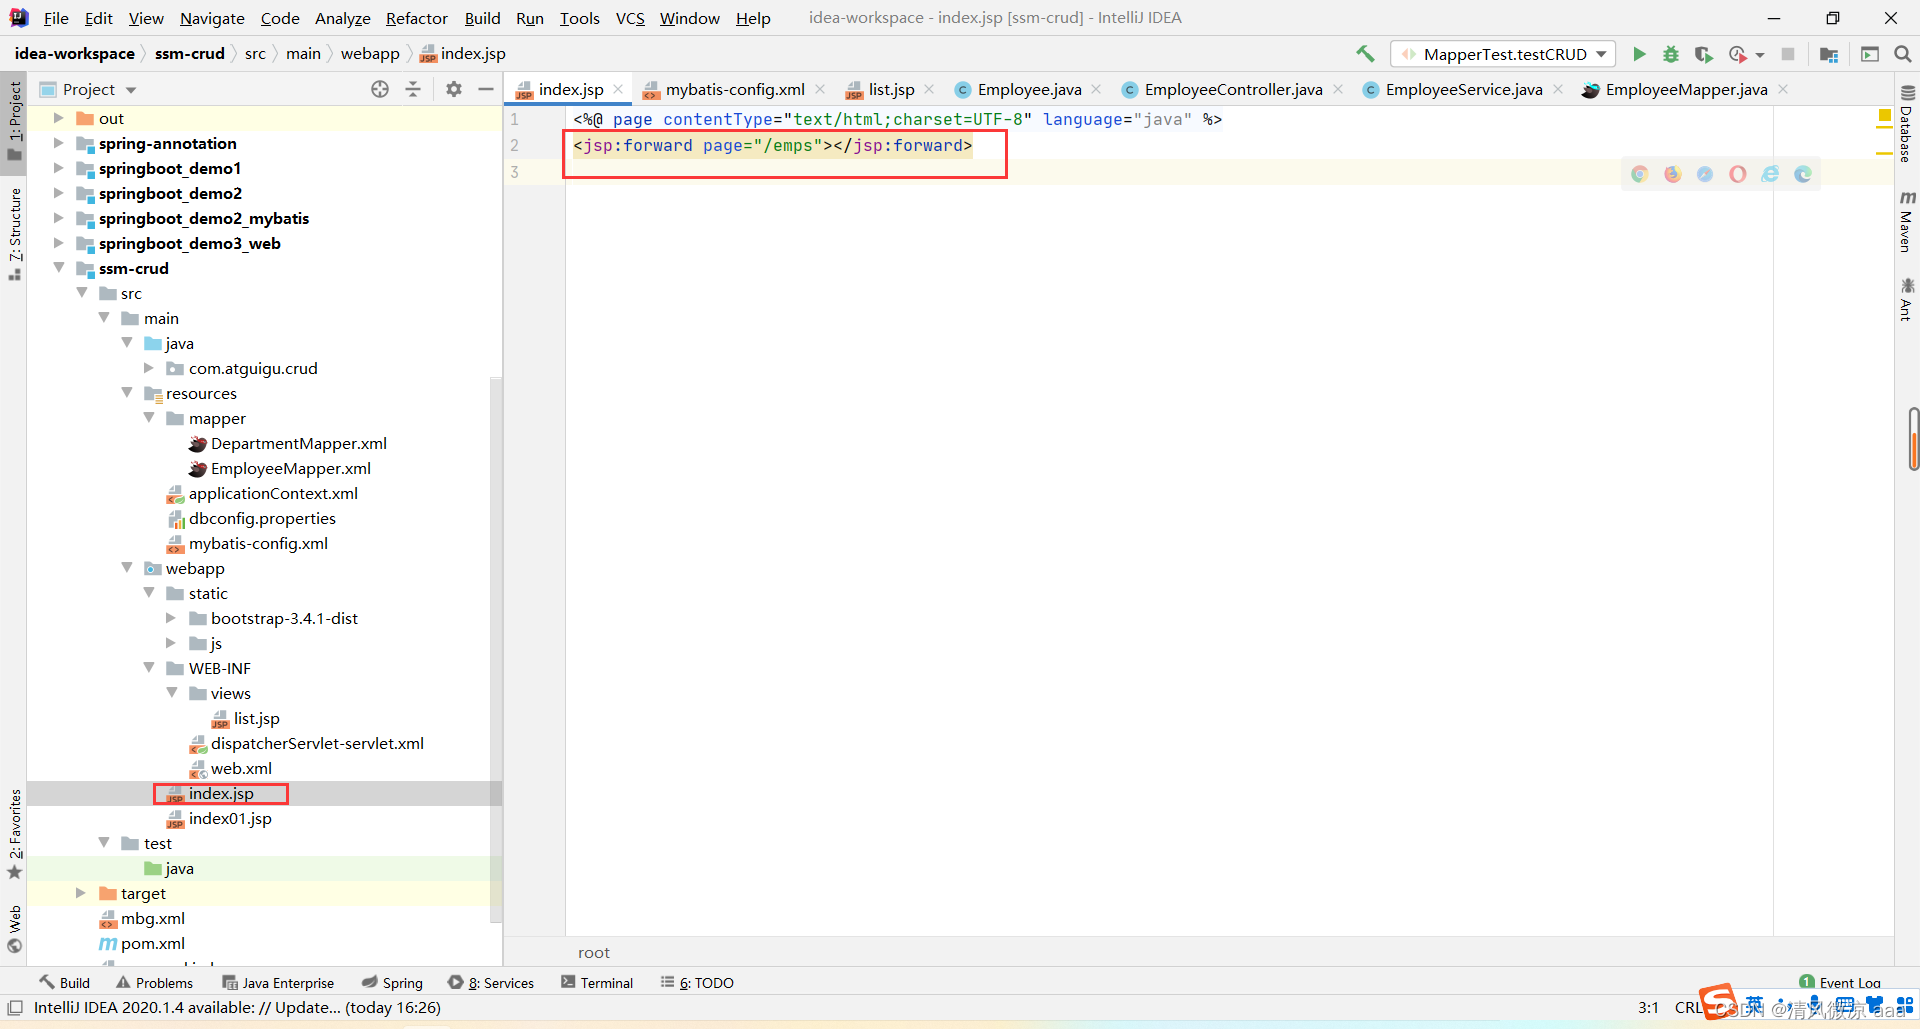
<%@ page contentType="text/html;charset=UTF-8" language="java" %>
<jsp:forward page="/emps"></jsp:forward>
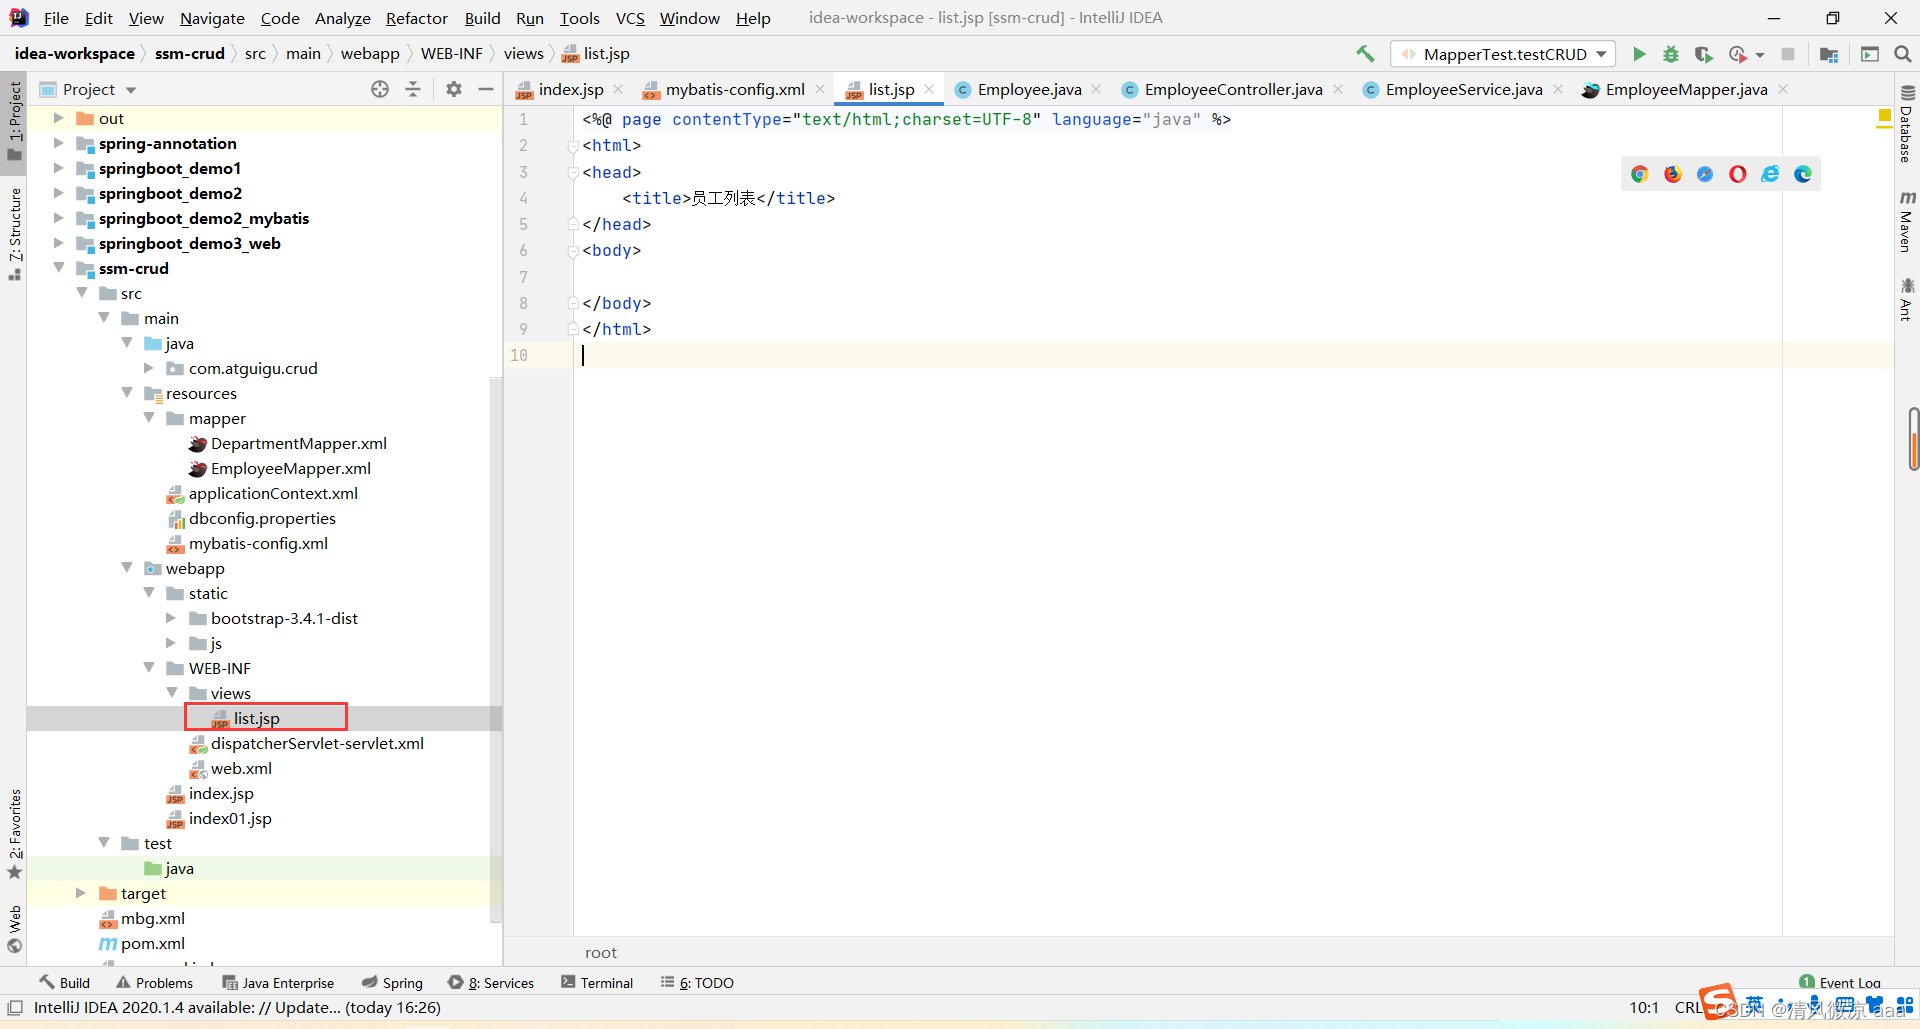
3.1.5、添加list.jsp页面
3.1.6、控制层:EmployeeController

package com.atguigu.crud.controller;
import com.atguigu.crud.bean.Employee;
import com.atguigu.crud.service.EmployeeService;
import com.github.pagehelper.PageHelper;
import com.github.pagehelper.PageInfo;
import org.springframework.beans.factory.annotation.Autowired;
import org.springframework.stereotype.Controller;
import org.springframework.ui.Model;
import org.springframework.web.bind.annotation.RequestMapping;
import org.springframework.web.bind.annotation.RequestParam;
import java.util.List;
/**
* 处理员工CRUD请求
*
* @author lfy
*
*/
@Controller
public class EmployeeController {
@Autowired
EmployeeService employeeService;
/**
* 查询员工数据(分页查询)
*
* @return
*/
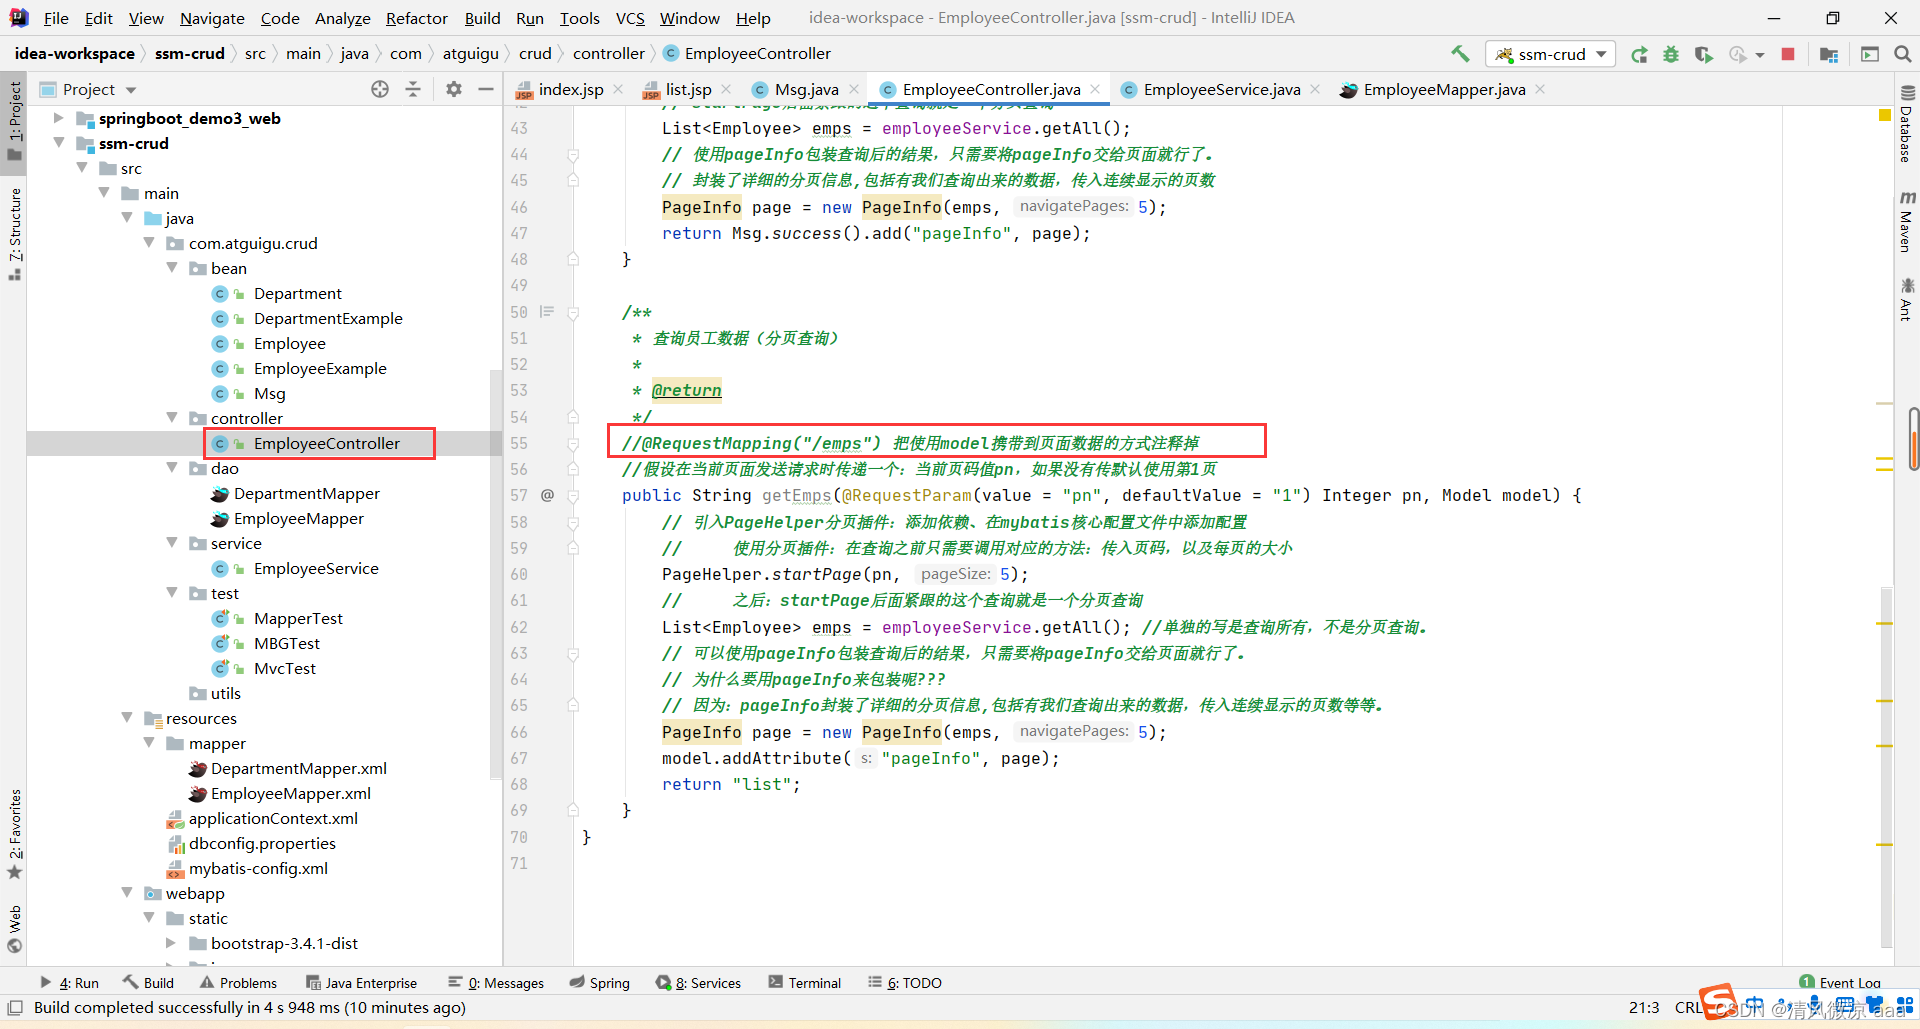
@RequestMapping("/emps")
//假设在当前页面发送请求时传递一个:当前页码值pn,如果没有传默认使用第1页
public String getEmps(@RequestParam(value = "pn", defaultValue = "1") Integer pn, Model model) {
// 引入PageHelper分页插件:添加依赖、在mybatis核心配置文件中添加配置
// 使用分页插件:在查询之前只需要调用对应的方法:传入页码,以及每页的大小
PageHelper.startPage(pn, 5);
// 之后:startPage后面紧跟的这个查询就是一个分页查询
List<Employee> emps = employeeService.getAll(); //单独的写是查询所有,不是分页查询。
// 可以使用pageInfo包装查询后的结果,只需要将pageInfo交给页面就行了。
// 为什么要用pageInfo来包装呢???
// 因为:pageInfo封装了详细的分页信息,包括有我们查询出来的数据,传入连续显示的页数等等。
PageInfo page = new PageInfo(emps, 5);
model.addAttribute("pageInfo", page);
return "list";
}
}
3.1.7、业务层:EmployeeService

package com.atguigu.crud.service;

import com.atguigu.crud.bean.Employee;
import com.atguigu.crud.dao.EmployeeMapper;
import org.springframework.beans.factory.annotation.Autowired;
import org.springframework.stereotype.Service;

import java.util.List;

@Service
public class EmployeeService {


    @Autowired
    EmployeeMapper employeeMapper;

    public List<Employee> getAll() {


        return employeeMapper.selectByExampleWithDept(null);
    }
}
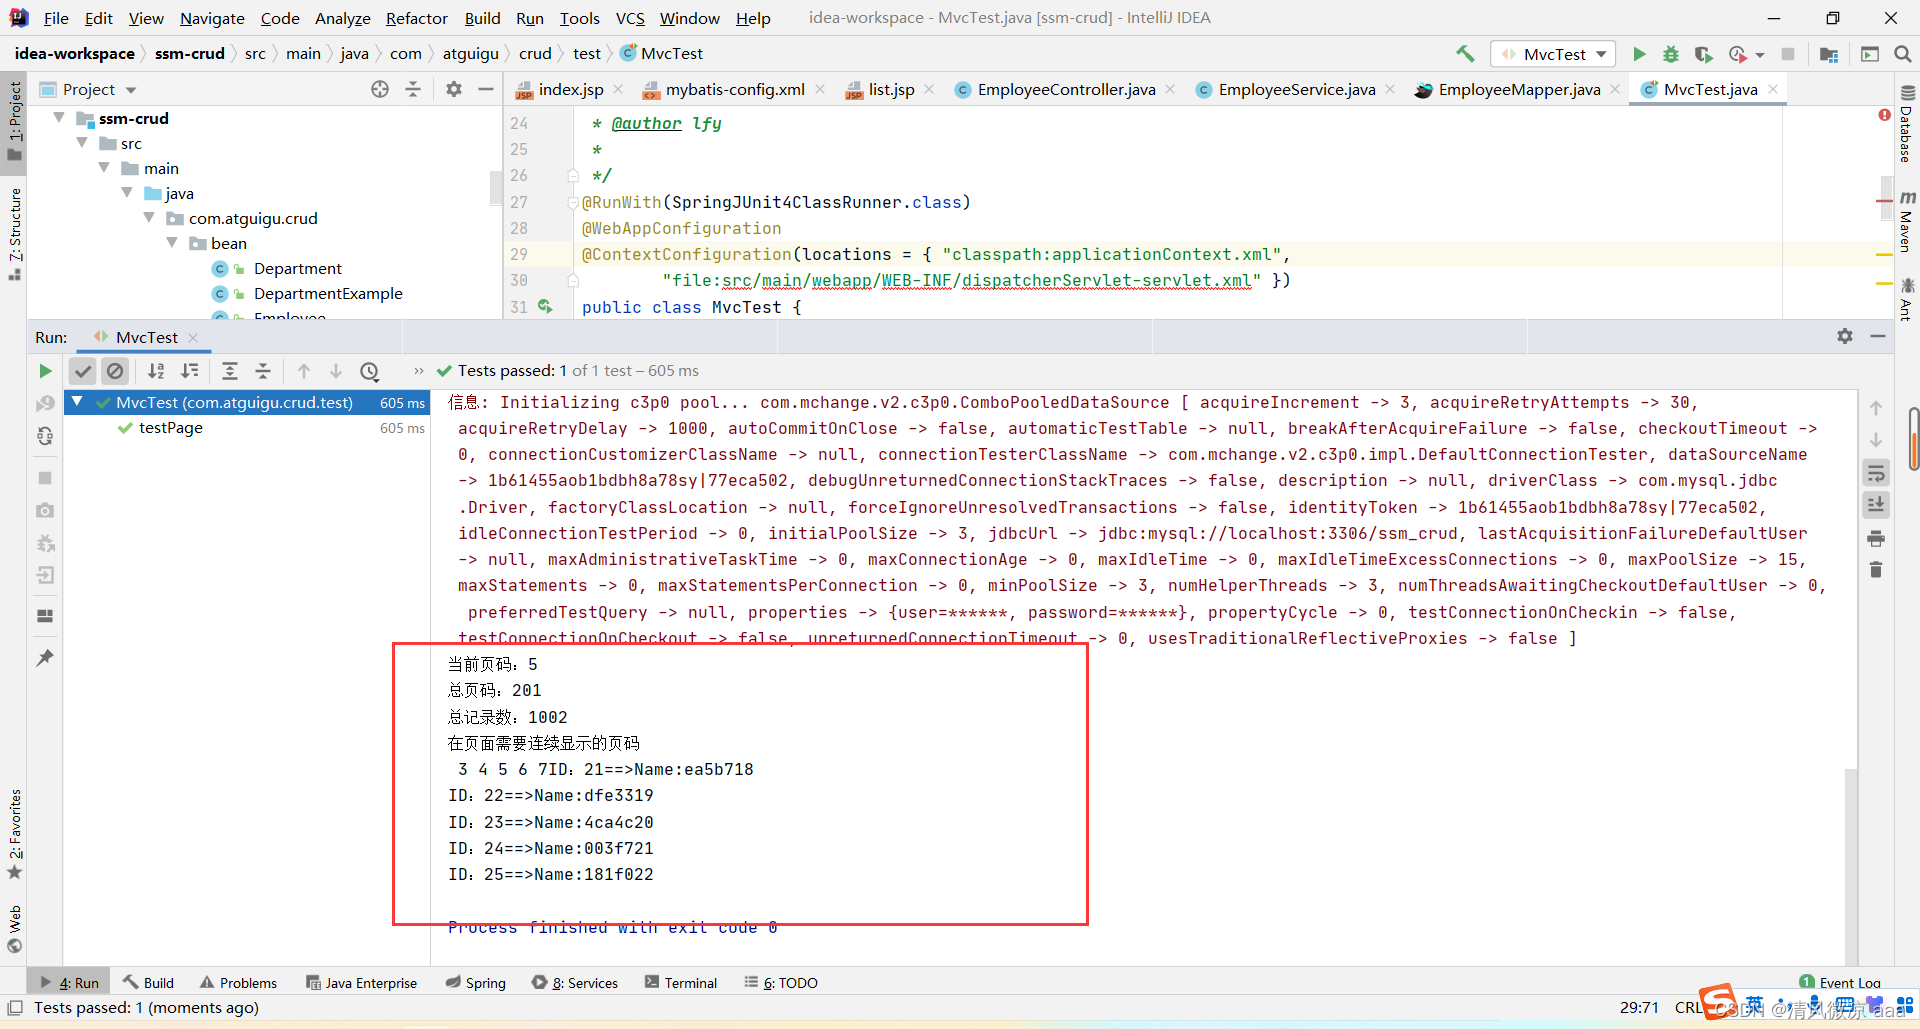
3.2、使用Spring单元测试,测试分页请求
3.2.1、编写测试类

package com.atguigu.crud.test;
import com.atguigu.crud.bean.Employee;
import com.github.pagehelper.PageInfo;
import org.junit.Before;
import org.junit.Test;
import org.junit.runner.RunWith;
import org.springframework.beans.factory.annotation.Autowired;
import org.springframework.mock.web.MockHttpServletRequest;
import org.springframework.test.context.ContextConfiguration;
import org.springframework.test.context.junit4.SpringJUnit4ClassRunner;
import org.springframework.test.context.web.WebAppConfiguration;
import org.springframework.test.web.servlet.MockMvc;
import org.springframework.test.web.servlet.MvcResult;
import org.springframework.test.web.servlet.request.MockMvcRequestBuilders;
import org.springframework.test.web.servlet.setup.MockMvcBuilders;
import org.springframework.web.context.WebApplicationContext;
import java.util.List;
/**
* 使用Spring测试模块提供的测试请求功能,测试curd请求的正确性
* Spring4测试的时候,需要servlet3.0的支持
* @author lfy
*
*/
@RunWith(SpringJUnit4ClassRunner.class)
@WebAppConfiguration
@ContextConfiguration(locations = {
"classpath:applicationContext.xml",
"file:src/main/webapp/WEB-INF/dispatcherServlet-servlet.xml" })
public class MvcTest {
// 传入Springmvc的ioc
@Autowired
WebApplicationContext context;
// 虚拟mvc请求,获取到处理结果。
MockMvc mockMvc;
@Before
public void initMokcMvc() {
mockMvc = MockMvcBuilders.webAppContextSetup(context).build();
}
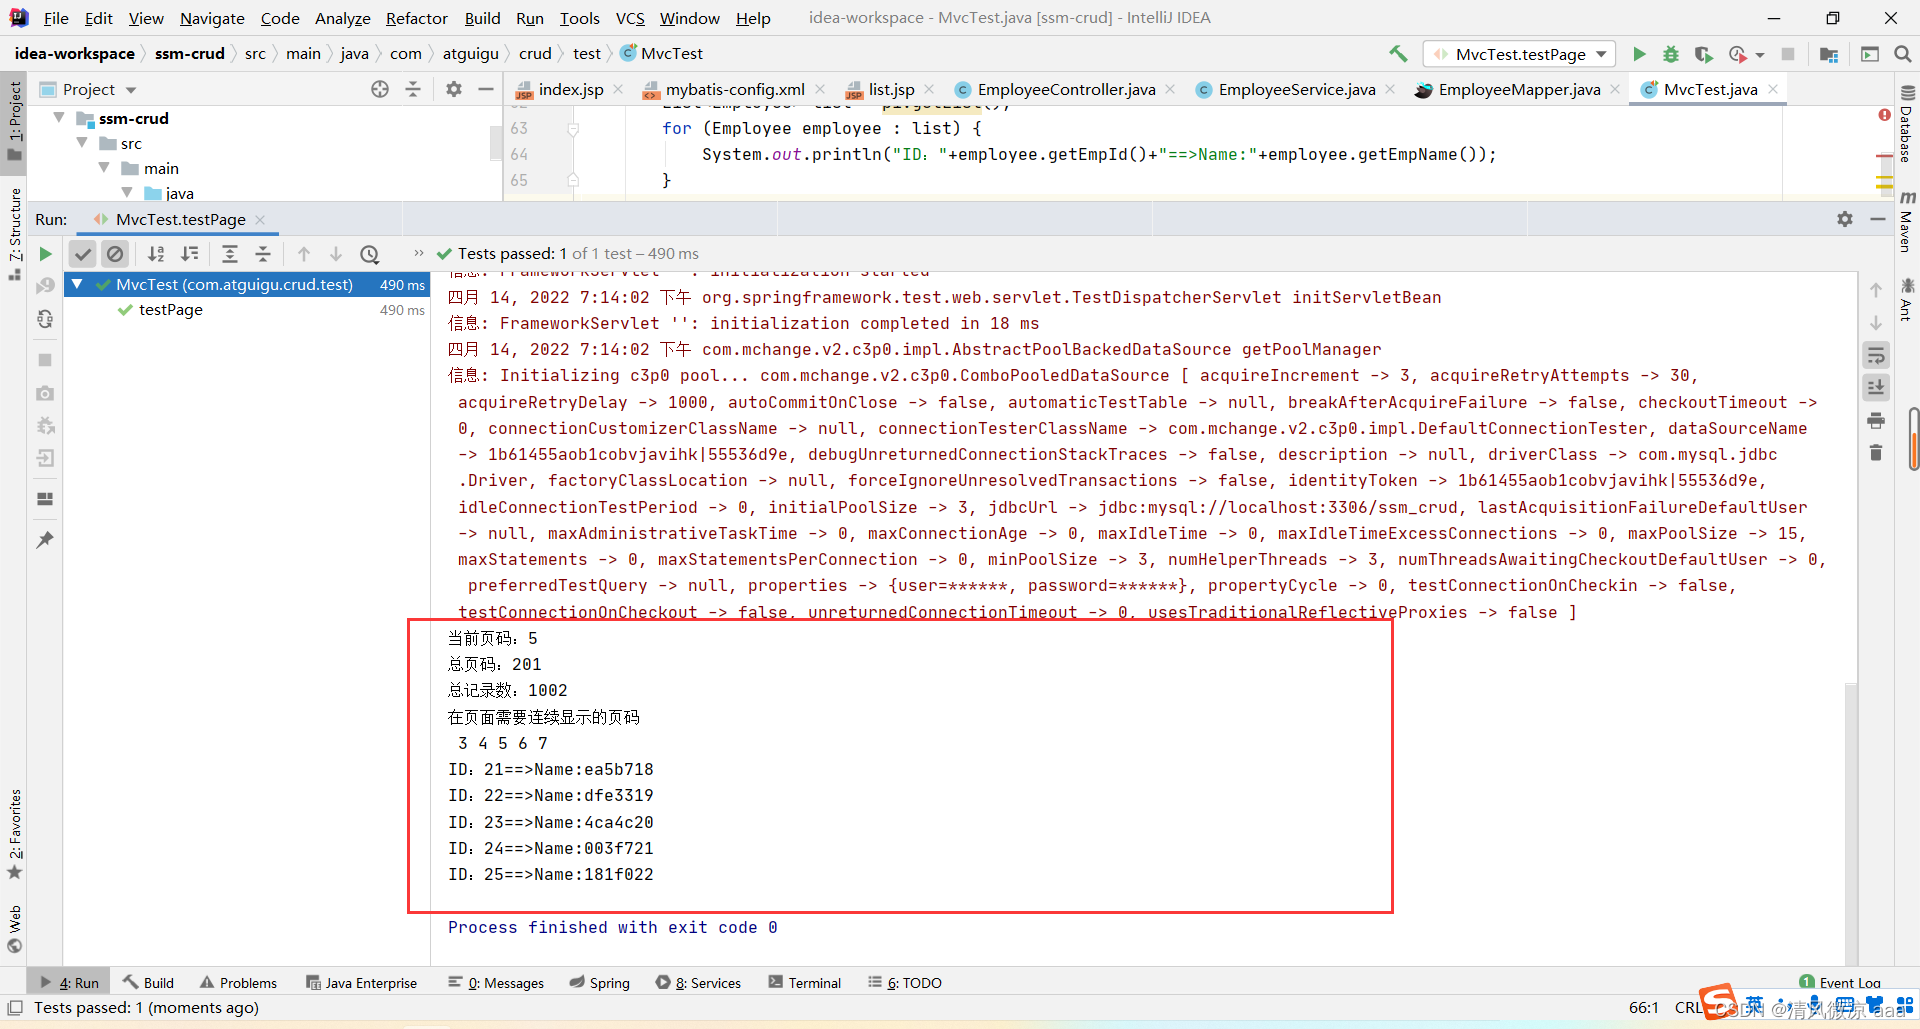
@Test
public void testPage() throws Exception {
//模拟请求拿到返回值
MvcResult result = mockMvc.perform(MockMvcRequestBuilders.get("/emps").param("pn", "5"))
.andReturn();
//请求成功以后,请求域中会有pageInfo;我们可以取出pageInfo进行验证
MockHttpServletRequest request = result.getRequest();
PageInfo pi = (PageInfo) request.getAttribute("pageInfo");
System.out.println("当前页码:"+pi.getPageNum());
System.out.println("总页码:"+pi.getPages());
System.out.println("总记录数:"+pi.getTotal());
System.out.println("在页面需要连续显示的页码");
int[] nums = pi.getNavigatepageNums();
for (int i : nums) {
System.out.print(" "+i);
}
System.out.println("");
//获取员工数据
List<Employee> list = pi.getList();
for (Employee employee : list) {
System.out.println("ID:"+employee.getEmpId()+"==>Name:"+employee.getEmpName());
}
}
}
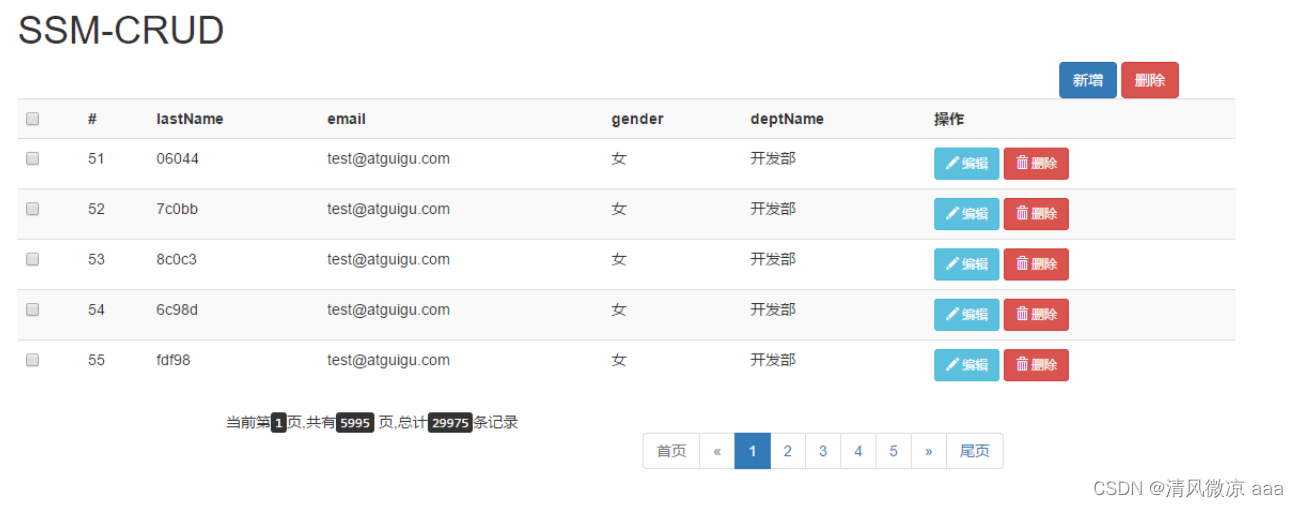
3.3.、搭建BootStrap分页页面
3.3.1、编写list.jsp
<%@ page language="java" contentType="text/html; charset=UTF-8"
pageEncoding="UTF-8"%>
<%@taglib uri="http://java.sun.com/jsp/jstl/core" prefix="c"%>
<!DOCTYPE html PUBLIC "-//W3C//DTD HTML 4.01 Transitional//EN" "http://www.w3.org/TR/html4/loose.dtd">
<html>
<head>
<meta http-equiv="Content-Type" content="text/html; charset=UTF-8">
<title>员工列表</title>
<%
pageContext.setAttribute("APP_PATH", request.getContextPath());
%>
<!-- web路径:
不以/开始的相对路径,找资源,以当前资源的路径为基准,经常容易出问题。
以/开始的相对路径,找资源,以服务器的路径为标准(http://localhost:3306);需要加上项目名
http://localhost:3306/crud
-->
<!--引入jquery:bootstrap里面用到了jquery,我们自己写也需要用到jquery-->
<script type="text/javascript" src="${APP_PATH }/static/js/jquery-3.6.0.min.js"></script>
<!--引入css样式-->
<link href="${APP_PATH }/static/bootstrap-3.4.1-dist/css/bootstrap.min.css" rel="stylesheet">
<!--引入引入js文件-->
<script src="${APP_PATH }/static/bootstrap-3.4.1-dist/js/bootstrap.min.js"></script>
</head>
<body>
<!-- 搭建显示页面 -->
<div class="container">
<!-- 标题 -->
<div class="row">
<div class="col-md-12">
<h1>SSM-CRUD</h1>
</div>
</div>
<!-- 按钮 -->
<div class="row">
<div class="col-md-4 col-md-offset-8">
<button class="btn btn-primary">新增</button>
<button class="btn btn-danger">删除</button>
</div>
</div>
<!-- 显示表格数据 -->
<div class="row">
<div class="col-md-12">
<table class="table table-hover">
<tr>
<th>#</th>
<th>empName</th>
<th>gender</th>
<th>email</th>
<th>deptName</th>
<th>操作</th>
</tr>
<c:forEach items="${pageInfo.list }" var="emp">
<tr>
<th>${
emp.empId }</th>
<th>${
emp.empName }</th>
<th>${
emp.gender=="M"?"男":"女" }</th>
<th>${
emp.email }</th>
<th>${
emp.department.deptName }</th>
<th>
<button class="btn btn-primary btn-sm">
<span class="glyphicon glyphicon-pencil" aria-hidden="true"></span>
编辑
</button>
<button class="btn btn-danger btn-sm">
<span class="glyphicon glyphicon-trash" aria-hidden="true"></span>
删除
</button>
</th>
</tr>
</c:forEach>
</table>
</div>
</div>
<!-- 显示分页信息 -->
<div class="row">
<!--分页文字信息 -->
<div class="col-md-6">当前 ${
pageInfo.pageNum }页,总${
pageInfo.pages }
页,总 ${
pageInfo.total } 条记录</div>
<!-- 分页条信息 -->
<div class="col-md-6">
<nav aria-label="Page navigation">
<ul class="pagination">
<li><a href="${APP_PATH }/emps?pn=1">首页</a></li>
<c:if test="${pageInfo.hasPreviousPage }">
<li><a href="${APP_PATH }/emps?pn=${pageInfo.pageNum-1}"
aria-label="Previous"> <span aria-hidden="true">«</span>
</a></li>
</c:if>
<c:forEach items="${pageInfo.navigatepageNums }" var="page_Num">
<c:if test="${page_Num == pageInfo.pageNum }">
<li class="active"><a href="#">${
page_Num }</a></li>
</c:if>
<c:if test="${page_Num != pageInfo.pageNum }">
<li><a href="${APP_PATH }/emps?pn=${page_Num }">${
page_Num }</a></li>
</c:if>
</c:forEach>
<c:if test="${pageInfo.hasNextPage }">
<li><a href="${APP_PATH }/emps?pn=${pageInfo.pageNum+1 }"
aria-label="Next"> <span aria-hidden="true">»</span>
</a></li>
</c:if>
<li><a href="${APP_PATH }/emps?pn=${pageInfo.pages}">末页</a></li>
</ul>
</nav>
</div>
</div>
</div>
</body>
</html>
4、查询功能的优化
说明:以上的分页是通过后端代码查询到数据,之后把数据转发到list.jsp页面,在页面上通过EL表达式把页面的数据遍历后取出来。但是这种方式有缺点:只适合浏览器与服务器的交互模型,而在移动互联网时代客户端不仅仅是浏览器还有可能是安卓客户端、ios客户端,那么此时客户端在发送请求,服务端返回一个页面携带数据,这样就不合适了。正确的做法是:服务端将有效的数据以json的形式返回给客户端,这样浏览器、安卓、ios等客户端解析也比较方便。
4.1、业务逻辑分析

4.2 、改造分页查询后台代码
4.2.1、添加jackson依赖
说明:@ResponseBody注解想要生效,需要导入jackson依赖。
<!-- 返回json字符串的支持 -->
		<!-- https://mvnrepository.com/artifact/com.fasterxml.jackson.core/jackson-databind -->
		<dependency>
			<groupId>com.fasterxml.jackson.core</groupId>
			<artifactId>jackson-databind</artifactId>
			<version>2.8.8</version>
		</dependency>
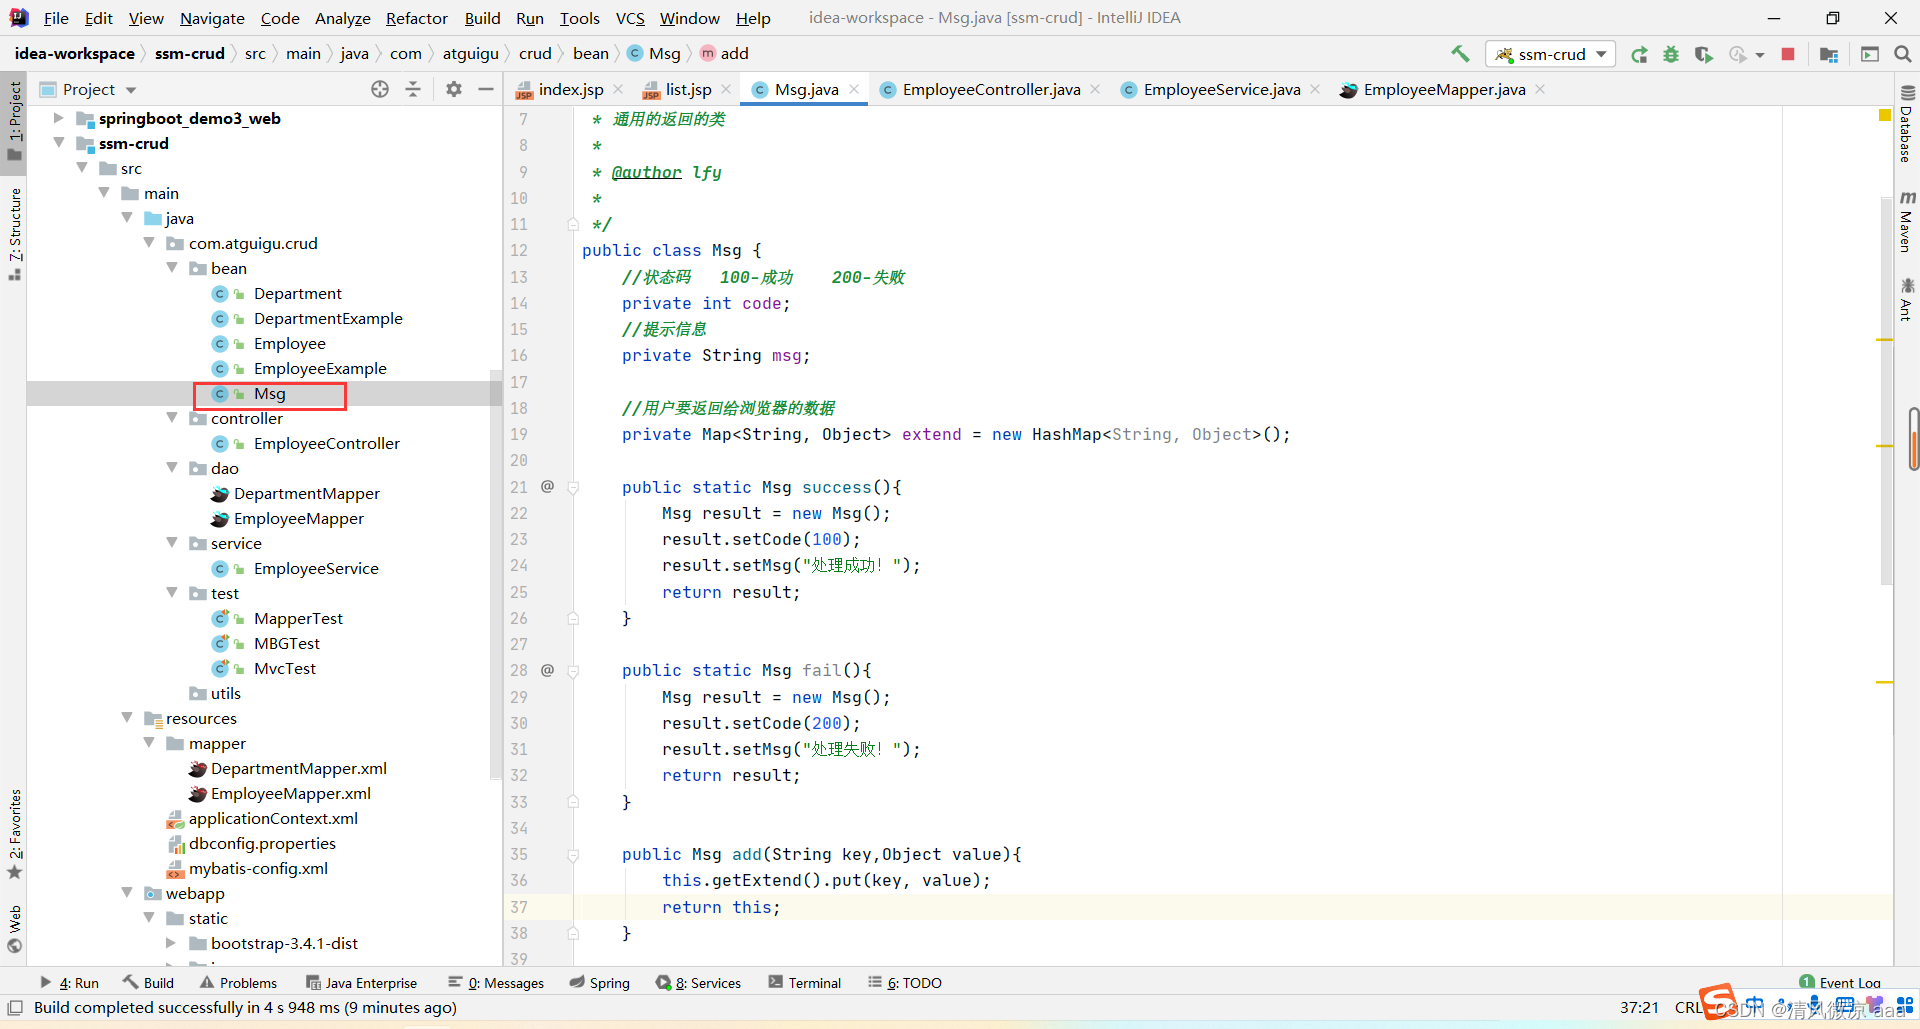
4.2.2、通用的返回类
说明:方法执行完成后直接返回给页面数据,客户端不知道服务端的代码是执行成功还是失败,所以可以设置一个通用的返回,可以返回当前请求的处理信息,状态信息等,这样客户端就知道是服务端的代码是成功还是失败。
package com.atguigu.crud.bean;

import java.util.HashMap;
import java.util.Map;

/**
 * 通用的返回的类
 *
 * @author lfy
 *
 */
public class Msg {


	//状态码   100-成功    200-失败
	private int code;
	//提示信息
	private String msg;

	//用户要返回给浏览器的数据
	private Map<String, Object> extend = new HashMap<String, Object>();

	public static Msg success(){


		Msg result = new Msg();
		result.setCode(100);
		result.setMsg("处理成功!");
		return result;
	}

	public static Msg fail(){


		Msg result = new Msg();
		result.setCode(200);
		result.setMsg("处理失败!");
		return result;
	}

	public Msg add(String key,Object value){


		this.getExtend().put(key, value);
		return this;
	}

	public int getCode() {


		return code;
	}

	public void setCode(int code) {


		this.code = code;
	}

	public String getMsg() {


		return msg;
	}

	public void setMsg(String msg) {


		this.msg = msg;
	}

	public Map<String, Object> getExtend() {


		return extend;
	}

	public void setExtend(Map<String, Object> extend) {


		this.extend = extend;
	}


}
4.2.3、修改控制层方法
把原来的方式注释掉:
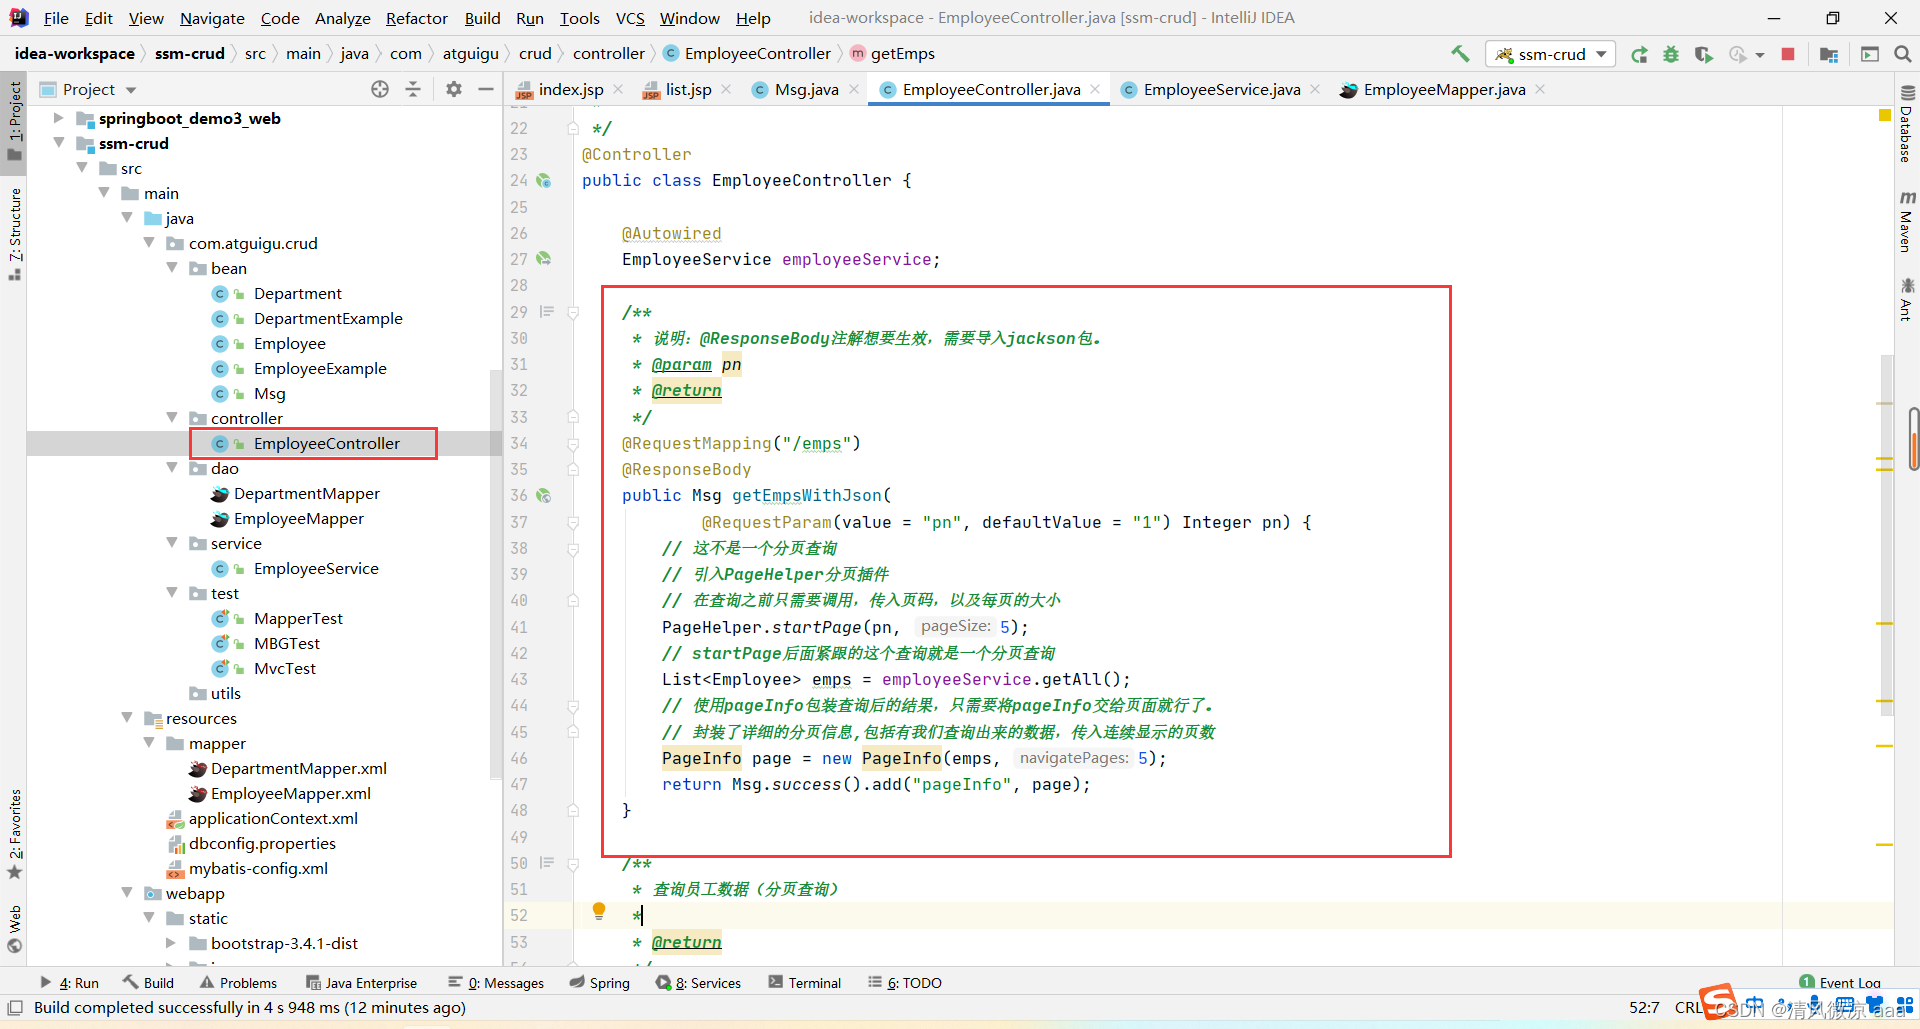
现在的方式:
package com.atguigu.crud.controller;

import com.atguigu.crud.bean.Employee;
import com.atguigu.crud.bean.Msg;
import com.atguigu.crud.service.EmployeeService;
import com.github.pagehelper.PageHelper;
import com.github.pagehelper.PageInfo;
import org.springframework.beans.factory.annotation.Autowired;
import org.springframework.stereotype.Controller;
import org.springframework.ui.Model;
import org.springframework.web.bind.annotation.RequestMapping;
import org.springframework.web.bind.annotation.RequestParam;
import org.springframework.web.bind.annotation.ResponseBody;

import java.util.List;

/**
 * 处理员工CRUD请求
 *
 * @author lfy
 *
 */
@Controller
public class EmployeeController {


    @Autowired
    EmployeeService employeeService;

    /**
     * 说明:@ResponseBody注解想要生效,需要导入jackson包。
     * @param pn
     * @return
     */
    @RequestMapping("/emps")
    @ResponseBody
    public Msg getEmpsWithJson(
            @RequestParam(value = "pn", defaultValue = "1") Integer pn) {


        // 这不是一个分页查询
        // 引入PageHelper分页插件
        // 在查询之前只需要调用,传入页码,以及每页的大小
        PageHelper.startPage(pn, 5);
        // startPage后面紧跟的这个查询就是一个分页查询
        List<Employee> emps = employeeService.getAll();
        // 使用pageInfo包装查询后的结果,只需要将pageInfo交给页面就行了。
        // 封装了详细的分页信息,包括有我们查询出来的数据,传入连续显示的页数
        PageInfo page = new PageInfo(emps, 5);
        return Msg.success().add("pageInfo", page);
    }


}
测试:
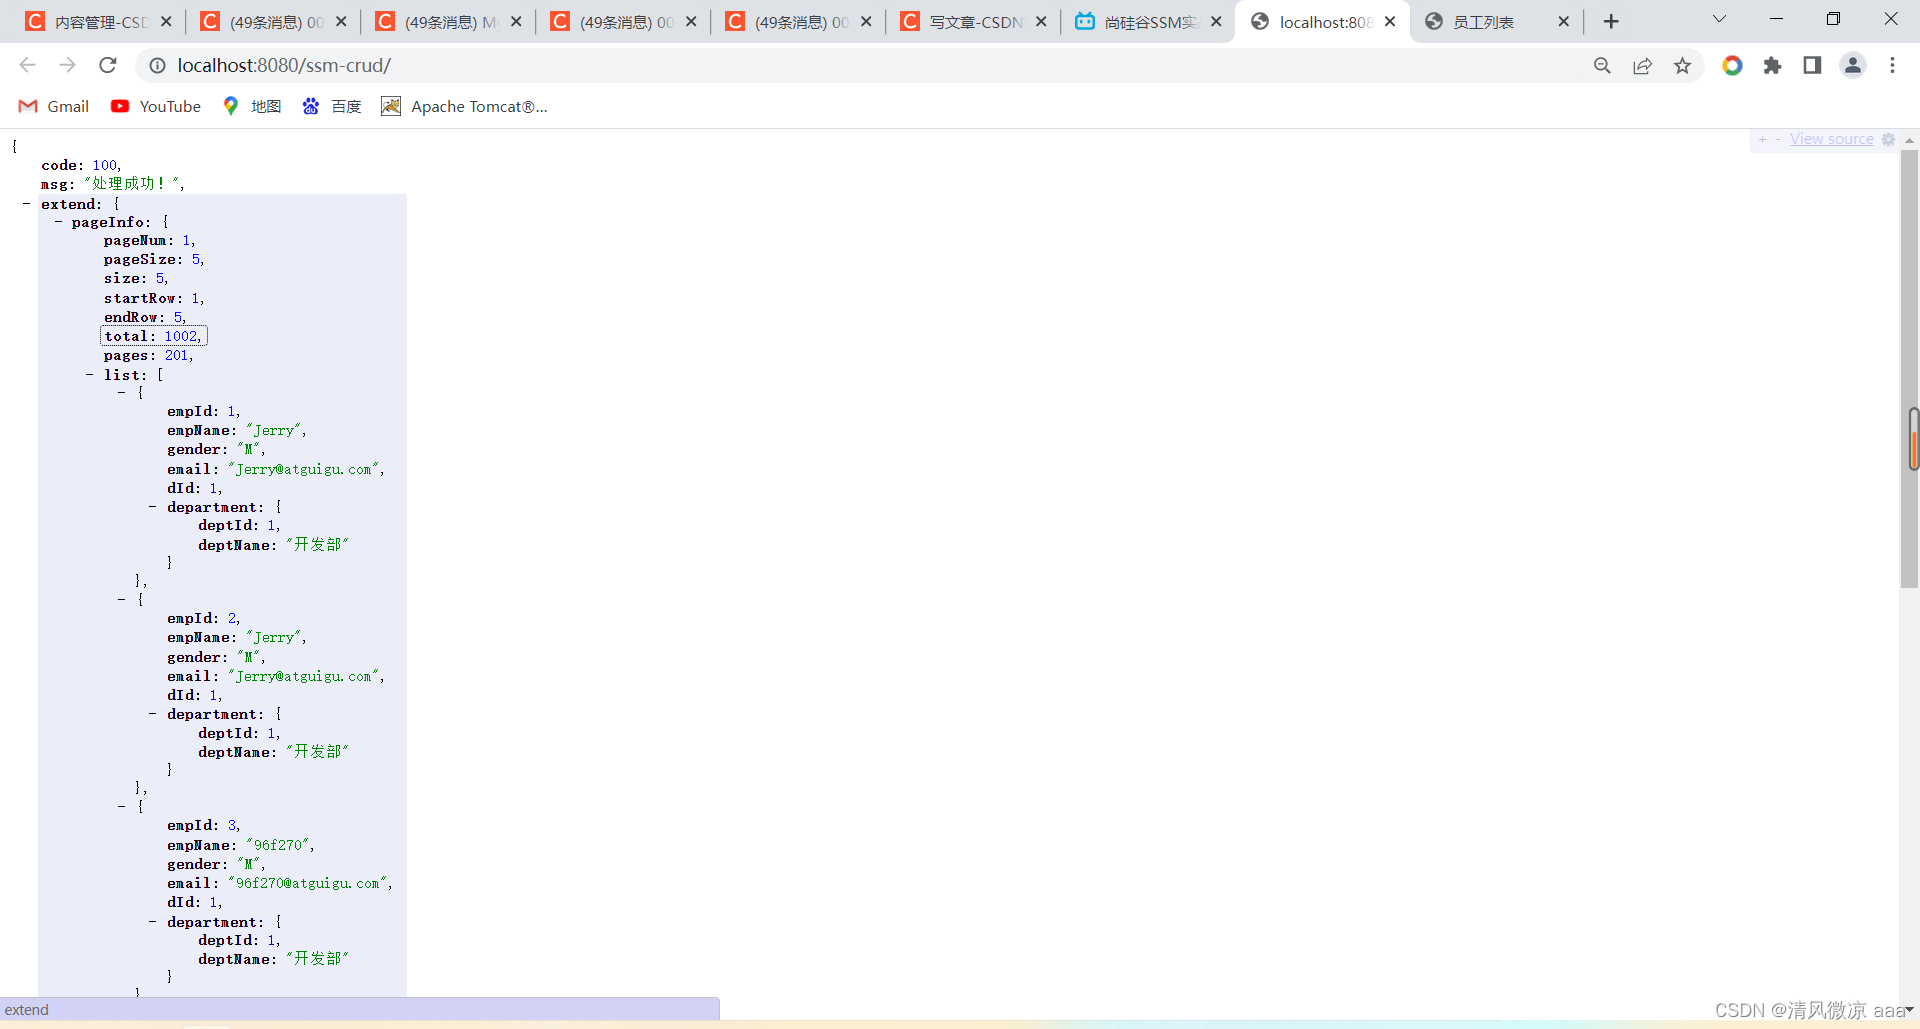
4.3 、改造index.jsp页面
说明:包含
<%@ page language="java" contentType="text/html; charset=UTF-8"
pageEncoding="UTF-8"%>
<%@taglib uri="http://java.sun.com/jsp/jstl/core" prefix="c"%>
<!DOCTYPE html PUBLIC "-//W3C//DTD HTML 4.01 Transitional//EN" "http://www.w3.org/TR/html4/loose.dtd">
<html>
<head>
<meta http-equiv="Content-Type" content="text/html; charset=UTF-8">
<title>员工列表</title>
<%
pageContext.setAttribute("APP_PATH", request.getContextPath());
%>
<!-- web路径:
不以/开始的相对路径,找资源,以当前资源的路径为基准,经常容易出问题。
以/开始的相对路径,找资源,以服务器的路径为标准(http://localhost:3306);需要加上项目名
http://localhost:3306/crud
-->
<!--引入jquery:bootstrap里面用到了jquery,我们自己写也需要用到jquery-->
<script type="text/javascript" src="static/js/jquery-3.6.0.min.js"></script>
<!--引入css样式-->
<link href="static/bootstrap-3.4.1-dist/css/bootstrap.min.css" rel="stylesheet">
<!--引入引入js文件-->
<script src="static/bootstrap-3.4.1-dist/js/bootstrap.min.js"></script>
</head>
<body>
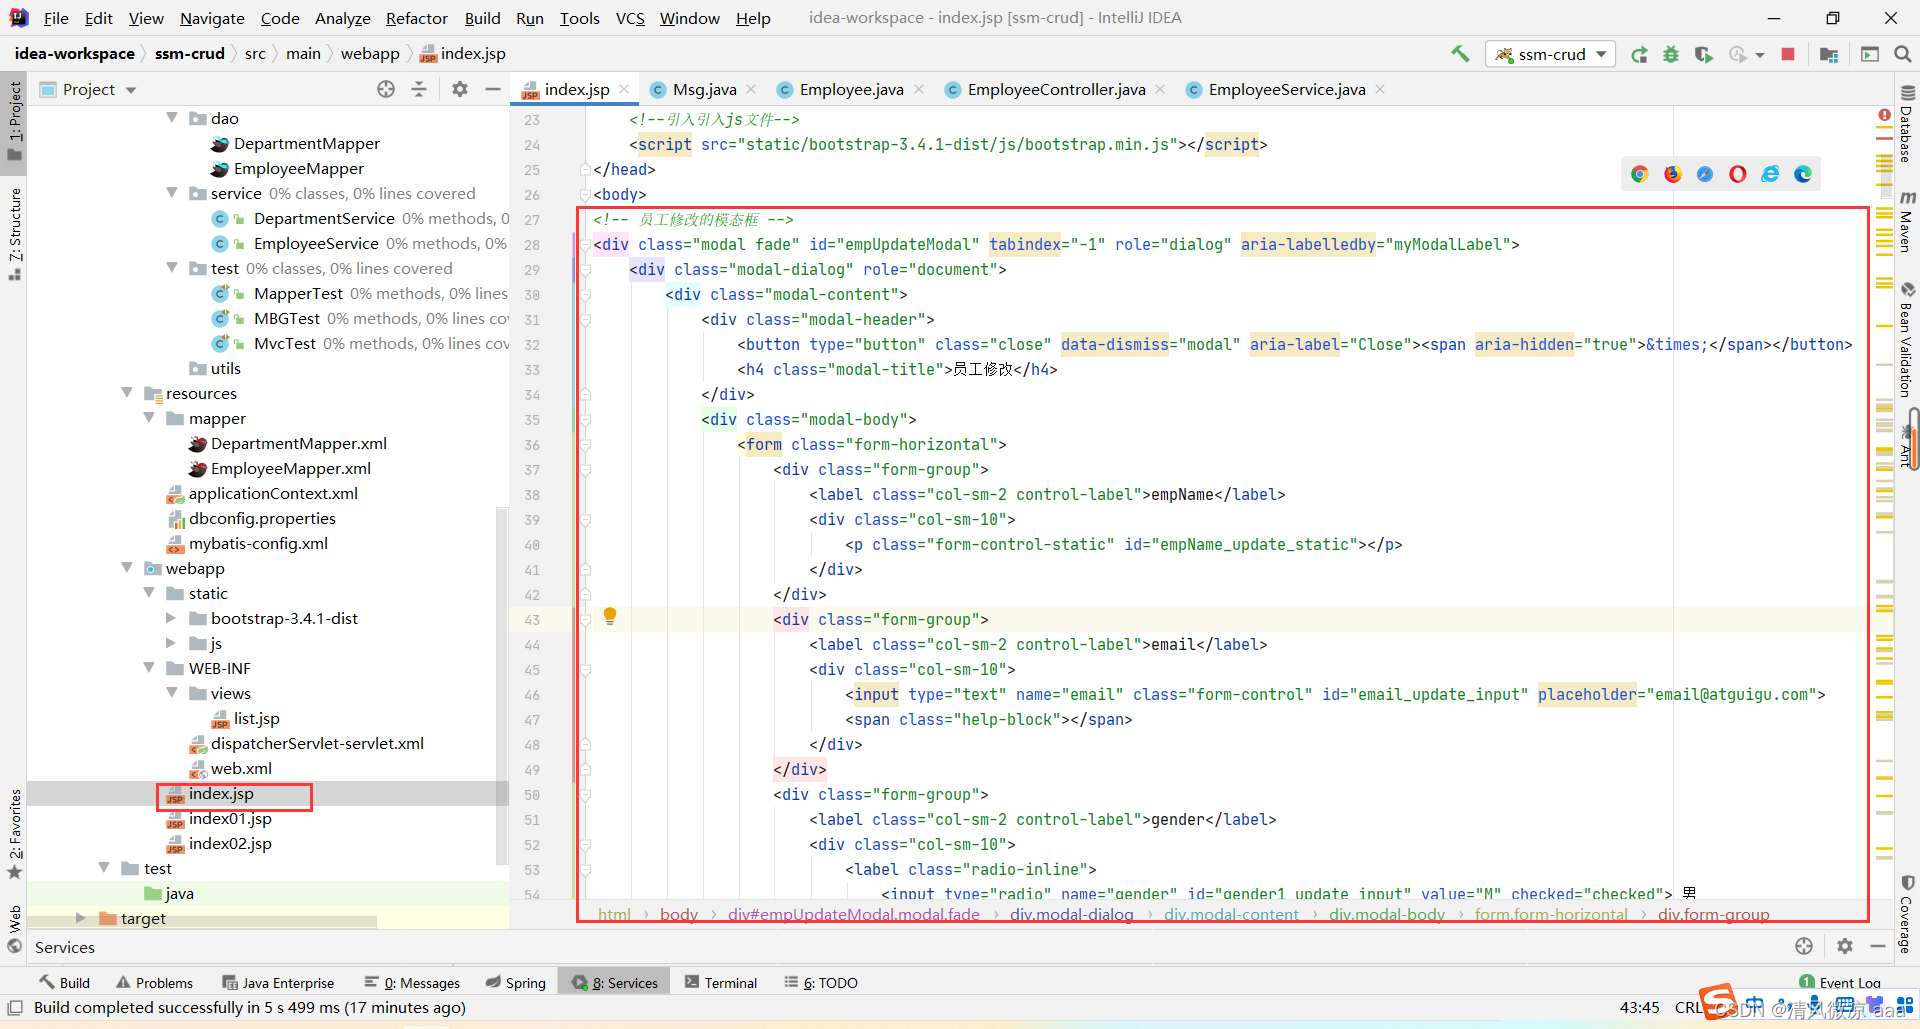
<!-- 员工修改的模态框 -->
<div class="modal fade" id="empUpdateModal" tabindex="-1" role="dialog" aria-labelledby="myModalLabel">
<div class="modal-dialog" role="document">
<div class="modal-content">
<div class="modal-header">
<button type="button" class="close" data-dismiss="modal" aria-label="Close"><span aria-hidden="true">×</span></button>
<h4 class="modal-title">员工修改</h4>
</div>
<div class="modal-body">
<form class="form-horizontal">
<div class="form-group">
<label class="col-sm-2 control-label">empName</label>
<div class="col-sm-10">
<p class="form-control-static" id="empName_update_static"></p>
</div>
</div>
<div class="form-group">
<label class="col-sm-2 control-label">email</label>
<div class="col-sm-10">
<input type="text" name="email" class="form-control" id="email_update_input" placeholder="[email protected]">
<span class="help-block"></span>
</div>
</div>
<div class="form-group">
<label class="col-sm-2 control-label">gender</label>
<div class="col-sm-10">
<label class="radio-inline">
<input type="radio" name="gender" id="gender1_update_input" value="M" checked="checked"> 男
</label>
<label class="radio-inline">
<input type="radio" name="gender" id="gender2_update_input" value="F"> 女
</label>
</div>
</div>
<div class="form-group">
<label class="col-sm-2 control-label">deptName</label>
<div class="col-sm-4">
<!-- 部门提交部门id即可 -->
<select class="form-control" name="dId">
</select>
</div>
</div>
</form>
</div>
<div class="modal-footer">
<button type="button" class="btn btn-default" data-dismiss="modal">关闭</button>
<button type="button" class="btn btn-primary" id="emp_update_btn">更新</button>
</div>
</div>
</div>
</div>
<!-- 员工添加的模态框 -->
<div class="modal fade" id="empAddModal" tabindex="-1" role="dialog" aria-labelledby="myModalLabel">
<div class="modal-dialog" role="document">
<div class="modal-content">
<div class="modal-header">
<button type="button" class="close" data-dismiss="modal" aria-label="Close"><span aria-hidden="true">×</span></button>
<h4 class="modal-title" id="myModalLabel">员工添加</h4>
</div>
<div class="modal-body">
<form class="form-horizontal">
<div class="form-group">
<label class="col-sm-2 control-label">empName</label>
<div class="col-sm-10">
<input type="text" name="empName" class="form-control" id="empName_add_input" placeholder="empName">
<span class="help-block"></span>
</div>
</div>
<div class="form-group">
<label class="col-sm-2 control-label">email</label>
<div class="col-sm-10">
<input type="text" name="email" class="form-control" id="email_add_input" placeholder="[email protected]">
<span class="help-block"></span>
</div>
</div>
<div class="form-group">
<label class="col-sm-2 control-label">gender</label>
<div class="col-sm-10">
<label class="radio-inline">
<input type="radio" name="gender" id="gender1_add_input" value="M" checked="checked"> 男
</label>
<label class="radio-inline">
<input type="radio" name="gender" id="gender2_add_input" value="F"> 女
</label>
</div>
</div>
<div class="form-group">
<label class="col-sm-2 control-label">deptName</label>
<div class="col-sm-4">
<!-- 部门提交部门id即可 -->
<select class="form-control" name="dId">
</select>
</div>
</div>
</form>
</div>
<div class="modal-footer">
<button type="button" class="btn btn-default" data-dismiss="modal">关闭</button>
<button type="button" class="btn btn-primary" id="emp_save_btn">保存</button>
</div>
</div>
</div>
</div>
<!-- 搭建显示页面 -->
<div class="container">
<!-- 标题 -->
<div class="row">
<div class="col-md-12">
<h1>SSM-CRUD</h1>
</div>
</div>
<!-- 按钮 -->
<div class="row">
<div class="col-md-4 col-md-offset-8">
<button class="btn btn-primary" id="emp_add_modal_btn">新增</button>
<button class="btn btn-danger" id="emp_delete_all_btn">删除</button>
</div>
</div>
<!-- 显示表格数据 -->
<div class="row">
<div class="col-md-12">
<table class="table table-hover" id="emps_table">
<thead>
<tr>
<th>
<input type="checkbox" id="check_all"/>
</th>
<th>#</th>
<th>empName</th>
<th>gender</th>
<th>email</th>
<th>deptName</th>
<th>操作</th>
</tr>
</thead>
<tbody>
</tbody>
</table>
</div>
</div>
<!-- 显示分页信息 -->
<div class="row">
<!--分页文字信息 -->
<div class="col-md-6" id="page_info_area"></div>
<!-- 分页条信息 -->
<div class="col-md-6" id="page_nav_area">
</div>
</div>
</div>
<script type="text/javascript">
var totalRecord,currentPage;
//1、页面加载完成以后,直接去发送ajax请求,要到分页数据
$(function(){
//去首页
to_page(1);
});
function to_page(pn){
$.ajax({
url:"${APP_PATH}/emps",
data:"pn="+pn,
type:"GET",
success:function(result){
//console.log(result);
//1、解析并显示员工数据
build_emps_table(result);
//2、解析并显示分页信息
build_page_info(result);
//3、解析显示分页条数据
build_page_nav(result);
}
});
}
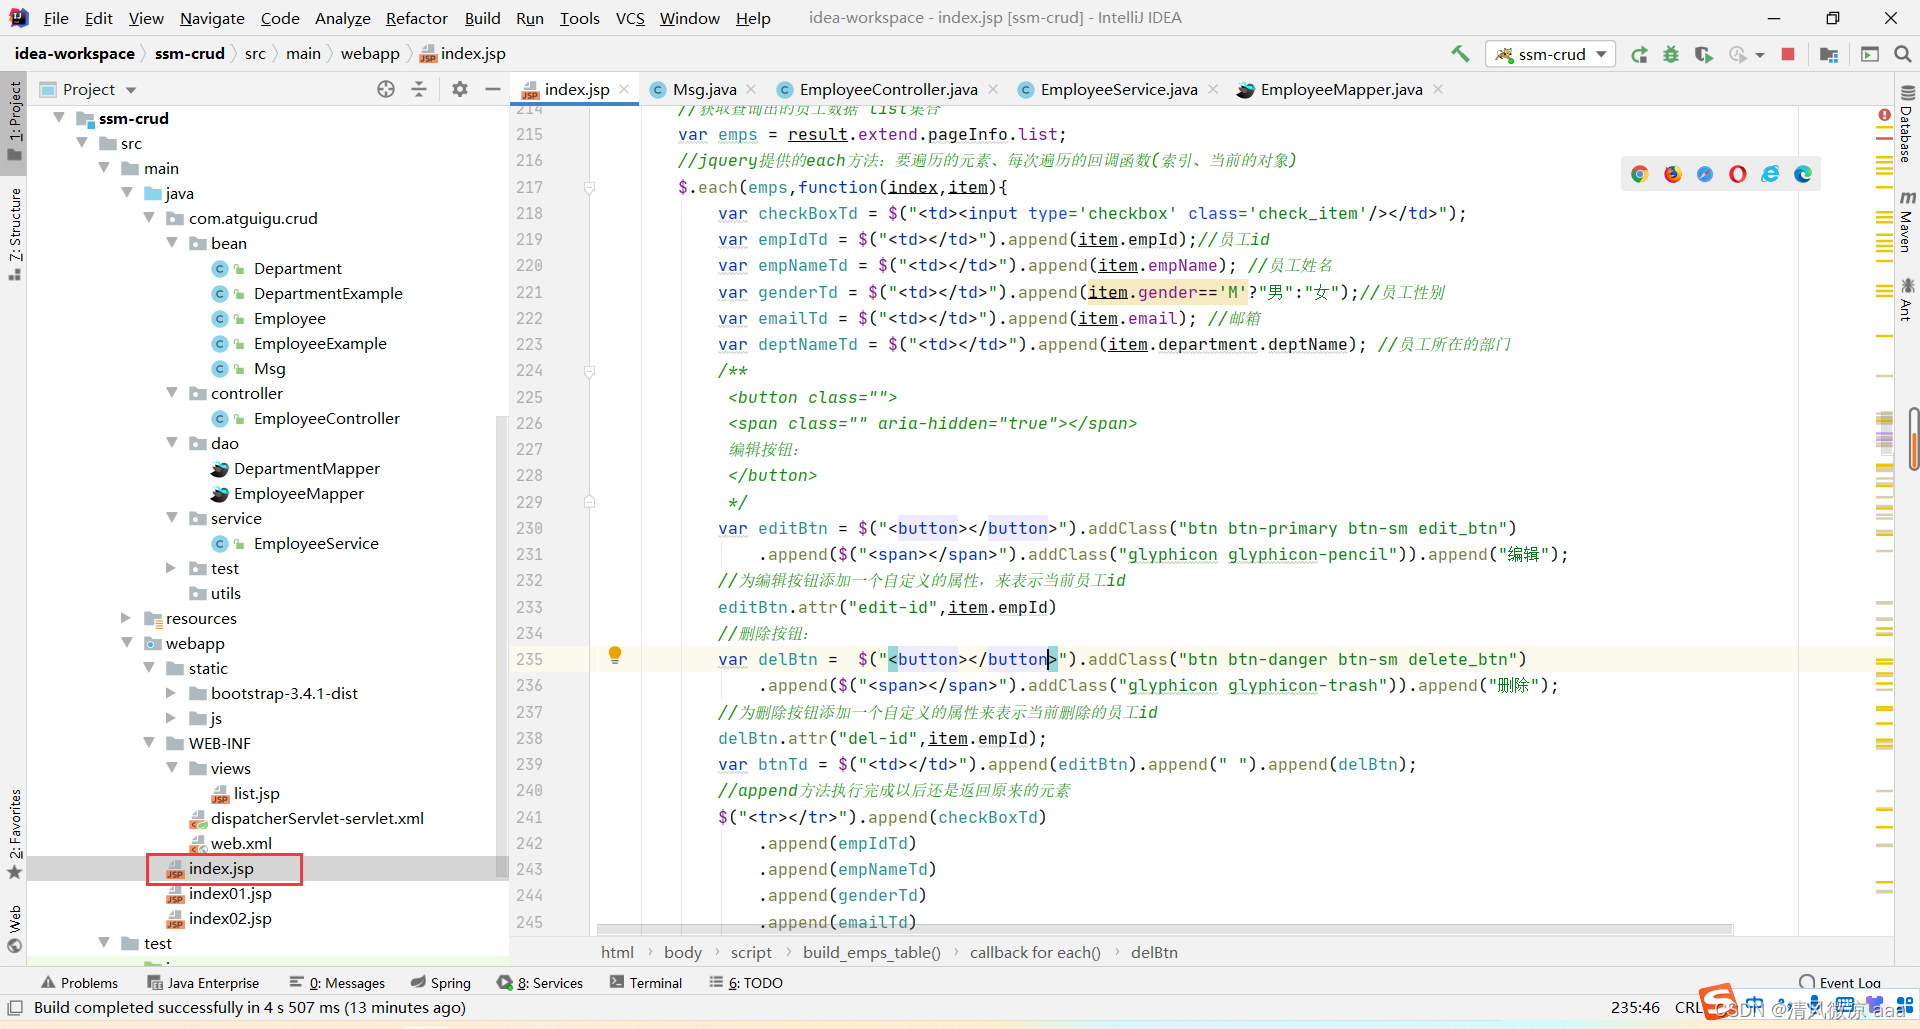
function build_emps_table(result){
//清空table表格
$("#emps_table tbody").empty();
//获取查询出的员工数据 list集合
var emps = result.extend.pageInfo.list;
//jquery提供的each方法:要遍历的元素、每次遍历的回调函数(索引、当前的对象)
$.each(emps,function(index,item){
var checkBoxTd = $("<td><input type='checkbox' class='check_item'/></td>");
var empIdTd = $("<td></td>").append(item.empId);//员工id
var empNameTd = $("<td></td>").append(item.empName); //员工姓名
var genderTd = $("<td></td>").append(item.gender=='M'?"男":"女");//员工性别
var emailTd = $("<td></td>").append(item.email); //邮箱
var deptNameTd = $("<td></td>").append(item.department.deptName); //员工所在的部门
/**
<button class="">
<span class="" aria-hidden="true"></span>
编辑按钮:
</button>
*/
var editBtn = $("<button></button>").addClass("btn btn-primary btn-sm edit_btn")
.append($("<span></span>").addClass("glyphicon glyphicon-pencil")).append("编辑");
//为编辑按钮添加一个自定义的属性,来表示当前员工id
editBtn.attr("edit-id",item.empId)
//删除按钮:
var delBtn = $("<button></button>").addClass("btn btn-danger btn-sm delete_btn")
.append($("<span></span>").addClass("glyphicon glyphicon-trash")).append("删除");
//为删除按钮添加一个自定义的属性来表示当前删除的员工id
delBtn.attr("del-id",item.empId);
var btnTd = $("<td></td>").append(editBtn).append(" ").append(delBtn);
//append方法执行完成以后还是返回原来的元素
$("<tr></tr>").append(checkBoxTd)
.append(empIdTd)
.append(empNameTd)
.append(genderTd)
.append(emailTd)
.append(deptNameTd)
.append(btnTd)
.appendTo("#emps_table tbody");//添加到对应的标签中
});
}
//解析显示分页信息
function build_page_info(result){
$("#page_info_area").empty();
$("#page_info_area").append("当前"+result.extend.pageInfo.pageNum+"页,总"+
result.extend.pageInfo.pages+"页,总"+
result.extend.pageInfo.total+"条记录");
totalRecord = result.extend.pageInfo.total;
currentPage = result.extend.pageInfo.pageNum;
}
//解析显示分页条,点击分页要能去下一页....
function build_page_nav(result){
//page_nav_area
$("#page_nav_area").empty();
var ul = $("<ul></ul>").addClass("pagination");
//构建元素
var firstPageLi = $("<li></li>").append($("<a></a>").append("首页").attr("href","#"));
var prePageLi = $("<li></li>").append($("<a></a>").append("«"));
if(result.extend.pageInfo.hasPreviousPage == false){
firstPageLi.addClass("disabled");
prePageLi.addClass("disabled");
}else{
//为元素添加点击翻页的事件
firstPageLi.click(function(){
to_page(1);
});
prePageLi.click(function(){
to_page(result.extend.pageInfo.pageNum -1);
});
}
var nextPageLi = $("<li></li>").append($("<a></a>").append("»"));
var lastPageLi = $("<li></li>").append($("<a></a>").append("末页").attr("href","#"));
if(result.extend.pageInfo.hasNextPage == false){
nextPageLi.addClass("disabled");
lastPageLi.addClass("disabled");
}else{
nextPageLi.click(function(){
to_page(result.extend.pageInfo.pageNum +1);
});
lastPageLi.click(function(){
to_page(result.extend.pageInfo.pages);
});
}
//添加首页和前一页 的提示
ul.append(firstPageLi).append(prePageLi);
//1,2,3遍历给ul中添加页码提示
$.each(result.extend.pageInfo.navigatepageNums,function(index,item){
var numLi = $("<li></li>").append($("<a></a>").append(item));
if(result.extend.pageInfo.pageNum == item){
numLi.addClass("active");
}
numLi.click(function(){
to_page(item);
});
ul.append(numLi);
});
//添加下一页和末页 的提示
ul.append(nextPageLi).append(lastPageLi);
//把ul加入到nav
var navEle = $("<nav></nav>").append(ul);
navEle.appendTo("#page_nav_area");
}
//清空表单样式及内容
function reset_form(ele){
$(ele)[0].reset();
//清空表单样式
$(ele).find("*").removeClass("has-error has-success");
$(ele).find(".help-block").text("");
}
//点击新增按钮弹出模态框。
$("#emp_add_modal_btn").click(function(){
//清除表单数据(表单完整重置(表单的数据,表单的样式))
reset_form("#empAddModal form");
//s$("")[0].reset();
//发送ajax请求,查出部门信息,显示在下拉列表中
getDepts("#empAddModal select");
//弹出模态框
$("#empAddModal").modal({
backdrop:"static"
});
});
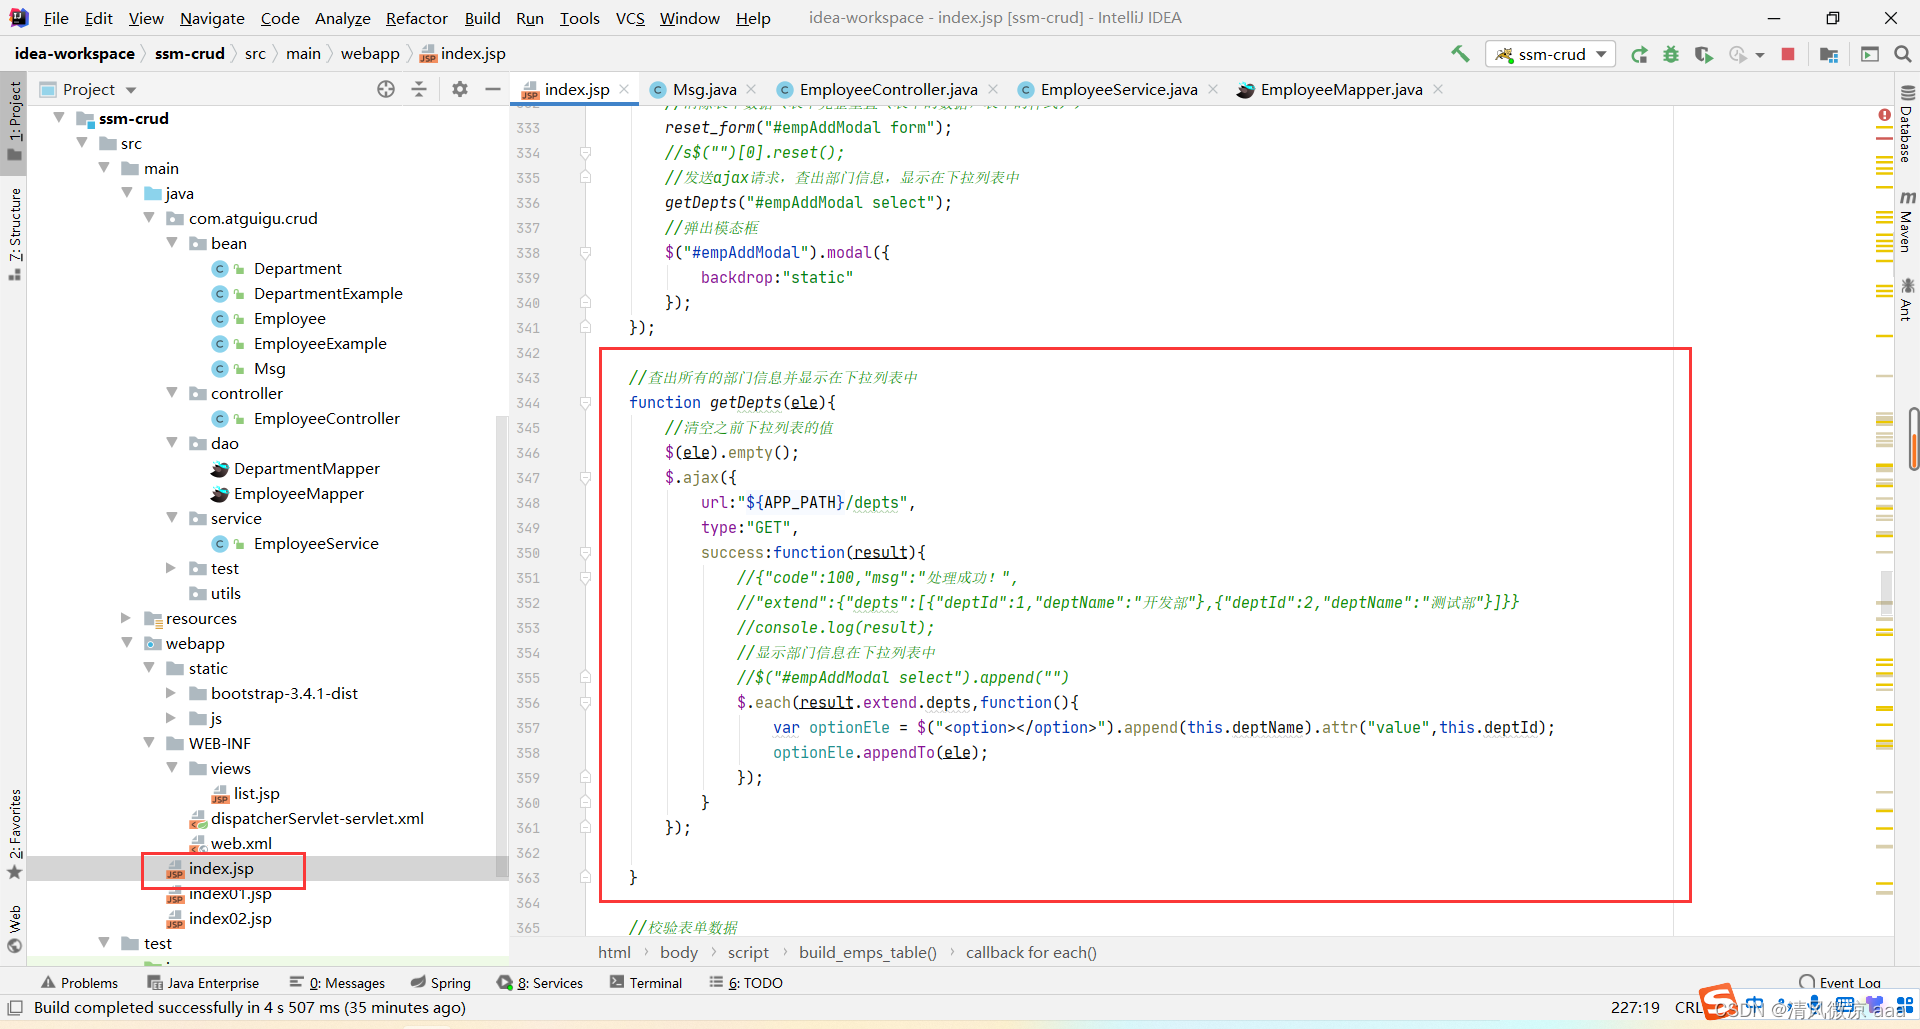
//查出所有的部门信息并显示在下拉列表中
function getDepts(ele){
//清空之前下拉列表的值
$(ele).empty();
$.ajax({
url:"${APP_PATH}/depts",
type:"GET",
success:function(result){
//{"code":100,"msg":"处理成功!",
//"extend":{"depts":[{"deptId":1,"deptName":"开发部"},{"deptId":2,"deptName":"测试部"}]}}
//console.log(result);
//显示部门信息在下拉列表中
//$("#empAddModal select").append("")
$.each(result.extend.depts,function(){
var optionEle = $("<option></option>").append(this.deptName).attr("value",this.deptId);
optionEle.appendTo(ele);
});
}
});
}
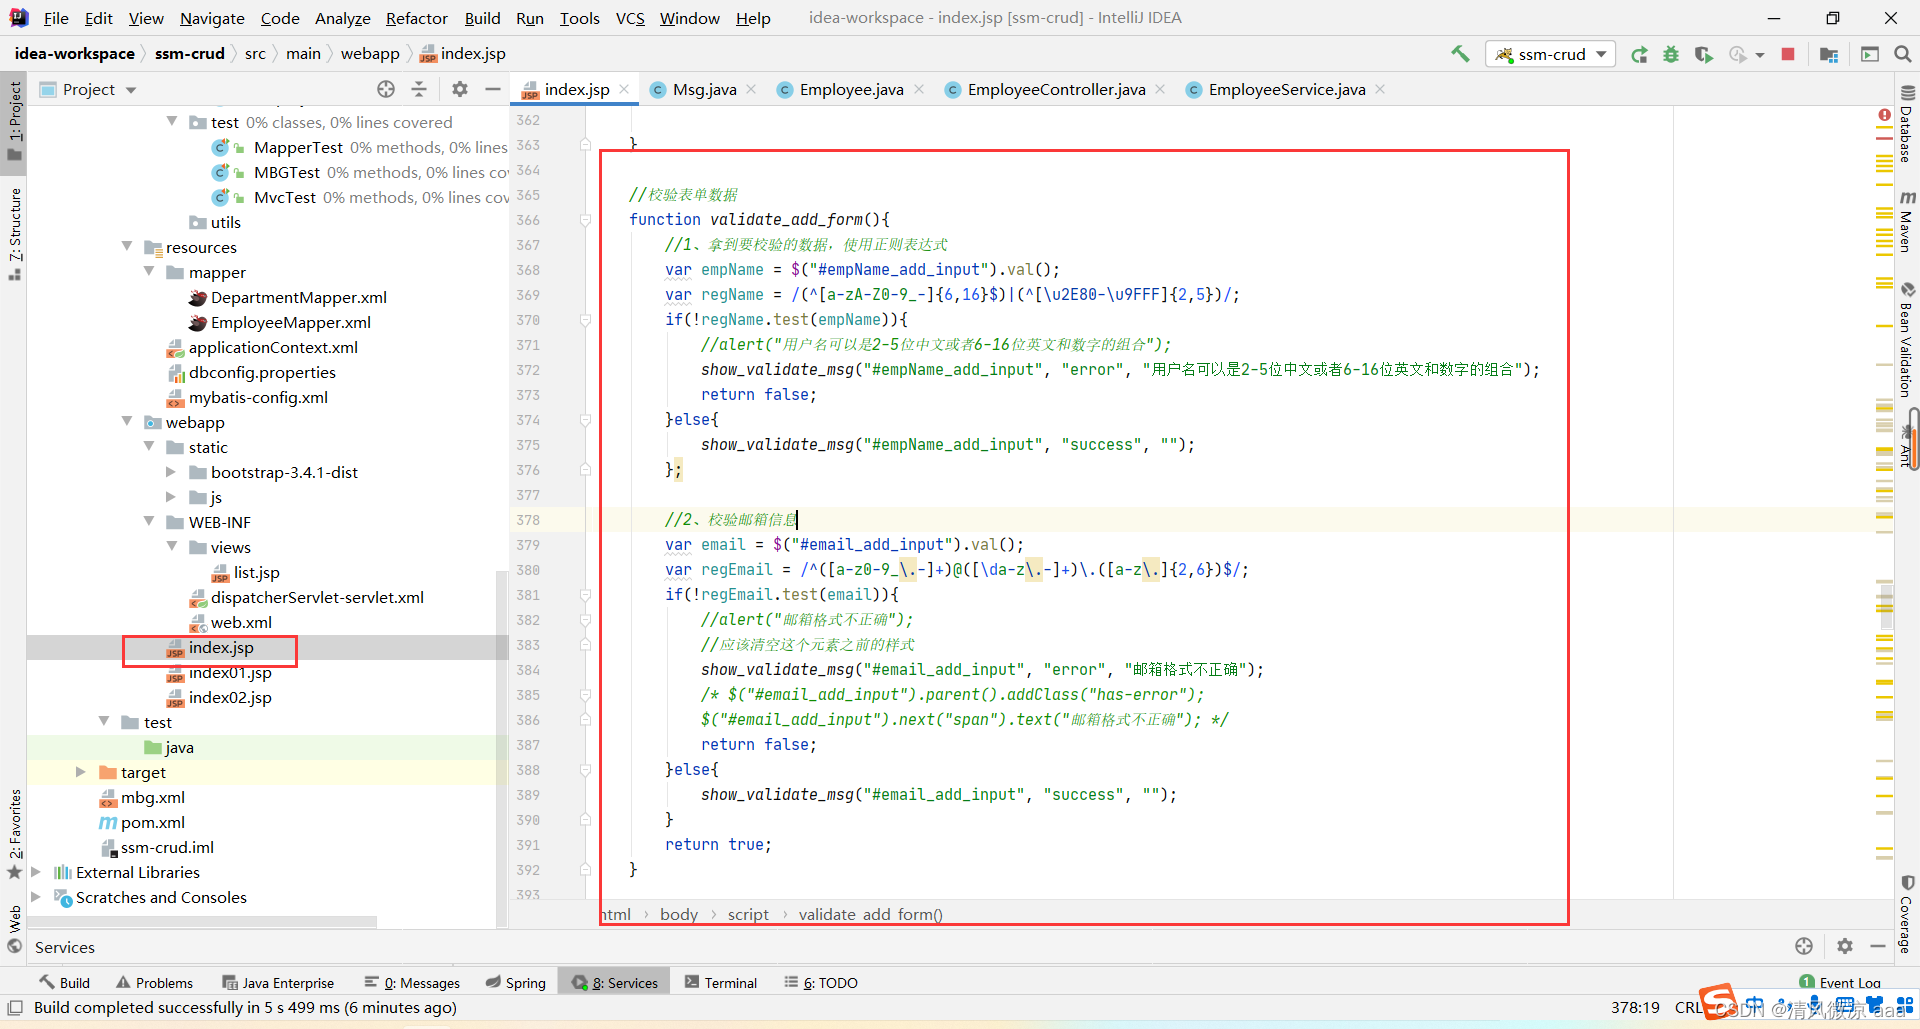
//校验表单数据
function validate_add_form(){
//1、拿到要校验的数据,使用正则表达式
var empName = $("#empName_add_input").val();
var regName = /(^[a-zA-Z0-9_-]{
6,16}$)|(^[\u2E80-\u9FFF]{
2,5})/;
if(!regName.test(empName)){
//alert("用户名可以是2-5位中文或者6-16位英文和数字的组合");
show_validate_msg("#empName_add_input", "error", "用户名可以是2-5位中文或者6-16位英文和数字的组合");
return false;
}else{
show_validate_msg("#empName_add_input", "success", "");
};
//2、校验邮箱信息
var email = $("#email_add_input").val();
var regEmail = /^([a-z0-9_\.-]+)@([\da-z\.-]+)\.([a-z\.]{
2,6})$/;
if(!regEmail.test(email)){
//alert("邮箱格式不正确");
//应该清空这个元素之前的样式
show_validate_msg("#email_add_input", "error", "邮箱格式不正确");
/* $("#email_add_input").parent().addClass("has-error");
$("#email_add_input").next("span").text("邮箱格式不正确"); */
return false;
}else{
show_validate_msg("#email_add_input", "success", "");
}
return true;
}
//显示校验结果的提示信息
function show_validate_msg(ele,status,msg){
//清除当前元素的校验状态
$(ele).parent().removeClass("has-success has-error");
$(ele).next("span").text("");
if("success"==status){
$(ele).parent().addClass("has-success");
$(ele).next("span").text(msg);
}else if("error" == status){
$(ele).parent().addClass("has-error");
$(ele).next("span").text(msg);
}
}
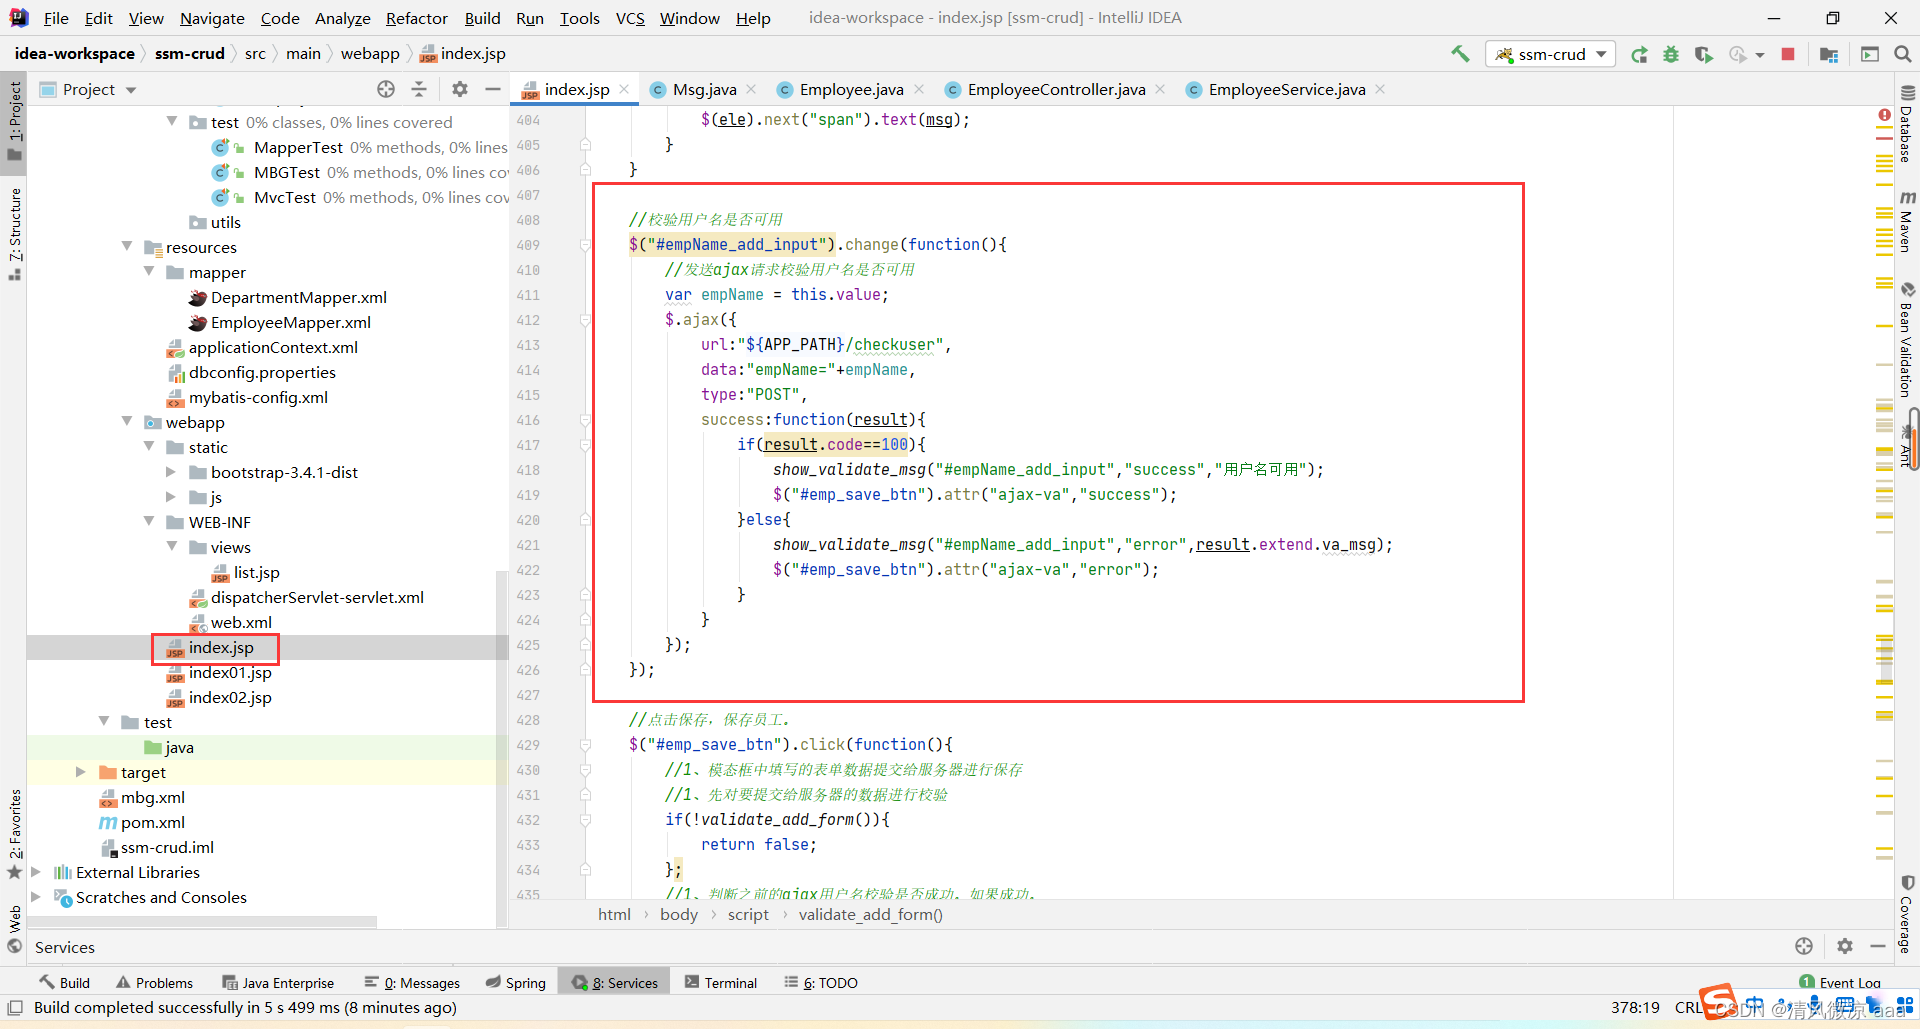
//校验用户名是否可用
$("#empName_add_input").change(function(){
//发送ajax请求校验用户名是否可用
var empName = this.value;
$.ajax({
url:"${APP_PATH}/checkuser",
data:"empName="+empName,
type:"POST",
success:function(result){
if(result.code==100){
show_validate_msg("#empName_add_input","success","用户名可用");
$("#emp_save_btn").attr("ajax-va","success");
}else{
show_validate_msg("#empName_add_input","error",result.extend.va_msg);
$("#emp_save_btn").attr("ajax-va","error");
}
}
});
});
//点击保存,保存员工。
$("#emp_save_btn").click(function(){
//1、模态框中填写的表单数据提交给服务器进行保存
//1、先对要提交给服务器的数据进行校验
if(!validate_add_form()){
return false;
};
//1、判断之前的ajax用户名校验是否成功。如果成功。
if($(this).attr("ajax-va")=="error"){
return false;
}
//2、发送ajax请求保存员工
$.ajax({
url:"${APP_PATH}/emp",
type:"POST",
data:$("#empAddModal form").serialize(),
success:function(result){
//alert(result.msg);
if(result.code == 100){
//员工保存成功;
//1、关闭模态框
$("#empAddModal").modal('hide');
//2、来到最后一页,显示刚才保存的数据
//发送ajax请求显示最后一页数据即可
to_page(totalRecord);
}else{
//显示失败信息
//console.log(result);
//有哪个字段的错误信息就显示哪个字段的;
if(undefined != result.extend.errorFields.email){
//显示邮箱错误信息
show_validate_msg("#email_add_input", "error", result.extend.errorFields.email);
}
if(undefined != result.extend.errorFields.empName){
//显示员工名字的错误信息
show_validate_msg("#empName_add_input", "error", result.extend.errorFields.empName);
}
}
}
});
});
//1、我们是按钮创建之前就绑定了click,所以绑定不上。
//1)、可以在创建按钮的时候绑定。 2)、绑定点击.live()
//jquery新版没有live,使用on进行替代
$(document).on("click",".edit_btn",function(){
//alert("edit");
//1、查出部门信息,并显示部门列表
getDepts("#empUpdateModal select");
//2、查出员工信息,显示员工信息
getEmp($(this).attr("edit-id"));
//3、把员工的id传递给模态框的更新按钮
$("#emp_update_btn").attr("edit-id",$(this).attr("edit-id"));
$("#empUpdateModal").modal({
backdrop:"static"
});
});
function getEmp(id){
$.ajax({
url:"${APP_PATH}/emp/"+id,
type:"GET",
success:function(result){
//console.log(result);
var empData = result.extend.emp;
$("#empName_update_static").text(empData.empName);
$("#email_update_input").val(empData.email);
$("#empUpdateModal input[name=gender]").val([empData.gender]);
$("#empUpdateModal select").val([empData.dId]);
}
});
}
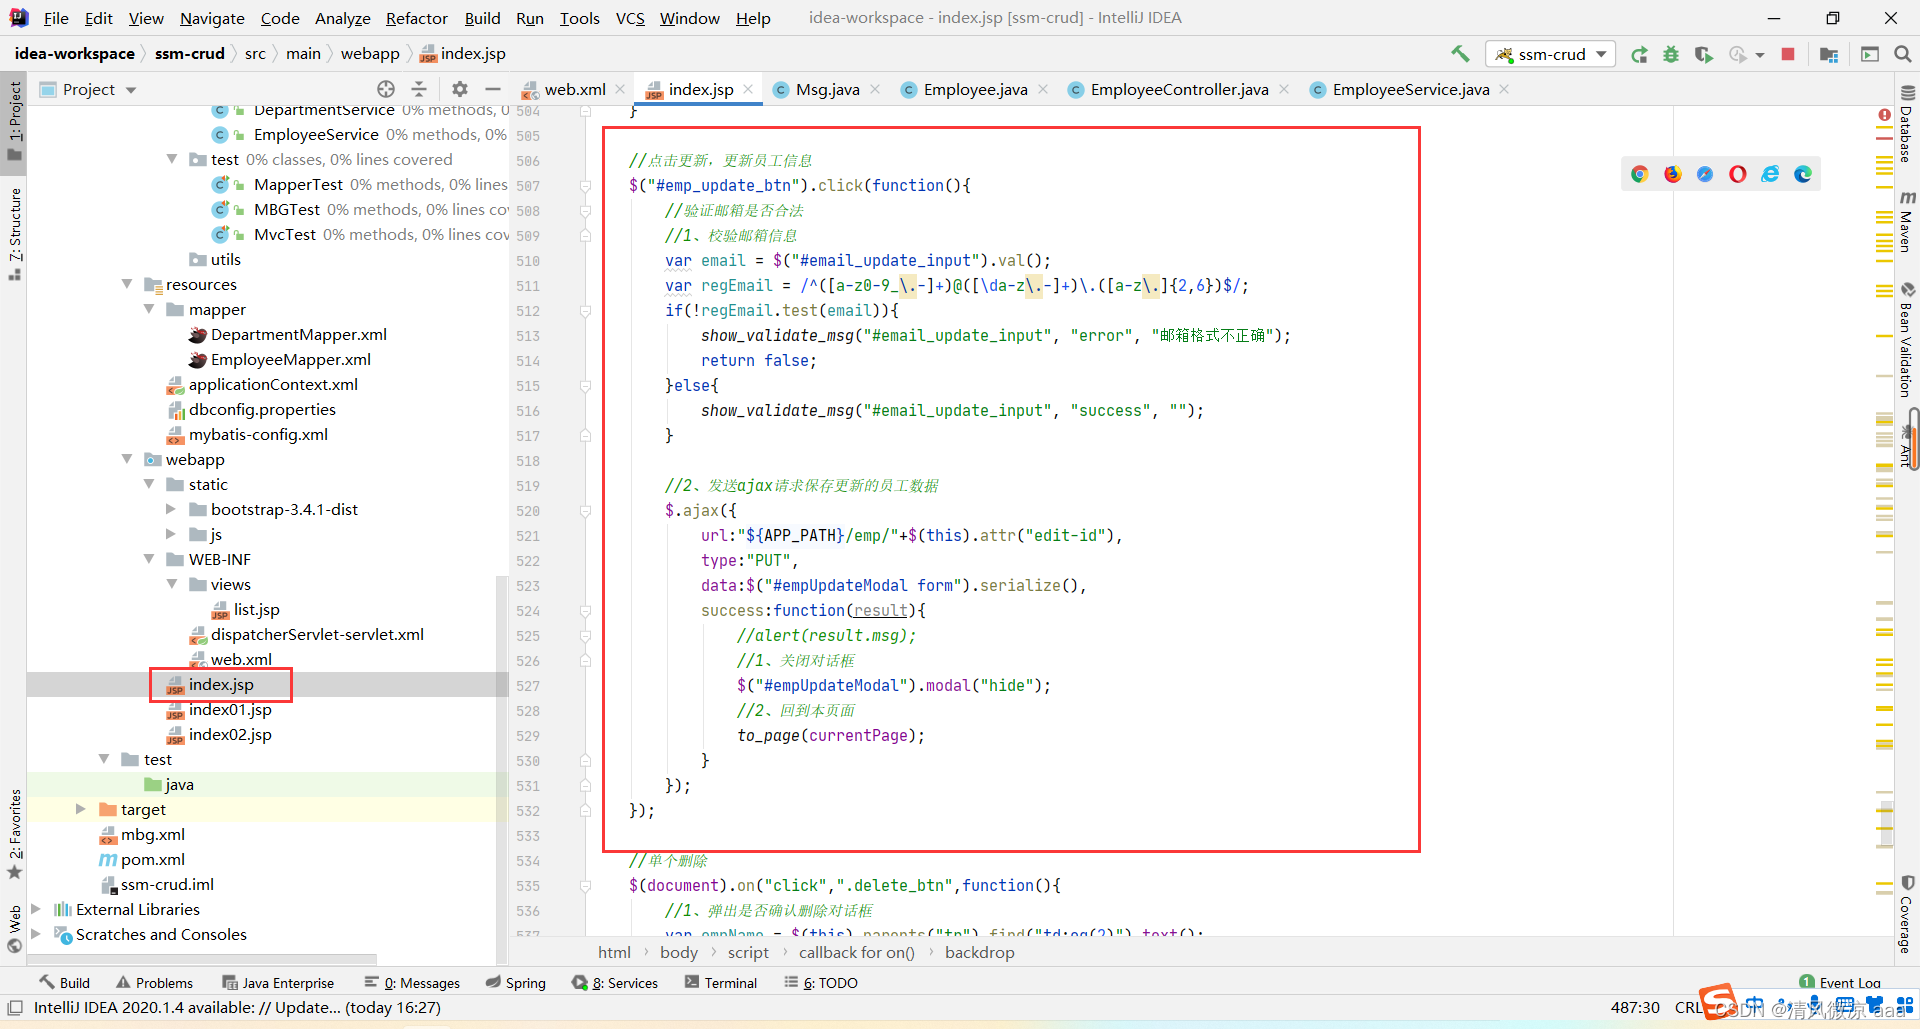
//点击更新,更新员工信息
$("#emp_update_btn").click(function(){
//验证邮箱是否合法
//1、校验邮箱信息
var email = $("#email_update_input").val();
var regEmail = /^([a-z0-9_\.-]+)@([\da-z\.-]+)\.([a-z\.]{
2,6})$/;
if(!regEmail.test(email)){
show_validate_msg("#email_update_input", "error", "邮箱格式不正确");
return false;
}else{
show_validate_msg("#email_update_input", "success", "");
}
//2、发送ajax请求保存更新的员工数据
$.ajax({
url:"${APP_PATH}/emp/"+$(this).attr("edit-id"),
type:"PUT",
data:$("#empUpdateModal form").serialize(),
success:function(result){
//alert(result.msg);
//1、关闭对话框
$("#empUpdateModal").modal("hide");
//2、回到本页面
to_page(currentPage);
}
});
});
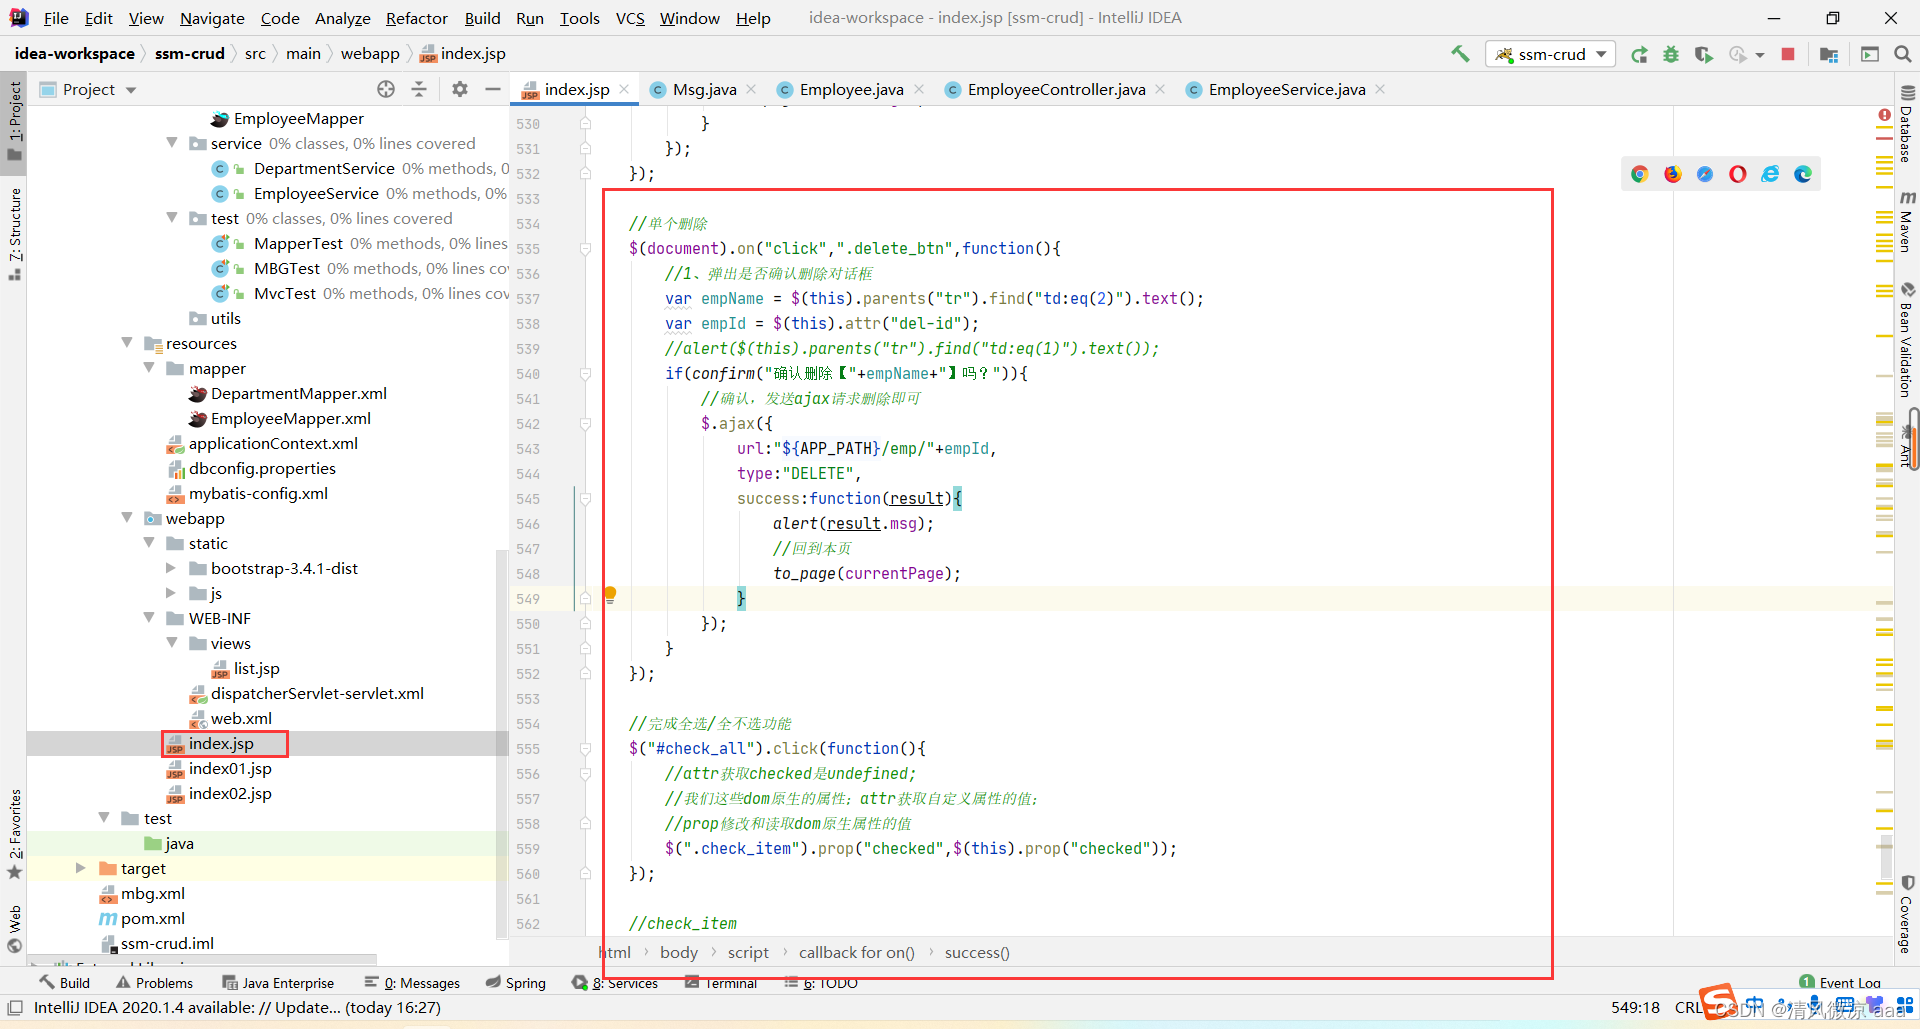
//单个删除
$(document).on("click",".delete_btn",function(){
//1、弹出是否确认删除对话框
var empName = $(this).parents("tr").find("td:eq(2)").text();
var empId = $(this).attr("del-id");
//alert($(this).parents("tr").find("td:eq(1)").text());
if(confirm("确认删除【"+empName+"】吗?")){
//确认,发送ajax请求删除即可
$.ajax({
url:"${APP_PATH}/emp/"+empId,
type:"DELETE",
success:function(result){
alert(result.msg);
//回到本页
to_page(currentPage);
}
});
}
});
//完成全选/全不选功能
$("#check_all").click(function(){
//attr获取checked是undefined;
//我们这些dom原生的属性;attr获取自定义属性的值;
//prop修改和读取dom原生属性的值
$(".check_item").prop("checked",$(this).prop("checked"));
});
//check_item
$(document).on("click",".check_item",function(){
//判断当前选择中的元素是否5个
var flag = $(".check_item:checked").length==$(".check_item").length;
$("#check_all").prop("checked",flag);
});
//点击全部删除,就批量删除
$("#emp_delete_all_btn").click(function(){
//
var empNames = "";
var del_idstr = "";
$.each($(".check_item:checked"),function(){
//this
empNames += $(this).parents("tr").find("td:eq(2)").text()+",";
//组装员工id字符串
del_idstr += $(this).parents("tr").find("td:eq(1)").text()+"-";
});
//去除empNames多余的,
empNames = empNames.substring(0, empNames.length-1);
//去除删除的id多余的-
del_idstr = del_idstr.substring(0, del_idstr.length-1);
if(confirm("确认删除【"+empNames+"】吗?")){
//发送ajax请求删除
$.ajax({
url:"${APP_PATH}/emp/"+del_idstr,
type:"DELETE",
success:function(result){
alert(result.msg);
//回到当前页面
to_page(currentPage);
}
});
}
});
</script>
</body>
</html>
5、新增
5.1、业务逻辑
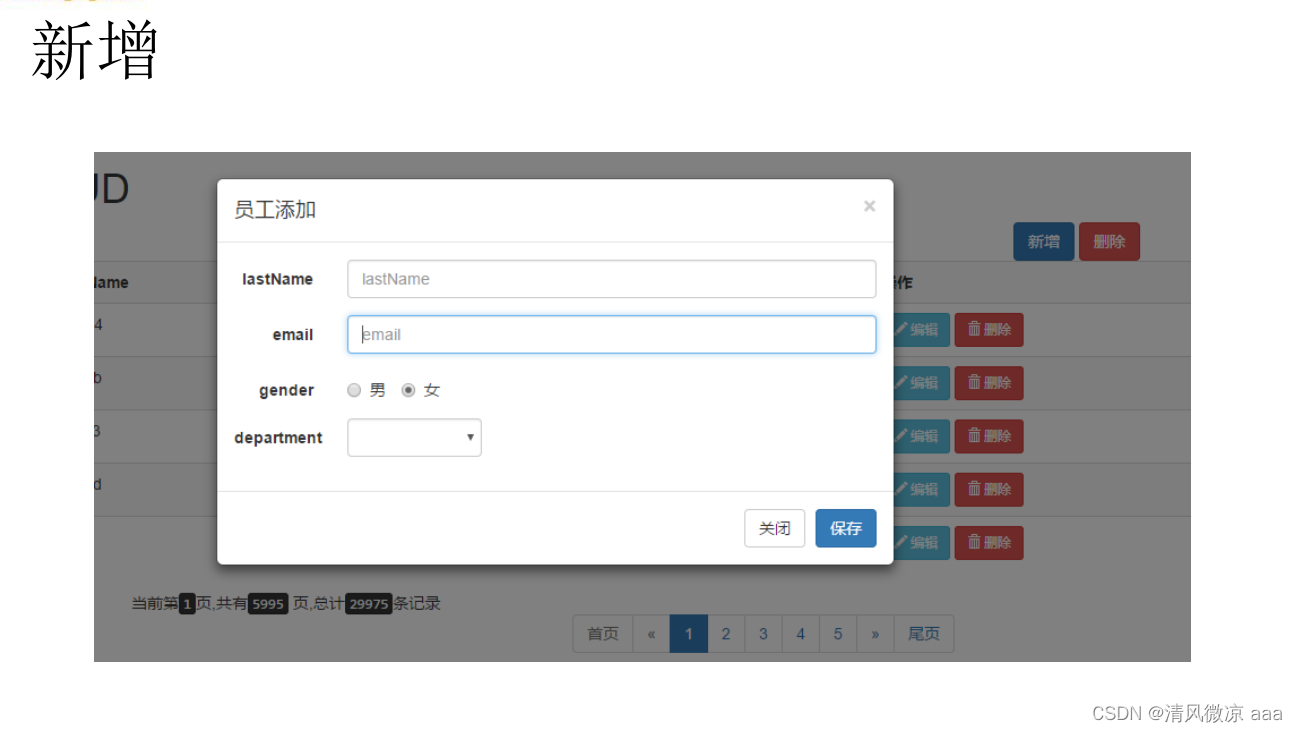

5.2、员工新增的模态框

5.3、Ajax显示部门信息
5.3.1、js代码
5.3.2、查询部门信息的控制层
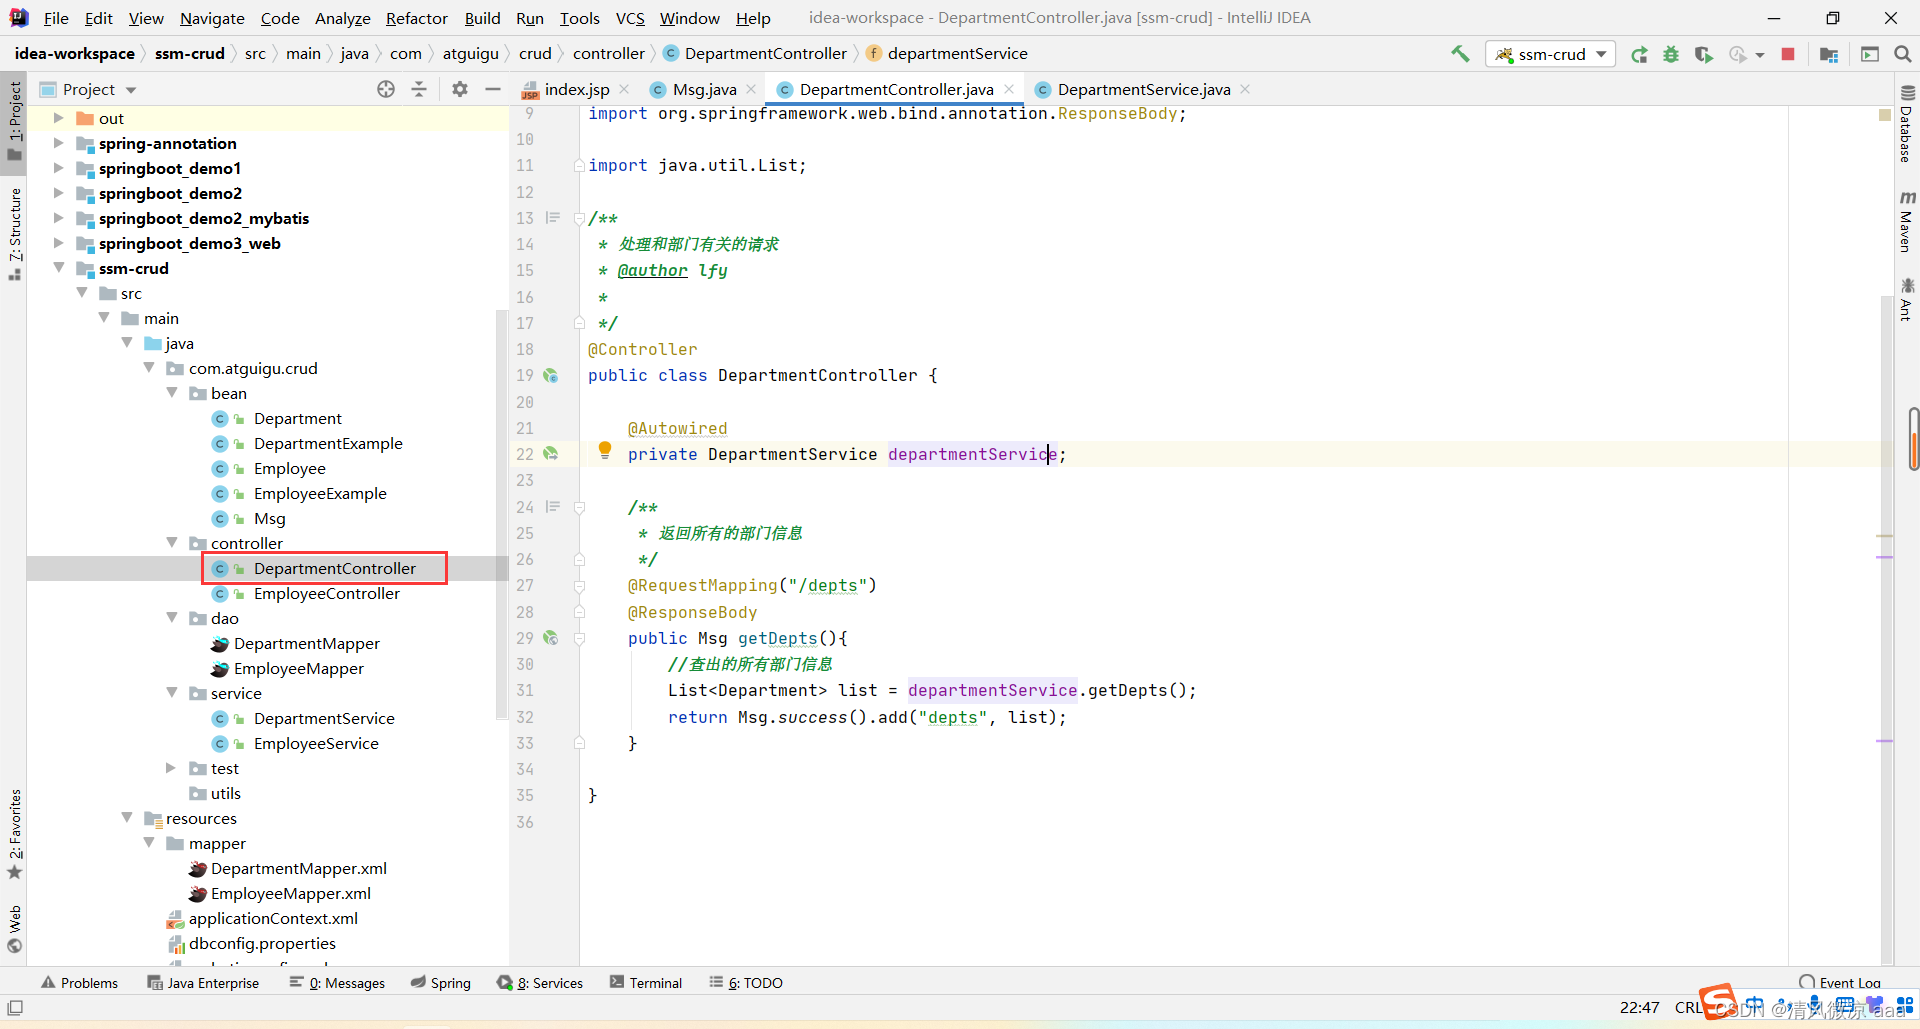
package com.atguigu.crud.controller;

import com.atguigu.crud.bean.Department;
import com.atguigu.crud.bean.Msg;
import com.atguigu.crud.service.DepartmentService;
import org.springframework.beans.factory.annotation.Autowired;
import org.springframework.stereotype.Controller;
import org.springframework.web.bind.annotation.RequestMapping;
import org.springframework.web.bind.annotation.ResponseBody;

import java.util.List;

/**
 * 处理和部门有关的请求
 * @author lfy
 *
 */
@Controller
public class DepartmentController {


    @Autowired
    private DepartmentService departmentService;

    /**
     * 返回所有的部门信息
     */
    @RequestMapping("/depts")
    @ResponseBody
    public Msg getDepts(){


        //查出的所有部门信息
        List<Department> list = departmentService.getDepts();
        return Msg.success().add("depts", list);
    }

}
5.3.3、查询部门信息的业务层
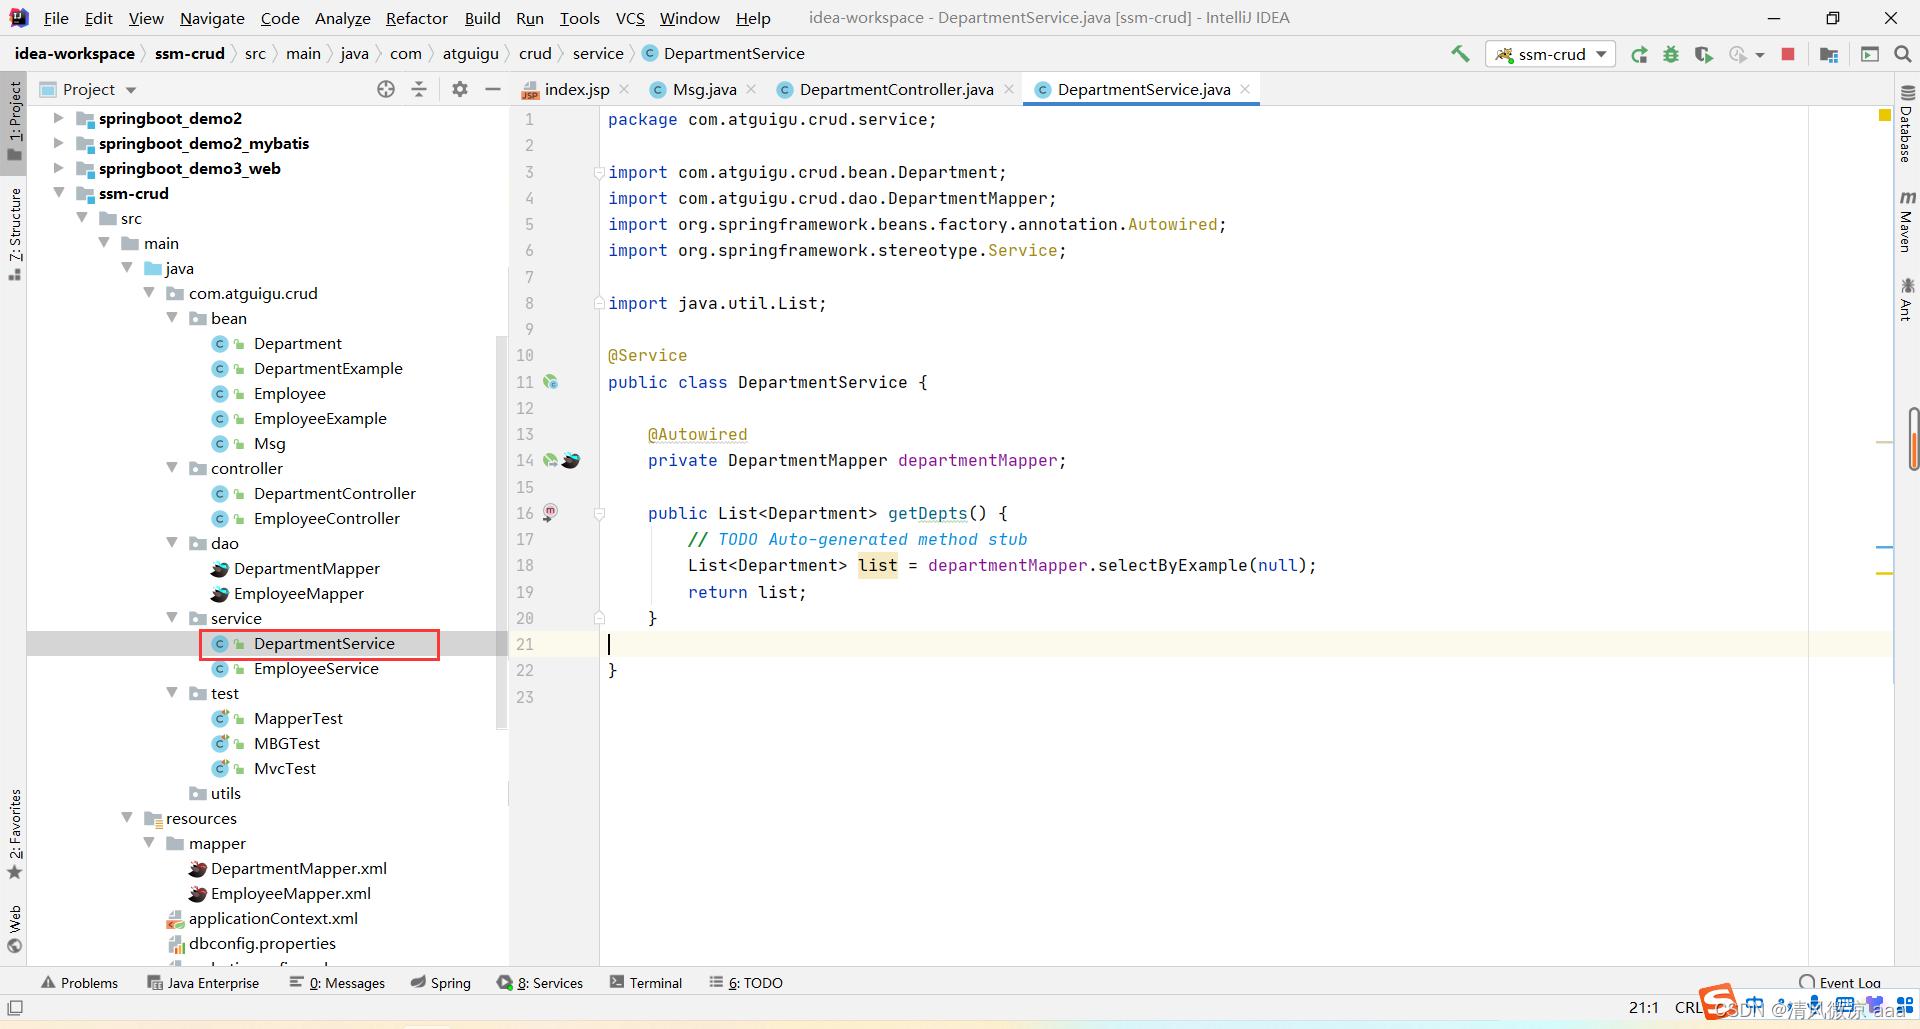
package com.atguigu.crud.service;

import com.atguigu.crud.bean.Department;
import com.atguigu.crud.dao.DepartmentMapper;
import org.springframework.beans.factory.annotation.Autowired;
import org.springframework.stereotype.Service;

import java.util.List;

@Service
public class DepartmentService {


    @Autowired
    private DepartmentMapper departmentMapper;

    public List<Department> getDepts() {


        // TODO Auto-generated method stub
        List<Department> list = departmentMapper.selectByExample(null);
        return list;
    }

}
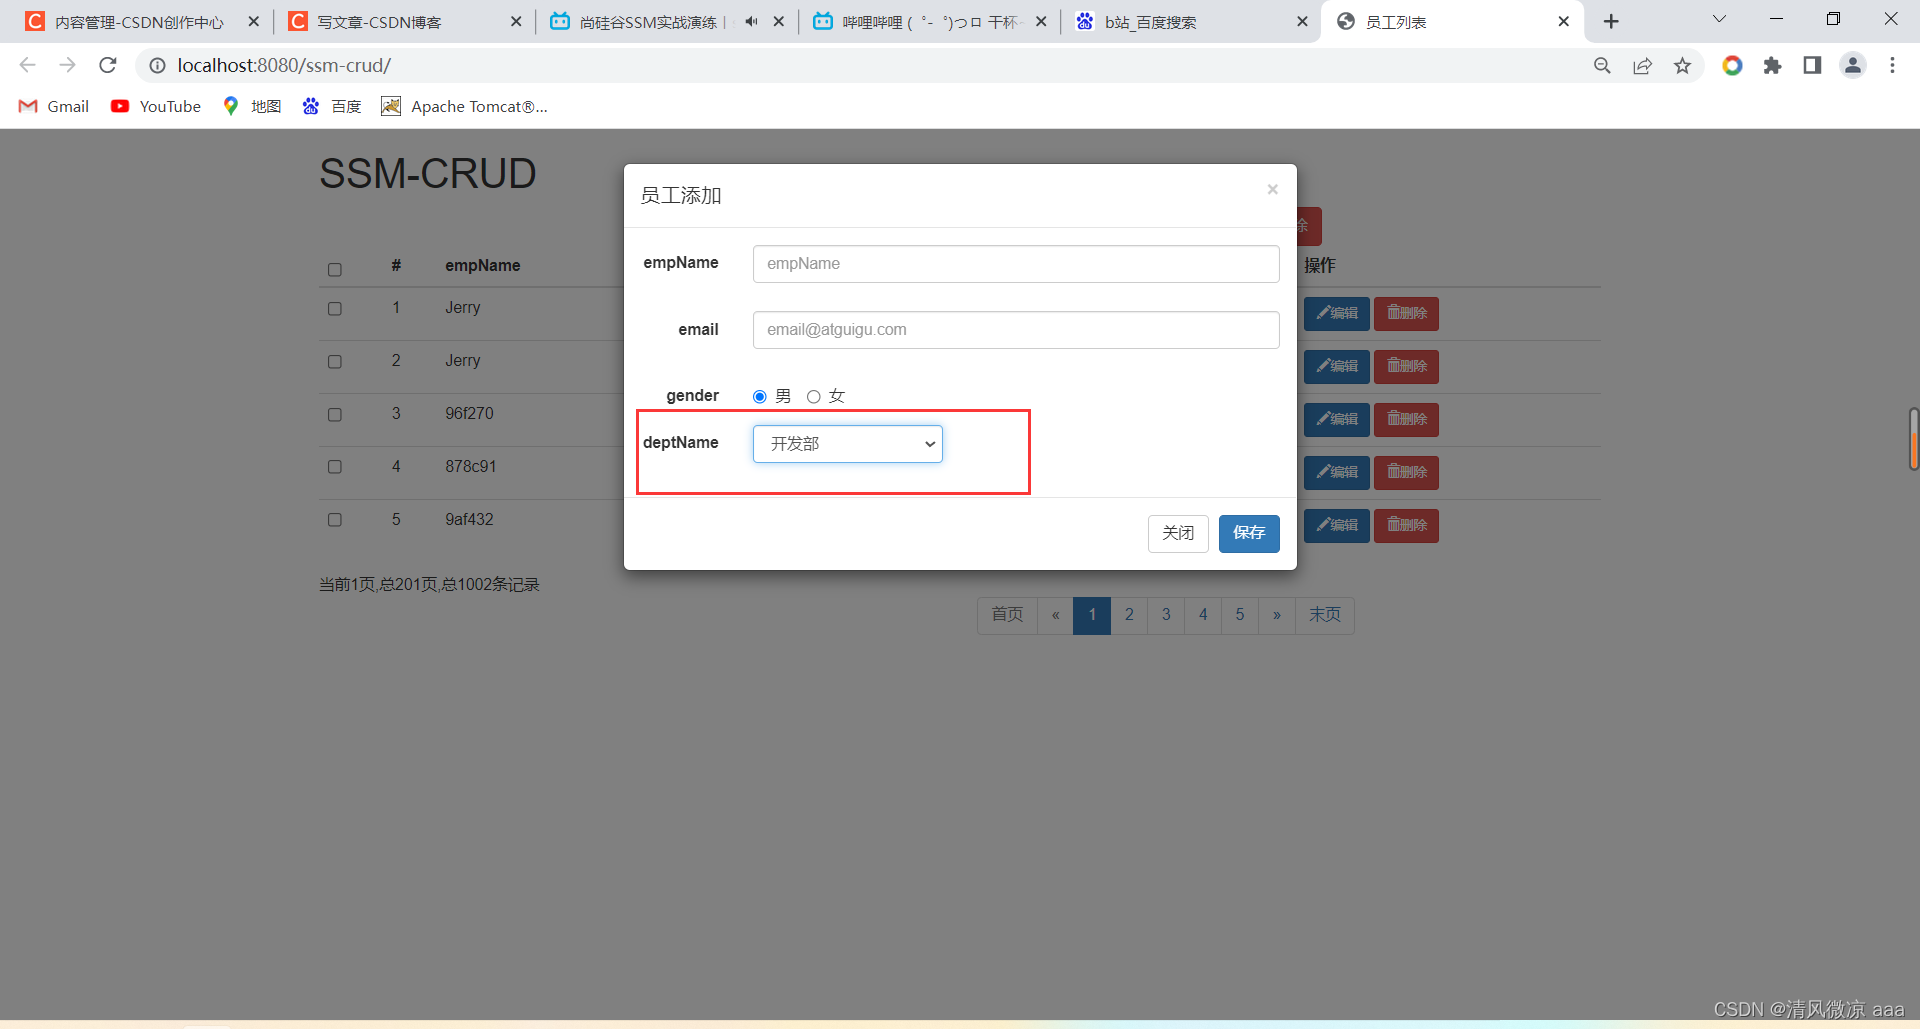
5.3.4、效果
5.4、保存新增的数据
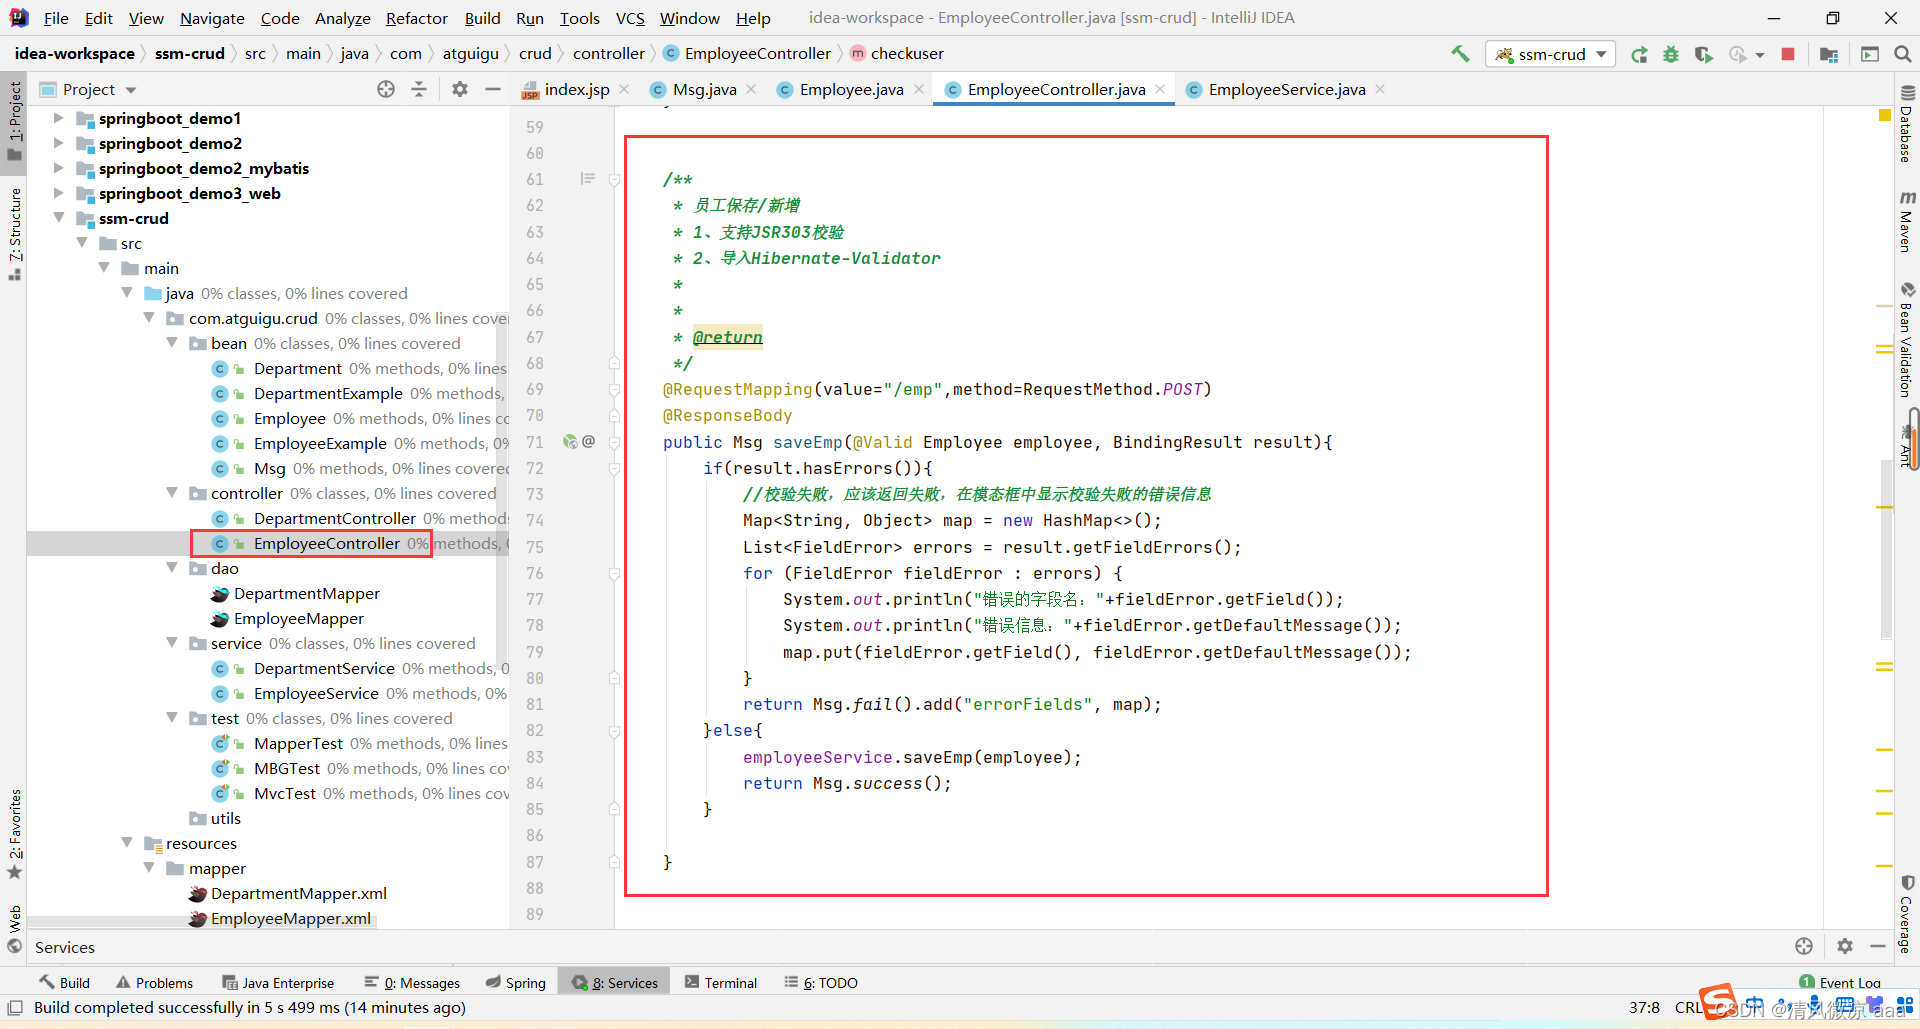
5.4.1、控制层方法
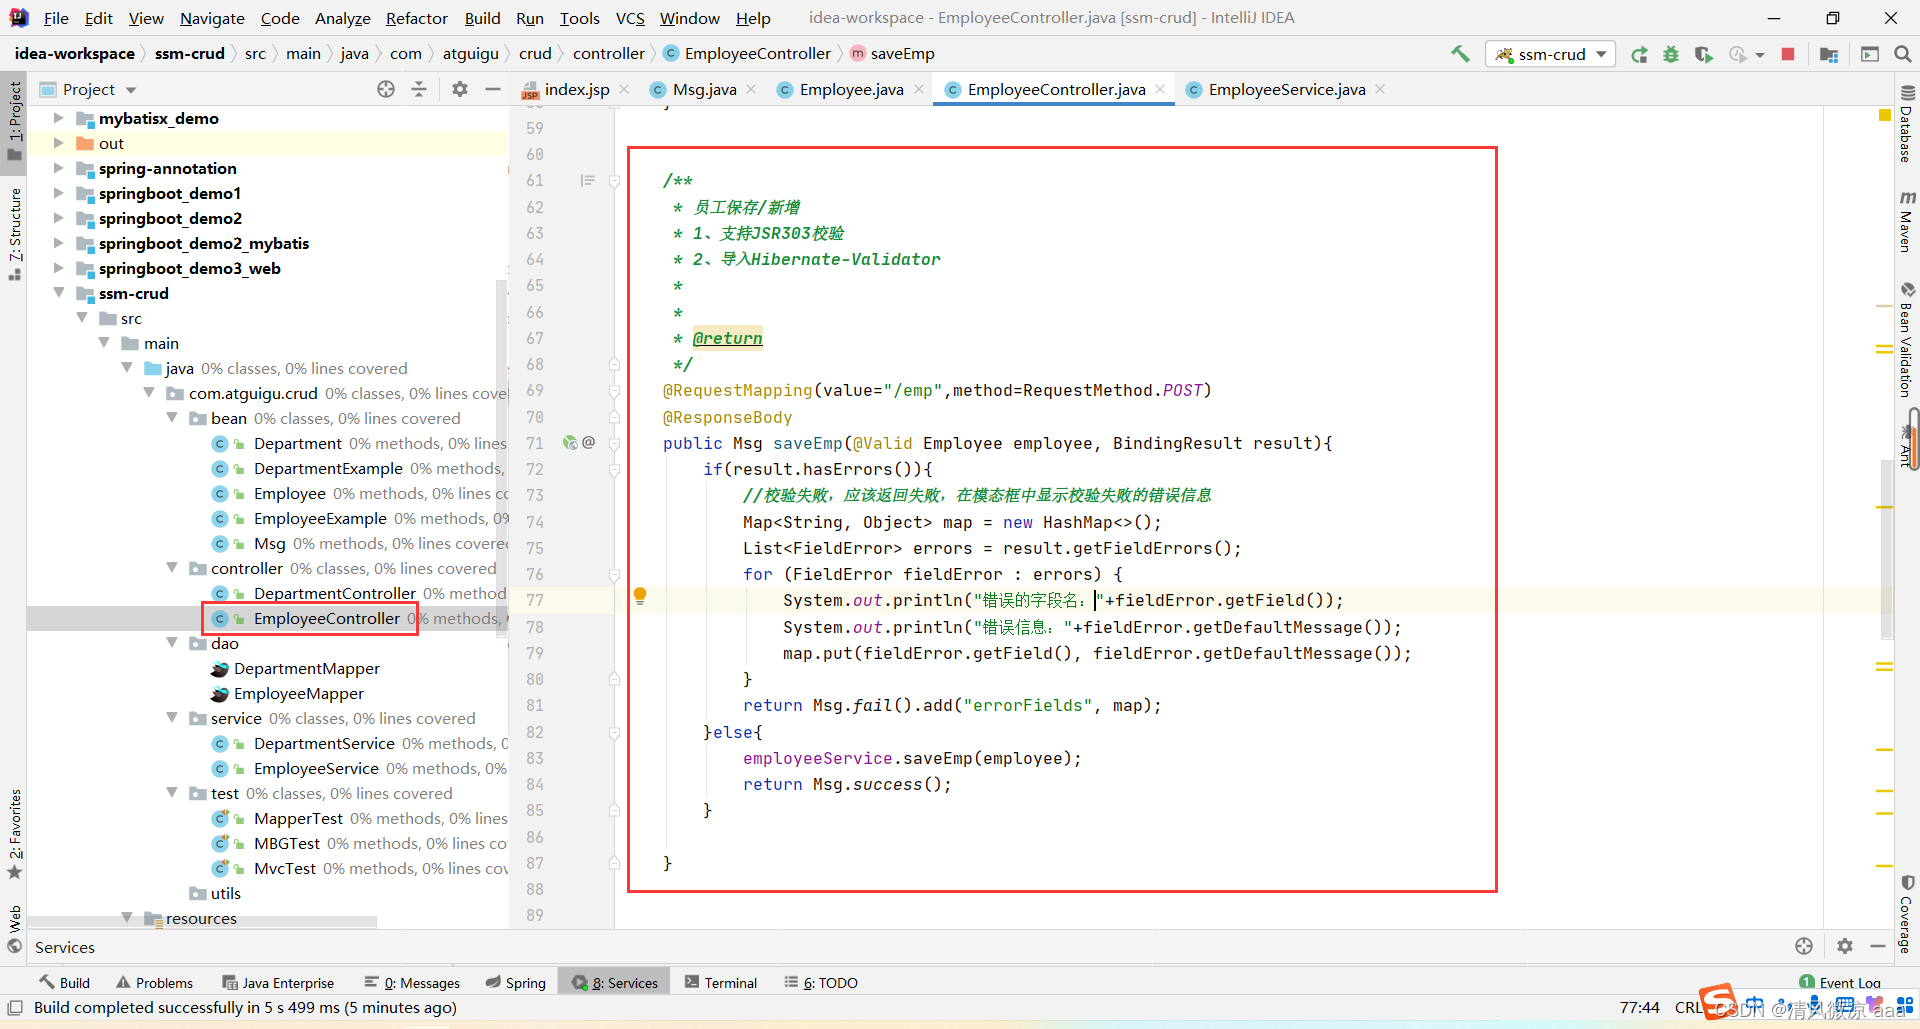
 /**
     * 员工保存/新增
     * 1、支持JSR303校验
     * 2、导入Hibernate-Validator
     *
     *
     * @return
     */
    @RequestMapping(value="/emp",method=RequestMethod.POST)
    @ResponseBody
    public Msg saveEmp(@Valid Employee employee, BindingResult result){


        if(result.hasErrors()){


            //校验失败,应该返回失败,在模态框中显示校验失败的错误信息
            Map<String, Object> map = new HashMap<>();
            List<FieldError> errors = result.getFieldErrors();
            for (FieldError fieldError : errors) {


                System.out.println("错误的字段名:"+fieldError.getField());
                System.out.println("错误信息:"+fieldError.getDefaultMessage());
                map.put(fieldError.getField(), fieldError.getDefaultMessage());
            }
            return Msg.fail().add("errorFields", map);
        }else{


            employeeService.saveEmp(employee);
            return Msg.success();
        }

    }
5.4.2、业务层方法
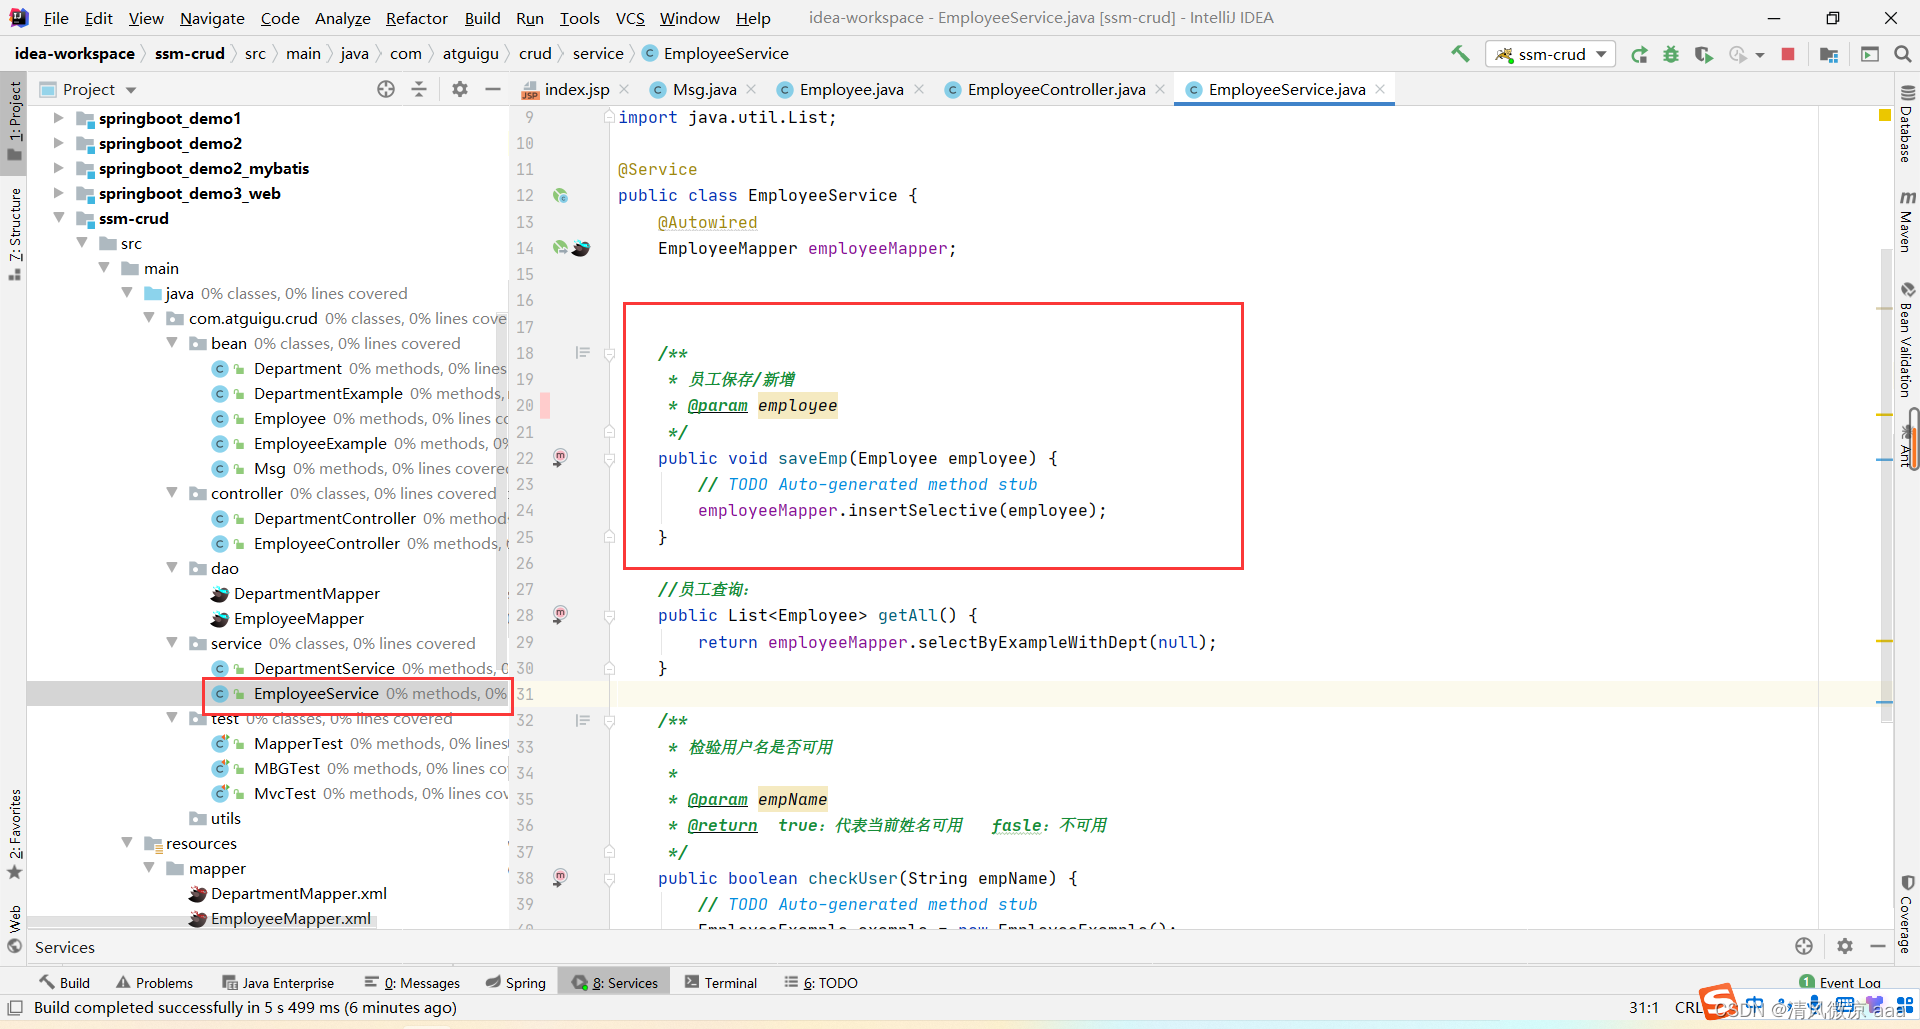
 /**
     * 员工保存/新增
     * @param employee
     */
    public void saveEmp(Employee employee) {


        // TODO Auto-generated method stub
        employeeMapper.insertSelective(employee);
    }
5.4.3、jquery前端进行校验
说明:在jquery前端进行校验用户名和邮箱的格式。
5.4.4、校验用户名是否重复:控制层方法
说明:通过前端发送请求到后台服务器,校验用户名是否重复。

 /**
     * 检查用户名是否可用
     * @param empName
     * @return
     */
    @ResponseBody
    @RequestMapping("/checkuser")
    public Msg checkuser(@RequestParam("empName")String empName){


        //先判断用户名是否是合法的表达式;
        String regx = "(^[a-zA-Z0-9_-]{6,16}$)|(^[\u2E80-\u9FFF]{2,5})";
        if(!empName.matches(regx)){


            return Msg.fail().add("va_msg", "用户名必须是6-16位数字和字母的组合或者2-5位中文");
        }

        //数据库用户名重复校验
        boolean b = employeeService.checkUser(empName);
        if(b){


            return Msg.success();
        }else{


            return Msg.fail().add("va_msg", "用户名不可用");
        }
    }
5.4.5、校验用户名是否重复:业务层方法
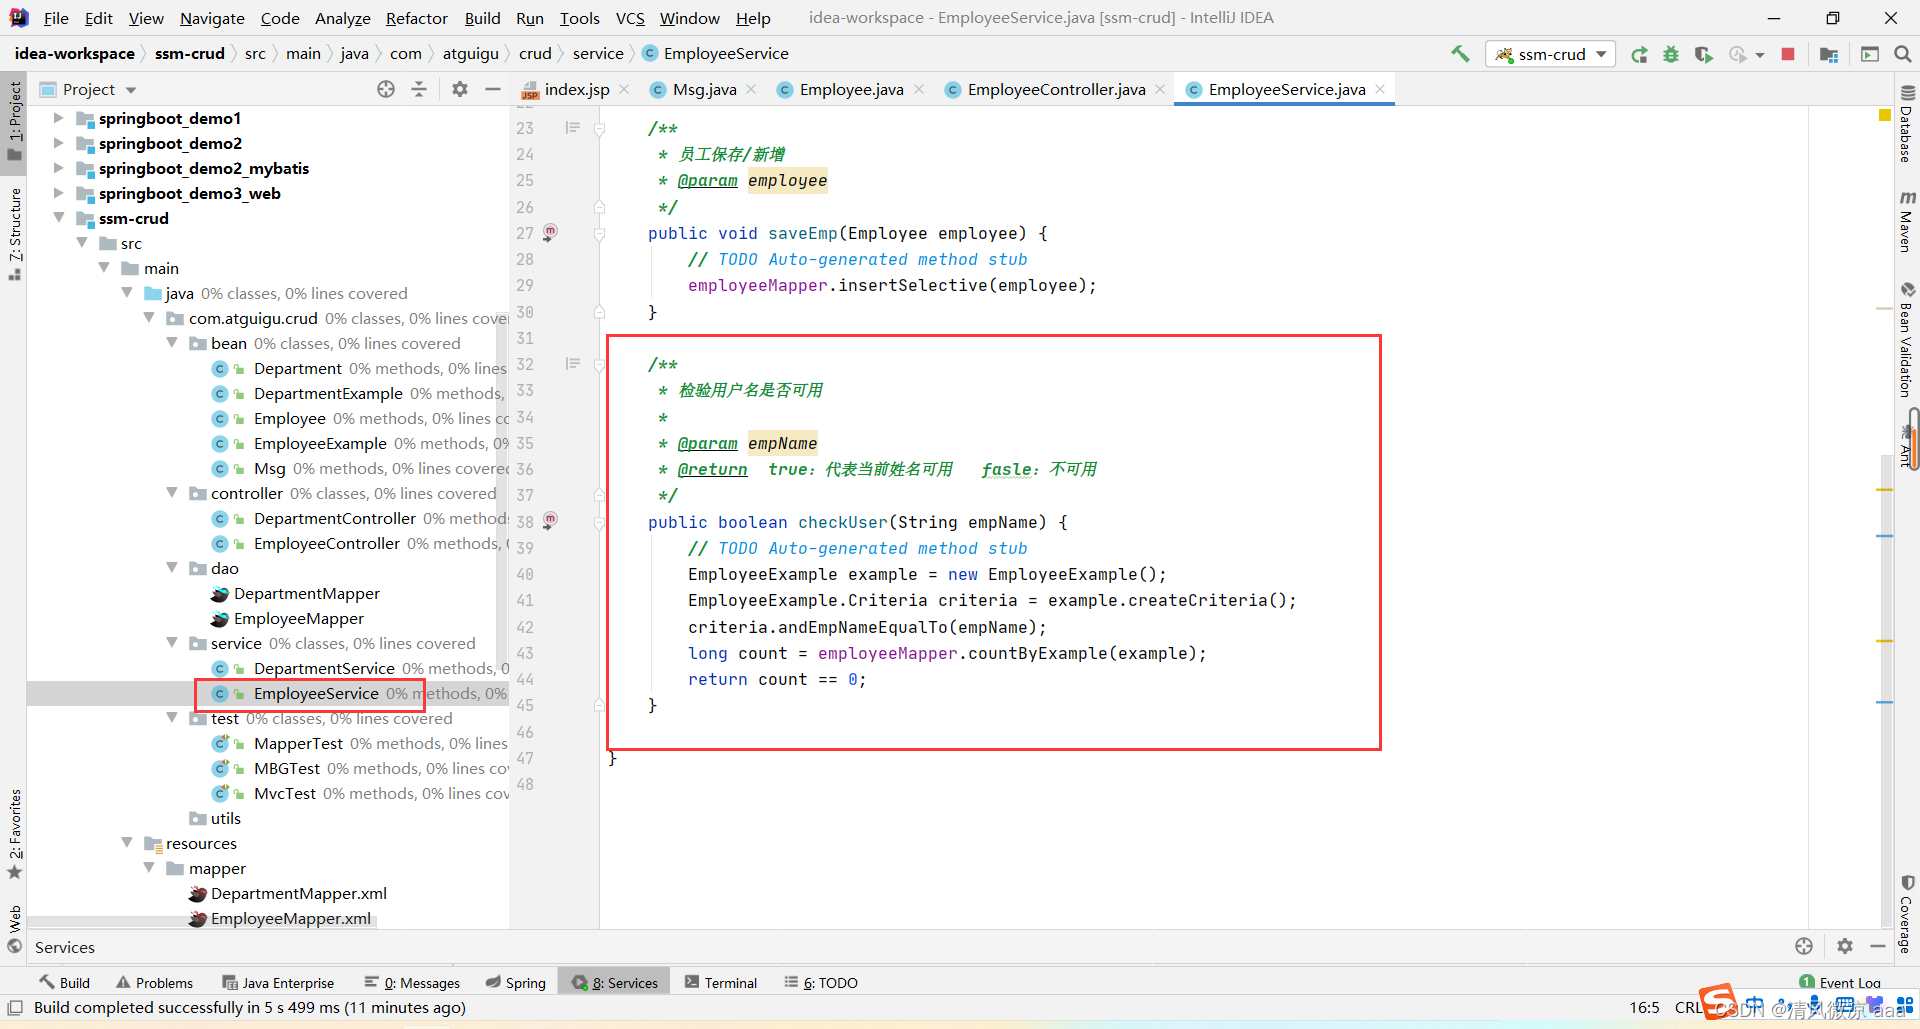
/**
     * 检验用户名是否可用
     *
     * @param empName
     * @return  true:代表当前姓名可用   fasle:不可用
     */
    public boolean checkUser(String empName) {


        // TODO Auto-generated method stub
        EmployeeExample example = new EmployeeExample();
        EmployeeExample.Criteria criteria = example.createCriteria();
        criteria.andEmpNameEqualTo(empName);
        long count = employeeMapper.countByExample(example);
        return count == 0;
    }
5.4.6、JSR303进行后端校验
说明:前端校验可以绕过,真正的校验流程,还要在后端、数据库层面都要进行校验。
导入依赖:
<!--JSR303数据校验支持;tomcat7及以上的服务器,
		tomcat7以下的服务器:el表达式。额外给服务器的lib包中替换新的标准的el
		-->
		<!-- https://mvnrepository.com/artifact/org.hibernate/hibernate-validator -->
		<dependency>
			<groupId>org.hibernate</groupId>
			<artifactId>hibernate-validator</artifactId>
			<version>5.4.1.Final</version>
		</dependency>
在实体类上定义校验规则:
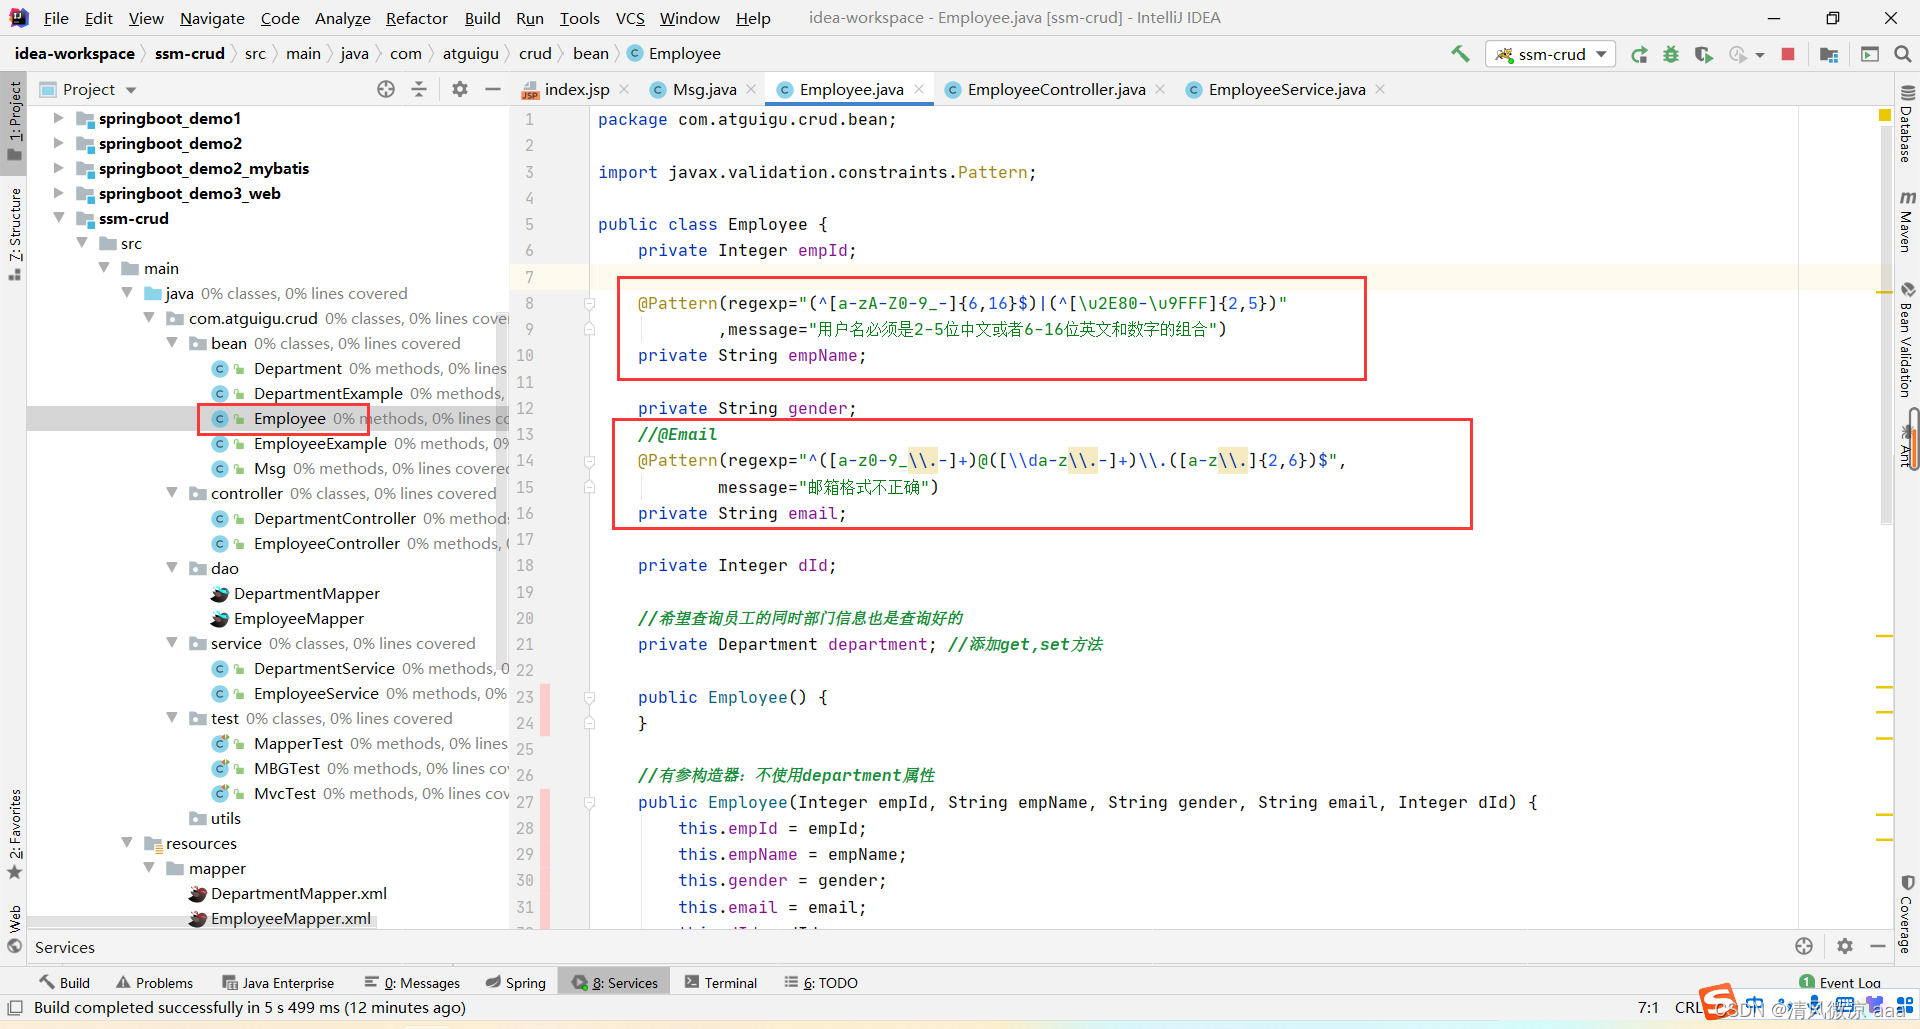
 @Pattern(regexp="(^[a-zA-Z0-9_-]{6,16}$)|(^[\u2E80-\u9FFF]{2,5})"
            ,message="用户名必须是2-5位中文或者6-16位英文和数字的组合")
    private String empName;

 //@Email
 @Pattern(regexp="^([a-z0-9_\\.-]+)@([\\da-z\\.-]+)\\.([a-z\\.]{2,6})$",
         message="邮箱格式不正确")
 private String email;
后端代码:
6、修改
6.1、业务逻辑
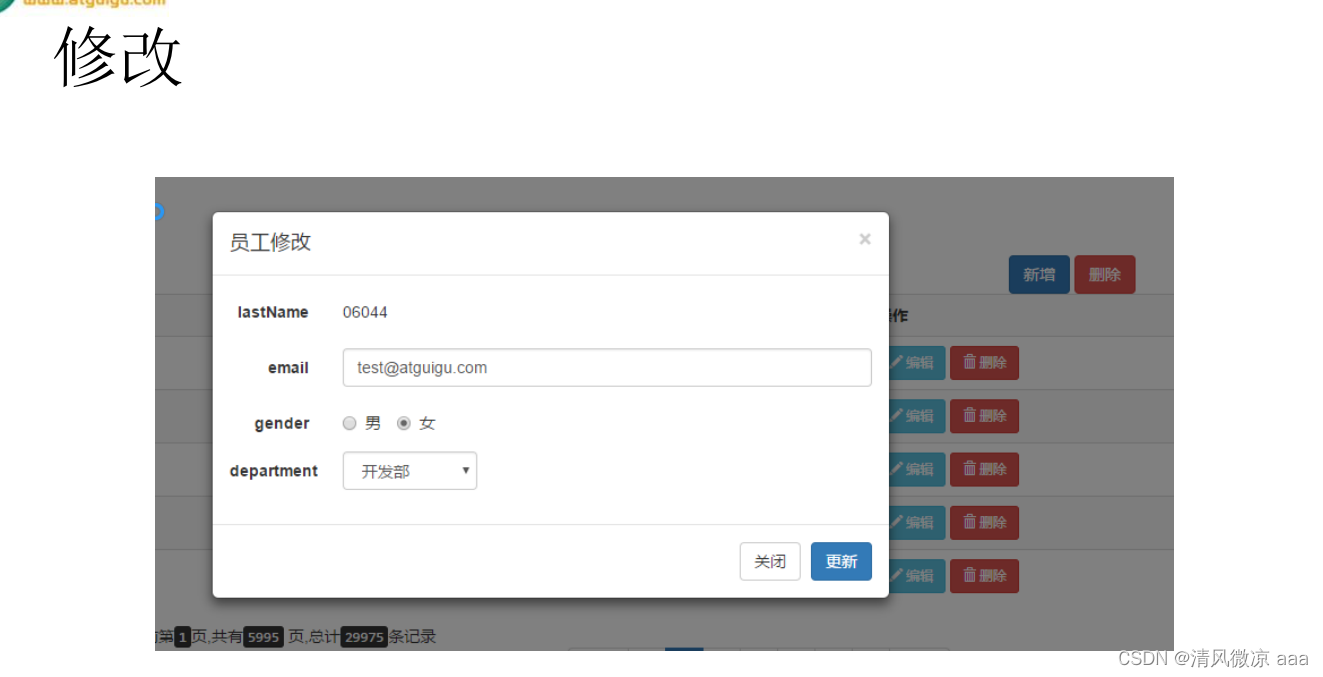

6.2、修改模态框
6.3、先根据id进行查询:js代码

6.4、先根据id进行查询:控制层

  /**
     * 根据id查询员工
     * @param id
     * @return
     */
    @RequestMapping(value="/emp/{id}",method=RequestMethod.GET)
    @ResponseBody
    public Msg getEmp(@PathVariable("id")Integer id){


        Employee employee = employeeService.getEmp(id);
        return Msg.success().add("emp", employee);
    }
6.5、先根据id进行查询:业务层
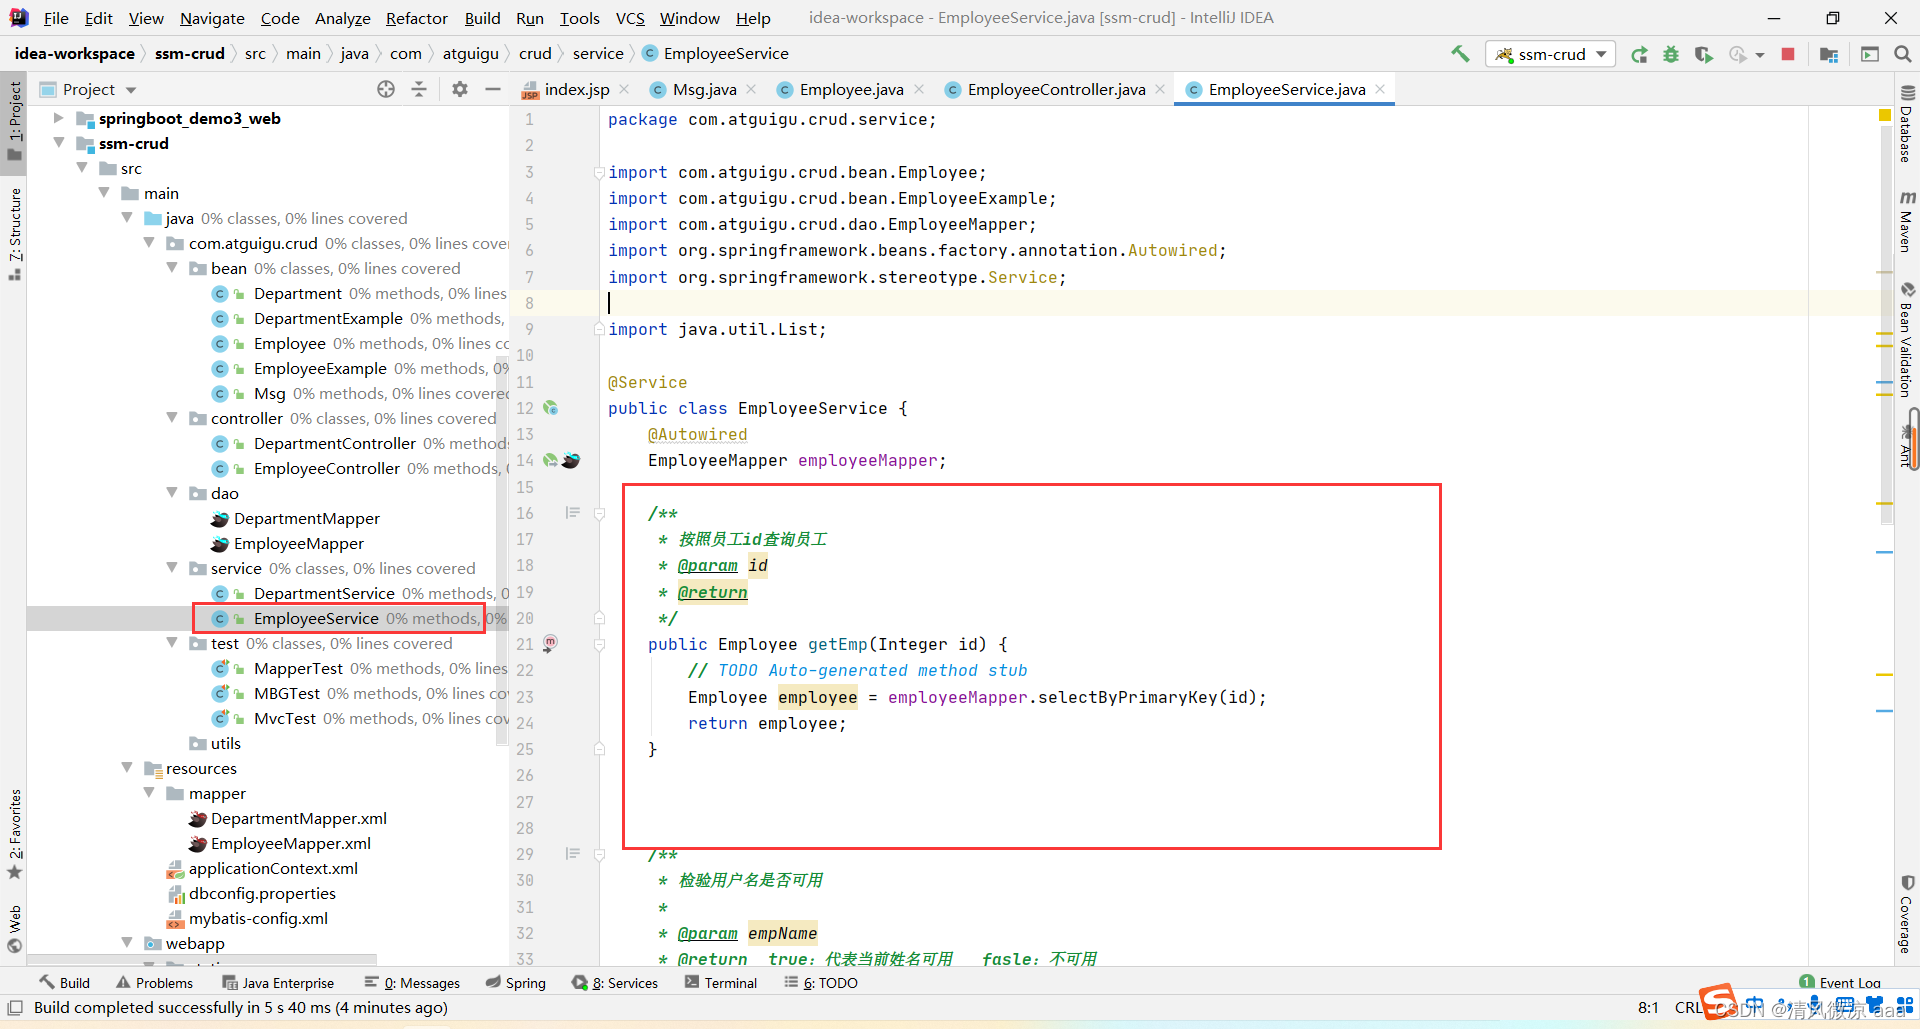
 /**
     * 按照员工id查询员工
     * @param id
     * @return
     */
    public Employee getEmp(Integer id) {


        // TODO Auto-generated method stub
        Employee employee = employeeMapper.selectByPrimaryKey(id);
        return employee;
    }
6.6、更新:Ajax发送put请求引发的血案
6.6.1、配置过滤器
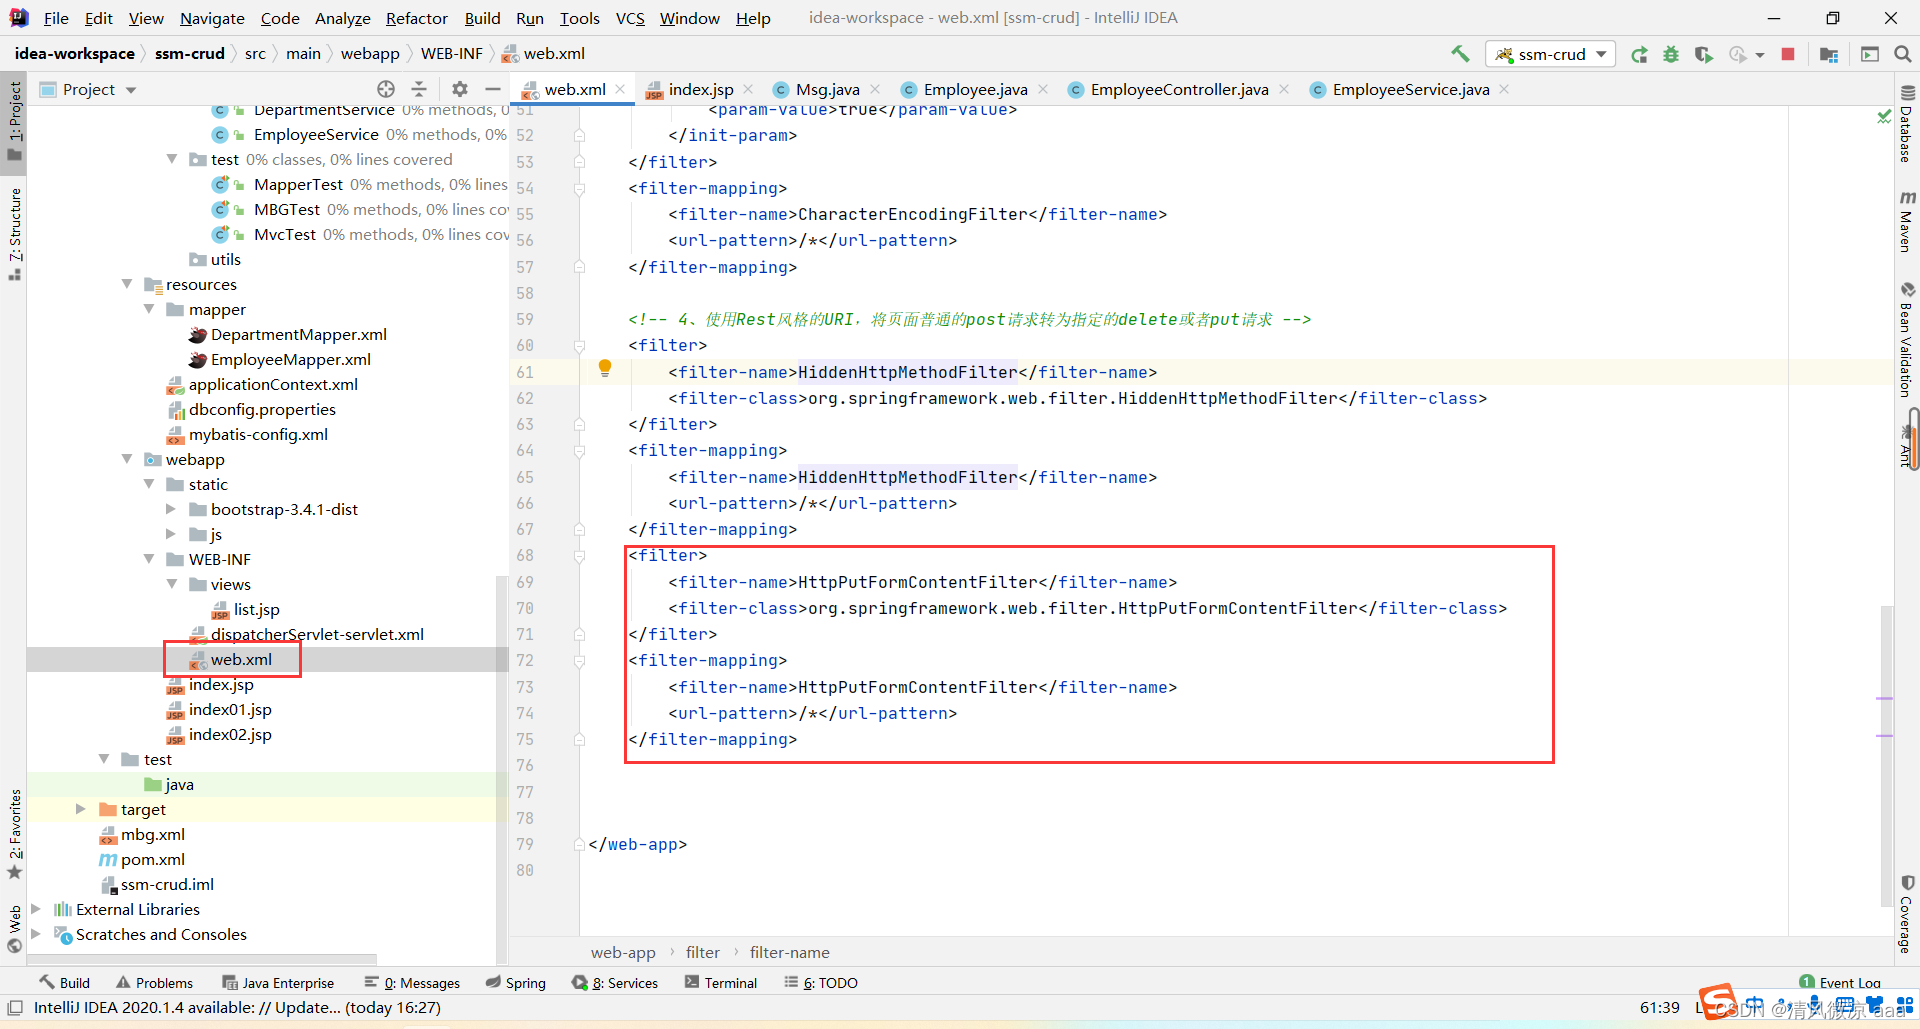
    <filter>
        <filter-name>HttpPutFormContentFilter</filter-name>
        <filter-class>org.springframework.web.filter.HttpPutFormContentFilter</filter-class>
    </filter>
    <filter-mapping>
        <filter-name>HttpPutFormContentFilter</filter-name>
        <url-pattern>/*</url-pattern>
    </filter-mapping>
6.6.2、前端代码
6.6.3、控制层
/**
* 如果直接发送ajax=PUT形式的请求
* 封装的数据
* Employee
* [empId=1014, empName=null, gender=null, email=null, dId=null]
*
* 问题:
* 请求体中有数据;
* 但是Employee对象封装不上;
* update tbl_emp where emp_id = 1014;
*
* 原因:
* Tomcat:
* 1、将请求体中的数据,封装一个map。
* 2、request.getParameter("empName")就会从这个map中取值。
* 3、SpringMVC封装POJO对象的时候。
* 会把POJO中每个属性的值,request.getParamter("email");
* AJAX发送PUT请求引发的血案:
* PUT请求,请求体中的数据,request.getParameter("empName")拿不到
* Tomcat一看是PUT不会封装请求体中的数据为map,只有POST形式的请求才封装请求体为map
* org.apache.catalina.connector.Request--parseParameters() (3111);
*
* protected String parseBodyMethods = "POST";
* if( !getConnector().isParseBodyMethod(getMethod()) ) {
success = true;
return;
}
*
*
* 解决方案;
* 我们要能支持直接发送PUT之类的请求还要封装请求体中的数据
* 1、在web.xml配置上HttpPutFormContentFilter过滤器;
* 2、它的作用;将请求体中的数据解析包装成一个map。
* 3、request被重新包装,request.getParameter()被重写,就会从自己封装的map中取数据
* 员工更新方法
* @param employee
* @return
*/
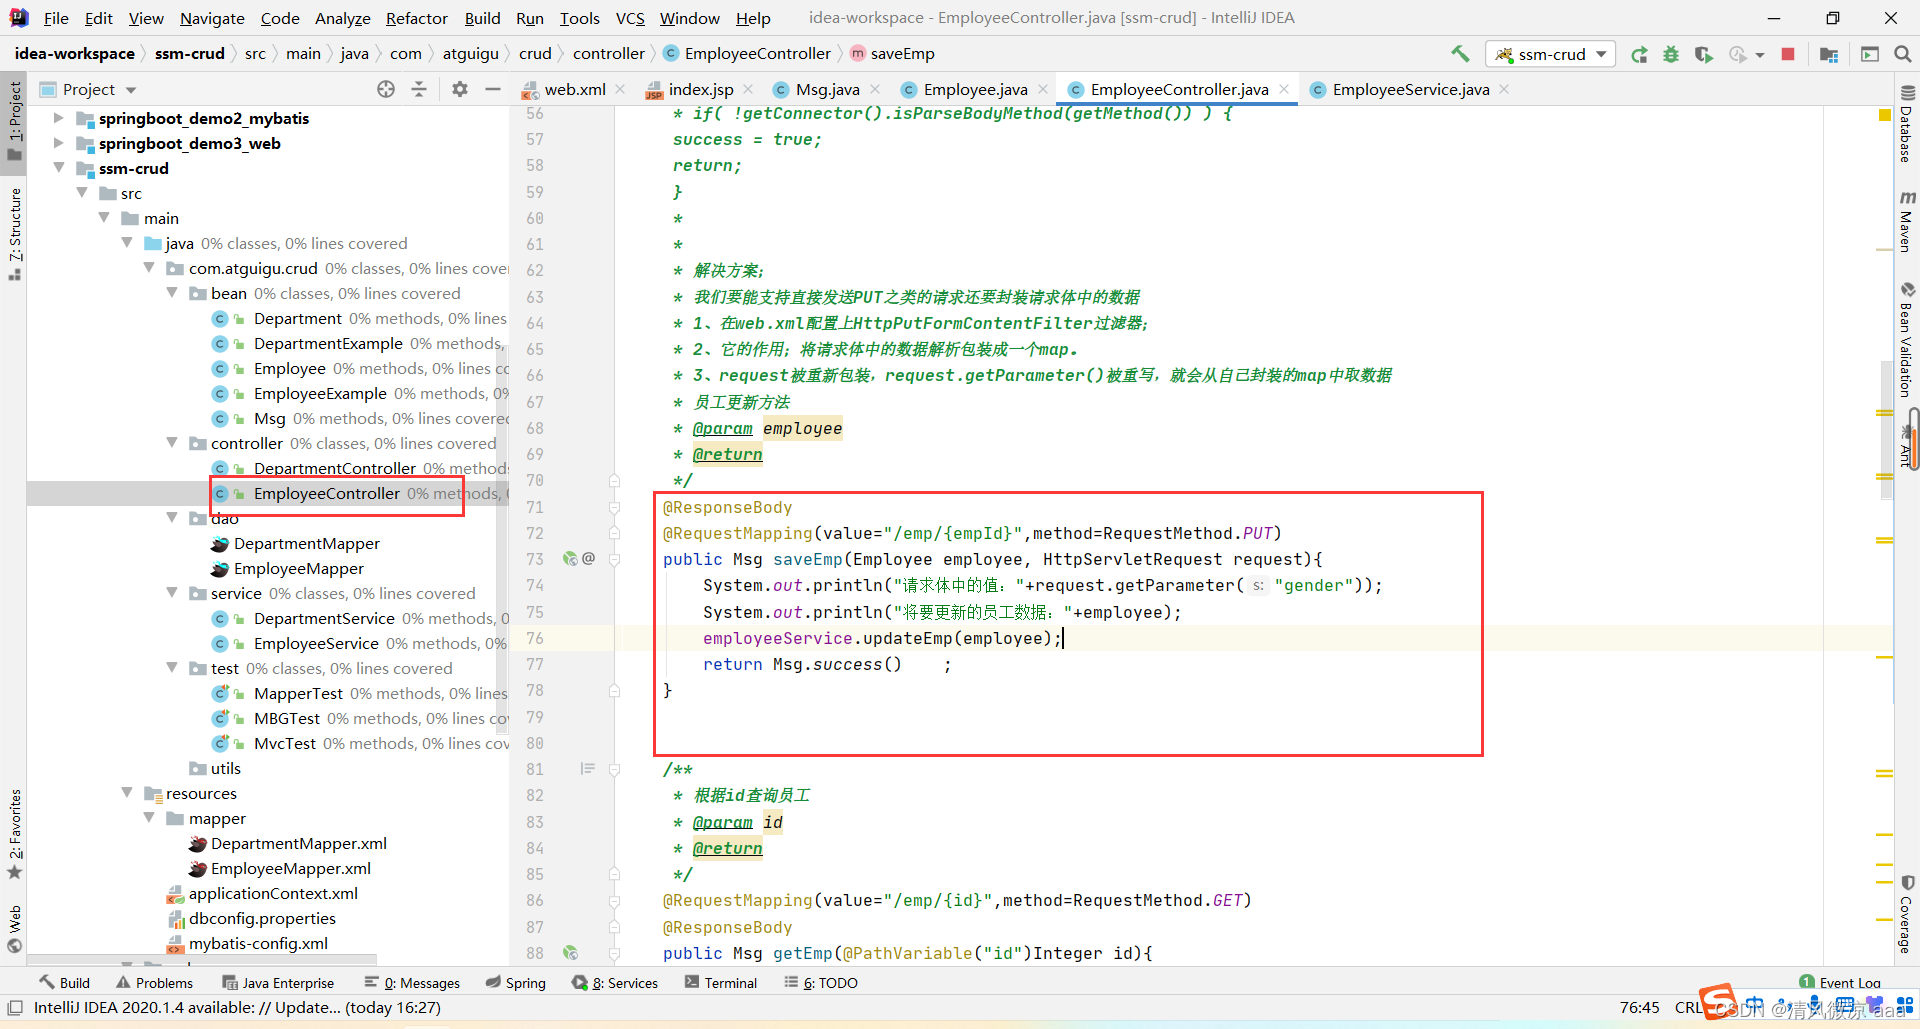
@ResponseBody
@RequestMapping(value="/emp/{empId}",method=RequestMethod.PUT)
public Msg saveEmp(Employee employee, HttpServletRequest request){
System.out.println("请求体中的值:"+request.getParameter("gender"));
System.out.println("将要更新的员工数据:"+employee);
employeeService.updateEmp(employee);
return Msg.success() ;
}
6.6.4、业务层
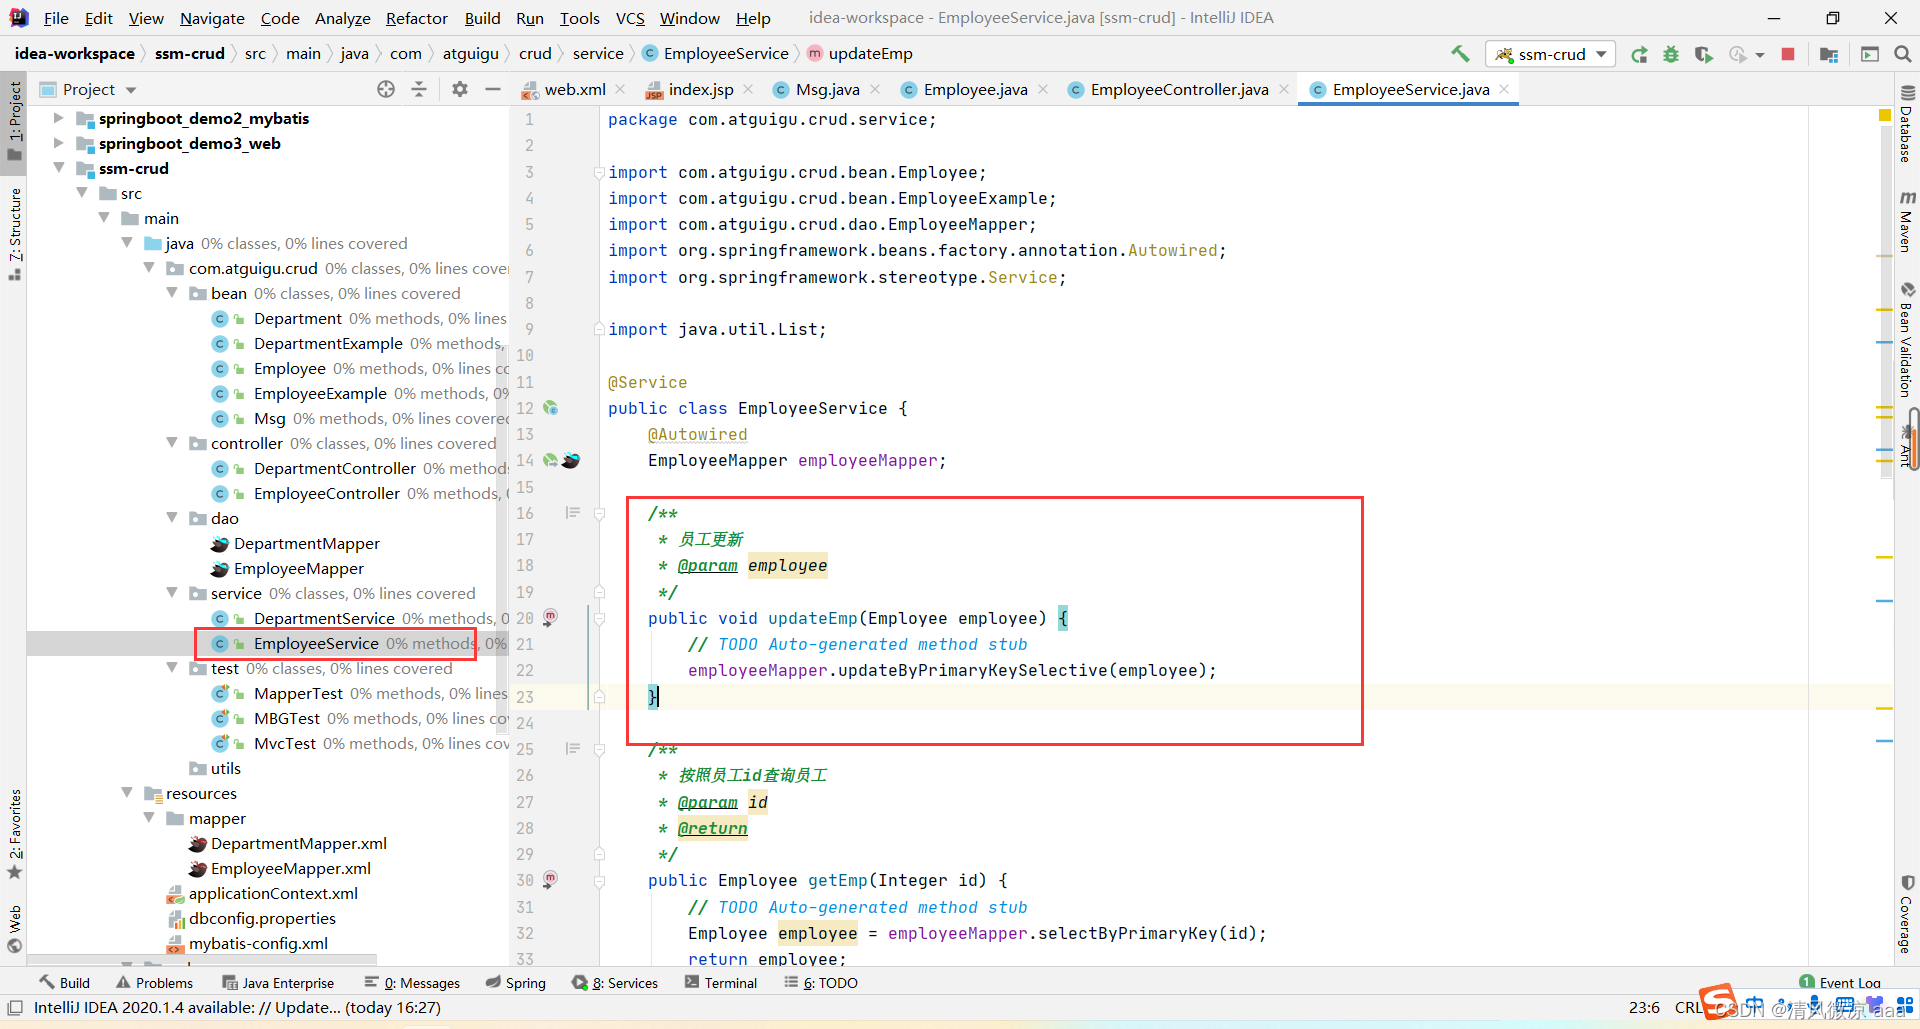
  /**
     * 员工更新
     * @param employee
     */
    public void updateEmp(Employee employee) {


        // TODO Auto-generated method stub
        employeeMapper.updateByPrimaryKeySelective(employee);
    }
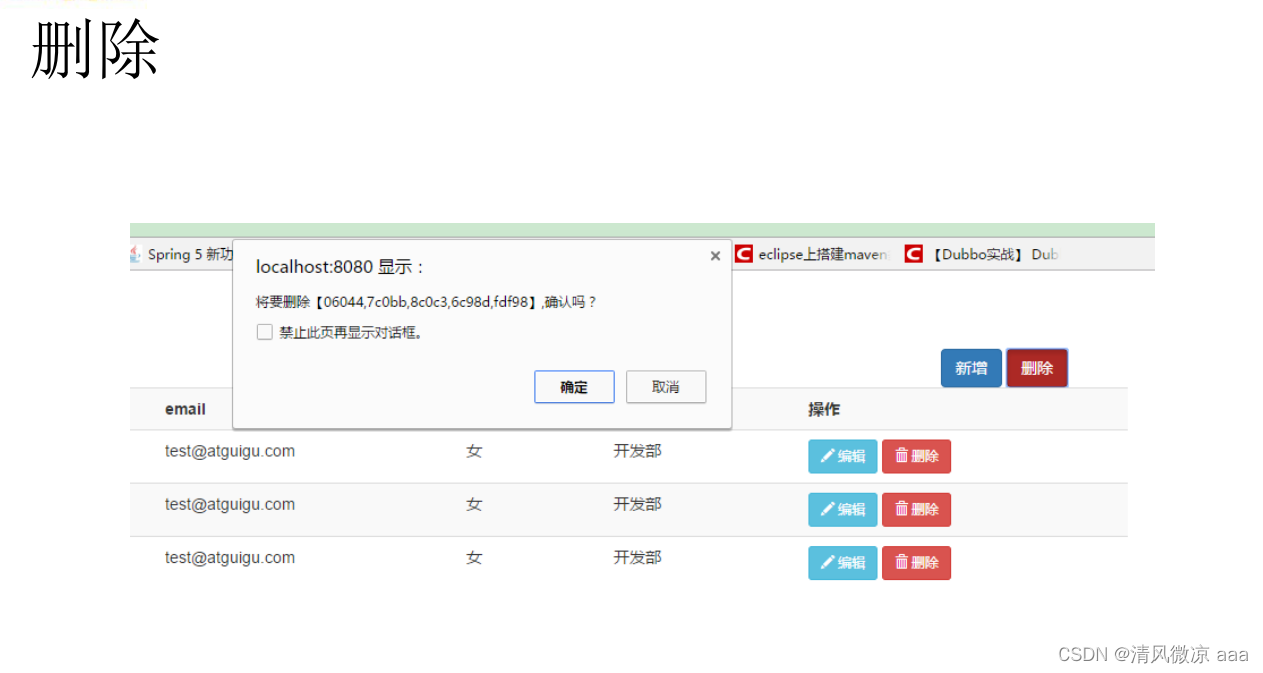
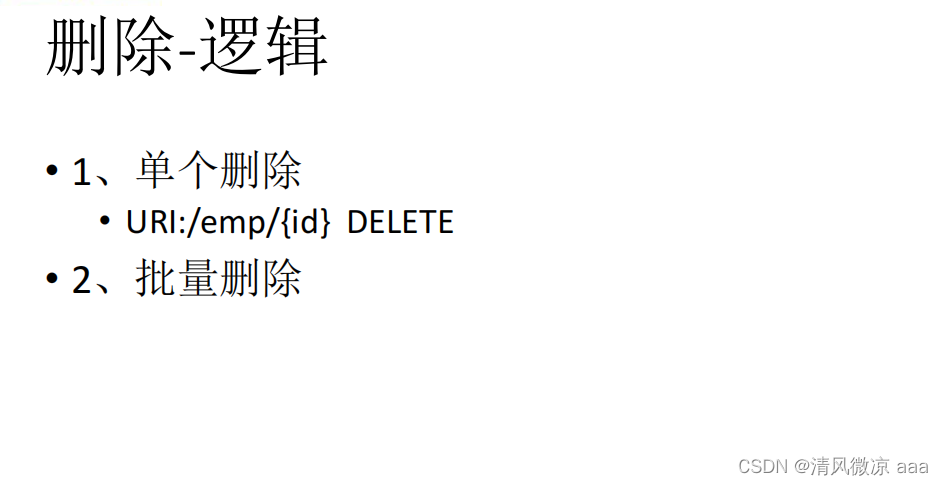
7、删除
7.1、业务逻辑
7.2、页面js
7.3、单个/ 批量删除
7.3.1 控制层
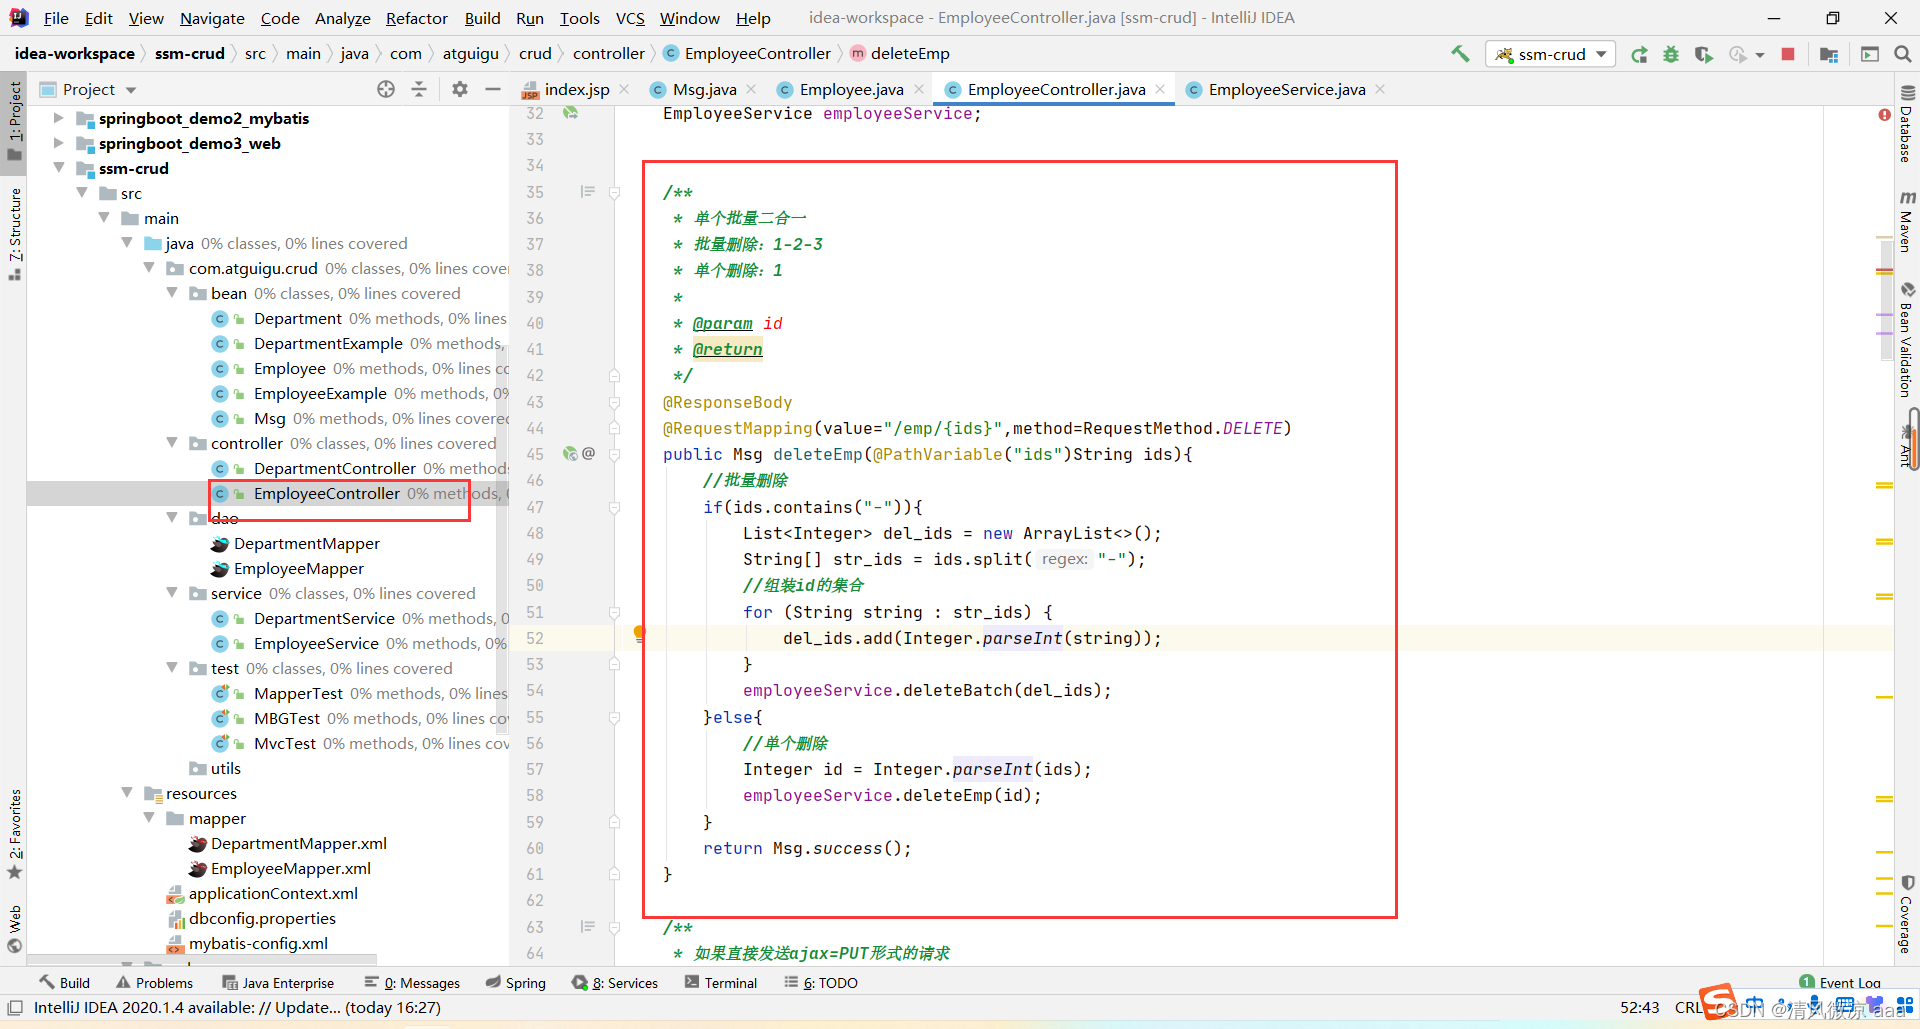
  /**
     * 单个批量二合一
     * 批量删除:1-2-3
     * 单个删除:1
     *
     * @param id
     * @return
     */
    @ResponseBody
    @RequestMapping(value="/emp/{ids}",method=RequestMethod.DELETE)
    public Msg deleteEmp(@PathVariable("ids")String ids){


        //批量删除
        if(ids.contains("-")){


            List<Integer> del_ids = new ArrayList<>();
            String[] str_ids = ids.split("-");
            //组装id的集合
            for (String string : str_ids) {


                del_ids.add(Integer.parseInt(string));
            }
            employeeService.deleteBatch(del_ids);
        }else{


            //单个删除
            Integer id = Integer.parseInt(ids);
            employeeService.deleteEmp(id);
        }
        return Msg.success();
    }
7.3.2 业务层
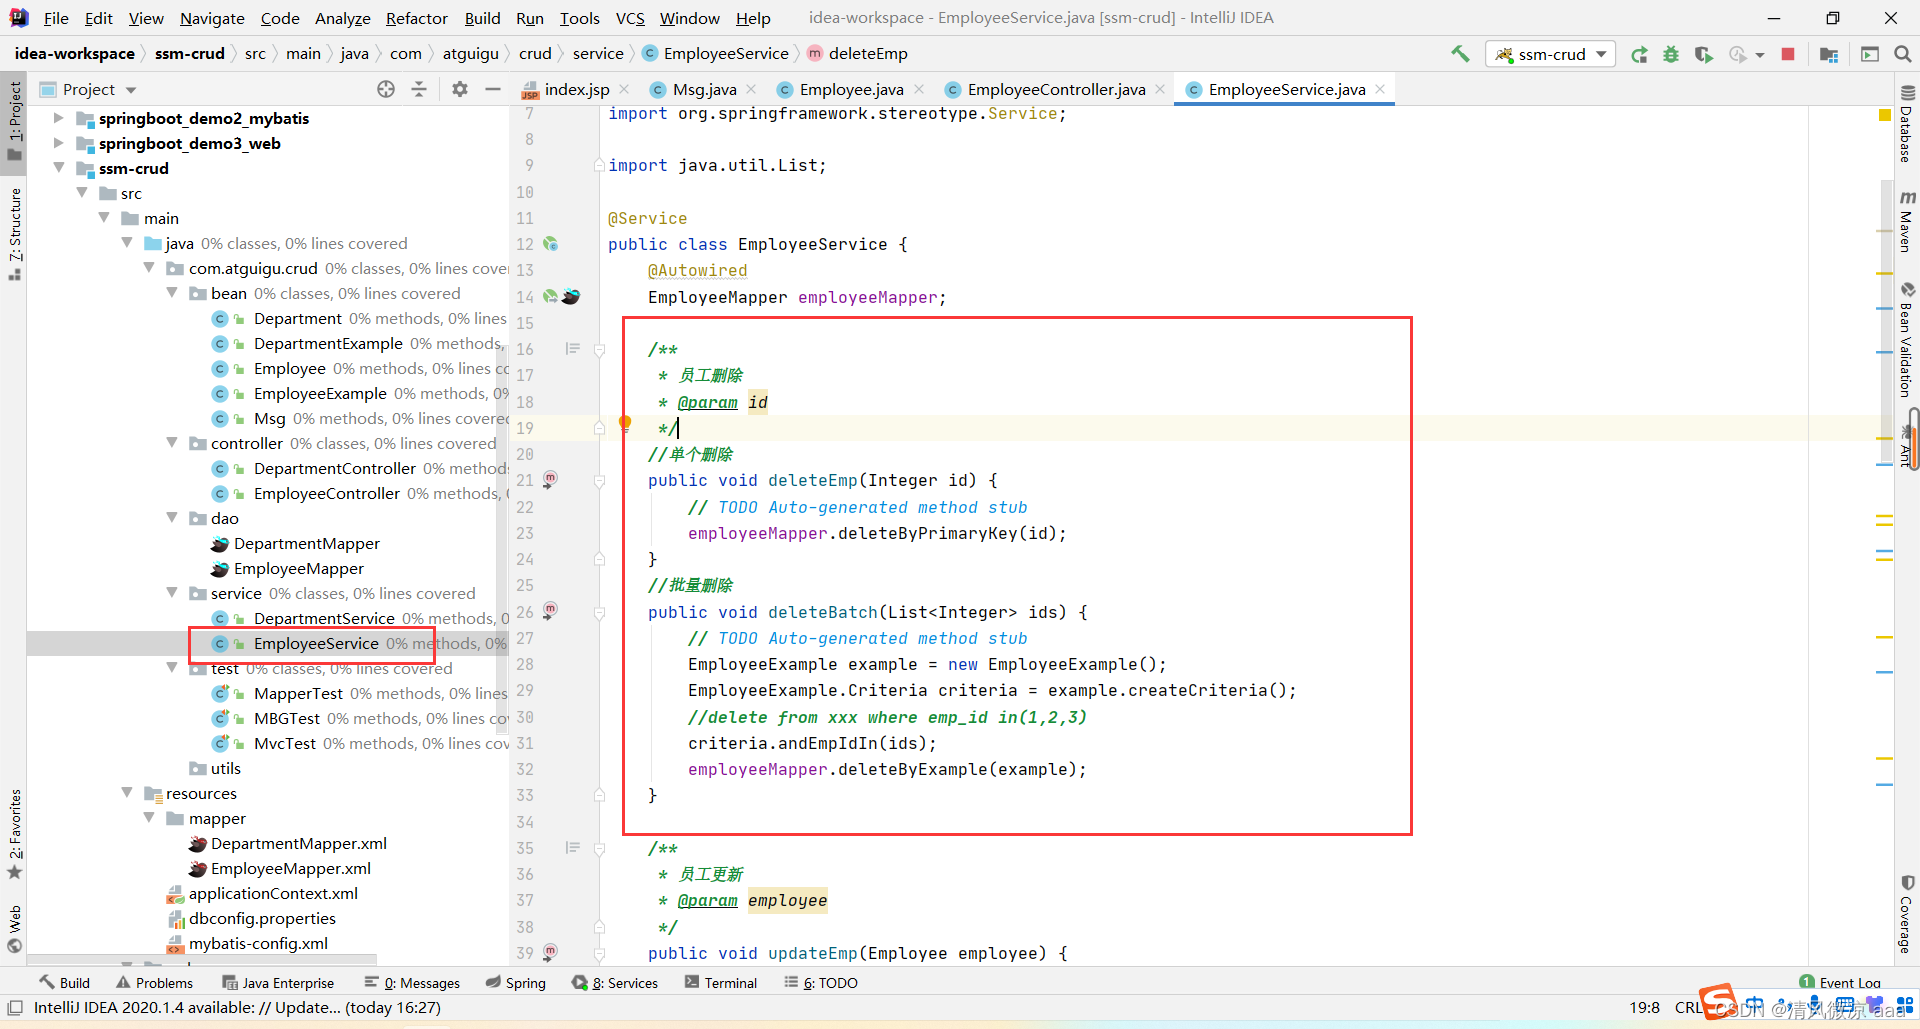
    /**
     * 员工删除
     * @param id
     */
    //单个删除
    public void deleteEmp(Integer id) {


        // TODO Auto-generated method stub
        employeeMapper.deleteByPrimaryKey(id);
    }
    //批量删除
    public void deleteBatch(List<Integer> ids) {


        // TODO Auto-generated method stub
        EmployeeExample example = new EmployeeExample();
        EmployeeExample.Criteria criteria = example.createCriteria();
        //delete from xxx where emp_id in(1,2,3)
        criteria.andEmpIdIn(ids);
        employeeMapper.deleteByExample(example);
    }
8、总结