Vue-03
(二十)、过渡和动画
1.过渡案列_原生实现
这里我们对img标签类名的修改的时候,我们需要使用到querySelectory(".类名")。不能使用GetElementByName().
transform:  透明和旋转
transition: 过渡 scale() 缩放
querySectory(): 获取Dom元素,可以修改className
<!DOCTYPE html>
<html lang="en">
<head>
    <meta charset="UTF-8">
    <meta http-equiv="X-UA-Compatible" content="IE=edge">
    <meta name="viewport" content="width=device-width, initial-scale=1.0">
    <title>Document</title>
    <style>
        .picture{


            width: 400px;
            /* 是图片在变化,我们需要给图片添加过渡:  1s监听一次,对所有的元素 匀速 */
            transition: 1s all linear;
        }
        .leave{


            /* 透明度+旋转 */
            transform: scale(0) rotate(180deg);
        }
        .come{


            /* 透明度+旋转 */
            transform: scale(1) rotate(0deg);
        }
    </style>
</head>
<body>
    <button id="btn">点我切换</button><br>
    <img class="picture" src="https://img2.baidu.com/it/u=3626502260,211748893&fm=253&fmt=auto&app=120&f=JPEG?w=1422&h=800">
    <script type="text/javascript">
        var btn=document.getElementById("btn");
        // 这里我们使用getElementByName()实现不了。
        const img=document.querySelector(".picture");
        btn.addEventListener('click',()=>{


            if(img.className == "picture"|| img.className =="picture come"){


                // 这里我们对img标签里面的class名进行修改
                img.className='picture leave';
            }
            else{


                img.className="picture come";
            }
        })
    </script>
</body>
</html>

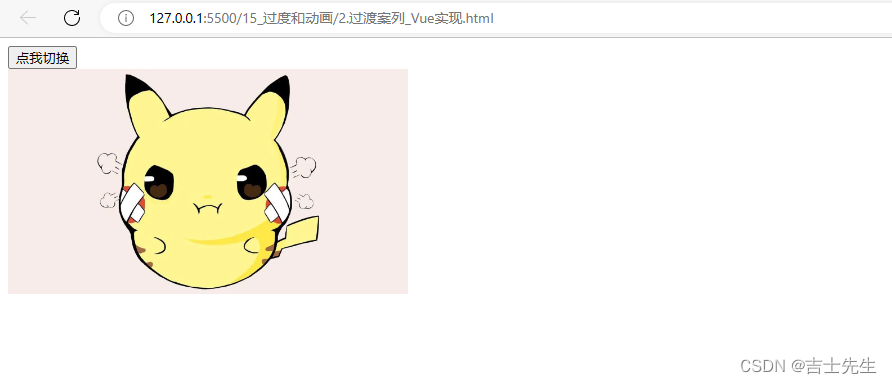
2.过渡案列_Vue实现
1.需要实现v-show();
2.需要过渡标签:<transition name=xxx></transition>
3.需要添加过渡的起点 终点 过程。
<!DOCTYPE html>
<html lang="en">

<head>
    <meta charset="UTF-8">
    <meta http-equiv="X-UA-Compatible" content="IE=edge">
    <meta name="viewport" content="width=device-width, initial-scale=1.0">
    <title>Document</title>
    <style>
        .picture {


            width: 400px;
        }

        /* 离开起点 : 显示程度为1,不旋转*/
        .qiuku-leave {


            opacity: 1;
            transform: scale(1) rotate(0deg);
        }

        /* 离开终点 */
        .qiuku-leave-to {


            opacity: 0;
            transform: scale(0) rotate(180deg);
        }

        /* 离开过程:在过程中添加过渡 */
        .qiuku-leave-active {


            transition: 1s all linear;
        }

        /*  */
        .qiuku-enter {


            opacity: 0;
            transform: scale(0) rotate(180deg);
        }

        .qiuku-enter-to {


            opacity: 1;
            transform: scale(1) rotate(0deg);
        }

        .qiuku-enter-active {


            transition: 4s all linear;
        }
    </style>
    <script src="../js/vue.js"></script>
</head>

<body>
    <!--
        1.Vue实现过渡
            (1).在目标元素外包裹<translation name="xxx"></translation>标签
            (2).编写css样式:
                进入:
                    进入起点:(xxx-enter)
                    进入终点:(xxx-enter-to)
                    进入过程:(xxx-enter-active)
                离开:
                    离开起点:(xxx-leave)
                    离开终点:(xxx-leave-to)
                    离开过程:(xxx-leave-active)
     -->
    <div id="root">
        <button @click="isShow=!isShow">点我切换</button><br>
        <!-- 我们为图片添加: 过渡。第一步:需要使用到v-show.第二步: 需要在外部添加过渡标签。 -->
        <transition name="qiuku">
            <img v-show="isShow" class="picture"
                src="https://img2.baidu.com/it/u=3626502260,211748893&fm=253&fmt=auto&app=120&f=JPEG?w=1422&h=800">
        </transition>

    </div>

    <script type="text/javascript">
        new Vue({


            el: "#root",
            data: {


                isShow: "true"
            },

        });
    </script>
</body>

</html>
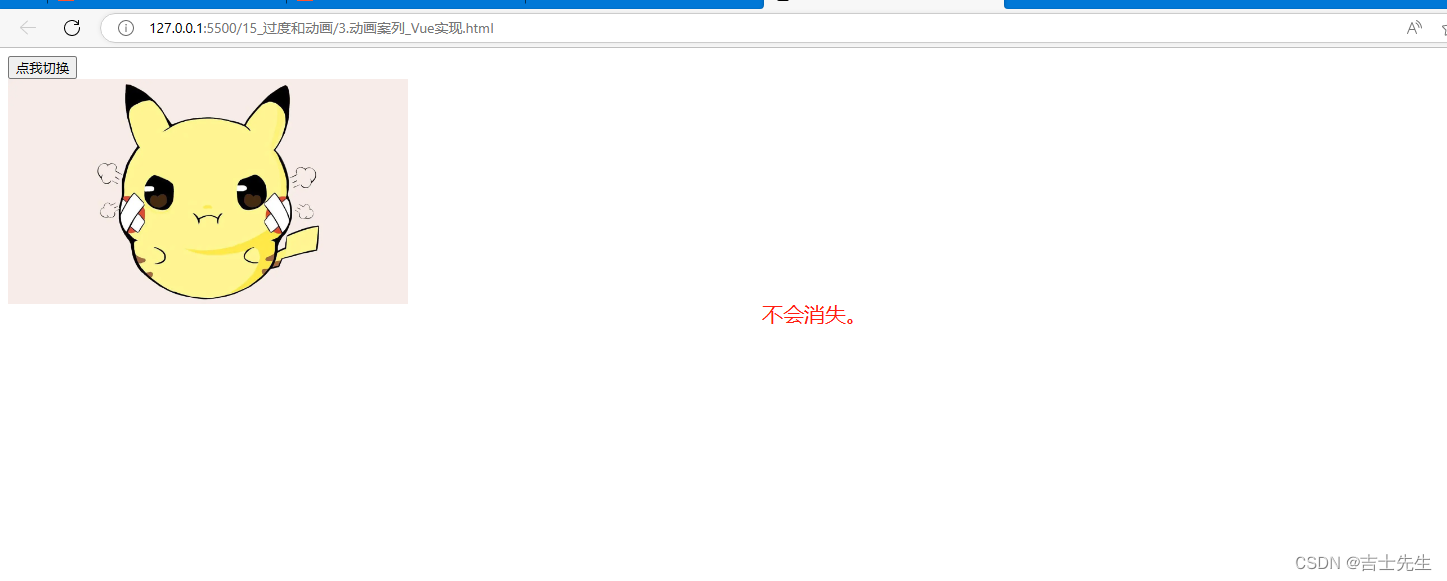
3.动画案列_Vue实现 (1)
animation: 动画名字 延迟几秒。
@keyframes: 动画帧率展现
<!DOCTYPE html>
<html lang="en">

<head>
    <meta charset="UTF-8">
    <meta http-equiv="X-UA-Compatible" content="IE=edge">
    <meta name="viewport" content="width=device-width, initial-scale=1.0">
    <title>Document</title>
    <style>
        .picture {


            width: 400px;
        }
        .enter {


            animation: jsxs_enter 1s;
        }
        @keyframes jsxs_enter {


            0%{


                /* scale 缩放 */
                transform: scale(1);
            }
            50%{


                /* scale */
                transform: scale(1.3);
            }
            100%{


                /* scale */
                transform: scale(0);
            }
        }
        .leave{


            animation: jsxs_leave 1s;
        }
        @keyframes jsxs_leave {


            0%{


                /* scale 缩放 */
                transform: scale(0);
            }
            50%{


                /* scale */
                transform: scale(1.3);
            }
            100%{


                /* opacity: 0; */
                transform: scale(1);
            }
        }
    </style>
    <script src="../js/vue.js"></script>
</head>

<body>
    <div id="root">
        <button id="btn" @click="click_btn" >点我切换</button><br>
        <img class="picture"
            src="https://img2.baidu.com/it/u=3626502260,211748893&fm=253&fmt=auto&app=120&f=JPEG?w=1422&h=800">
    </div>
    <script type="text/javascript">
        new Vue({


            el: "#root",
            data: {


                isShow: "true"
            },
            methods: {


                click_btn(){


                    var btn=document.getElementById("btn");
                    const img=document.querySelector(".picture");
                        if(img.className=="picture"||img.className=="picture leave"){


                        img.className="picture enter";
                    }else{


                        img.className="picture leave";
                    }
                    }
            },
        });
    </script>
</body>

</html>
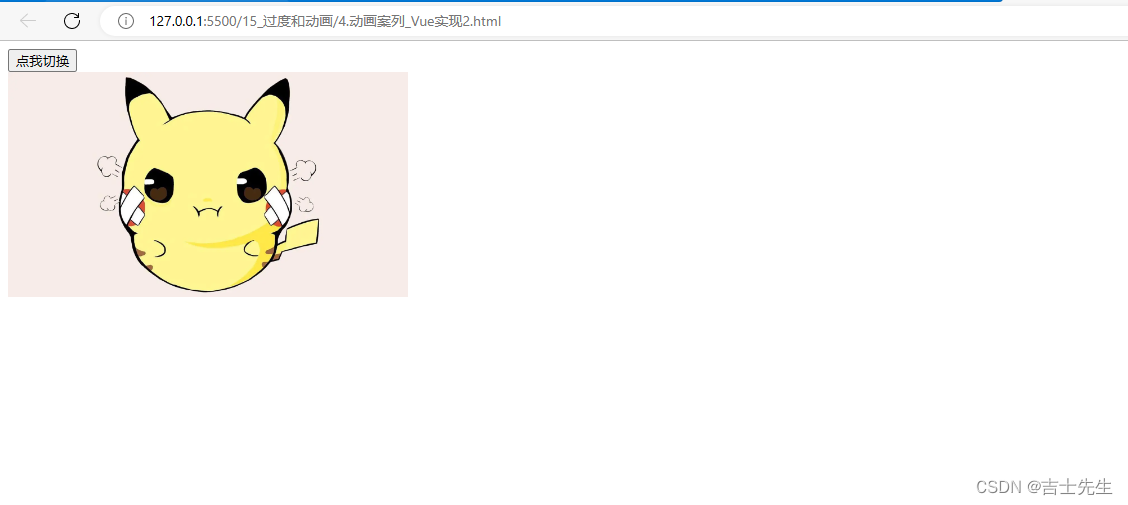
4.动画案列_Vue实现(2)
animation : 名字 时间

                1.基本编码:
                    (1).在目标元素外包裹<transition name="xxx"></transition>
                    (2).编写:进入动画、离开动画的样式
                3.类名规范:
                    进入动画样式: xxx-enter-active
                    离开动画样式: xxx-leave-active
<!DOCTYPE html>
<html lang="en">

<head>
    <meta charset="UTF-8">
    <meta http-equiv="X-UA-Compatible" content="IE=edge">
    <meta name="viewport" content="width=device-width, initial-scale=1.0">
    <title>Document</title>
    <style>
        .picture {


            width: 400px;
        }
        .qiuku-enter-active{


            animation: jsxs_enter 1s;
        }
        @keyframes jsxs_enter{


            0%{


                /* scale 缩放 */
                transform: scale(0);
            }
            50%{


                /* scale */
                transform: scale(1.3);
            }
            100%{


                /* scale */
                transform: scale(1);
            }
        }
        /* 动画离开 */
        .qiuku-leave-active {


            animation: jsxs 1s;
        }
        @keyframes jsxs{


            0%{


                /* scale 缩放 */
                transform: scale(1);
            }
            50%{


                /* scale */
                transform: scale(1.3);
            }
            100%{


                /* scale */
                transform: scale(0);
            }
        }
    </style>
    <script src="../js/vue.js"></script>
</head>

<body>
    <!--
            动画:
                1.基本编码:
                    (1).在目标元素外包裹<transition name="xxx"></transition>
                    (2).编写:进入动画、离开动画的样式
                3.类名规范:
                    进入动画样式: xxx-enter-active
                    离开动画样式: xxx-leave-active
     -->
    <div id="root">
        <button  @click="isShow=!isShow" >点我切换</button><br>
        <transition name="qiuku">
                    <img v-show="isShow" class="picture"src="https://img2.baidu.com/it/u=3626502260,211748893&fm=253&fmt=auto&app=120&f=JPEG?w=1422&h=800">
        </transition>
    </div>
    <script type="text/javascript">
        new Vue({


            el: "#root",
            data: {


                isShow: "true"
            },
        });
    </script>
</body>

</html>
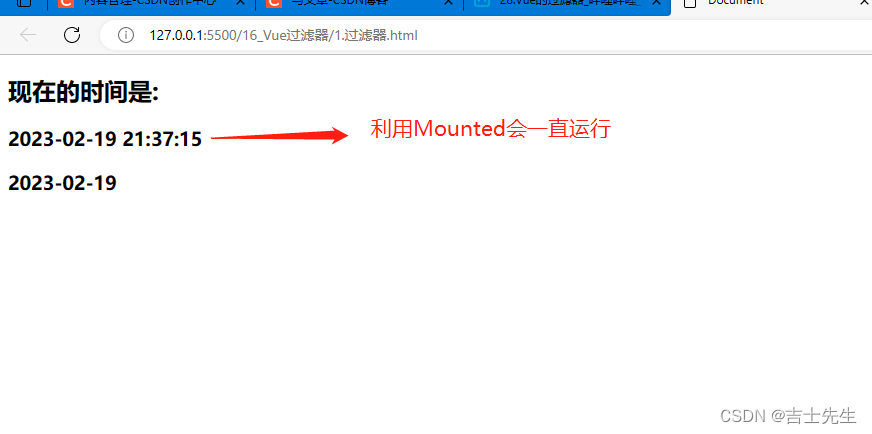
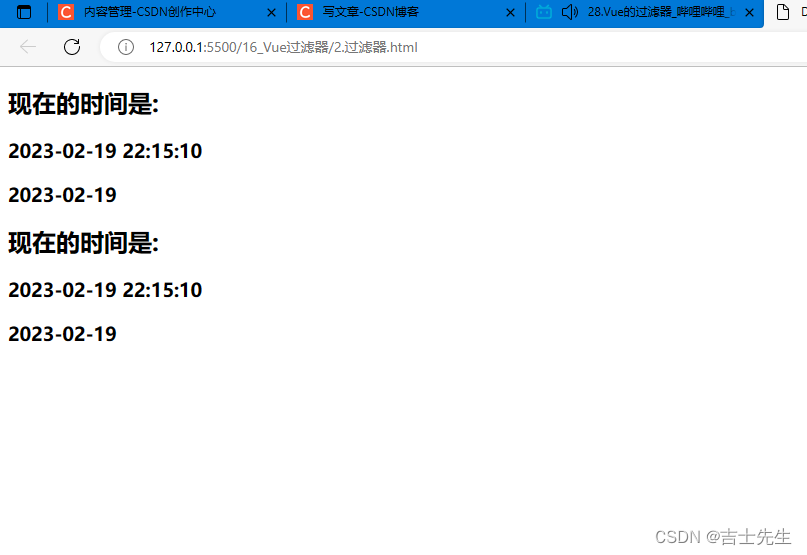
5.Vue实现时间格式化
时间格式化CDN
<script src="https://cdn.bootcdn.net/ajax/libs/moment.js/2.29.4/moment.min.js"></script>
<!DOCTYPE html>
<html lang="en">
<head>
    <meta charset="UTF-8">
    <meta http-equiv="X-UA-Compatible" content="IE=edge">
    <meta name="viewport" content="width=device-width, initial-scale=1.0">
    <title>Document</title>
    <script src="../js/vue.js"></script>
    <!-- 利用cdn远程引入 moment.js -->
    <script src="https://cdn.bootcdn.net/ajax/libs/moment.js/2.29.4/moment.min.js"></script>
</head>
<body>
    <div id="root">
        <h2>现在的时间是:</h2>
        <h3>{

   {fmtData("YYYY-MM-DD HH:mm:ss")}}</h3>
        <h3>{

   {fmtData()}}</h3>
    </div>
    <script type="text/javascript">
        new Vue({


            el:"#root",
            data:{


                time:Date.now(),
            },
            methods: {


                // 假如说:"没有信息传入,那么我们就让这个格式称为默认的。如果有信息传入,我们就使用信息传入的"
                fmtData(str="YYYY-MM-DD"){


                    //  这里的moment的参数如果为空: 那么就解析此时此刻的时间。如果添加参数,那么就解析添加的
                    return moment(this.time).format(str);
                }
            },
            mounted() {


                setInterval(()=>{


                    this.time=Date.now();
                },1000);
            },
        });
    </script>
</body>
</html>
6.Vue实现过滤器
``
配置过滤器
        // 全局注册的过滤器:  "名字",函数(value就是被调用者的值,str就是我们传入的值)
        Vue.filter('dataFormat',function(value,str="YYYY-MM-DD"){


            console.log(value+" "+str);
            return moment(value).format(str);
        });
使用过滤器
    <div id="root">
        <h2>现在的时间是:</h2>
        <h3>{

   {time |dataFormat("YYYY-MM-DD HH:mm:ss")}}</h3>
        <h3>{

   {time | dataFormat}}</h3>
    </div>
<!DOCTYPE html>
<html lang="en">
<head>
    <meta charset="UTF-8">
    <meta http-equiv="X-UA-Compatible" content="IE=edge">
    <meta name="viewport" content="width=device-width, initial-scale=1.0">
    <title>Document</title>
    <script src="../js/vue.js"></script>
    <!-- 利用cdn远程引入 moment.js -->
    <script src="https://cdn.bootcdn.net/ajax/libs/moment.js/2.29.4/moment.min.js"></script>
</head>
<body>
    <div id="root">
        <h2>现在的时间是:</h2>
        <h3>{

   {time |dataFormat("YYYY-MM-DD HH:mm:ss")}}</h3>
        <h3>{

   {time | dataFormat}}</h3>
    </div>
    <div id="root2">
        <h2>现在的时间是:</h2>
        <h3>{

   {time |dataFormat("YYYY-MM-DD HH:mm:ss")}}</h3>
        <h3>{

   {time | dataFormat}}</h3>
    </div>
    <script type="text/javascript">
        // 全局注册的过滤器:  "名字",函数(value就是被调用者的值,str就是我们传入的值)
        Vue.filter('dataFormat',function(value,str="YYYY-MM-DD"){


            console.log(value+" "+str);
            return moment(value).format(str);
        });

        new Vue({


            el:"#root",
            data:{


                time:Date.now(),
            },
            mounted() {


                setInterval(()=>{


                    this.time=Date.now()
                },1000)
            },
            },
        );
        new Vue({


            el:"#root2",
            data:{


                time:Date.now(),
            },
            mounted() {


                setInterval(()=>{


                    this.time=Date.now()
                },1000)
            },
            },
        );
    </script>
</body>
</html>
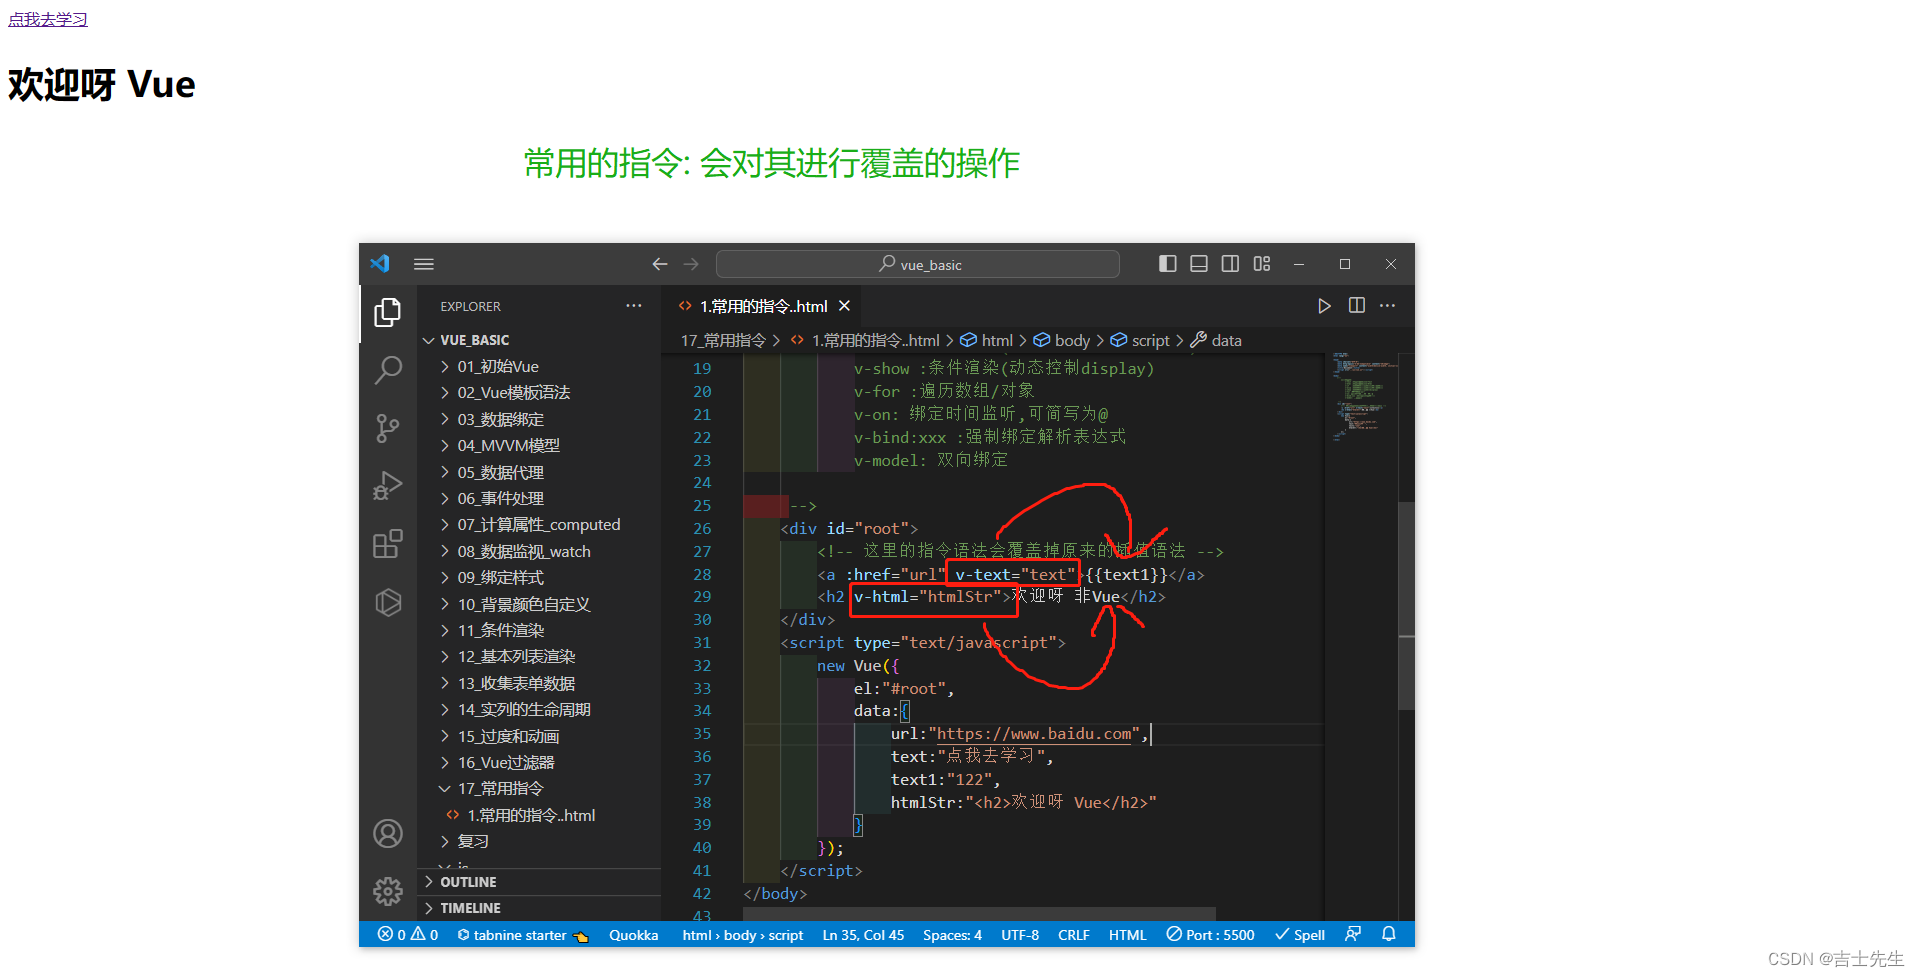
7.Vue常用内置指令
        常用的指令:
            v-text :更新元素的innerText
            v-html :更新元素的innerHtml
            v-if   :条件渲染(动态控制结点是否存在)
            v-else :条件渲染(动态控制结点是否存在)
            v-show :条件渲染(动态控制display)
            v-for :遍历数组/对象
            v-on: 绑定时间监听,可简写为@
            v-bind:xxx :强制绑定解析表达式
            v-model: 双向绑定
<!DOCTYPE html>
<html lang="en">

<head>
    <meta charset="UTF-8">
    <meta http-equiv="X-UA-Compatible" content="IE=edge">
    <meta name="viewport" content="width=device-width, initial-scale=1.0">
    <title>Document</title>
    <script src="../js/vue.js"></script>
</head>

<body>
    <!--
        常用的指令:
            v-text :更新元素的innerText
            v-html :更新元素的innerHtml
            v-if   :条件渲染(动态控制结点是否存在)
            v-else :条件渲染(动态控制结点是否存在)
            v-show :条件渲染(动态控制display)
            v-for :遍历数组/对象
            v-on: 绑定时间监听,可简写为@
            v-bind:xxx :强制绑定解析表达式
            v-model: 双向绑定

     -->
    <div id="root">
        <!-- 这里的指令语法会覆盖掉原来的插值语法 -->
        <a :href="url" v-text="text">{

   {text1}}</a>
        <h2 v-html="htmlStr">欢迎呀 非Vue</h2>
    </div>
    <script type="text/javascript">
        new Vue({


            el:"#root",
            data:{


                url:"https://www.baidu.com",
                text:"点我去学习",
                text1:"122",
                htmlStr:"<h2>欢迎呀 Vue</h2>"
            }
        });
    </script>
</body>

</html>
(二十一)、Vue的自定义指令
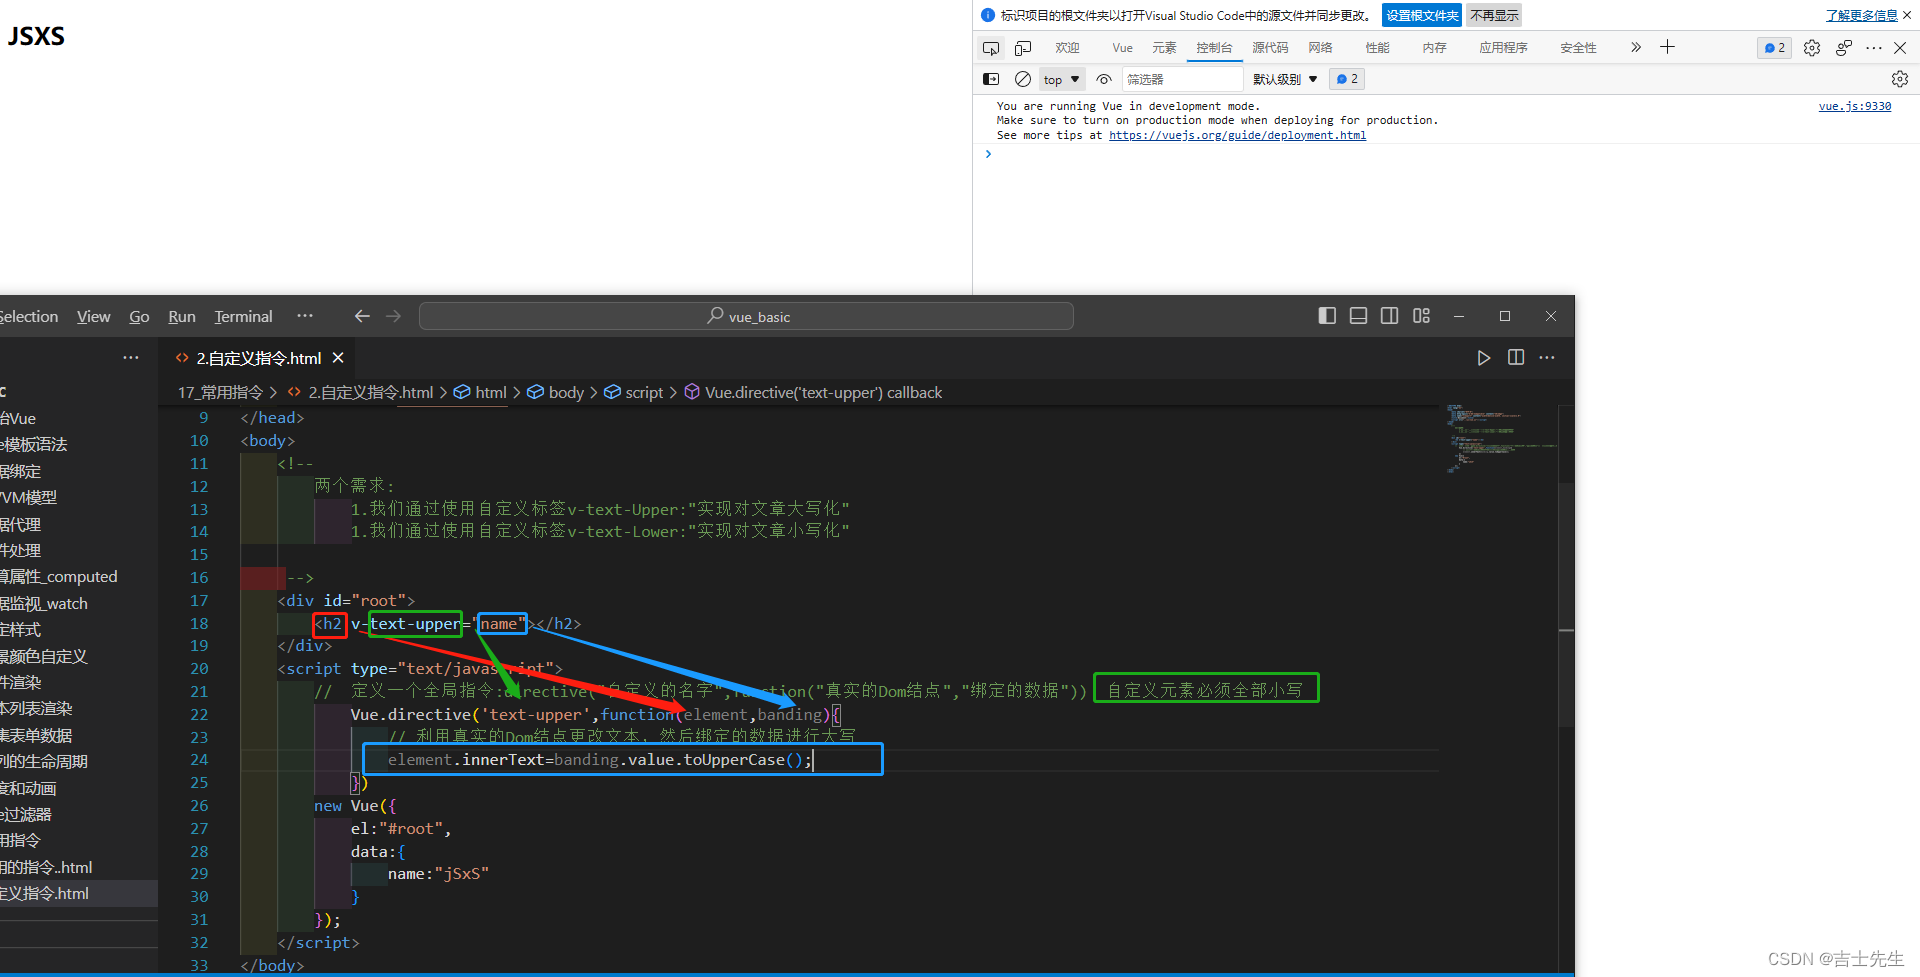
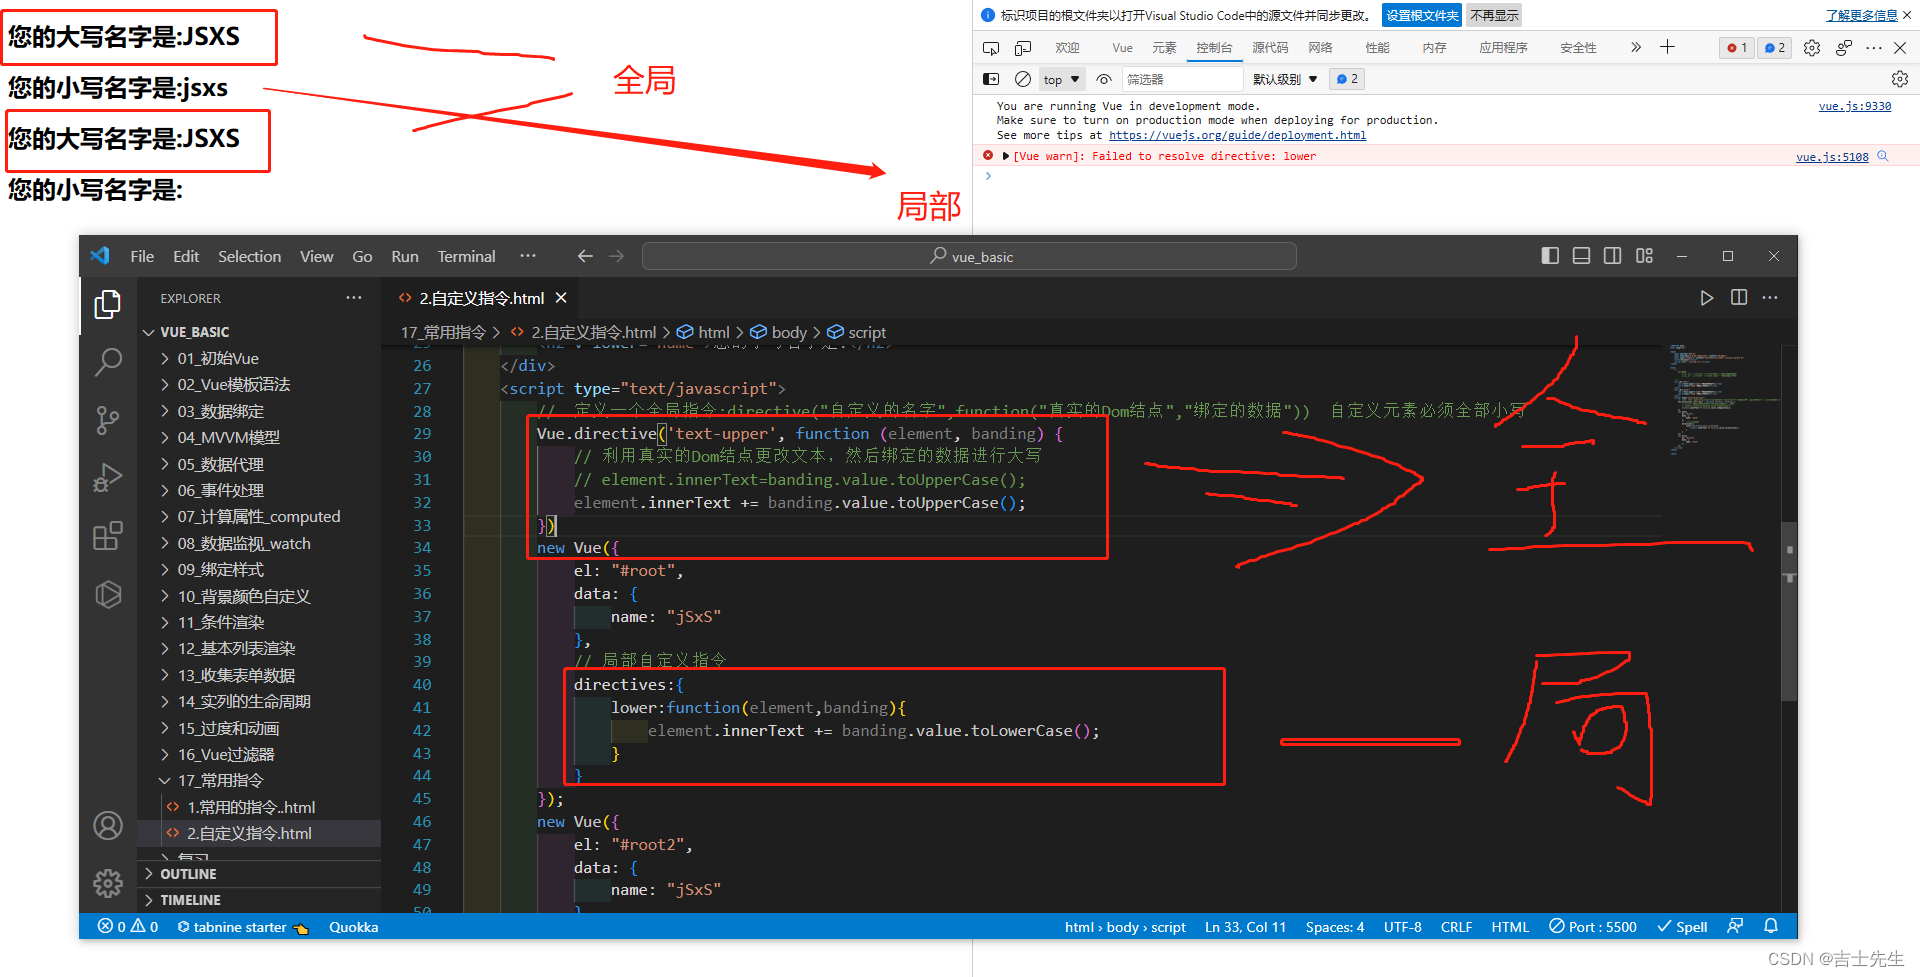
1.自定义非内嵌指令(不保留h2中的原有text)
- 自定义的名字前面不加v- ,Vue帮我们自动添加
- element是一个真实的Dom节点
- banding是我们绑定的数据
在自定义的指令中的名字,必须全部小写。
//  定义一个全局指令:directive("自定义的名字",function("真实的Dom结点","绑定的数据"))  自定义元素必须全部小写
Vue.directive('text-upper',function(element,banding){


                // 利用真实的Dom结点更改文本,然后绑定的数据进行大写
                element.innerText=banding.value.toUpperCase();
            })
<!DOCTYPE html>
<html lang="en">
<head>
    <meta charset="UTF-8">
    <meta http-equiv="X-UA-Compatible" content="IE=edge">
    <meta name="viewport" content="width=device-width, initial-scale=1.0">
    <title>Document</title>
    <script src="../js/vue.js"></script>
</head>
<body>
    <!--
        两个需求:
            1.我们通过使用自定义标签v-text-Upper:"实现对文章大写化"
            1.我们通过使用自定义标签v-text-Lower:"实现对文章小写化"

     -->
    <div id="root">
        <h2 v-text-upper="name"></h2>
    </div>
    <script type="text/javascript">
        //  定义一个全局指令:directive("自定义的名字",function("真实的Dom结点","绑定的数据"))  自定义元素必须全部小写
            Vue.directive('text-upper',function(element,banding){


                // 利用真实的Dom结点更改文本,然后绑定的数据进行大写
                element.innerText=banding.value.toUpperCase();
            })
        new Vue({


            el:"#root",
            data:{


                name:"jSxS"
            }
        });
    </script>
</body>
</html>
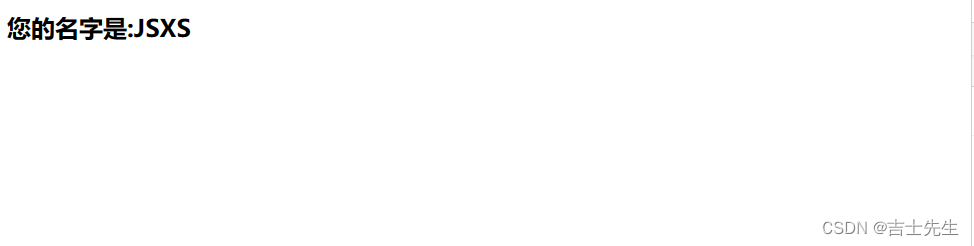
2.自定义非内嵌指令(保留h2中的原有text)
要使用 += 而不是原来的=
element.innerText += banding.value.toUpperCase();
<!DOCTYPE html>
<html lang="en">

<head>
    <meta charset="UTF-8">
    <meta http-equiv="X-UA-Compatible" content="IE=edge">
    <meta name="viewport" content="width=device-width, initial-scale=1.0">
    <title>Document</title>
    <script src="../js/vue.js"></script>
</head>

<body>
    <!--
        两个需求:
            1.我们通过使用自定义标签v-text-Upper:"实现对文章大写化"
            1.我们通过使用自定义标签v-text-Lower:"实现对文章小写化"

     -->
    <div id="root">
        <h2 v-text-upper="name">您的名字是:</h2>
    </div>
    <script type="text/javascript">
        //  定义一个全局指令:directive("自定义的名字",function("真实的Dom结点","绑定的数据"))  自定义元素必须全部小写
        Vue.directive('text-upper', function (element, banding) {


            // 利用真实的Dom结点更改文本,然后绑定的数据进行大写
            // element.innerText=banding.value.toUpperCase();
            element.innerText += banding.value.toUpperCase();
        })
        new Vue({


            el: "#root",
            data: {


                name: "jSxS"
            }
        });
    </script>
</body>

</html>
3.自定义非内嵌指令 (非全局)
- 如果自定义 的标签只有 v-xxx,那么我们只需要在方法前写上 xxx:function(){}即可
- 如果自定义 的标签只有 v-xxx-xxxx,那么我们只需要在方法前写上 ‘xxx-xxx’:function(){}即可
<h2 v-lower="name">您的小写名字是:</h2>

            directives:{
                lower:function(element,banding){
                    element.innerText += banding.value.toLowerCase();
                }
            }
<h2 v-text-lower="name">您的小写名字是:</h2>
            directives:{
                'text-lower':function(element,banding){
                    element.innerText += banding.value.toLowerCase();
                }
            }
<!DOCTYPE html>
<html lang="en">

<head>
    <meta charset="UTF-8">
    <meta http-equiv="X-UA-Compatible" content="IE=edge">
    <meta name="viewport" content="width=device-width, initial-scale=1.0">
    <title>Document</title>
    <script src="../js/vue.js"></script>
</head>

<body>
    <!--
        两个需求:
            1.我们通过使用自定义标签v-text-Upper:"实现对文章大写化"
            1.我们通过使用自定义标签v-text-Lower:"实现对文章小写化"

     -->
    <div id="root">
        <h2 v-text-upper="name">您的大写名字是:</h2>
        <h2 v-lower="name">您的小写名字是:</h2>
    </div>
    <div id="root2">
        <h2 v-text-upper="name">您的大写名字是:</h2>
        <h2 v-lower="name">您的小写名字是:</h2>
    </div>
    <script type="text/javascript">
        //  定义一个全局指令:directive("自定义的名字",function("真实的Dom结点","绑定的数据"))  自定义元素必须全部小写
        Vue.directive('text-upper', function (element, banding) {


            // 利用真实的Dom结点更改文本,然后绑定的数据进行大写
            // element.innerText=banding.value.toUpperCase();
            element.innerText += banding.value.toUpperCase();
        })
        new Vue({


            el: "#root",
            data: {


                name: "jSxS"
            },
            // 局部自定义指令
            directives:{


                lower:function(element,banding){


                    element.innerText += banding.value.toLowerCase();
                }
            }
        });
        new Vue({


            el: "#root2",
            data: {


                name: "jSxS"
            },
        });
    </script>
</body>

</html>
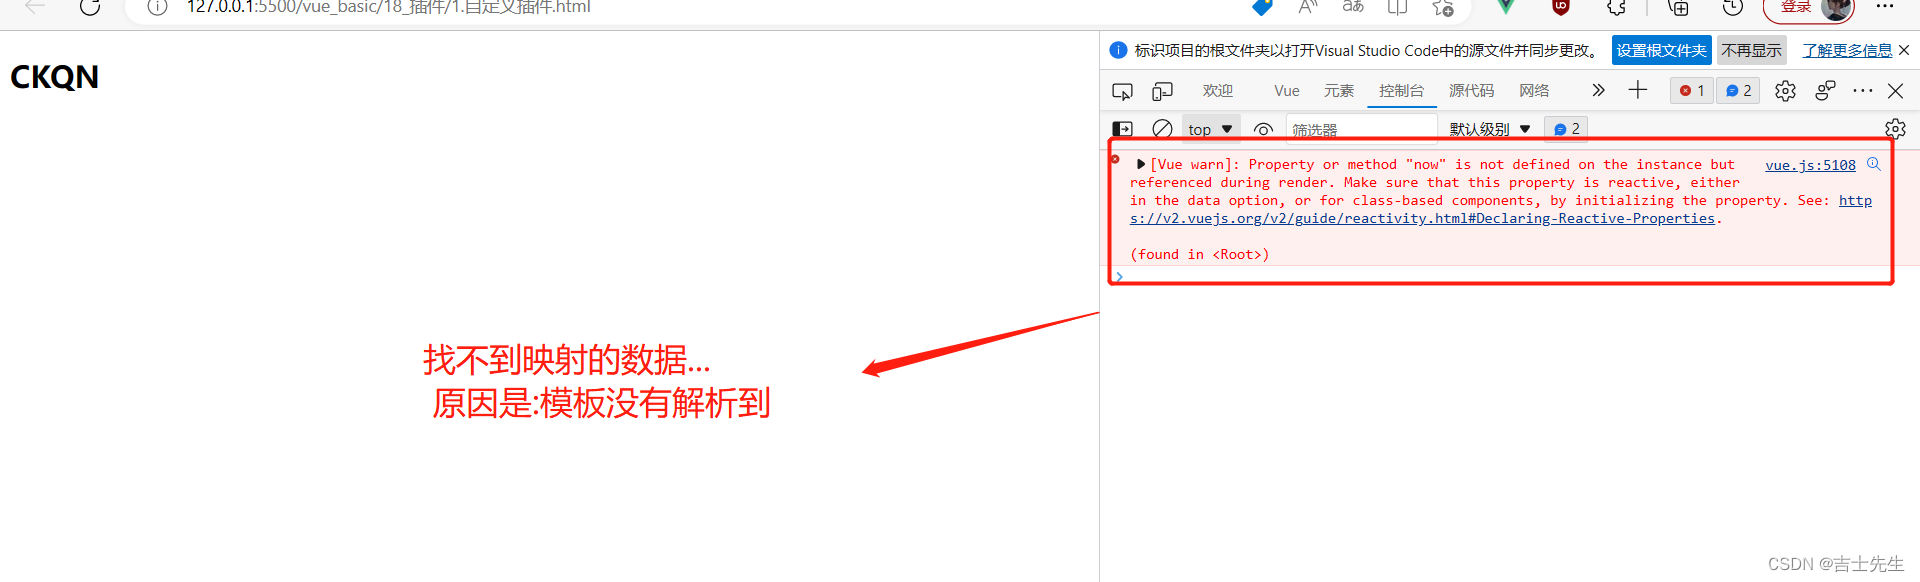
4.Vue的自定义插件 ⭐
Vue自带的原型数据...

Vue解析不到的数据
<!DOCTYPE html>
<html lang="en">
<head>
    <meta charset="UTF-8">
    <meta http-equiv="X-UA-Compatible" content="IE=edge">
    <meta name="viewport" content="width=device-width, initial-scale=1.0">
    <title>自定义插件</title>
    <script src="../js/vue.js"></script>
</head>
<body>
    <!-- 准备好一个容器 -->
    <div id="root">
        <h2>{

   {name}}</h2>
        <h2>{

   {now}}</h2>
    </div>
    <script>
        Vue.config.productionTip = false  //关闭生产提示
        const vm=new Vue({


            el:'#root',
           data:{


            name:'CKQN'
           }
        });
        vm.$now=new Date();   // xxx这里解析不到数据
    </script>
</body>
</html>
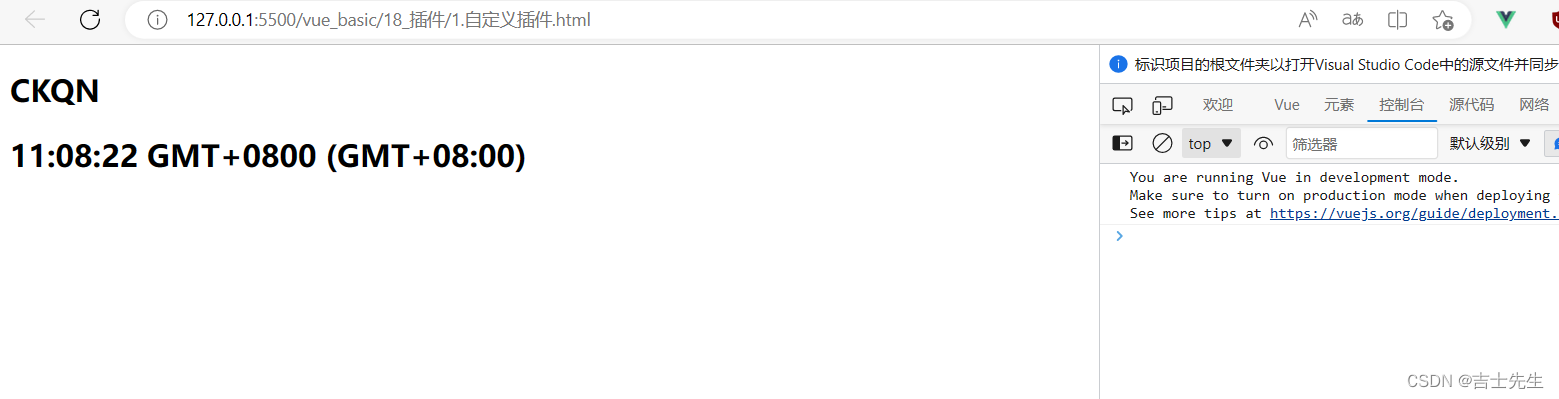
Vue这样的话就能够解析到.
<!DOCTYPE html>
<html lang="en">
<head>
    <meta charset="UTF-8">
    <meta http-equiv="X-UA-Compatible" content="IE=edge">
    <meta name="viewport" content="width=device-width, initial-scale=1.0">
    <title>自定义插件</title>
    <script src="../js/vue.js"></script>
</head>
<body>
    <!-- 准备好一个容器 -->
    <div id="root">
        <h2>{

   {name}}</h2>
        <h2>{

   {$now}}</h2>
    </div>
    <script>
        Vue.config.productionTip = false  //关闭生产提示
        // 向Vue原型上追加一个$now属性,值为当前的时间。 $now是给实列vm用的。
        Vue.prototype.$now=new Date().toTimeString();  // 这里进行格式化数据...
        const vm=new Vue({


            el:'#root',
           data:{


            name:'CKQN'
           }
        });
        // vm.$now=new Date();
    </script>
</body>
</html>
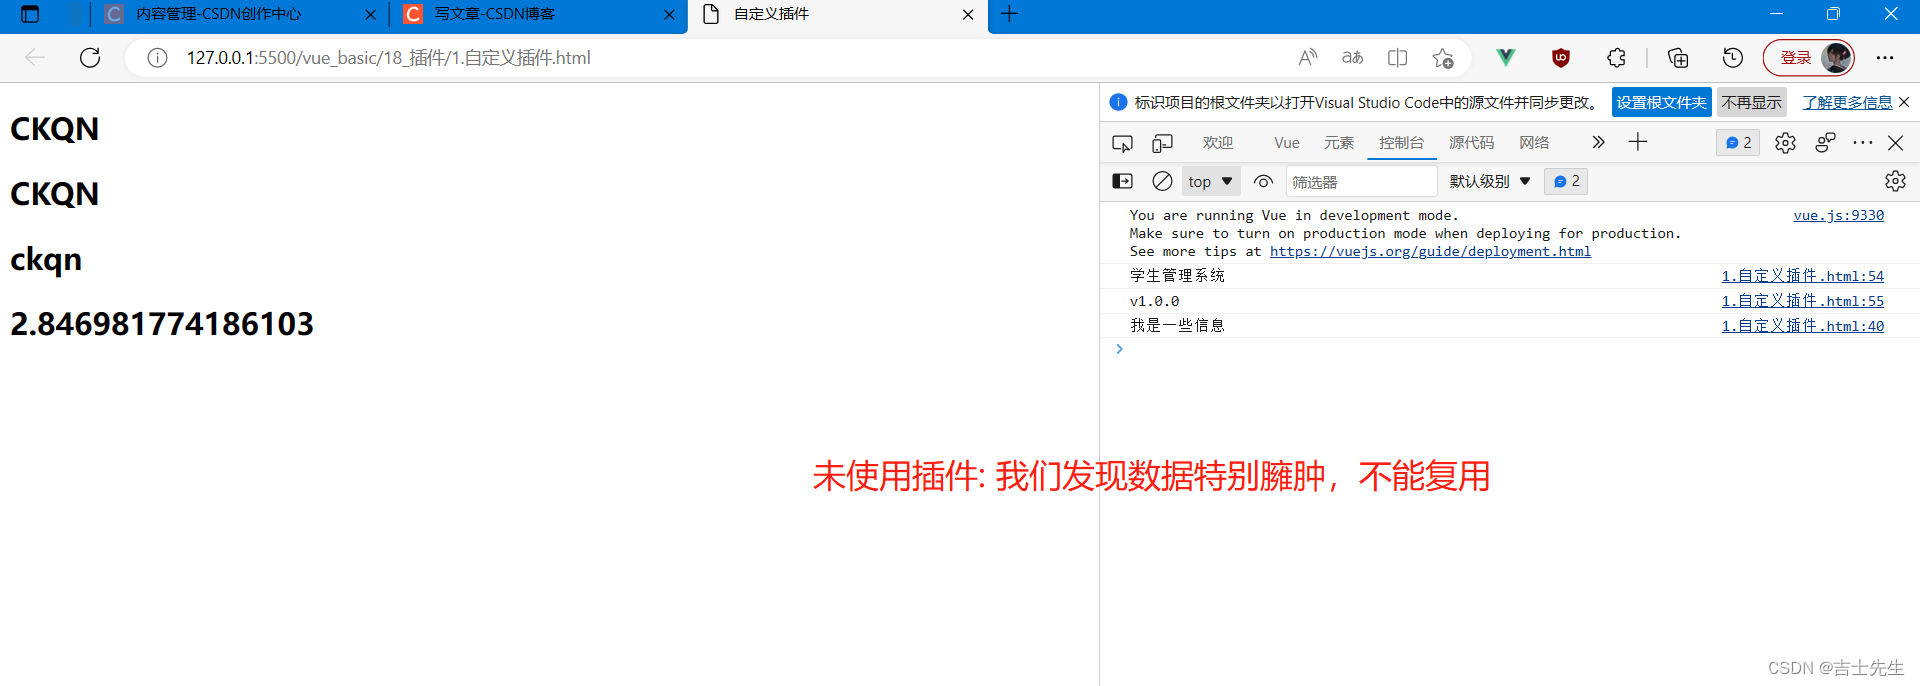
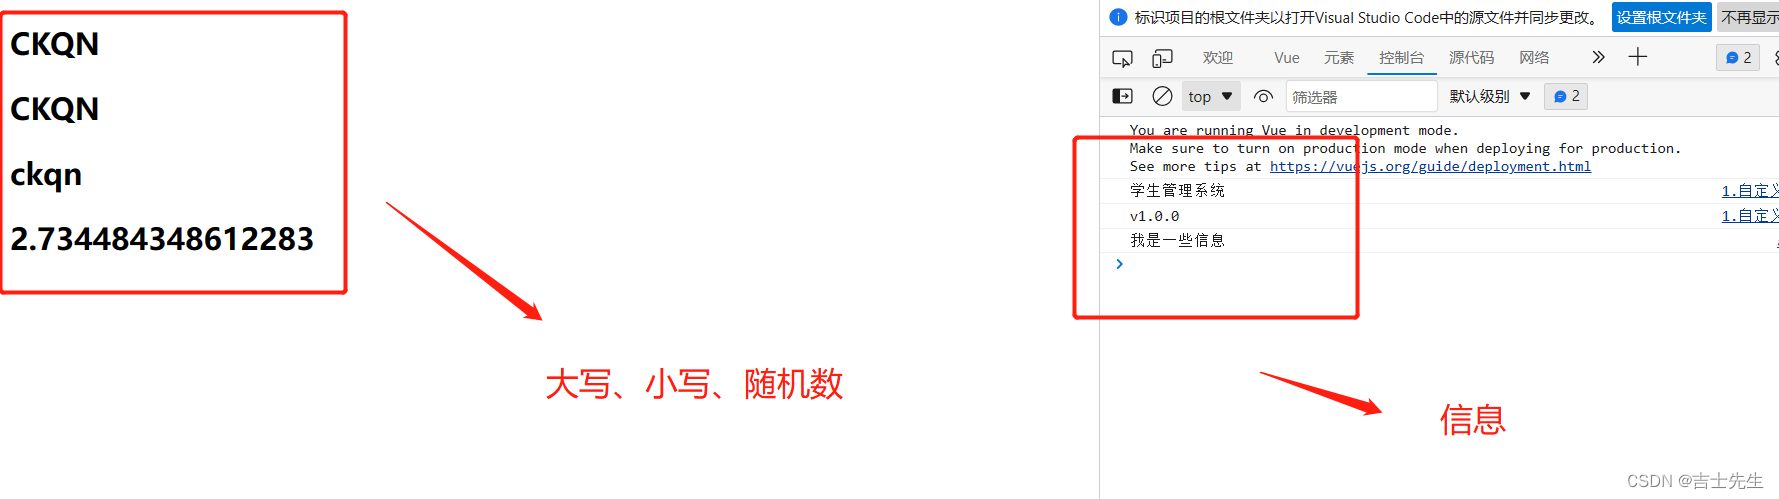
插件的正式使用
插件的定义: 插件就是一个包含install方法的对象。
非插件实列
<!DOCTYPE html>
<html lang="en">

<head>
    <meta charset="UTF-8">
    <meta http-equiv="X-UA-Compatible" content="IE=edge">
    <meta name="viewport" content="width=device-width, initial-scale=1.0">
    <title>自定义插件</title>
    <script src="../js/vue.js"></script>
    <!-- <script src="../18_插件/atguigu.js"></script> -->

</head>

<body>
    <!-- 准备好一个容器 -->
    <div id="root">
        <h2>{

   {name}}</h2>
        <h2 v-upper-text="name"></h2>
        <h2 v-lower-text="name"></h2>
        <!-- 调用我们自定义插件种的原型 -->
        <h2>{

   {$random(2,8)}}</h2>
    </div>
    <script>

         // 添加两个全局指令

    //  大写
    Vue.directive('upper-text',function(el,bangding){


        el.innerText=bangding.value.toUpperCase();
    })
    //  小写
    Vue.directive('lower-text',function(el,bangding){


        el.innerText=bangding.value.toLowerCase();
    })

    // 给Vue自身添加属性
    Vue.projectName='学生管理系统';
    Vue.MyVersion='v1.0.0'
    Vue.showInfo=function(){


        console.log('我是一些信息');
    };

    // 给Vue原型上添加数据,供vm使用。
    Vue.prototype.$random=function(min,max){


        return Math.random()*(max-min)+min   // TODO (0~1)*6+2
    }
        /*
            插件的定义: 是一个包含install方法的对象,
        */
        Vue.config.productionTip = false  //关闭生产提示

        // //Vue会帮助我们去调用atguigu 这个插件里面的install方法
        // Vue.use(atguigu)
        console.log(Vue.projectName)
        console.log(Vue.MyVersion)
        Vue.showInfo()

        const vm = new Vue({


            el: '#root',
            data: {


                name: 'CKQN'
            }
        });
    </script>
</body>

</html>
插件实列
基本方法
1. 需要引入插件的js
<script src="../18_插件/atguigu.js"></script>
2. 使用插件:  Vue.use(插件的名字)
 Vue.use(atguigu)
atguigu.js
const atguigu={


}

atguigu.install=function(Vue,options){


    // 添加两个全局指令

    //  大写
    Vue.directive('upper-text',function(el,bangding){


        el.innerText=bangding.value.toUpperCase();
    })
    //  小写
    Vue.directive('lower-text',function(el,bangding){


        el.innerText=bangding.value.toLowerCase();
    })

    // 给Vue自身添加属性
    Vue.projectName='学生管理系统';
    Vue.MyVersion='v1.0.0'
    Vue.showInfo=function(){


        console.log('我是一些信息');
    };

    // 给Vue原型上添加数据,供vm使用。
    Vue.prototype.$random=function(min,max){


        return Math.random()*(max-min)+min   // TODO (0~1)*6+2
    }
}
html代码
<!DOCTYPE html>
<html lang="en">

<head>
    <meta charset="UTF-8">
    <meta http-equiv="X-UA-Compatible" content="IE=edge">
    <meta name="viewport" content="width=device-width, initial-scale=1.0">
    <title>自定义插件</title>
    <script src="../js/vue.js"></script>
    <script src="../18_插件/atguigu.js"></script>

</head>

<body>
    <!-- 准备好一个容器 -->
    <div id="root">
        <h2>{

   {name}}</h2>
        <h2 v-upper-text="name"></h2>
        <h2 v-lower-text="name"></h2>
        <!-- 调用我们自定义插件种的原型 -->
        <h2>{

   {$random(2,8)}}</h2>
    </div>
    <script>
        /*
            插件的定义: 是一个包含install方法的对象,
        */
        Vue.config.productionTip = false  //关闭生产提示

        //Vue会帮助我们去调用atguigu 这个插件里面的install方法
        Vue.use(atguigu)
        console.log(Vue.projectName)
        console.log(Vue.MyVersion)
        Vue.showInfo()

        const vm = new Vue({


            el: '#root',
            data: {


                name: 'CKQN'
            }
        });
    </script>
</body>

</html>
插件的好处: 可以使用第三方库、降低原有代码的臃肿性,提升代码的简介程度
(二十二)、组件(Compontents)
1.组件_非单文件
- 单文件与非单文件的区别:
单文件组件: 一个文件就是一个组件,而且文件后缀是.vue
非单文件组件: 所有组件,都定义在一个文件中,文件的后缀不是.vue
我们正常开发中一定使用的是单文件组件,我们实列用的.html .js都是非单文件组件。
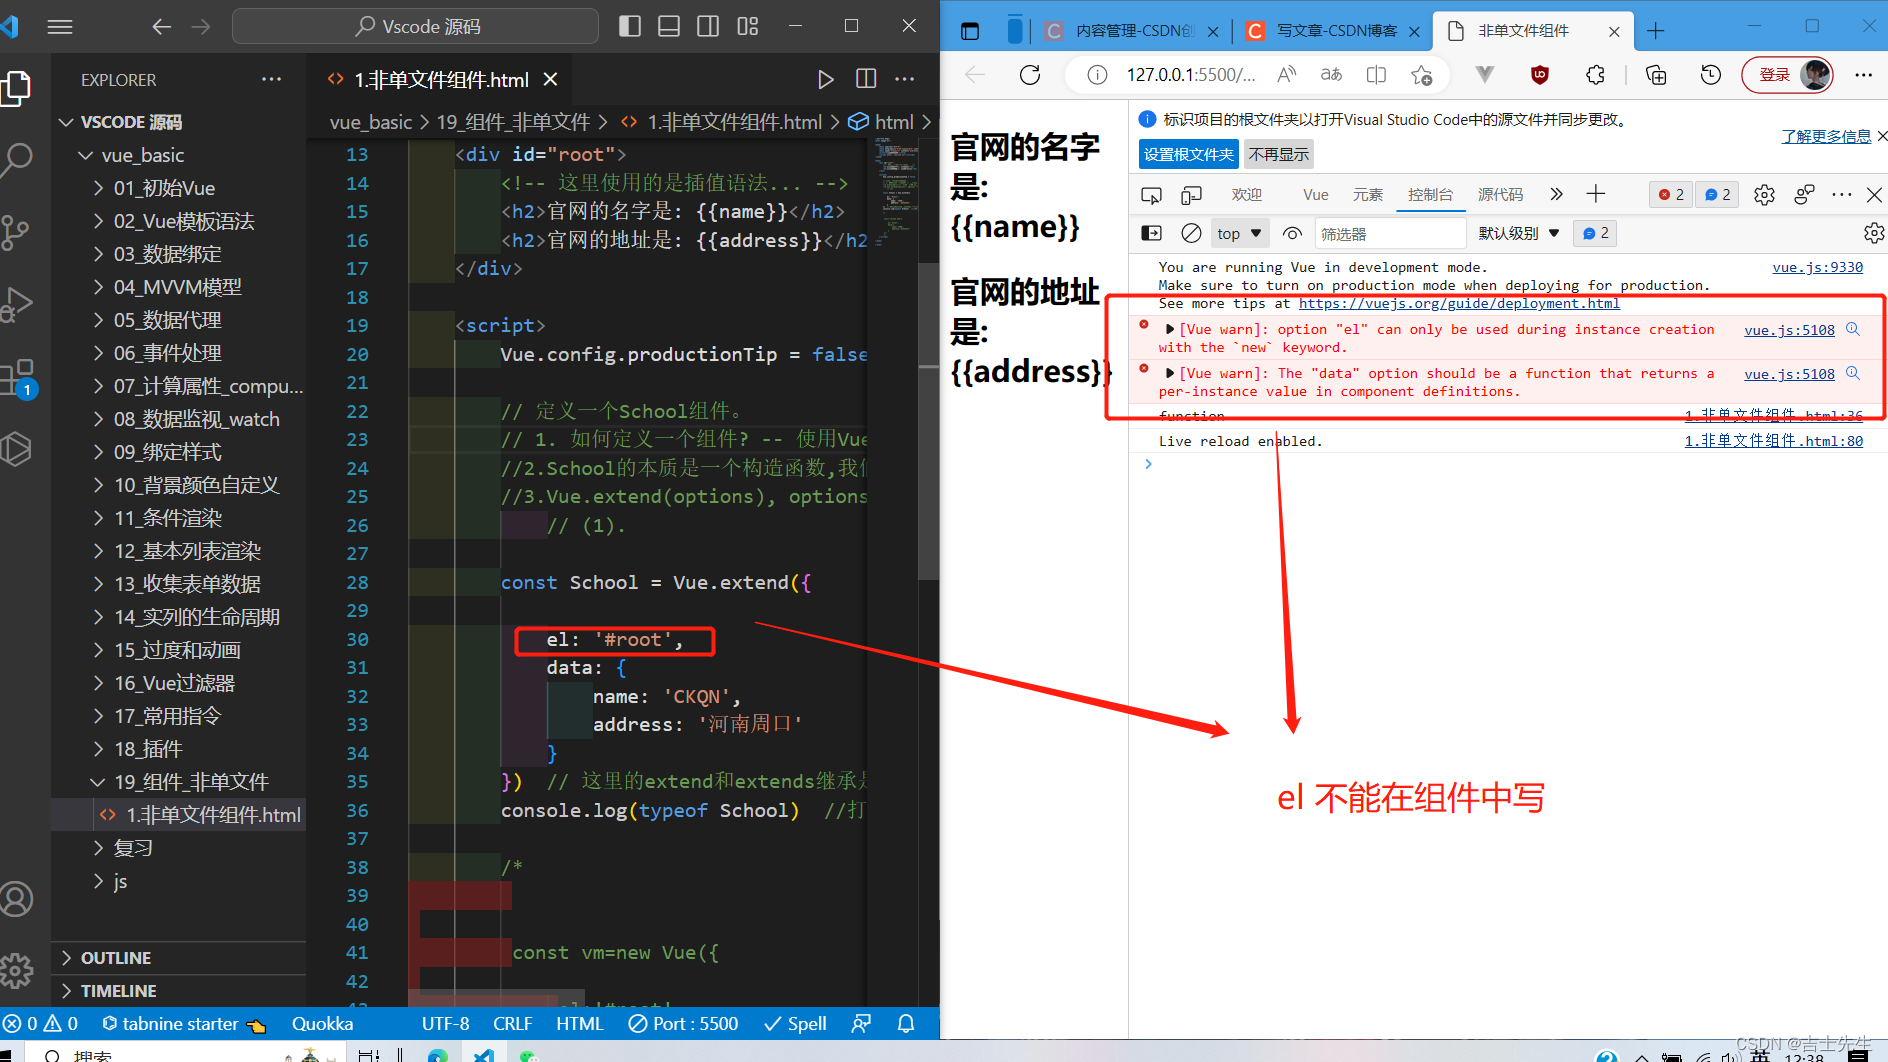
- 组件的调用
组件的参数和new Vue()一样是一个配置对象,但是在这个配置对象中: el不能被写在这里,data在这里必须是一个方法而不能是一个对象。如果是一个对象就会报错!目的是为了确保组件中的属性不会被干扰。
组件的使用基本流程:
 1.定义组件
 2.注册组件:
   (1).全局注册
     // 全局注册组件Vue.component(组件名,组件)
     Vue.component('School',School) // 自定义组件名、组件
   (2).局部注册
    components:{

    // 局部注册组件
          School
   }
 3.定义一个Vue的实列
   const vm=new Vue({


       el:'#root',
         components:{

       // 局部注册组件
            School
       }
    });
 4.组件标签展示
     <div id="root">
        <School></School>

    </div>
全局注册组件可以供多个Vue实列共享,局部全局注册组件只能供一个使用
<!DOCTYPE html>
<html lang="en">

<head>
    <meta charset="UTF-8">
    <meta http-equiv="X-UA-Compatible" content="IE=edge">
    <meta name="viewport" content="width=device-width, initial-scale=1.0">
    <title>非单文件组件</title>
    <script src="../js/vue.js"></script>
</head>

<body>
    <!--
        组件的使用基本流程:
            1.定义组件
            2.注册组件:  (1).全局注册 (2).局部注册
            3.定义一个Vue的实列
            4.组件标签展示
     -->
    <div id="root">
        <School></School>

    </div>

    <script>
        Vue.config.productionTip = false

        // 定义一个School组件。
        //1. 如何定义一个组件? -- 使用Vue.extend(options)去创建
        //2.School的本质是一个构造函数,我们以后写<School/>,Vue帮我们new School
        //3.Vue.extend(options), options -->是一个配置对象,这个配置对象几乎和new Vue时的哪个options一样。
            // (1). 不能写el去指定容器?
                    // 所有组件实列最终要被一个vm所管理,vm中会指定好一个el,即组件放入哪个容器
            // (2). data必须写成函数,不能写成对象。
                    // 即利用return。 原因是:如果是一个对象,那么修改一个属性,后面调用的这个属性都会变化成我们修改的属性。而函数的话只会调用修改的函数,没调用的不会被修改
            // (3).组件的模板结构,
                    //3.1 要配置在template属性中,值为html字符串,而且要用模板字符串:"``" ->反引号
                    //3.2 模板结构必须只有一个跟标签。
        //4.所有的组件定义后,必须注册后才能够使用。
        //5.特别注意:
            // (1). School确实是构造函数,但不是我们亲手写的School,而是Vue.extend生成的。
            // (2).Vue.extend()的返回值是: VueComponent 构造函数,所以new School其实就是在 new VueComponent()
            // (3).所有的组件实列,都是VueComponent创建的实列,简称:"vc"。 所有Vue的实列都是Vue创建的实列,简称:"vm"
        //6.一个非常重要的关系
            // (1). VueComponent继承了Vue,所以Vue原型上的属性和方法,VC都能够看得到。 ⭐⭐
            const School = Vue.extend({


            data(){


                return{


                    name:'CKQN',
                    address:'河南周口'
                }

            },
            // template中配置组件的模板结构
                    template:`
                    <div>
                        <h2>{

       {name}}</h2>
                        <h2>{

       {address}}</h2>
                    </div>
                    `
        })  // 这里的extend和extends继承是有关系的。

        // 全局注册组件Vue.component(组件名,组件)
            // Vue.component('School',School) // 自定义组件名、组件

        // 定义一个Vue的实列去管理组件
            const vm=new Vue({


                el:'#root',
                components:{

         // 局部注册组件
                    School
                }
            });
         const s=new School();
         console.log(s);
    </script>

</body>

</html>
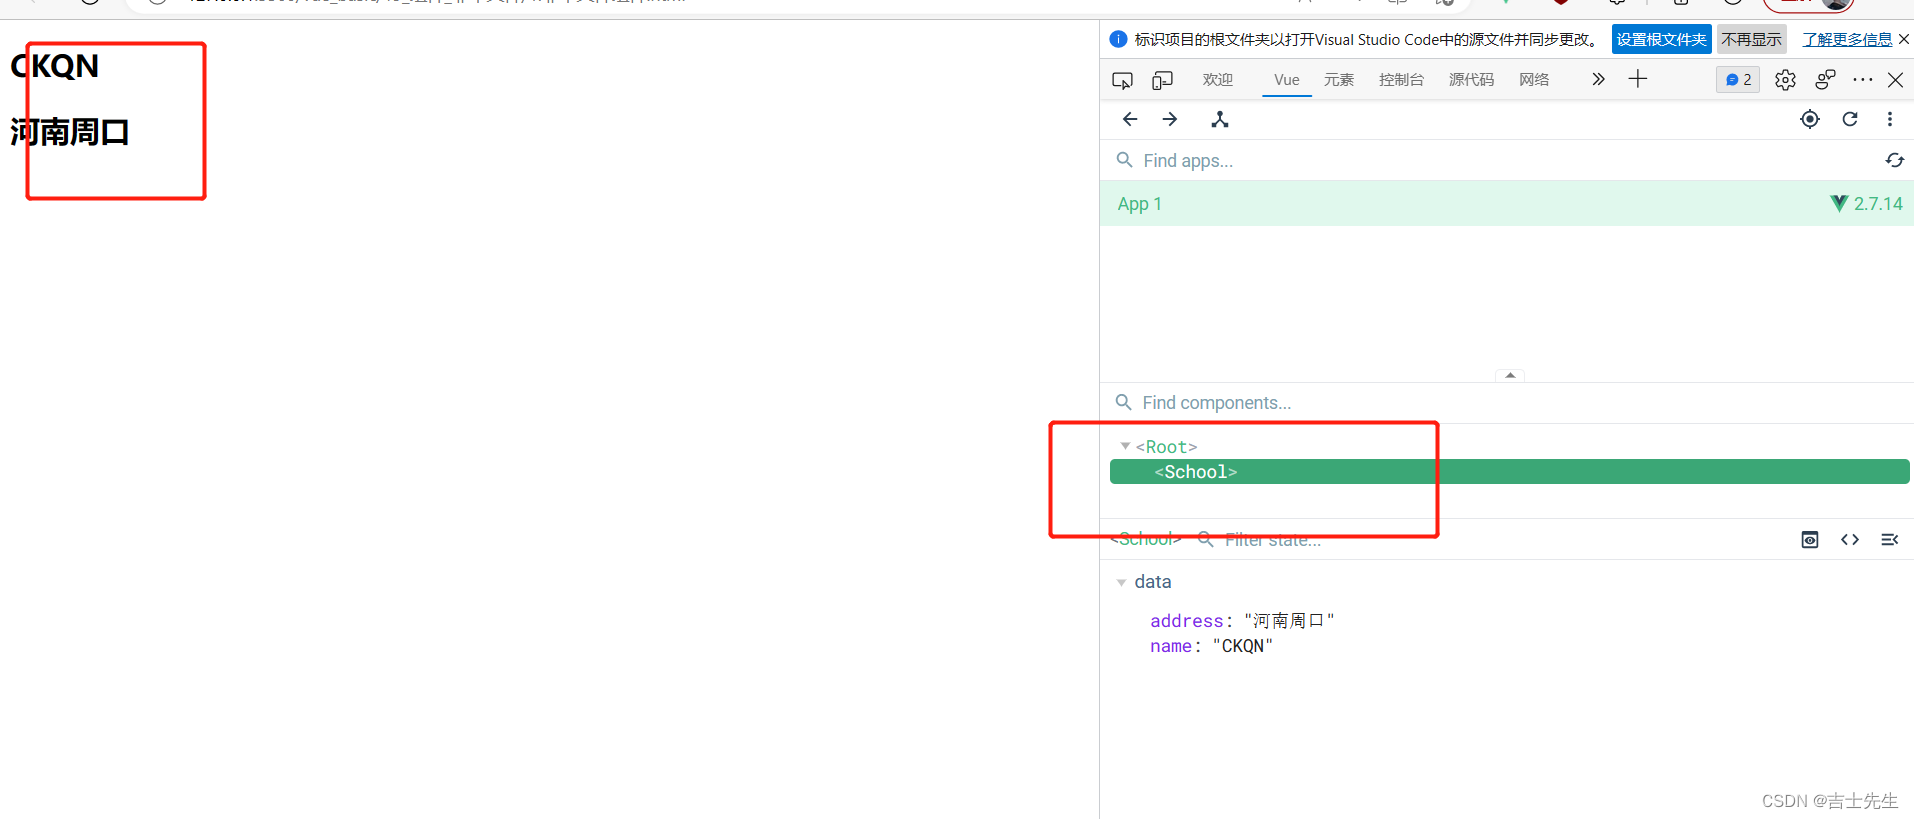
组件对象都是VueComponent创建的,简称:"vc"。VueComponent继承了Vue。
继承的实质: 就是让子类的原型对象指向父类的实列
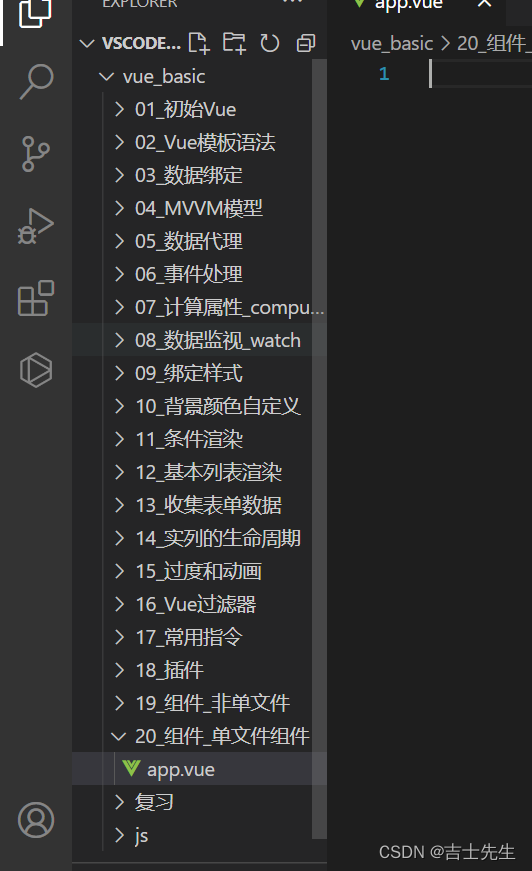
2.组件_单文件
1.非单文件弊端。
- 模板编写没有提示并且不高亮。
- 没有构建过程,无法将ES6转换成ES5。
- 不支持组件的CSS。
- 真正的开发根本用不到。
组件与组件之间可以嵌套。
- 创作vue组件-但未成功!!
创建单文件数据组件
/* 这里写完并不是说我们创建好了一个组件,只能说写完了一个组件的全部配置。因为没有调用Vue.extend()*/

/* 配置组件模板结构 */

<template>
  <!-- div 会跑到页面上去 -->
  <div>
    <h2 class="title">学校名: {

   { name }}</h2>
    <h2 class="info" @click="showInfo">学校地址: {

   { address }}</h2>
  </div>
</template>

/* 配置组件数据、交互、时间等等*/
<script>
// 此处只是暴露一个组件的配置,⭐并没有去创建组件⭐,因为没有调用Vue.extend();
export default {


  // data区域
  data: {


    name: "CKQN",
    address: "河南周口",
  },
  //   方法区域
  methods: {


    showInfo() {


      // 这里的this是vc 并不是vm了
      alert(this.address);
    },
  },
};
</script>
/* 配置组件样式  */
<style>
    .title{


        background-color: blue;
    }
    .info{


        background-color: brown;
    }
</style>
内嵌单文件组件
// 配置组件模板的结构
<template>
    <div>
        <h2>我是APP: {

   {car}}</h2>
        <school></school>
    </div>
</template>

// 配置组件的交互、事件等信息
<script>
// 引入School组件
import School from './components/School'
// 暴露组件
export default{


    data() {


        return {


            car:'宝马'
        }
    },
    components:{

      SchoolSchool}
}
</script>

<style>

</style>
index.html
<!DOCTYPE html>
<html lang="en">
<head>
    <meta charset="UTF-8">
    <meta http-equiv="X-UA-Compatible" content="IE=edge">
    <meta name="viewport" content="width=device-width, initial-scale=1.0">
    <title>Document</title>
    <script src="../js/vue.js"></script>
</head>
<body>
    <div id="root">
        <App></App>
    </div>

    <script>
        import App from './App.vue'
        new Vue({


            el:'#root',
            components:{

      App}
        })
    </script>
</body>
</html>
运行结果: 失败!!
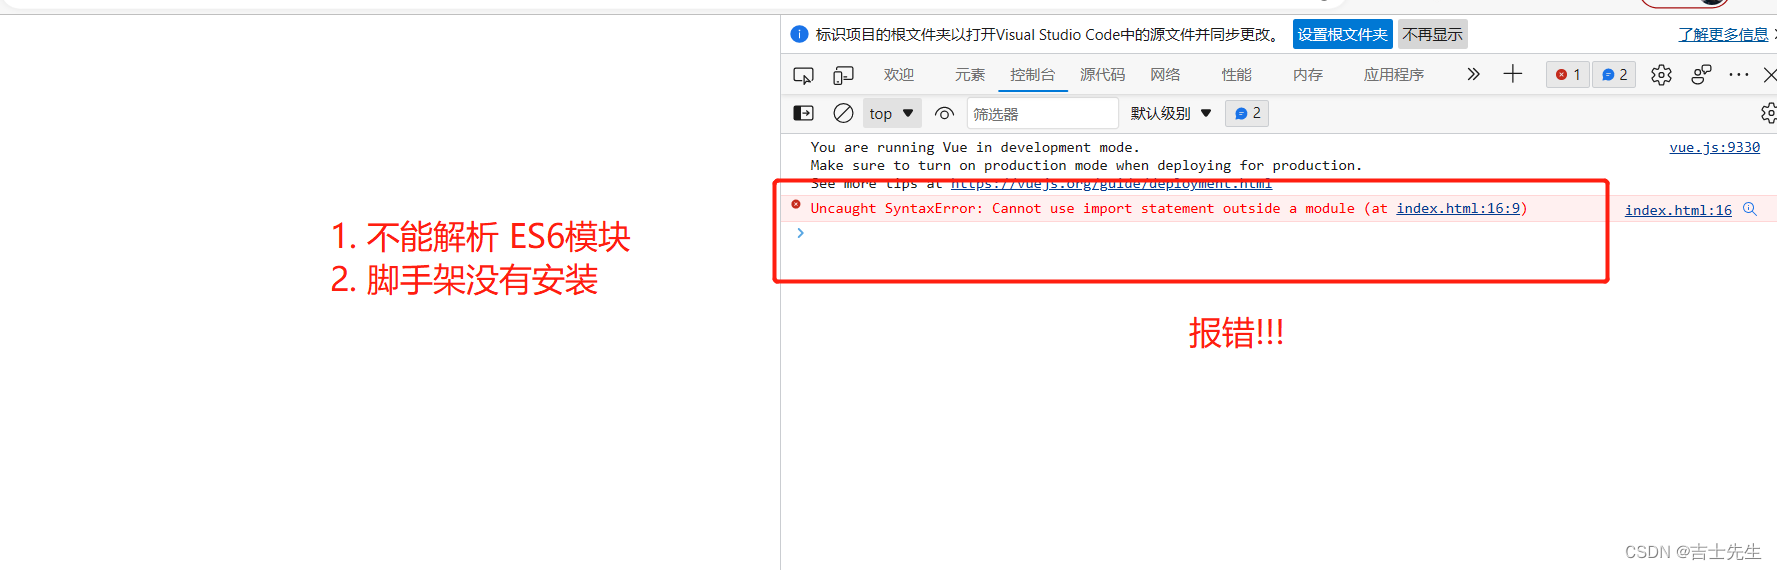
(二十三).使用Vue脚手架
脚手架的作用: 解析ES6模块、解析vue组件、以及自动调用Vue.extend()
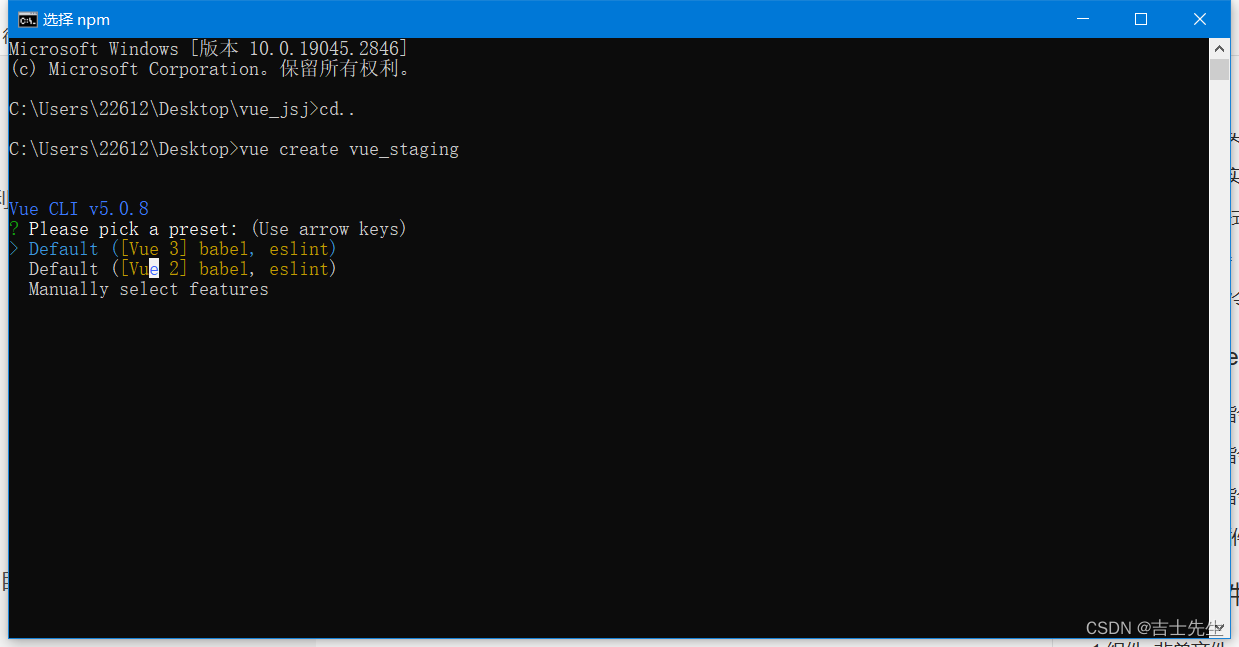
1.使用脚手架创建模板项目
- 说明
- vue-cil是vue官方提供的脚手架工具。
- 3.x相对于2.x的版本相差特别大,我们利用vue-cli 4.0版本。
- 在线文档:
- 创建vue项目
第一步: 安装Vue脚手架:
npm install -g @vue/cli
第二步: 进入我们需要使用脚手架项目的目录下:
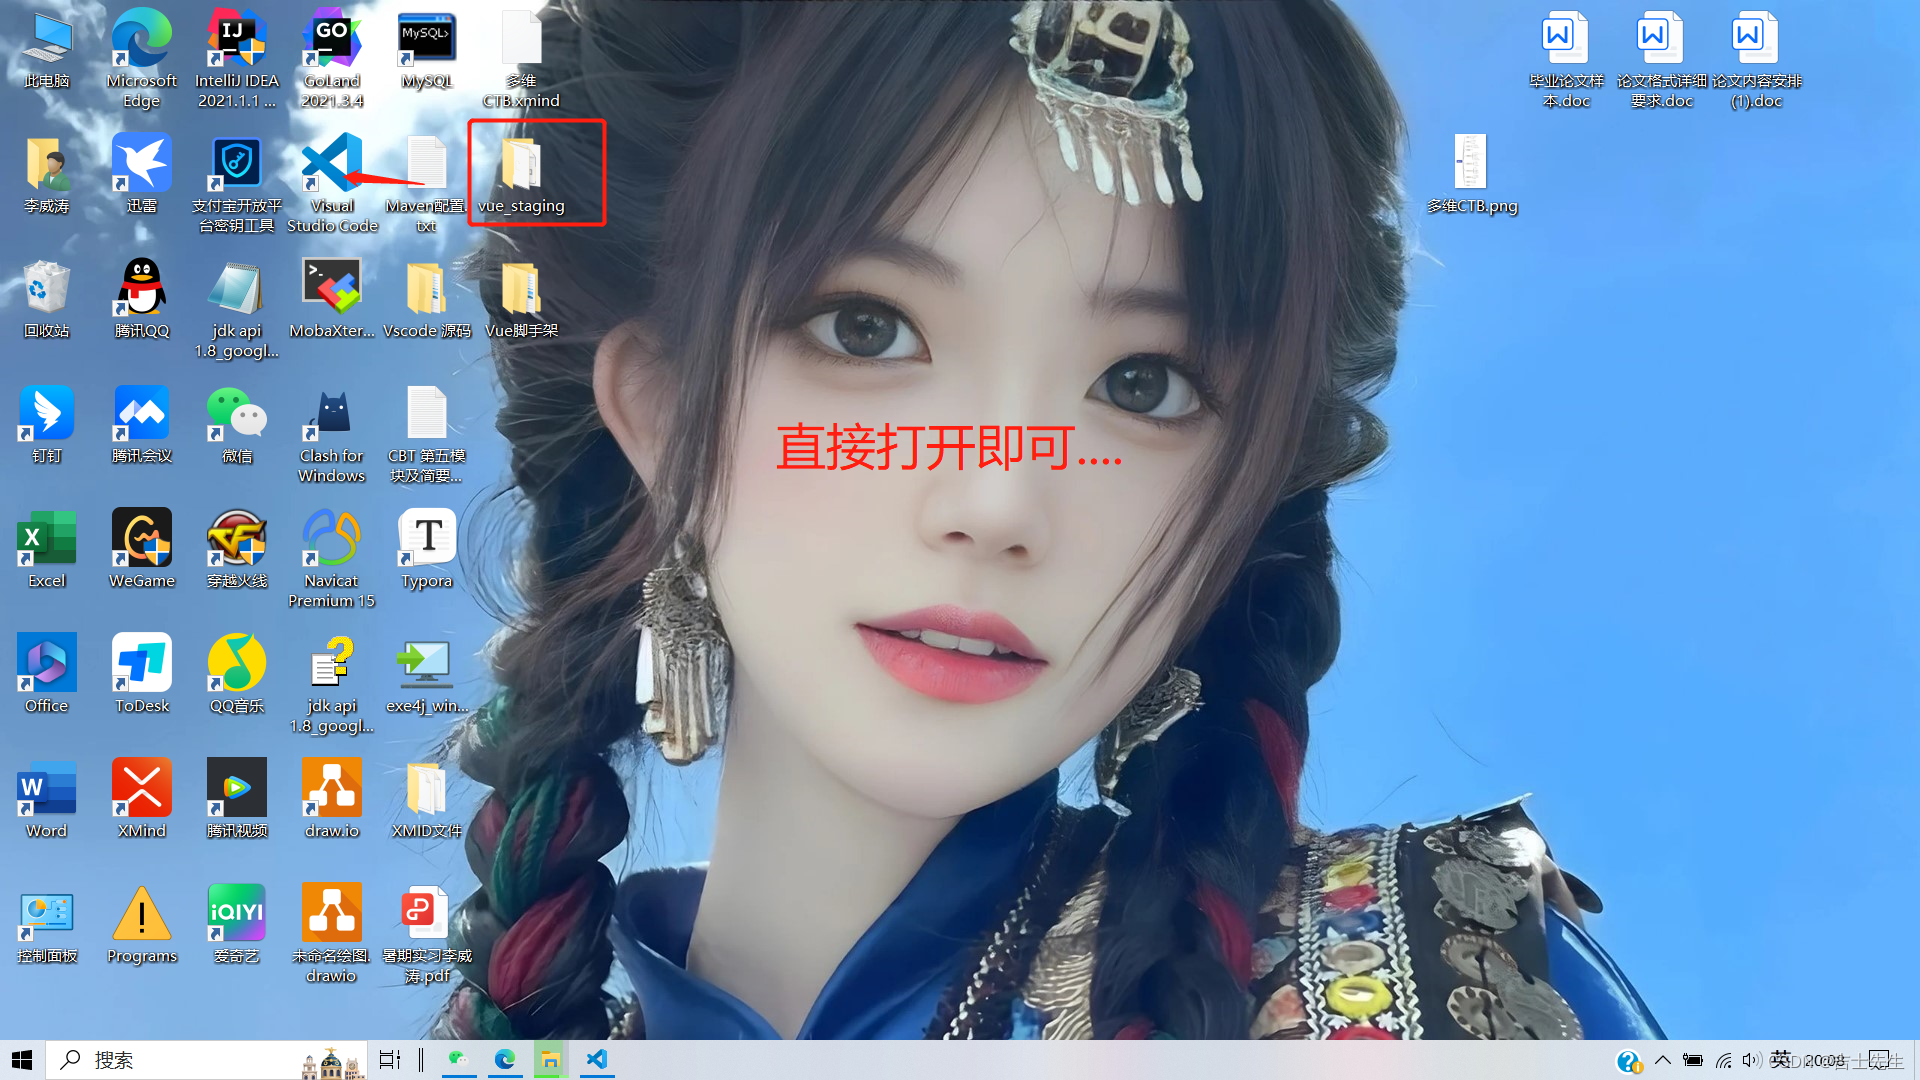
打开cmd,在桌面的目录上..
vue create '自定义名字'
选择2
创建完毕之后: 会显示下面的页面
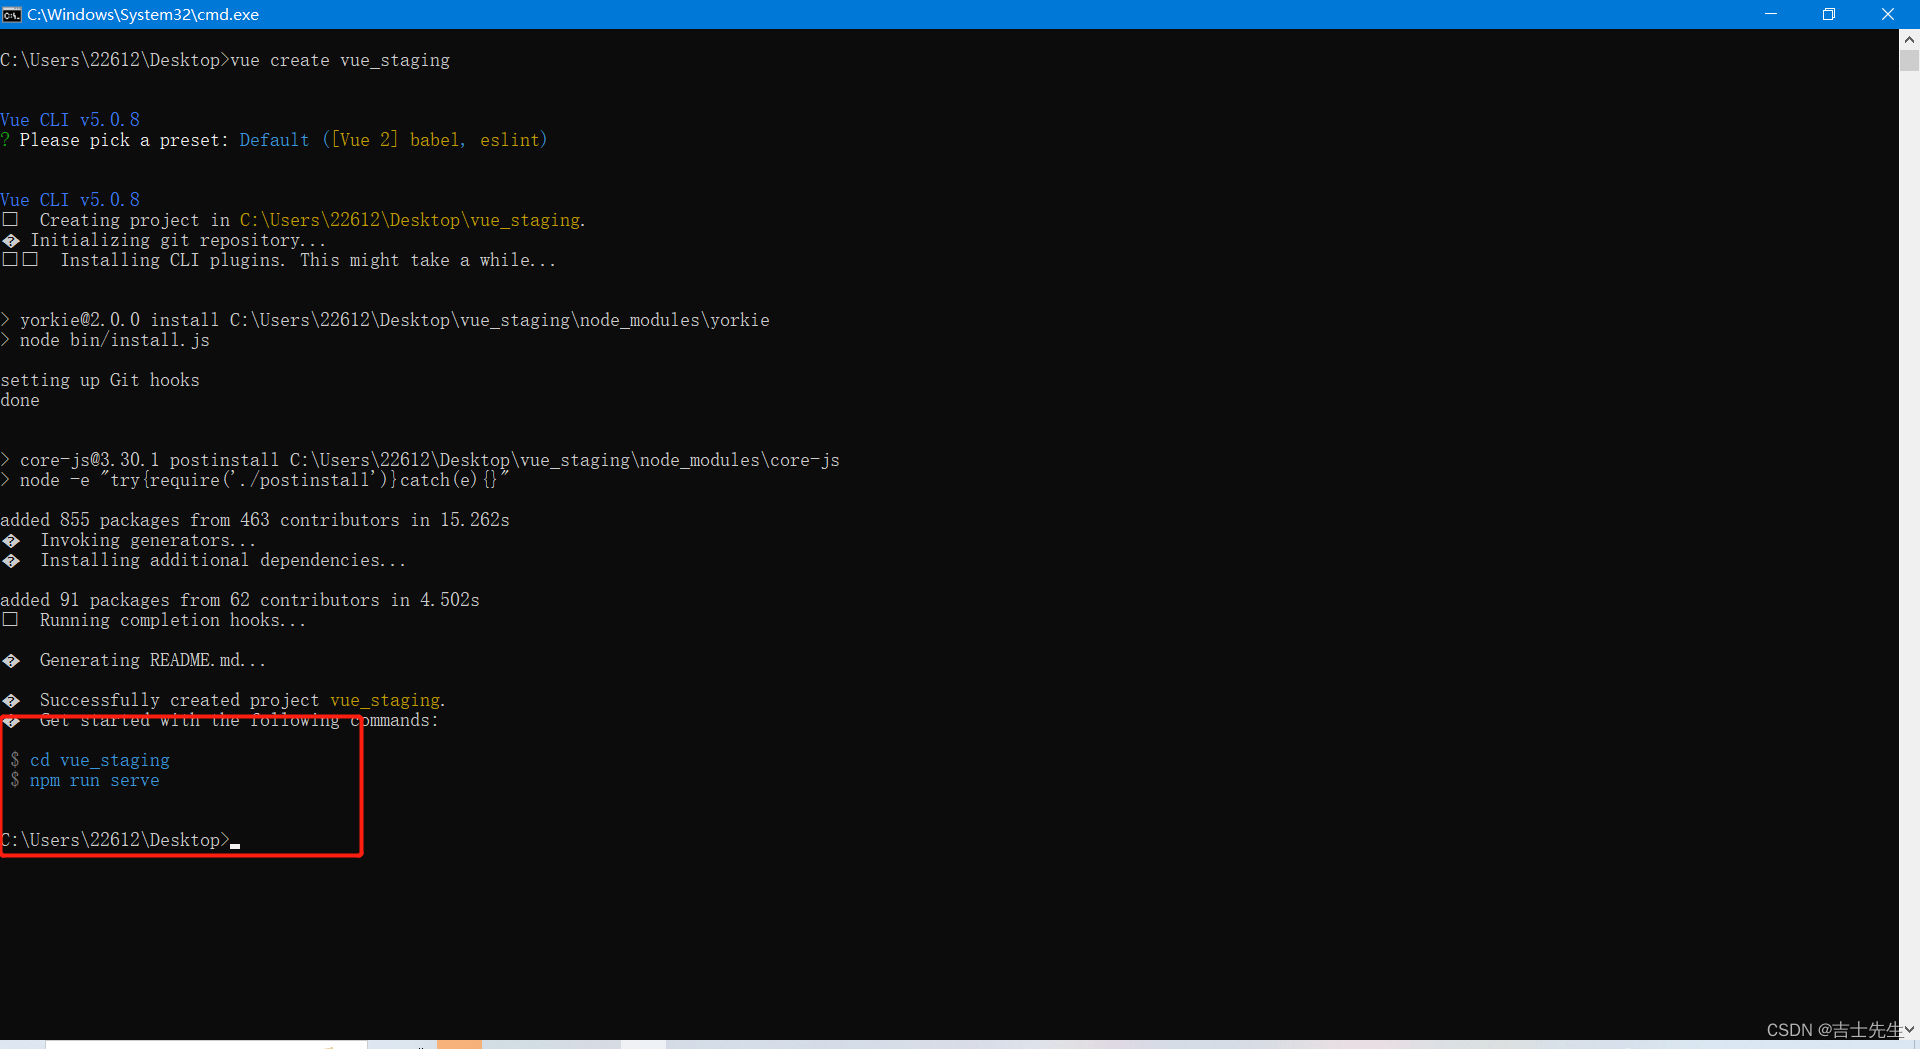
3.根据提示进入它指定的位置:
cd vue_staging
4.运行 脚手架
npm run serve
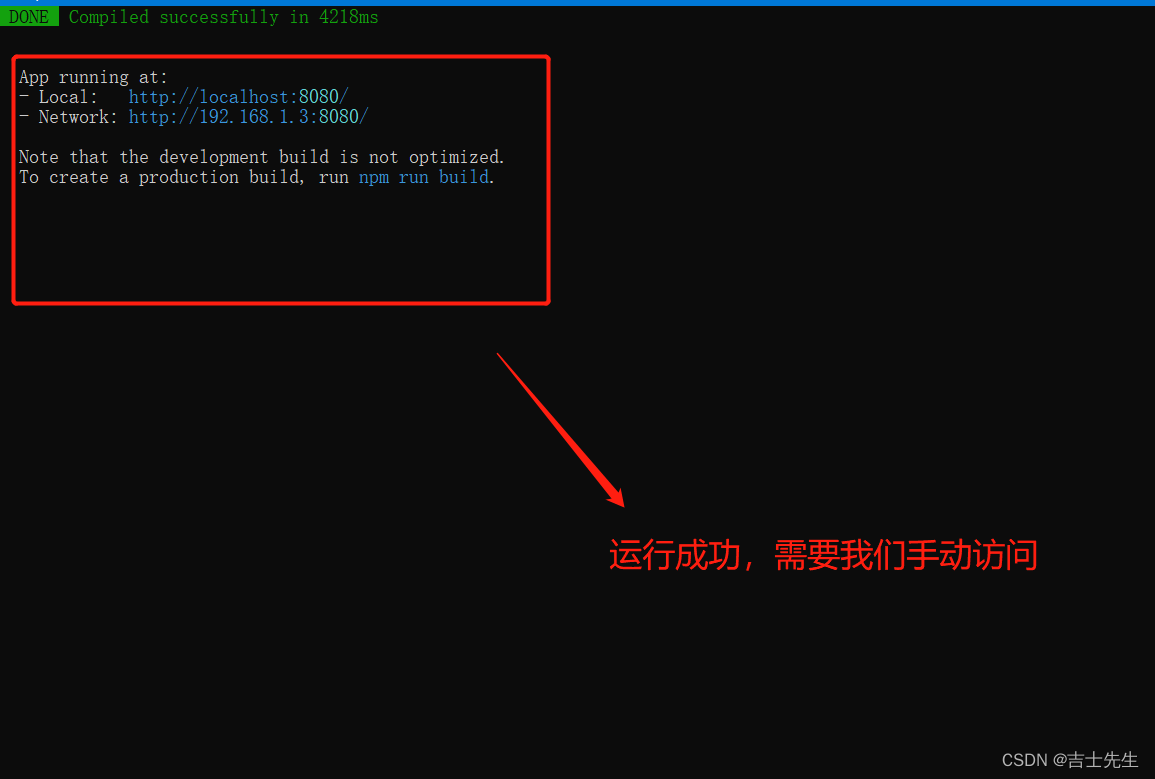
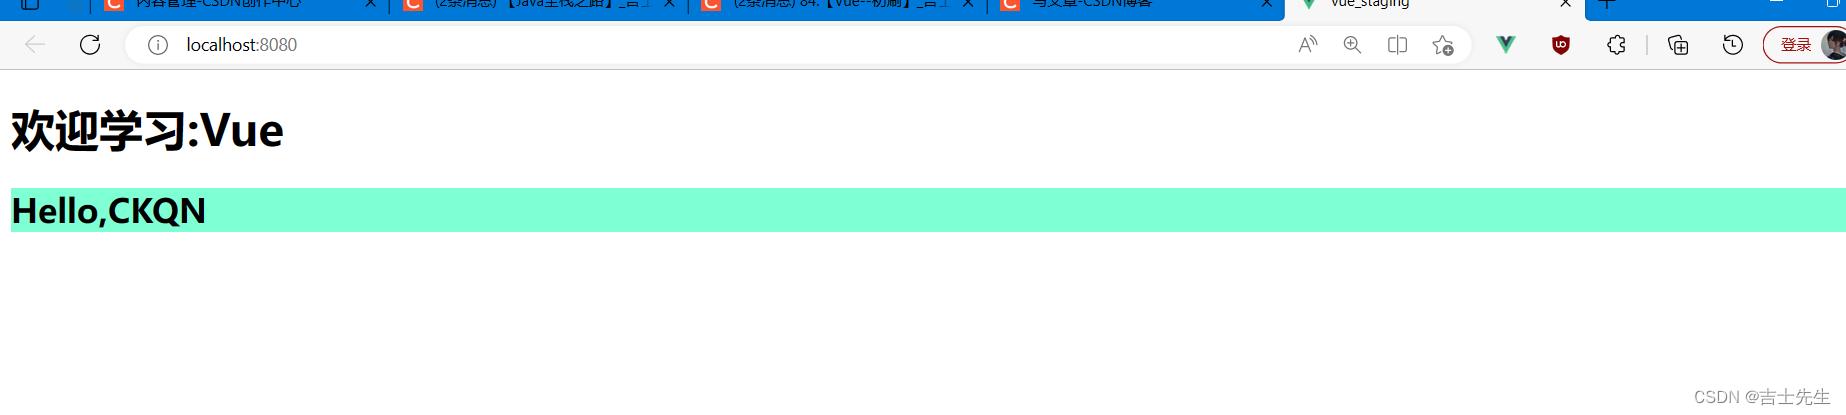
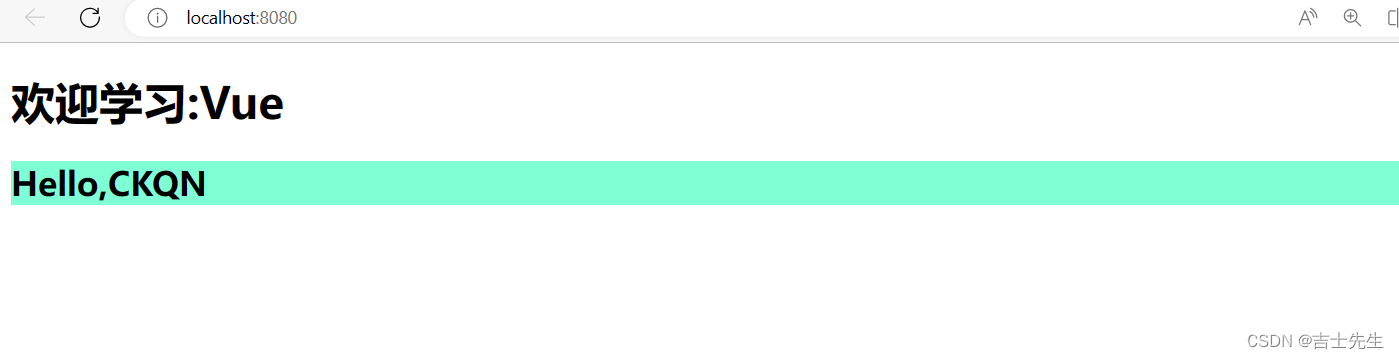
浏览器输入网址:显示下面的页面也就是成功了
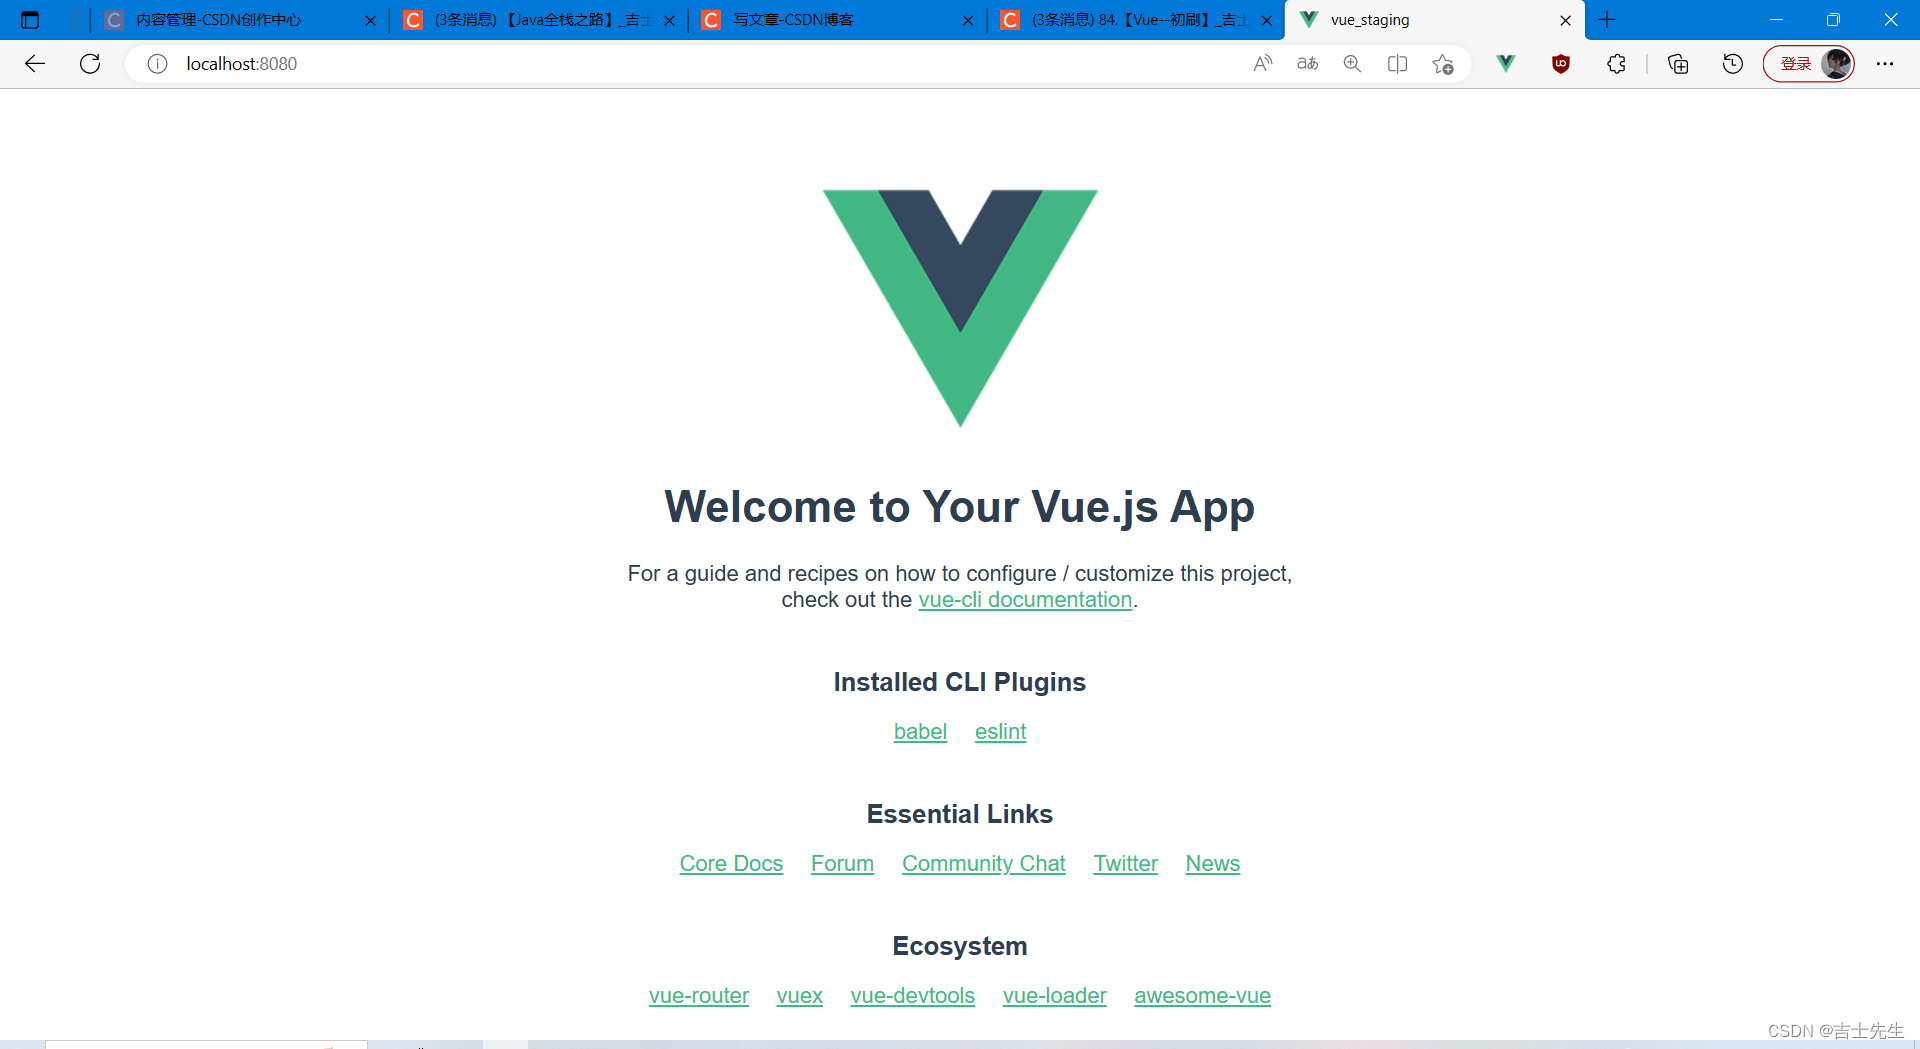
Vue脚手架只需安装一次即可。然后终身受益
2.分析Vue脚手架
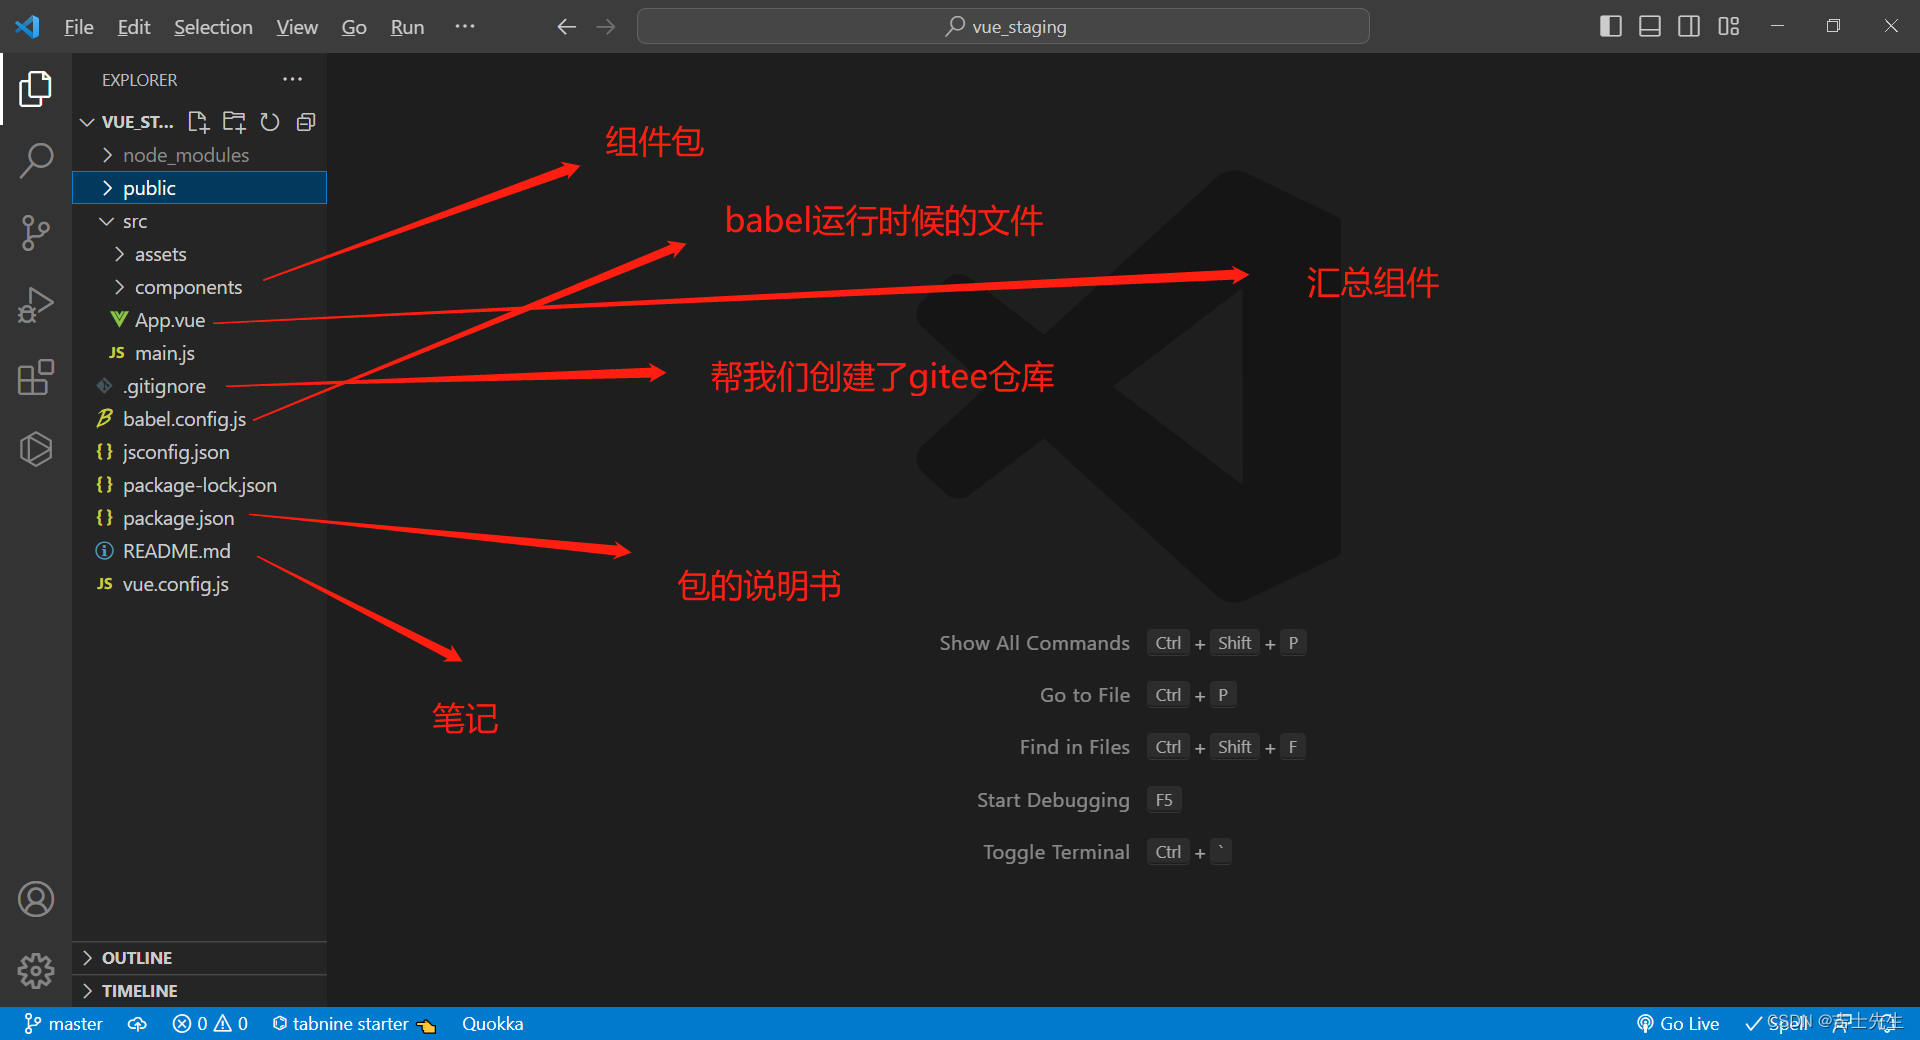
查看我们下载的Vue脚手架
汇总组件
├── node_modules
├── public
│   ├── favicon.ico: 页签图标
│   └── index.html: 主页面
├── src
│   ├── assets: 存放静态资源
│   │   └── logo.png
│   │── component: 存放组件
│   │   └── HelloWorld.vue
│   │── App.vue: 汇总所有组件
│   │── main.js: 入口文件
├── .gitignore: git版本管制忽略的配置
├── babel.config.js: babel的配置文件
├── package.json: 应用包配置文件
├── README.md: 应用描述文件
├── package-lock.json:包版本控制文件
- 修改源代码
HelloWorld.vue
<template>
<div>
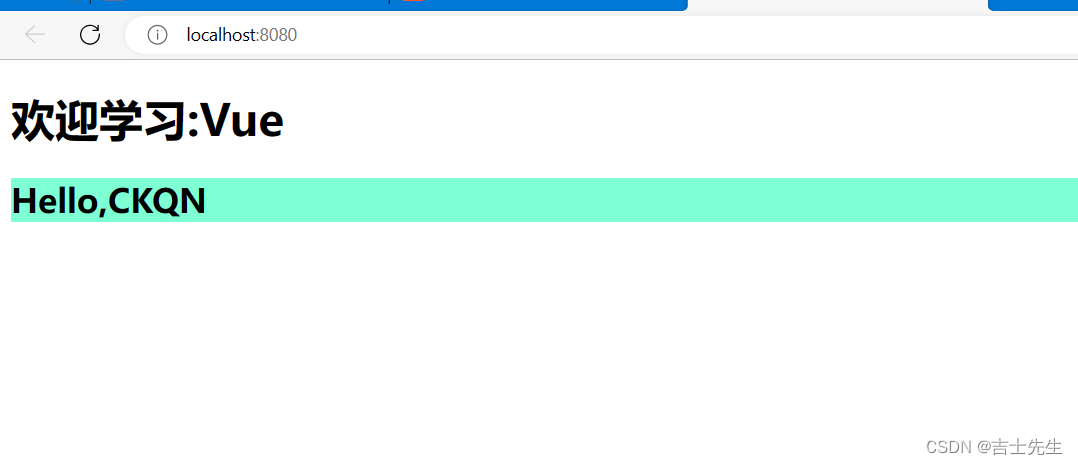
<h2>Hello,{
{name}}</h2>
</div>
</template>
<script>
export default {
data() {
return {
name:'CKQN'
}
},
};
</script>
<style>
h2{
background-color: aquamarine;
}
</style>
App.vue
<template>
    <div>
      <h1>欢迎学习:{

   {text}} </h1>
      <HelloWorld/>
    </div>
</template>

<script>

// 引入外壳组件
import  HelloWorld  from './components/HelloWorld.vue'
export default {


    components:{

      HelloWorld},   // 这个名字是: 我们引入的 {HelloWorld}
    data(){


  return {


    text:'Vue'
  }
}

}
</script>

<style>

</style>
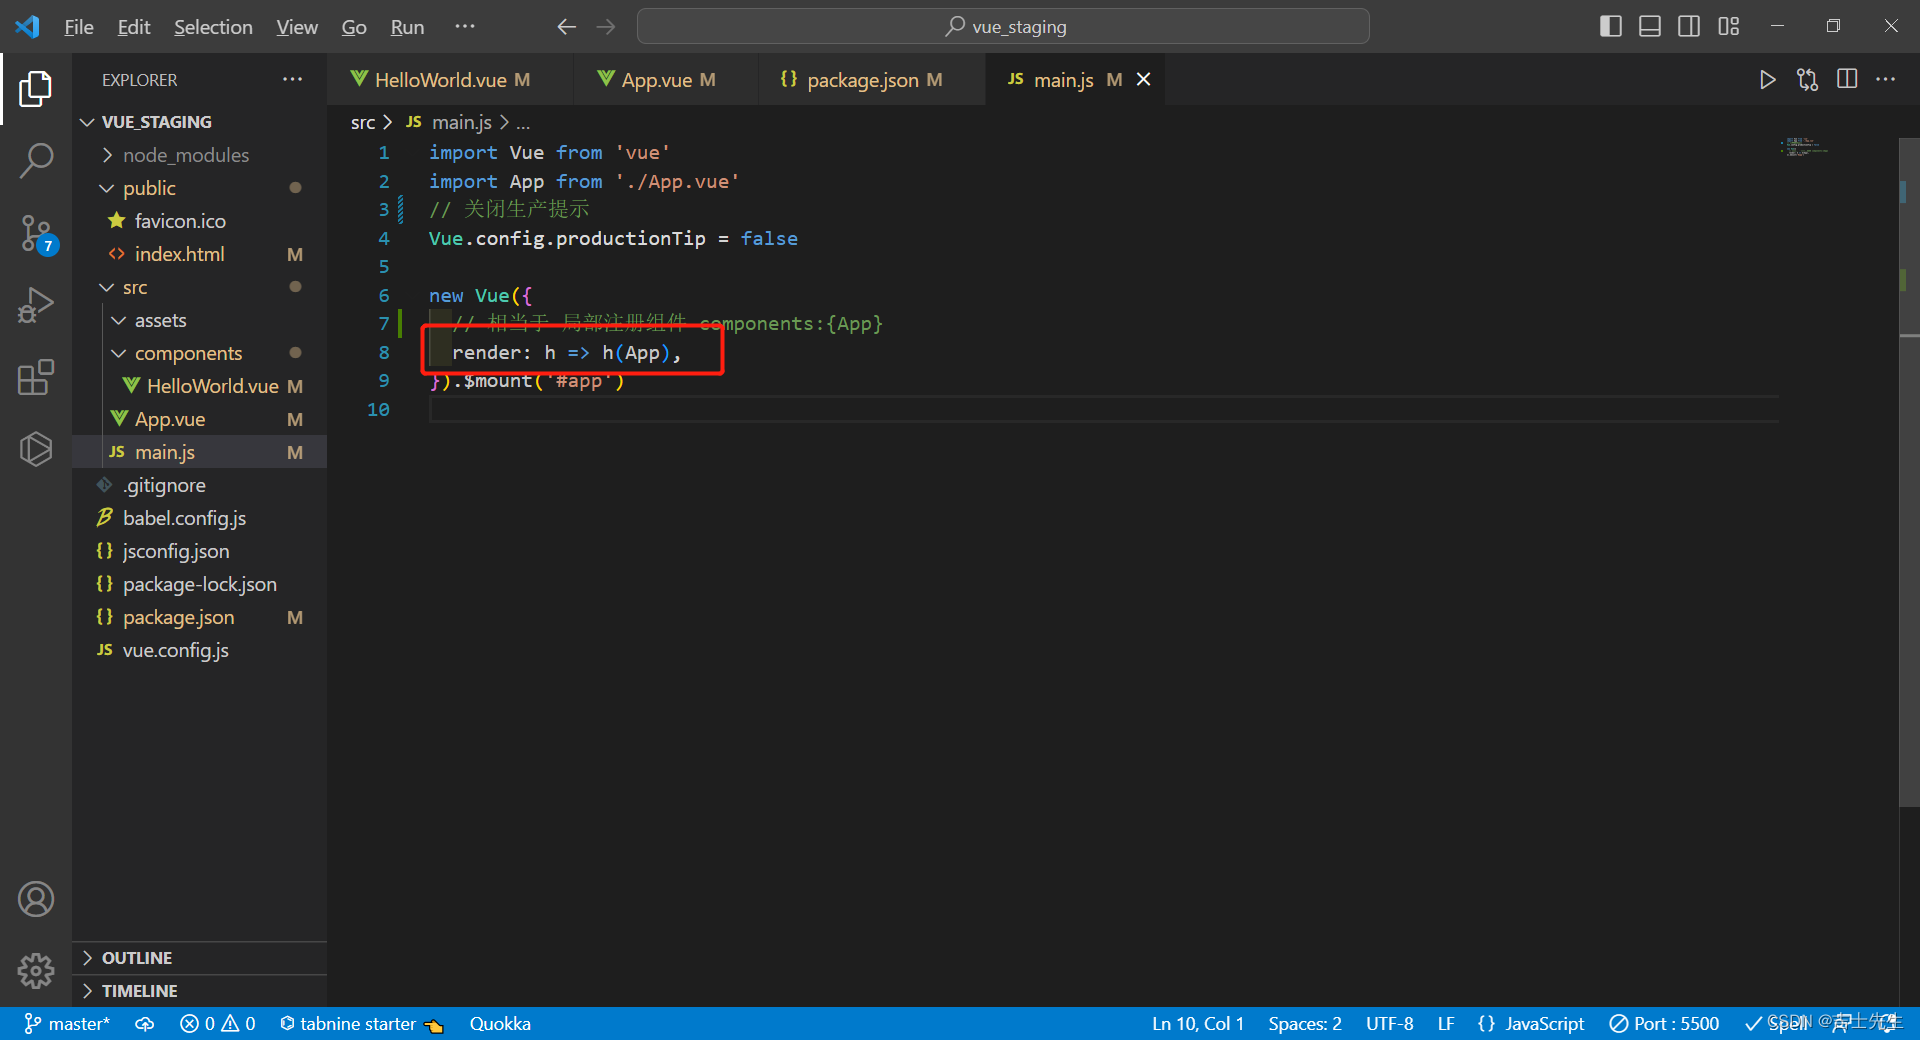
main.js
import Vue from 'vue'
import App from './App.vue'
// 关闭生产提示
Vue.config.productionTip = false

new Vue({


  // 相当于 局部注册组件 components:{App}
  render: h => h(App),
}).$mount('#app')
index.html
<!DOCTYPE html>
<html lang="">
  <head>
    <meta charset="utf-8">
    <!-- 能够获得更好的浏览器兼容性 -->
    <meta http-equiv="X-UA-Compatible" content="IE=edge">
    <!-- 做移动端需要添加的 -->
    <meta name="viewport" content="width=device-width,initial-scale=1.0">
    <!-- 网站图标定制路径 -->
    <link rel="icon" href="<%= BASE_URL %>favicon.ico">
    <!-- 自动读取包下package.json的名字 -->
    <title><%= htmlWebpackPlugin.options.title %></title>
  </head>
  <body>
    <div id="app">
      <App></App>
    </div>

  </body>
</html>
在控制台中断输入:
npm run serve
- 运行报错的解决办法:
运行的时候出错:
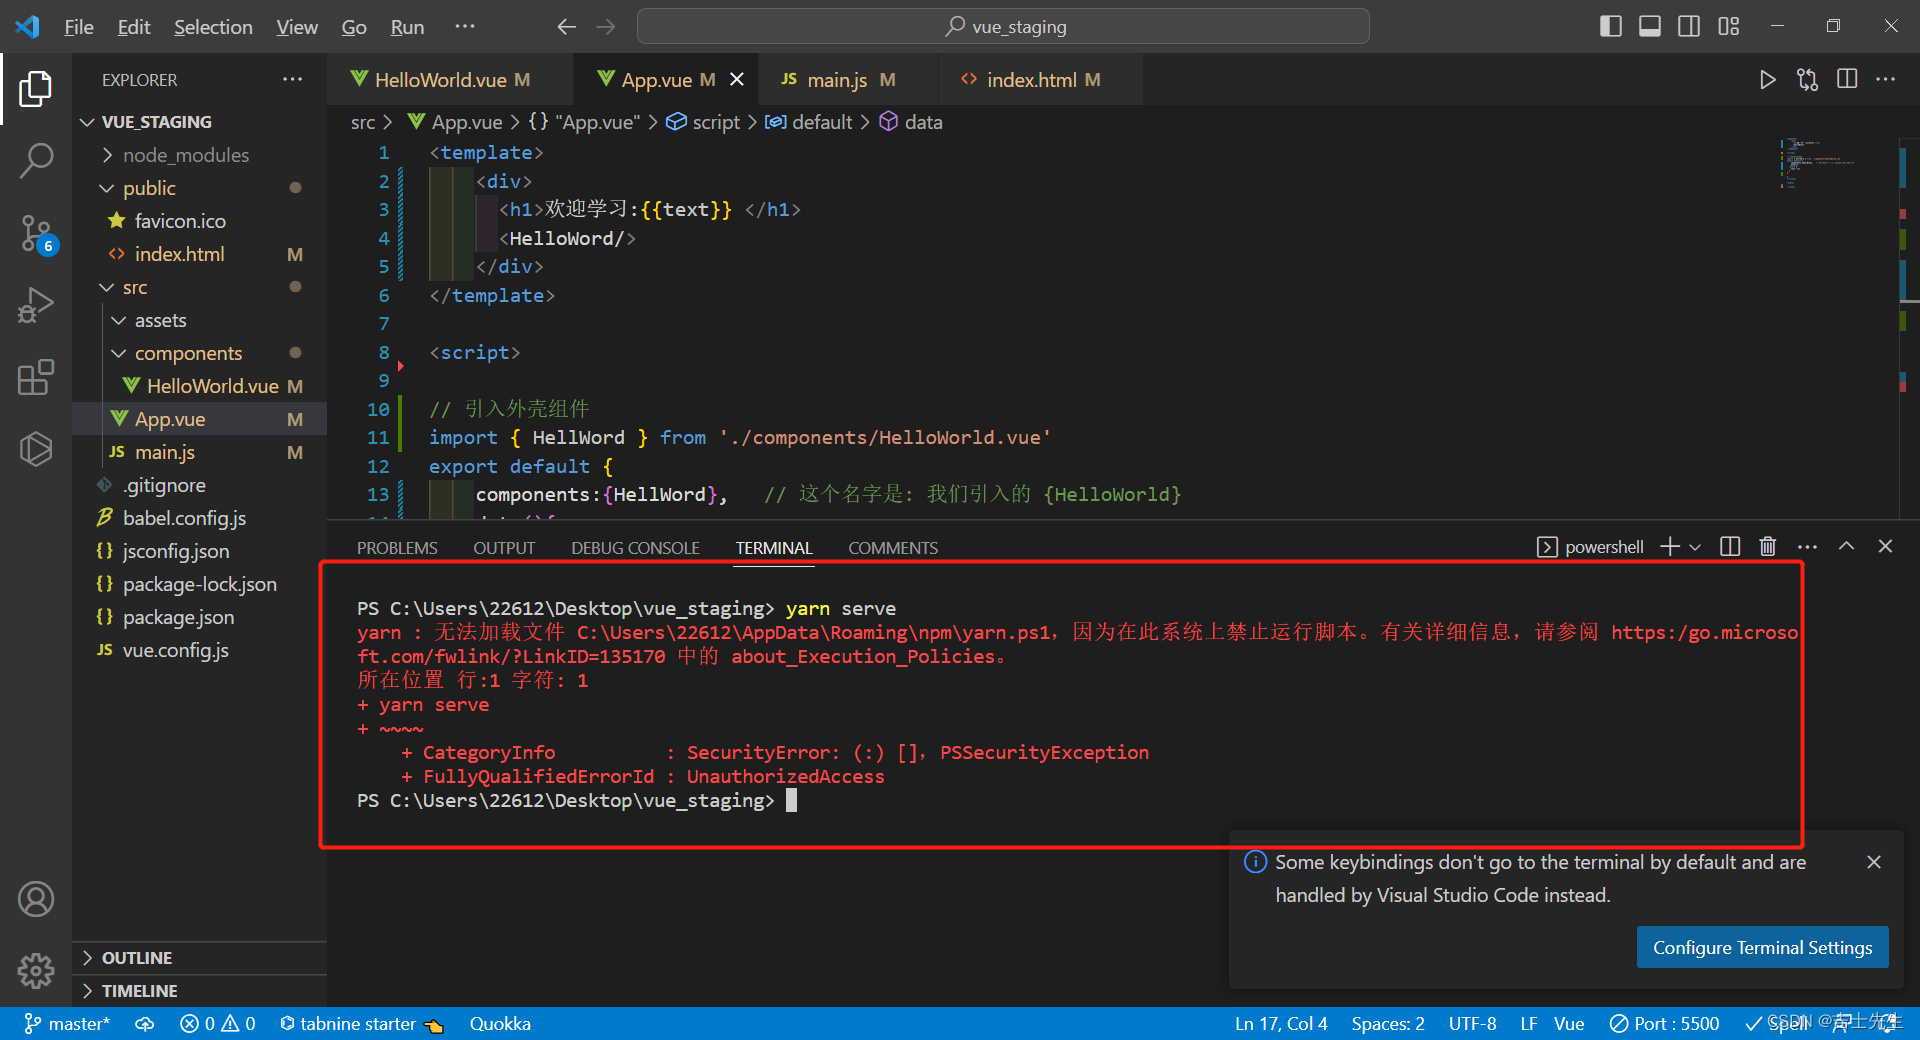
解决办法
1)搜索powershell,右键以管理员身份运行

2)输入:set-ExecutionPolicy RemoteSigned

然后:输入 y

3)关闭命令窗口 即可

在package.json中添加
    "rules": {


      "vue/no-unused-components": "off",
      "no-unused-vars":"off"
    }
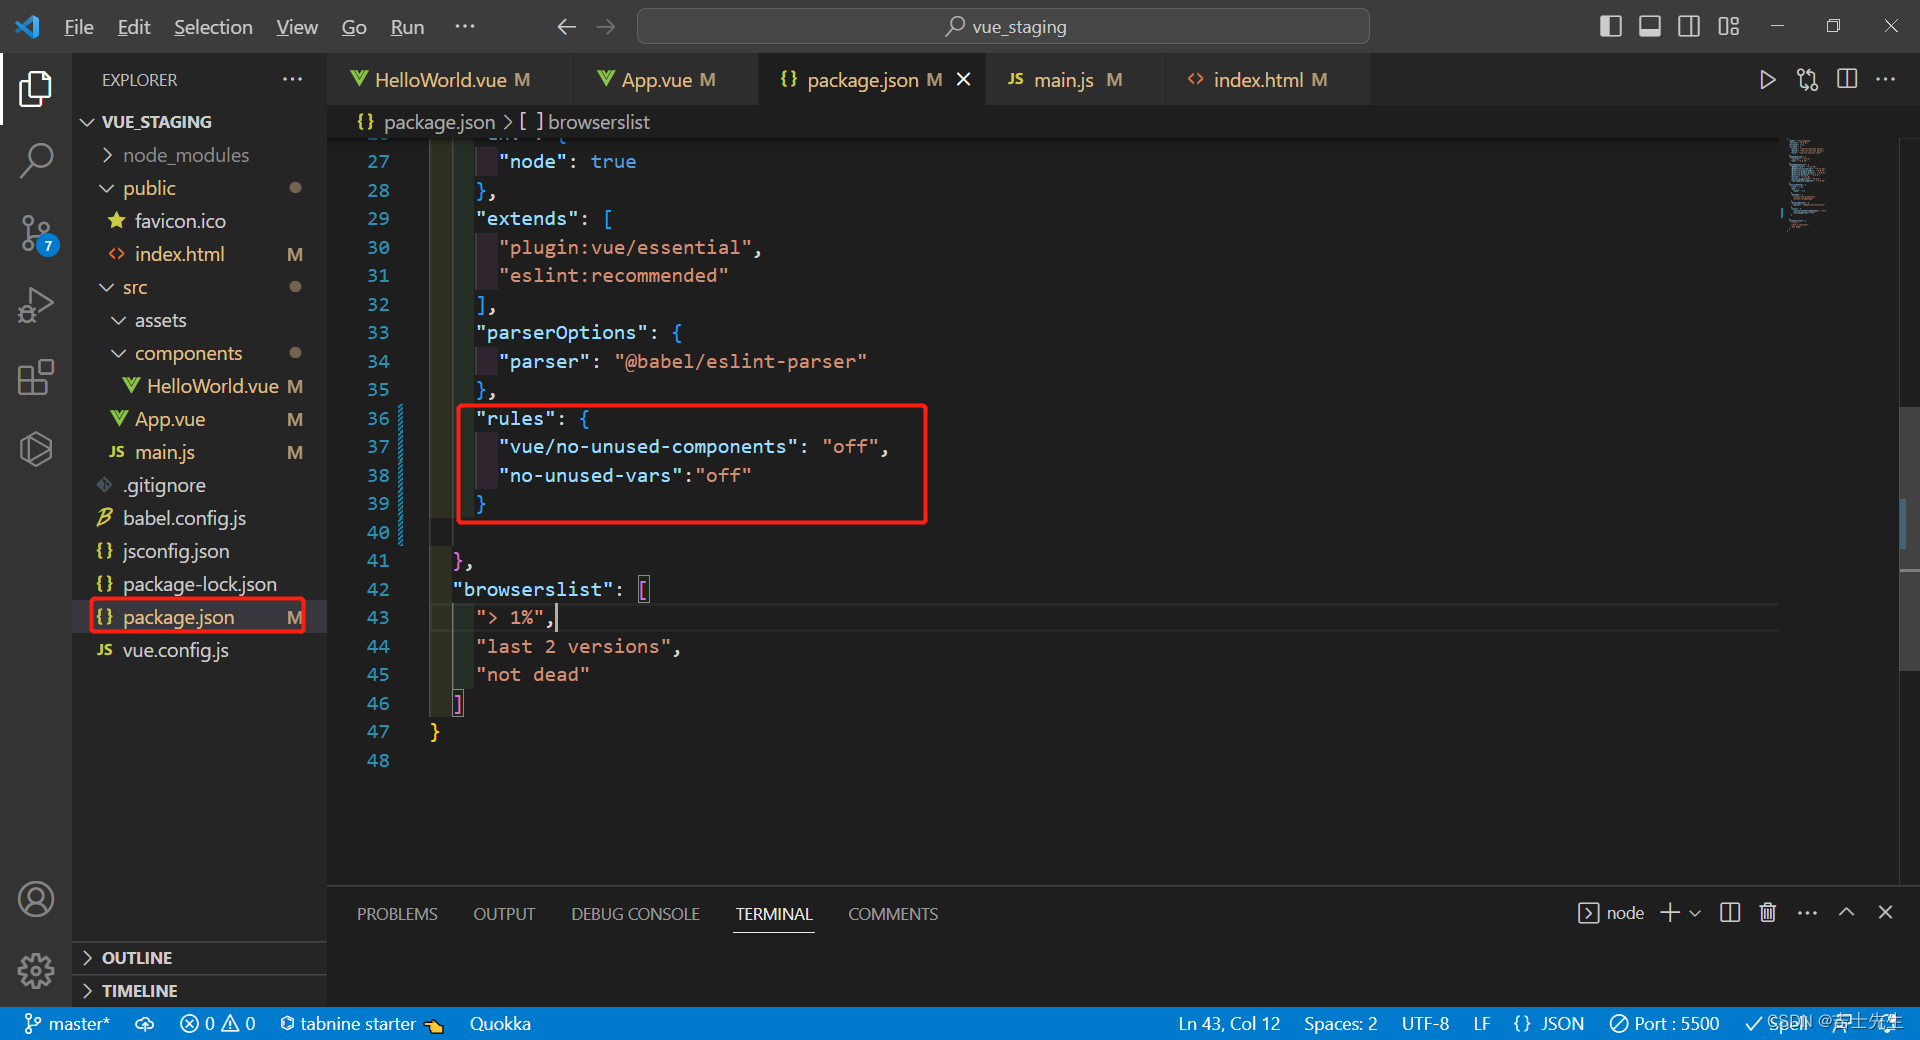
- 成功解决
3.关于main.js中的h说明
- render与compontents的区别
只能使用h这个属性
import Vue from 'vue'
import App from './App.vue'
// 关闭生产提示
Vue.config.productionTip = false

new Vue({


  // 相当于 局部注册组件 components:{App},但是不能换成在局部注册组件
  render: h => h(App),
}).$mount('#app')
不能切换成我们熟悉的局部注册组件
import Vue from 'vue'
import App from './App.vue'
// 关闭生产提示
Vue.config.productionTip = false

new Vue({


  // 相当于 局部注册组件 components:{App}
  // render: h => h(App),
  components:{

    App}
}).$mount('#app')
会报错:
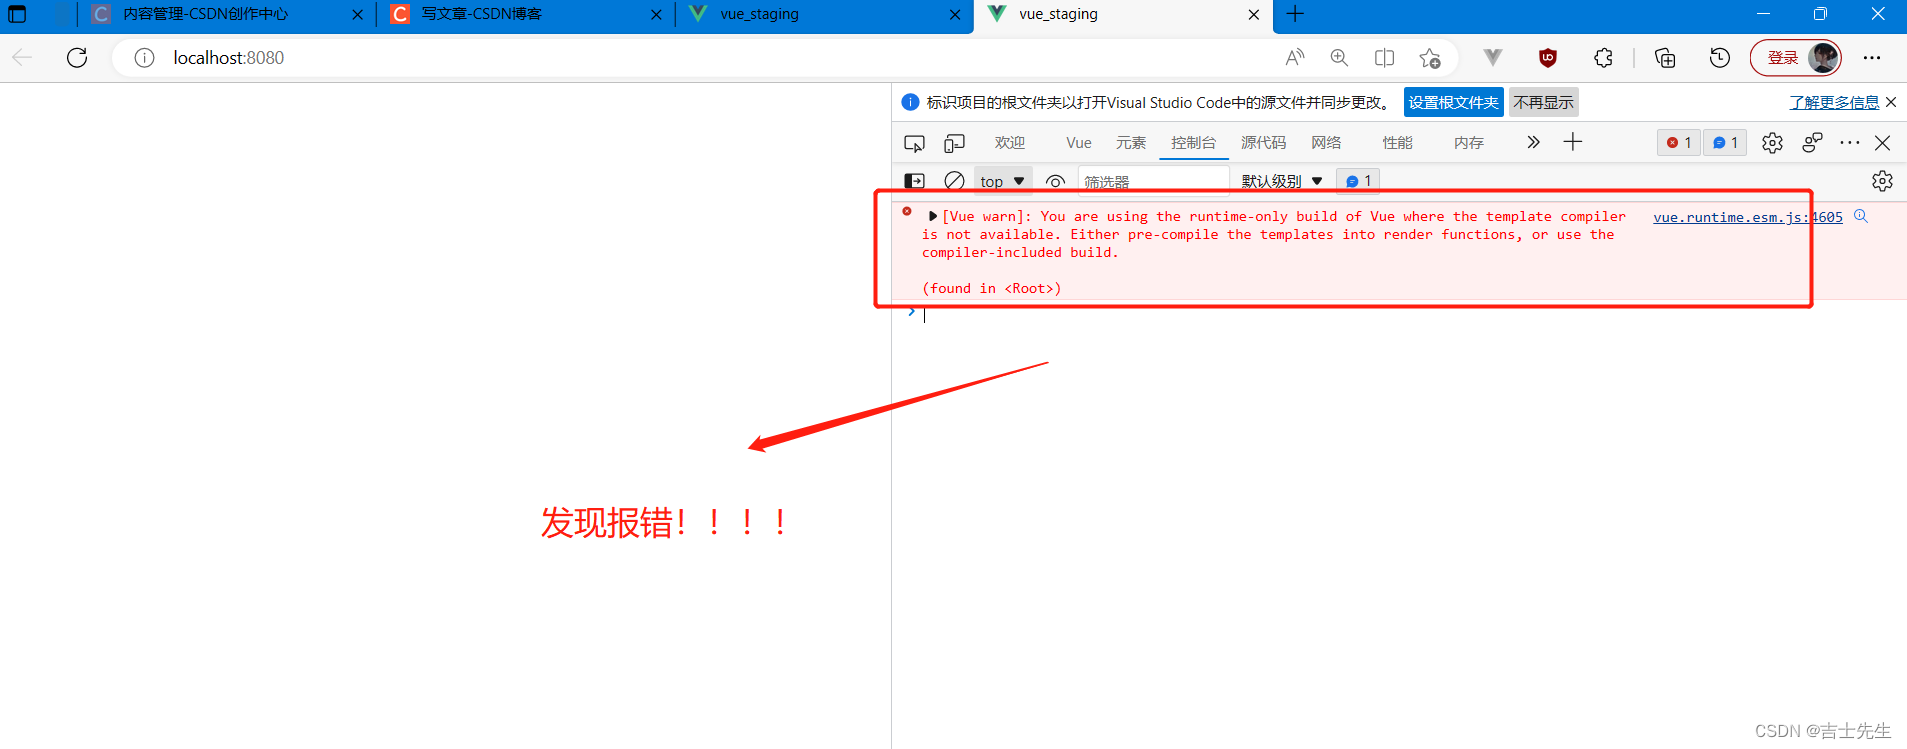
- 为什么会报错?
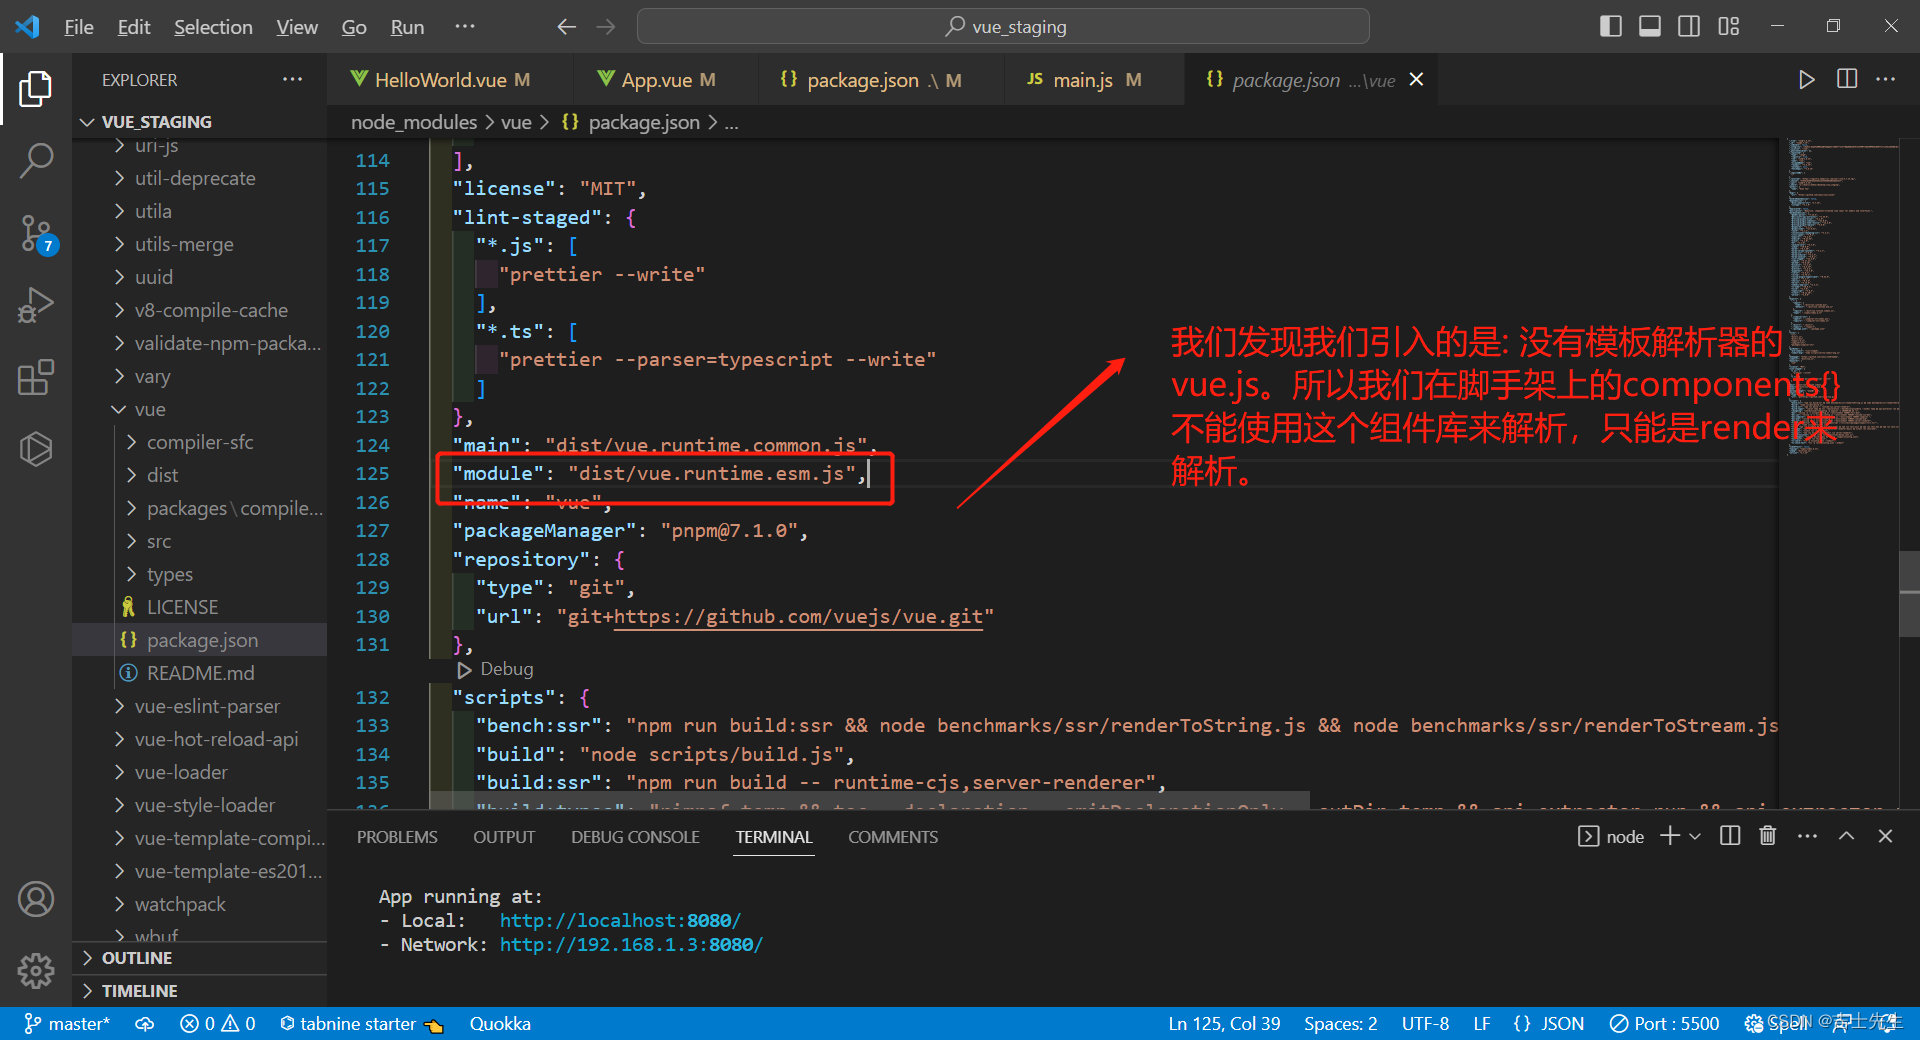
原因是:脚手架引用的vue库是简化版本的,没有模板解析器
import Vue from 'vue'
import App from './App.vue'
// 关闭生产提示
Vue.config.productionTip = false
/*
vue.js与vue.runtime.common.js的区别
vue.runtime.common.js (项目中用的多)
1. 不包含模板解析器,打包后体积校
2.配置项中的不能写template, 要用render: h=>h(App)
vue.js
1.包含模板解析器,打包后体积大
2.配置可以写template
*/
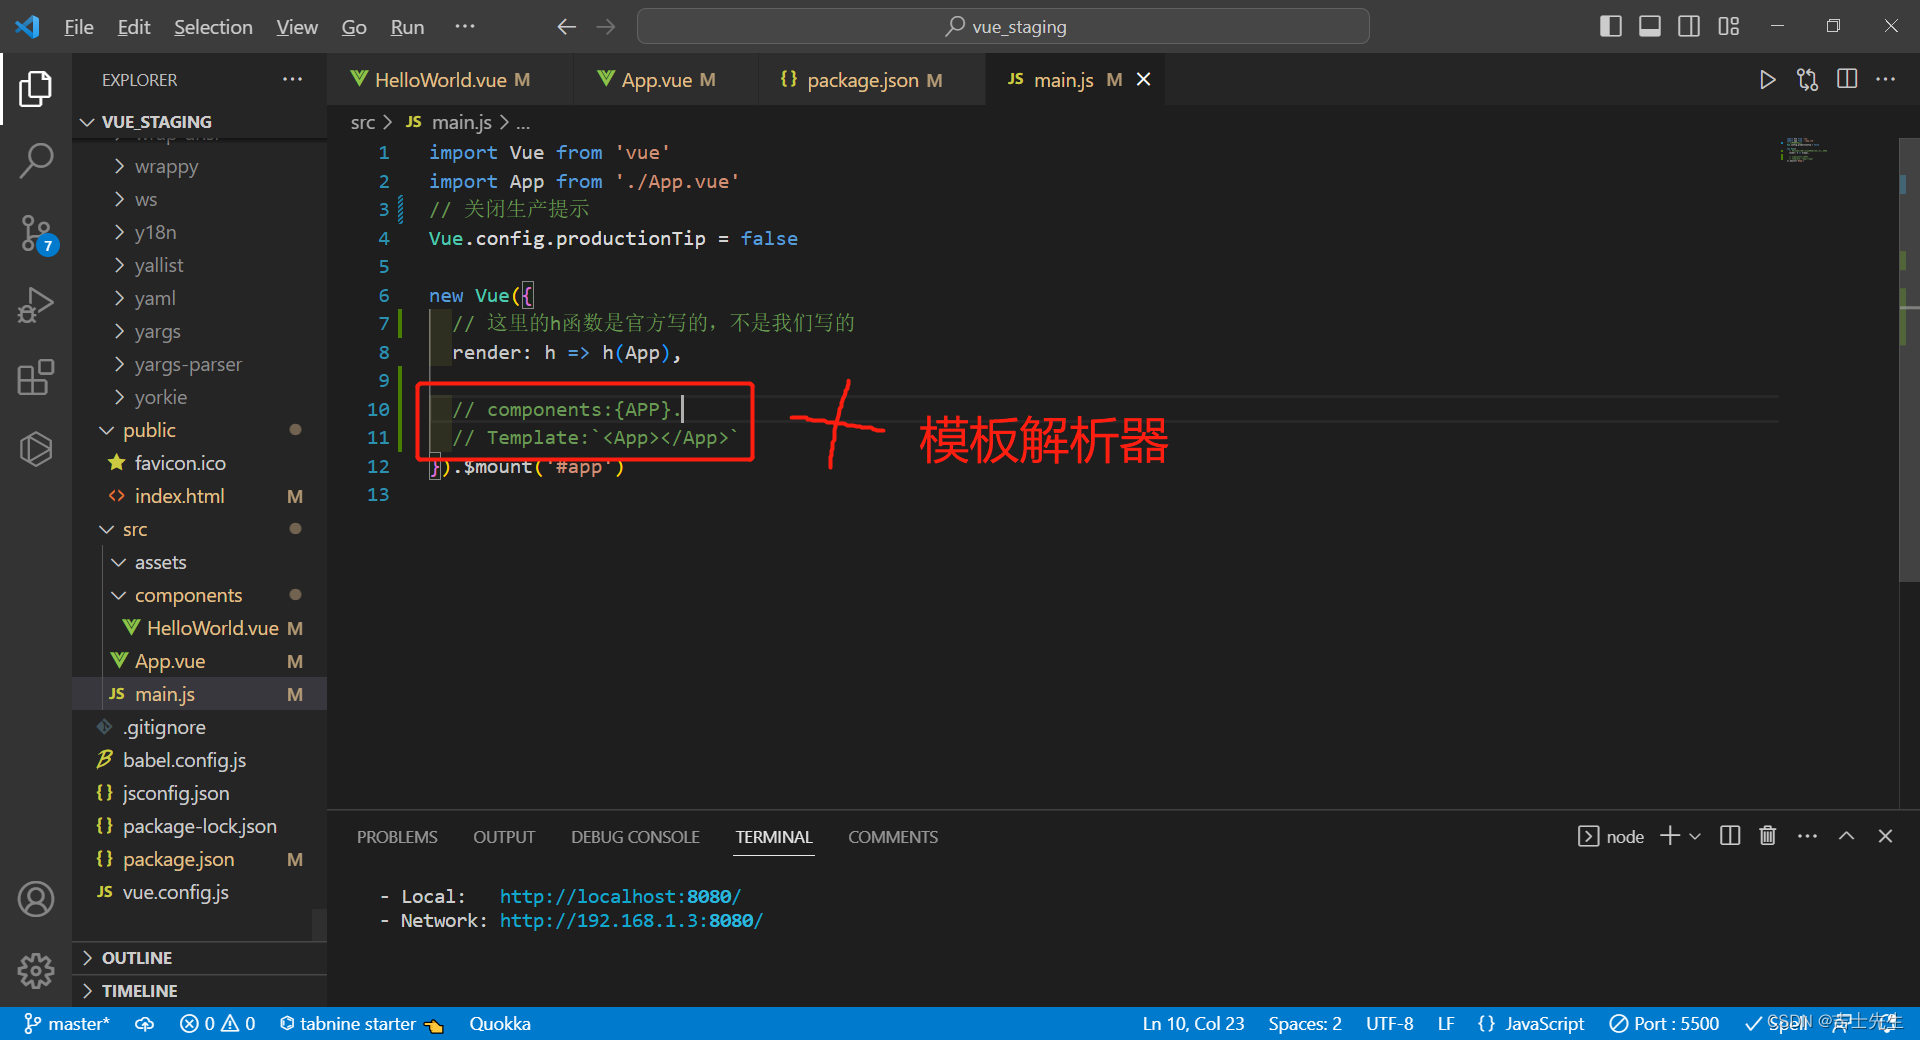
new Vue({
// 这里的h函数是官方写的,不是我们写的
render: h => h(App),
// components:{APP}.
// Template:`<App></App>`
}).$mount('#app')
h函数相当于:下面那俩行+模板解析器
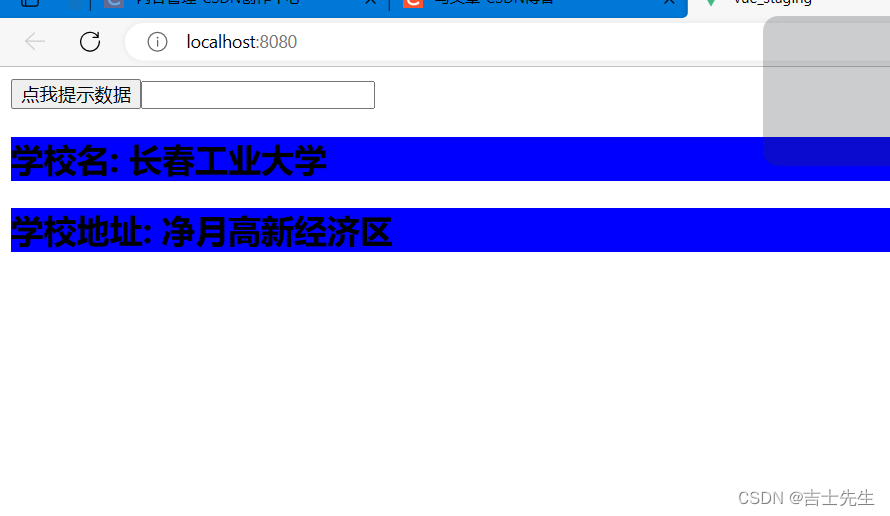
4.Vue中使用ref的Dom节点
- v-model: 获取的是值
School.vue
<template>
    <div>
        <h2>学校名: {

   {name}}</h2>
        <h2>学校地址: {

   {address}}</h2>
    </div>
</template>

<script>
export default {


    data() {


        return {


            name:'长春工业大学',
            address:'净月高新经济区'
        }
    },
}
</script>

<style>
h2{


    background-color: blue;
}
</style>
App.vue
<template>
  <div>
    <button @click="showData">点我提示数据</button>
    <!-- 给input标签打了一个ref input标签是html内置的标签 -->
    <input type="text" v-model="keyWords"/>
    <School></School>
  </div>
</template>

<script>
    // 引入School组件
    import School from './components/School.vue'
export default {


    // 局部注册组件
    components:{


        School
    },
methods:{


      showData(){


        alert(this.keyWords)
      }
    },
    data() {


      return {


        keyWords:''
      }
    },

}
</script>

<style>

</style>
main.js
import  Vue  from 'vue'  // 引入阉割版本的vue
import  App  from './App.vue' // 引入App.vue组件

new Vue({


    render:h=>h(App)
}).$mount('#app');
index.html
<!DOCTYPE html>
<html lang="">
  <head>
    <meta charset="utf-8">
    <!-- 能够获得更好的浏览器兼容性 -->
    <meta http-equiv="X-UA-Compatible" content="IE=edge">
    <!-- 做移动端需要添加的 -->
    <meta name="viewport" content="width=device-width,initial-scale=1.0">
    <!-- 网站图标定制路径 -->
    <link rel="icon" href="<%= BASE_URL %>favicon.ico">
    <!-- 自动读取包下package.json的名字 -->
    <title><%= htmlWebpackPlugin.options.title %></title>
  </head>
  <body>
    <div id="app">
      <App></App>
    </div>

  </body>
</html>
如果运行的时候显示:
Vue报错“Component name “School“ should always be multi-word”
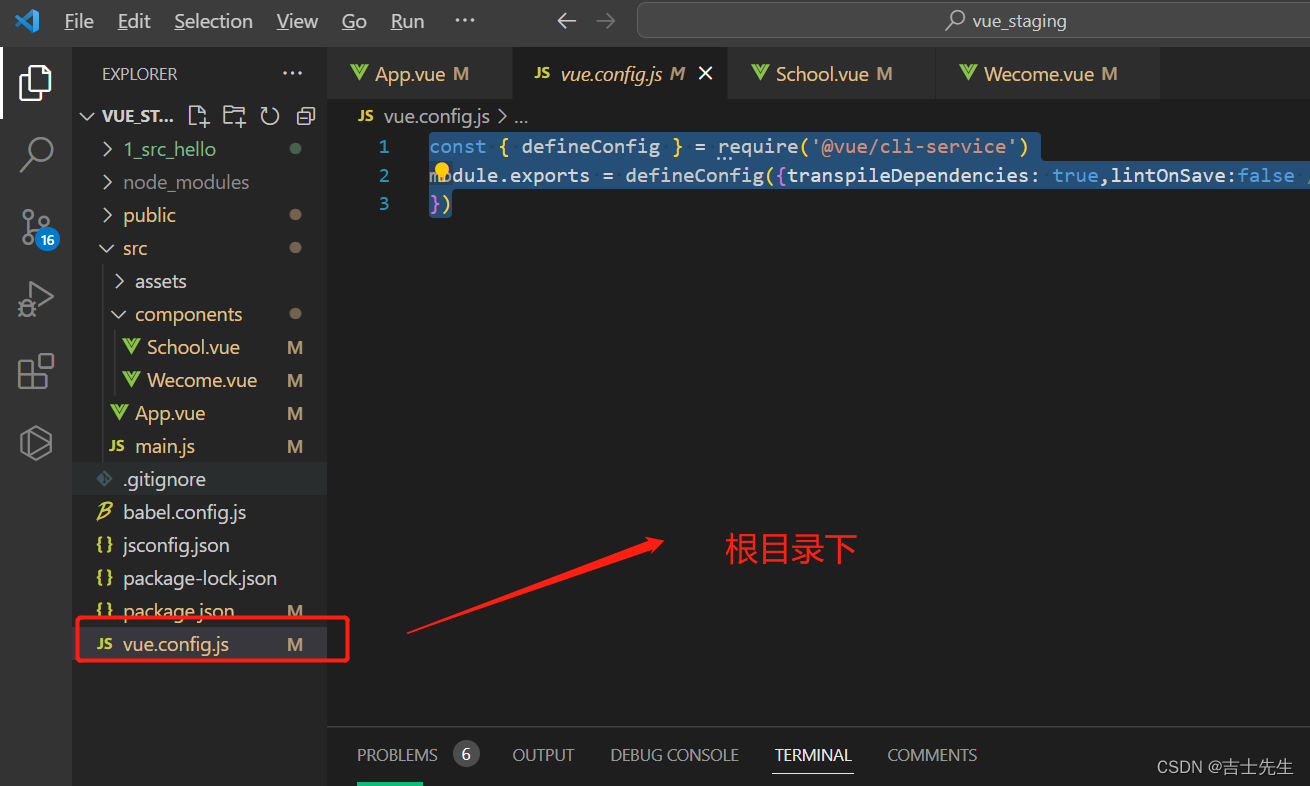
vue.config.js代码全选修改成如下: 关闭语法检查
const {

     defineConfig } = require('@vue/cli-service')
module.exports = defineConfig({

    transpileDependencies: true,lintOnSave:false // 关闭语法检查
})
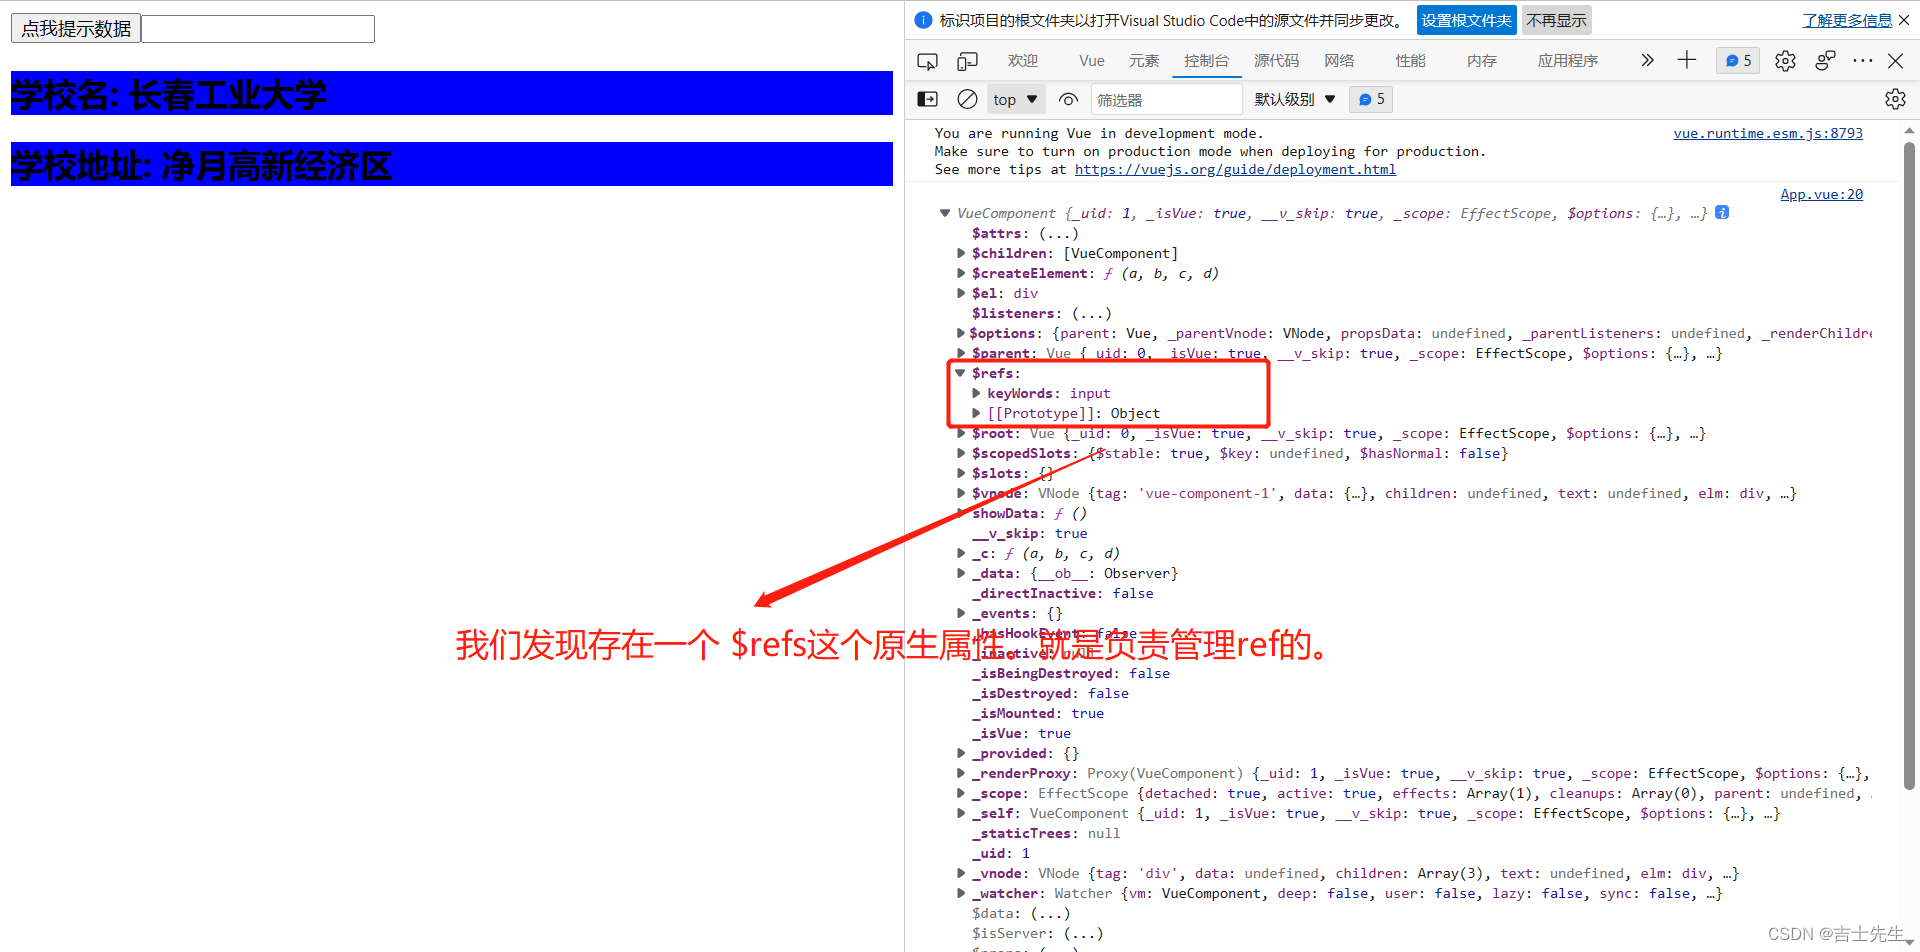
- ref-> 这里获取的是Dom节点
我们打印this发现是VC的实列对象。这里面存在着一个$refs的原生属性。是一个节点
其他的不更改,我们只负责更改App.vue组件
<template>
  <div>
    <button @click="showData">点我提示数据</button>
    <!-- 给input标签打了一个ref input标签是html内置的标签,所以通过this.$ref.keyword获取到的真实Dom节点 -->
    <input type="text" ref="keyWords"/>
    <School></School>
  </div>
</template>

<script>
    // 引入School组件
    import School from './components/School.vue'
export default {


    // 局部注册组件
    components:{


        School
    },
methods:{


      showData(){


        console.log(this.$refs.keyWords.value)  // 通过ref获取值
      }
    },

}
</script>

<style>

</style>
通过DOM节点获取文本框的value值

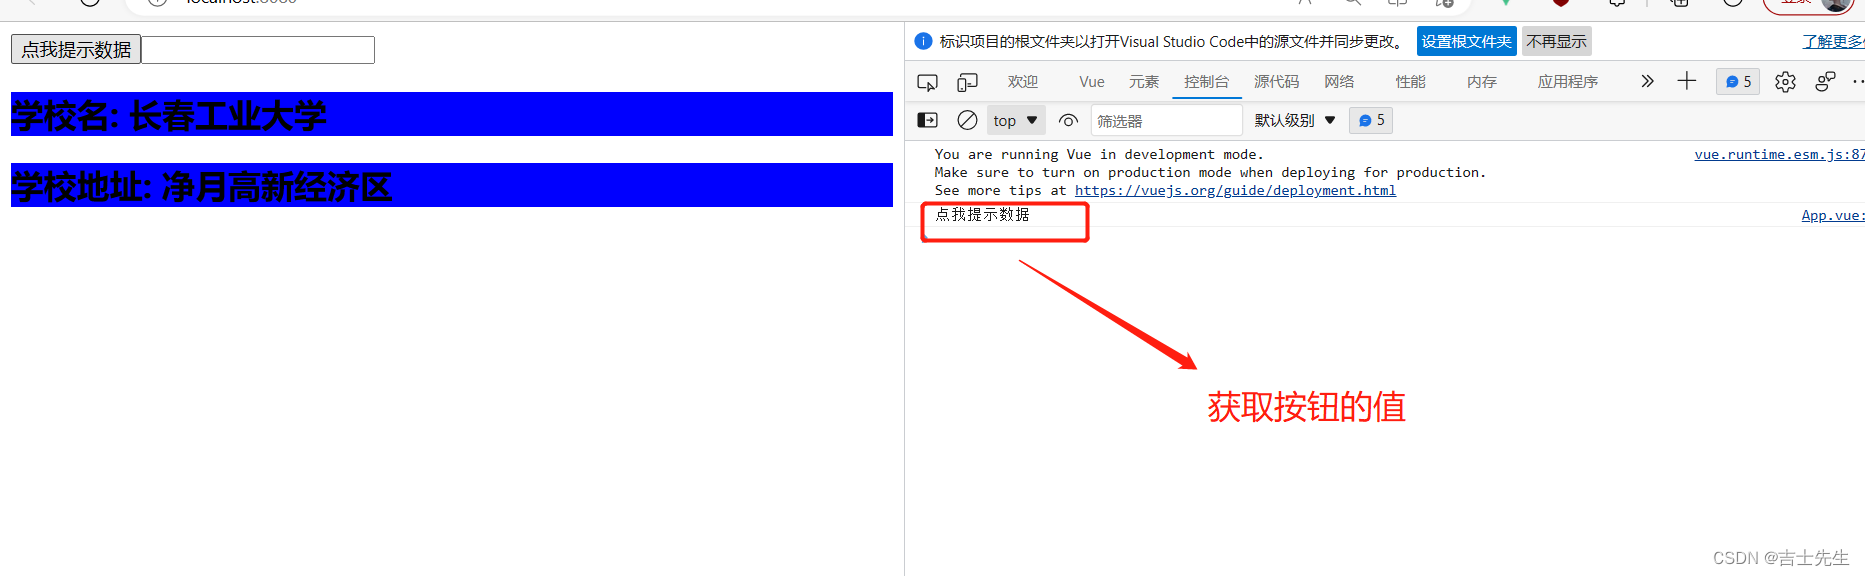
通过dom节点获取按钮的value值
App.vue
<template>
  <div>
    <button ref="btn" @click="showData">点我提示数据</button>
    <!-- 给input标签打了一个ref input标签是html内置的标签,所以通过this.$ref.keyword获取到的真实Dom节点 -->
    <input type="text" ref="keyWords"/>
    <School></School>
  </div>
</template>

<script>
    // 引入School组件
    import School from './components/School.vue'
export default {


    // 局部注册组件
    components:{


        School
    },
methods:{


      showData(){


        console.log(this.$refs.btn.innerText)
      }
    },

}
</script>

<style>

</style>
- 举列子: 点击按钮获取焦点
<template>
  <div>
    <!--
        ref的使用方式:
          1.标签中直接编写 ref="xxx"
          2.通过this.$refs.xxx获取Dom节点
          3.备注:
            (1).若给html内置标签打ref,则获取到的是真实地Dom节点
            (2).若给组件标签打ref,则获取到地是组件实列对象。

     -->
    <button ref="btn" @click="showData">点我提示数据</button>
    <!-- 给input标签打了一个ref input标签是html内置的标签,所以通过this.$ref.keyword获取到的真实Dom节点 -->
    <input type="text" ref="keyWords"/>
    <School></School>
  </div>
</template>

<script>
    // 引入School组件
    import School from './components/School.vue'
export default {


    // 局部注册组件
    components:{


        School
    },
methods:{


      showData(){


        this.$refs.keyWords.focus();
      }
    },

}
</script>

<style>

</style>

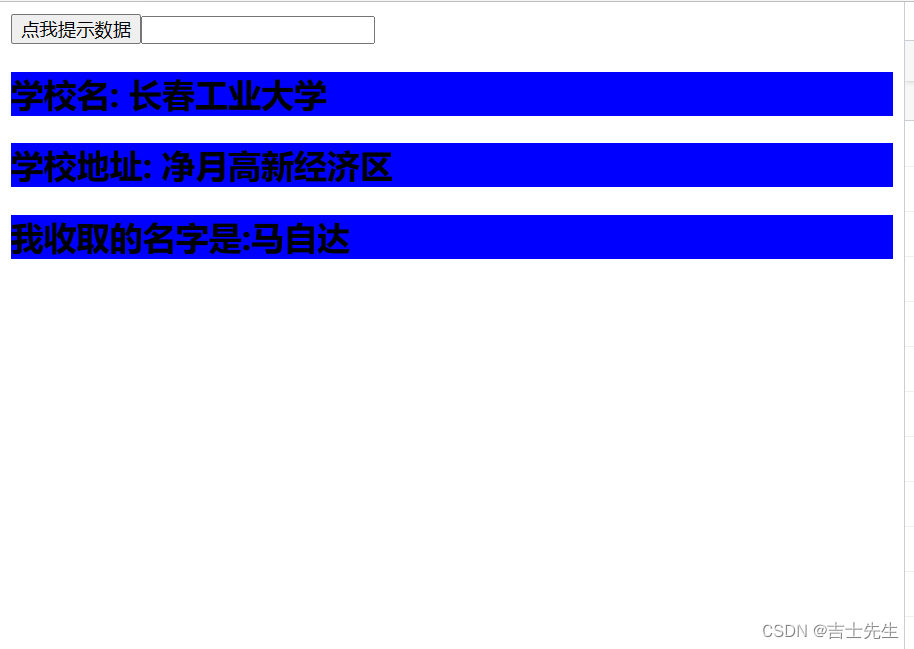
5.Vue中的props
App.vue: 主要作用是: 创建data
<template>
  <div>
    <!--
        ref的使用方式:
          1.标签中直接编写 ref="xxx"
          2.通过this.$refs.xxx获取Dom节点
          3.备注:
            (1).若给html内置标签打ref,则获取到的是真实地Dom节点
            (2).若给组件标签打ref,则获取到地是组件实列对象。

     -->
    <button ref="btn" @click="showData">点我提示数据</button>
    <!-- 给input标签打了一个ref input标签是html内置的标签,所以通过this.$ref.keyword获取到的真实Dom节点 -->
    <input type="text" ref="keyWords"/>
    <School :username1="username"/>
  </div>
</template>

<script>
    // 引入School组件
    import School from './components/School.vue'
export default {


    // 局部注册组件
    components:{


        School
    },
methods:{


      showData(){


        this.$refs.keyWords.focus();
      }
    },
data() {


  return {


    username:'马自达'
  }
},
}
</script>

<style>

</style>
School.vue: 声明props对象用来接受数据
1. 全面写法
    // 声明接受props -- 最完整的写法: 最完整的写法: 限制了类型、必要性、指定了默认值
    props:{


        // 这个username1的这个标签需要与 App.vue中的School标签中的username1属性一致
      username1:{


        type:String,  // 接受地类型
        required:true, // 是否必须要接受
        default:'宝马' // 假如没有数据,默认值就是宝马
      }
    }
2.精简写法1:  只限制类型
props:{


	username1:String
}
3.精简写法2:  什么都不限制
props:['username1']
<template>
    <div>
        <h2>学校名: {

   {name}}</h2>
        <h2>学校地址: {

   {address}}</h2>
        <h2>我收取的名字是:{

   {username1}}</h2>
    </div>
</template>

<script>
export default {


    data() {


        console.log('school',this)
        return {


            name:'长春工业大学',
            address:'净月高新经济区'
        }
    },
    // 声明接受props -- 最完整的写法: 最完整的写法: 限制了类型、必要性、指定了默认值
    props:{


        // 这个username1的这个标签需要与 App.vue中的School标签中的username1属性一致
      username1:{


        type:String,  // 接受地类型
        required:true, // 是否必须要接受
        default:'宝马' // 假如没有数据,默认值就是宝马
      }
    }
}
</script>

<style>
h2{


    background-color: blue;
}
</style>
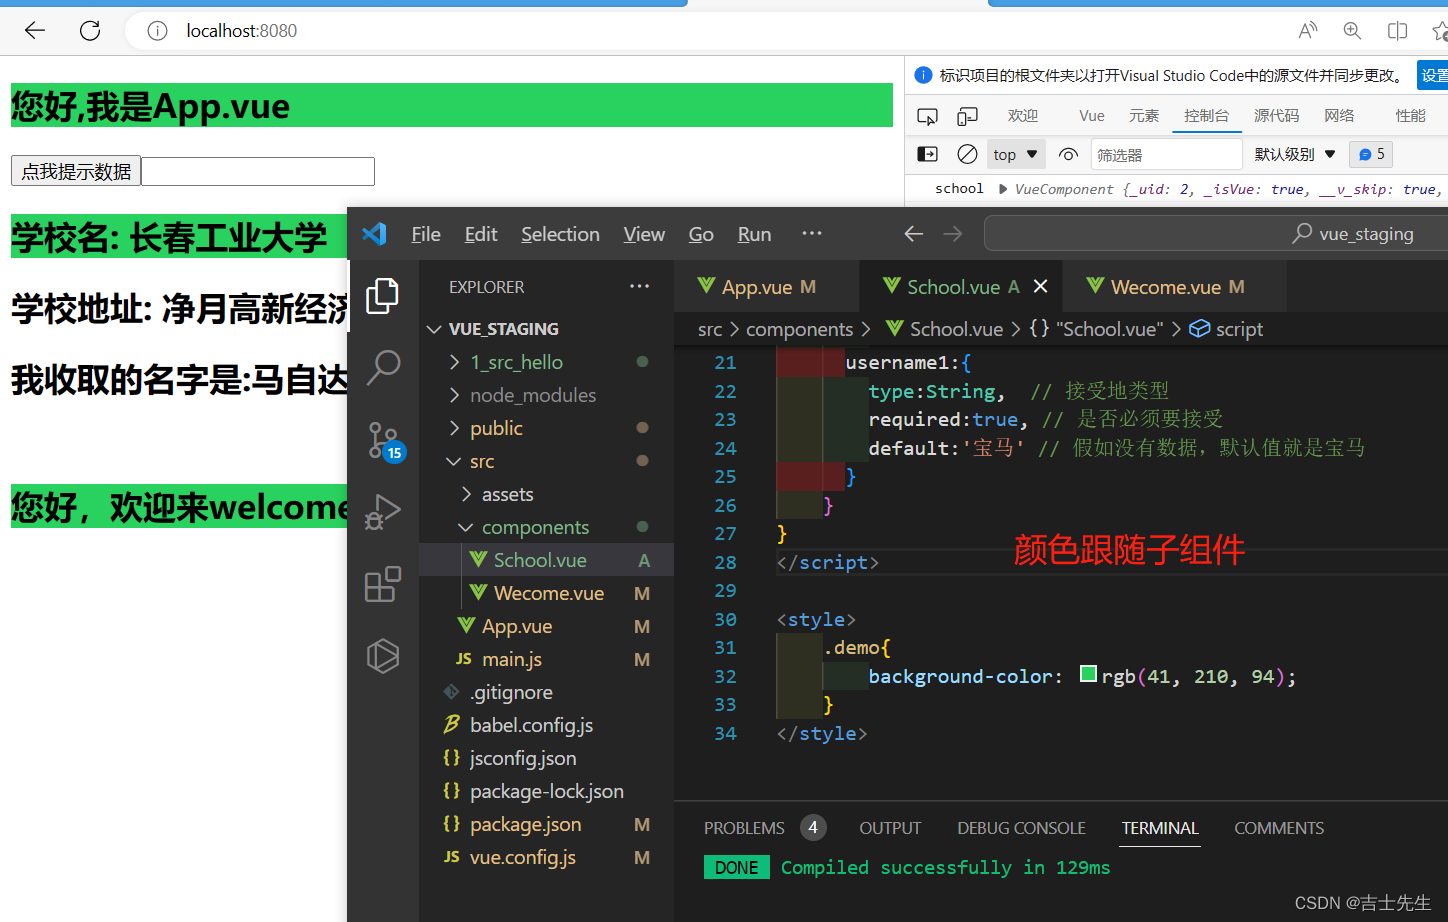
6.Vue的作用域(Scope)
- 汇总组件和其中一个子组件无颜色,另一个有颜色。
子组件: wecome.vue: 无颜色
<template>
   <div>
    <h2 class="demo">您好,欢迎来welcome页面</h2>
   </div>
</template>

<script>
export default {


}
</script>

<style>

</style>
子组件:school.vue 有颜色
<template>
    <div>
        <h2 class="demo">学校名: {

   {name}}</h2>
        <h2>学校地址: {

   {address}}</h2>
        <h2>我收取的名字是:{

   {username1}}</h2>
    </div>
</template>

<script>
export default {


    data() {


        console.log('school',this)
        return {


            name:'长春工业大学',
            address:'净月高新经济区'
        }
    },
    // 声明接受props -- 最完整的写法: 最完整的写法: 限制了类型、必要性、指定了默认值
    props:{


        // 这个username1的这个标签需要与 App.vue中的School标签中的username1属性一致
      username1:{


        type:String,  // 接受地类型
        required:true, // 是否必须要接受
        default:'宝马' // 假如没有数据,默认值就是宝马
      }
    }
}
</script>

<style>
    .demo{


        background-color: rgb(41, 210, 94);
    }
</style>
汇总组件: App.vue 无颜色
<template>
  <div>
    <h2 class="demo">您好,我是App.vue</h2>
    <!--
        ref的使用方式:
          1.标签中直接编写 ref="xxx"
          2.通过this.$refs.xxx获取Dom节点
          3.备注:
            (1).若给html内置标签打ref,则获取到的是真实地Dom节点
            (2).若给组件标签打ref,则获取到地是组件实列对象。

     -->
    <button ref="btn" @click="showData">点我提示数据</button>
    <!-- 给input标签打了一个ref input标签是html内置的标签,所以通过this.$ref.keyword获取到的真实Dom节点 -->
    <input type="text" ref="keyWords"/>
    <School :username1="username"/>
    <br>
    <Wecome/>
  </div>
</template>

<script>
    // 引入School组件
    import School from './components/School.vue'
     import Wecome from './components/Wecome.vue'
export default {


    // 局部注册组件
    components:{


        School,
        Wecome
    },
methods:{


      showData(){


        this.$refs.keyWords.focus();
      }
    },
data() {


  return {


    username:'马自达'
  }
},
}
</script>

<style>

</style>
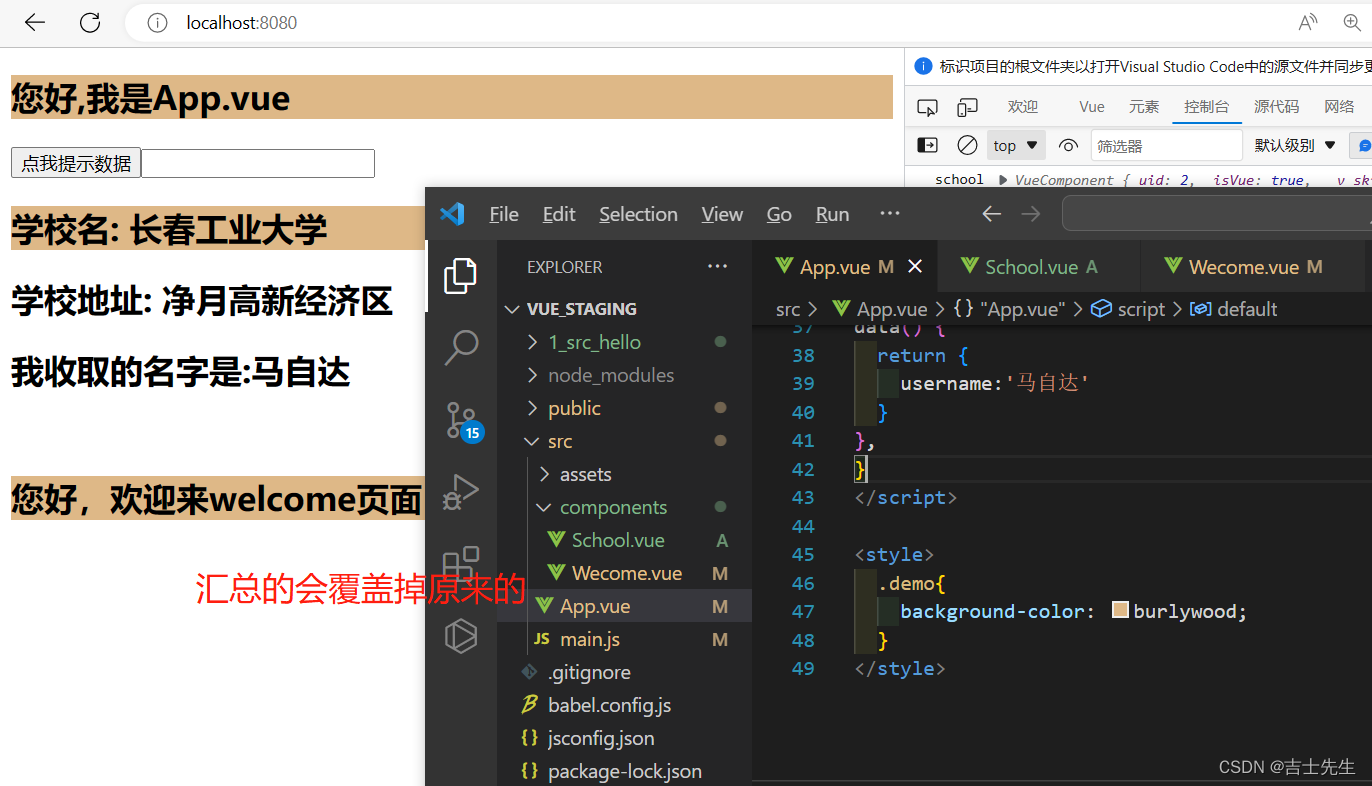
- 汇总的无颜色,其余子组件的有颜色
wecome.vue组件也添加颜色。即两子组件都有颜色
<template>
   <div>
    <h2 class="demo">您好,欢迎来welcome页面</h2>
   </div>
</template>

<script>
export default {


}
</script>

<style>
    .demo{


        background-color: brown;
    }
</style>
后引入的会覆盖

- 汇总组件和其余组件都有样式
<template>
  <div>
    <h2 class="demo">您好,我是App.vue</h2>
    <!--
        ref的使用方式:
          1.标签中直接编写 ref="xxx"
          2.通过this.$refs.xxx获取Dom节点
          3.备注:
            (1).若给html内置标签打ref,则获取到的是真实地Dom节点
            (2).若给组件标签打ref,则获取到地是组件实列对象。

     -->
    <button ref="btn" @click="showData">点我提示数据</button>
    <!-- 给input标签打了一个ref input标签是html内置的标签,所以通过this.$ref.keyword获取到的真实Dom节点 -->
    <input type="text" ref="keyWords"/>
    <School :username1="username"/>
    <br>
    <Wecome/>
  </div>
</template>

<script>
    // 引入School组件
    import School from './components/School.vue'
    import Wecome from './components/Wecome.vue'
export default {


    // 局部注册组件
    components:{


        School,
        Wecome
    },
methods:{


      showData(){


        this.$refs.keyWords.focus();
      }
    },
data() {


  return {


    username:'马自达'
  }
},
}
</script>

<style>
  .demo{


    background-color: burlywood;
  }
</style>
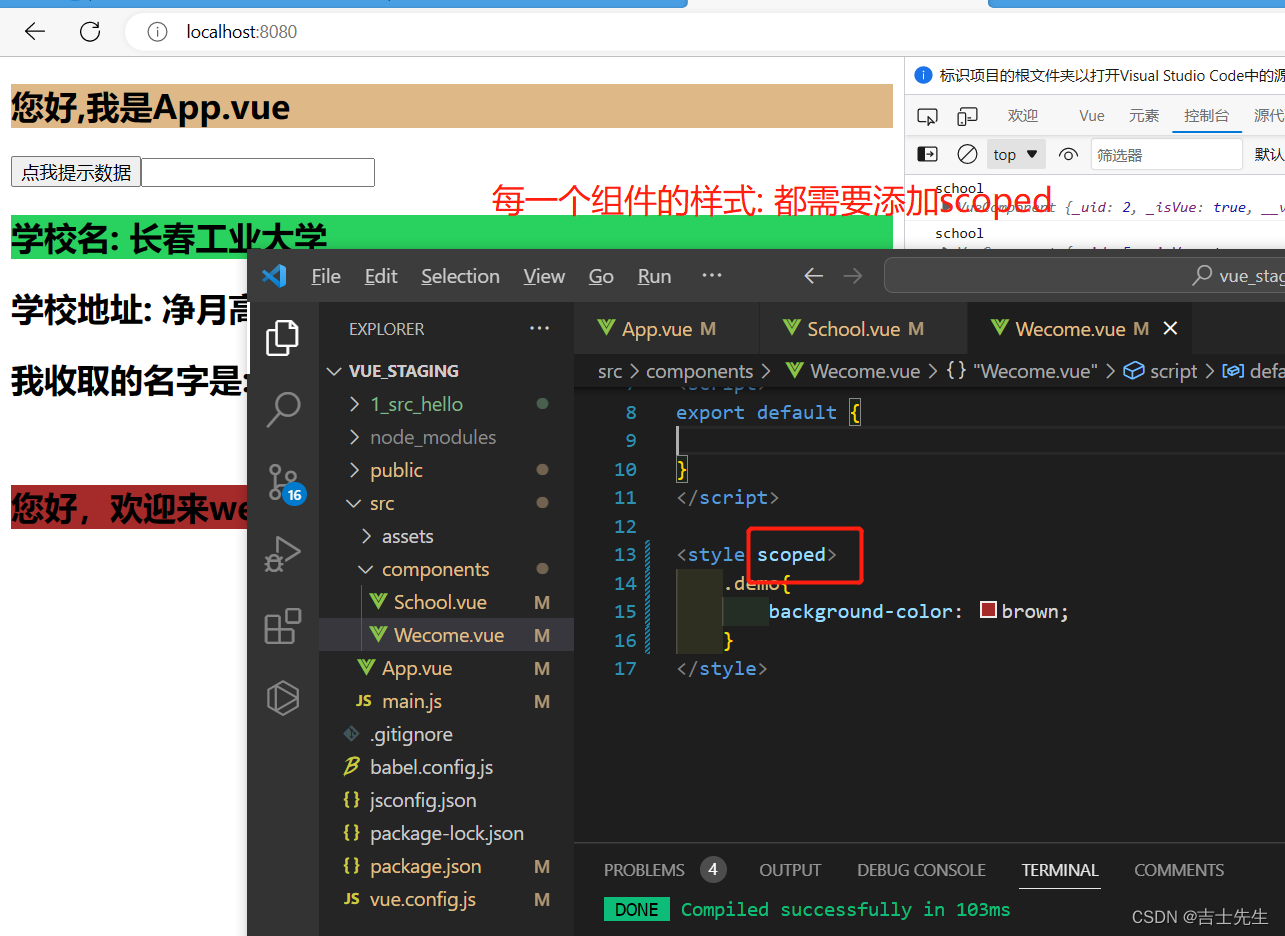
- 解决办法
我们只需要在style中添加一个作用域: scoped
切记如果我们设计的是公共的样式,千万不要加scoped.
7.Vue组件注册名与Vue组件引用名
- 组件注册名与组件引用名要一致
<template>
<div>
<h2 class="demo">您好,我是App.vue</h2>
<!--
ref的使用方式:
1.标签中直接编写 ref="xxx"
2.通过this.$refs.xxx获取Dom节点
3.备注:
(1).若给html内置标签打ref,则获取到的是真实地Dom节点
(2).若给组件标签打ref,则获取到地是组件实列对象。
-->
<button ref="btn" @click="showData">点我提示数据</button>
<!-- 给input标签打了一个ref input标签是html内置的标签,所以通过this.$ref.keyword获取到的真实Dom节点 -->
<input type="text" ref="keyWords"/>
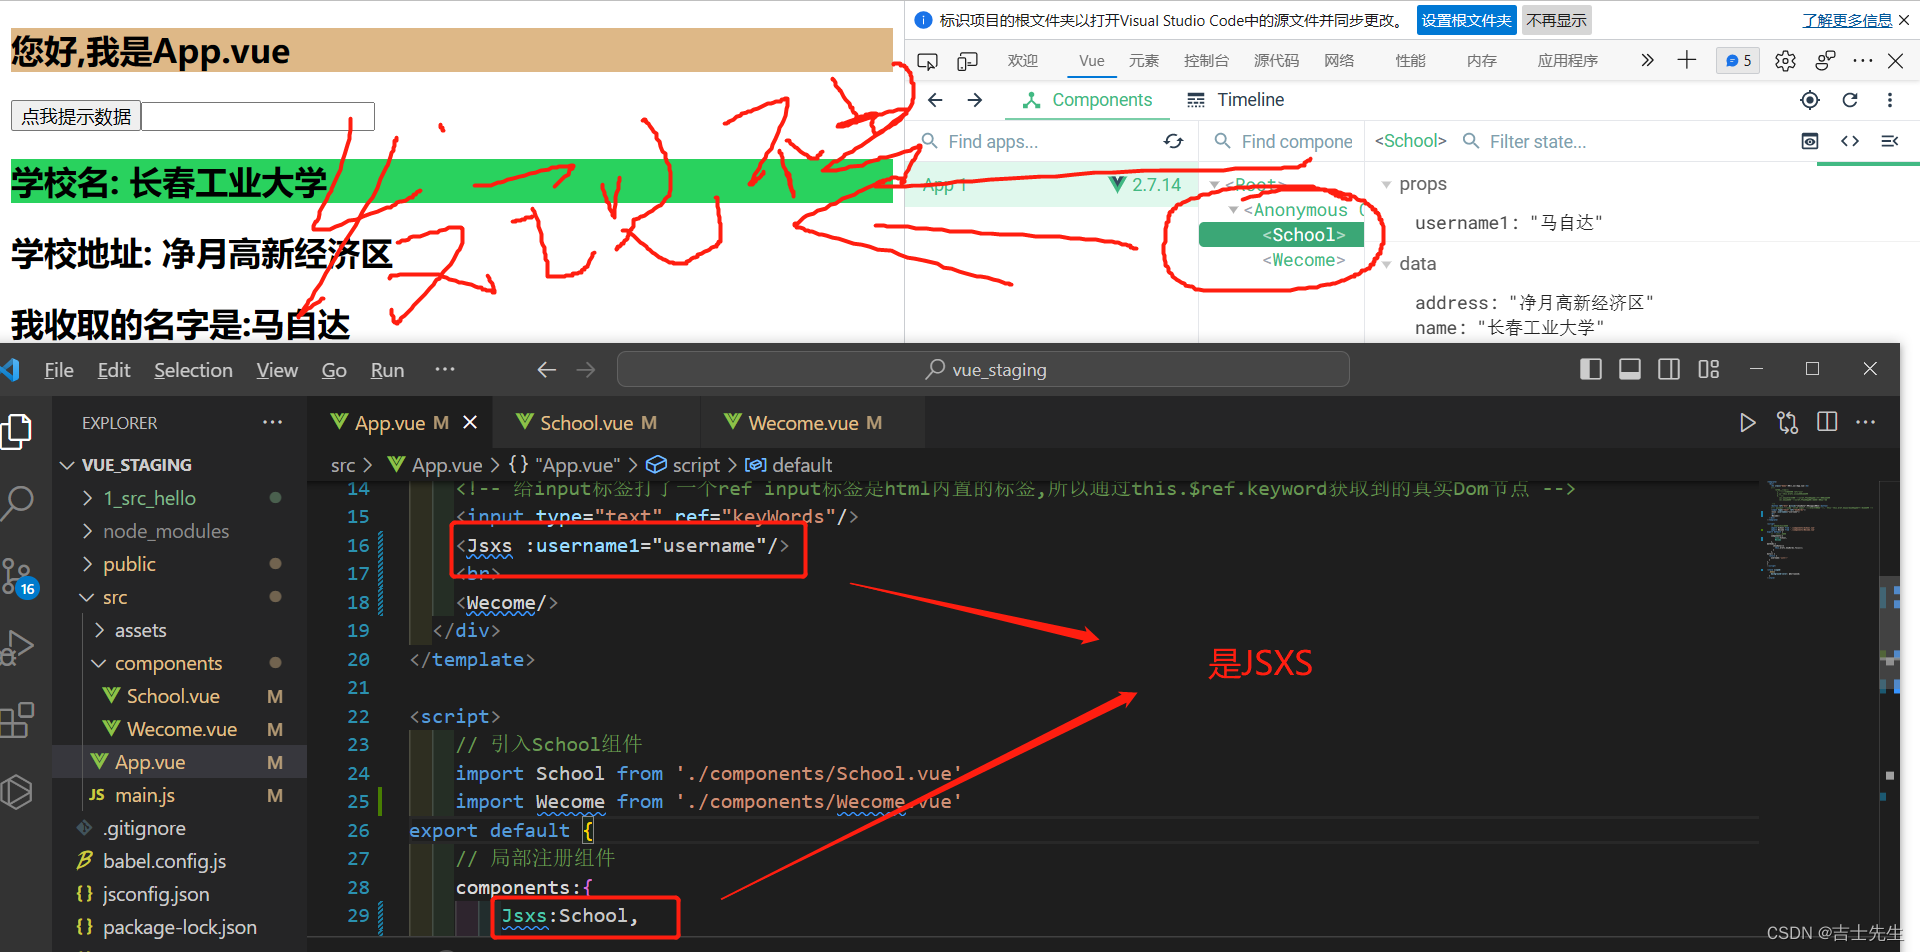
<Jsxs :username1="username"/>
<br>
<Wecome/>
</div>
</template>
<script>
// 引入School组件
import School from './components/School.vue'
import Wecome from './components/Wecome.vue'
export default {
// 局部注册组件
components:{
Jsxs:School,
Wecome
},
methods:{
showData(){
this.$refs.keyWords.focus();
}
},
data() {
return {
username:'马自达'
}
},
}
</script>
<style scoped>
.demo{
background-color: burlywood;
}
</style>
我们引入和注册组件的时候,需要对应。如果引用了不注册也会报错
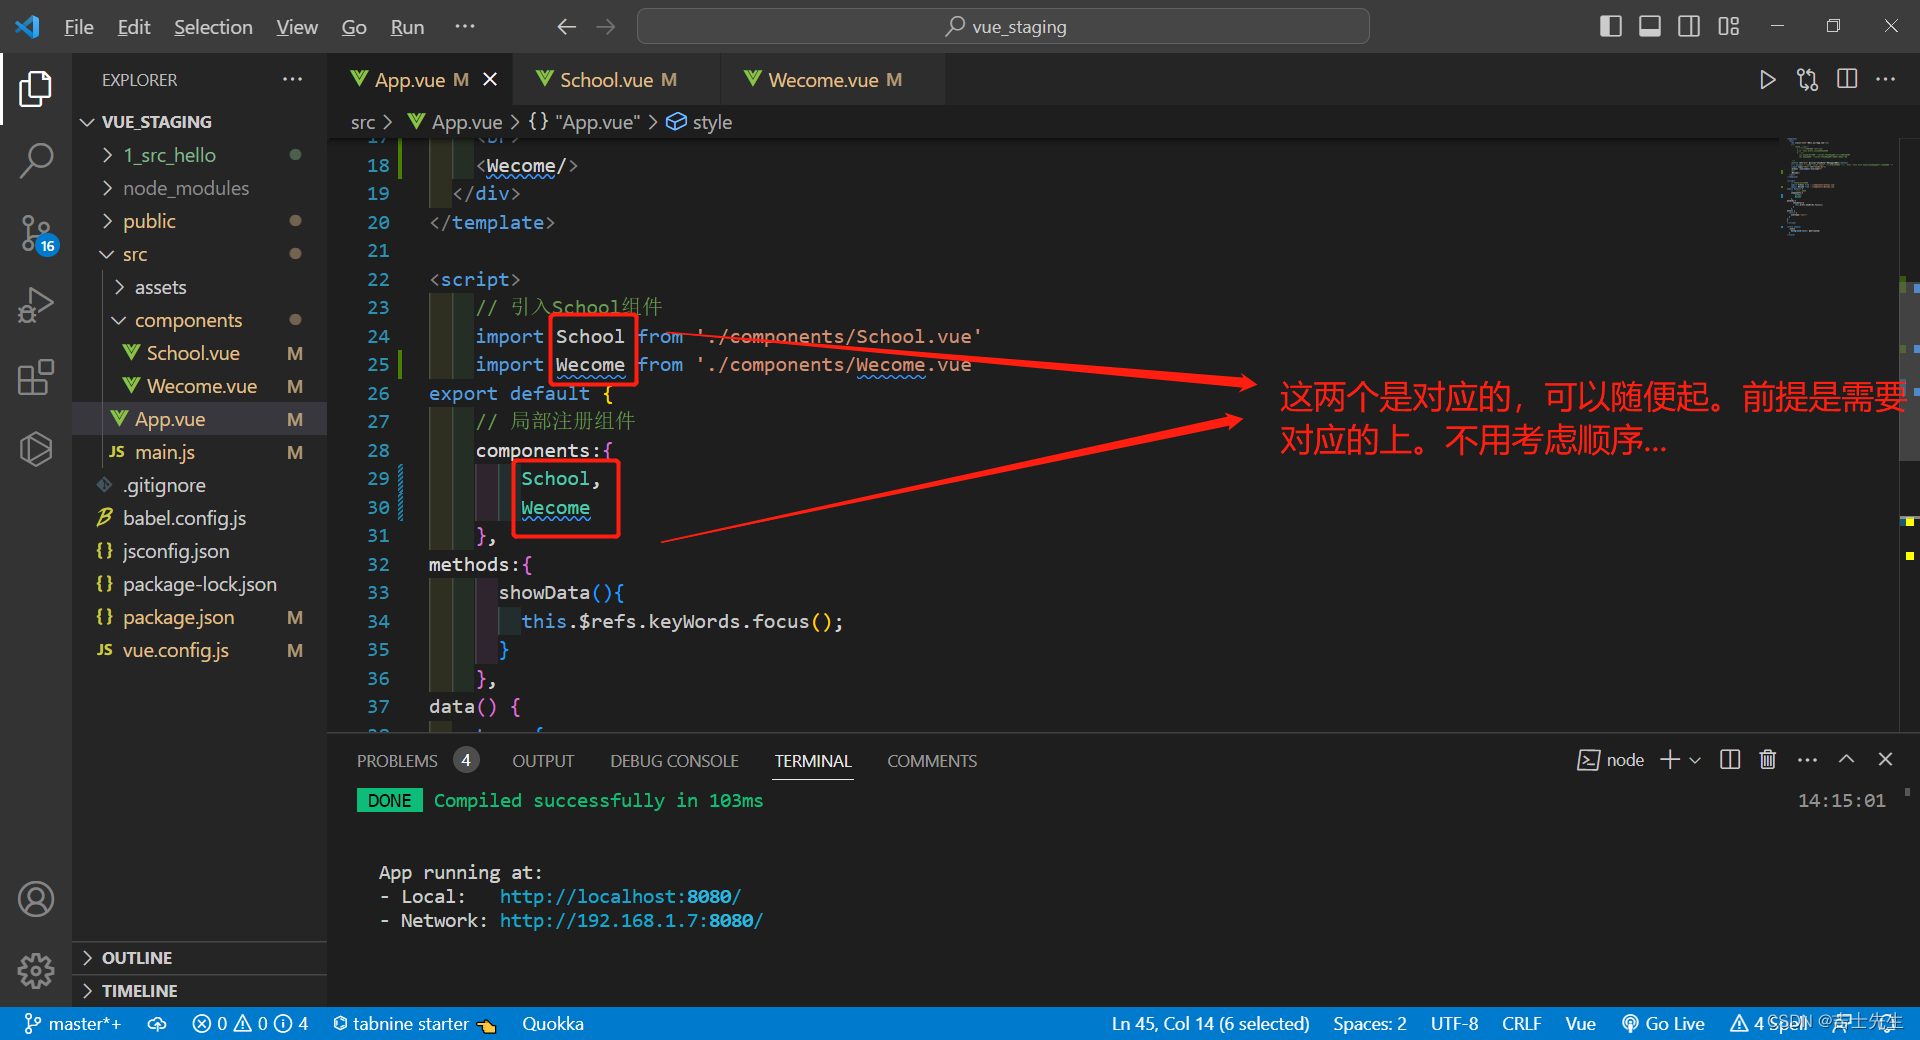
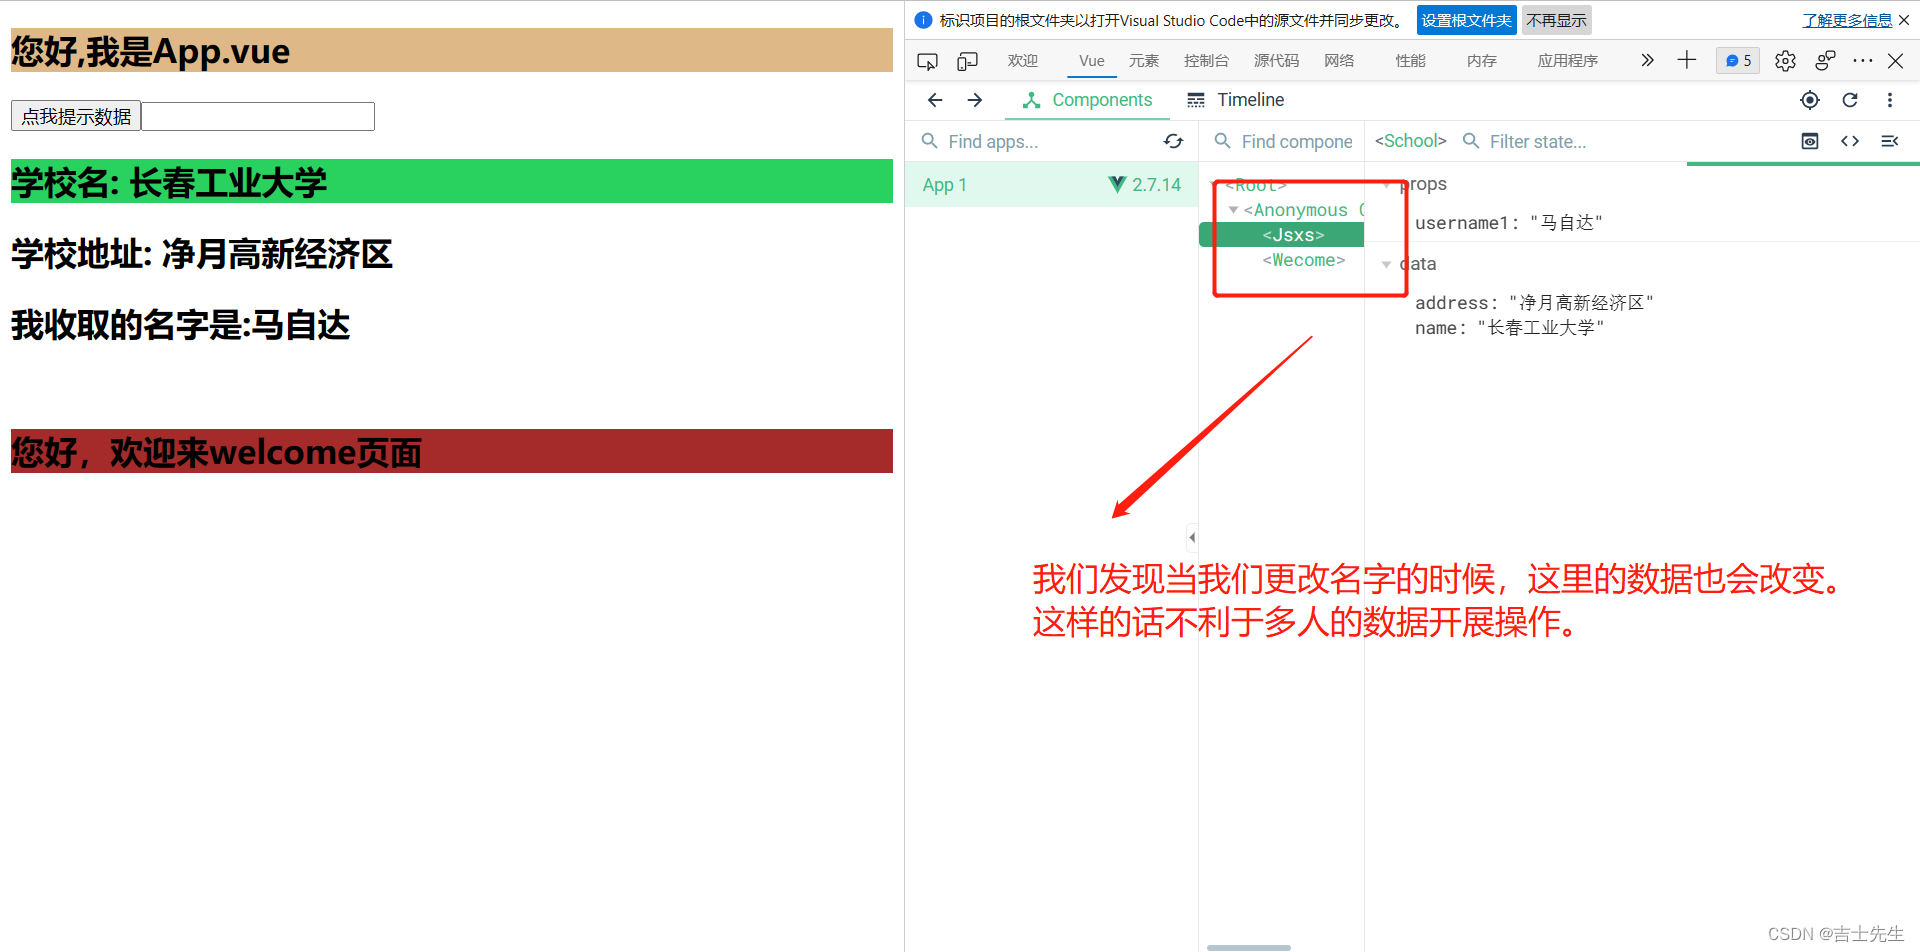
可以给注册的组件起别名,起别名之后。我们引用组件的时候一定要用别名否则报错
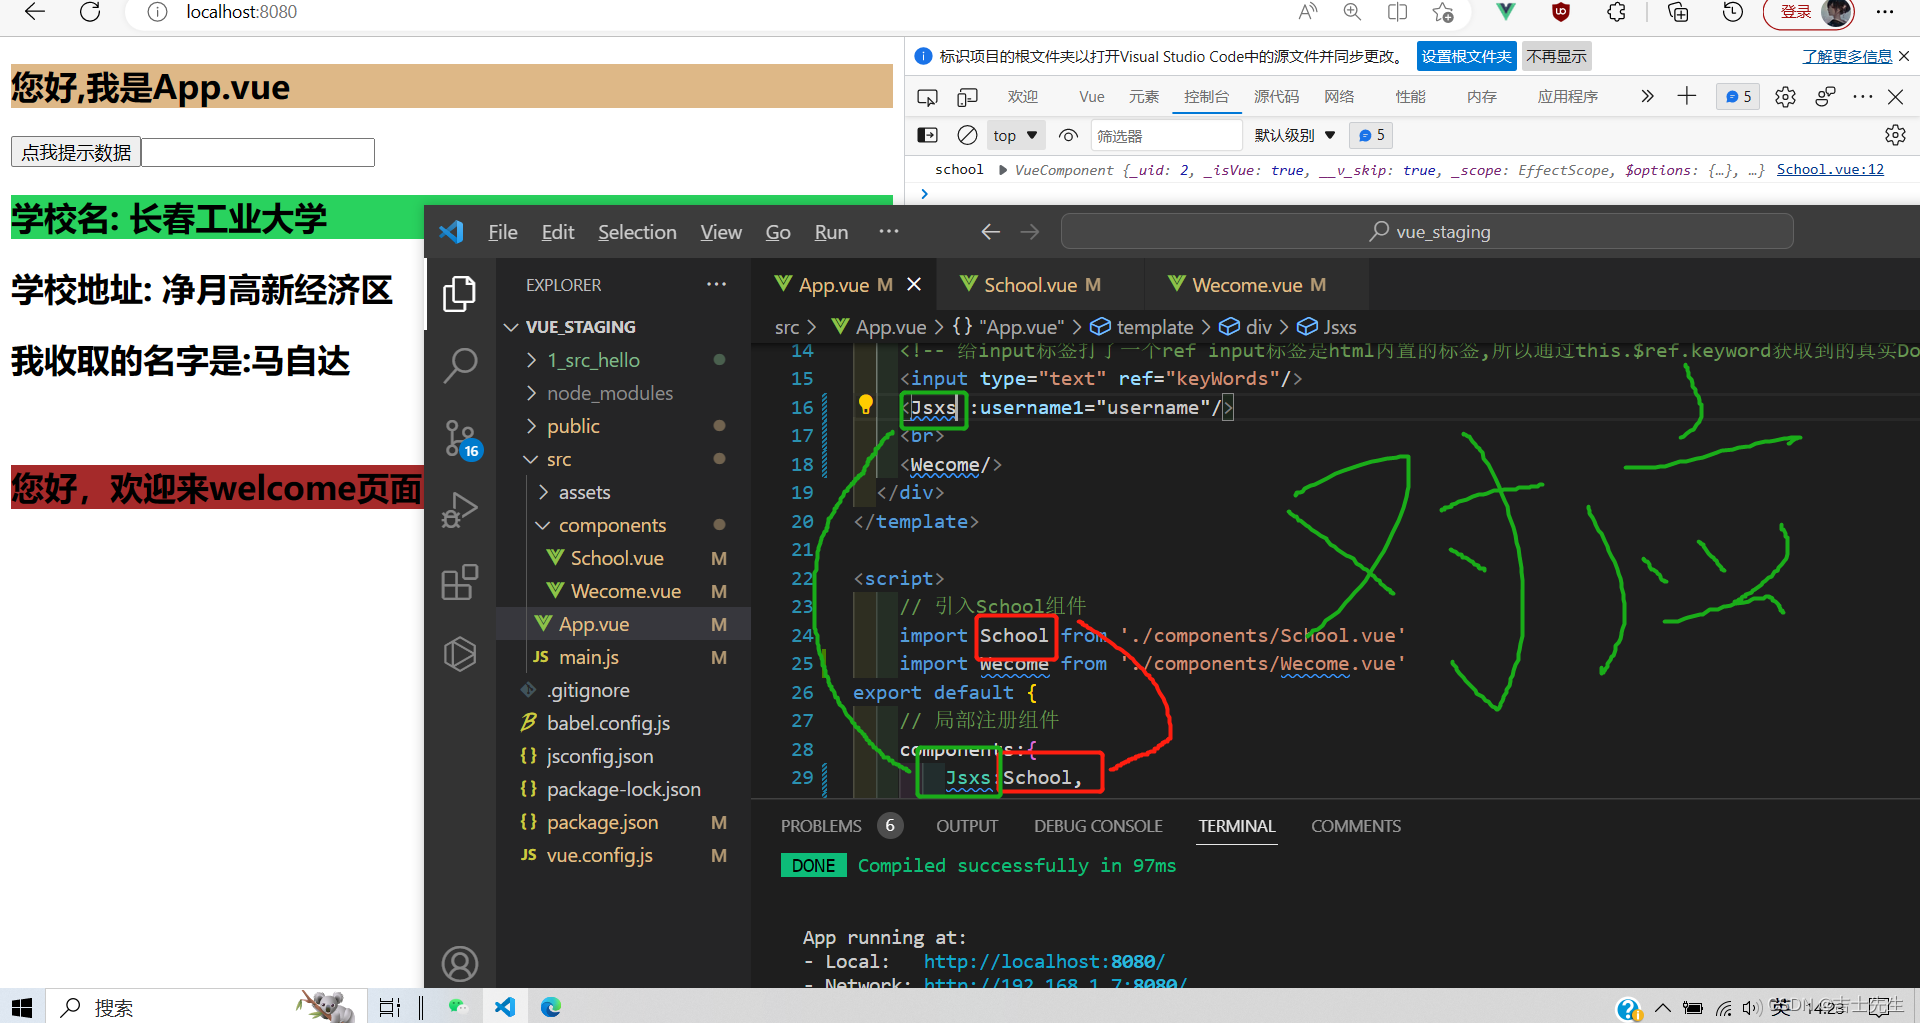
我们发现vue的插件中也会改变,不利于工作的开展
- 改变vue插件中的数据
我们只需要在对应的组件与data函数同级下添加一个name属性接口。不是App.vue这个组件中
<template>
    <div>
        <h2 class="demo">学校名: {

   {name}}</h2>
        <h2>学校地址: {

   {address}}</h2>
        <h2>我收取的名字是:{

   {username1}}</h2>
    </div>
</template>

<script>
export default {


    name: 'School',
    data() {


        console.log('school',this)
        return {


            name:'长春工业大学',
            address:'净月高新经济区'
        }
    },
    // 声明接受props -- 最完整的写法: 最完整的写法: 限制了类型、必要性、指定了默认值
    props:{


        // 这个username1的这个标签需要与 App.vue中的School标签中的username1属性一致
      username1:{


        type:String,  // 接受地类型
        required:true, // 是否必须要接受
        default:'宝马' // 假如没有数据,默认值就是宝马
      }
    }
}
</script>

<style scoped>
    .demo{


        background-color: rgb(41, 210, 94);
    }
</style>
发现不会改变
8.关于语法检查的配置 ⭐⭐
下面的注解: 意思就是对它下面仅以行的这个语法关闭语法检查
/*eslint-disable-next-line*/
 const a=1  // 我们只负责定义没有使用,发现会报错
对某一个组件关闭语法检查
/*eslint-disable*/
对下面的语法都关闭语法检查
对整个vue组件关闭语法检查
vue.config.js
const {

     defineConfig } = require('@vue/cli-service')
module.exports = defineConfig({

    transpileDependencies: true,lintOnSave:false // 关闭语法检查
})
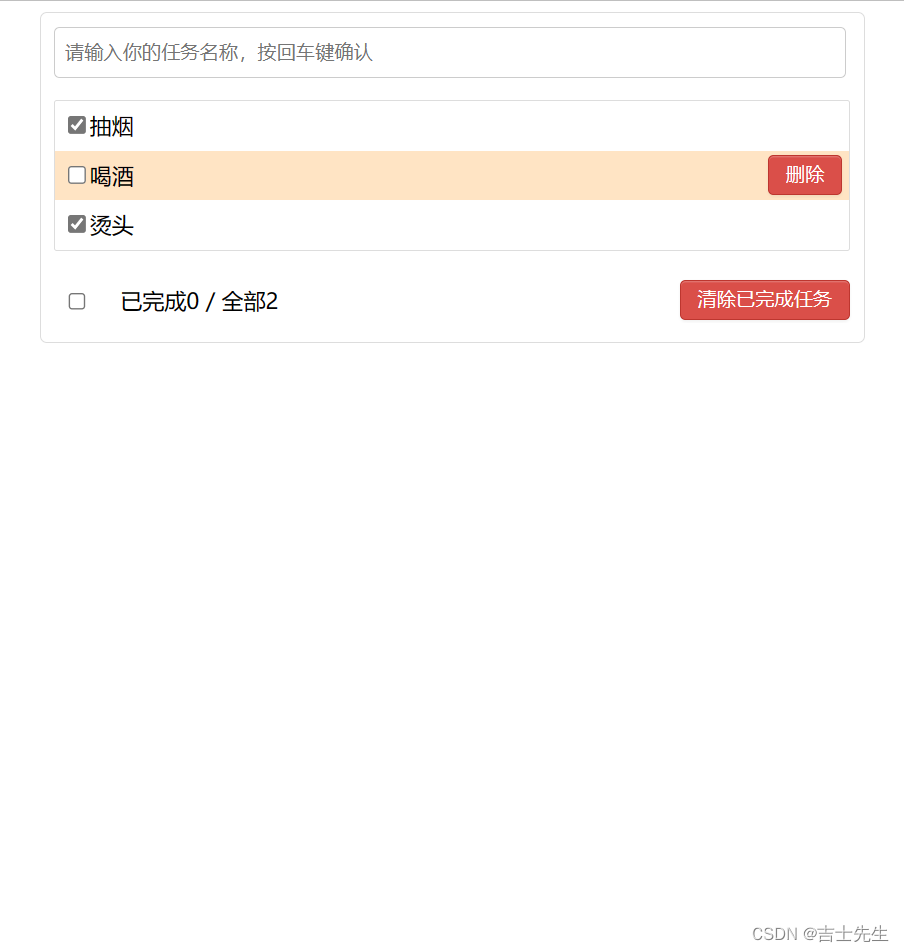
(二十三)、todoList案列
1.案列_静态
(1).未拆分的静态资源
下面的数据直接复制:就行。博主没有进行修改或添加什么,和张天禹来时的静态资源一摸一样的。
App.vue
<template>
  <div>
   <div class="todo-container">
    <div class="todo-wrap">
      <!-- 1.头部 -->
      <div class="todo-header">
        <input type="text" placeholder="请输入你的任务名称,按回车键确认"/>
      </div>
      <!-- 2.列表 -->
      <ul class="todo-main">
        <li>
          <label>
            <input type="checkbox"/>
            <span>xxxxx</span>
          </label>
          <button class="btn btn-danger" style="display:none">删除</button>
        </li>
        <li>
          <label>
            <input type="checkbox"/>
            <span>yyyy</span>
          </label>
          <button class="btn btn-danger" style="display:none">删除</button>
        </li>
      </ul>
      <!-- 3.底部导航 -->
      <div class="todo-footer">
        <label>
          <input type="checkbox"/>
        </label>
        <span>
          <span>已完成0</span> / 全部2
        </span>
        <button class="btn btn-danger">清除已完成任务</button>
      </div>
    </div>
  </div>
  </div>
</template>

<script>
export default {


  name:'App' // 目的是在浏览器VUE插件中的名字都是App不会被改变。
}
</script>

<style>

  /*base*/
  body {


    background: #fff;
  }

  .btn {


    display: inline-block;
    padding: 4px 12px;
    margin-bottom: 0;
    font-size: 14px;
    line-height: 20px;
    text-align: center;
    vertical-align: middle;
    cursor: pointer;
    box-shadow: inset 0 1px 0 rgba(255, 255, 255, 0.2), 0 1px 2px rgba(0, 0, 0, 0.05);
    border-radius: 4px;
  }

  .btn-danger {


    color: #fff;
    background-color: #da4f49;
    border: 1px solid #bd362f;
  }

  .btn-danger:hover {


    color: #fff;
    background-color: #bd362f;
  }

  .btn:focus {


    outline: none;
  }

  .todo-container {


    width: 600px;
    margin: 0 auto;
  }
  .todo-container .todo-wrap {


    padding: 10px;
    border: 1px solid #ddd;
    border-radius: 5px;
  }

  /*header*/
  .todo-header input {


    width: 560px;
    height: 28px;
    font-size: 14px;
    border: 1px solid #ccc;
    border-radius: 4px;
    padding: 4px 7px;
  }

  .todo-header input:focus {


    outline: none;
    border-color: rgba(82, 168, 236, 0.8);
    box-shadow: inset 0 1px 1px rgba(0, 0, 0, 0.075), 0 0 8px rgba(82, 168, 236, 0.6);
  }

  /*list*/
  .todo-main {


    margin-left: 0px;
    border: 1px solid #ddd;
    border-radius: 2px;
    padding: 0px;
  }

  .todo-empty {


    height: 40px;
    line-height: 40px;
    border: 1px solid #ddd;
    border-radius: 2px;
    padding-left: 5px;
    margin-top: 10px;
  }
  /*item*/
  li {


    list-style: none;
    height: 36px;
    line-height: 36px;
    padding: 0 5px;
    border-bottom: 1px solid #ddd;
  }

  li label {


    float: left;
    cursor: pointer;
  }

  li label li input {


    vertical-align: middle;
    margin-right: 6px;
    position: relative;
    top: -1px;
  }

  li button {


    float: right;
    display: none;
    margin-top: 3px;
  }

  li:before {


    content: initial;
  }

  li:last-child {


    border-bottom: none;
  }

  /*footer*/
  .todo-footer {


    height: 40px;
    line-height: 40px;
    padding-left: 6px;
    margin-top: 5px;
  }

  .todo-footer label {


    display: inline-block;
    margin-right: 20px;
    cursor: pointer;
  }

  .todo-footer label input {


    position: relative;
    top: -1px;
    vertical-align: middle;
    margin-right: 5px;
  }

  .todo-footer button {


    float: right;
    margin-top: 5px;
  }


</style>
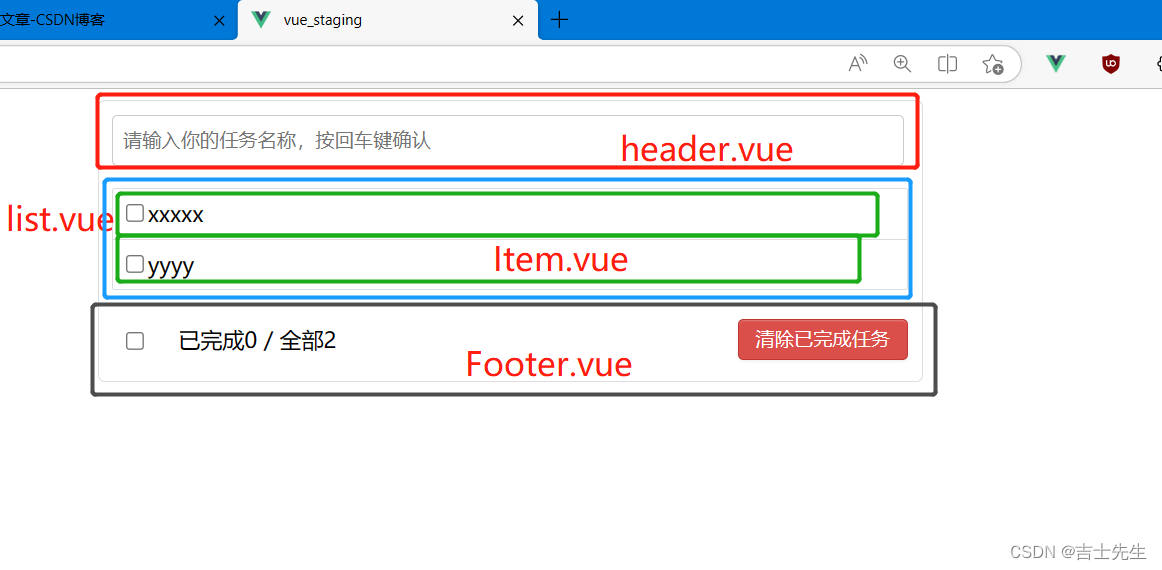
(2).拆分之后的静态资源
Header.vue
<template>
  <div>
          <!-- 1.头部 -->
      <div class="todo-header">
        <input type="text" placeholder="请输入你的任务名称,按回车键确认"/>
      </div>
  </div>
</template>

<script>
export default {


    name:'Header'
}
</script>

<style scoped>
  /*header*/
  .todo-header input {


    width: 560px;
    height: 28px;
    font-size: 14px;
    border: 1px solid #ccc;
    border-radius: 4px;
    padding: 4px 7px;
  }

  .todo-header input:focus {


    outline: none;
    border-color: rgba(82, 168, 236, 0.8);
    box-shadow: inset 0 1px 1px rgba(0, 0, 0, 0.075), 0 0 8px rgba(82, 168, 236, 0.6);
  }

</style>
List.vue
<template>
  <div>
    <ul class="todo-main">
        <Item/>
      </ul>
  </div>
</template>

<script>
    import Item from './Item.vue'
export default {


    name:'List',
    components:{


        Item,
    }
}
</script>

<style scoped>
  /*List*/
  .todo-main {


    margin-left: 0px;
    border: 1px solid #ddd;
    border-radius: 2px;
    padding: 0px;
  }

  .todo-empty {


    height: 40px;
    line-height: 40px;
    border: 1px solid #ddd;
    border-radius: 2px;
    padding-left: 5px;
    margin-top: 10px;
  }
</style>
Item.vue
<template>
  <div>
        <li>
          <label>
            <input type="checkbox"/>
            <span>xxxxx</span>
          </label>
          <button class="btn btn-danger" style="display:none">删除</button>
        </li>
        <li>
          <label>
            <input type="checkbox"/>
            <span>yyyy</span>
          </label>
          <button class="btn btn-danger" style="display:none">删除</button>
        </li>
  </div>
</template>

<script>
export default {


name:'Item'
}
</script>

<style>
 /*item*/
  li {


    list-style: none;
    height: 36px;
    line-height: 36px;
    padding: 0 5px;
    border-bottom: 1px solid #ddd;
  }

  li label {


    float: left;
    cursor: pointer;
  }

  li label li input {


    vertical-align: middle;
    margin-right: 6px;
    position: relative;
    top: -1px;
  }

  li button {


    float: right;
    display: none;
    margin-top: 3px;
  }

  li:before {


    content: initial;
  }

  li:last-child {


    border-bottom: none;
  }
</style>
Footer.vue
<template>
  <div>
    <div class="todo-footer">
        <label>
          <input type="checkbox"/>
        </label>
        <span>
          <span>已完成0</span> / 全部2
        </span>
        <button class="btn btn-danger">清除已完成任务</button>
      </div>
  </div>
</template>

<script>
export default {


name:'Footer'
}
</script>

<style scoped>
 /*footer*/
  .todo-footer {


    height: 40px;
    line-height: 40px;
    padding-left: 6px;
    margin-top: 5px;
  }

  .todo-footer label {


    display: inline-block;
    margin-right: 20px;
    cursor: pointer;
  }

  .todo-footer label input {


    position: relative;
    top: -1px;
    vertical-align: middle;
    margin-right: 5px;
  }

  .todo-footer button {


    float: right;
    margin-top: 5px;
  }
</style>
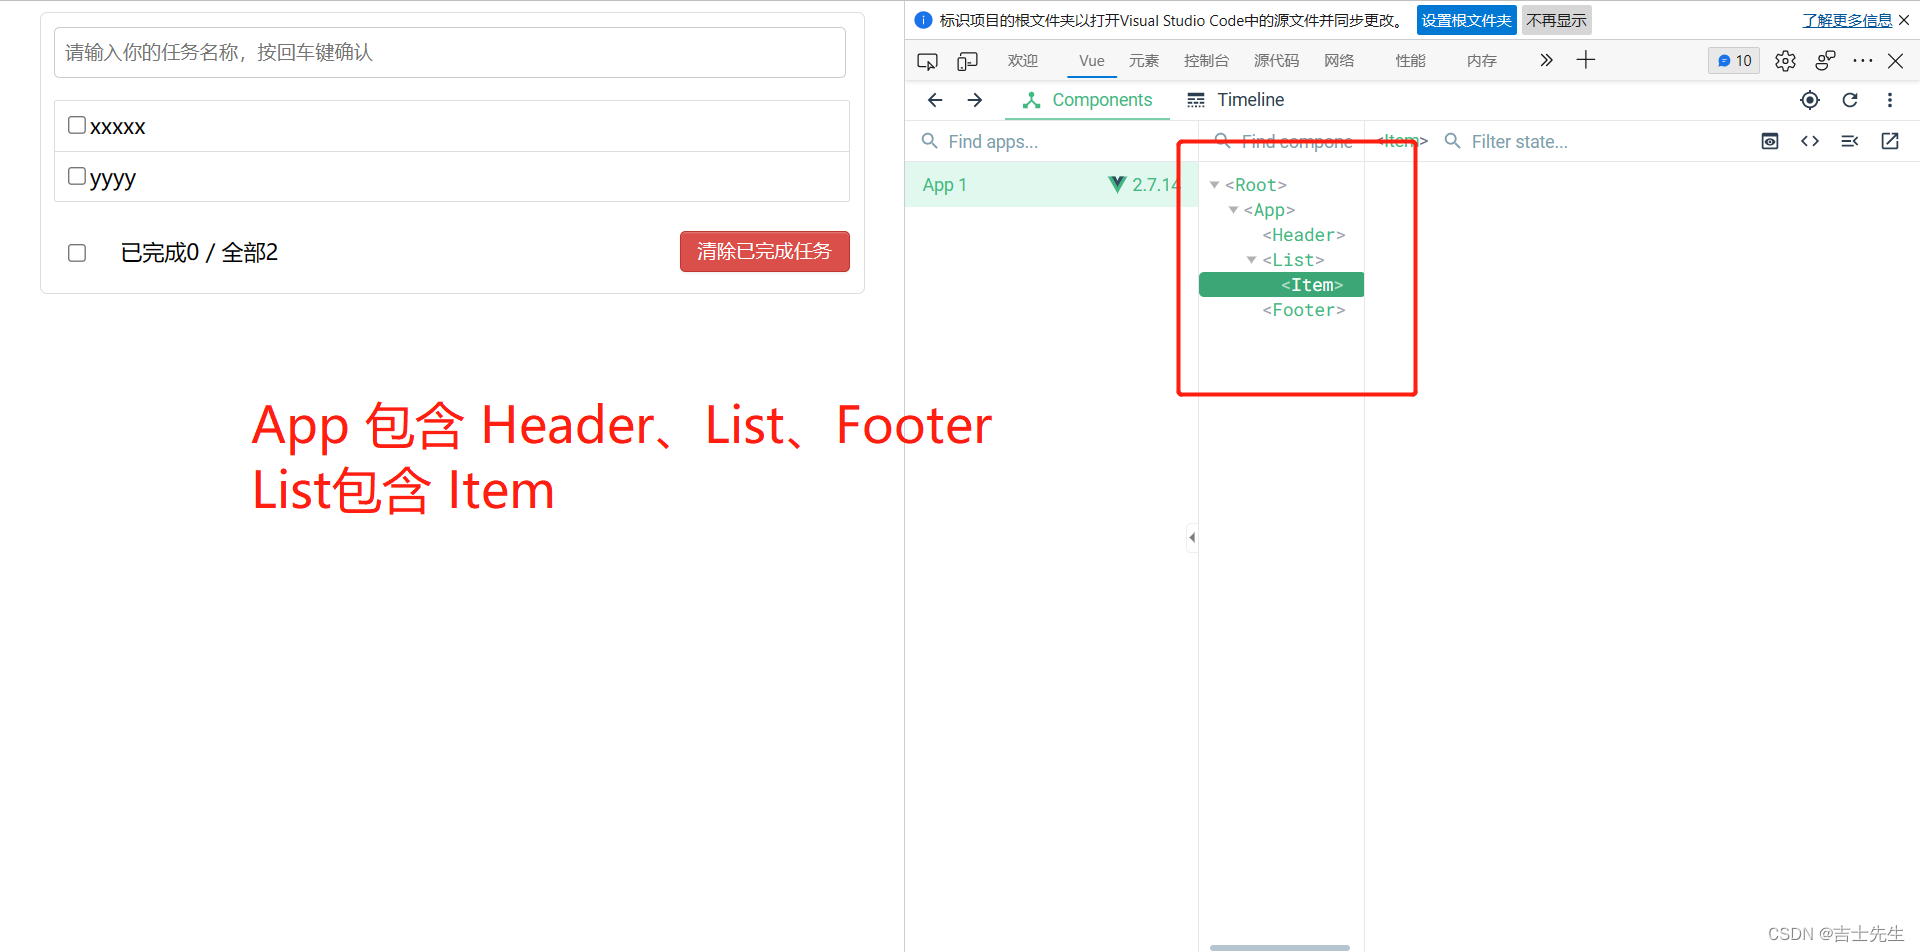
App.vue
<template>
  <div>
   <div class="todo-container">
    <div class="todo-wrap">
      <!-- 1.头部 -->
      <Header/>
      <!-- 2.列表 -->
      <list/>
      <!-- 3.底部导航 -->
      <Footer/>
    </div>
  </div>
  </div>
</template>

<script>
  // 1.引入
  import Header from './components/Header.vue'
  import List from './components/List.vue'
  import Footer from './components/Footer.vue'
export default {


  name:'App', // 目的是在浏览器VUE插件中的名字都是App不会被改变。
  // 2.注册
  components:{


    Header,
    List,
    Footer
  }
}
</script>

<style>

  /*base*/
  body {


    background: #fff;
  }

  .btn {


    display: inline-block;
    padding: 4px 12px;
    margin-bottom: 0;
    font-size: 14px;
    line-height: 20px;
    text-align: center;
    vertical-align: middle;
    cursor: pointer;
    box-shadow: inset 0 1px 0 rgba(255, 255, 255, 0.2), 0 1px 2px rgba(0, 0, 0, 0.05);
    border-radius: 4px;
  }

  .btn-danger {


    color: #fff;
    background-color: #da4f49;
    border: 1px solid #bd362f;
  }

  .btn-danger:hover {


    color: #fff;
    background-color: #bd362f;
  }

  .btn:focus {


    outline: none;
  }

  .todo-container {


    width: 600px;
    margin: 0 auto;
  }
  .todo-container .todo-wrap {


    padding: 10px;
    border: 1px solid #ddd;
    border-radius: 5px;
  }

</style>
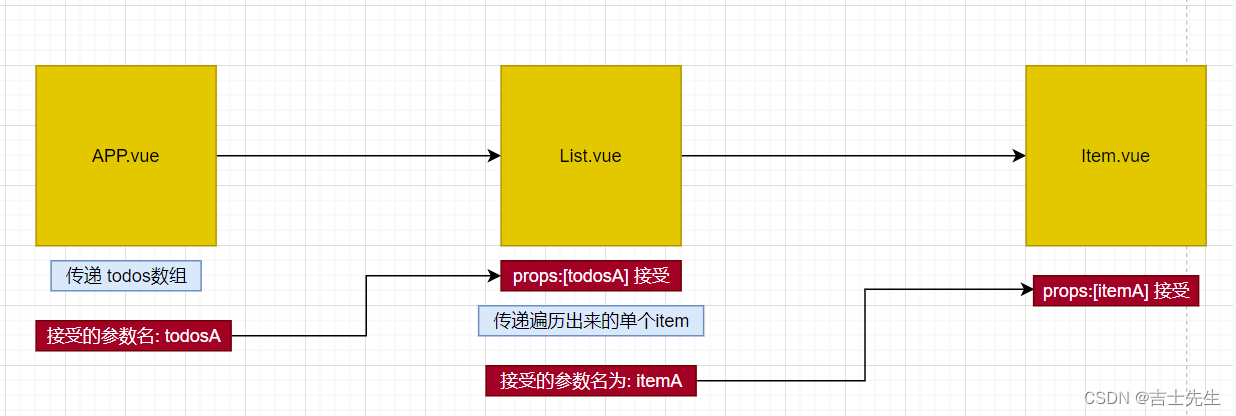
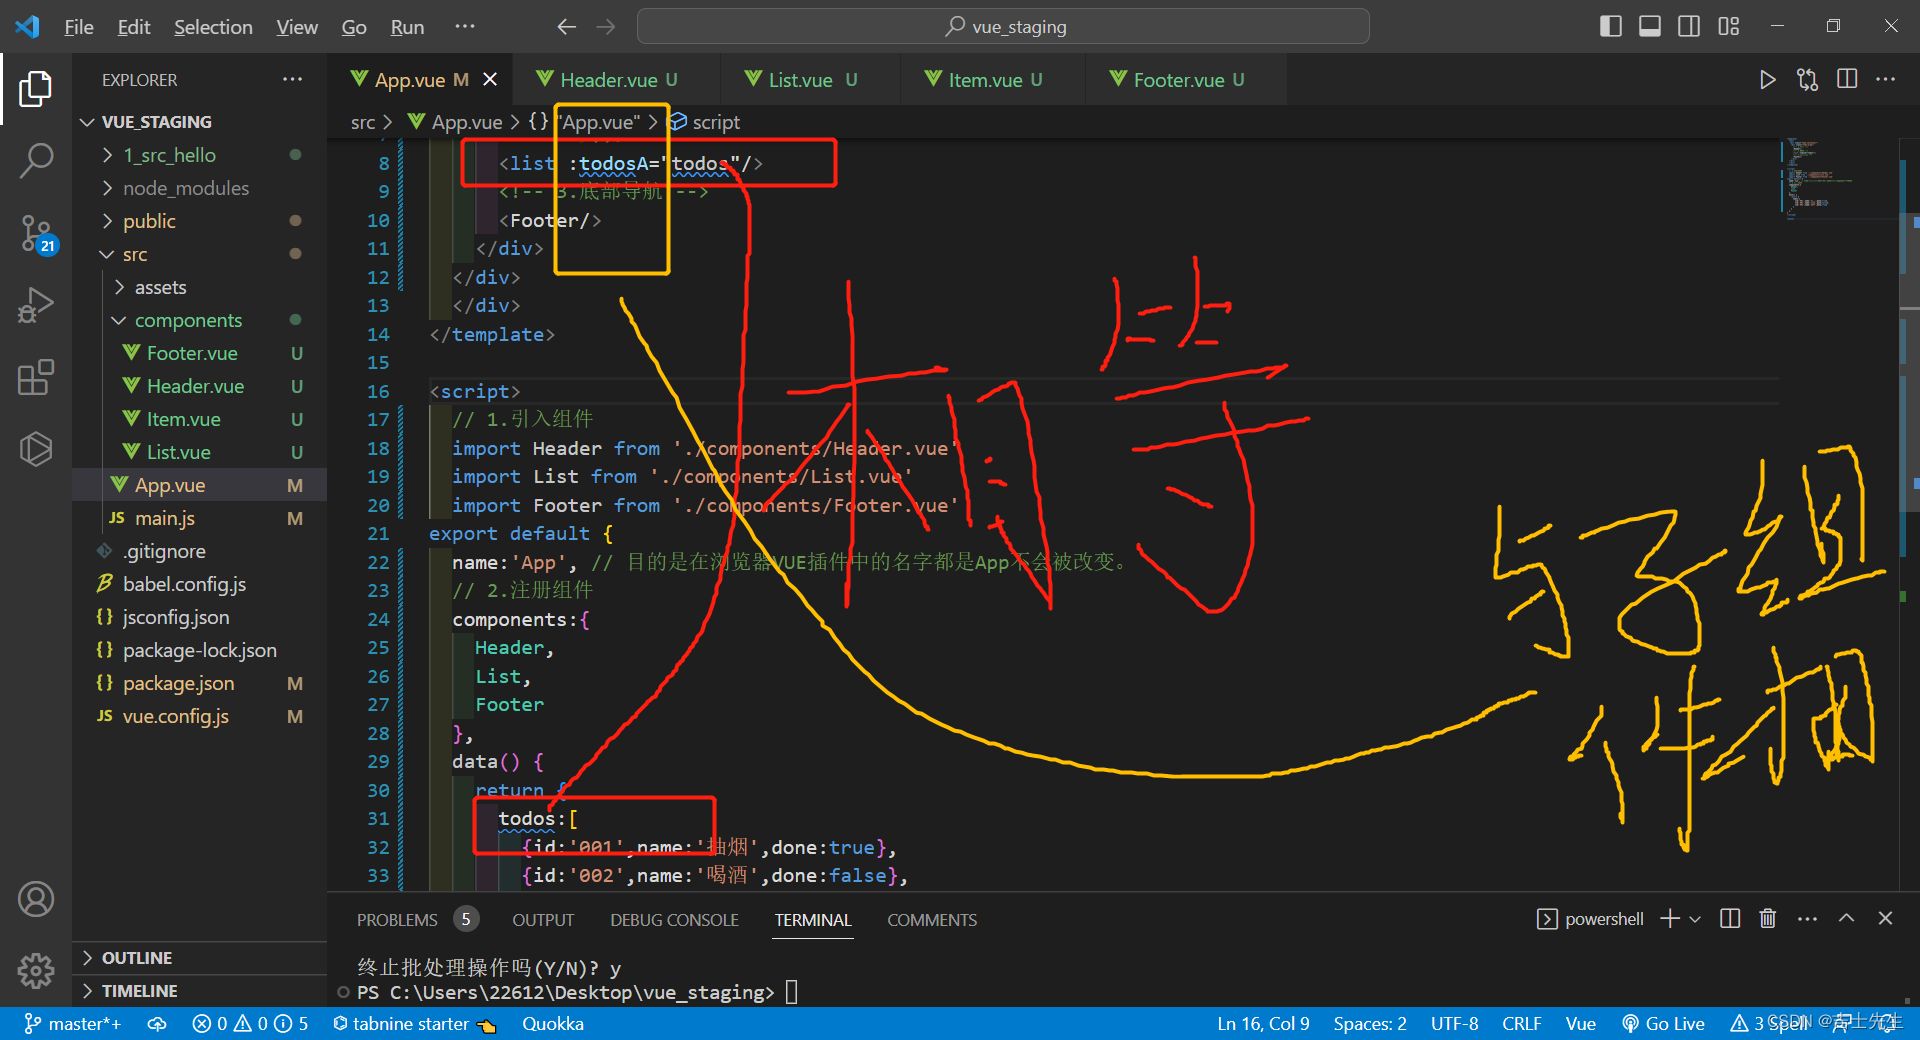
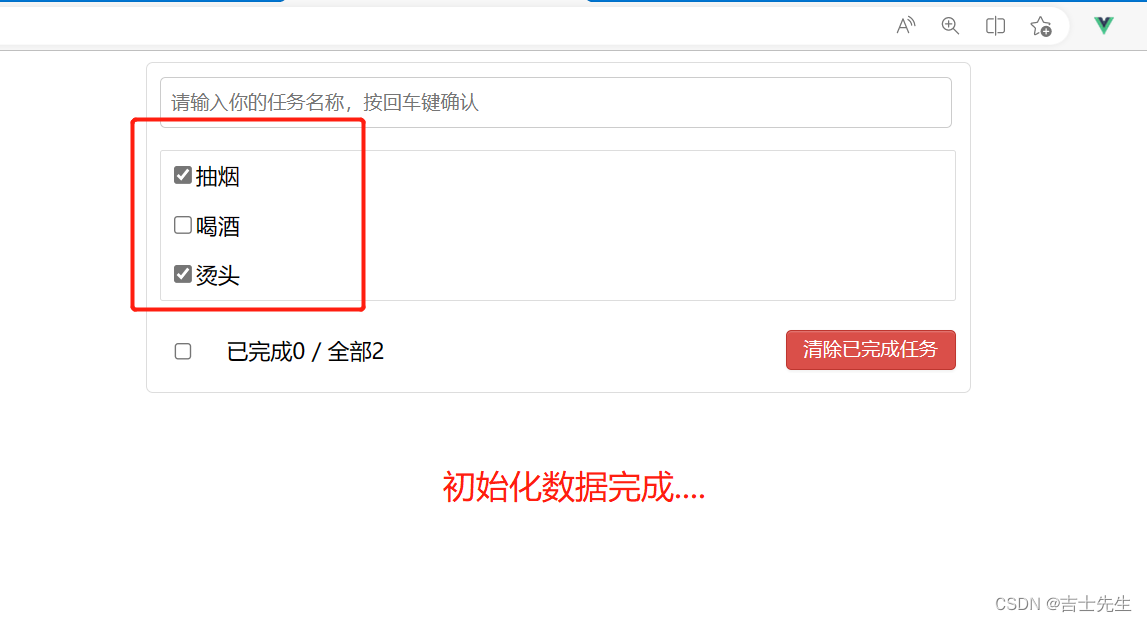
2.案列_初始化数据 (父App.vue传递数组)
(1).利用props接受父App.vue传过来的数据
引用父类传递给子类的数据的时候,一定要添加上this.(父类传递的数据)
切记一句话,数据源在哪,就在哪里做增删改查,子类需要通知父App.vue.然后父App.vue进行真实的增删改查
1.App.vue
<template>
  <div>
   <div class="todo-container">
    <div class="todo-wrap">
      <!-- 1.头部 -->
      <Header/>
      <!-- 2.列表 -->
      <list :todosA="todos"/>
      <!-- 3.底部导航 -->
      <Footer/>
    </div>
  </div>
  </div>
</template>

<script>
  // 1.引入组件
  import Header from './components/Header.vue'
  import List from './components/List.vue'
  import Footer from './components/Footer.vue'
export default {


  name:'App', // 目的是在浏览器VUE插件中的名字都是App不会被改变。
  // 2.注册组件
  components:{


    Header,
    List,
    Footer
  },
  data() {


    return {


      todos:[
        {

      id:'001',name:'抽烟',done:true},
        {

      id:'002',name:'喝酒',done:false},
        {

      id:'003',name:'烫头',done:true}
      ]
    }
  },
}
</script>

<style>

  /*base*/
  body {


    background: #fff;
  }

  .btn {


    display: inline-block;
    padding: 4px 12px;
    margin-bottom: 0;
    font-size: 14px;
    line-height: 20px;
    text-align: center;
    vertical-align: middle;
    cursor: pointer;
    box-shadow: inset 0 1px 0 rgba(255, 255, 255, 0.2), 0 1px 2px rgba(0, 0, 0, 0.05);
    border-radius: 4px;
  }

  .btn-danger {


    color: #fff;
    background-color: #da4f49;
    border: 1px solid #bd362f;
  }

  .btn-danger:hover {


    color: #fff;
    background-color: #bd362f;
  }

  .btn:focus {


    outline: none;
  }

  .todo-container {


    width: 600px;
    margin: 0 auto;
  }
  .todo-container .todo-wrap {


    padding: 10px;
    border: 1px solid #ddd;
    border-radius: 5px;
  }

</style>
2.List.vue: 接受父App.vue传递的参数并遍历我们传入的数据
1.一定要存在 :key否则会报错。
<Item v-for="t in this.todosA" :key="t.id"/>
2.将数据传递给Item.vue子组件
<Item v-for="t in this.todosA" :key="t.id" :itemA="t"/>
<template>
  <div>
    <ul class="todo-main">
        <!-- 这里我们必须需要添加key。 并向Item.vue传递遍历的对象t-->
        <<Item v-for="t in this.todosA" :key="t.id" :itemA="t"/>
      </ul>
  </div>
</template>

<script>
    import Item from './Item.vue'
export default {


    name:'List',
    components:{


        Item,
    },
    props:['todosA'],  // 负责声明接受且不做限制...
}
</script>

<style scoped>
  /*List*/
  .todo-main {


    margin-left: 0px;
    border: 1px solid #ddd;
    border-radius: 2px;
    padding: 0px;
  }

  .todo-empty {


    height: 40px;
    line-height: 40px;
    border: 1px solid #ddd;
    border-radius: 2px;
    padding-left: 5px;
    margin-top: 10px;
  }
</style>
3.Item.vue: 接受父List.vue的传递的参数并赋值
<template>
  <div>
        <li>
          <label>
            <input type="checkbox" :checked="itemA.done"/>
            <span>{

   {itemA.name}}</span>
          </label>
          <button class="btn btn-danger" style="display:none">删除</button>
        </li>
  </div>
</template>

<script>
export default {


name:'Item',
props:['itemA']
}
</script>

<style>
 /*item*/
  li {


    list-style: none;
    height: 36px;
    line-height: 36px;
    padding: 0 5px;
    border-bottom: 1px solid #ddd;
  }

  li label {


    float: left;
    cursor: pointer;
  }

  li label li input {


    vertical-align: middle;
    margin-right: 6px;
    position: relative;
    top: -1px;
  }

  li button {


    float: right;
    display: none;
    margin-top: 3px;
  }

  li:before {


    content: initial;
  }

  li:last-child {


    border-bottom: none;
  }
</style>
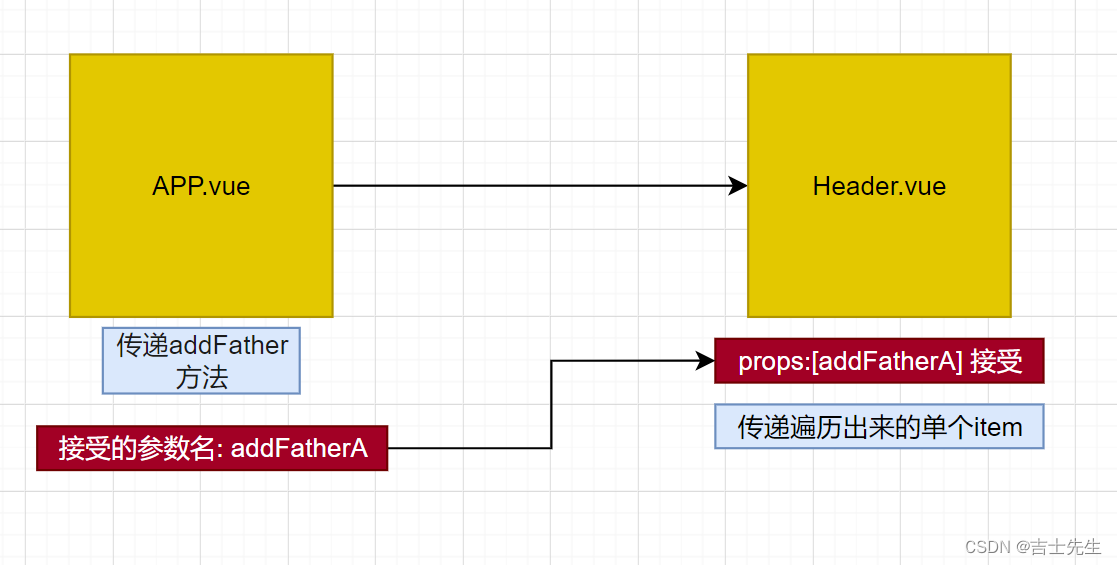
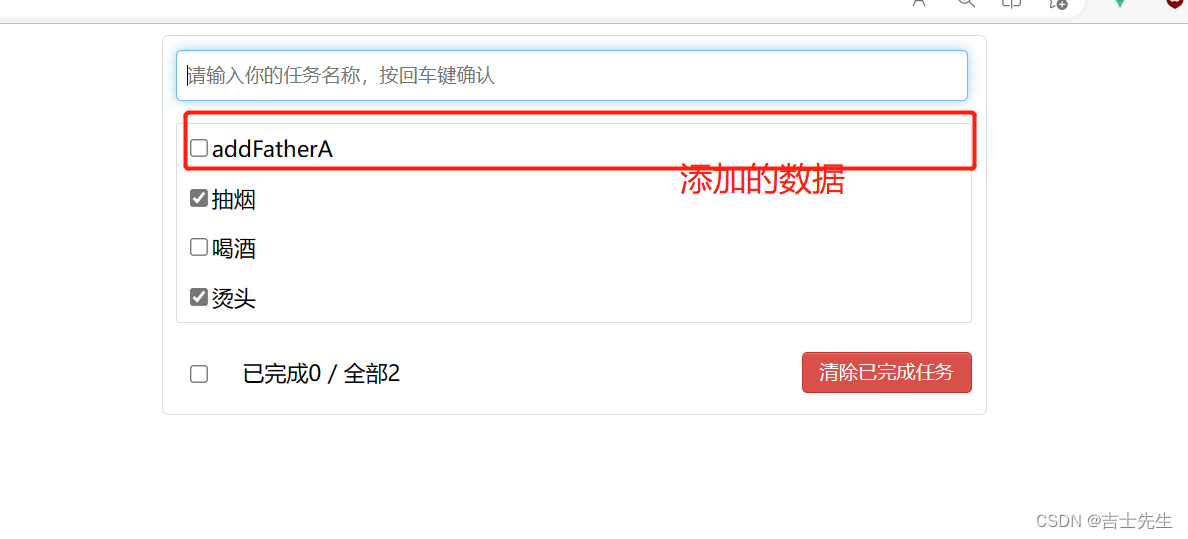
3.案列_添加todo (父APP.vue传递方法)
当我们在输入框输入文字之后,然后按下回车键。就在列表中添加数据。子类调用父类的时候一定要使用this.父类传递来的方法
Header.vue
<template>
  <div>
          <!-- 1.头部 -->
      <div class="todo-header">
        <input type="text" placeholder="请输入你的任务名称,按回车键确认" v-model="textA" @keyup.enter="add"/>
      </div>
  </div>
</template>

<script>
export default {


    name:'Header',
    data() {


      return {


        textA:''
      }
    },
    methods: {


      add(){


        if(this.textA!==null){


           // 根据用户的输入生成一个todo对象
        const todo={

      id:Date.now(),name:this.textA,done:false}
        // 通知父App.vue添加这个数据
        this.addFatherA(todo)
        }
        this.textA=''
      }
    },
    // 接受父APP.vue传递过来的方法
    props:['addFatherA']

}
</script>

<style scoped>
  /*header*/
  .todo-header input {


    width: 560px;
    height: 28px;
    font-size: 14px;
    border: 1px solid #ccc;
    border-radius: 4px;
    padding: 4px 7px;
  }

  .todo-header input:focus {


    outline: none;
    border-color: rgba(82, 168, 236, 0.8);
    box-shadow: inset 0 1px 1px rgba(0, 0, 0, 0.075), 0 0 8px rgba(82, 168, 236, 0.6);
  }

</style>
App.vue
<template>
  <div>
   <div class="todo-container">
    <div class="todo-wrap">
      <!-- 1.头部 将父APP.VUE的addFather方法传递给子组件-->
      <Header :addFatherA="addFather"/>
      <!-- 2.列表 : 将父APP.VUE的todos数组传递给子组件-->
      <list :todosA="todos"/>
      <!-- 3.底部导航 -->
      <Footer/>
    </div>
  </div>
  </div>
</template>

<script>
  // 1.引入组件
  import Header from './components/Header.vue'
  import List from './components/List.vue'
  import Footer from './components/Footer.vue'
export default {


  name:'App', // 目的是在浏览器VUE插件中的名字都是App不会被改变。
  // 2.注册组件
  components:{


    Header,
    List,
    Footer
  },
  data() {


    return {


      todos:[
        {

      id:'001',name:'抽烟',done:true},
        {

      id:'002',name:'喝酒',done:false},
        {

      id:'003',name:'烫头',done:true}
      ]
    }
  },
  methods: {


    addFather(todoObj){


      // 这个方法是对todos这个数组的尾部追加对象todoObj
      this.todos.unshift(todoObj)
    }
  },
}
</script>

<style>

  /*base*/
  body {


    background: #fff;
  }

  .btn {


    display: inline-block;
    padding: 4px 12px;
    margin-bottom: 0;
    font-size: 14px;
    line-height: 20px;
    text-align: center;
    vertical-align: middle;
    cursor: pointer;
    box-shadow: inset 0 1px 0 rgba(255, 255, 255, 0.2), 0 1px 2px rgba(0, 0, 0, 0.05);
    border-radius: 4px;
  }

  .btn-danger {


    color: #fff;
    background-color: #da4f49;
    border: 1px solid #bd362f;
  }

  .btn-danger:hover {


    color: #fff;
    background-color: #bd362f;
  }

  .btn:focus {


    outline: none;
  }

  .todo-container {


    width: 600px;
    margin: 0 auto;
  }
  .todo-container .todo-wrap {


    padding: 10px;
    border: 1px solid #ddd;
    border-radius: 5px;
  }

</style>
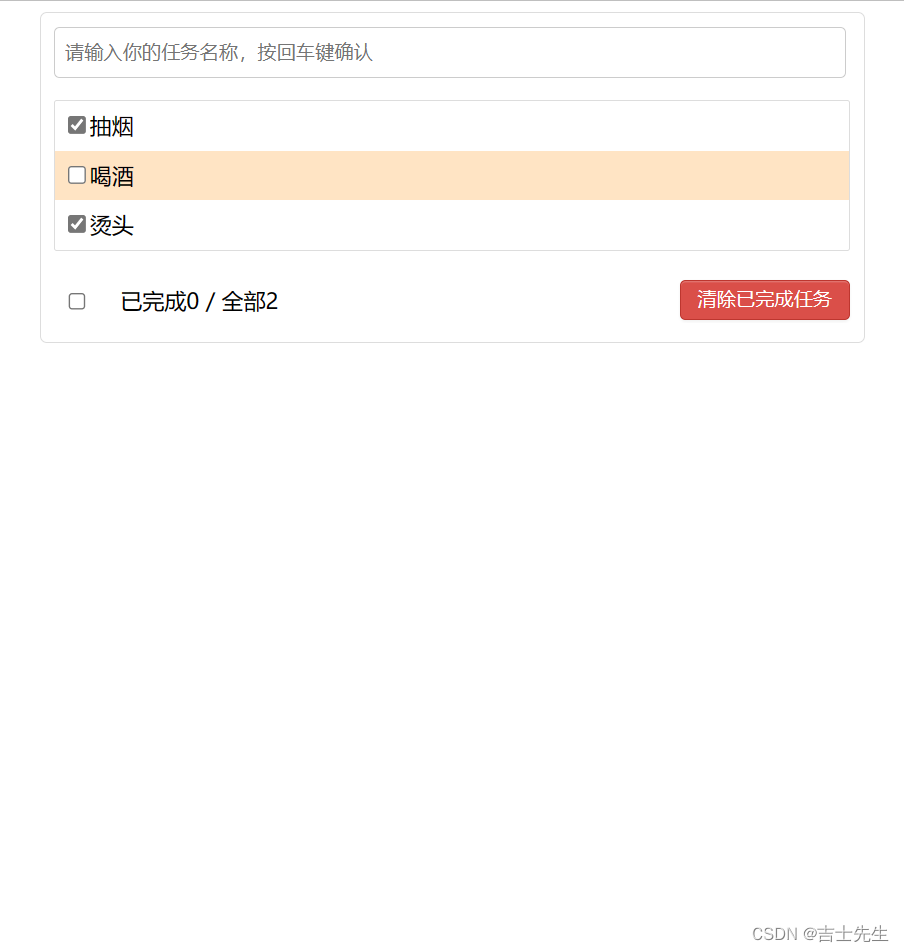
4.案列_Item高亮
(1).鼠标到达的地方出现残影
1. 利用三元运算符进行残影的确定。
<li @mouseenter="isEnter=true" @mouseleave="isEnter=false" :class="isEnter ? 'high_light' : ''">
2.知道样式却不知道用不用
<li @mouseenter="isEnter=true" @mouseleave="isEnter=false" :class="{

     'high_light':isEnter}">
<template>
  <div>
        <!-- 鼠标进入与鼠标移除的值是: boolean值。 利用三元运算符进行判定是否使用样式 -->
        <!-- <li @mouseenter="isEnter=true" @mouseleave="isEnter=false" :class="isEnter ? 'high_light' : ''"> -->
        <li @mouseenter="isEnter=true" @mouseleave="isEnter=false" :class="{

     'high_light':isEnter}">
          <label>
            <input type="checkbox" :checked="this.itemA.done"/>
            <span>{

   {this.itemA.name}}</span>
          </label>
          <button class="btn btn-danger" style="display:none">删除</button>
        </li>
  </div>
</template>

<script>
export default {


name:'Item',
props:['itemA'],
data() {


  return {


    isEnter:false // 标识鼠标是否移入
  }
},
}

</script>

<style>
 /*item*/
  li {


    list-style: none;
    height: 36px;
    line-height: 36px;
    padding: 0 5px;
    border-bottom: 1px solid #ddd;
  }

  li label {


    float: left;
    cursor: pointer;
  }

  li label li input {


    vertical-align: middle;
    margin-right: 6px;
    position: relative;
    top: -1px;
  }

  li button {


    float: right;
    display: none;
    margin-top: 3px;
  }

  li:before {


    content: initial;
  }

  li:last-child {


    border-bottom: none;
  }
  .high_light {


    background-color: bisque;
  }
</style>
(2).鼠标达到的地方出现残影+按钮展现
如果样式里面是: 用的是对象那么有下划线的地方需要使用单引号。否则可以省略,但建议都加上单引号
 <!-- 想要动态的处理一定要进行 : 然后利用三元运算符进行判断是否要展示按钮block展示,none不展示-->
 <button class="btn btn-danger" :style="{

     'display':isEnter ? 'block' : 'none'}">删除</button>
<template>
  <div>
        <!-- 鼠标进入与鼠标移除的值是: boolean值。 利用三元运算符进行判定是否使用样式 -->
        <!-- <li @mouseenter="isEnter=true" @mouseleave="isEnter=false" :class="isEnter ? 'high_light' : ''"> -->
        <li @mouseenter="isEnter=true" @mouseleave="isEnter=false" :class="{

     'high_light':isEnter}">
          <label>
            <input type="checkbox" :checked="this.itemA.done"/>
            <span>{

   {this.itemA.name}}</span>
          </label>
          <!-- 想要动态的处理一定要进行 : 然后利用三元运算符进行判断是否要展示按钮block展示,none不展示-->
          <button class="btn btn-danger" :style="{

     'display':isEnter ? 'block' : 'none'}">删除</button>
        </li>
  </div>
</template>

<script>
export default {


name:'Item',
props:['itemA'],
data() {


  return {


    isEnter:false // 标识鼠标是否移入
  }
},
}

</script>

<style>
 /*item*/
  li {


    list-style: none;
    height: 36px;
    line-height: 36px;
    padding: 0 5px;
    border-bottom: 1px solid #ddd;
  }

  li label {


    float: left;
    cursor: pointer;
  }

  li label li input {


    vertical-align: middle;
    margin-right: 6px;
    position: relative;
    top: -1px;
  }

  li button {


    float: right;
    display: none;
    margin-top: 3px;
  }

  li:before {


    content: initial;
  }

  li:last-child {


    border-bottom: none;
  }
  .high_light {


    background-color: bisque;
  }
</style>
5.案列_勾选todo
(1).利用id去更新一个数组
Item.vue
主要负责通知App.vue和接受App.vue传递过来的方法
    updateFather(id,doneA){


      // 利用map遍历数组todos,获取到的分别是数组对象和对象坐标
      this.todos=this.todos.map((value,index)=>{

     // 这里的this是window,匿名
          if(id===value.id){

      // 假如说子类传递过来的值和map遍历的值一样,那么就返回 所有的属性+修改后的值
              return {

    ...value,done:doneA}
          }else{


            return value
          }
      })
    }
<template>
  <div>
        <!-- 鼠标进入与鼠标移除的值是: boolean值。 利用三元运算符进行判定是否使用样式 -->
        <!-- <li @mouseenter="isEnter=true" @mouseleave="isEnter=false" :class="isEnter ? 'high_light' : ''"> -->
        <li @mouseenter="isEnter=true" @mouseleave="isEnter=false" :class="{

     'high_light':isEnter}">
          <label>
            <input type="checkbox" :checked="this.itemA.done" @click="update(itemA.id,$event)"/>
            <span>{

   {this.itemA.name}}</span>
          </label>
          <!-- 想要动态的处理一定要进行 : 然后利用三元运算符进行判断是否要展示按钮block展示,none不展示-->
          <button class="btn btn-danger" :style="{

     'display':isEnter ? 'block' : 'none'}">删除</button>
        </li>
  </div>
</template>

<script>
export default {


name:'Item',
props:['itemA','updateFatherB'],
data() {


  return {


    isEnter:false // 标识鼠标是否移入
  }
},
methods: {


  update(id,event){


    // 获取勾选的id 和勾选的值。这里因为属性是checked所以我们获取到的应该是checked而不是value。
    console.log(id,event.target.checked);
    // 2.通知父App.vue
    this.updateFatherB(id,event.target.checked)
  }
},
}
</script>

<style>
 /*item*/
  li {


    list-style: none;
    height: 36px;
    line-height: 36px;
    padding: 0 5px;
    border-bottom: 1px solid #ddd;
  }

  li label {


    float: left;
    cursor: pointer;
  }

  li label li input {


    vertical-align: middle;
    margin-right: 6px;
    position: relative;
    top: -1px;
  }

  li button {


    float: right;
    display: none;
    margin-top: 3px;
  }

  li:before {


    content: initial;
  }

  li:last-child {


    border-bottom: none;
  }
  .high_light {


    background-color: bisque;
  }
</style>
App.vue
主要负责给子类List.vue传递勾选的方法
<template>
  <div>
   <div class="todo-container">
    <div class="todo-wrap">
      <!-- 1.头部 将父APP.VUE的addFather方法传递给子组件-->
      <Header :addFatherA="addFather"/>
      <!-- 2.列表 : 将父APP.VUE的todos数组传递给子组件-->
      <list :todosA="todos" :updateFatherA="updateFather"/>
      <!-- 3.底部导航 -->
      <Footer/>
    </div>
  </div>
  </div>
</template>

<script>
  // 1.引入组件
  import Header from './components/Header.vue'
  import List from './components/List.vue'
  import Footer from './components/Footer.vue'
export default {


  name:'App', // 目的是在浏览器VUE插件中的名字都是App不会被改变。
  // 2.注册组件
  components:{


    Header,
    List,
    Footer
  },
  data() {


    return {


      todos:[
        {

      id:'001',name:'抽烟',done:true},
        {

      id:'002',name:'喝酒',done:false},
        {

      id:'003',name:'烫头',done:true}
      ]
    }
  },
  methods: {


    addFather(todoObj){


      // 这个方法是对todos这个数组的尾部追加对象todoObj
      this.todos.unshift(todoObj)
    },
    updateFather(id,doneA){


      // 利用map遍历数组todos,获取到的分别是数组对象和对象坐标
      this.todos=this.todos.map((value,index)=>{


          if(id===value.id){

        // 假如说子类传递过来的值和map遍历的值一样,那么就返回 所有的属性+修改后的值
              return {

      ...value,done:doneA}
          }else{


            return value
          }
      })
    }
  },
}
</script>

<style>

  /*base*/
  body {


    background: #fff;
  }

  .btn {


    display: inline-block;
    padding: 4px 12px;
    margin-bottom: 0;
    font-size: 14px;
    line-height: 20px;
    text-align: center;
    vertical-align: middle;
    cursor: pointer;
    box-shadow: inset 0 1px 0 rgba(255, 255, 255, 0.2), 0 1px 2px rgba(0, 0, 0, 0.05);
    border-radius: 4px;
  }

  .btn-danger {


    color: #fff;
    background-color: #da4f49;
    border: 1px solid #bd362f;
  }

  .btn-danger:hover {


    color: #fff;
    background-color: #bd362f;
  }

  .btn:focus {


    outline: none;
  }

  .todo-container {


    width: 600px;
    margin: 0 auto;
  }
  .todo-container .todo-wrap {


    padding: 10px;
    border: 1px solid #ddd;
    border-radius: 5px;
  }

</style>
List.vue
主要负责当桥梁因为父App.vue不能直接传递给Item.vue。需要借助List.vue传递给Item.vue
<template>
  <div>
    <ul class="todo-main">
        <!-- 这里我们必须需要添加key -->
        <Item v-for="t in this.todosA" :key="t.id" :itemA="t" :updateFatherB="updateFatherA"/>
      </ul>
  </div>
</template>

<script>
    import Item from './Item.vue'
export default {


    name:'List',
    components:{


        Item,
    },
    // 接受更新的函数
    props:['todosA','updateFatherA'],  // 负责声明接受且不做限制...
}
</script>

<style scoped>
  /*List*/
  .todo-main {


    margin-left: 0px;
    border: 1px solid #ddd;
    border-radius: 2px;
    padding: 0px;
  }

  .todo-empty {


    height: 40px;
    line-height: 40px;
    border: 1px solid #ddd;
    border-radius: 2px;
    padding-left: 5px;
    margin-top: 10px;
  }
</style>
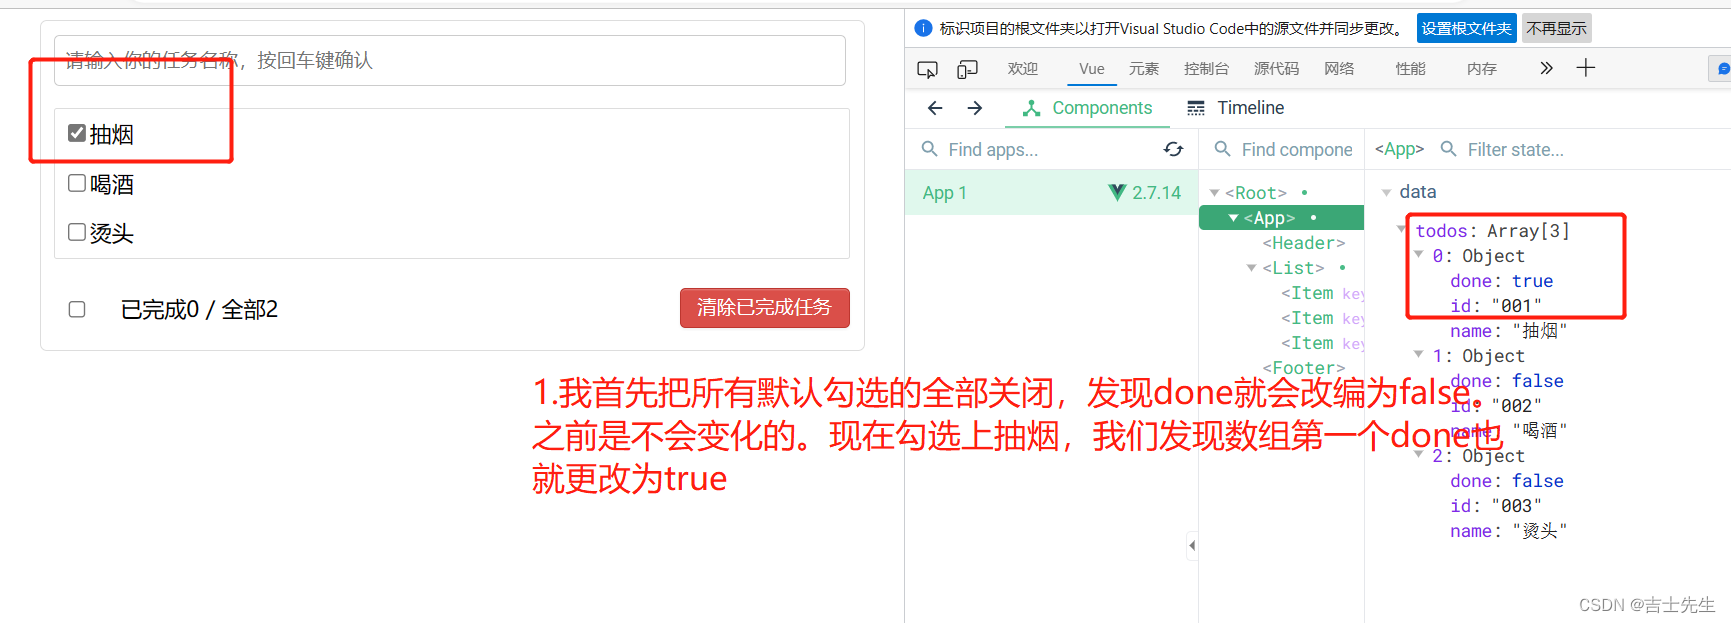
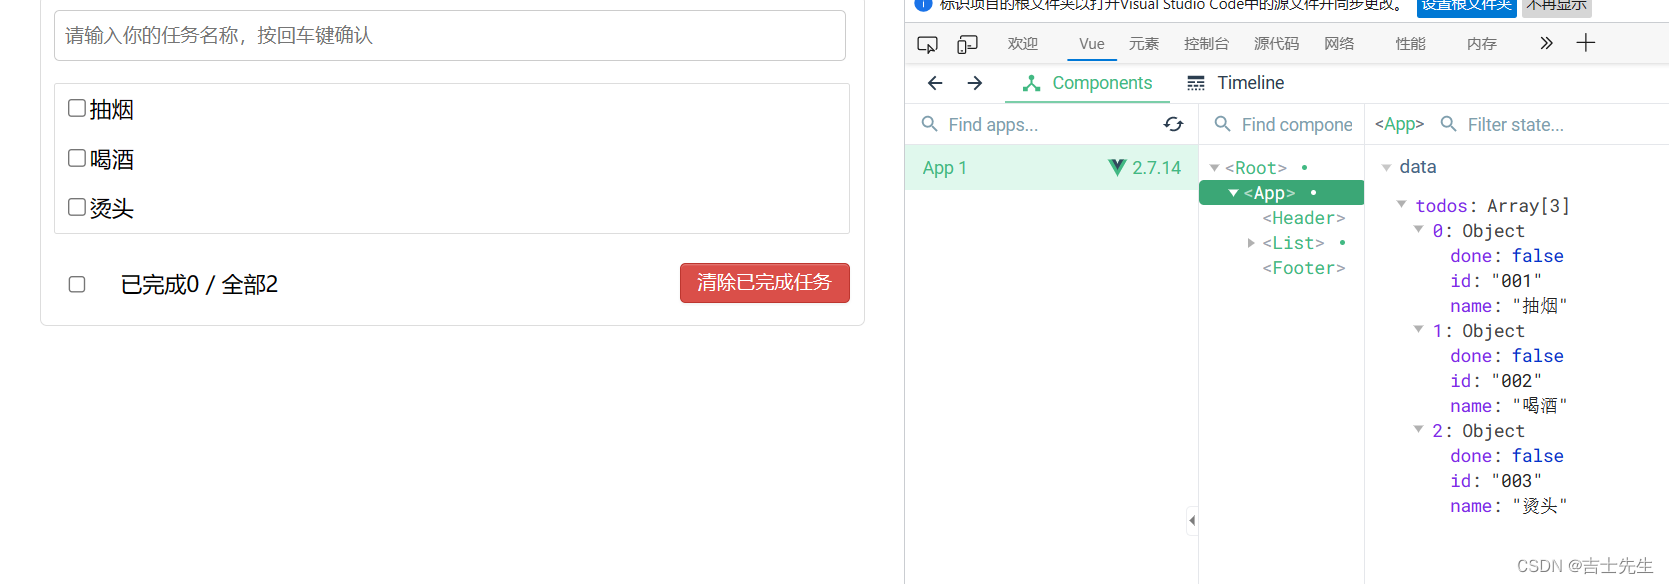
(2).利用index去更新一个数组
App.vue
<template>
  <div>
   <div class="todo-container">
    <div class="todo-wrap">
      <!-- 1.头部 将父APP.VUE的addFather方法传递给子组件-->
      <Header :addFatherA="addFather"/>
      <!-- 2.列表 : 将父APP.VUE的todos数组传递给子组件-->
      <list :todosA="todos" :updateFatherA="updateFather"/>
      <!-- 3.底部导航 -->
      <Footer/>
    </div>
  </div>
  </div>
</template>

<script>
  // 1.引入组件
  import Header from './components/Header.vue'
  import List from './components/List.vue'
  import Footer from './components/Footer.vue'
export default {


  name:'App', // 目的是在浏览器VUE插件中的名字都是App不会被改变。
  // 2.注册组件
  components:{


    Header,
    List,
    Footer
  },
  data() {


    return {


      todos:[
        {

      id:'001',name:'抽烟',done:true},
        {

      id:'002',name:'喝酒',done:false},
        {

      id:'003',name:'烫头',done:true}
      ]
    }
  },
  methods: {


    addFather(todoObj){


      // 这个方法是对todos这个数组的尾部追加对象todoObj
      this.todos.unshift(todoObj)
    },
/*    利用id
    updateFather(id,doneA){

      // 利用map遍历数组todos,获取到的分别是数组对象和对象坐标
      this.todos=this.todos.map((value,index)=>{
          if(id===value.id){  // 假如说子类传递过来的值和map遍历的值一样,那么就返回 所有的属性+修改后的值
              return {...value,done:doneA}
          }else{
            return value
          }
      })
    }
*/
    updateFather(index,doneA){


      this.todos[index].done=doneA
    }
  },
}
</script>

<style>

  /*base*/
  body {


    background: #fff;
  }

  .btn {


    display: inline-block;
    padding: 4px 12px;
    margin-bottom: 0;
    font-size: 14px;
    line-height: 20px;
    text-align: center;
    vertical-align: middle;
    cursor: pointer;
    box-shadow: inset 0 1px 0 rgba(255, 255, 255, 0.2), 0 1px 2px rgba(0, 0, 0, 0.05);
    border-radius: 4px;
  }

  .btn-danger {


    color: #fff;
    background-color: #da4f49;
    border: 1px solid #bd362f;
  }

  .btn-danger:hover {


    color: #fff;
    background-color: #bd362f;
  }

  .btn:focus {


    outline: none;
  }

  .todo-container {


    width: 600px;
    margin: 0 auto;
  }
  .todo-container .todo-wrap {


    padding: 10px;
    border: 1px solid #ddd;
    border-radius: 5px;
  }

</style>
List.vue
在遍历的时候: 我们添加一个index.并且将这个index传递给Item.vue
<template>
  <div>
    <ul class="todo-main">
        <!-- 这里我们必须需要添加key -->
        <Item v-for="(t,index) in this.todosA" :key="t.id"
        :itemA="t"
        :updateFatherB="updateFatherA"
        :indexB="index"
        />
      </ul>
  </div>
</template>

<script>
    import Item from './Item.vue'
export default {


    name:'List',
    components:{


        Item,
    },
    // 接受更新的函数
    props:['todosA','updateFatherA'],  // 负责声明接受且不做限制...
}
</script>

<style scoped>
  /*List*/
  .todo-main {


    margin-left: 0px;
    border: 1px solid #ddd;
    border-radius: 2px;
    padding: 0px;
  }

  .todo-empty {


    height: 40px;
    line-height: 40px;
    border: 1px solid #ddd;
    border-radius: 2px;
    padding-left: 5px;
    margin-top: 10px;
  }
</style>
Item.vue
接受传递过来的index,并通知父App.vue
<template>
  <div>
        <!-- 鼠标进入与鼠标移除的值是: boolean值。 利用三元运算符进行判定是否使用样式 -->
        <!-- <li @mouseenter="isEnter=true" @mouseleave="isEnter=false" :class="isEnter ? 'high_light' : ''"> -->
        <li @mouseenter="isEnter=true" @mouseleave="isEnter=false" :class="{

     'high_light':isEnter}">
          <label>
            <input type="checkbox" :checked="this.itemA.done" @click="update(indexB,$event)"/>
            <span>{

   {this.itemA.name}}</span>
          </label>
          <!-- 想要动态的处理一定要进行 : 然后利用三元运算符进行判断是否要展示按钮block展示,none不展示-->
          <button class="btn btn-danger" :style="{

     'display':isEnter ? 'block' : 'none'}">删除</button>
        </li>
  </div>
</template>

<script>
export default {


name:'Item',
props:['itemA','updateFatherB','indexB'],
data() {


  return {


    isEnter:false // 标识鼠标是否移入
  }
},
methods: {


  /*  利用id

  update(id,event){
    // 获取勾选的id 和勾选的值。这里因为属性是checked所以我们获取到的应该是checked而不是value。
    console.log(id,event.target.checked);
    // 2.通知父App.vue
    this.updateFatherB(id,event.target.checked)
  }*/


    // 利用index
    update(index,event){


    // 获取勾选的id 和勾选的值。这里因为属性是checked所以我们获取到的应该是checked而不是value。
    console.log(index,event.target.checked);
    // 2.通知父App.vue
    this.updateFatherB(index,event.target.checked)
  }
},
}
</script>

<style>
 /*item*/
  li {


    list-style: none;
    height: 36px;
    line-height: 36px;
    padding: 0 5px;
    border-bottom: 1px solid #ddd;
  }

  li label {


    float: left;
    cursor: pointer;
  }

  li label li input {


    vertical-align: middle;
    margin-right: 6px;
    position: relative;
    top: -1px;
  }

  li button {


    float: right;
    display: none;
    margin-top: 3px;
  }

  li:before {


    content: initial;
  }

  li:last-child {


    border-bottom: none;
  }
  .high_light {


    background-color: bisque;
  }
</style>
(3).利用v-model更新数组
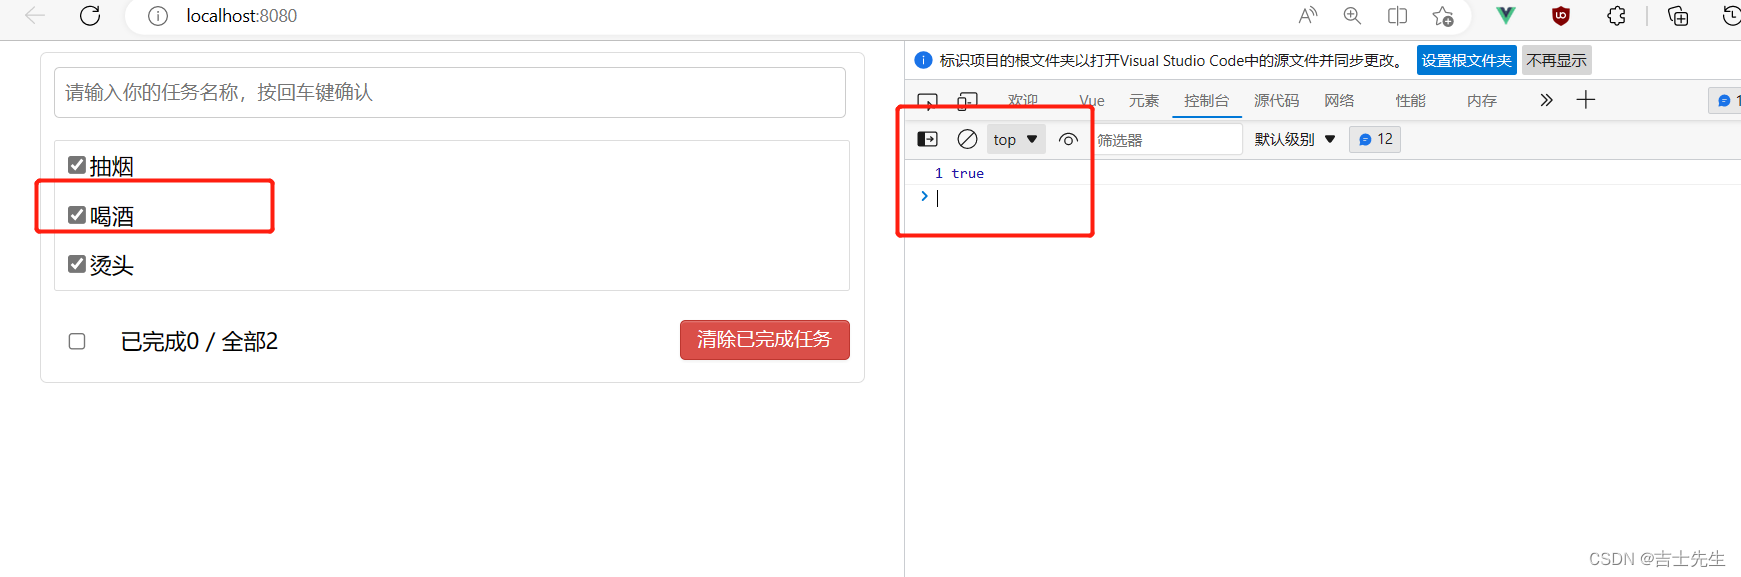
- 发现控制台输出的数据和实质不一样 ⭐
    // 利用index
    update(index,event){


    // 获取勾选的id 和勾选的值。这里因为属性是checked所以我们获取到的应该是checked而不是value。
    console.log(index,this.isChecked);
    // 2.通知父App.vue
    this.updateFatherB(index,event.target.checked)
  }
<template>
  <div>
        <!-- 鼠标进入与鼠标移除的值是: boolean值。 利用三元运算符进行判定是否使用样式 -->
        <!-- <li @mouseenter="isEnter=true" @mouseleave="isEnter=false" :class="isEnter ? 'high_light' : ''"> -->
        <li @mouseenter="isEnter=true" @mouseleave="isEnter=false" :class="{

     'high_light':isEnter}">
          <label>
            <input type="checkbox" v-model="isChecked" @click="update(indexB,$event)"/>
            <span>{

   {this.itemA.name}}</span>
          </label>
          <!-- 想要动态的处理一定要进行 : 然后利用三元运算符进行判断是否要展示按钮block展示,none不展示-->
          <button class="btn btn-danger" :style="{

     'display':isEnter ? 'block' : 'none'}">删除</button>
        </li>
  </div>
</template>

<script>
export default {


name:'Item',
props:['itemA','updateFatherB','indexB'],
data() {


  return {


    isEnter:false, // 标识鼠标是否移入
    isChecked:this.itemA.done
  }
},
methods: {


  /*  利用id

  update(id,event){
    // 获取勾选的id 和勾选的值。这里因为属性是checked所以我们获取到的应该是checked而不是value。
    console.log(id,event.target.checked);
    // 2.通知父App.vue
    this.updateFatherB(id,event.target.checked)
  }*/


    // 利用index
    update(index,event){


    // 获取勾选的id 和勾选的值。这里因为属性是checked所以我们获取到的应该是checked而不是value。
    console.log(index,this.isChecked);
    // 2.通知父App.vue
    this.updateFatherB(index,event.target.checked)
  }
},
}
</script>

<style>
 /*item*/
  li {


    list-style: none;
    height: 36px;
    line-height: 36px;
    padding: 0 5px;
    border-bottom: 1px solid #ddd;
  }

  li label {


    float: left;
    cursor: pointer;
  }

  li label li input {


    vertical-align: middle;
    margin-right: 6px;
    position: relative;
    top: -1px;
  }

  li button {


    float: right;
    display: none;
    margin-top: 3px;
  }

  li:before {


    content: initial;
  }

  li:last-child {


    border-bottom: none;
  }
  .high_light {


    background-color: bisque;
  }
</style>
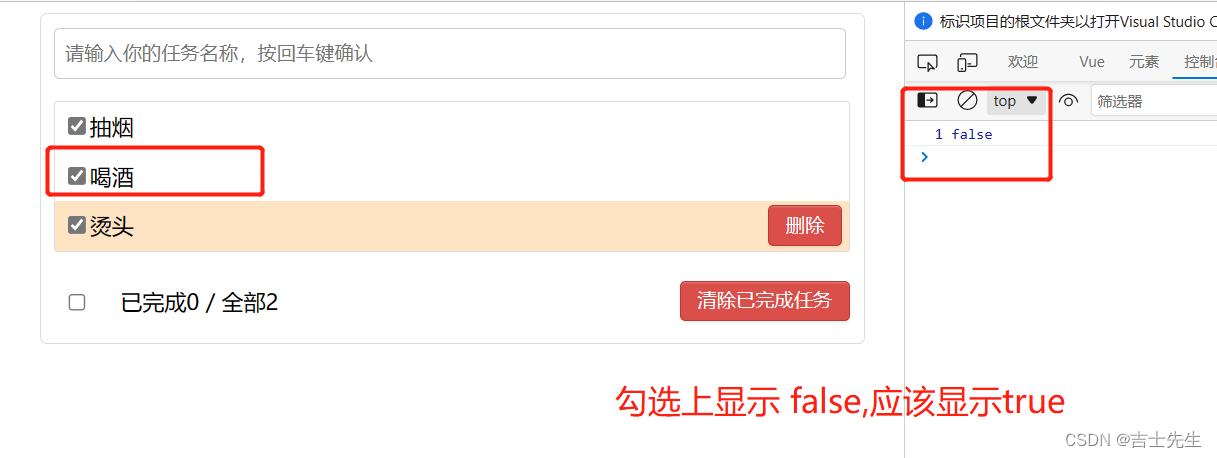
- 解决控制台输出的数据和实质不一样 ⭐
原因是vue事件优先,所以点击事件先被调用之后,才是model
直接打印出事件的值而不是data区域的数据
    // 利用index
    update(index,event){


    // 获取勾选的id 和勾选的值。这里因为属性是checked所以我们获取到的应该是checked而不是value。
    console.log(index,event.target.checked);
    // 2.通知父App.vue
    this.updateFatherB(index,event.target.checked)
  }
<template>
  <div>
        <!-- 鼠标进入与鼠标移除的值是: boolean值。 利用三元运算符进行判定是否使用样式 -->
        <!-- <li @mouseenter="isEnter=true" @mouseleave="isEnter=false" :class="isEnter ? 'high_light' : ''"> -->
        <li @mouseenter="isEnter=true" @mouseleave="isEnter=false" :class="{

     'high_light':isEnter}">
          <label>
            <input type="checkbox" v-model="isChecked" @click="update(indexB,$event)"/>
            <span>{

   {this.itemA.name}}</span>
          </label>
          <!-- 想要动态的处理一定要进行 : 然后利用三元运算符进行判断是否要展示按钮block展示,none不展示-->
          <button class="btn btn-danger" :style="{

     'display':isEnter ? 'block' : 'none'}">删除</button>
        </li>
  </div>
</template>

<script>
export default {


name:'Item',
props:['itemA','updateFatherB','indexB'],
data() {


  return {


    isEnter:false, // 标识鼠标是否移入
    isChecked:this.itemA.done
  }
},
methods: {


  /*  利用id

  update(id,event){
    // 获取勾选的id 和勾选的值。这里因为属性是checked所以我们获取到的应该是checked而不是value。
    console.log(id,event.target.checked);
    // 2.通知父App.vue
    this.updateFatherB(id,event.target.checked)
  }*/


    // 利用index
    update(index,event){


    // 获取勾选的id 和勾选的值。这里因为属性是checked所以我们获取到的应该是checked而不是value。
    console.log(index,event.target.checked);
    // 2.通知父App.vue
    this.updateFatherB(index,event.target.checked)
  }
},
}
</script>

<style>
 /*item*/
  li {


    list-style: none;
    height: 36px;
    line-height: 36px;
    padding: 0 5px;
    border-bottom: 1px solid #ddd;
  }

  li label {


    float: left;
    cursor: pointer;
  }

  li label li input {


    vertical-align: middle;
    margin-right: 6px;
    position: relative;
    top: -1px;
  }

  li button {


    float: right;
    display: none;
    margin-top: 3px;
  }

  li:before {


    content: initial;
  }

  li:last-child {


    border-bottom: none;
  }
  .high_light {


    background-color: bisque;
  }
</style>
6.案列_删除
App.vue: 传递给List.vue删除的方法"
    deleteFather(index){


    // 根据坐标删除数据
    this.todos.splice(index,1)
  }
<template>
  <div>
   <div class="todo-container">
    <div class="todo-wrap">
      <!-- 1.头部 将父APP.VUE的addFather方法传递给子组件-->
      <Header :addFatherA="addFather"/>
      <!-- 2.列表 : 将父APP.VUE的todos数组传递给子组件-->
      <list
      :todosA="todos"
      :updateFatherA="updateFather"
      :deleteFatherA="deleteFather"
      />
      <!-- 3.底部导航 -->
      <Footer/>
    </div>
  </div>
  </div>
</template>

<script>
  // 1.引入组件
  import Header from './components/Header.vue'
  import List from './components/List.vue'
  import Footer from './components/Footer.vue'
export default {


  name:'App', // 目的是在浏览器VUE插件中的名字都是App不会被改变。
  // 2.注册组件
  components:{


    Header,
    List,
    Footer
  },
  data() {


    return {


      todos:[
        {

      id:'001',name:'抽烟',done:true},
        {

      id:'002',name:'喝酒',done:false},
        {

      id:'003',name:'烫头',done:true}
      ]
    }
  },
  methods: {


    addFather(todoObj){


      // 这个方法是对todos这个数组的尾部追加对象todoObj
      this.todos.unshift(todoObj)
    },
/*    利用id
    updateFather(id,doneA){

      // 利用map遍历数组todos,获取到的分别是数组对象和对象坐标
      this.todos=this.todos.map((value,index)=>{
          if(id===value.id){  // 假如说子类传递过来的值和map遍历的值一样,那么就返回 所有的属性+修改后的值
              return {...value,done:doneA}
          }else{
            return value
          }
      })
    }
*/
    updateFather(index,doneA){


      this.todos[index].done=doneA
    },
    deleteFather(index){


    // 根据坐标删除数据
    this.todos.splice(index,1)
  }
  },
}
</script>

<style>

  /*base*/
  body {


    background: #fff;
  }

  .btn {


    display: inline-block;
    padding: 4px 12px;
    margin-bottom: 0;
    font-size: 14px;
    line-height: 20px;
    text-align: center;
    vertical-align: middle;
    cursor: pointer;
    box-shadow: inset 0 1px 0 rgba(255, 255, 255, 0.2), 0 1px 2px rgba(0, 0, 0, 0.05);
    border-radius: 4px;
  }

  .btn-danger {


    color: #fff;
    background-color: #da4f49;
    border: 1px solid #bd362f;
  }

  .btn-danger:hover {


    color: #fff;
    background-color: #bd362f;
  }

  .btn:focus {


    outline: none;
  }

  .todo-container {


    width: 600px;
    margin: 0 auto;
  }
  .todo-container .todo-wrap {


    padding: 10px;
    border: 1px solid #ddd;
    border-radius: 5px;
  }

</style>
List.vue: 传递给Item.vue的删除方法
<template>
  <div>
    <ul class="todo-main">
        <!-- 这里我们必须需要添加key -->
        <Item v-for="(t,index) in this.todosA" :key="t.id"
        :itemA="t"
        :updateFatherB="updateFatherA"
        :indexB="index"
        :deleteFatherB="deleteFatherA"
        />
      </ul>
  </div>
</template>

<script>
    import Item from './Item.vue'
export default {


    name:'List',
    components:{


        Item,
    },
    // 接受更新的函数
    props:['todosA','updateFatherA','deleteFatherA'],  // 负责声明接受且不做限制...
}
</script>

<style scoped>
  /*List*/
  .todo-main {


    margin-left: 0px;
    border: 1px solid #ddd;
    border-radius: 2px;
    padding: 0px;
  }

  .todo-empty {


    height: 40px;
    line-height: 40px;
    border: 1px solid #ddd;
    border-radius: 2px;
    padding-left: 5px;
    margin-top: 10px;
  }
</style>
Item.vue: 通知父App.vue传进来一个删除的方法
<template>
  <div>
    <ul class="todo-main">
        <!-- 这里我们必须需要添加key -->
        <Item v-for="(t,index) in this.todosA" :key="t.id"
        :itemA="t"
        :updateFatherB="updateFatherA"
        :indexB="index"
        :deleteFatherB="deleteFatherA"
        />
      </ul>
  </div>
</template>

<script>
    import Item from './Item.vue'
export default {


    name:'List',
    components:{


        Item,
    },
    // 接受更新的函数
    props:['todosA','updateFatherA','deleteFatherA'],  // 负责声明接受且不做限制...
}
</script>

<style scoped>
  /*List*/
  .todo-main {


    margin-left: 0px;
    border: 1px solid #ddd;
    border-radius: 2px;
    padding: 0px;
  }

  .todo-empty {


    height: 40px;
    line-height: 40px;
    border: 1px solid #ddd;
    border-radius: 2px;
    padding-left: 5px;
    margin-top: 10px;
  }
</style>
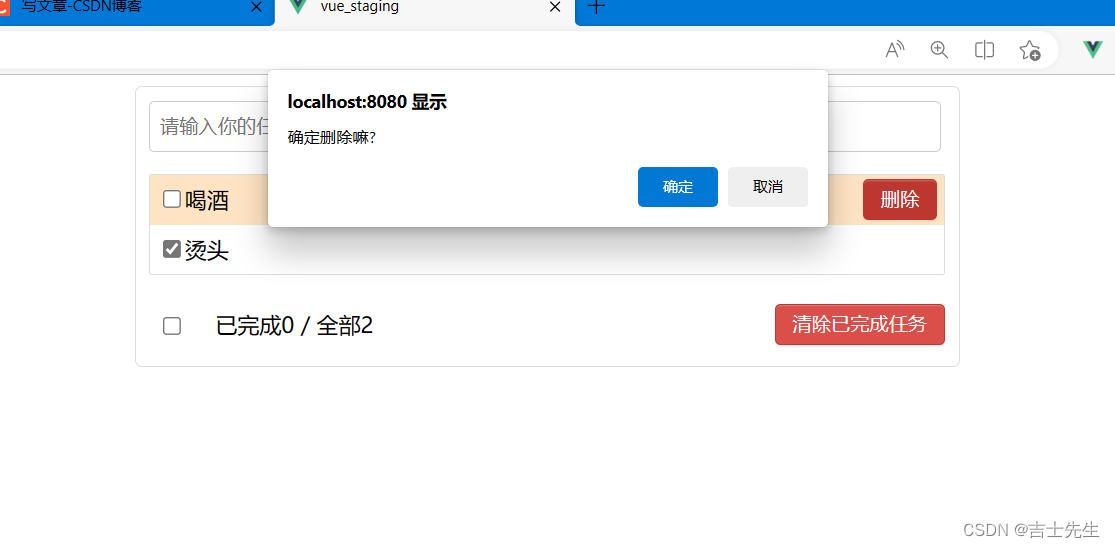
7.案列_全选
(1).案列总数与已选总数
App.vue传递Footer.vue数组
<!-- 3.底部导航 -->
      <Footer
      :FooterTodos="todos"/>
<template>
  <div>
   <div class="todo-container">
    <div class="todo-wrap">
      <!-- 1.头部 将父APP.VUE的addFather方法传递给子组件-->
      <Header :addFatherA="addFather"/>
      <!-- 2.列表 : 将父APP.VUE的todos数组传递给子组件-->
      <list
      :todosA="todos"
      :updateFatherA="updateFather"
      :deleteFatherA="deleteFather"
      />
      <!-- 3.底部导航 -->
      <Footer
      :FooterTodos="todos"/>
    </div>
  </div>
  </div>
</template>

<script>
  // 1.引入组件
  import Header from './components/Header.vue'
  import List from './components/List.vue'
  import Footer from './components/Footer.vue'
export default {


  name:'App', // 目的是在浏览器VUE插件中的名字都是App不会被改变。
  // 2.注册组件
  components:{


    Header,
    List,
    Footer
  },
  data() {


    return {


      todos:[
        {

      id:'001',name:'抽烟',done:true},
        {

      id:'002',name:'喝酒',done:false},
        {

      id:'003',name:'烫头',done:true}
      ]
    }
  },
  methods: {


    addFather(todoObj){


      // 这个方法是对todos这个数组的尾部追加对象todoObj
      this.todos.unshift(todoObj)
    },
/*    利用id
    updateFather(id,doneA){

      // 利用map遍历数组todos,获取到的分别是数组对象和对象坐标
      this.todos=this.todos.map((value,index)=>{
          if(id===value.id){  // 假如说子类传递过来的值和map遍历的值一样,那么就返回 所有的属性+修改后的值
              return {...value,done:doneA}
          }else{
            return value
          }
      })
    }
*/
    updateFather(index,doneA){


      this.todos[index].done=doneA
    },
    deleteFather(index){


    // 根据坐标删除数据
    this.todos.splice(index,1)
  }
  },
}
</script>

<style>

  /*base*/
  body {


    background: #fff;
  }

  .btn {


    display: inline-block;
    padding: 4px 12px;
    margin-bottom: 0;
    font-size: 14px;
    line-height: 20px;
    text-align: center;
    vertical-align: middle;
    cursor: pointer;
    box-shadow: inset 0 1px 0 rgba(255, 255, 255, 0.2), 0 1px 2px rgba(0, 0, 0, 0.05);
    border-radius: 4px;
  }

  .btn-danger {


    color: #fff;
    background-color: #da4f49;
    border: 1px solid #bd362f;
  }

  .btn-danger:hover {


    color: #fff;
    background-color: #bd362f;
  }

  .btn:focus {


    outline: none;
  }

  .todo-container {


    width: 600px;
    margin: 0 auto;
  }
  .todo-container .todo-wrap {


    padding: 10px;
    border: 1px solid #ddd;
    border-radius: 5px;
  }

</style>
Footer.vue
利用计算属性: 获取总数和
computed:{


    doneCount(){


      // 数组的所有方法以及定时函数的所有方法都是归window管理的
      // 数组.reduce(累加数据,初始值) js自带的累加器
        return this.FooterTodos.reduce((pre,current)=>pre+=current.done ? 1: 0,0) // 匿名方法的参数:(上次调用函数的返回值,当前元素)
    },
    total(){


        return this.FooterTodos.length;
    }
}
<template>
  <div>
    <div class="todo-footer">
        <label>
          <input type="checkbox"/>
        </label>
        <span>
          <span>已完成{

   {doneCount}}</span> / 全部{

   {total}}
        </span>
        <button class="btn btn-danger">清除已完成任务</button>
      </div>
  </div>
</template>

<script>
export default {


name:'Footer',
// 声明
props:['FooterTodos'],
// 1.利用计算属性进行获取已完成
computed:{


    doneCount(){


      // 数组的所有方法以及定时函数的所有方法都是归window管理的
      // 数组.reduce(累加数据,初始值) js自带的累加器
        return this.FooterTodos.reduce((pre,current)=>pre+=current.done ? 1: 0,0) // 匿名方法的参数:(上次调用函数的返回值,当前元素)
    },
    total(){


        return this.FooterTodos.length;
    }
}
}
</script>

<style scoped>
 /*footer*/
  .todo-footer {


    height: 40px;
    line-height: 40px;
    padding-left: 6px;
    margin-top: 5px;
  }

  .todo-footer label {


    display: inline-block;
    margin-right: 20px;
    cursor: pointer;
  }

  .todo-footer label input {


    position: relative;
    top: -1px;
    vertical-align: middle;
    margin-right: 5px;
  }

  .todo-footer button {


    float: right;
    margin-top: 5px;
  }
</style>
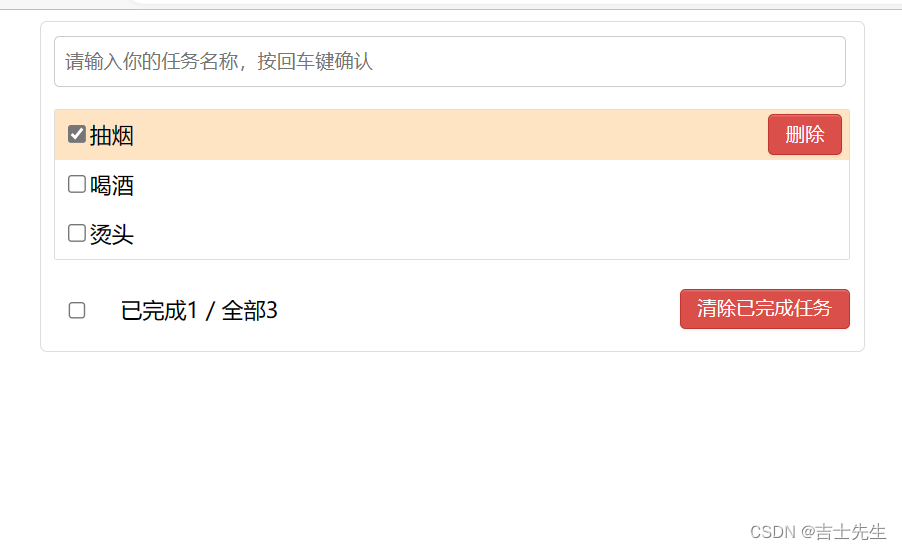
(2).案列全选
App.vue: 传递一个方法
<template>
  <div>
   <div class="todo-container">
    <div class="todo-wrap">
      <!-- 1.头部 将父APP.VUE的addFather方法传递给子组件-->
      <Header :addFatherA="addFather"/>
      <!-- 2.列表 : 将父APP.VUE的todos数组传递给子组件-->
      <list
      :todosA="todos"
      :updateFatherA="updateFather"
      :deleteFatherA="deleteFather"
      />
      <!-- 3.底部导航 -->
      <Footer
      :FooterTodos="todos"
      :updateAllFatherA="updateAllFather"
      />
    </div>
  </div>
  </div>
</template>

<script>
  // 1.引入组件
  import Header from './components/Header.vue'
  import List from './components/List.vue'
  import Footer from './components/Footer.vue'
export default {


  name:'App', // 目的是在浏览器VUE插件中的名字都是App不会被改变。
  // 2.注册组件
  components:{


    Header,
    List,
    Footer
  },
  data() {


    return {


      todos:[
        {

      id:'001',name:'抽烟',done:true},
        {

      id:'002',name:'喝酒',done:false},
        {

      id:'003',name:'烫头',done:true}
      ]
    }
  },
  methods: {


    addFather(todoObj){


      // 这个方法是对todos这个数组的尾部追加对象todoObj
      this.todos.unshift(todoObj)
    },
/*    利用id
    updateFather(id,doneA){

      // 利用map遍历数组todos,获取到的分别是数组对象和对象坐标
      this.todos=this.todos.map((value,index)=>{
          if(id===value.id){  // 假如说子类传递过来的值和map遍历的值一样,那么就返回 所有的属性+修改后的值
              return {...value,done:doneA}
          }else{
            return value
          }
      })
    }
*/
  // 更新
    updateFather(index,doneA){


      this.todos[index].done=doneA
    },
    // 删除
    deleteFather(index){


    // 根据坐标删除数据
    this.todos.splice(index,1)
  },
  // 全选或者不选
  updateAllFather(doneOption){


    // map():创建一个新数组,这个新数组由原数组中的每个元素都调用一次提供的函数后的返回值组成。
      this.todos=this.todos.map((value)=>{

        // 这个参数是遍历的单个对象
        return {

      ...value,done:doneOption} // 返回将done属性改编为doneOption的完整对象
      })
  }
  },
}
</script>

<style>

  /*base*/
  body {


    background: #fff;
  }

  .btn {


    display: inline-block;
    padding: 4px 12px;
    margin-bottom: 0;
    font-size: 14px;
    line-height: 20px;
    text-align: center;
    vertical-align: middle;
    cursor: pointer;
    box-shadow: inset 0 1px 0 rgba(255, 255, 255, 0.2), 0 1px 2px rgba(0, 0, 0, 0.05);
    border-radius: 4px;
  }

  .btn-danger {


    color: #fff;
    background-color: #da4f49;
    border: 1px solid #bd362f;
  }

  .btn-danger:hover {


    color: #fff;
    background-color: #bd362f;
  }

  .btn:focus {


    outline: none;
  }

  .todo-container {


    width: 600px;
    margin: 0 auto;
  }
  .todo-container .todo-wrap {


    padding: 10px;
    border: 1px solid #ddd;
    border-radius: 5px;
  }

</style>
Footer.vue: 接受一个方法
// 计算属性是顺序的,也就是可以套娃
    isAll:{
      // 全选的效果
      set(flag){ //获取到的是一个布尔值
      console.log(flag)
            // 通知父App.vue传递方法
            return this.updateAllFatherA(flag)
      },
      //
      get(){
          return this.doneCount===this.total && this.total>0
        }
<template>
  <div>
    <div class="todo-footer">
        <label>
          <!-- 类型为checkbox 的值是布尔值 -->
          <input type="checkbox" v-model="isAll"/>
        </label>
        <span>
          <span>已完成{

   {doneCount}}</span> / 全部{

   {total}}
        </span>
        <button class="btn btn-danger">清除已完成任务</button>
      </div>
  </div>
</template>

<script>
export default {


name:'Footer',
// 声明
props:['FooterTodos','updateAllFatherA'],
// 1.利用计算属性进行获取已完成
computed:{


    // 被选择的
    doneCount(){


      // 数组的所有方法以及定时函数的所有方法都是归window管理的
      // 数组.reduce(累加数据,初始值) js自带的累加器
        return this.FooterTodos.reduce((pre,current)=>pre+=current.done ? 1: 0,0) // 匿名方法的参数:(上次调用函数的返回值,当前元素)
    },
    // 总数
    total(){


        return this.FooterTodos.length;
    },
    // 计算属性是顺序的,也就是可以套娃
    isAll:{


      // 全选的效果
      set(flag){

       //获取到的是一个布尔值
      console.log(flag)
            // 通知父App.vue传递方法
            return this.updateAllFatherA(flag)
      },
      //
      get(){


          return this.doneCount===this.total && this.total>0
        }


   }

}
}
</script>

<style scoped>
 /*footer*/
  .todo-footer {


    height: 40px;
    line-height: 40px;
    padding-left: 6px;
    margin-top: 5px;
  }

  .todo-footer label {


    display: inline-block;
    margin-right: 20px;
    cursor: pointer;
  }

  .todo-footer label input {


    position: relative;
    top: -1px;
    vertical-align: middle;
    margin-right: 5px;
  }

  .todo-footer button {


    float: right;
    margin-top: 5px;
  }
</style>
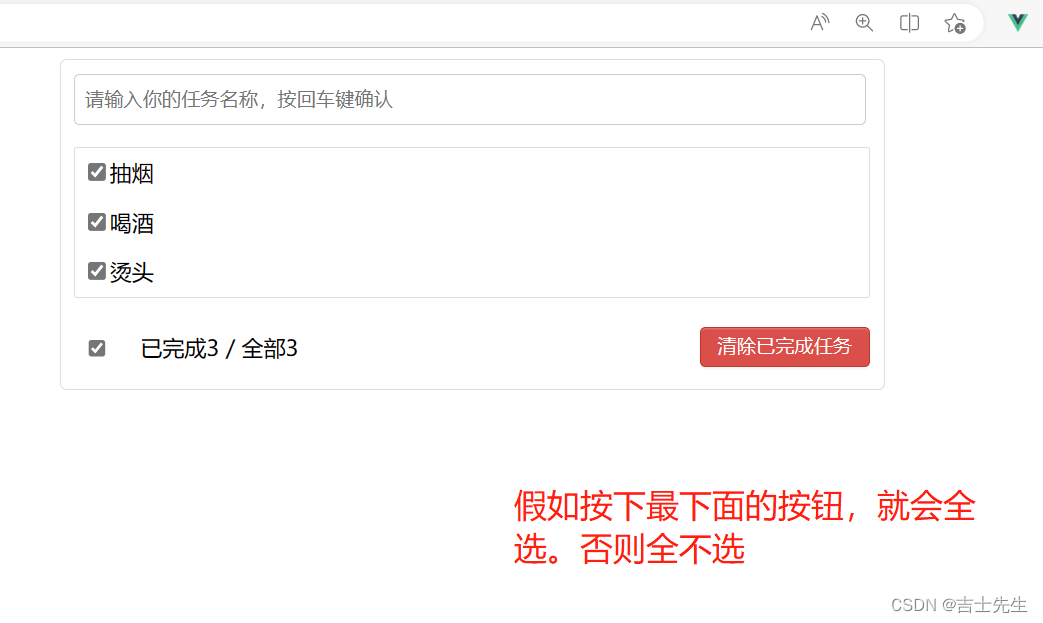
8.案列_清除所有已完成的
App.vue
   // 清除已经已经勾选的
   clearAllDoneFather(){
    this.todos=this.todos.filter((value)=>{
      // 假如说done值为false就不用过滤-保留,否则就需要过滤-不保留
      return value.done===false
    })
   }
<template>
  <div>
   <div class="todo-container">
    <div class="todo-wrap">
      <!-- 1.头部 将父APP.VUE的addFather方法传递给子组件-->
      <Header :addFatherA="addFather"/>
      <!-- 2.列表 : 将父APP.VUE的todos数组传递给子组件-->
      <list
      :todosA="todos"
      :updateFatherA="updateFather"
      :deleteFatherA="deleteFather"
      />
      <!-- 3.底部导航 -->
      <Footer
      :FooterTodos="todos"
      :updateAllFatherA="updateAllFather"
      :clearAllDoneFatherA="clearAllDoneFather"
      />
    </div>
  </div>
  </div>
</template>

<script>
  // 1.引入组件
  import Header from './components/Header.vue'
  import List from './components/List.vue'
  import Footer from './components/Footer.vue'
export default {


  name:'App', // 目的是在浏览器VUE插件中的名字都是App不会被改变。
  // 2.注册组件
  components:{


    Header,
    List,
    Footer
  },
  data() {


    return {


      todos:[
        {

      id:'001',name:'抽烟',done:true},
        {

      id:'002',name:'喝酒',done:false},
        {

      id:'003',name:'烫头',done:true}
      ]
    }
  },
  methods: {


    addFather(todoObj){


      // 这个方法是对todos这个数组的尾部追加对象todoObj
      this.todos.unshift(todoObj)
    },
/*    利用id
    updateFather(id,doneA){

      // 利用map遍历数组todos,获取到的分别是数组对象和对象坐标
      this.todos=this.todos.map((value,index)=>{
          if(id===value.id){  // 假如说子类传递过来的值和map遍历的值一样,那么就返回 所有的属性+修改后的值
              return {...value,done:doneA}
          }else{
            return value
          }
      })
    }
*/
  // 更新
    updateFather(index,doneA){


      this.todos[index].done=doneA
    },
    // 删除
    deleteFather(index){


    // 根据坐标删除数据
    this.todos.splice(index,1)
  },
  // 全选或者不选
  updateAllFather(doneOption){


    // map():创建一个新数组,这个新数组由原数组中的每个元素都调用一次提供的函数后的返回值组成。
      this.todos=this.todos.map((value)=>{

        // 这个参数是遍历的单个对象
        return {

      ...value,done:doneOption} // 返回将done属性改编为doneOption的完整对象
      })
  },
   // 清除已经已经勾选的
   clearAllDoneFather(){


    this.todos=this.todos.filter((value)=>{


      // 假如说done值为false就不用过滤-保留,否则就需要过滤-不保留
      return value.done===false
    })
   }
  },

}
</script>

<style>

  /*base*/
  body {


    background: #fff;
  }

  .btn {


    display: inline-block;
    padding: 4px 12px;
    margin-bottom: 0;
    font-size: 14px;
    line-height: 20px;
    text-align: center;
    vertical-align: middle;
    cursor: pointer;
    box-shadow: inset 0 1px 0 rgba(255, 255, 255, 0.2), 0 1px 2px rgba(0, 0, 0, 0.05);
    border-radius: 4px;
  }

  .btn-danger {


    color: #fff;
    background-color: #da4f49;
    border: 1px solid #bd362f;
  }

  .btn-danger:hover {


    color: #fff;
    background-color: #bd362f;
  }

  .btn:focus {


    outline: none;
  }

  .todo-container {


    width: 600px;
    margin: 0 auto;
  }
  .todo-container .todo-wrap {


    padding: 10px;
    border: 1px solid #ddd;
    border-radius: 5px;
  }

</style>
Footer.vue
<template>
  <div>
    <div class="todo-footer">
        <label>
          <!-- 类型为checkbox 的值是布尔值 -->
          <input type="checkbox" v-model="isAll"/>
        </label>
        <span>
          <span>已完成{

   {doneCount}}</span> / 全部{

   {total}}
        </span>
        <button class="btn btn-danger" @click="clearAllDone">清除已完成任务</button>
      </div>
  </div>
</template>

<script>
export default {


name:'Footer',
// 声明
props:['FooterTodos','updateAllFatherA','clearAllDoneFatherA'],
// 1.利用计算属性进行获取已完成
computed:{


    // 被选择的
    doneCount(){


      // 数组的所有方法以及定时函数的所有方法都是归window管理的
      // 数组.reduce(累加数据,初始值) js自带的累加器
        return this.FooterTodos.reduce((pre,current)=>pre+=current.done ? 1: 0,0) // 匿名方法的参数:(上次调用函数的返回值,当前元素)
    },
    // 总数
    total(){


        return this.FooterTodos.length;
    },
    // 计算属性是顺序的,也就是可以套娃
    isAll:{


      // 全选的效果
      set(flag){

       //获取到的是一个布尔值
      console.log(flag)
            // 通知父App.vue传递方法
            return this.updateAllFatherA(flag)
      },
      //
      get(){


          return this.doneCount===this.total && this.total>0
        }
   }
},
methods: {


  clearAllDone(){


    if(confirm('确定删除已经完成的任务么?')){


      // 通知父组件安排方法
        this.clearAllDoneFatherA();
    }
  }
},
}
</script>

<style scoped>
 /*footer*/
  .todo-footer {


    height: 40px;
    line-height: 40px;
    padding-left: 6px;
    margin-top: 5px;
  }

  .todo-footer label {


    display: inline-block;
    margin-right: 20px;
    cursor: pointer;
  }

  .todo-footer label input {


    position: relative;
    top: -1px;
    vertical-align: middle;
    margin-right: 5px;
  }

  .todo-footer button {


    float: right;
    margin-top: 5px;
  }
</style>
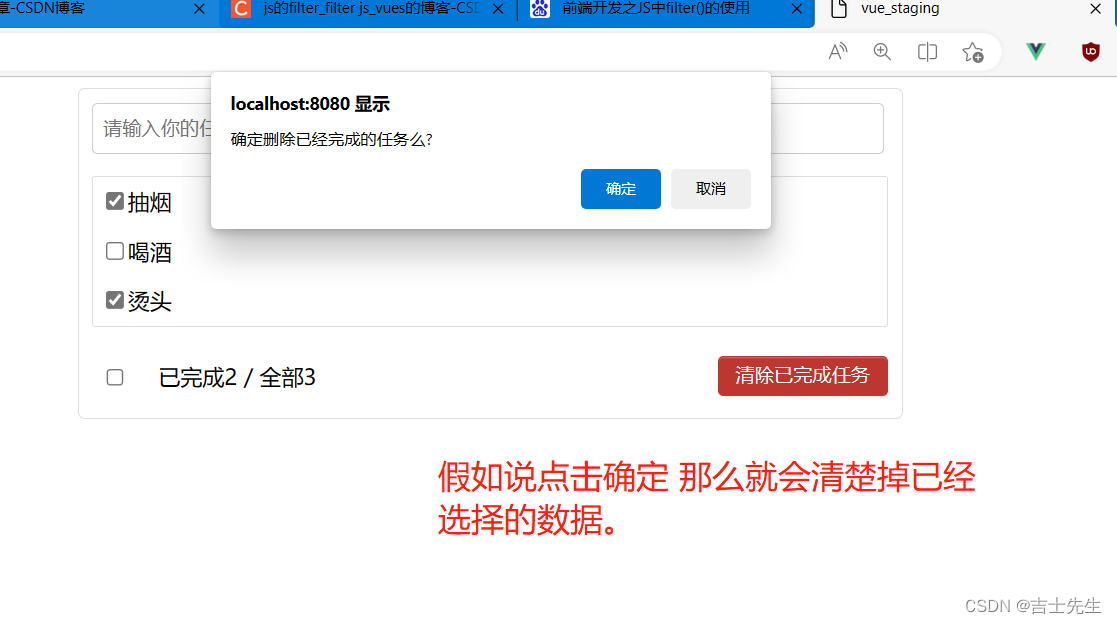
9.todoList 小结⭐⭐⭐⭐
(1).filter过滤数组的总结
array.filter(function(currentValue,index,arr), thisValue);
3、参数
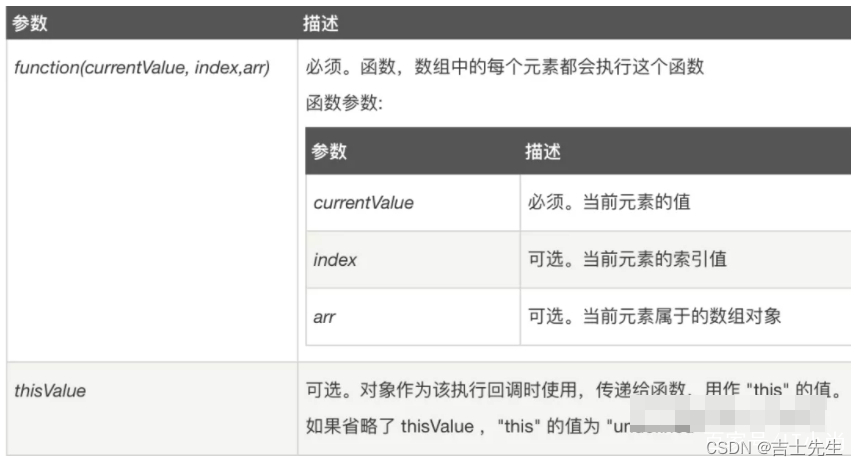
返回值

4、用法
filter() 方法用于把Array中的某些元素过滤掉,然后返回剩下的未被过滤掉的元素。
5、注意事项
(1)filter() 不会对空数组进行检测;
(2)filter() 不会改变原始数组。
6、如果返回值为true就不过滤掉-保留、否则就过滤-不保留
- 简单实列
1.返回数组nums中所有大于5的元素
let nums = [1, 2, 3, 4, 5, 6, 7, 8, 9, 10];

let res = nums.filter((num) => {


  return num > 5;
});

console.log(res);  // [6, 7, 8, 9, 10]
- 过滤数组对象中done值不为false的值、
arrA=arrB.filter((value)=>{


      // 假如说done值为false就不用过滤-保留,否则就需要过滤-不保留
      return value.done===false
    })
- 模糊查询
name.indexOf(keywords) 该方法将从头到尾地检索数组,看它是否含有对应的元素。如果在数组中没找到指定元素则返回 -1。
filter的参数为一个的时候,return 和{}可以同时省略
  fmtPersons(){


     const {

    keywords} = this;    //这里相当于 const keywords=this.keywords;
     return this.persons.filter(p=>p.name.indexOf(keywords)!==-1);
    }
fmtPersons(){


     const {

    keywords} = this;    //这里相当于 const keywords=this.keywords;
     return this.persons.filter((p)=>{

     return p.name.indexOf(keywords)!==-1});
                }
(2).map过滤数组的总结
- 遍历数组对象
里面的参数第一个遍历的对象与所在的坐标
返回值: {...value,done:doneOption} 就是除了将原有对象属性done改为doneOption之外其他都不变的对象
updateAllFather(doneOption){


    // map():创建一个新数组,这个新数组由原数组中的每个元素都调用一次提供的函数后的返回值组成。
      this.todos=this.todos.map((value)=>{

      // 这个参数是遍历的单个对象
        return {

    ...value,done:doneOption} // 返回将done属性改编为doneOption的完整对象
      })
  },
(3).增、删、改
1. 根据坐标更改某一个对象的值
  // 更新
    updateFather(index,doneA){


      arr[index].done=doneA
    },
2.根据坐标删除某一个对象
    // 删除
    deleteFather(index){


    // 根据坐标删除数据
    arr.splice(index,1)
  },
3.向某个数组的头部添加
    addFather(todoObj){


      // 这个方法是对todos这个数组的尾部追加对象todoObj
      arr.unshift(todoObj)
    },