四、Springboot配置文件
4.1 默认配置文件
Springboot使用一个全局的配置文件,配置文件名是固定的,application。
配置文件的作用: 修改Springboot自动配置的默认值。
配置文件的位置: 默认在src/main/resources 目录下。
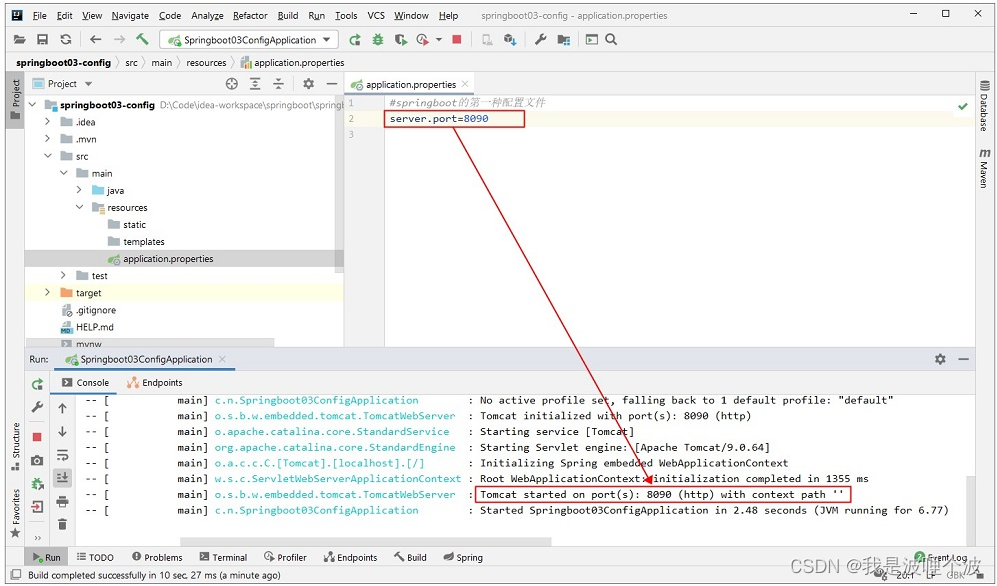
如果在 application.properties 文件中添加如下配置:
server.port=8090
运行项目会发现,运行端口为调整为8090。
4.2 yaml
Springboot 中除了可以使用 properties 文件之外,还可以使用一种新的文件形式YAML。
4.2.1 简介
YAML 是 “YAML Ain’t a Markup Language”(YAML不是一种标记语言)的递归缩写。在开发这种语言时,YAML 的意思其实是:“Yet Another Markup Language”(仍是一种标记语言)。以数据为中心,比json、xml等更适合做配置文件。
如果两种配置文件同时配置时,都会在起作用,只不过两种配置文件有优先级。
application.properties > applicaton.yml
4.2.2 yml基本语法
- key: value,键值对之间必须有空格间隔(key以高亮显示);
- 大小写敏感;
- 使用换行和缩进表示层级关系;
- 缩进不允许使用tab,只允许空格;
- 缩进时的空格数量没有要求,只要相同层级的元素左对齐即可;
- ‘#’ 井号表示注释。
4.2.3 yml数据结构
4.2.3.1 字面值
单个值,不可再分割。数字(number),字符(string),布尔值(boolean),日期(date),空值(null)。
示例:
#字面值
number: 123
str: hello
date: 2021/08/16
flag: true
obj: ~
字符串默认不用加上单引号或者双引号,如果字符串之中包含空格或特殊字符,需要放在引号之中。
- 双引号:不会转义字符串里面的特殊字符,特殊字符会作为本身想表示的意思。
- 单引号:会转义特殊字符,特殊字符最终只是一个普通的字符串数据。
- 单引号之中如果还有单引号,必须连续使用两个单引号转义。
str1: "how are you"
str2: "how\nare\nyou"
str3: 'hello\n''abc'''
4.2.3.2 数组
一组按次序排列的值。又称为序列(sequence)或列表(list)。
示例:
用 - 值表示数组中的一个元素。
#数组
array1:
  - java
  - html
  - css
  - js
行内写法:
array2: [tom, jerry, chris]
4.2.3.3 对象
键值对的集合,又称为映射(mapping)、哈希(hashes)、字典(dictionary)。
示例:
#对象
student:
  id: 10
  name: 张三
  age: 20
  gender: true
  birth: 1996/12/08
  skill: [java, spring, mysql]
行内写法:
address: {

    province: 河南省, city: 郑州市, area: 高新区, street: 迎春街, num: 18号}
4.3 配置文件读取
在项目开发中经常会用到配置,配置文件中除了修改Spring组件、第三方组件的默认配置外,还会编写一些自定义配置信息,如何读取自定义配置呢?
4.3.1 @Value
使用@Value注解+SpringEL来读取配置信息,在@Value的配置项中利用表达式${配置文件中的键名}来读取。
@RestController
public class ReadConfigController {


    @Value("${number}")
    private Integer number;

    @Value("${str}")
    private String str;

    @Value("${date}")
    private Date date;

    @Value("${flag}")
    private Boolean flag;

    @Value("${str1}")
    private String str1;

    @Value("${str2}")
    private String str2;

    @Value("${str3}")
    private String str3;

    @Value("${student.name}")
    private String stuName;

    @Value("${array[0]}")
    public String arrayItem;

    @GetMapping("/getValue")
    public String getValue(){


        System.out.println("数字:" + number);
        System.out.println("字符:" + str);
        System.out.println("日期:" + date);
        System.out.println("布尔:" + flag);
        System.out.println("str1:" + str1);
        System.out.println("str2:" + str2);
        System.out.println("str3:" + str3);
        System.out.println("学生姓名:" + stuName);
        System.out.println("数组元素:" + arrayItem);
        return "ok";
    }

}
访问:http://localhost:8090/getValue,控制台输入结果:
数字:123
字符:hello
日期:Mon Aug 16 00:00:00 CST 2021
布尔:true
str1:how are you
str2:how
are
you
str3:hello\n'abc'
学生姓名:张三
数组元素:java
4.3.2 Environment
这种方式是依赖注入Evnironment(环境对象)来完成,然后使用 env.getProperty("键名") 即可读取出对应的值。
@Autowired
private Environment env;

@GetMapping("/getEnv")
public String getEnv(){


    System.out.println("数字:" + env.getProperty("number"));
    System.out.println("字符:" + env.getProperty("str"));
    System.out.println("学生姓名:" + env.getProperty("student.name"));
    System.out.println("学生年龄:" + env.getProperty("student.age"));
    return "ok";
}
访问:http://localhost:8090/getEnv,控制台输入结果:
数字:123
字符:hello
学生姓名:张三
学生年龄:20
4.4 配置绑定
配置绑定也是读取配置文件的一种方式,可以说是批量读取配置文件。使用Java读取到配置文件中的内容,并且把它封装到JavaBean中,以供随时使用。
4.4.1 @ConfigurationProperties + @Component
需要使用一个特殊的注解 @ConfigurationProperties,该注解必须提供一个配置项prefix ,表示yml文件中前缀名称的指定。
@ConfigurationProperties是springboot提供读取配置文件的一个注解。
@ConfigurationProperties(prefix = "student") 表示读取以 student 为前缀的配置信息。
配置绑定类:
@Component
@ConfigurationProperties(prefix = "student")
public class StudentProperties {


    private Integer id;
    private String name;
    private Integer age;
    private Boolean gender;
    private Date birth;
    private String[] skill;

    public Integer getId() {


        return id;
    }

    public void setId(Integer id) {


        this.id = id;
    }

    public String getName() {


        return name;
    }

    public void setName(String name) {


        this.name = name;
    }

    public Integer getAge() {


        return age;
    }

    public void setAge(Integer age) {


        this.age = age;
    }

    public Boolean getGender() {


        return gender;
    }

    public void setGender(Boolean gender) {


        this.gender = gender;
    }

    public Date getBirth() {


        return birth;
    }

    public void setBirth(Date birth) {


        this.birth = birth;
    }

    public String[] getSkill() {


        return skill;
    }

    public void setSkill(String[] skill) {


        this.skill = skill;
    }
}
读取配置:
@Autowired
private StudentProperties studentProperties;
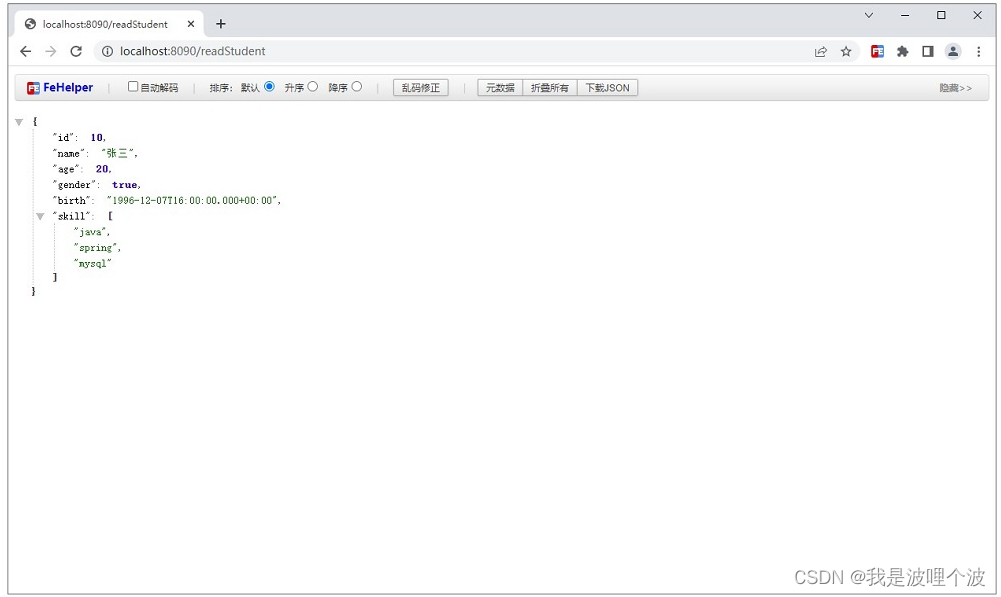
@GetMapping("/readStudent")
public StudentProperties readStudent(){
return studentProperties;
}
4.4.2 @ConfigurationProperties + @EnableConfigurationProperties
使用 @ConfigurationProperties注解读取配置,并且在配置类上使用@EnableConfigurationProperties注解开启配置绑定。
注意:该方式主要用于第三方的配置绑定类上,比如WebMvcProperties。
配置绑定类:
@ConfigurationProperties(prefix = "address")
public class AddressProperties {


    private String province;
    private String city;
    private String area;
    private String street;
    private String num;

    public String getProvince() {


        return province;
    }

    public void setProvince(String province) {


        this.province = province;
    }

    public String getCity() {


        return city;
    }

    public void setCity(String city) {


        this.city = city;
    }

    public String getArea() {


        return area;
    }

    public void setArea(String area) {


        this.area = area;
    }

    public String getStreet() {


        return street;
    }

    public void setStreet(String street) {


        this.street = street;
    }

    public String getNum() {


        return num;
    }

    public void setNum(String num) {


        this.num = num;
    }
}
主程序或配置类上可开启配置绑定:
@SpringBootApplication
//启用指定的配置绑定类
@EnableConfigurationProperties({

    AddressProperties.class})
public class Springboot03ConfigApplication {


    public static void main(String[] args) {


        SpringApplication.run(Springboot03ConfigApplication.class, args);
    }
}
读取配置:
@Autowired
private AddressProperties addressProperties;
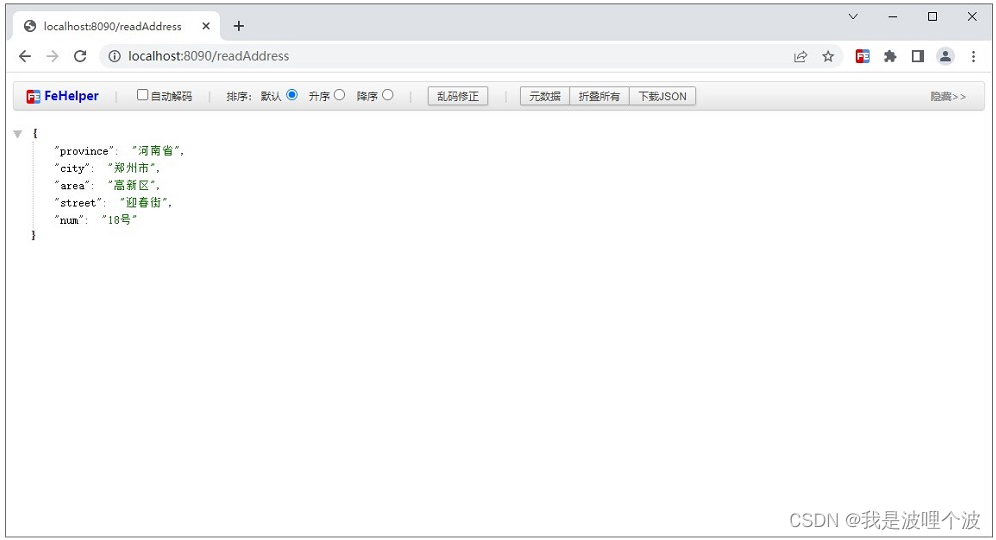
@GetMapping("/readAddress")
public AddressProperties readAddress(){
return addressProperties;
}
4.4.3 配置提示
自定义的配置读取类和配置文件绑定一般没有提示,如果需要提示可在pom.xml文件中添加maven依赖。
<!--配置解析依赖-->
<dependency>
    <groupId>org.springframework.boot</groupId>
    <artifactId>spring-boot-configuration-processor</artifactId>
    <optional>true</optional>
</dependency>
重启Springboot程序后,让yml的解析器生效,然后在yml文件中编写配置节点的值,就可以有对应的提示。
4.4.4 @Value获取值和@ConfigurationProperties获取值比较
| 项次 | @ConfigurationProperties | @Value |
|---|---|---|
| 功能 | 批量注入配置文件中的属性 | 单个指定 |
| 松散绑定(松散语法) | 支持 | 不支持 |
| SpEL | 不支持 | 支持 |
| JSR303数据校验 | 支持 | 不支持 |
| 复杂类型封装 | 支持 | 不支持 |
建议:
- 如果只是在某个业务逻辑中需要获取一下配置文件中的某项值,使用@Value。
- 如果专门编写了一个JavaBean来和配置文件进行绑定,我们就直接使用@ConfigurationProperties。
- 松散绑定:https://blog.csdn.net/u011628753/article/details/125431909
4.5 原生配置文件
Springboot默认仅支持properties和yaml格式的配置文件,并且名称为application。如果仍需使用原生配置文件可采用下面两种注解。
4.5.1 @ImportResource
@ImportResource注解可导入Spring的传统的配置文件,让配置文件里面的配置内容生效。
Bean类:
public class Dept {


    @Override
    public String toString() {


        return "Dept对象";
    }
}

public class Emp {


    private Dept dept;

    public void setDept(Dept dept) {


        this.dept = dept;
    }

    @Override
    public String toString() {


        return "Emp对象{" +
                "dept=" + dept +
                '}';
    }
}
原生xml配置:
<?xml version="1.0" encoding="UTF-8"?>
<beans xmlns="http://www.springframework.org/schema/beans"
       xmlns:xsi="http://www.w3.org/2001/XMLSchema-instance"
       xsi:schemaLocation="http://www.springframework.org/schema/beans http://www.springframework.org/schema/beans/spring-beans.xsd">

    <bean id="dept" class="com.newcapec.bean.Dept"/>
    <bean id="emp" class="com.newcapec.bean.Emp">
        <property name="dept" ref="dept"/>
    </bean>
</beans>
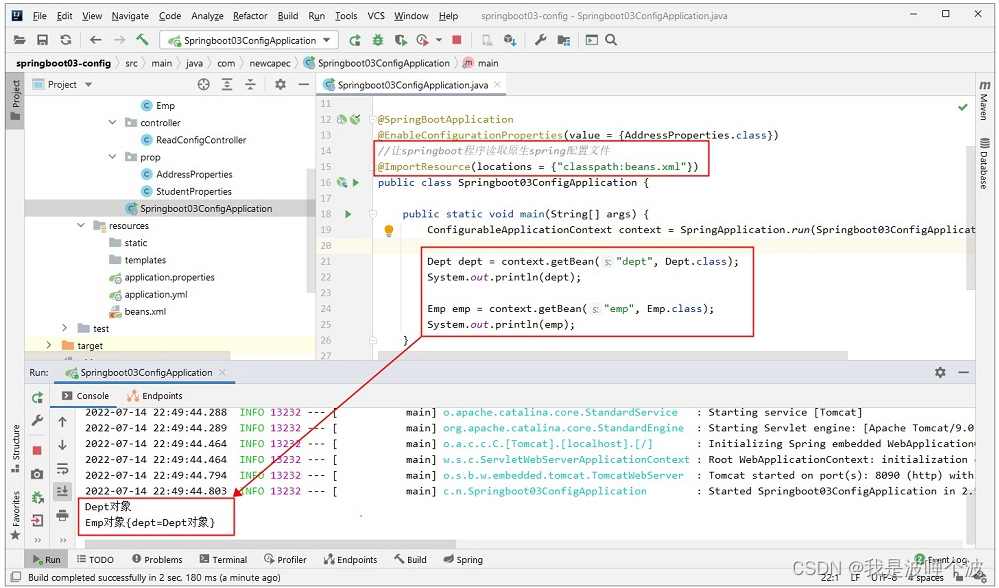
Springboot主程序类:
想让Spring的配置文件生效需要添加@ImportResource注解在主程序类(或一个配置类)上。
@SpringBootApplication
@EnableConfigurationProperties({

    AddressProperties.class})
//让springboot程序读取原生spring配置文件
@ImportResource(locations = {

    "classpath:beans.xml"})
public class Springboot03ConfigApplication {


    public static void main(String[] args) {


        ConfigurableApplicationContext context = SpringApplication.run(Springboot03ConfigApplication.class, args);

        Dept dept = context.getBean("dept", Dept.class);
        System.out.println(dept);

        Emp emp = context.getBean("emp", Emp.class);
        System.out.println(emp);
    }
}
4.5.2 @PropertySource
加载读取非Springboot的properties文件。
db.properties文件:
mysql.driver=com.mysql.jdbc.Driver
mysql.url=jdbc:mysql://localhost/test?useUnicode=true&characterEncoding=UTF-8
mysql.username=root
mysql.password=123456
配置绑定类:
@Component
@ConfigurationProperties(prefix = "mysql")
@PropertySource(value = "classpath:db.properties")
public class MysqlProperties {


    private String username;
    private String password;
    private String driver;
    private String url;

    public String getUsername() {


        return username;
    }

    public void setUsername(String username) {


        this.username = username;
    }

    public String getPassword() {


        return password;
    }

    public void setPassword(String password) {


        this.password = password;
    }

    public String getDriver() {


        return driver;
    }

    public void setDriver(String driver) {


        this.driver = driver;
    }

    public String getUrl() {


        return url;
    }

    public void setUrl(String url) {


        this.url = url;
    }
}
读取配置:
@Autowired
private MysqlProperties mysqlProperties;

@GetMapping("/readMysql")
public MysqlProperties readMysql(){


    return mysqlProperties;
}
4.6 Profile
Profile是Springboot对不同环境提供不同配置功能的支持,可以通过激活,制定参数等方式快速切换环境。
4.6.1 多Profile文件
在主配置文件编写的时,文件名可以是 application-{profile}.yml 或者 application-{profile}.properties,以下用yml为主。
主配置文件 application.yml:
spring:
  profiles:
    active: dev
开发环境配置文件 application-dev.yml:
server:
  port: 8081
测试环境配置文件 application-test.yml:
server:
  port: 8082
生产环境配置文件 application-prod.yml:
server:
  port: 8083
4.6.2 yml支持多文档块方式
配置文件中也支持使用多文档块的方式创建多环境,是用 --- (三个中划线)表示一个文档块,如果不指定启动别的文档块,默认启动第一个文档块。
spring:
  profiles:
    active: dev # 指定当前激活的profile

---
#开发profile
server:
  port: 8091
spring:
  profiles: dev #指定属于哪个环境

---
#测试profile
server:
  port: 8092
spring:
  profiles: test #指定属于哪个环境

---
#生产profile
server:
  port: 8093
spring:
  profiles: product  #指定属于哪个环境
关于spring-profiles提示已弃用的问题:https://blog.csdn.net/huang498/article/details/123776406
4.6.3 激活指定的profile
以上的多profile配置,都需要激活指定profile。
4.6.3.1 配置文件
在主配置文件 application.yml 中激活。
spring:
  profiles:
    active: dev
4.6.3.2 命令行
将项目打成jar包,然后命令行的方式启动。
java -jar springboot03-config-0.0.1-SNAPSHOT.jar --spring.profiles.active=prod
4.6.3.3 虚拟机参数
在IDEA的Run/Debug Configurations中指定VM options参数。
-Dspring.profiles.active=prod
注意: -D是固定写法。

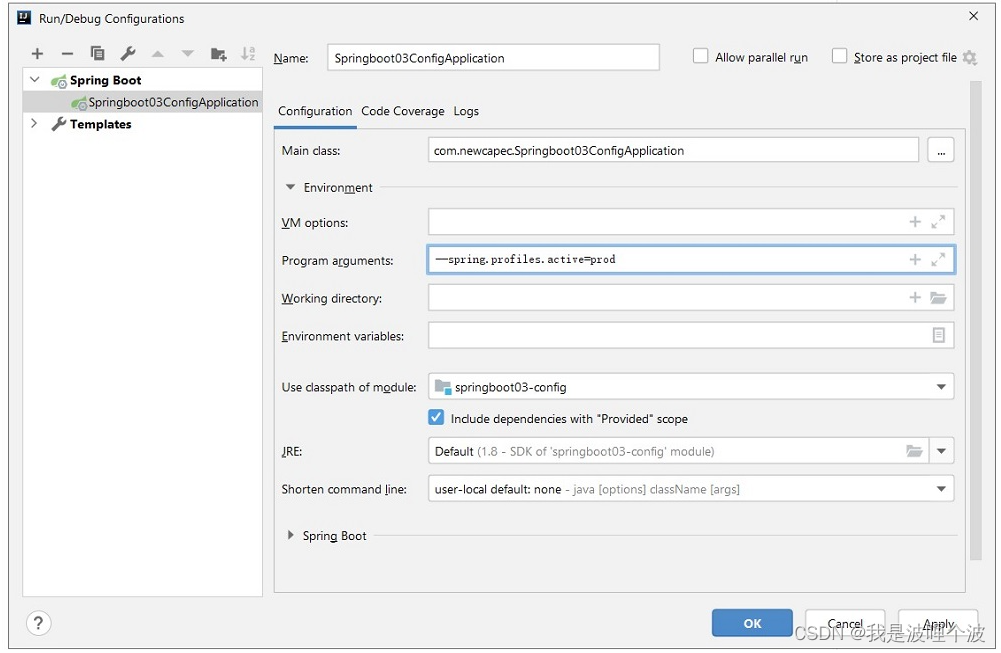
4.6.3.4 应用程序参数
在IDEA的Run/Debug Configurations中指定Program arguments参数。
--spring.profiles.active=prod
4.7 配置文件加载位置
Springboot启动会扫描以下位置的application.properties或者application.yml文件作为Springboot的默认配置文件。
- file:./config/ (当前项目文件目录下的config)
- file:./ (当前项目文件目录下)
- classpath:/config/
- classpath:/
优先级由高到低,高优先级的配置会覆盖低优先级的配置。
Springboot会从这四个位置全部加载主配置文件,互补配置跟css的层叠式样式表类似。
还可以通过spring.config.location来改变默认的配置文件位置:
spring.config.location=d:/application.properties
项目打包好以后,我们可以使用命令行参数的形式,启动项目的时候来指定配置文件的新位置;指定配置文件和默认加载的这些配置文件共同起作用形成互补配置;
java -jar springboot03-config-0.0.1-SNAPSHOT.jar --spring.config.location=d:/application.properties
4.8 外部配置加载顺序
Springboot也可以从以下位置加载配置。优先级从低到高,高优先级的配置覆盖低优先级的配置,所有的配置会形成互补配置。
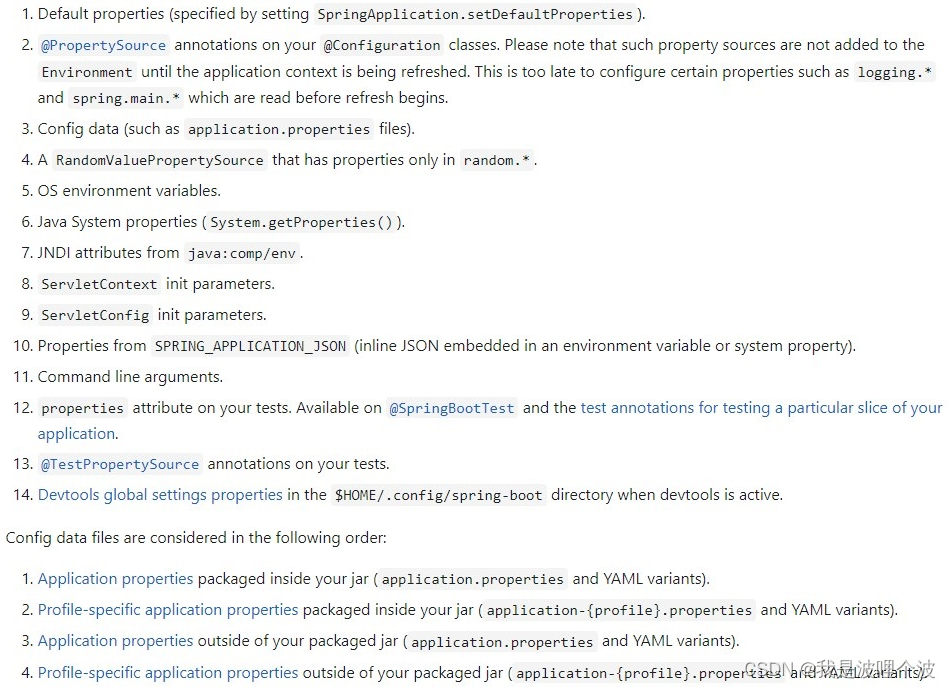
- 通过SpringApplication.setDefaultProperties指定的默认属性。
- @Configuration配置类上的@PropertySource注解。
- jar包内部的application.properties或application.yml(不带spring.profile)配置文件。
- jar包内部的application-{profile}.properties或application-{profile}.yml(带spring.profile)配置文件。
- jar包外部的application.properties或application.yml(不带spring.profile)配置文件。
- jar包外部的application-{profile}.properties或application-{profile}.yml(带spring.profile)配置文件。
RandomValuePropertySource配置的random.*属性值。- 操作系统环境变量。
- Java系统属性(System.getProperties())。
- 来自java:comp/env的JNDI属性。
- Servlet上下文对象的初始化参数。
- Servlet对象的初始化参数。
- 来自 SPRING_APPLICATION_JSON(内置在环境变量或系统属性中的JSON文件)的属性。
- 命令行参数。
- 测试中的
properties属性。可用于@SpringBootTest注释和应用程序的特定部分测试。 - 测试中的
@TestPropertySource注释。 - 当 devtools 处于激活状态时,
$HOME/.config/spring-boot目录中的 devtools 全局设置属性。
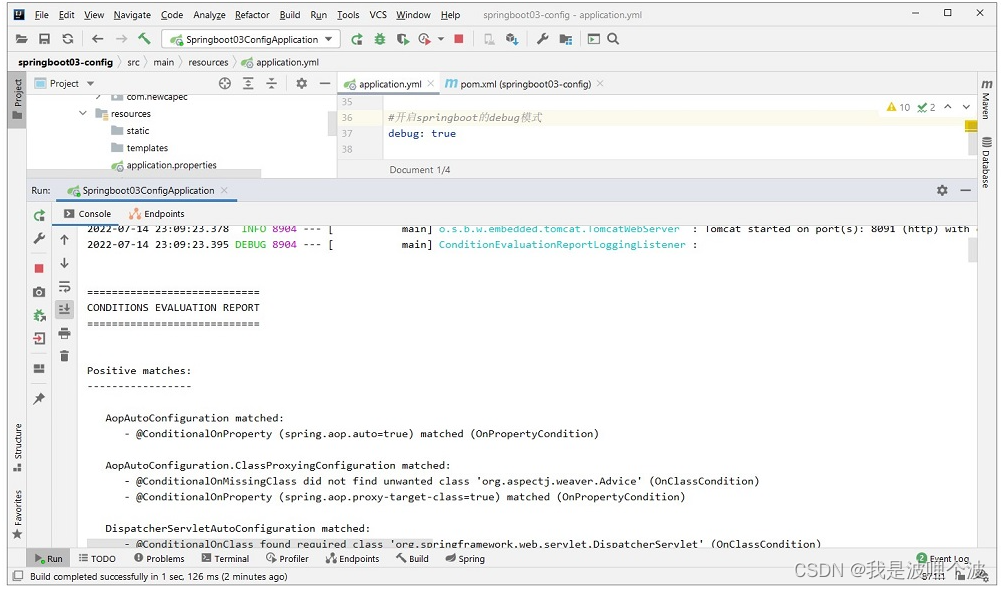
4.9 debug模式
Springboot的debug模式,默认是false,可以设置为true,来让Springboot生成debug模式下面的报告信息。
注:配置尽量放在profile之前;
debug: true
4.10 通用应用程序配置项列表
Springboot配置文件中有很多配置项,但是具体到底有那些配置项,可供程序员使用呢?