配置文件读写类,它要有以下这些方法:
1. 支持读入一个指定配置文件的能力
2. 支持随时加入一个配置项的能力
3. 足够强大,能够写入各种数据结构的配置信息
C++ 里,我们要存储这样的数据就使用 std::map 即可。
也就是说,我们的 Config 类中,需要有一个最基本最基本的存储配置文件键值对信息的 std::map 成员,这个成员用来将配置文件中的每个 key 值和其对应的 value 值记录下来。
那么另外一个问题也就来了,我们的 std::map 究竟应该是什么类型的呢?
哈哈,这个问题其实非常简单,因为我们的键值对信息都是要读出写入到文件的,那么 std::map 不论是 key 值还是 value 值都将会是字符串类型,即 C++ STL 的 std::string (Config 类不支持中文编码)类即可。
那么有人就会问了,如果 value 值只是一个简简单单的 std::string 类的话,我想要存储一个非常复杂的数据结构怎么办,比如一个 phone key 值,对应了一个电话号码列表呢?
这个问题其实也非常简单,这里的 std::map 成员只是 Config 类中的最基本最基本存储到文件里的字符串键值对记录,而 Config 为了支持用户存储多种复杂的 value 值,还提供了模板支持。因此,这里只需要你提供的 value 值的结构可以被转化为 std::string 类型,就可以使用 Config 类来存储你的数据结构了。
因此,让我们看看 Config 类的代码:
std::string m_Delimiter;  //!< separator between key and value
std::string m_Comment; //!< separator between value and comments std::map<std::string, std::string> m_Contents; //!< extracted keys and values - 1
- 2
- 3
这三个内部的属性, m_Delimiter 是我们之前提到的 key 值和 value 值的分隔符 = 的设置,m_Comment 是我们之前提到的注释内容开头 # 字符的设置,m_Contents 就是我们上面讨论的 std::map 对象,并且以 key 值和 value 值均为 std::string 类型存储。
此外,我们在 Config 类中看到的那么多的模板函数,其归根结底想要实现的,就是支持用户自定义的 value 数据结构的读取和写入:
//!<Search for key and read value or optional default value, call as read<T>
template<class T> T Read(const std::string& in_key) const; // Modify keys and values template<class T> void Add(const std::string& in_key, const T& in_value);- 1
- 2
- 3
- 4
这里截取了两个重要的函数,一个用来读取 key 值对应的 value 值,一个用来添加一个键值对。可以看到,这里的 key 值永远都是一个 std::string 类型的对象,而相应的 value 值则是模板定义的类型,支持用户自定义传入任何的可以转成 std::string 类型的数据结构。
三、Config 设计之:暴露方法
接下来让我们想想这样一个问题,在我们看到了配置文件的内容之后,并且将其抽象成了 std::map 的数据结构,之后我们需要做的,就是给类的调用者暴露方法的方法即可。
那么应该有哪些方法呢:
1. 一个可以跟某个具体的配置文件绑定起来的构造函数
2. 获取指定 key 值的 value 值
3. 加入一对键值对
4. 修改指定 key 值的 value 值
5. 删除一对键值对
暂时就想到了这些比较重要的,那么 Config 类中提供了这些方法了吗?
哈哈,提供了,让我们一个一个来看:
1. 一个可以跟某个具体的配置文件绑定起来的构造函数
Config::Config(string filename, string delimiter, string comment)
    : m_Delimiter(delimiter), m_Comment(comment)
{
    // Construct a Config, getting keys and values from given file
std::ifstream in(filename.c_str()); if (!in) throw File_not_found(filename); in >> (*this); }- 1
- 2
- 3
- 4
- 5
- 6
- 7
- 8
作者使用 std::ifstream 打开了一个本地文件,注意,调用这个方法之前必须保证该文件存在。我们要注意到作者调用了 in >> (*this),调用了本类的 operator>> 重载函数,用来读取文件内容(此函数过于冗长,可以自行查看源码)并将其存储到 std::map
//!<Search for key and read value or optional default value, call as read<T>
template<class T> T Read(const std::string& in_key) const; template<class T> T Read(const std::string& in_key, const T& in_value) const; template<class T> bool ReadInto(T& out_var, const std::string& in_key) const;- 1
- 2
- 3
- 4
这三个都是模板函数,主要是用来获取用户自定义数据结构的 value 值。需要注意的是,这三个函数的用法,第一个是返回 value 值;第二个是可以将 value 值在参数中返回;第三个直接将 value 值写入到传入的 var 对象中。
3. 加入一对键值对
4. 修改指定 key 值的 value 值
作者直接使用了一个函数即完成了第 3 点和第 4 点的工作:
template<class T>
void Config::Add(const std::string& in_key, const T& value) { // Add a key with given value std::string v = T_as_string(value); std::string key = in_key; Trim(key); Trim(v); m_Contents[key] = v; return; }- 1
- 2
- 3
- 4
- 5
- 6
- 7
- 8
- 9
- 10
- 11
这里使用了 C++ 的 std::map 的特性,如果 key 值在 std::map 中存在,则更新 value 值,否则就新增一对键值对。需要注意的是,这里调用了这行代码:
std::string v = T_as_string(value);- 1
其中 T_as_string 函数将用户传入的自定义模板类转化为 std::string 类型进行存储,而该方法的实现如下:
/* static */
template<class T>
std::string Config::T_as_string(const T& t) { // Convert from a T to a string // Type T must support << operator std::ostringstream ost; ost << t; return ost.str(); }- 1
- 2
- 3
- 4
- 5
- 6
- 7
- 8
- 9
- 10
这个类直接调用了用户自定义模板类的 operator<< 重载操作符函数,也就是说,只要用户自定义数据结构自定义重载了 operator<< 操作符函数,就可以用 Config 类来进行 value 值的读写操作了。
5. 删除一对键值对
void Config::Remove(const string& key)
{
    // Remove key and its value
    m_Contents.erase(m_Contents.find(key));
return; }- 1
- 2
- 3
- 4
- 5
- 6
幸而有 C++ STL 强大的功能,删除一对键值对就是这么简单。
6. 另外的一些方法
作者为了方便用户使用,还提供了诸如查询文件是否存在、键值是否存在、读入文件、设置获取键值分隔符、设置获取注释标识符等等方法。都是比较简单并且易用的,感兴趣的同学可以自行查看源码。
四、Config 的使用 Demo
这里,我自行编写了一个 Demo 来测试 Config 类的功能:
#include <iostream>
#include <cstdlib>
#include <string>
#include <fstream>
#include "Config.h" int main() { // 打开一个写文件流指向 config.ini 文件 std::string strConfigFileName("config.ini"); std::ofstream out(strConfigFileName); // 初始化写入注释 out << "# test for config read and write\n"; // 写入一对配置记录: name = wangying out << "name = wangying\n"; out.close(); // 初始化 Config 类 Config config(strConfigFileName); // 读取键值 std::string strKey = "name"; std::string strValue; strValue = config.Read<std::string>(strKey); std::cout << "Read Key " << strKey << "'s Value is " << strValue << std::endl; // 写入新键值对 std::string strNewKey = "age"; std::string strNewValue = "23"; config.Add<std::string>(strNewKey, strNewValue); // 将 Config 类的修改写入文件 out.open(strConfigFileName, std::ios::app); if (out.is_open()) { // 利用 Config 类的 << 重载运算符 out << config; std::cout << "Write config content success!" << std::endl; } out.close(); system("pause"); return 0; }- 1
- 2
- 3
- 4
- 5
- 6
- 7
- 8
- 9
- 10
- 11
- 12
- 13
- 14
- 15
- 16
- 17
- 18
- 19
- 20
- 21
- 22
- 23
- 24
- 25
- 26
- 27
- 28
- 29
- 30
- 31
- 32
- 33
- 34
- 35
- 36
- 37
- 38
- 39
- 40
- 41
- 42
- 43
- 44
幸而有强大的 Config 类,让我操作配置文件变成了一件这么简单的事情!

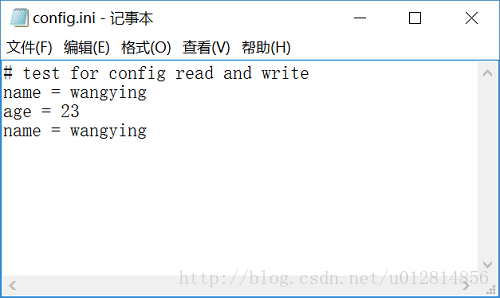
然而这里需要注意的是,我们在使用 Config 类进行了 Add() 操作之后,我们仅仅只是在 Config 类中操作了 std::map 类型的 m_Contens 对象内容而已,我们还需要将其写入到文件中去,因此这里我最后调用了写文件流进行写入操作,注意这行代码:
// 利用 Config 类的 << 重载运算符
out << config;- 1
- 2
这里隐含调用了 Config 类的 operator<< 重载运算符:
std::ostream& operator<<(std::ostream& os, const Config& cf) { // Save a Config to os for (Config::mapci p = cf.m_Contents.begin(); p != cf.m_Contents.end(); ++p) { os << p->first << " " << cf.m_Delimiter << " "; os << p->second << std::endl; } return os; }