shader 属性为:
	Properties
	{
		_MainTex ("Texture", 2D) = "white" {}//主纹理
		_NoiseTex("Noise", 2D) = "white" {}//噪声纹理
		_Threshold("Threshold", Range(0.0, 1.0)) = 0.5//消融阀值
		_EdgeLength("Edge Length", Range(0.0, 0.2)) = 0.1//边缘宽度
		_EdgeFirstColor("First Edge Color", Color) = (1,1,1,1)//边缘颜色值1
		_EdgeSecondColor("Second Edge Color", Color) = (1,1,1,1)//边缘颜色值2
	}
Tags 为常规设置
Tags { "Queue"="Geometry" "RenderType"="Opaque" }//标签进入Pass
Cull Off //要渲染背面保证效果正确
核心代码:
struct a2v//顶点着色器输入结构体
{
float4 vertex : POSITION;
float2 uv : TEXCOORD0;
};
struct v2f
{
float4 vertex : SV_POSITION;
float2 uvMainTex : TEXCOORD0;
float2 uvNoiseTex : TEXCOORD1;
};
sampler2D _MainTex;
float4 _MainTex_ST;
sampler2D _NoiseTex;
float4 _NoiseTex_ST;
float _Threshold;
float _EdgeLength;
fixed4 _EdgeFirstColor;
fixed4 _EdgeSecondColor;
v2f vert (a2v v)//顶点着色器
{
v2f o;
o.vertex = UnityObjectToClipPos(v.vertex);//将顶点坐标变化到剪裁坐标系
o.uvMainTex = TRANSFORM_TEX(v.uv, _MainTex);//进行主纹理坐标变换
o.uvNoiseTex = TRANSFORM_TEX(v.uv, _NoiseTex);//进行噪声纹理坐标变换
return o;
}
fixed4 frag (v2f i) : SV_Target//片元着色器
{
fixed cutout = tex2D(_NoiseTex, i.uvNoiseTex).r;//获取灰度图的R通道
clip(cutout - _Threshold);//根据消融阀值裁剪片元
float degree = saturate((cutout - _Threshold) / _EdgeLength);//规范化
fixed4 edgeColor = lerp(_EdgeFirstColor, _EdgeSecondColor, degree);//对颜色值进行插值
fixed4 col = tex2D(_MainTex, i.uvMainTex);//对主纹理进行采样
fixed4 finalColor = lerp(edgeColor, col, degree);//对边缘颜色与片元颜色进行插值
return fixed4(finalColor.rgb, 1);
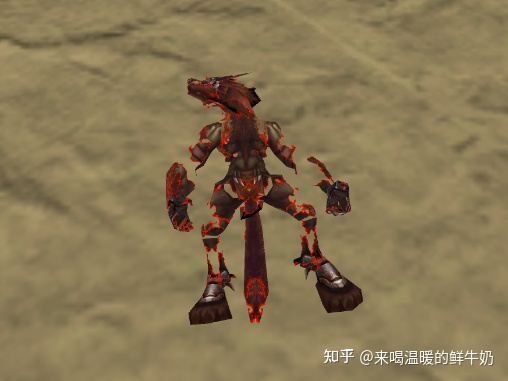
}溶解特效通常用于角色死亡,但是换个花样,会有别具一格的效果。比如在一款MMORPG的选装备的环节,装备的切换通过如下方式显示:

效果令人印象深刻,但所用技术并不复杂。无非就是对溶解特效做了一点改变。
选中某件装备,则减小溶解阈值 _Threshold(这里减少为显现),使其显现出来,将之前装备的溶解阈值相应的增大,同时反转选中装备材质的溶解噪音贴图采样值 cutout 。
代码如下所示:
	fixed4 frag (v2f i) : SV_Target//片元着色器
			{
				fixed cutout = tex2D(_NoiseTex, i.uvNoiseTex).r;//获取灰度图的R通道
				if(_IsVerse)//增加选中反转
				    cutout = 1- cutout;
				clip(cutout - _Threshold);//根据消融阀值裁剪片元

				float degree = saturate((cutout - _Threshold) / _EdgeLength);//规范化
				fixed4 edgeColor = lerp(_EdgeFirstColor, _EdgeSecondColor, degree);//对颜色值进行插值

				fixed4 col = tex2D(_MainTex, i.uvMainTex);//对主纹理进行采样

				fixed4 finalColor = lerp(edgeColor, col, degree);//对边缘颜色与片元颜色进行插值
				return fixed4(finalColor.rgb, 1);
			}
在 C# 脚本里设置溶解阈值,完整代码如下:
using System;
using System.Collections;
using System.Collections.Generic;
using UnityEngine;

public class ChooseMgr : MonoBehaviour
{
    public Material material1;
    public Material material2;

    private static readonly int Threshold = Shader.PropertyToID("_Threshold");
    private static readonly int IsVerse = Shader.PropertyToID("_IsVerse");


    enum ChooseState
    {
        none,
        first,
        second,
    }

    private ChooseState _chooseState = ChooseState.none;

    void Start()
    {
        material1.SetFloat(Threshold, 1);
        material2.SetFloat(Threshold, 1);
    }

    void Update()
    {
        if (Input.GetKeyDown(KeyCode.Alpha1))
        {
            _chooseState = ChooseState.first;
        }

        if (Input.GetKeyDown(KeyCode.Alpha2))
        {
            _chooseState = ChooseState.second;
        }

        if (_chooseState == ChooseState.first)
        {
            material1.SetInt(IsVerse, 1);
            if (material1.GetFloat(Threshold) < 0)
            {
                material1.SetFloat(Threshold, 0);
                return;
            }
            material1.SetFloat(Threshold, material1.GetFloat(Threshold) - .005f);
        }
        else
        {
            material1.SetInt(IsVerse, 0);
            if (material1.GetFloat(Threshold) > 1)
            {
                material1.SetFloat(Threshold, 1);
                return;
            }
            material1.SetFloat(Threshold, material1.GetFloat(Threshold) + .005f);
        }


        if (_chooseState == ChooseState.second)
        {
            material2.SetInt(IsVerse, 1);
            if (material2.GetFloat(Threshold) < 0)
            {
                material2.SetFloat(Threshold, 0);
                return;
            }
            material2.SetFloat(Threshold, material2.GetFloat(Threshold) - .005f);
        }
        else
        {
            material2.SetInt(IsVerse, 0);
            if (material2.GetFloat(Threshold) > 1)
            {
                material2.SetFloat(Threshold, 1);
                return;
            }
            material2.SetFloat(Threshold, material2.GetFloat(Threshold) + .005f);
        }

    }
}
效果如下:
