因在Spring官网上都推荐使用Maven下载相关的Spring jar包,故复习了一下如何使用Maven构建Spring MVC,顺便学习一下Spring MVC。(m2eclipse的插件的安装,在此不作描述。)
一、新建Maven工程,如下图所示
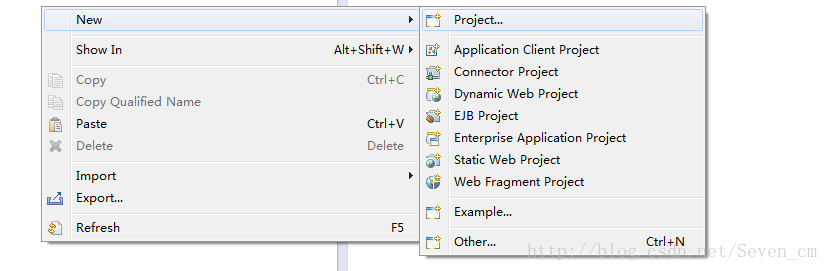
1、右键新建项目
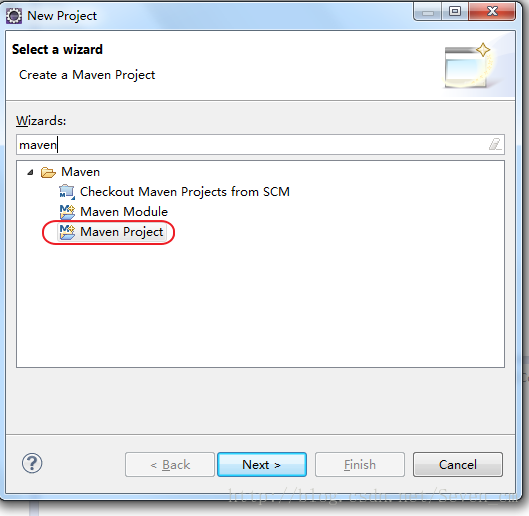
2、可以在搜索中直接输入maven
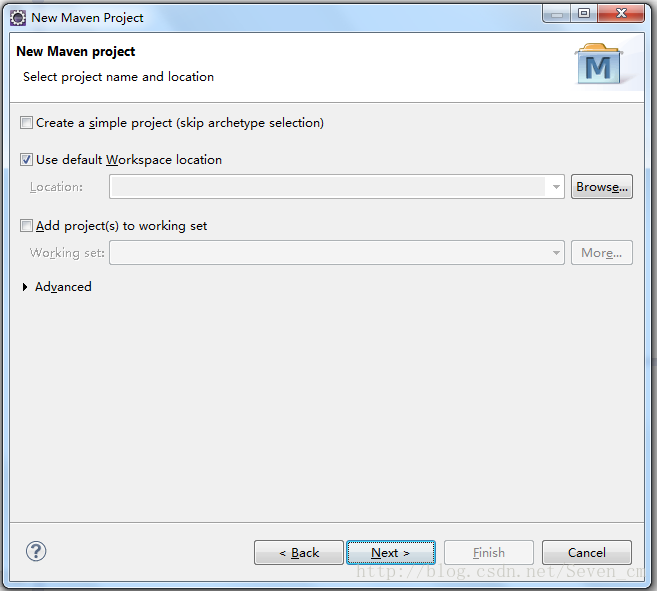
3、我这里选择的是使用默认的项目空间
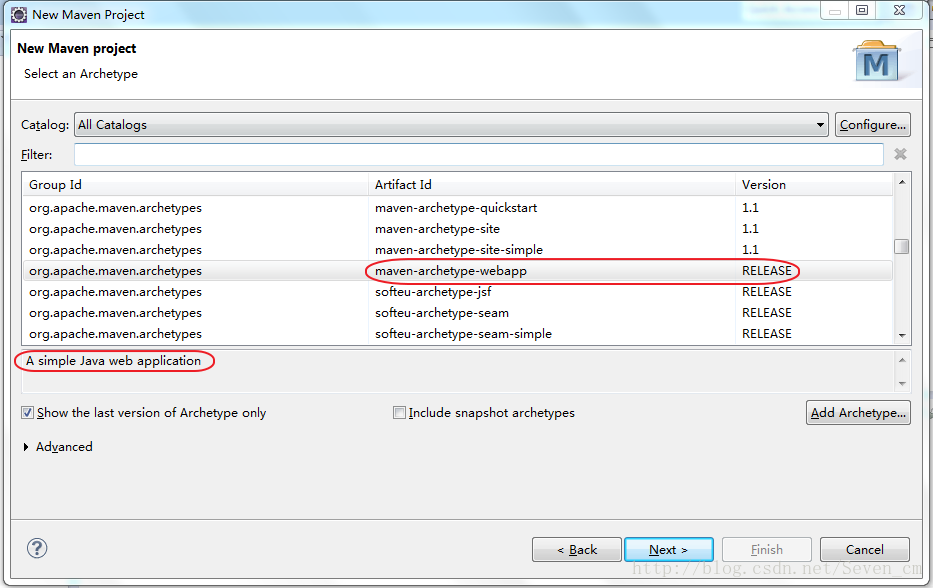
4、选择Maven webapp
5、输入相应的项目名称

注:关于Group Id等字段的意义可参考该文章:http://www.iteye.com/topic/973166
6点击Finish
二、添加Dynamic Web Module
1、点击工程,使用组合键:alt + enter
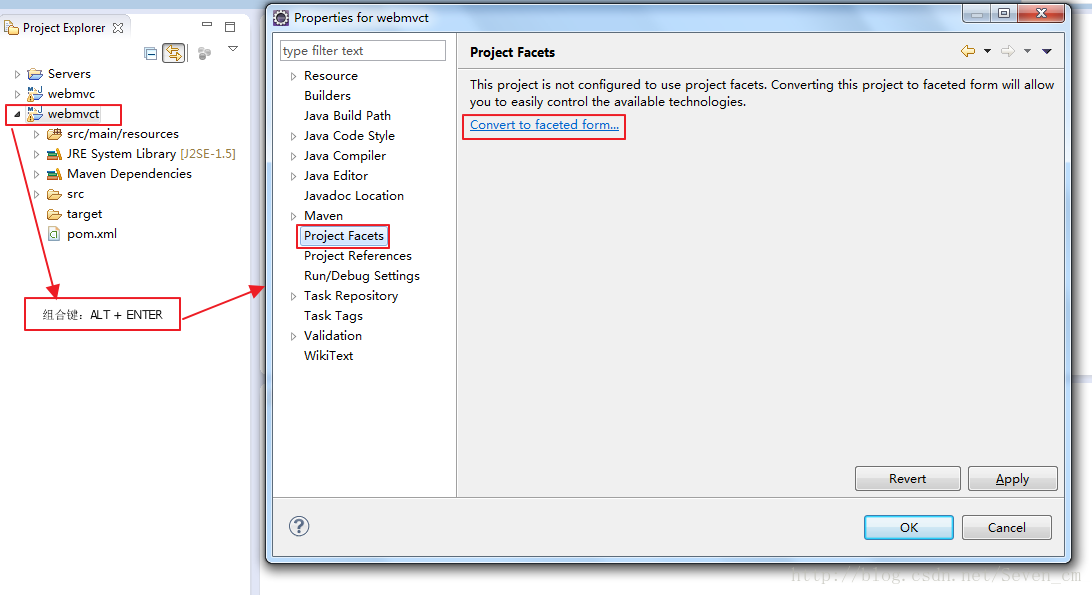
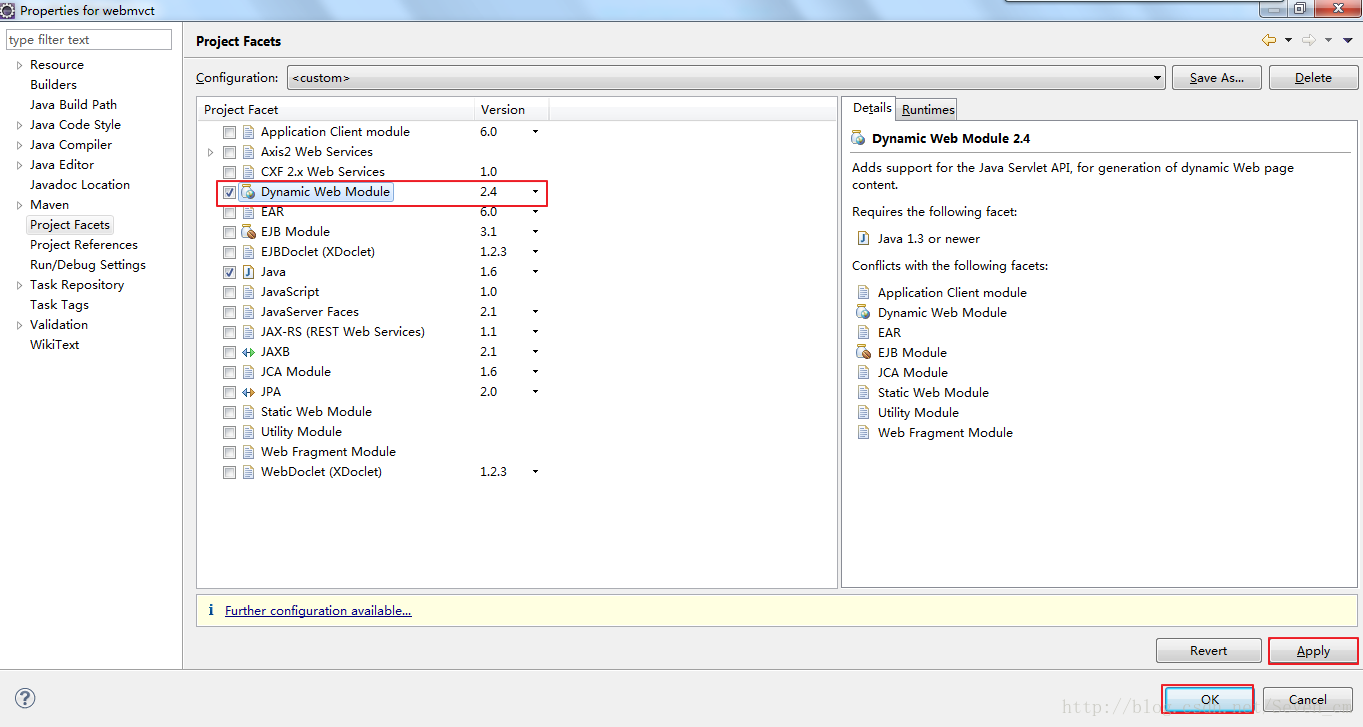
2、选择Project Facets
3、增加目录:src/test/resources

4、复制WebContent/WEB-INF/下的web.xml到 /webmvct/src/main/webapp/WEB-INF目中
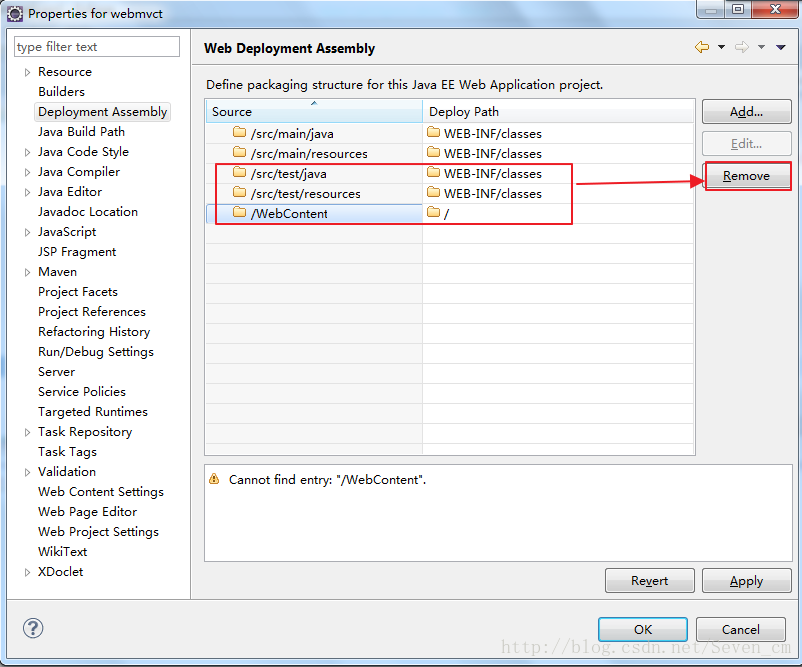
5、删除WebContent文件
6、点击工程使用组合键,打开工程选项,删除以下几项:
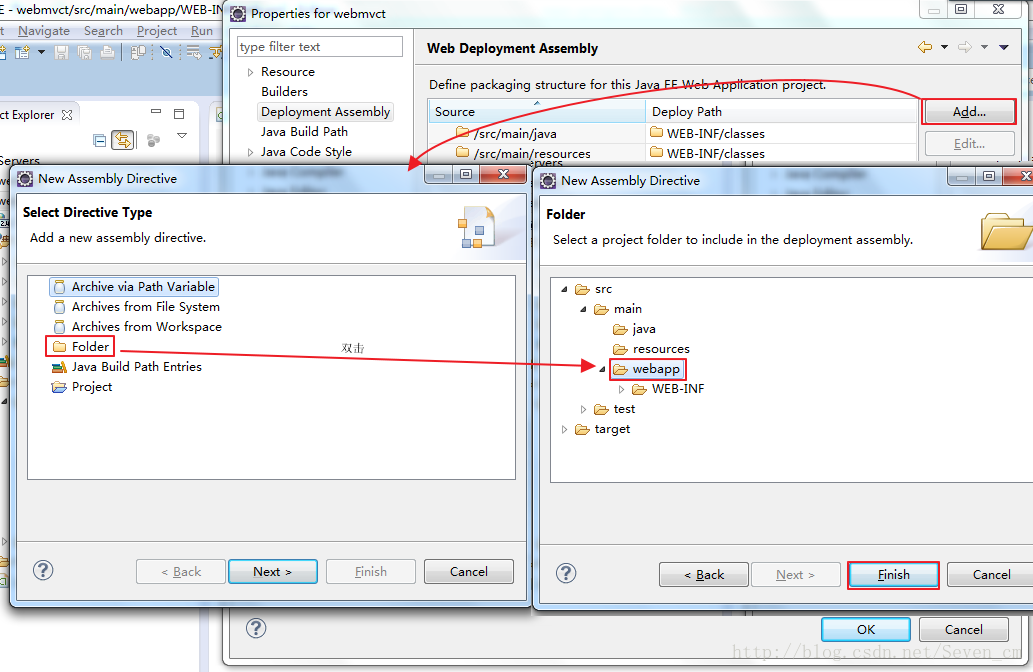
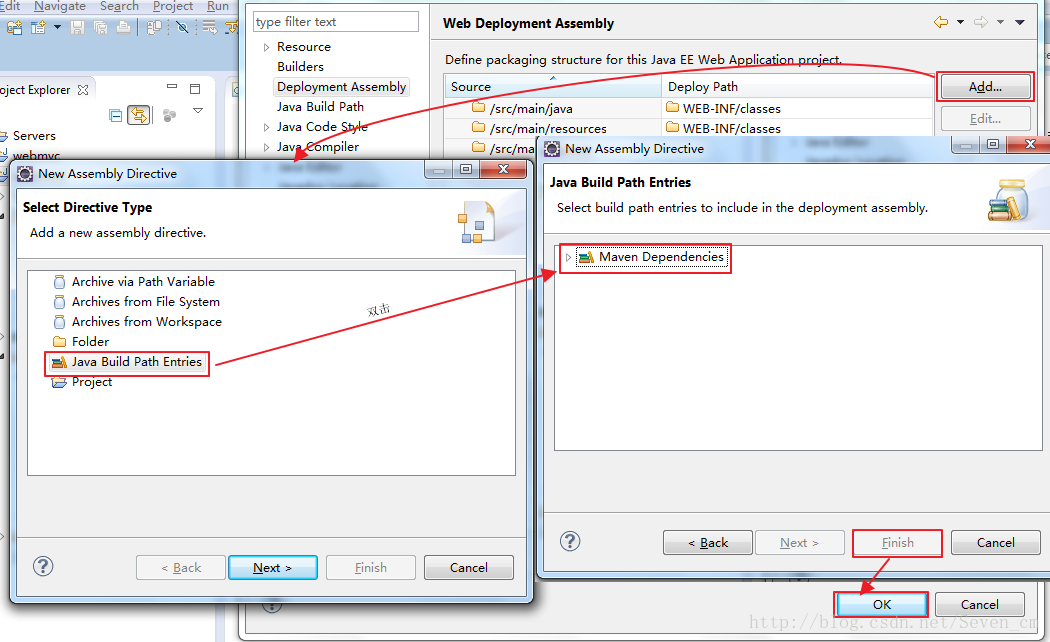
7、增加目录:webapp 和 Maven Dependenices
三、修改 web.xml文件
- <?xml version="1.0" encoding="UTF-8"?>
- <web-app id="WebApp_ID" version="2.4"
- xmlns="http://java.sun.com/xml/ns/j2ee" xmlns:xsi="http://www.w3.org/2001/XMLSchema-instance"
- xsi:schemaLocation="http://java.sun.com/xml/ns/j2ee http://java.sun.com/xml/ns/j2ee/web-app_2_4.xsd">
- <display-name>webmvct</display-name>
- <context-param>
- <param-name>webAppRootKey</param-name>
- <param-value>webmvct.root</param-value>
- </context-param>
- <context-param>
- <param-name>log4jConfigLocation</param-name>
- <param-value>WEB-INF/log4j.properties</param-value>
- </context-param>
- <listener>
- <listener-class>org.springframework.web.util.Log4jConfigListener</listener-class>
- </listener>
- <listener>
- <listener-class>org.springframework.web.context.ContextLoaderListener</listener-class>
- </listener>
- <servlet>
- <servlet-name>webmvct</servlet-name>
- <servlet-class>org.springframework.web.servlet.DispatcherServlet</servlet-class>
- <load-on-startup>1</load-on-startup>
- </servlet>
- <servlet-mapping>
- <servlet-name>webmvct</servlet-name>
- <url-pattern>/</url-pattern>
- </servlet-mapping>
- <welcome-file-list>
- <welcome-file>index.jsp</welcome-file>
- </welcome-file-list>
- </web-app>
四、在WEB-INF 目录下增加文件: 工程名-servlet.xml
(WEB-INF/webmvct-servlet.xml)
- <?xml version="1.0" encoding="UTF-8"?>
- <beans xmlns="http://www.springframework.org/schema/beans" xmlns:xsi="http://www.w3.org/2001/XMLSchema-instance"
- xmlns:p="http://www.springframework.org/schema/p" xmlns:context="http://www.springframework.org/schema/context"
- xmlns:jee="http://www.springframework.org/schema/jee" xmlns:tx="http://www.springframework.org/schema/tx"
- xsi:schemaLocation="http://www.springframework.org/schema/beans http://www.springframework.org/schema/beans/spring-beans-2.5.xsd
- http://www.springframework.org/schema/context http://www.springframework.org/schema/context/spring-context-2.5.xsd
- http://www.springframework.org/schema/jee http://www.springframework.org/schema/jee/spring-jee-2.5.xsd
- http://www.springframework.org/schema/tx http://www.springframework.org/schema/tx/spring-tx-2.5.xsd">
- <!-- 对包中的所有类进行扫描,以完成Bean创建和自动依赖注入的功能 稍后会创建该包:webmvct.cmd -->
- <context:component-scan base-package="webmvct.cmd"/>
- <!-- 定义Spring MVC 的模板文件 -->
- <bean id="viewResolver" class="org.springframework.web.servlet.view.InternalResourceViewResolver">
- <property name="viewClass" value="org.springframework.web.servlet.view.JstlView"/> <!-- 支持JSTL -->
- <property name="prefix" value="/WEB-INF/jsp/" /> <!-- 模板的路径 -->
- <property name="suffix" value=".jsp" /> <!-- 模板文件的后缀-->
- </bean>
- </beans>
五、修改pom.xml
可到该网址查询相应的spring包:http://repo.spring.io/webapp/browserepo.html?0
- <project xmlns="http://maven.apache.org/POM/4.0.0" xmlns:xsi="http://www.w3.org/2001/XMLSchema-instance"
- xsi:schemaLocation="http://maven.apache.org/POM/4.0.0 http://maven.apache.org/maven-v4_0_0.xsd">
- <modelVersion>4.0.0</modelVersion>
- <groupId>com.learn.cm</groupId>
- <artifactId>webmvct</artifactId>
- <packaging>war</packaging>
- <version>0.0.1-SNAPSHOT</version>
- <name>webmvct Maven Webapp</name>
- <url>http://maven.apache.org</url>
- <dependencies>
- <dependency>
- <groupId>junit</groupId>
- <artifactId>junit</artifactId>
- <version>3.8.1</version>
- <scope>test</scope>
- </dependency>
- <dependency>
- <groupId>org.springframework</groupId>
- <artifactId>spring</artifactId>
- <version>2.5.6</version>
- </dependency>
- <dependency>
- <groupId>org.springframework</groupId>
- <artifactId>spring-webmvc</artifactId>
- <version>2.5.6</version>
- </dependency>
- <dependency>
- <groupId>org.mortbay.jetty</groupId>
- <artifactId>servlet-api-2.5</artifactId>
- <version>6.0.1</version>
- </dependency>
- <dependency>
- <groupId>javax.servlet</groupId>
- <artifactId>jstl</artifactId>
- <version>1.1.2</version>
- </dependency>
- <dependency>
- <groupId>log4j</groupId>
- <artifactId>log4j</artifactId>
- <version>1.2.14</version>
- </dependency>
- </dependencies>
- <build>
- <finalName>webmvct</finalName>
- </build>
- </project>
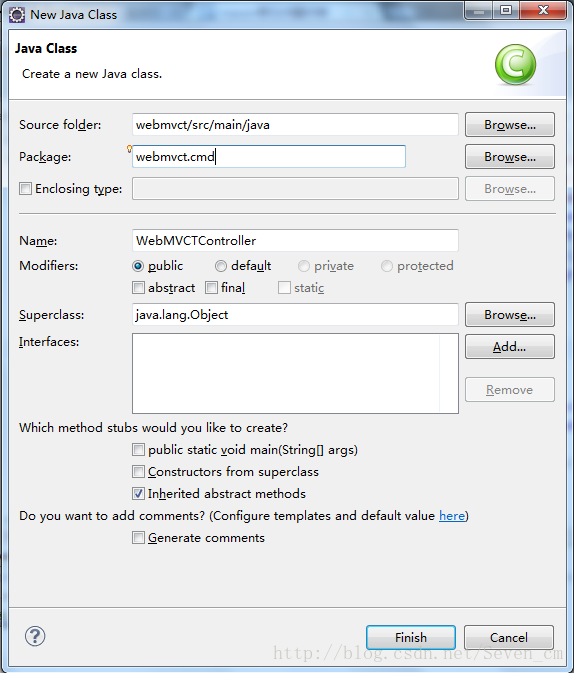
六、在src/main/java 文件夹中新建类 WebMVCTController
七、在WEB-INF目录下新建文件夹jsp ,并在jsp文件夹中新建login.jsp
- <!DOCTYPE html>
- <html>
- <head>
- <title>webmvct简单例子</title>
- <meta charset="utf-8">
- <meta name="viewport" content="width=device-width, initial-scale=1.0">
- <!-- Bootstrap -->
- <link rel="stylesheet" href="http://cdn.bootcss.com/twitter-bootstrap/3.0.3/css/bootstrap.min.css">
- <link rel="stylesheet" href="http://v3.bootcss.com/examples/signin/signin.css"/>
- <!-- HTML5 Shim and Respond.js IE8 support of HTML5 elements and media queries -->
- <!-- WARNING: Respond.js doesn't work if you view the page via file:// -->
- <!--[if lt IE 9]>
- <script src="http://cdn.bootcss.com/html5shiv/3.7.0/html5shiv.min.js"></script>
- <script src="http://cdn.bootcss.com/respond.js/1.3.0/respond.min.js"></script>
- <![endif]-->
- <!-- jQuery (necessary for Bootstrap's JavaScript plugins) -->
- <script src="http://cdn.bootcss.com/jquery/1.10.2/jquery.min.js"></script>
- <!-- Include all compiled plugins (below), or include individual files as needed -->
- <script src="http://cdn.bootcss.com/twitter-bootstrap/3.0.3/js/bootstrap.min.js"></script>
- </head>
- <body>
- <div class="container">
- <form class="form-signin" role="form" action="login">
- <h2 class="form-signin-heading">登陆</h2>
- <input type="text" name="username" class="form-control" placeholder="请输入用户名" required autofocus>
- <button class="btn btn-lg btn-primary btn-block" type="submit">登陆</button>
- </form>
- </body>
- </html>
八、同时新建文件:business.jsp
- <!DOCTYPE html PUBLIC "-//W3C//DTD HTML 4.01 Transitional//EN" "http://www.w3.org/TR/html4/loose.dtd">
- <html>
- <head>
- <meta http-equiv="Content-Type" content="text/html; charset=utf-8">
- <title>欢迎</title>
- </head>
- <body>
- ${userName}
- </body>
- </html>
九、在WEB-INF目录下创建log4j配置文件:
log4j.properties
- # For JBoss: Avoid to setup Log4J outside $JBOSS_HOME/server/default/deploy/log4j.xml!
- # For all other servers: Comment out the Log4J listener in web.xml to activate Log4J.
- log4j.rootLogger=DEBUG, stdout
- log4j.appender.stdout=org.apache.log4j.ConsoleAppender
- log4j.appender.stdout.layout=org.apache.log4j.PatternLayout
- log4j.appender.stdout.layout.ConversionPattern=%d %p [%c] - %m%n
十、在WEB-INF文件夹中增加文件applicationContext.xml
- <?xml version="1.0" encoding="UTF-8"?>
- <beans xmlns="http://www.springframework.org/schema/beans"
- xmlns:xsi="http://www.w3.org/2001/XMLSchema-instance"
- xmlns:aop="http://www.springframework.org/schema/aop"
- xmlns:tx="http://www.springframework.org/schema/tx"
- xmlns:context="http://www.springframework.org/schema/context"
- xsi:schemaLocation="http://www.springframework.org/schema/beans
- http://www.springframework.org/schema/beans/spring-beans-2.5.xsd
- http://www.springframework.org/schema/aop
- http://www.springframework.org/schema/aop/spring-aop-2.5.xsd
- http://www.springframework.org/schema/tx
- http://www.springframework.org/schema/tx/spring-tx-2.5.xsd
- http://www.springframework.org/schema/context
- http://www.springframework.org/schema/context/spring-context-2.5.xsd
- ">
- <!-- the parent application context definition for the springapp application -->
- <!-- <bean class="org.springframework.beans.factory.annotation.AutowiredAnnotationBeanPostProcessor"/>
- -->
- </beans>
十一、修改index.jsp文件
- <%
- request.getRequestDispatcher("/WEB-INF/jsp/login.jsp").forward(request,response);
- %>
十二、发布,启动工程
在浏览器中输入:http://localhost:8080/webmvct/

