记录一次发布JitPack依赖库全流程.
AndroidStudo版本:2021.1.1 Patch3
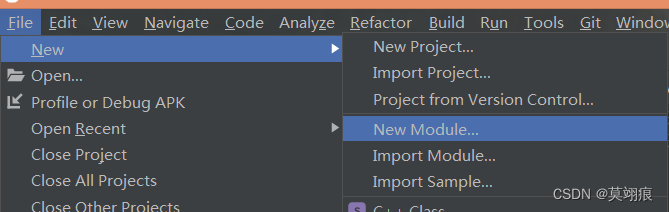
1.创建项目
项目名称自定义,这里为WLibrary

2.创建Library
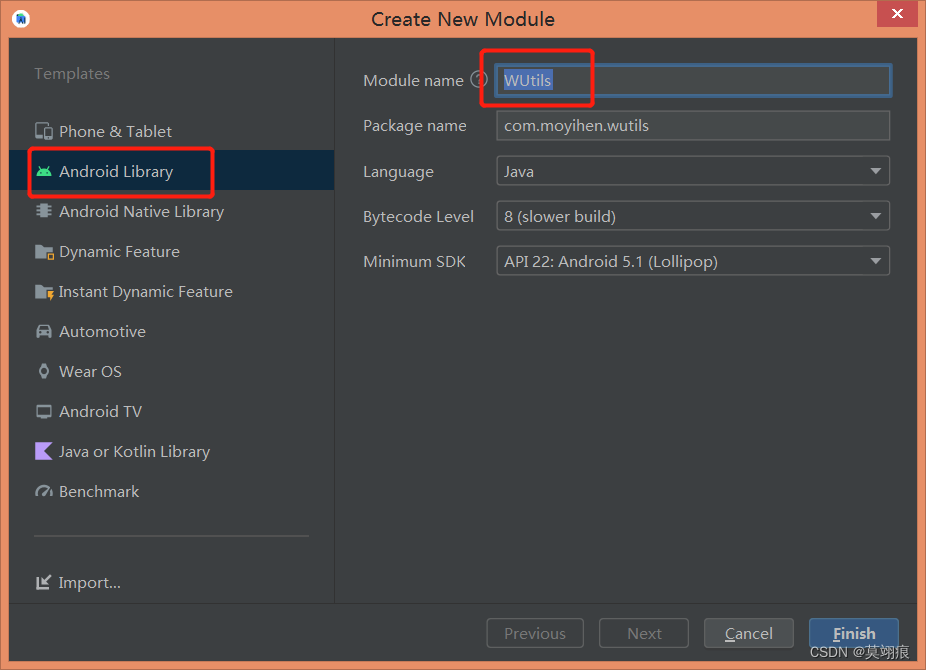
2.1创建名字为WUtils的Android Library
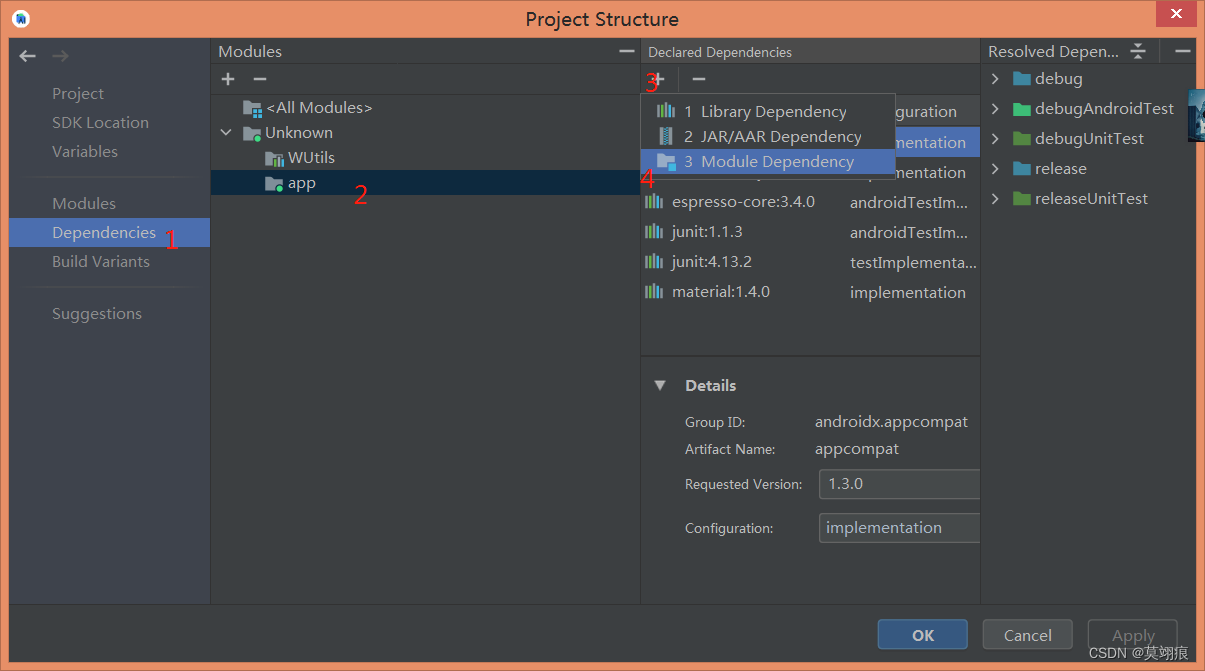
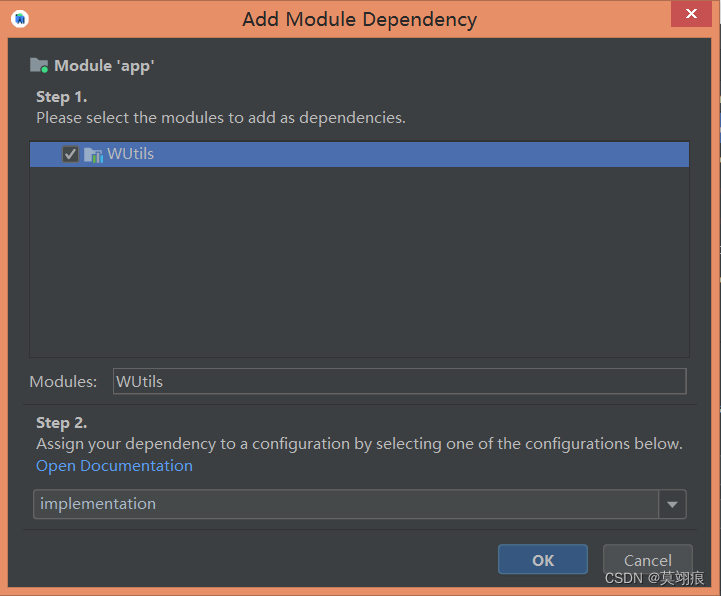
2.2依赖创建的library
打开File ==>ProjectsStructure,注意选择框起来的label
3.配置项目
3.1工程根目录新建 jitpack.yml
before_install:
  - sdk install java 11.0.10-open
  - sdk use java 11.0.10-open

jdk:
  - openjdk11

3.2WUtils模块的build.gradle加入以下选中代码

完整的build.gradle
plugins {


    id 'com.android.library'
    id 'maven-publish'
}

android {


    compileSdk 31

    defaultConfig {


        minSdk 22
        targetSdk 31

        testInstrumentationRunner "androidx.test.runner.AndroidJUnitRunner"
        consumerProguardFiles "consumer-rules.pro"
    }

    buildTypes {


        release {


            minifyEnabled false
            proguardFiles getDefaultProguardFile('proguard-android-optimize.txt'), 'proguard-rules.pro'
        }
    }
    compileOptions {


        sourceCompatibility JavaVersion.VERSION_1_8
        targetCompatibility JavaVersion.VERSION_1_8
    }
}

dependencies {


    implementation 'androidx.appcompat:appcompat:1.3.0'
    implementation 'com.google.android.material:material:1.4.0'
    testImplementation 'junit:junit:4.13.2'
    androidTestImplementation 'androidx.test.ext:junit:1.1.3'
    androidTestImplementation 'androidx.test.espresso:espresso-core:3.4.0'
}

afterEvaluate {


    publishing {


        publications {


            release(MavenPublication) {


                from components.release
                //依赖库组id
                groupId = 'com.moyihen.w-library'
                //单组件发布时随意填写,多组件时即为此组件的artifactId
                artifactId = 'w-library'
            }
        }
    }
}
4.提交代码到github
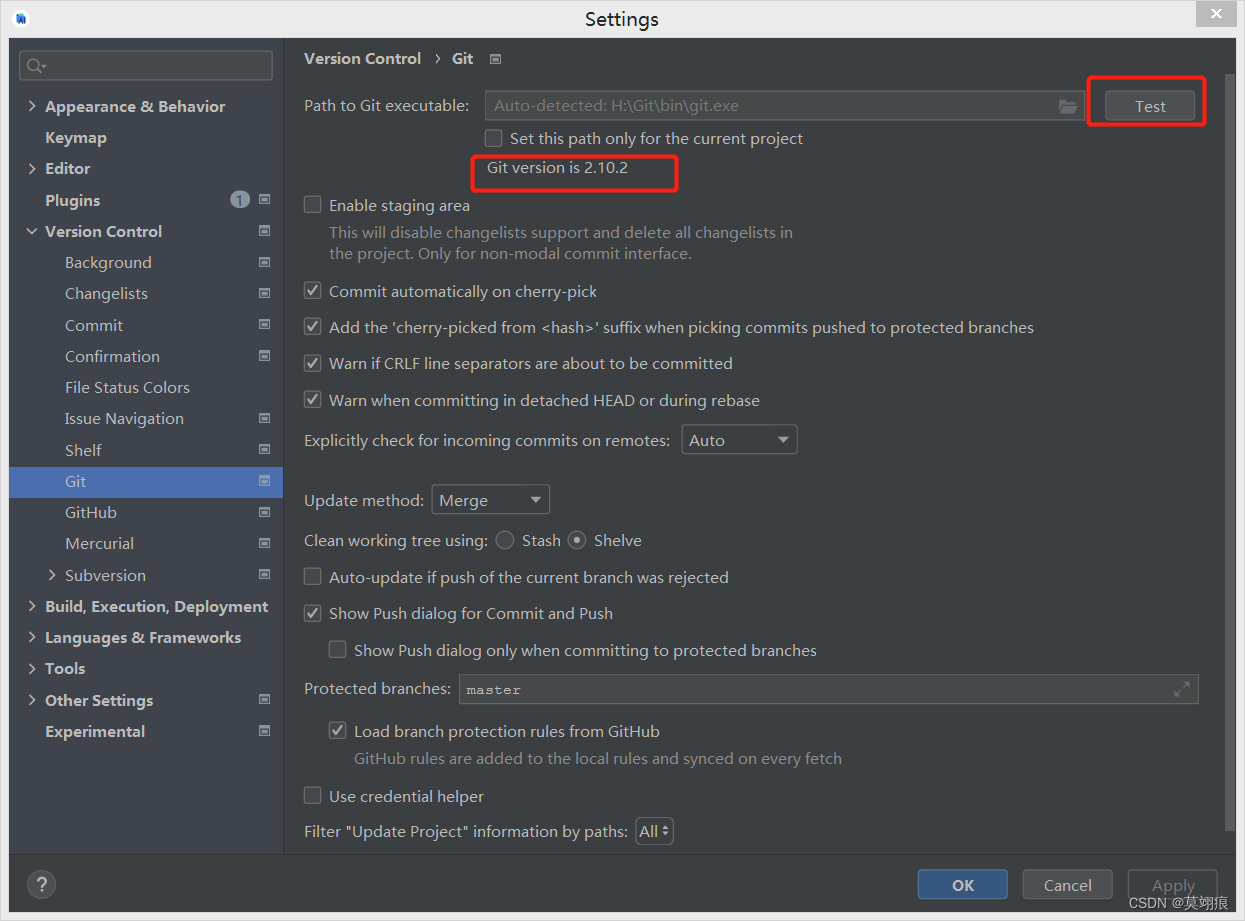
4.1验证git是否安装
确定已安装git,没有安装去官网下载,打开File =>Settings=>Version Control=>Git,点Test测试能正确找到安装路径,出现版本号为正常.
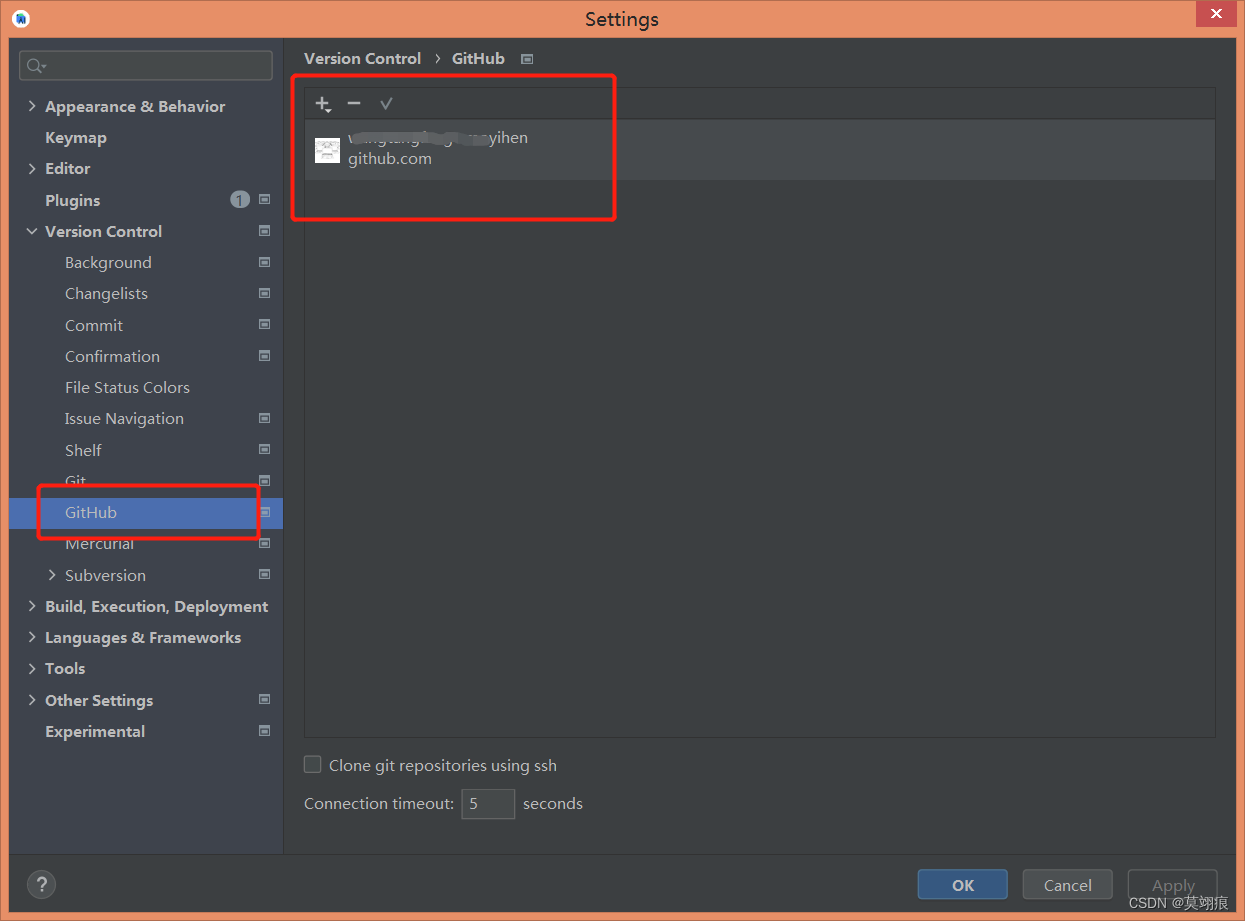
4.2点击GitHub 登录你的github账号
下面是正常登录状态.
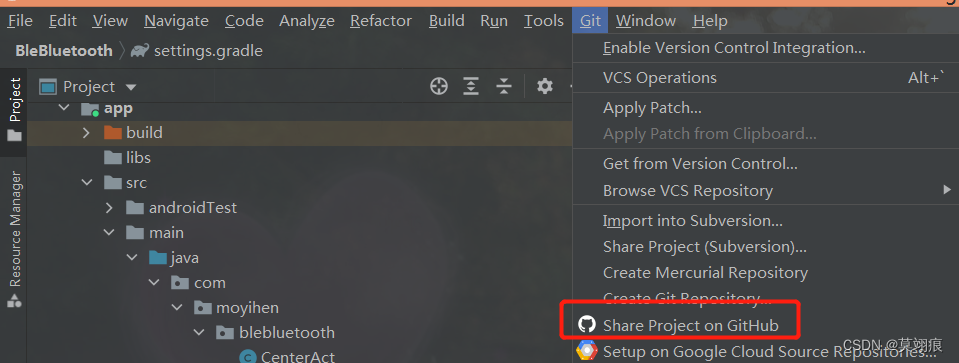
4.3 提交代码
首次提交会默认创建仓库.点击Git=>Share Project on GitHub =>share=>Add

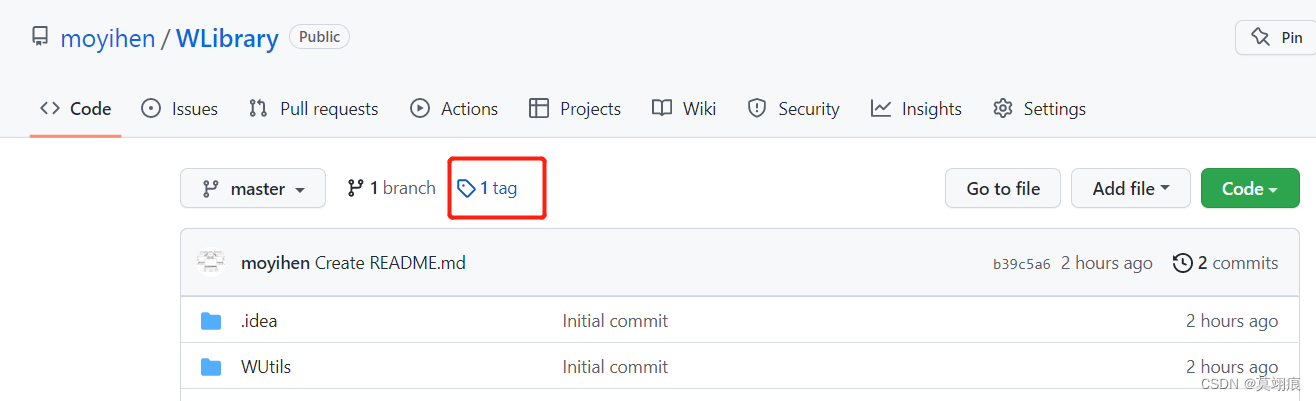
上传成功,点下方蓝色字体会跳转github上传地址.

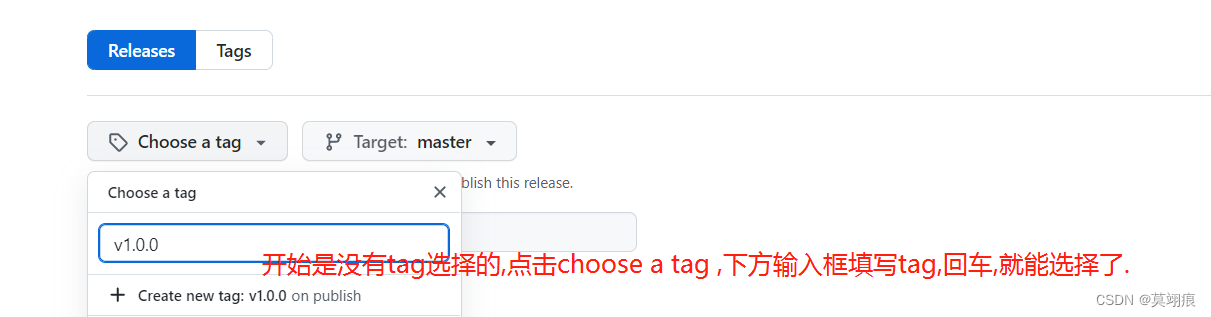
5 创建发行版本
5.1 点击tags,

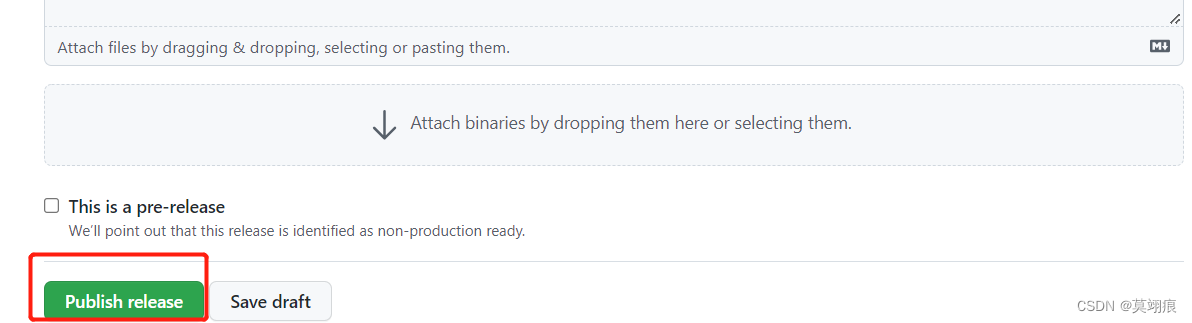
5.2 点击底部Publish release
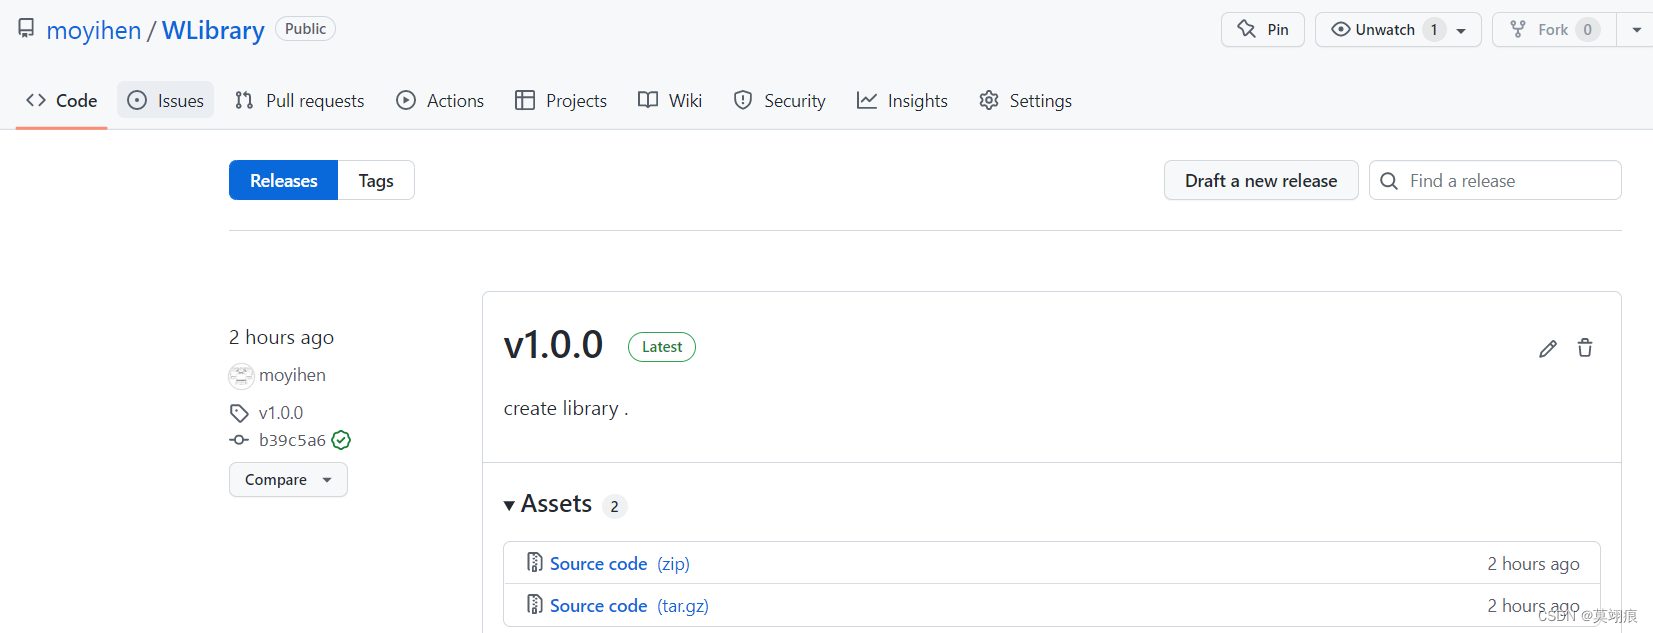
5.3 发布完成,
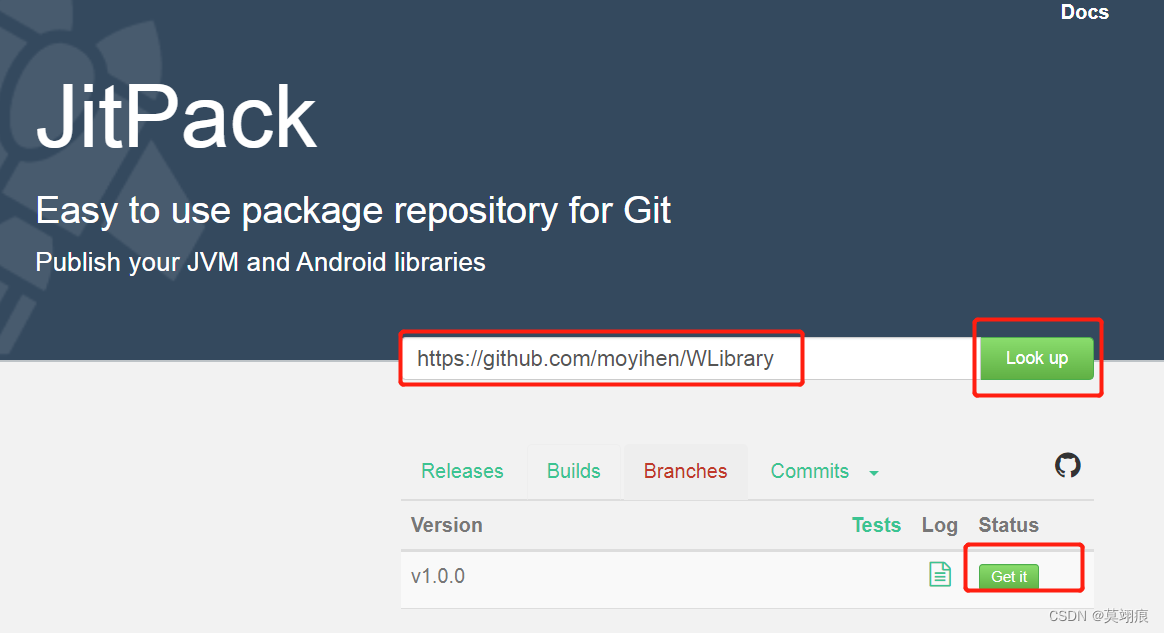
6 关联JitPack
输入自己项目仓库地址,我的是https://github.com/moyihen/WLibrary,点击Look up =>点击Get it ,这样就关联发布成功了.往下滑有依赖 库使用方法.
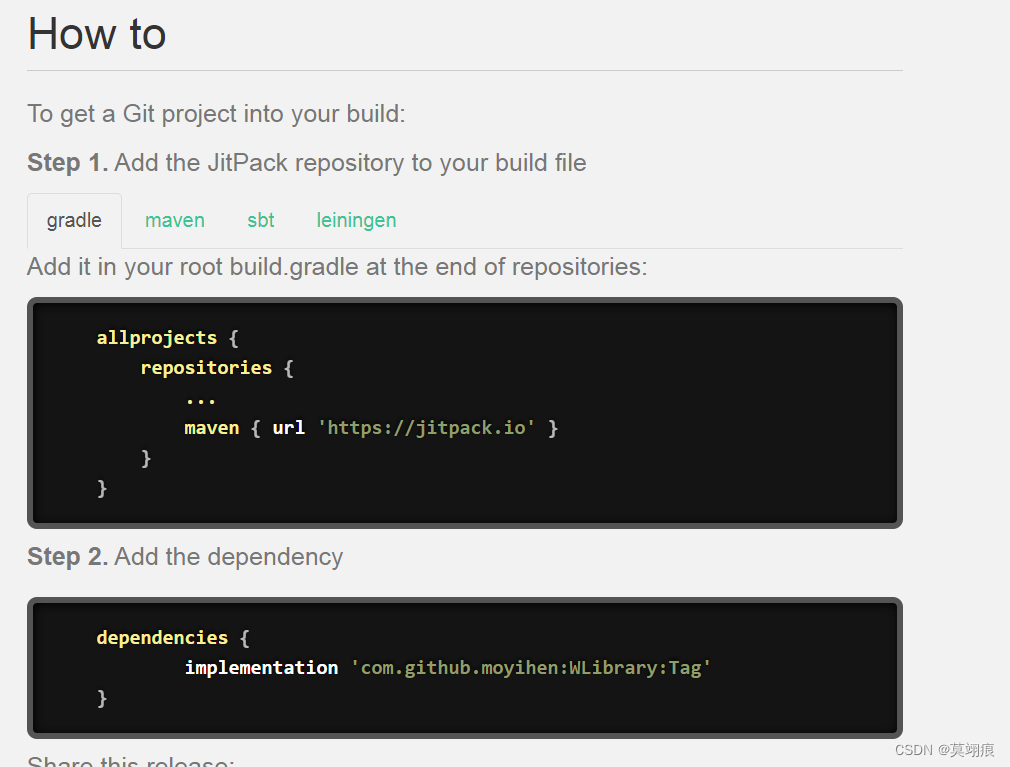
7 测试依赖库是否发布成功.
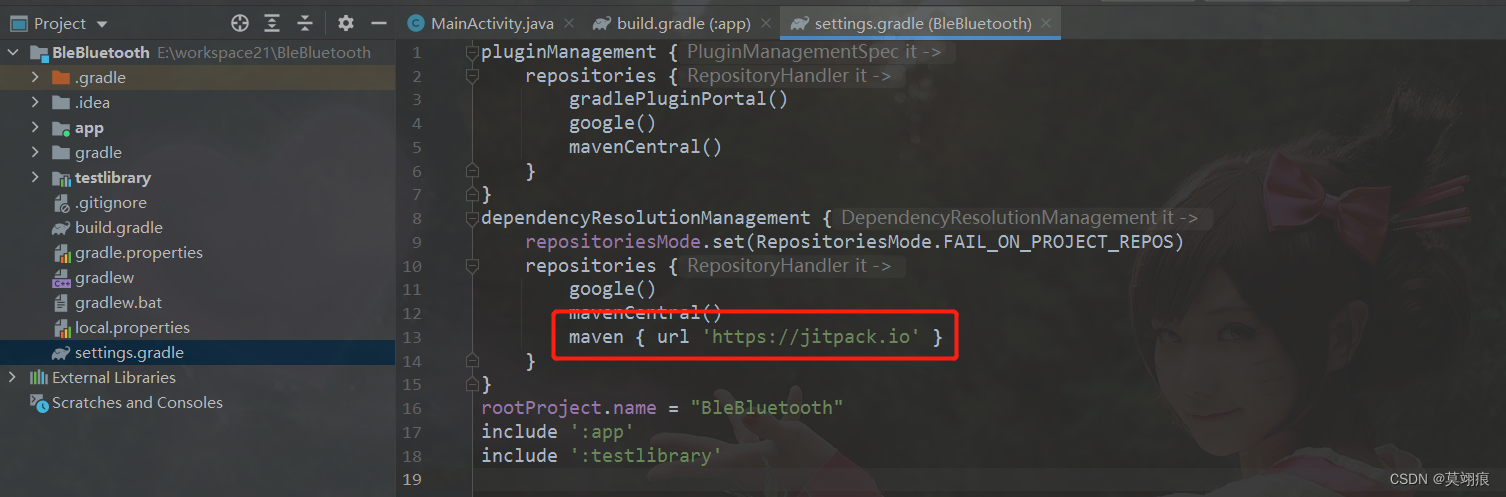
grade7.0依赖有所变动.
7.1 打开项目settings.gradle,配置 maven { url ‘https://jitpack.io’ }
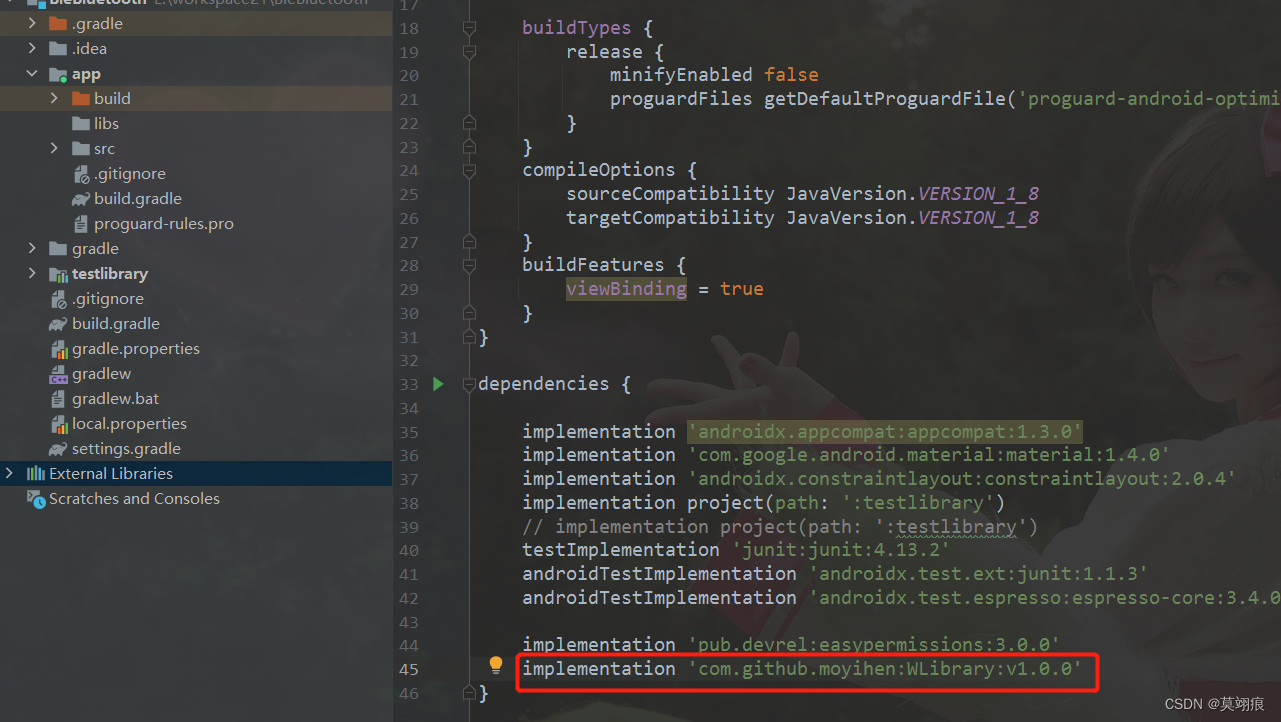
7.2 打开app=>build.gradle,
配置 implementation ‘com.github.moyihen:WLibrary:v1.0.0’
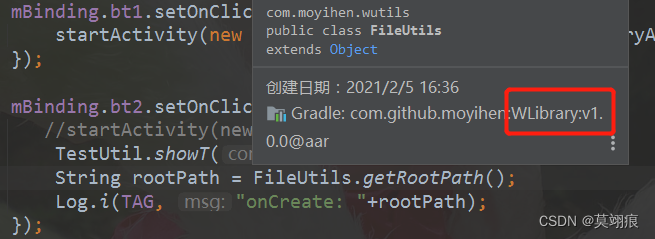
7.3 项目可正常依赖WLibrary,调用函数正常
end.