html2canvas在上个公司用过,当时业务场景是在pc端将一个包含若干echarts、包含不同域名图片的【长到有滚动条的】html转成pdf提供下载。
当时做的也不难嘛【狗头】,也就跨域图片折磨了一阵【哭笑不得】,说起跨域图片可以提一下:html下image加载图片是异步的,所以看普通网页时是可以看到图片,但转成图片/pdf后可能会看不到图,此时各位可以从两方面考虑:
1,查看html2canvas配置项是否开启跨域(当时开了也没卵用)
2,可以提前把图片转成base64,存到浏览器本地就不存在什么跨域了。
而这次场景改为了H5,且业务非常简单,请求到动态的推广码加已有的背景图合成图片,供用户下载到手机,可以发朋友圈或好友推广就行。当然也要求当晚开发当晚上线。
技术栈:vue2+vant
这里要注意几个点:
1.H5包括普通浏览器和微信等内置浏览器,基于微信不允许直接提供下载的操作(推荐长按-保存图片的方式),所以在设计时统一做“长按保存图片”的提示,而不是提供个按钮。
2.需要考虑ios和安卓的兼容、移动端网络等问题,不过这些都不是大问题。
考虑到以上几点,我们可以有个大概流程了:
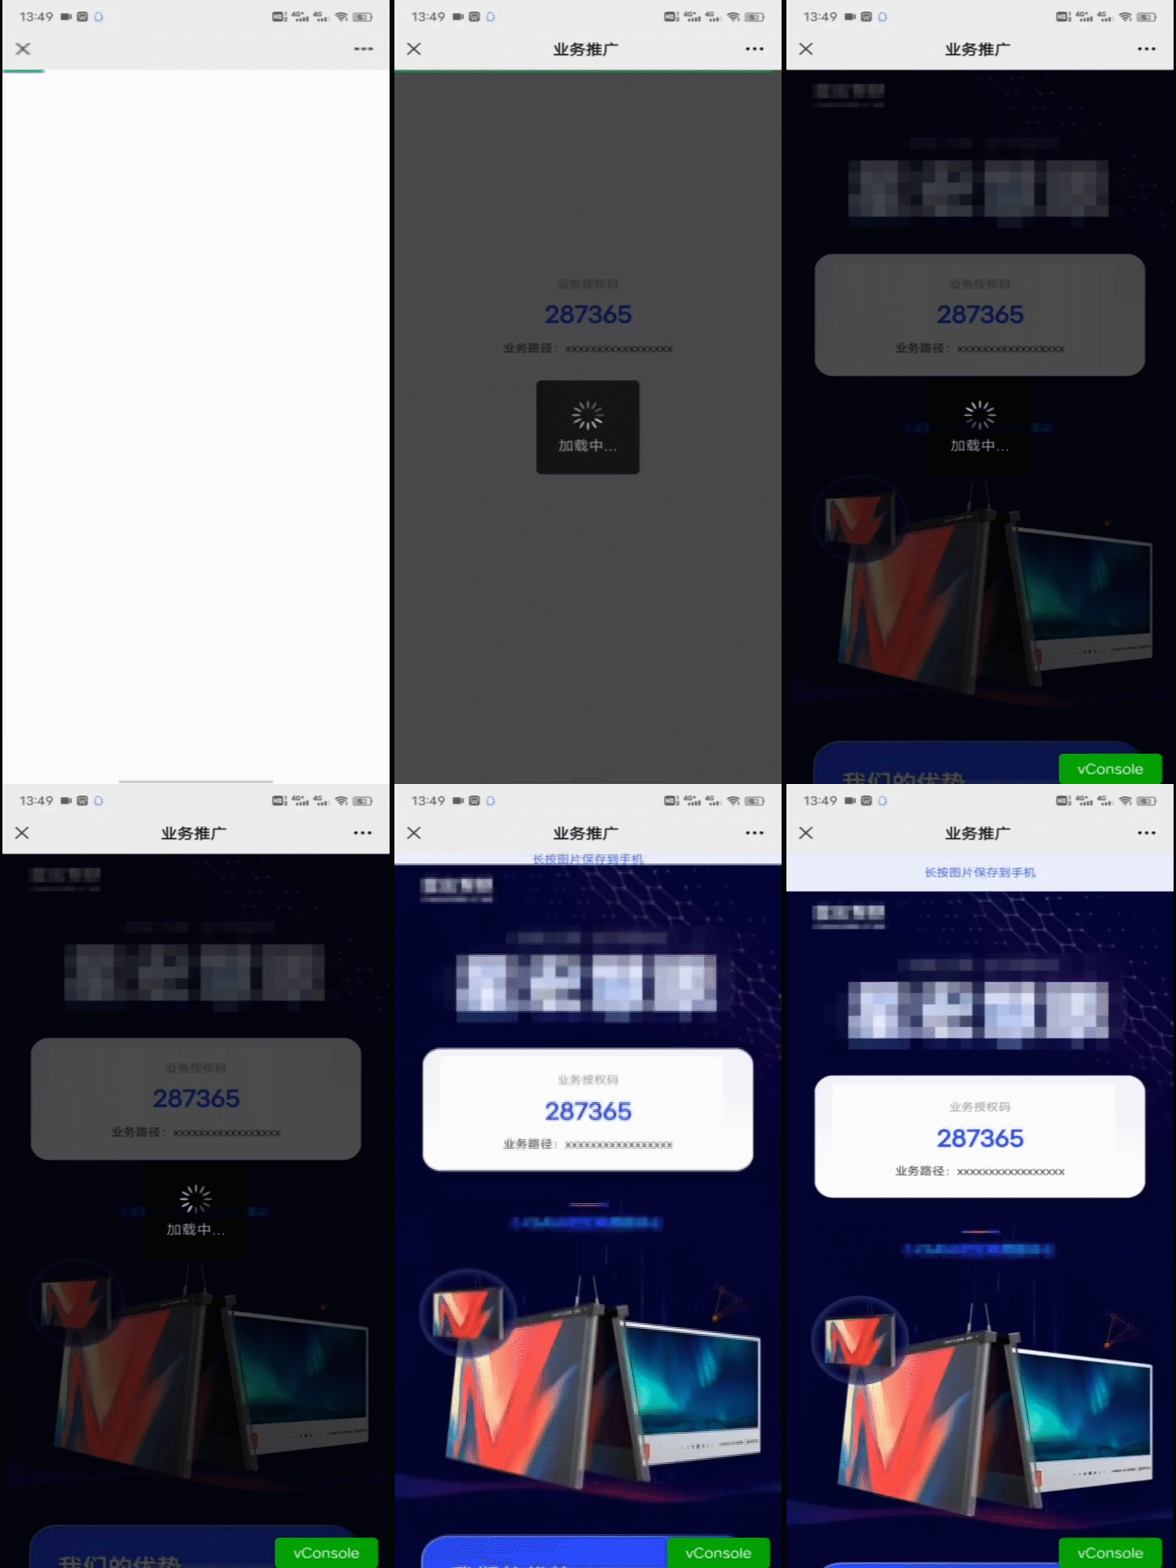
1.将底图放在项目本地,利用webpack等做压缩处理,请求动态推广码,等待期间显示loading不允许操作页面(避免还没得到推广码就保存图片)。
2.待底图加载完毕、推广码拿到,立即生成图片,生成图片后将原底图+推广码隐藏,显示新生成的图片,隐藏loading。
3.顶部下拉出保存提示,提示用户长按保存图片。
html转图片的代码网上都有,比较重要的是ios的兼容性问题,可参考
html2canvas 在IOS系统13.4以上失效的问题解决方法
1.0.0-rc.4版本替换了没有效果,用的是第二个方法
// htmlToImg.js
export default function (el) {
  try {
    let elDom = null
    if (el instanceof HTMLElement) {
      elDom = el
    } else if (typeof el === 'string') {
      elDom = document.querySelector(el) // 需要截图的包裹的(原生的)DOM 对象
    } else {
      return -1
    }
    let scale = DPR() // 定义任意放大倍数 支持小数
    const width = elDom.clientWidth // 获取dom 宽度
    const height = elDom.clientHeight // 获取dom 高度
    let canvas = document.createElement('canvas') // 创建一个canvas节点
    canvas.width = width * scale // 定义canvas 宽度 * 缩放
    canvas.height = height * scale // 定义canvas高度 *缩放
    canvas.style.width = width + 'px'
    canvas.style.height = height + 'px'
    canvas.getContext('2d') // 获取context,设置scale
    // context.scale(scale, scale)
    let opts = {
      scale: scale, // 添加的scale 参数
      canvas: canvas, // 自定义 canvas
      logging: false, // 日志开关,便于查看html2canvas的内部执行流程
      backgroundColor: '#040231',
      // width: width, // dom 原始宽度
      // height: height,
      // x: 0,
      // y: window.pageYOffset,
      useCORS: true // 【重要】开启跨域配置
      // logging: true,
    }
    return new Promise((resolve, reject) => {
      // eslint-disable-next-line
      (window.html2canvas || html2canvas)(elDom, opts).then(() => {
        // 压缩图片
        compressImg(canvas.toDataURL('image/png'), 0.8, (blob, base64) => {
          let image = new Image()
          image.style.width = width + 'px'
          image.style.height = height + 'px'
          image.src = base64
          image.draggable = false

          resolve(image)
        })
      })
    })
  } catch (error) {
    console.log(error)
    this.$toast.fail('图片保存异常');
    return -1
  }
}

/**
 * 根据window.devicePixelRatio获取像素比
 */
function DPR () {
  if (window.devicePixelRatio && window.devicePixelRatio > 1) {
    return window.devicePixelRatio;
  }
  return 1;
}
// compress.js
/**
* 获取到的二进制文件 转 base64文件
* @param blob
*/
function blobToBase64 (blob) {
const self = this // 绑定this
const reader = new FileReader() //实例化一个reader文件
reader.readAsDataURL(blob) // 添加二进制文件
reader.onload = function (event) {
const base64 = event.target.result // 获取到它的base64文件
const scale = 0.99 // 设置缩放比例 (0-1)
self.compressImg(base64, scale, self.uploadImg) // 调用压缩方法
}
}
/**
* 压缩图片方法
* @param base64 ----baser64文件
* @param scale ----压缩比例 画面质量0-9,数字越小文件越小画质越差
* @param callback ---回调函数
*/
export function compressImg (base64, scale, callback) {
console.log(`执行缩放程序,scale=${scale}`)
// 处理缩放,转换格式
// 下面的注释就不写了,就是new 一个图片,用canvas来压缩
const img = new Image()
img.src = base64
img.onload = function () {
const canvas = document.createElement('canvas')
const ctx = canvas.getContext('2d')
canvas.setAttribute('width', this.width)
canvas.setAttribute('height', this.height)
ctx.clearRect(0, 0, canvas.width, canvas.height)
ctx.drawImage(img, 0, 0, canvas.width, canvas.height)
// 转成base64 文件
let base64 = canvas.toDataURL('image/jpeg')
// 根据自己需求填写大小 我的目标是小于3兆
while (base64.length > 1024 * 1024 * 3) {
scale -= 0.01
base64 = canvas.toDataURL('image/jpeg', scale)
}
// baser64 TO blob 这一块如果不懂可以自行百度,我就不加注释了
const arr = base64.split(',')
const mime = arr[0].match(/:(.*?);/)[1]
const bytes = atob(arr[1])
const bytesLength = bytes.length
const u8arr = new Uint8Array(bytesLength)
for (let i = 0; i < bytes.length; i++) {
u8arr[i] = bytes.charCodeAt(i)
}
const blob = new Blob([u8arr], { type: mime })
// 回调函数 根据需求返回二进制数据或者base64数据,我的项目都给返回了
callback(blob, base64)
}
}<template>
<div class="share-box" v-title="'业务推广'">
<div class="share-tip" :style="{height: isCreatedImg?'0.8rem':'0'}">
长按图片保存到手机
</div>
<div class="tip-block" :style="{height: isCreatedImg?'0.8rem':'0'}"></div>
<div v-show="!isCreatedImg" class="share-panel">
<div class="share-info">
<div class="share-title">业务授权码</div>
<div class="share-code">{
{ popCode }}</div>
<div class="share-desc">业务路径:xxxxxxxxxx</div>
</div>
<div class="share-img">
<van-image :src="imgSrc" @load="imageLoad">
</van-image>
</div>
</div>
<div v-show="isCreatedImg" class="share-panel">
<div class="share-img create-img">
</div>
</div>
<loading v-if="isLoading"></loading>
<van-overlay :show="isLoading" />
</div>
</template>
<script>
import htmlToImg from '@/util/htmlToImg.js'
import loading from '@/components/loading.vue'
export default {
components: {
loading
},
data () {
return {
canvasImg: null,
popCode: '',
isCreatedImg: false, // 是否生成了图片
isLoading: false,
imgSrc: require('@/assets/image/share-bg.png'),
isImgLoad: false // 图片是否加载成功
}
},
created () {
// ios清缓存后第一次html2canvas无法执行成功,刷新一下就可以,所以进来先刷新一下
if (localStorage.getItem('shareReload')) {
localStorage.removeItem('shareReload', '1')
} else {
localStorage.setItem('shareReload', '1')
window.location.reload()
}
this.initCode()
// 显示loading,防止未生成图片前保存图片
this.isLoading = true
},
mounted () {
// 当激活码还没获取到,此时不能生成图片
if (this.popCode !== '' && !this.isCreatedImg && this.isImgLoad) {
this.saveShareImg()
}
},
watch: {
'popCode': function (val) {
// 当拿到激活码且底图加载完成 且未生成图片
if (!!val && !this.isCreatedImg && this.isImgLoad) {
this.$nextTick(() => {
this.saveShareImg()
})
}
},
'isImgLoad': function (val) {
// 当拿到激活码且底图加载完成 且未生成图片
if (val && !this.isCreatedImg && !!this.popCode) {
this.$nextTick(() => {
this.saveShareImg()
})
}
}
},
methods: {
// 初始化激活码
initCode () {
// 分享什么码就展示什么码
this.popCode = this.$route.query.popCode
// const res = await SelfUsedUserPopCode()
// //
// if (res.code === 1) {
// this.popCode = res.data
// } else {
// // this.$toast.fail(res.msg)
// }
},
// 执行html转图片
async saveShareImg () {
let res = await htmlToImg('.share-panel')
if (res !== -1) {
this.canvasImg = res
document.querySelector('.create-img').append(res)
this.isCreatedImg = true
} else {
this.isCreatedImg = false
}
this.isLoading = false
},
// 图片加载回调
imageLoad () {
this.isImgLoad = true
}
}
}
</script>
<style lang="less" scoped>
.share-box{
position: relative;
.share-tip{
position: fixed;
top: 0;
left: 0;
width: 7.5rem;
display: flex;
justify-content: center;
align-items: center;
background-color: #EBEFFF;
color: #3E5FF9;
font-size: 0.24rem;
transition: height 1s ease-in-out;
z-index: 1;
overflow: hidden;
}
.tip-block{
transition: height 1s ease-in-out;
}
.share-panel{
position: relative;
height: 100%;
.share-info{
position: absolute;
top: 3.97rem;
left: 50%;
margin-left: -3.2rem;
text-align: center;
width: 6.4rem;
height: 2.6rem;
z-index: 1;
.share-title{
margin-top: 0.45rem;
font-size: 0.24rem;
color: #999999;
}
.share-code{
margin-top: 0.22rem;
font-size: 0.48rem;
font-weight: bold;
color: #2E46FF;
}
.share-desc{
margin-top: 0.3rem;
font-size: 0.24rem;
color: #333333;
}
}
.share-img{
img {
width: 100%;
}
}
.create-img{
/deep/img {
display: block;
-webkit-touch-callout: none;
-webkit-user-select: none;
}
}
}
.share-btn{
position: fixed;
bottom: 2rem;
left: 50%;
transform: translateX(-50%);
}
}
</style>
基本都差不多了,剩下的还有一些优化,比如:
1.需要等激活码、背景图加载完成,这里激活码暂取的路由,背景图用的van-image,能借用load完成对图片加载的识别。
2.ios在长按时会自动选中图片,增加样式防止出现选中样式
-webkit-touch-callout: none;
-webkit-user-select: none;3.由于移动端的像素比一般为2,因此注释了 context.scale(scale, scale) ,否则图片会只显示一部分。
效果图:

还偶尔会出现一些问题:
1.偶尔会出现图只加载了一部分的情况,这可能是由于生成的图较大导致的,底图约500k,合成后大约6M有些大了,因此canvas转成图片后又对图片进行了压缩,压缩后大约200k

2.微信等清缓存后,ios手机第一次都卡在了转canvas这一步,不报错也不反应,猜测可能和html2canvas.js的缓存有关,刷新一下页面才行,鉴于时间关系,在mounted加了个刷新逻辑,也可以在created/beforeRouteEnter中写也行。