上一章:Vue实现自动化平台(四)--接口管理页面的实现_做测试的喵酱的博客-CSDN博客
github地址:https://github.com/18713341733/vuemiaotest
这个目前只是用来练手的,项目还没成型。等以后我写完了,再更新一下项目链接。
一、编辑用例页面样式展示
编辑用例页面,样式展示来源于postman的样式。


二、整体代码
2.1 插件安装
本章需要安装2个插件。
方式一:nmp命令安装
npm install vue-json-views注意,我们使用的vue2, 所以这里是 vue2-ace-editor
nmp install vue2-ace-editor方式二:vue ui 安装依赖
vue ui 先选中自己的项目

安装下面两个依赖
vue-json-views
vue2-ace-editor


2.2 整体代码
Cases.vue
<template>
	<div class="caseEdit">
		<el-card class="box-card">
			<!-- 顶部的面包屑 -->
			<div slot="header" class="clearfix">
				<el-breadcrumb separator-class="el-icon-arrow-right">
					<el-breadcrumb-item :to="{ path: '/' }">首页</el-breadcrumb-item>
					<el-breadcrumb-item>用例管理</el-breadcrumb-item>
					<el-breadcrumb-item>用例编辑</el-breadcrumb-item>
				</el-breadcrumb>
			</div>
			<!-- 显示主体内容的卡片 -->
			<el-card class="box-card">
				<el-divider content-position="left"><span style="color: #409EFF; font-weight: bold;">Api</span>
				</el-divider>
				<!-- api请求的基本信息 -->
				<el-row :gutter="20">
					<!-- 请求方法选择 -->
					<el-col :span="3">
						<el-select v-model="caseInfo.method" placeholder="请求方法">
							<el-option label="GET" value="GET"></el-option>
							<el-option label="POST" value="POST"></el-option>
							<el-option label="PUT" value="PUT"></el-option>
							<el-option label="DELETE" value="DELETE"></el-option>
							<el-option label="PATCH" value="PATCH"></el-option>
							<el-option label="HEAD" value="HEAD"></el-option>
							<el-option label="OPTION" value="OPTION"></el-option>
						</el-select>
					</el-col>
					<!-- host地址输入 -->
					<el-col :span="9">
						<el-input placeholder="host地址" v-model="caseInfo.host">
							<template slot="prepend">Host</template>
						</el-input>
					</el-col>
					<!-- 接口地址输入 -->
					<el-col :span="9">
						<el-input placeholder="接口路径" v-model="caseInfo.interface">
							<template slot="prepend">接口地址</template>
						</el-input>
					</el-col>
					<!-- 运行按钮 -->
					<el-col :span="3">
						<el-button type="primary" icon="el-icon-s-promotion">Run</el-button>
					</el-col>
				</el-row>
				<el-divider content-position="left"><span style="color: #409EFF; font-weight: bold;">Request</span>
				</el-divider>
				<!--用例信息 -->
				<el-tabs type="border-card">
					<!-- 请求头 -->
					<el-tab-pane label="请求头">
						<el-row :gutter="20" v-for='(header,index) in caseInfo.headers' :key='index' style="margin: 10px;">
							<el-col :span="6">
								<el-input v-model.lazy="header.key" placeholder="KEY"></el-input>
							</el-col>
							<el-col :span="12">
								<el-input v-model.lazy="header.value" placeholder="VALUE"></el-input>
							</el-col>
							<el-col :span="6">
								<el-button type="danger" icon="el-icon-delete" @click='deleteInputRow(header,"headers")'></el-button>
							</el-col>
						</el-row>
					</el-tab-pane>
					<!-- 请求参数 -->
					<el-tab-pane label="请求参数">
						<el-tabs>
							<el-tab-pane label="application/json" >
								<editor height="300" width="100%" ref="editor" :content="caseInfo.json"
								    v-model="caseInfo.json" :options="{
								    enableBasicAutocompletion: true,
								    enableSnippets: true,
								    enableLiveAutocompletion: true,
								    tabSize:2,
								    fontSize:20,
								    showPrintMargin:false,}" :lang="'json'" @init="editorInit">
								</editor>
								<el-button type="primary" size="mini" @click='jsonFormat'>json格式化</el-button>

							</el-tab-pane>
							<el-tab-pane label="Params" >
								<el-row :gutter="20" v-for='(par,index) in caseInfo.params' :key='index' style="margin: 10px;">
									<el-col :span="6">
										<el-input v-model.lazy="par.key" placeholder="KEY"></el-input>
									</el-col>
									<el-col :span="12">
										<el-input v-model.lazy="par.value" placeholder="VALUE"></el-input>
									</el-col>
									<el-col :span="6">
										<el-button type="danger" icon="el-icon-delete" @click='deleteInputRow(par,"params")'></el-button>
									</el-col>
								</el-row>

							</el-tab-pane>
							<el-tab-pane label="application/X-www-urlencoded" >
								<el-row :gutter="20" v-for='(val,index) in caseInfo.data' :key='index' style="margin: 10px;">
									<el-col :span="6">
										<el-input v-model.lazy="val.key" placeholder="KEY"></el-input>
									</el-col>
									<el-col :span="12">
										<el-input v-model.lazy="val.value" placeholder="VALUE"></el-input>
									</el-col>
									<el-col :span="6">
										<el-button type="danger" icon="el-icon-delete" @click='deleteInputRow(val,"data")'></el-button>
									</el-col>
								</el-row>

							</el-tab-pane>
						</el-tabs>

					</el-tab-pane>
					<el-tab-pane label="响应提取">响应提取</el-tab-pane>
					<el-tab-pane label="用例断言">用例断言</el-tab-pane>
					<el-tab-pane label="数据库校验">数据库校验</el-tab-pane>
				</el-tabs>
				<el-button type="info" size="mini" @click='dialogVisible=true'>用例详情</el-button>
			</el-card>
		</el-card>
		<el-dialog
		  title="提示"
		  :visible.sync="dialogVisible"
		  width="60%">
		  <json-view :data="caseInfo" style="height: 600px; scroll" />
		  <span slot="footer" class="dialog-footer">
		    <el-button type="primary" @click="dialogVisible = false">关闭</el-button>
		  </span>
		</el-dialog>


	</div>
</template>

<script>
	import Editor from 'vue2-ace-editor'
	import jsonView from 'vue-json-views'

	export default {
		data() {
			return {
				// 用例详细信息展示的窗口
				dialogVisible:false,
				caseInfo: {
					method: 'GET',
					host: '',
					interface: '',
					headers: [{
						key: '',
						value: ''
					}],
					params:[{
						key: '',
						value: ''
					}],
					data:[{
						key: '',
						value: ''
					}],
					json:'{}'
				}
			}
		},
		methods: {
			// deleteRow(header) {
			// 	console.log(header)
			// 	// 删除headers的一行内容
			// 	this.caseInfo.headers = this.caseInfo.headers.filter(function(item, index) {
			// 		return item !== header
			// 	})
			// },
			// deleteParRow(par) {
			// 	// 删除 params中的一行内容
			// 	console.log(par)
			// 	this.caseInfo.params = this.caseInfo.params.filter(function(item, index) {
			// 		return item !== par
			// 	})
			// },

			// 删除行
			deleteInputRow(value,name) {
				//value 要删除的数据,name :表示数据的种类
				console.log('要删除的数据:',value)
				// 删除headers的一行内容
				this.caseInfo[name] = this.caseInfo[name].filter(function(item, index) {
					return item !== value
				})
			},
			// 添加行
			addInputRow(name){
				// name:添加行的数据种类
				const par = this.caseInfo[name]
				// 判断当前数据的长度是否为0
				if (par.length ===0){
					this.caseInfo[name].push({key:'',value:''})
				}
				if (par[par.length-1].key ||par[par.length-1].value){
					this.caseInfo[name].push({key:'',value:''})
				}
			},
			// json编辑器的初始化方法
			editorInit() {
			    require('brace/theme/chrome')
			    require('brace/ext/language_tools')
			    require('brace/mode/yaml')
			    require('brace/mode/json')
			    require('brace/mode/less')
			    require('brace/snippets/json')
			},
			// json数据格式化
			jsonFormat(){
				// JSON方法:parse:将json字符串 转换为js对象,   stringify:将js对象转换为json字符串
				const jsObj= JSON.parse(this.caseInfo.json)
				this.caseInfo.json = JSON.stringify(jsObj,null,4)
			}
		},
		watch: {
			// 监听headers中的数据是否发送变化,当发送变化时,则判断最后一行是否有值,
			'caseInfo.headers': {
				handler: function(value, oldVal) {
					this.addInputRow('headers')
					// if (value.length === 0) {
					// 	this.caseInfo.headers.push({key: '',value: ''})
					// }
					// // 判断最后一行是否有值,
					// if (value[value.length - 1].key || value[value.length - 1].value) {
					// 	this.caseInfo.headers.push({
					// 		key: '',
					// 		value: ''
					// 	})
					// }
				},
				deep: true
			},
			'caseInfo.params':{
				deep:true,
				handler:function(value,oldval){
					this.addInputRow('params')
					// const par = this.caseInfo.params
					// // 判断当前数据的长度是否为0
					// if (par.length ===0){
					// 	this.caseInfo.params.push({key:'',value:''})
					// }
					// if (par[par.length-1].key ||par[par.length-1].value){
					// 	this.caseInfo.params.push({key:'',value:''})
					// }
				}
			},
			'caseInfo.data':{
				deep:true,
				handler:function(value,oldval){
					this.addInputRow('data')
				}
			}

		},
		components:{
			Editor,
			jsonView,
		}


	}
</script>

<style scoped>
</style>
三、知识点
3.1 表单格栅布局
来源:element UI 组件。Layout 布局:Element - The world's most popular Vue UI framework

格栅布局:将一行分成很多块。
3.2 选项卡的实现
来源:element UI 组件,Tabs标签页 Element - The world's most popular Vue UI framework

3.3 动态增加输入框
监听器的应用
3.4 json格式数据展示
1、安装依赖
npm install vue-json-views2、注册为子组件
import jsonView from 'vue-json-views'

components: {

        jsonView,

        }
3、使用组件
<json-view :data="editData" style="height: 420px;overflow-y: scroll" />3.5 json数据编辑器
实现在页面上编写json格式的数据,对格式进行校验。
1、安装依赖
nmp install vue2-ace-editorgithub地址: https://github.com/chairuosen/vue2-ace-editor
2、导入依赖,注册为子组件
import Editor from 'vue2-ace-editor'
// 在页面组件中通过components,注册导入的组件
3、组件使用
只需要修改v-model就可以了
								<editor height="300" width="100%" ref="editor" :content="caseInfo.json"
								    v-model="caseInfo.json" :options="{
								    enableBasicAutocompletion: true,
								    enableSnippets: true,
								    enableLiveAutocompletion: true,
								    tabSize:2,
								    fontSize:20,
								    showPrintMargin:false,}" :lang="'json'" @init="editorInit">
								</editor>
3.6 输入框的实现
Element - The world's most popular Vue UI framework

四、填写header时,自动增加下一行(嵌套监听)
通过监听器watch实现。监听caseInfo中的headers。
监听器能直接监听某个属性。但是如果要监听caseInfo.headers,需要将caseInfo.headers括起来。
‘caseInfo.headers’4.1 嵌套监听
vue官网地址:
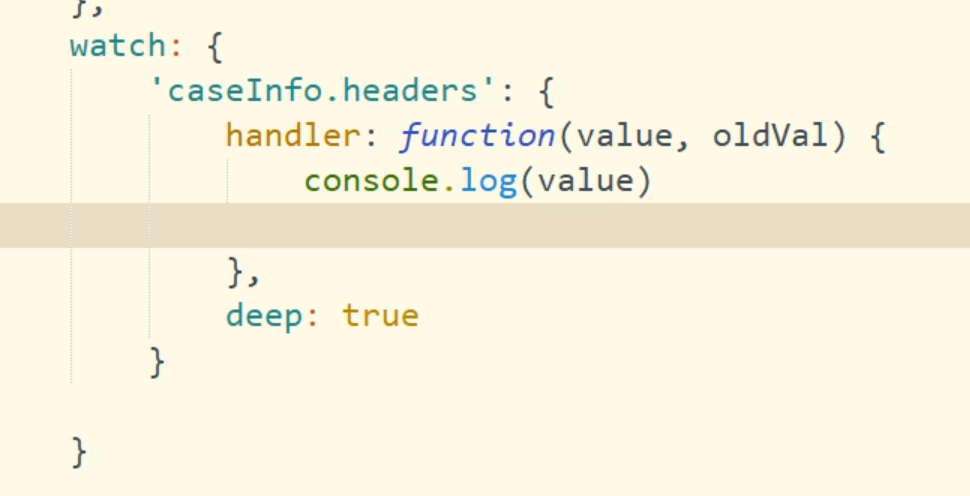
多层嵌套的侦听注意:
1、被监听的字段需要用引号引起来
2、使用handler这种方式
4.2 实现逻辑:
1、监听headers中的数据是否发送变化,当发送变化时,则判断最后一行是否有值,
有值,就新增一行。
		watch: {
			// 监听headers中的数据是否发送变化,当发送变化时,则判断最后一行是否有值,
			'caseInfo.headers': {
				handler: function(value, oldVal) {
					if (value.length === 0) {
						this.caseInfo.headers.push({
							key: '',
							value: ''
						})
					}
					// 判断最后一行是否有值,
					if (value[value.length - 1].key || value[value.length - 1].value) {
						this.caseInfo.headers.push({
							key: '',
							value: ''
						})
					}

				},
				deep: true
			}

		},
2、双向绑定,在表单中输入内容,等失去焦点时,再同步数据
v-model.lazy="header.key" <!-- 请求头 -->
<el-tab-pane label="请求头">
<el-row :gutter="20" v-for='header in caseInfo.headers' :key='header.key' style="margin: 10px;">
<el-col :span="6">
<el-input v-model.lazy="header.key" placeholder="KEY"></el-input>
</el-col>
<el-col :span="12">
<el-input v-model.lazy="header.value" placeholder="VALUE"></el-input>
</el-col>
<el-col :span="6">
<el-button type="danger" icon="el-icon-delete" @click='deleteRow(header)'></el-button>
</el-col>
</el-row>
</el-tab-pane>4.3 实现删除header功能
点击删除按钮,删除这一行header。
1、数据传递:
在点击删除的时候,将这一行的数据作为参数传递给删除的方法。

2、删除的方法:
删除2种方法。1、通过索引删除。2、通过过滤删除。
hIndex ,为获取的索引。

过滤删除
不等于header的过滤出来,给caseInfo.headers 重新赋值。
		methods: {
			deleteRow(header) {
				console.log(header)
				// 删除一行内容
				const newHeaders = this.caseInfo.headers.filter(function(item, index) {
					return item !== header
				})
				this.caseInfo.headers = newHeaders
			},
五、请求参数
与添加header方法是一致的。
参数有2种类型,form表单与json格式。
样式来源,tabs 标签页,element ui
5.1 json 编辑器依赖
5.1.1 依赖安装
本章需要安装2个插件。
方式一:nmp命令安装
npm install vue-json-views注意,我们使用的vue2, 所以这里是 vue2-ace-editor
nmp install vue2-ace-editor方式二:vue ui 安装依赖
vue ui 先选中自己的项目
安装下面两个依赖
vue-json-views
vue2-ace-editor
5.1.2 json 编辑器使用
实现在页面上编写json格式的数据,对格式进行校验。
1、安装依赖
nmp install vue2-ace-editorgithub地址: https://github.com/chairuosen/vue2-ace-editor
2、导入依赖,注册为子组件
import Editor from 'vue2-ace-editor'
// 在页面组件中通过components,注册导入的组件
3、组件使用
只需要修改v-model就可以了
								<editor height="300" width="100%" ref="editor" :content="caseInfo.json"
								    v-model="caseInfo.json" :options="{
								    enableBasicAutocompletion: true,
								    enableSnippets: true,
								    enableLiveAutocompletion: true,
								    tabSize:2,
								    fontSize:20,
								    showPrintMargin:false,}" :lang="'json'" @init="editorInit">
								</editor>
5.2 json数据展示
1、安装依赖
npm install vue-json-views2、注册为子组件
import jsonView from 'vue-json-views'

components: {

        jsonView,

        }
3、使用组件
<json-view :data="editData" style="height: 420px;overflow-y: scroll" />